Crystal Mill Hike: Iconic Colorado
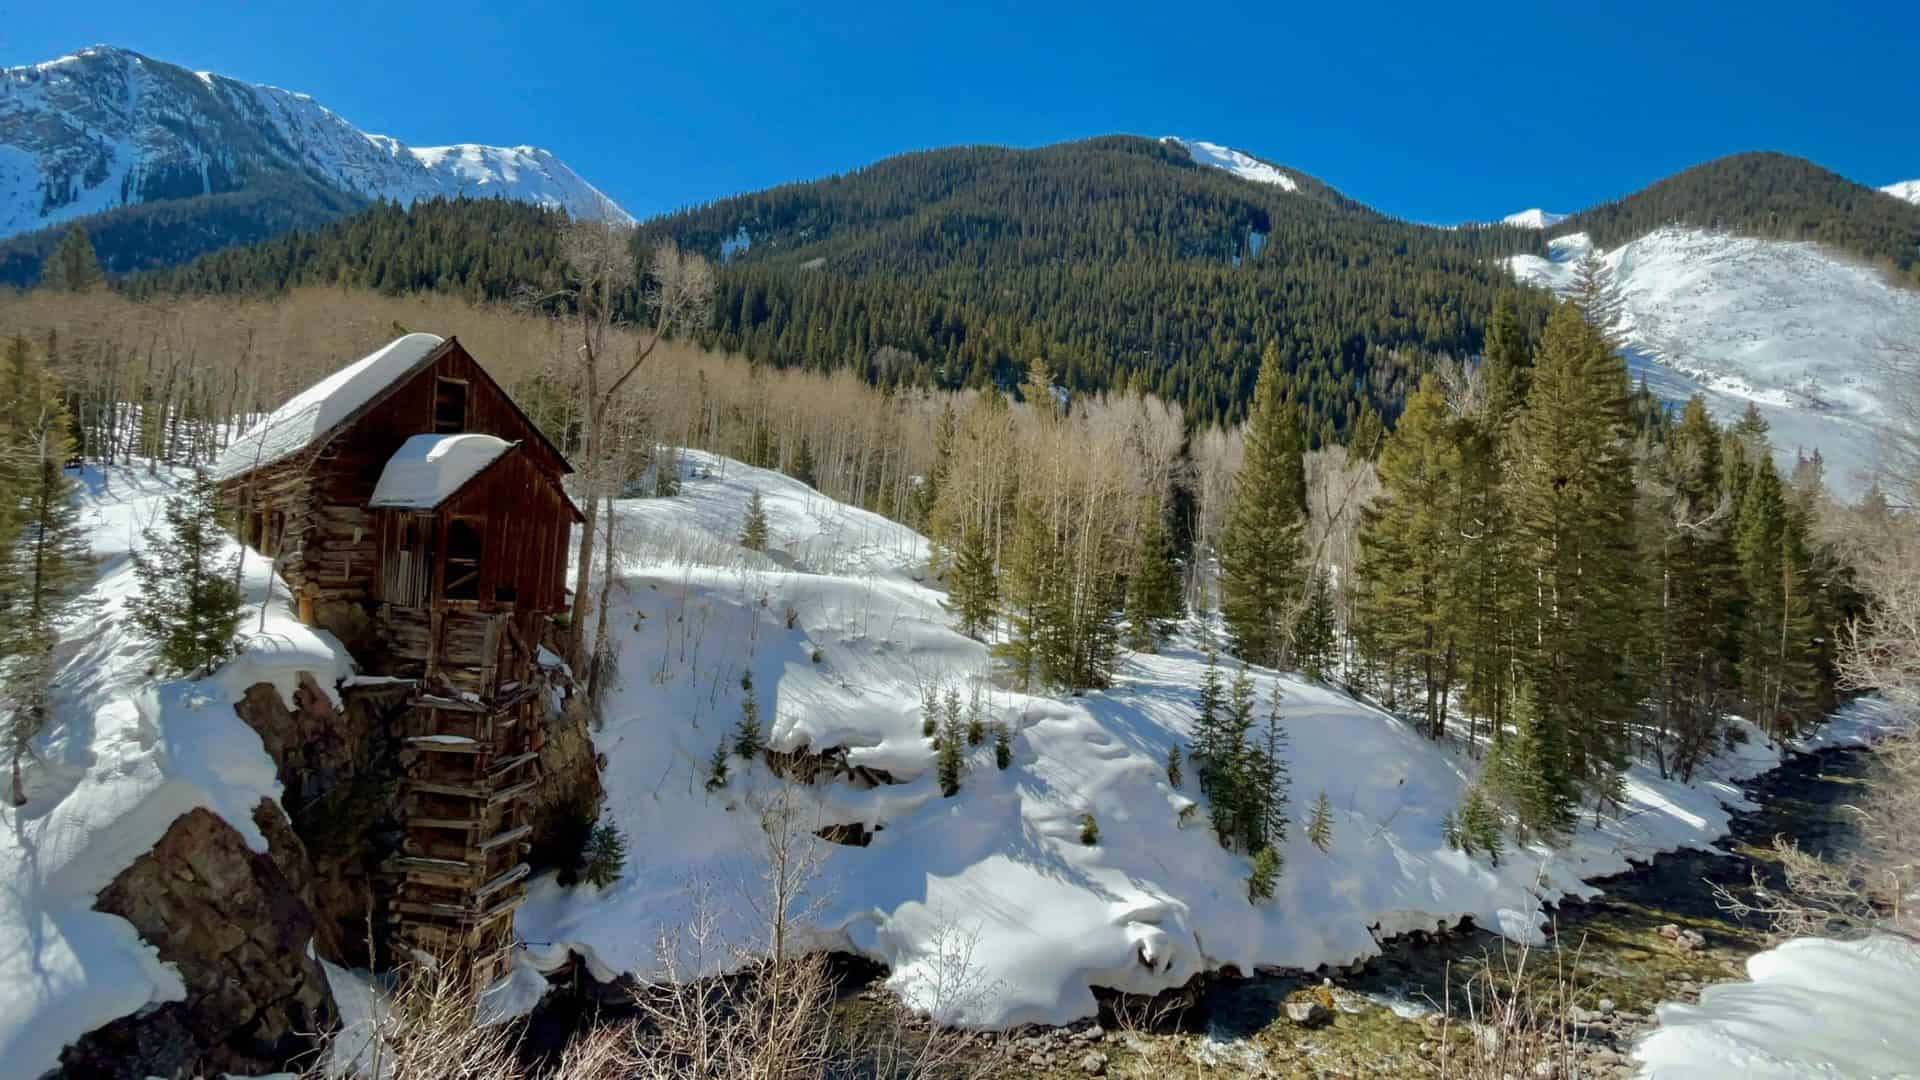
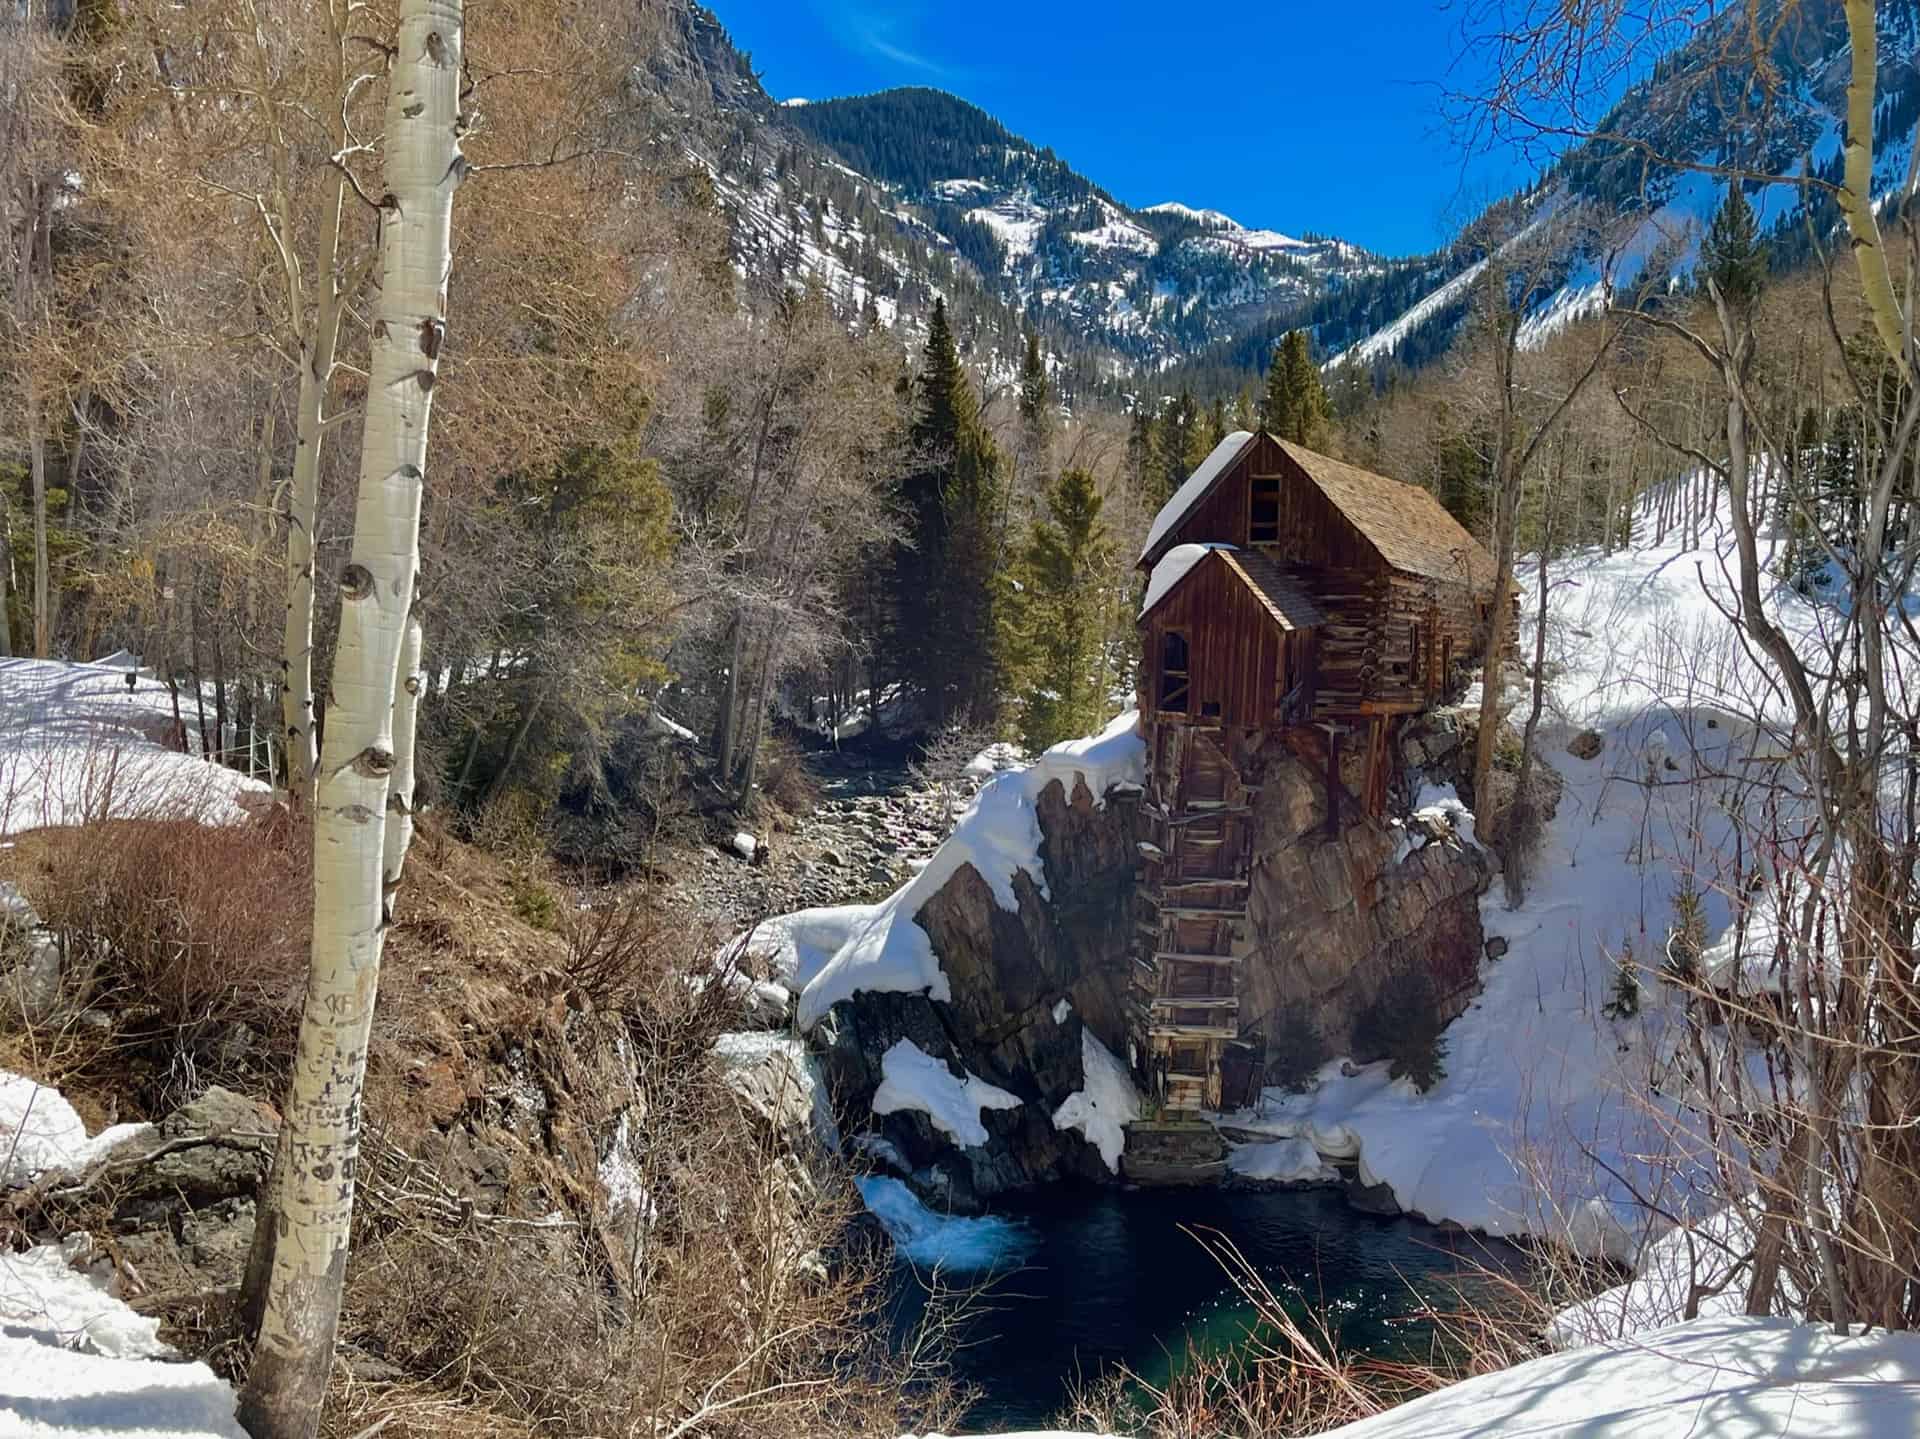
You've likely seen the photo, but may not have known how to reach it: Crystal Mill. The legendary Old West structure, built in 1892 during the silver boom, stands tall - yet precariously as ever - in the gorgeous back county of the White River National Forest. The Crystal Mill remains one of the most photographed places in the state, and appears on many Top 10 lists for the mountain west, weaving its way into the heart of locals and tourists alike.
The storied mill carries its mystery into the present day. Efforts are underway as of 2021 to preserve it. Up until now, the landowners and waves of volunteers performed small repairs to stabilize it. More than just a pretty photo spot, this Instagrammer's dream also supports layers of the local economy. When visiting, you will see a donation box for an opportunity to contribute to its preservation. Also, if you want to proceed beyond the rope at the site, you need to pop into the General Store in Marble to secure and sign a waiver (as of this post, it cost $10). Please be respectful to the private property owners along the entirety of FR314.
Explore the full Crystal Mill Hike profile below for trail map, driving directions, and more tips and details to help you enjoy this classic Colorado site!
Trail Snapshot: Crystal Mill Hike
| Hike Distance | 9 miles Round Trip |
|---|---|
| Difficulty | Easy to Moderate |
| Duration | Approx 4-5hr |
| Trail Type | Out-and-Back |
| Starting Elevation | 8,150′ |
| Elevation Gain | Approx +850′ |
| Seasons | All Seasons |
| Dogs | Allowed On Leash |
| Hike Trail Map | Click for Trail Map of Crystal Mill Hike |
| Denver Drive Time | approx. 4 hours |
| Driving Directions to Marble, CO | Click for Google Map |
| Town Nearest Hike | Marble, Colorado |
| Beauty | River valley, iconic Crystal Mill, Ghost Town |
| Activities | Hiking, Snowshoeing |
Parking & Trailhead Information for Crystal Mill
From Denver, heading west on I-70, take exit 116 toward Snowmass/Aspen, which is State Route 82. Follow 82 East for approximately 12 miles to the turn off for State Route 133, appearing on the right. Follow 133 South through Carbondale and proceed for approximately 21 miles. The road passes through Redstone, where curious travelers can visit the historic "Coke Ovens". (Nope, this is not the soft drink or the narcotic!) Shortly after, turn left onto County Road 3. About six miles down CR3 the road enters Mable, CO.
County Road 3 becomes Park Street; curve left (north) onto West 2nd Street, then right (east) on West 2nd Street. Turn left (north) onto West 1st Street, then right onto Main Street. Turn left (north) on East 2nd Street, then right (east) on Silver Street, heading toward and around Beaver Lake. (If all of that sounds remarkably confusing, rest easy. Marble is very small, and there are signs indicating the direction toward Crystal Mill. It's simpler than it reads!) After the lake, at what visibly feels like the end of the street, there is a small parking lot on the left. A sign designates the rest of the road is suitable for high clearance vehicles, only.
Note: Along the way, about 18 miles after the turnoff onto 133 South and just beyond Redstone, the Hayes Creek Falls Waterfall graces the side of the road. This optional stop provides a burst of refreshment from the drive -- or from the 9-mile Crystal Mill Hike!
The Hike: Crystal Mill
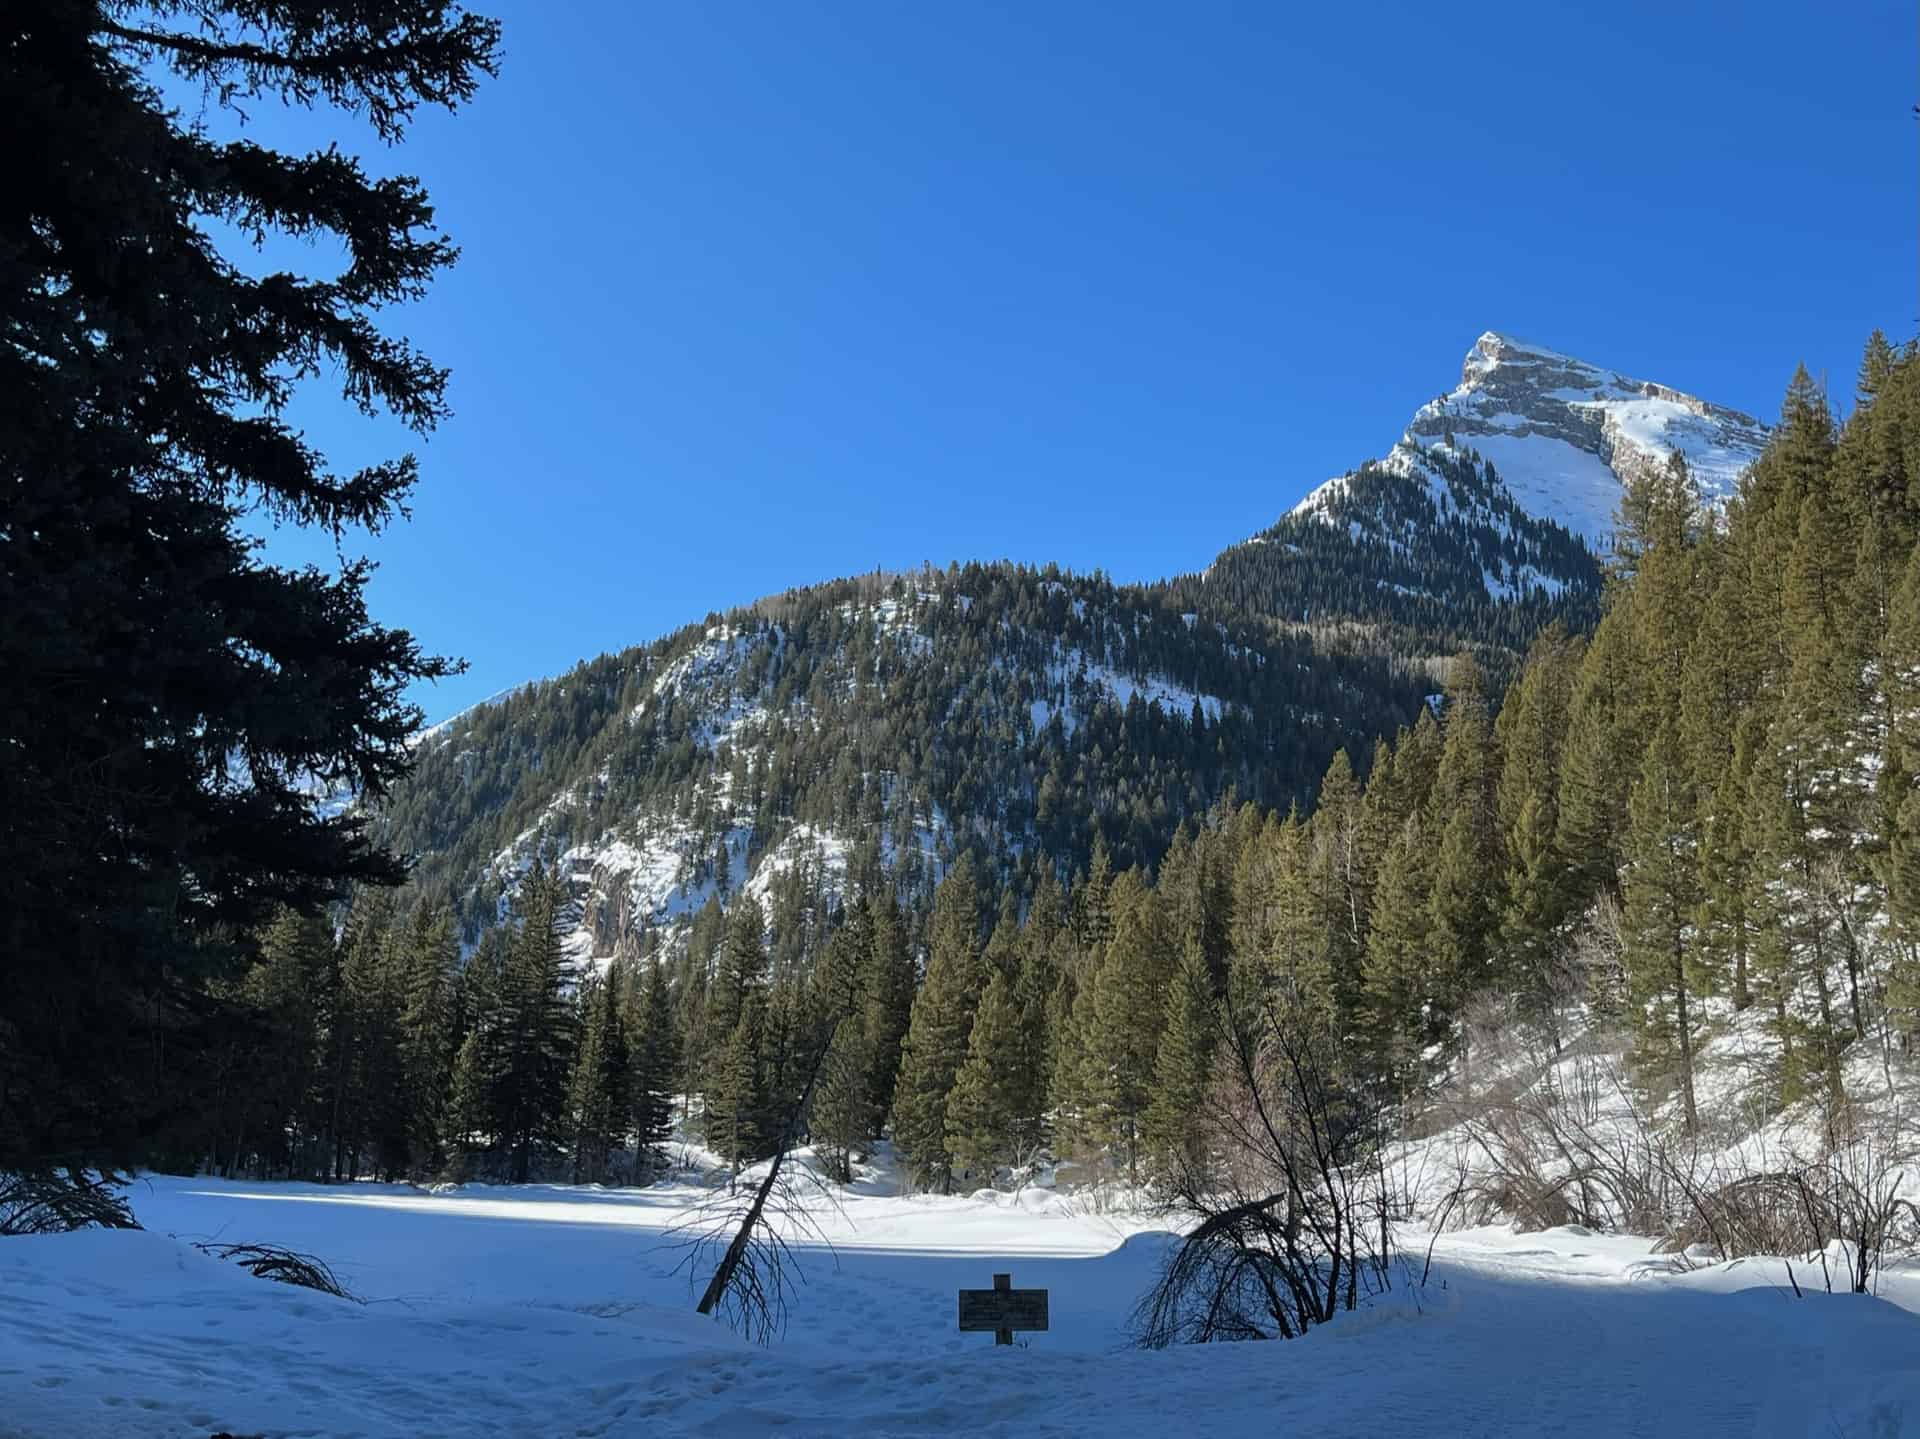
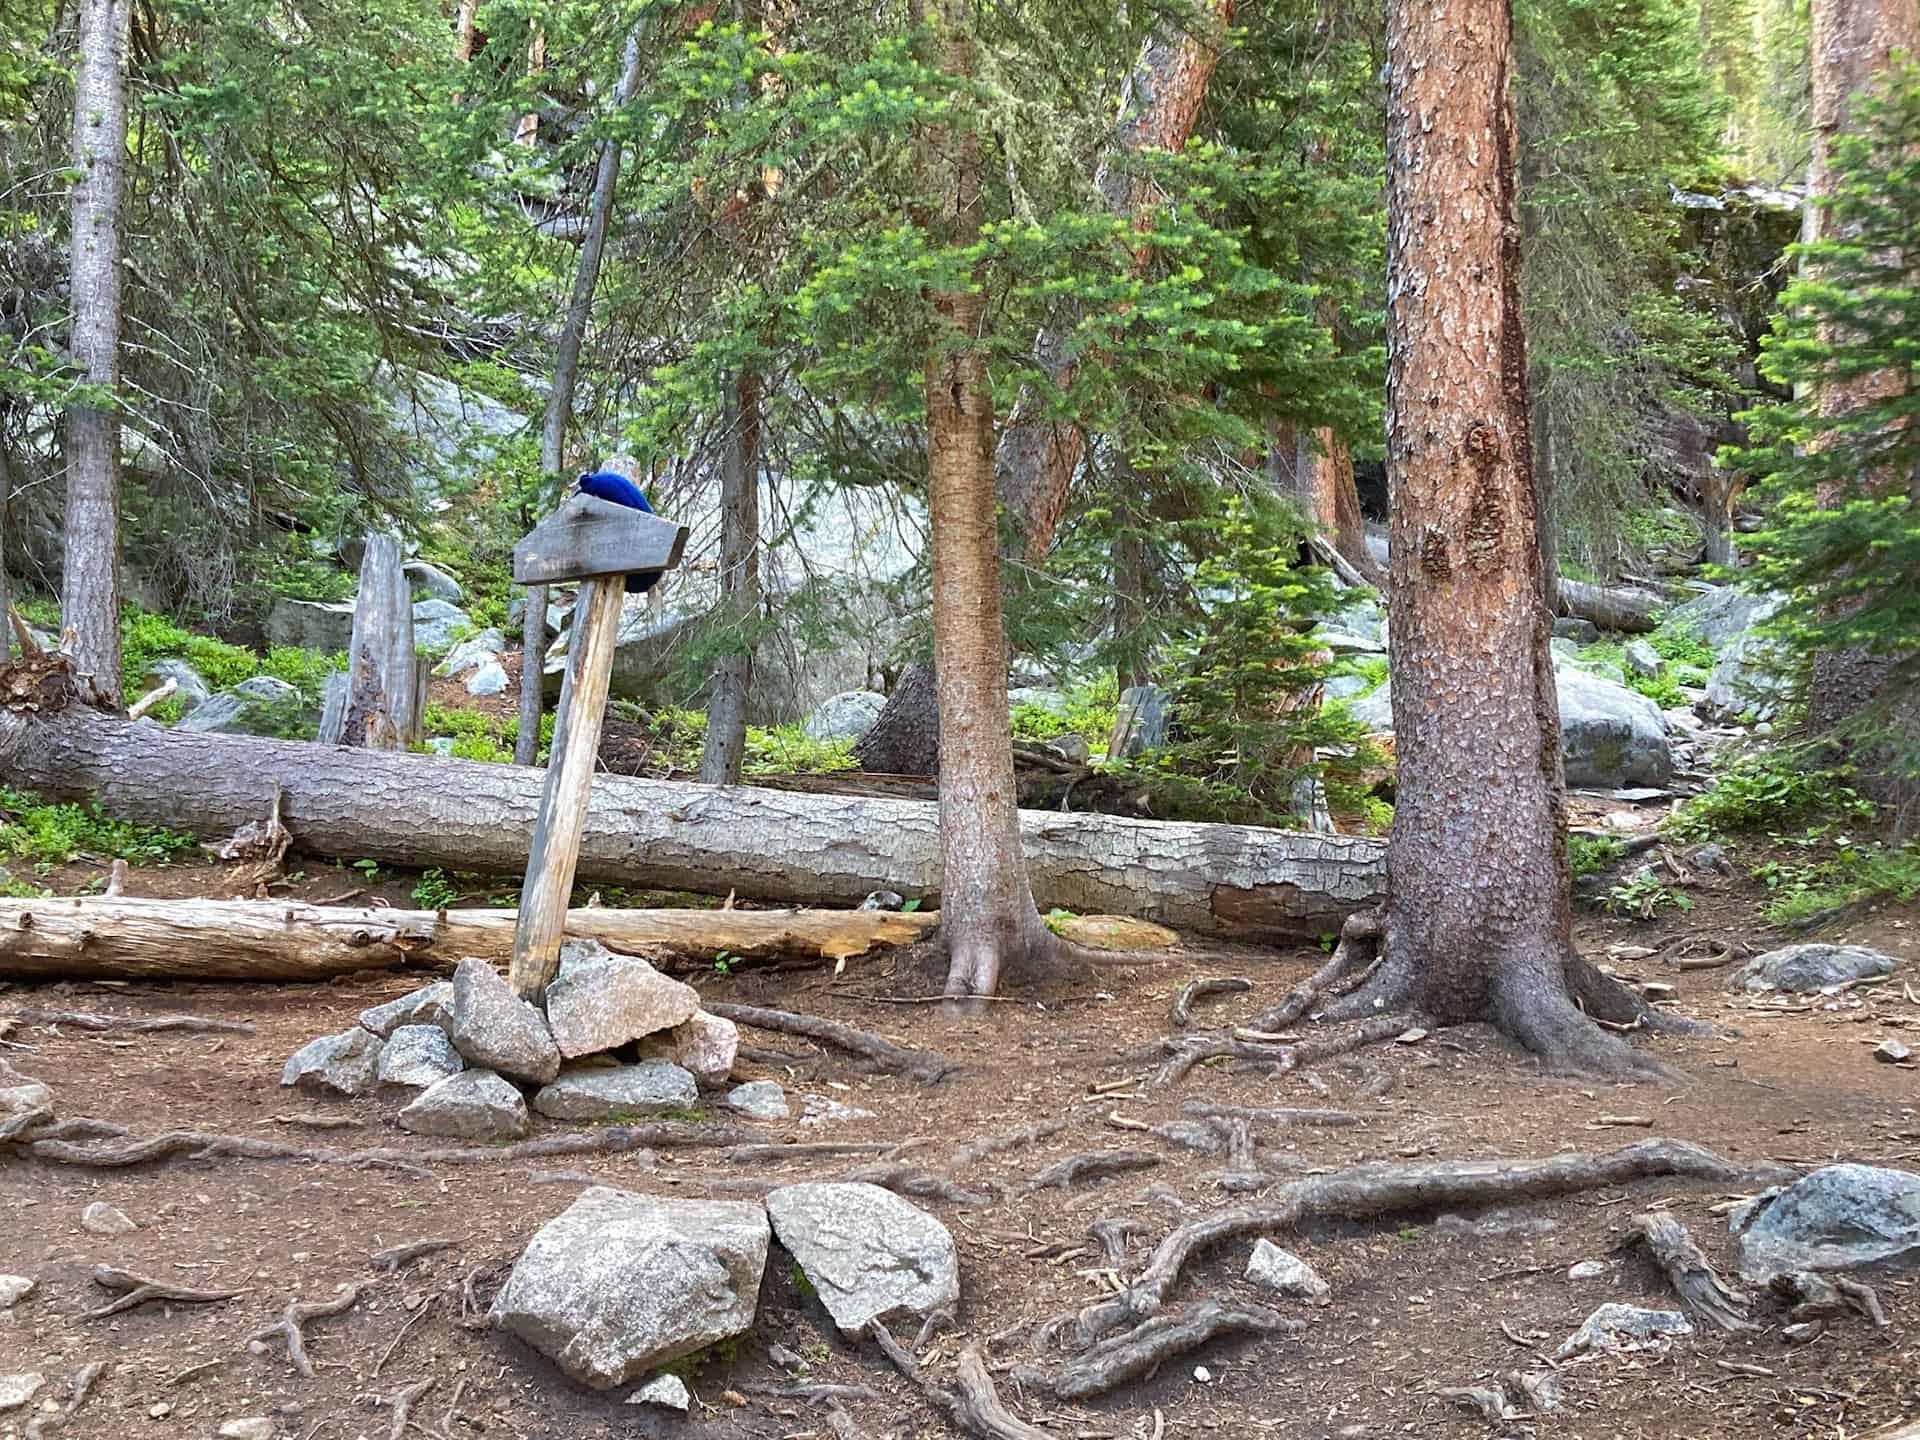
From the parking lot, the trail begins by continuing straight up the road to the east. Slightly beyond the 3/4-mile mark, the road splits. Up and to the left leads to Lead King Basin; the Crystal Mill hike follows the road to the right and down the hill, along Forest Road 314 (look for the small brown sign with "314" aligned vertically), a.k.a. CR3.
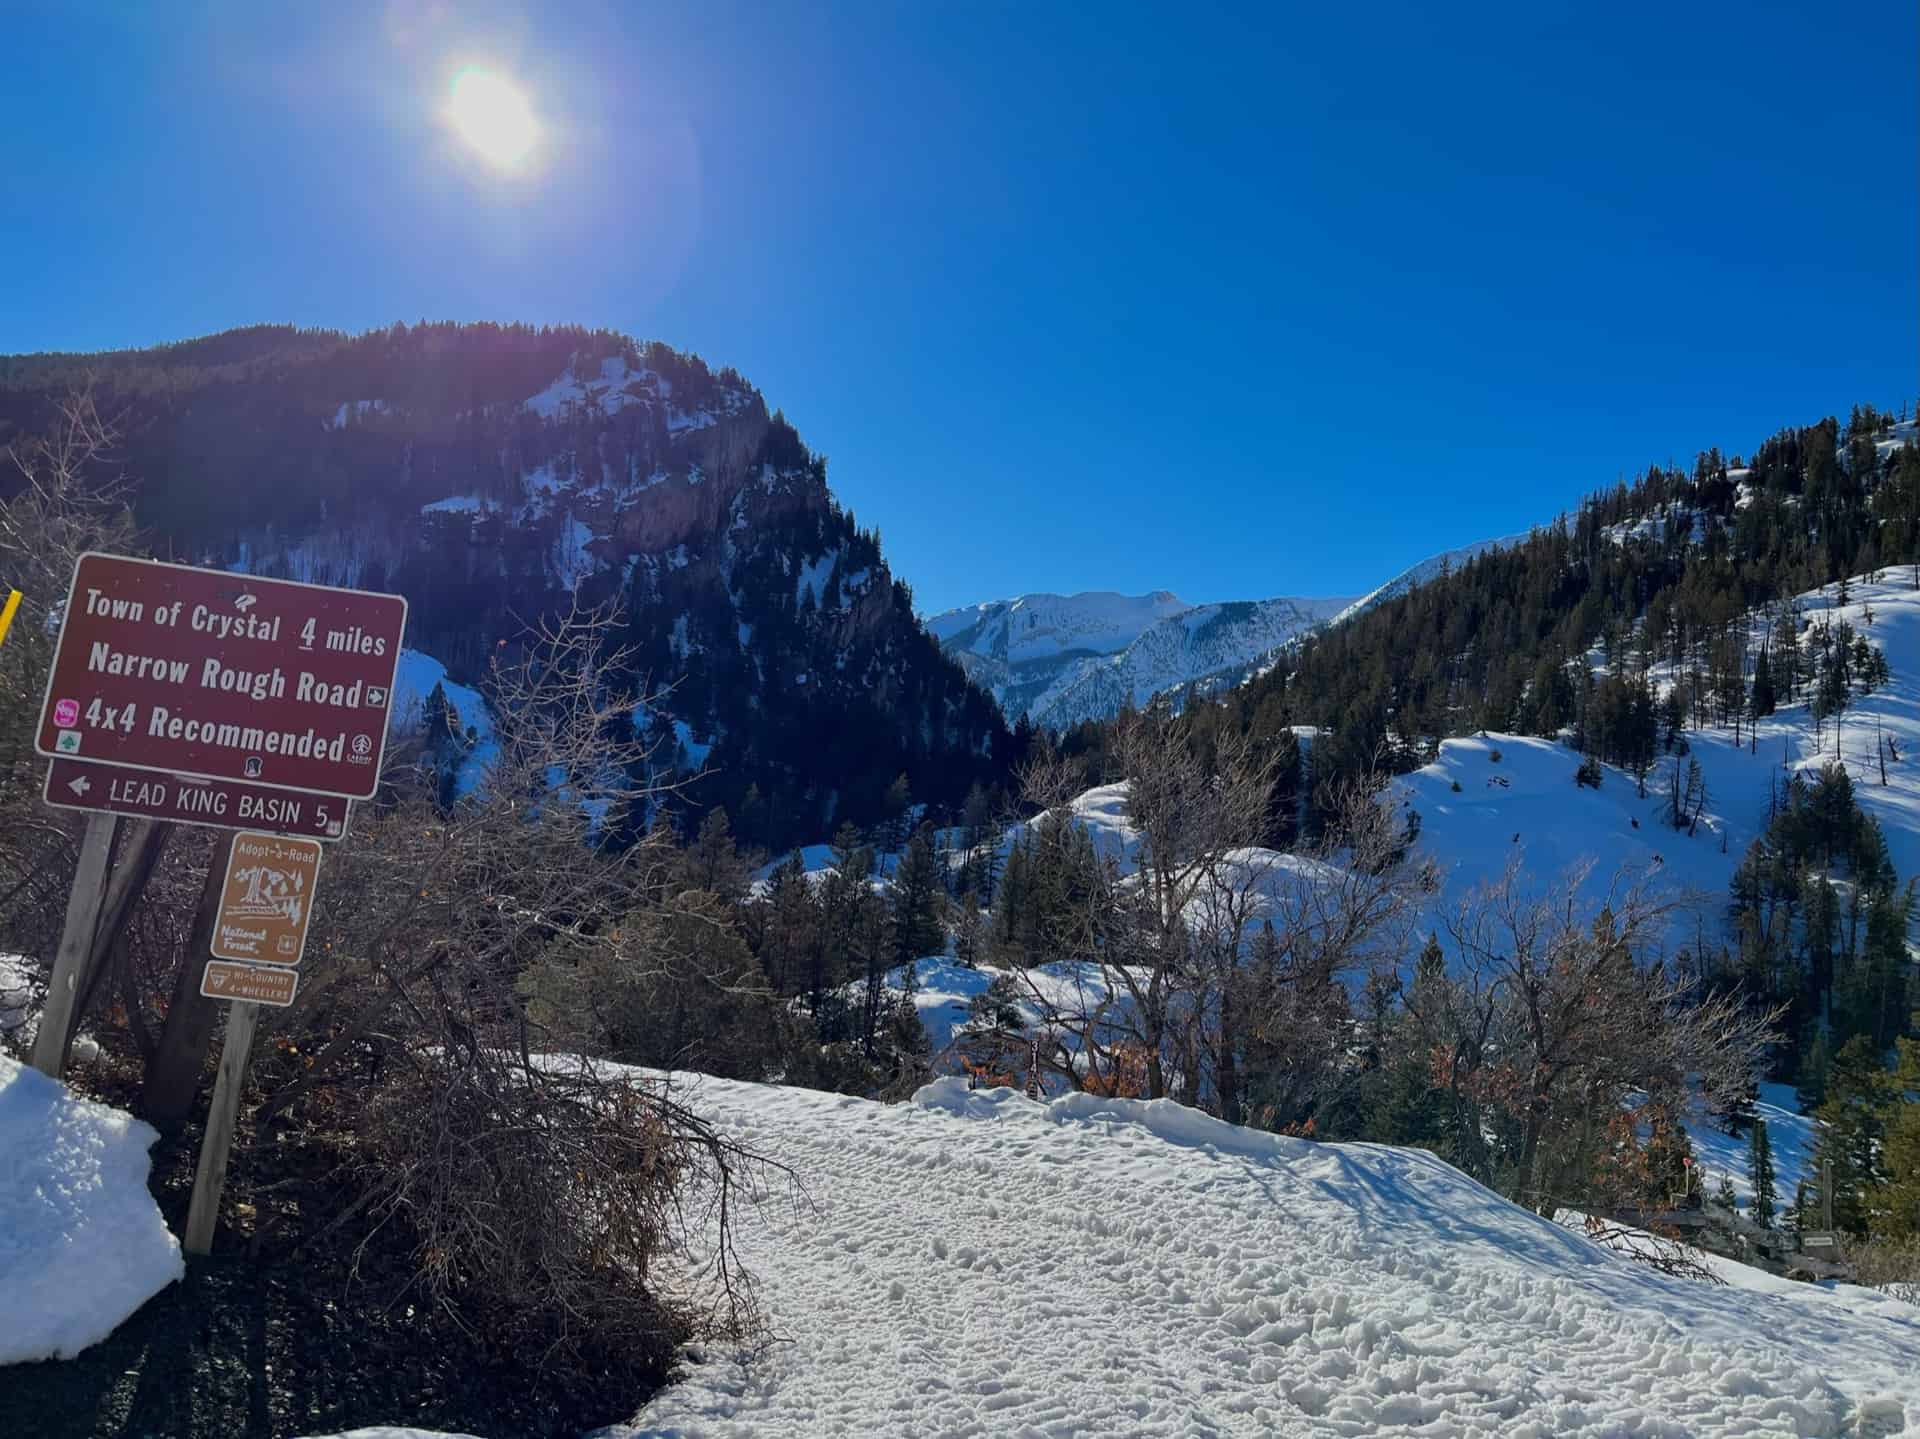
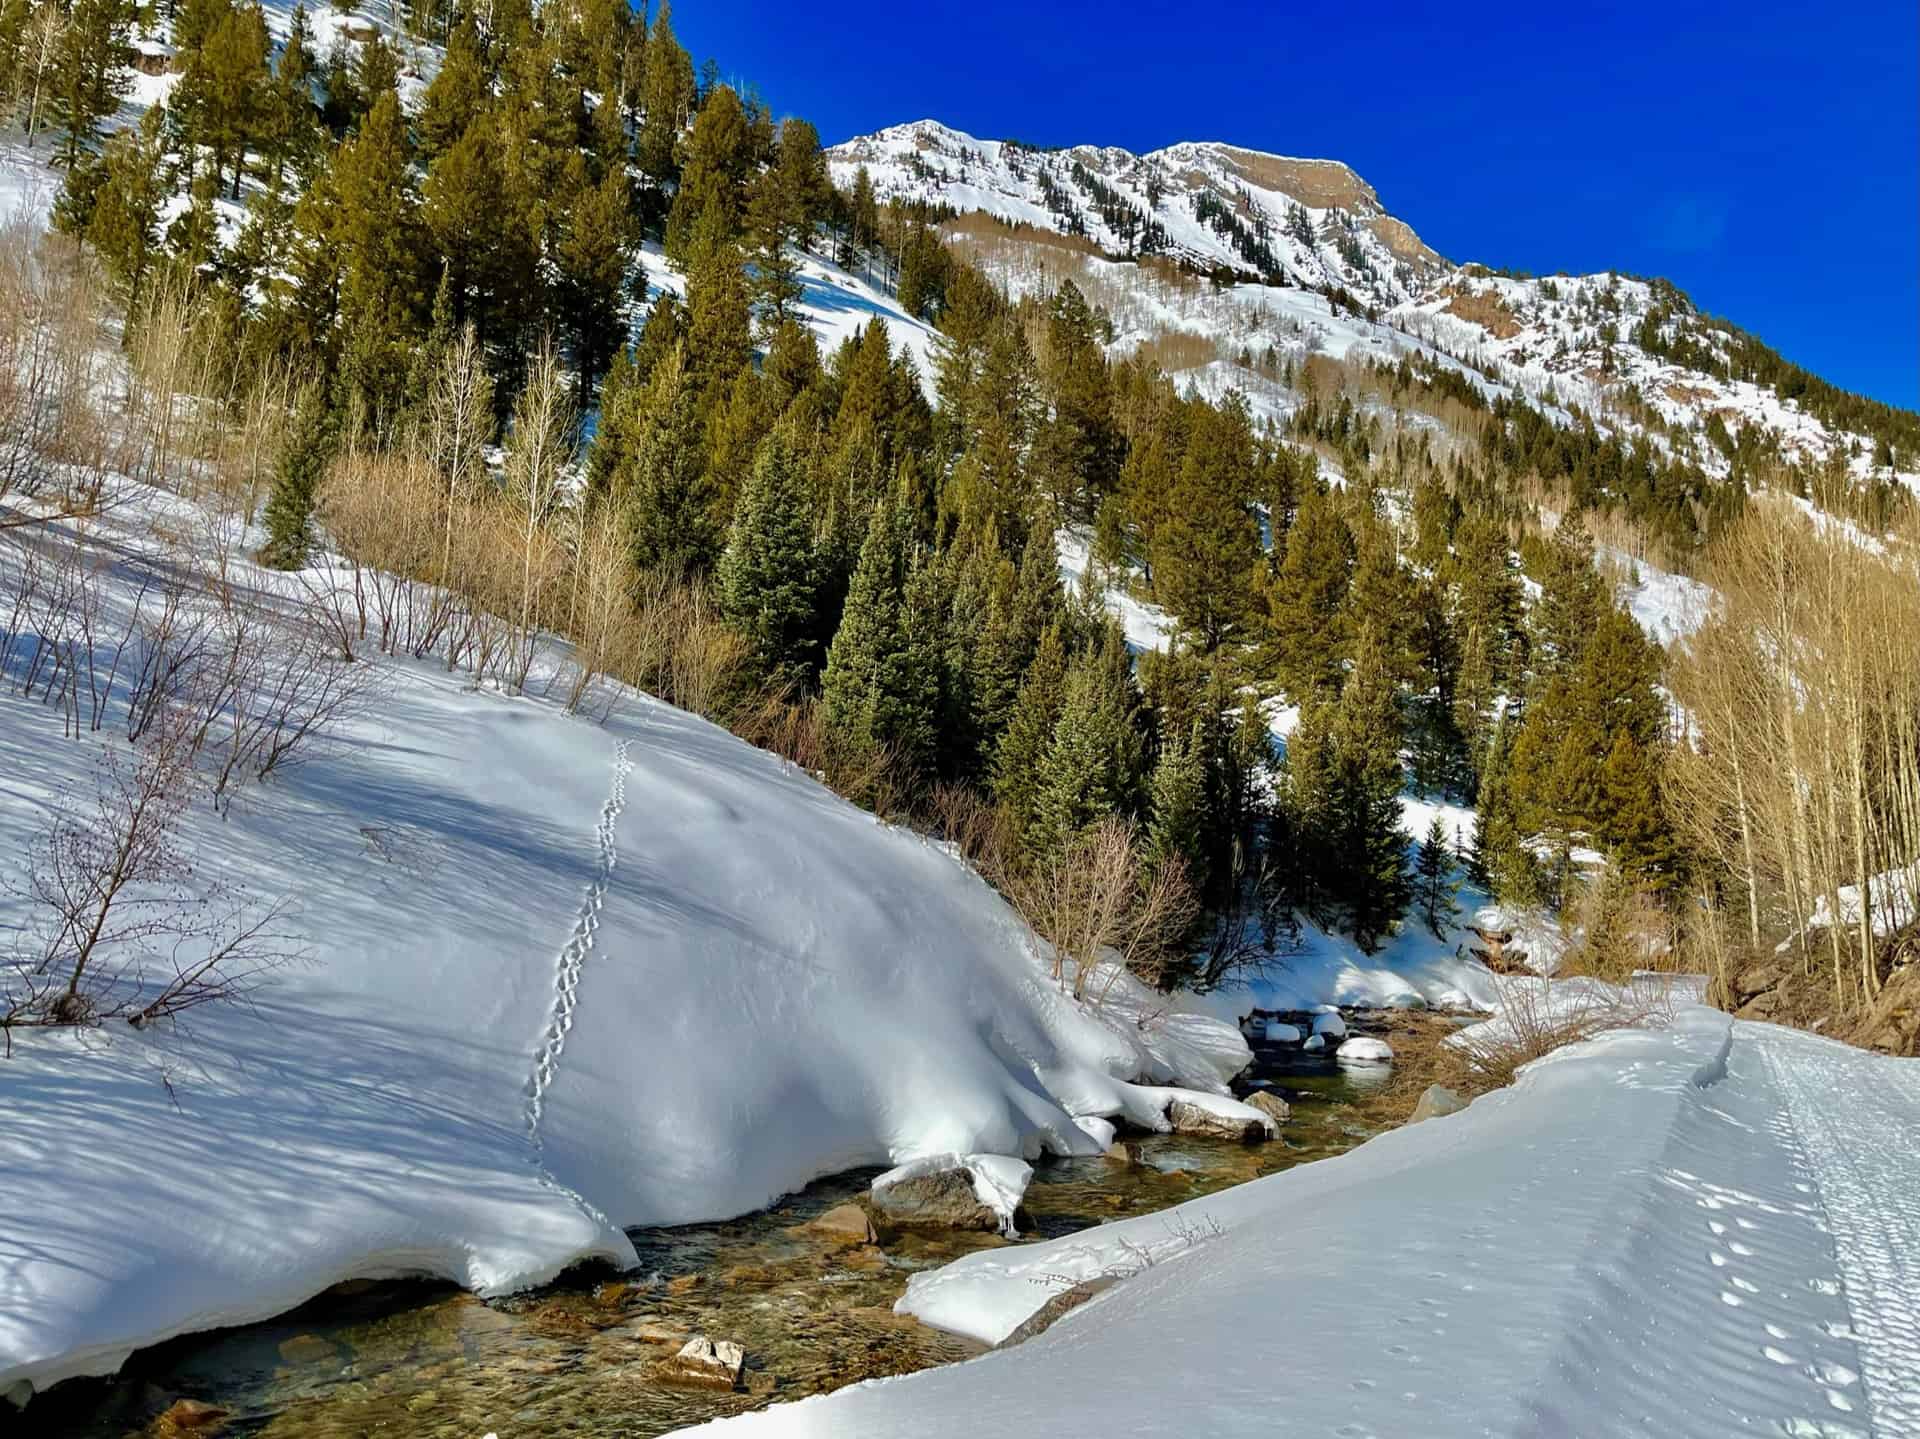
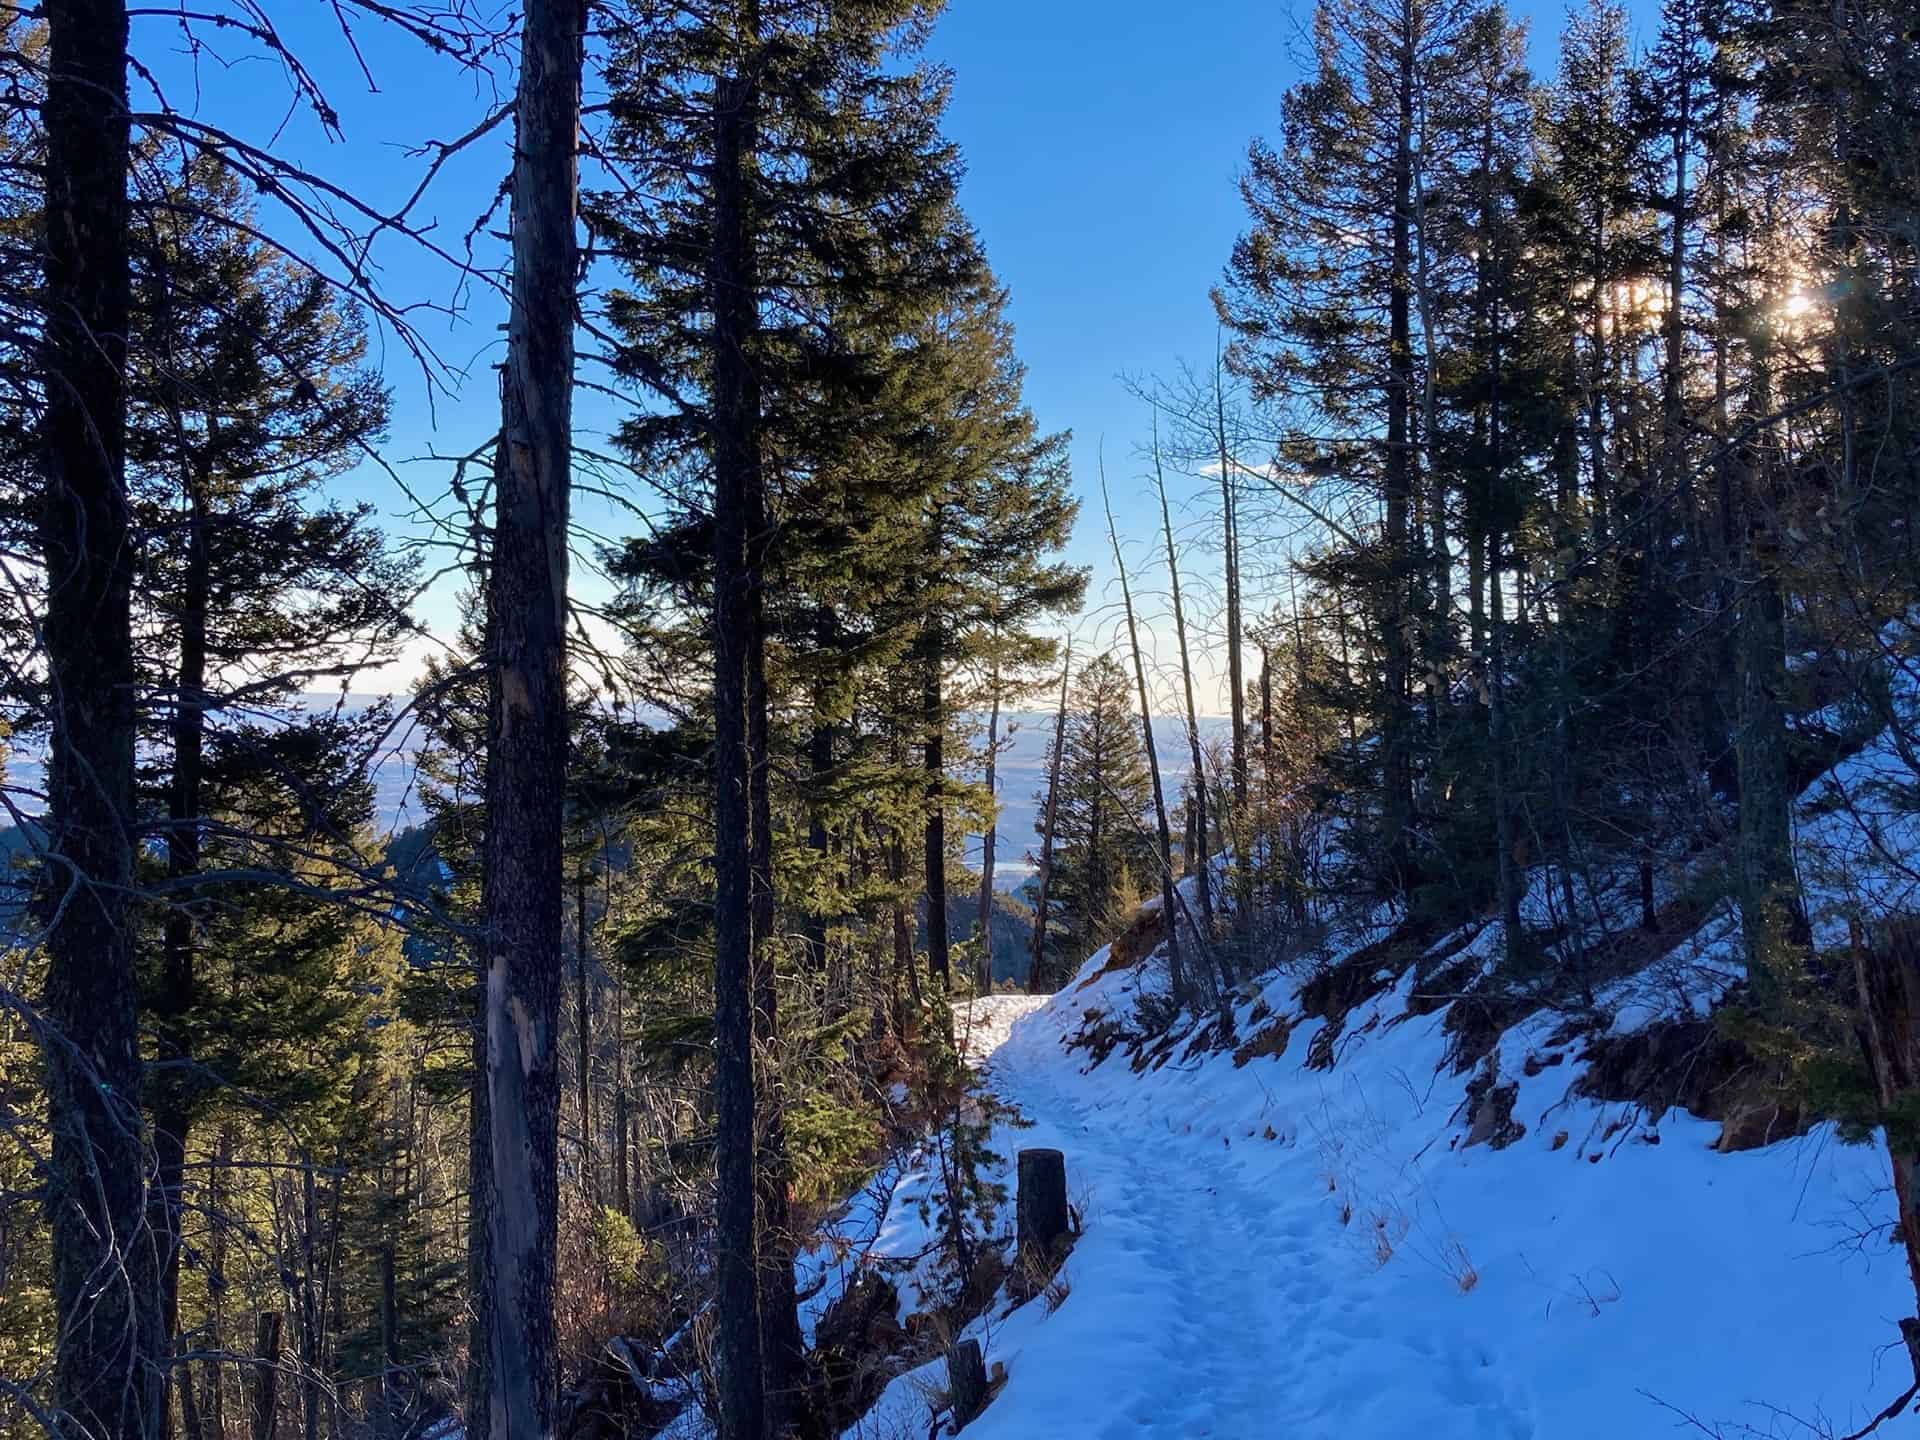
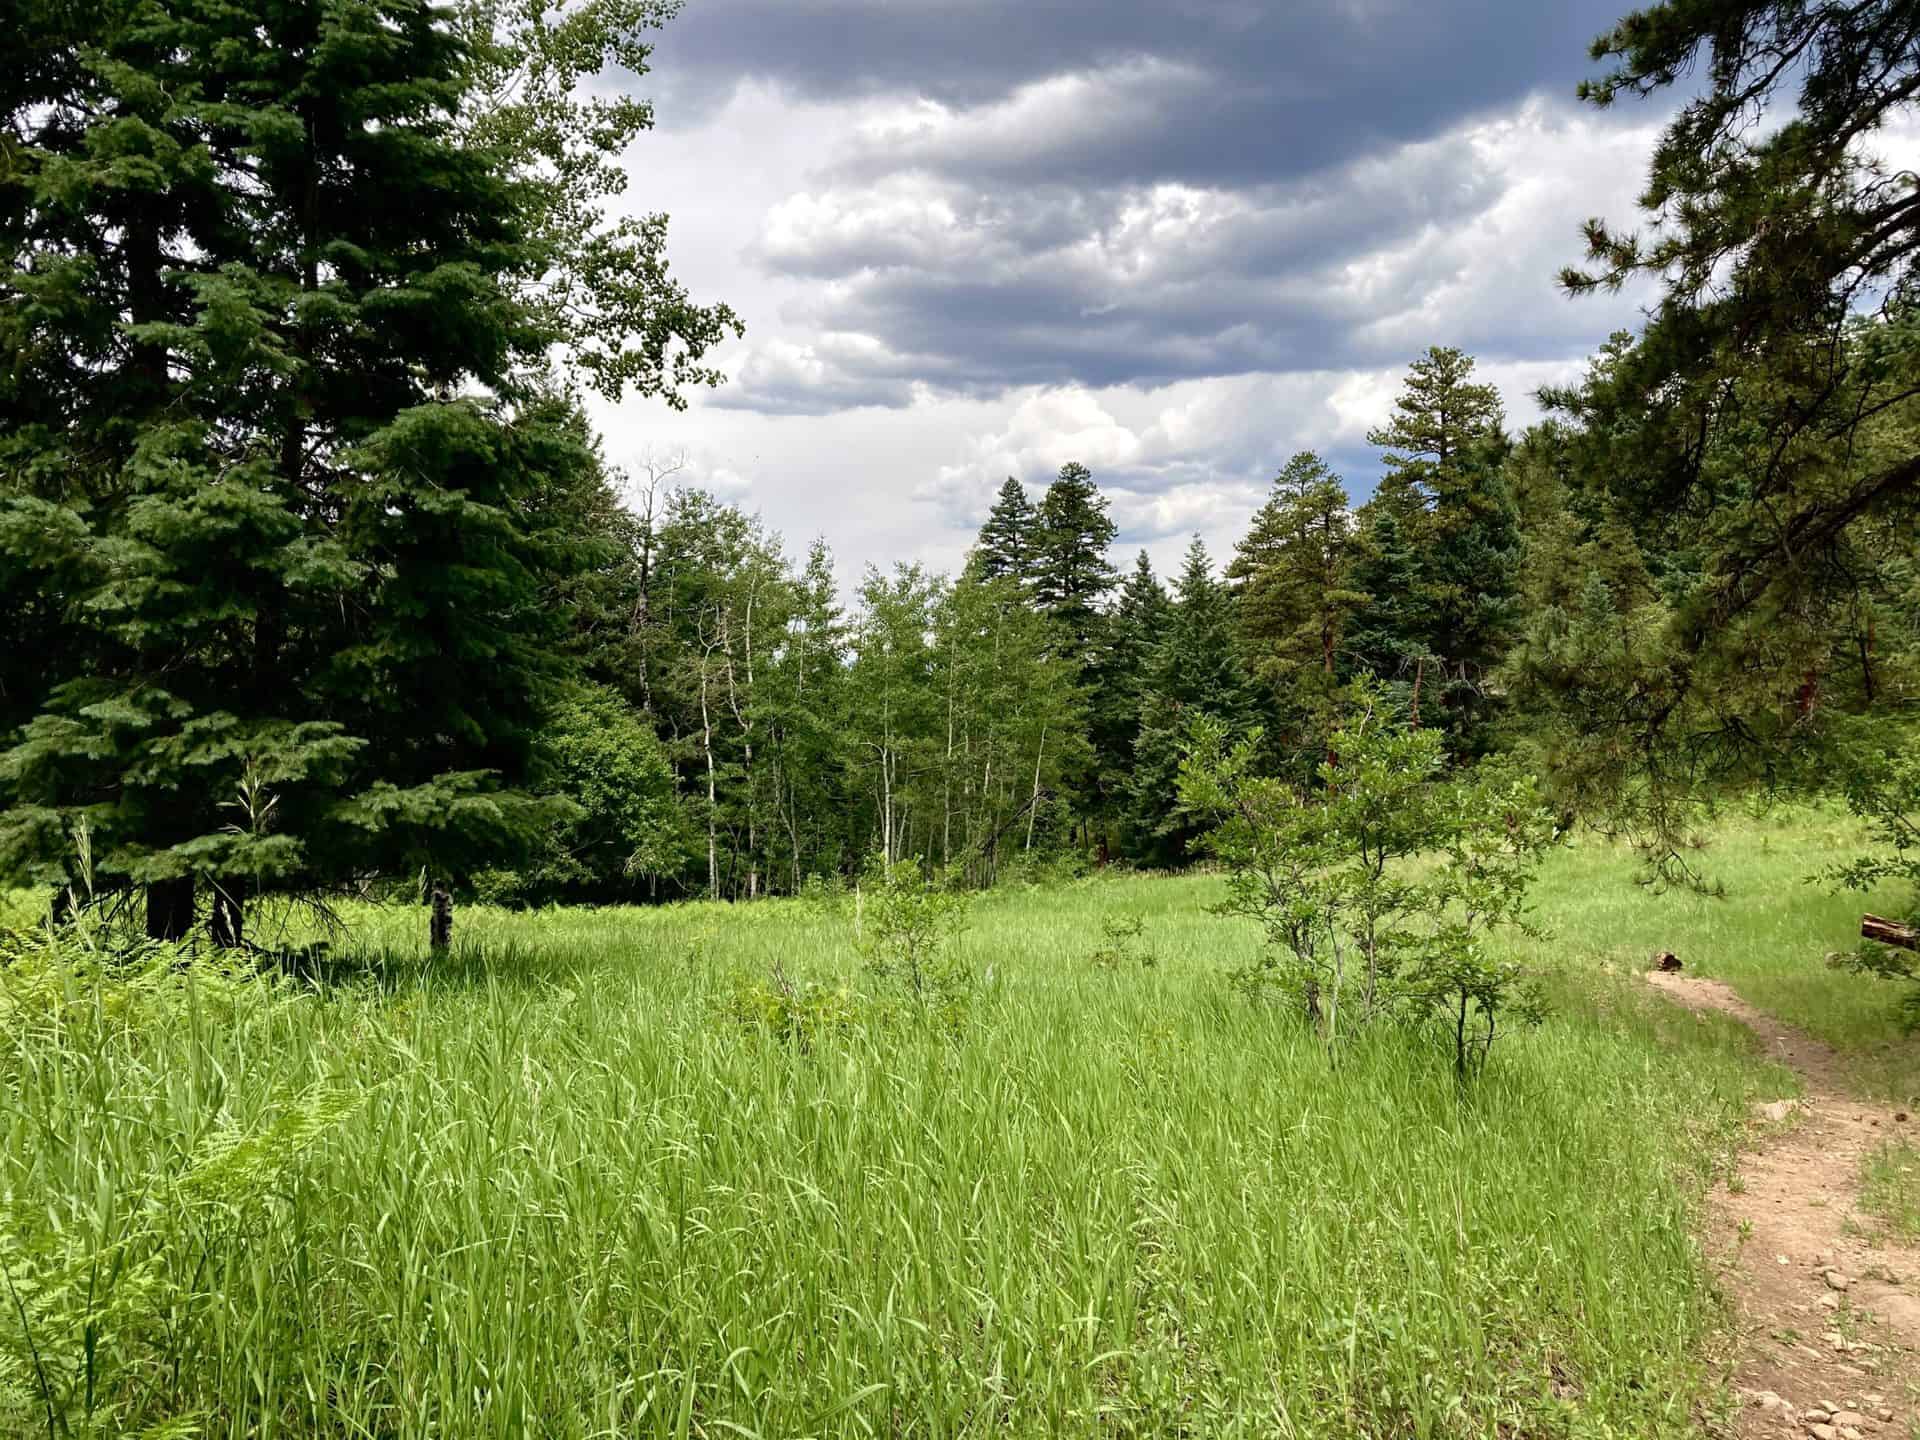
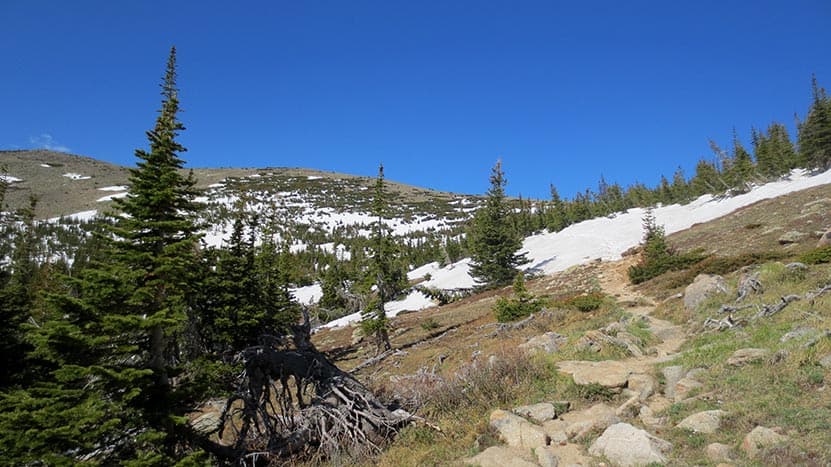
Now, set the cruise control. The stroll from here clocks just under 4 miles one-way. During the summer, the path often attracts ATVs and 4x4 enthusiasts; the fall brings breath-taking aspen colors and their fans. This post documents a winter trek, on which a single snowmobile passed by. Within this blessed solitude, the river basin, Crystal Mill, and the ghost town of Crystal stood frozen in time and silence. On that note, wise hikers will double-check the Colorado Avalanche Information Center prior to stepping out in adventure. While this route typically poses minimal risk, be alert to the slopes above the road and learn the signs of compromised snow fields. At the 1-1/4 mile mark, the trail wraps around the right side of Lizard Lake, often a destination in itself.
From the southeast end of the lake, the trail drifts leisurely on a ridge above Crystal River. No matter the season, the river valley floor sparkles. With gentle elevation changes and no risk of taking a wrong turn, hiking the remaining 3-1/4 miles is pure delight. Upon reaching the mill, the awe-inspiring nature of this historic landmark is impossible to miss. And if time and weather permit, those with energy and curiosity can continue up the road another a few paces to the actual town of Crystal. During the summer months, this often serves as an outpost for impromptu picnics. To return to the trailhead, reverse the route.
Crystal Mill resides on my Mom's all-time "Must see!" list in Colorado. Whether by foot or 4x4, I hope she gets to see it and take 1,000 pictures.
Tips & Resources for Hiking to the Crystal Mill
- TIP: While the remote location deters some, the sheer popularity of the site beckons people from all over. The small parking lot fills fast in summer and autumn, and even in the winter it can be full. Consider a mid-week visit or plan to go early.
- Trail Map: Crystal Mill Hike
- Packing List: Always pack the 10 Essentials. Download our Hiking Guide to get the list and dayhiking packing checklist. Additionally, take some time to review our 10 Winter Hiking Tips.
- Colorado Road Conditions: Colorado Road Conditions
- After the Hike: Get some back country BBQ at Slow Groovin'! Just note carefully that they operate from May 1st - October 31st.
Weather
Map & Driving Directions
Click for Driving Directions
Mt. Flora to Mt. Eva Hike above Berthoud Pass
High mountains passes, like Guanella, Kenosha, and Loveland, all offer 14er-level views but often without the 14er-level effort...or crowds! The Mt. Flora hike (with option to Mt. Eva) provides this kind of experience. Explore the full Mt. Flora to Mt. Eva Hike profile below for trail map, driving directions, and more tips and details to help you enjoy this adventure above Berthoud Pass near Denver.
Trail Snapshot: Mt. Flora to Mt. Eva Trail
| Hike Distance | 6-10 miles Round Trip |
|---|---|
| Difficulty | Moderate to Difficult |
| Duration | Approx 3-6hr |
| Trail Type | Out-and-Back |
| Starting Elevation | 11,300′ |
| Elevation Gain | Approx 1,800' to 2,800′ |
| Seasons | All Year |
| Dogs | Allowed On Leash |
| Hike Trail Map | Click for Trail Map of Mt. Flora and Mt. Eva Hikes |
| Denver Drive Time | 1 hour |
| Driving Directions to Berthoud Pass Trailhead | Click for Google Map |
| Town Nearest Hike | Idaho Springs and Georgetown, Colorado |
| Beauty | 360-degree vistas, Berthoud Pass, Valleys, Lakes |
| Activities | Hiking, Photography |
Parking & Trailhead Information for Mt. Flora and Mt. Eva Hikes
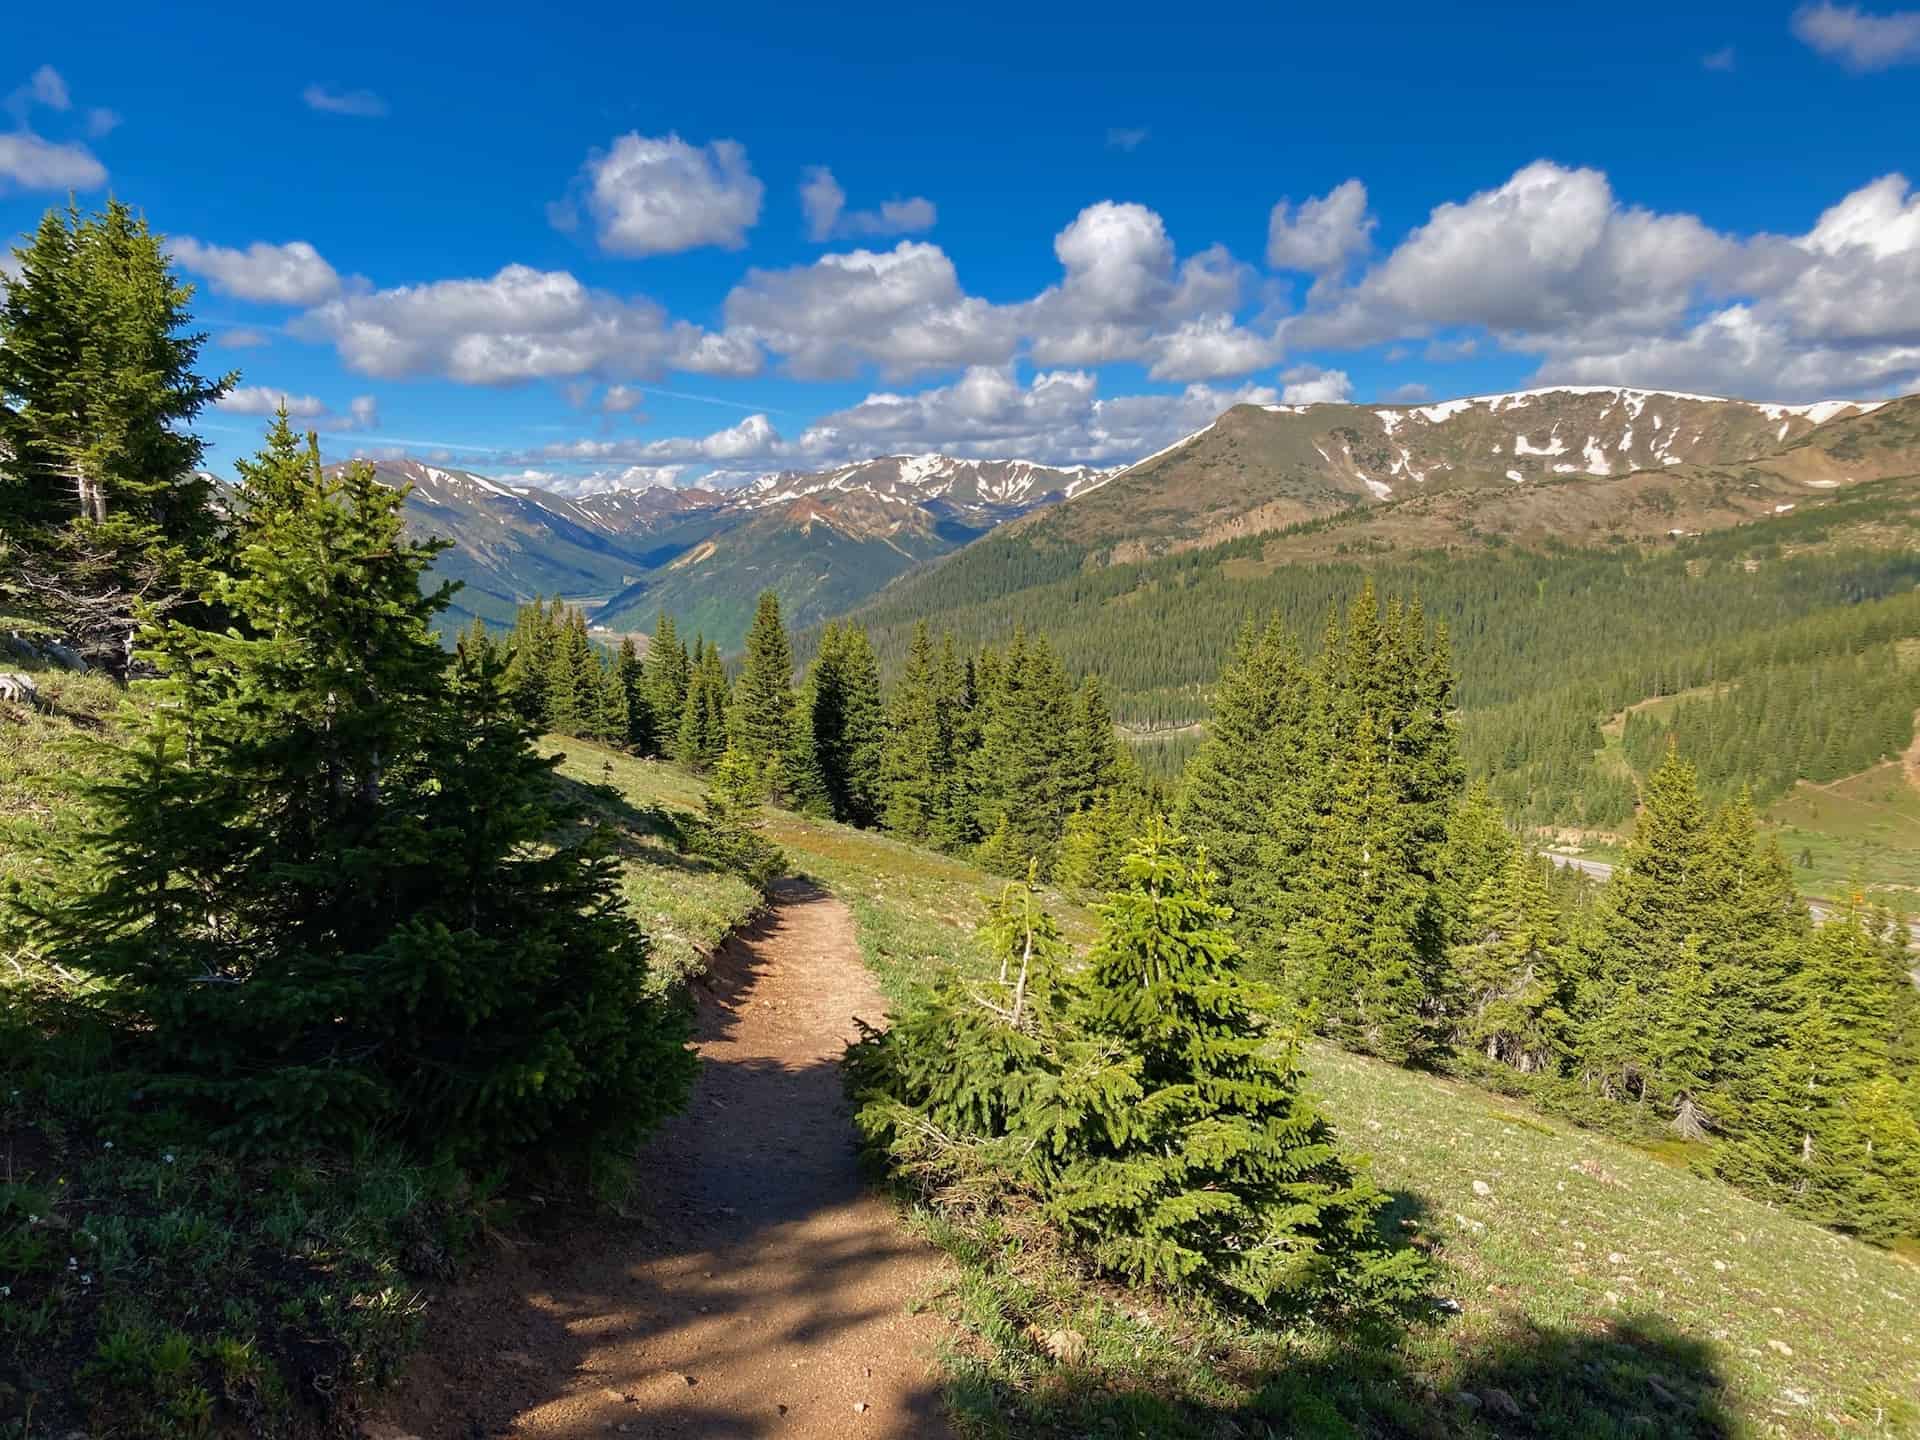
Berthoud Pass, barely an hour west of Denver, beckons hikers above 13,000ft to a crest of the Continental Divide trail. The trailhead serves as a fount for multiple hikes, with a common and simple trek up a forest road to the Colorado Mines Peak (just under 13,000ft). Other well-conditioned adventurers may opt to continue along Highway 40 another hour north, going just beyond Granby, to catch the Crater Lake Hike.
From Denver, heading west on I-70, take exit 232 for U.S. 40 toward Empire, CO. Staying straight to join Highway 40, continue for approximately 14 miles to the Berthoud Pass Parking lot, which sits on the right (east) side of the highway. Berthoud Pass requires navigating a half-dozen tight curves, so keep aware of the road while also appreciating the immense beauty around each of them! The parking lot provides ample parking for the official trailhead accessing the Mt. Flora hike.
The Hike: Mt. Flora and Mt. Eva Trail
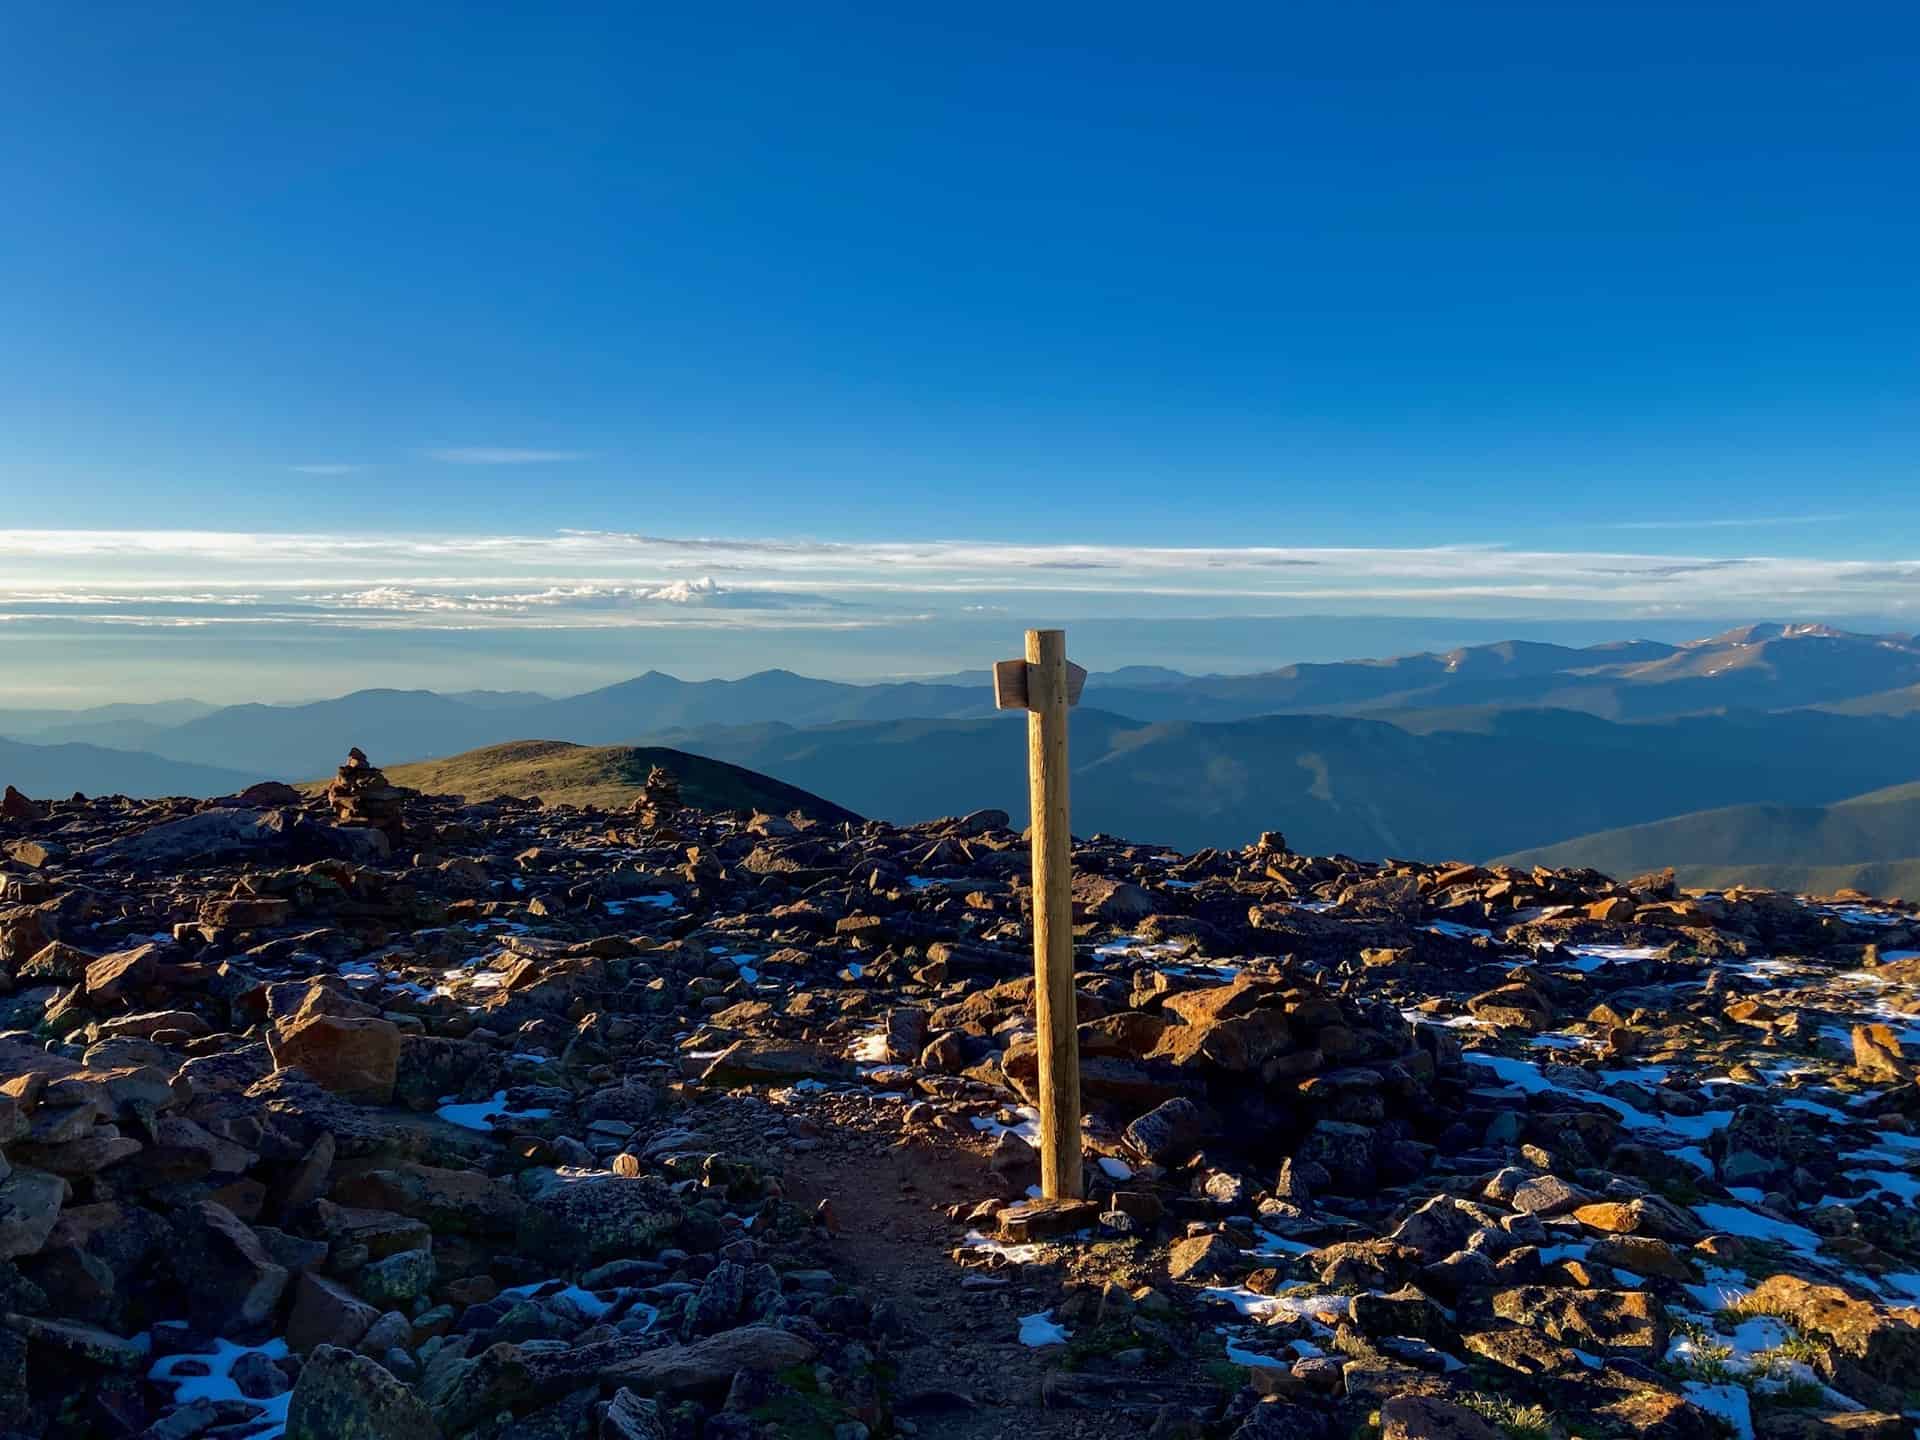
Beginning at the Berthoud Pass Parking Lot, the trail begins just beyond the gate to the forest road at the south end. The road is the trail for just over 3/4-mile, where a junction appears on the left at a sharp curve. Taking this foot-path for another 3/4-mile brings the trail to the ridge overlooking Blue Lake, and gazing back right (south), nearly eye-level with Colorado Mines Peak. Continuing along for approximately 1.5 miles, the trail tops the Mt. Flora peak, a small but broad mesa-like rock crop. From here, Ethel Lake and Mill Creek stand out below in the valley. The Continental Divide Trail veers to the right to descend to Breckenridge Peak.
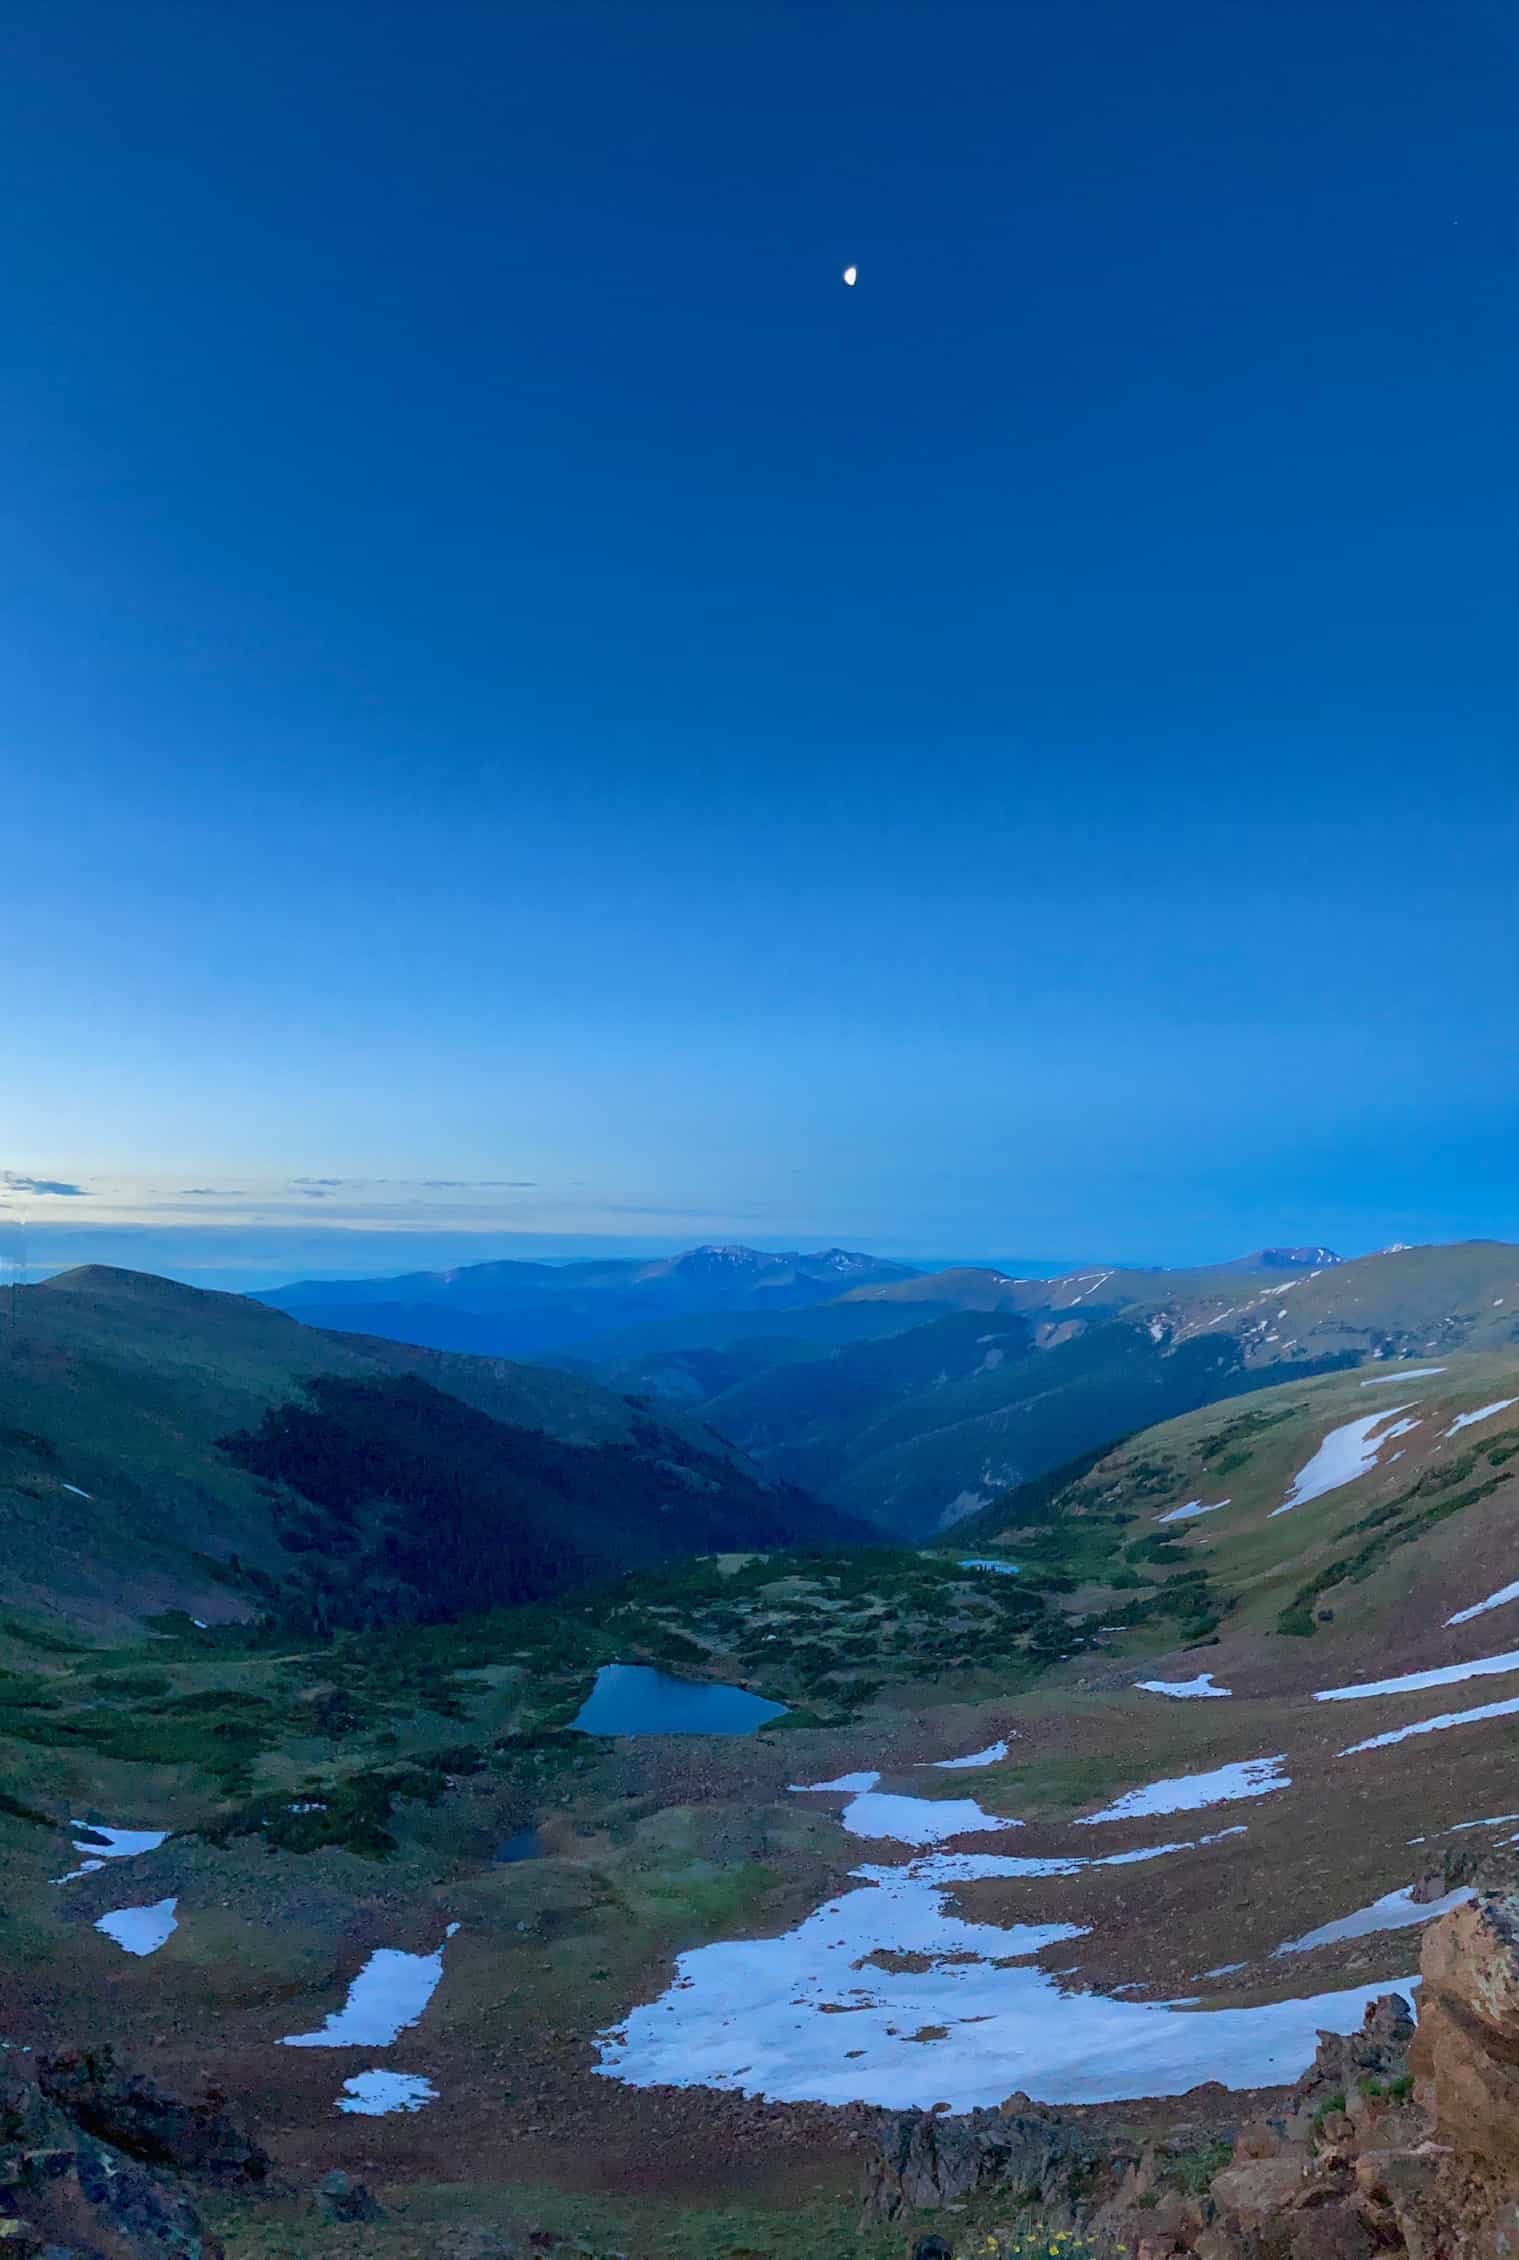
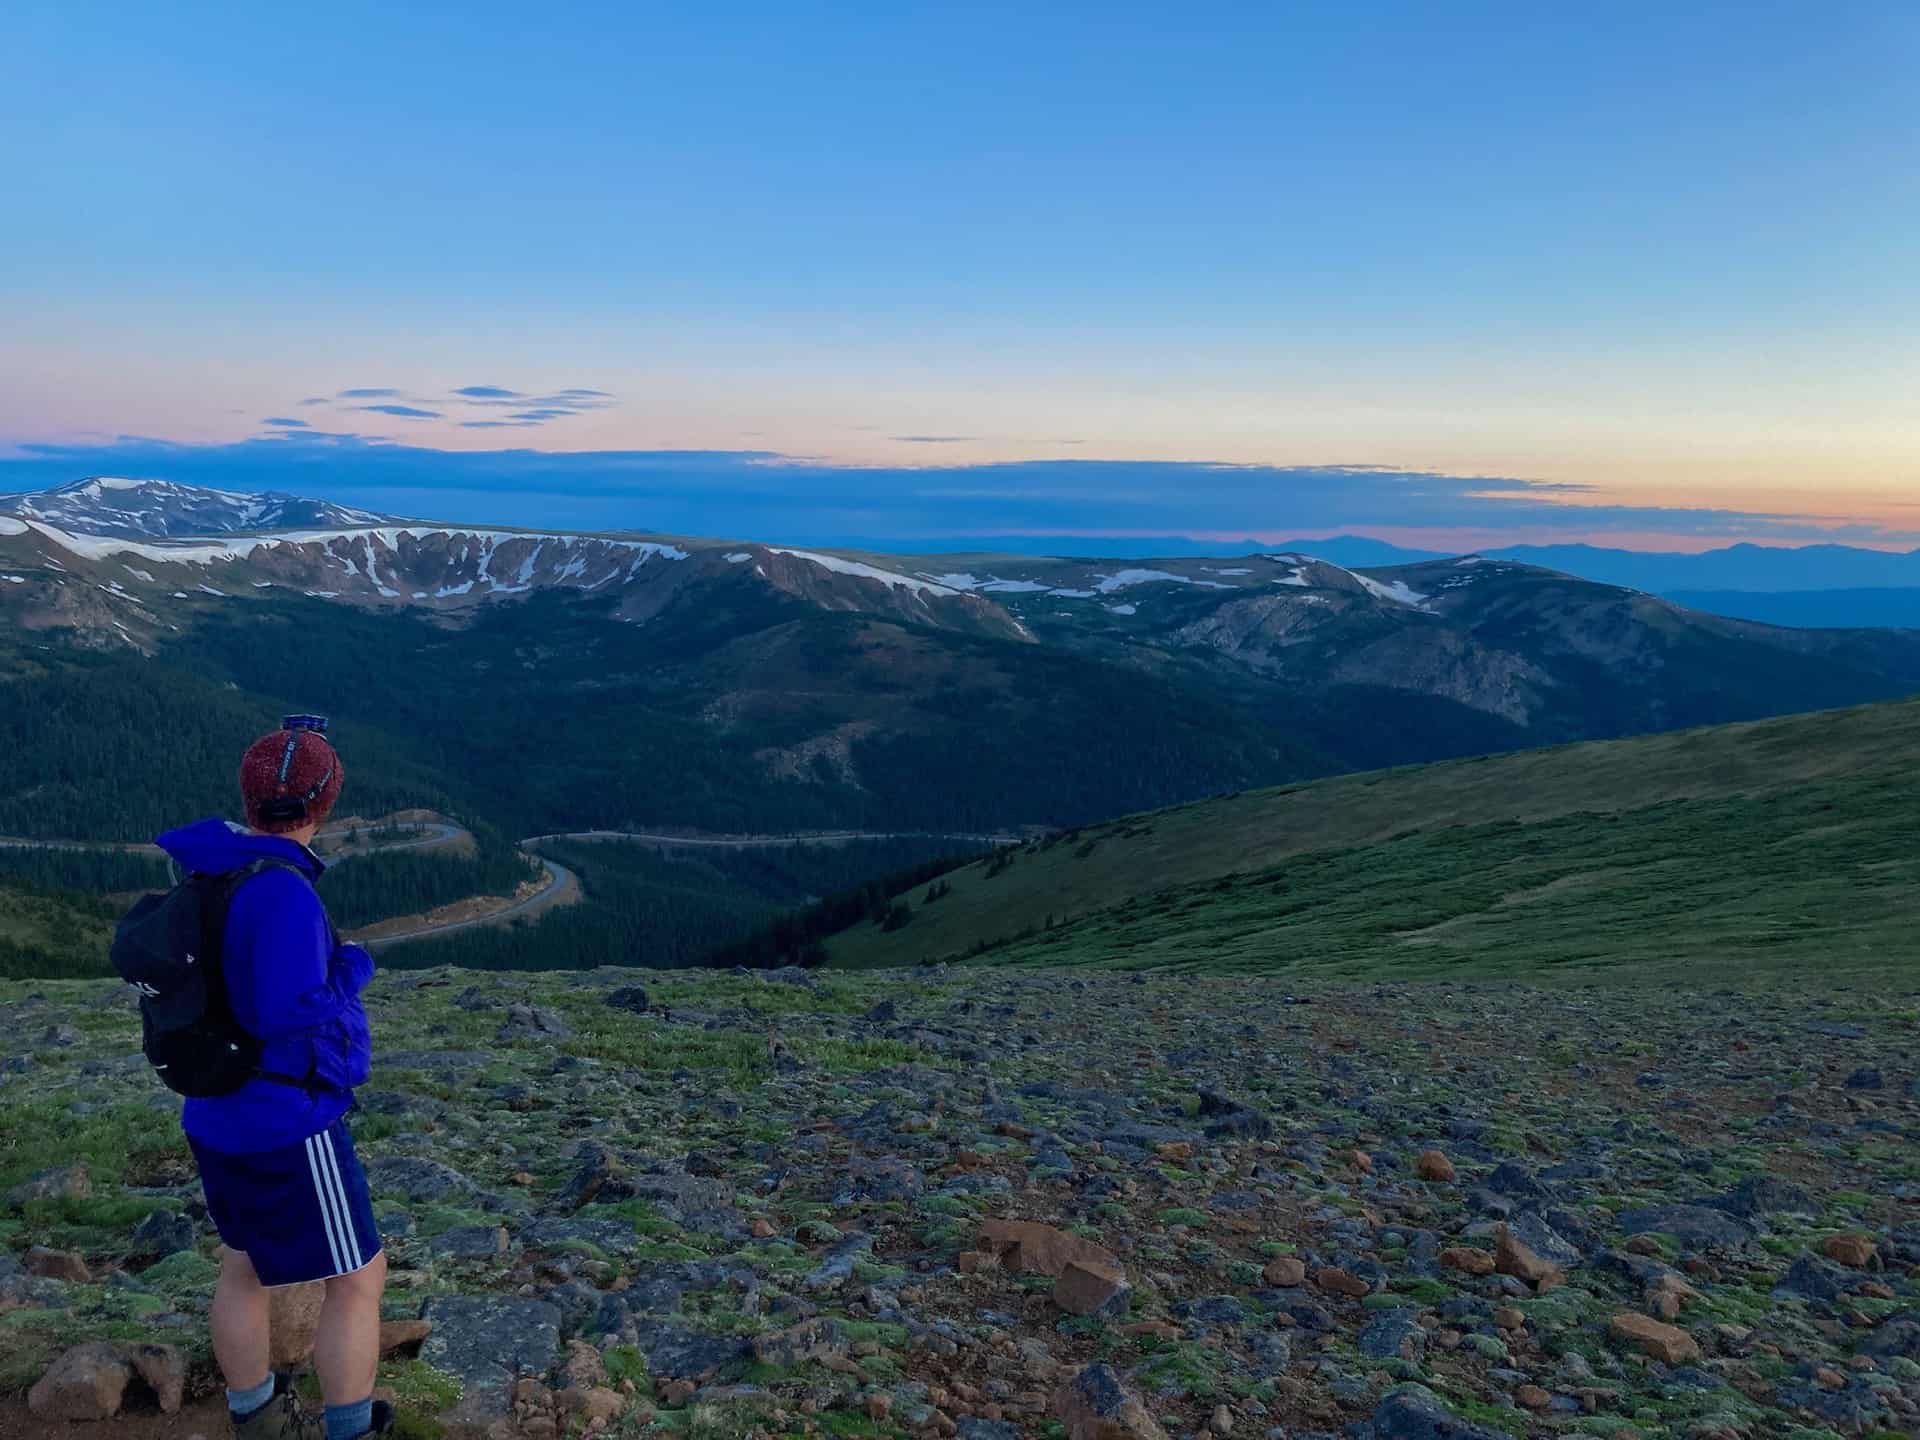
At this point, hikers have options. One may choose simply to return to the trailhead by reversing this route, completing six miles. The route under review here chooses to continue northeast -- as if going straight and originally bypassing the Mt. Flora peak -- and seek to capture the Mt. Eva peak, too. The next mile of the trail gradually unfolds by means of cairns (small piles of rocks stacked by previous hikers) and on- and off-again worn foot paths. It also descends over 600ft rapidly, then regains this in the next mile to reach the peak. However, the lung-busting elevation loss and gain comes with a stunning reward atop Mt. Eva...views of Slater Lake and three reservoirs, as well as Parry Peak and Mt. Bancroft to the north and northeast.
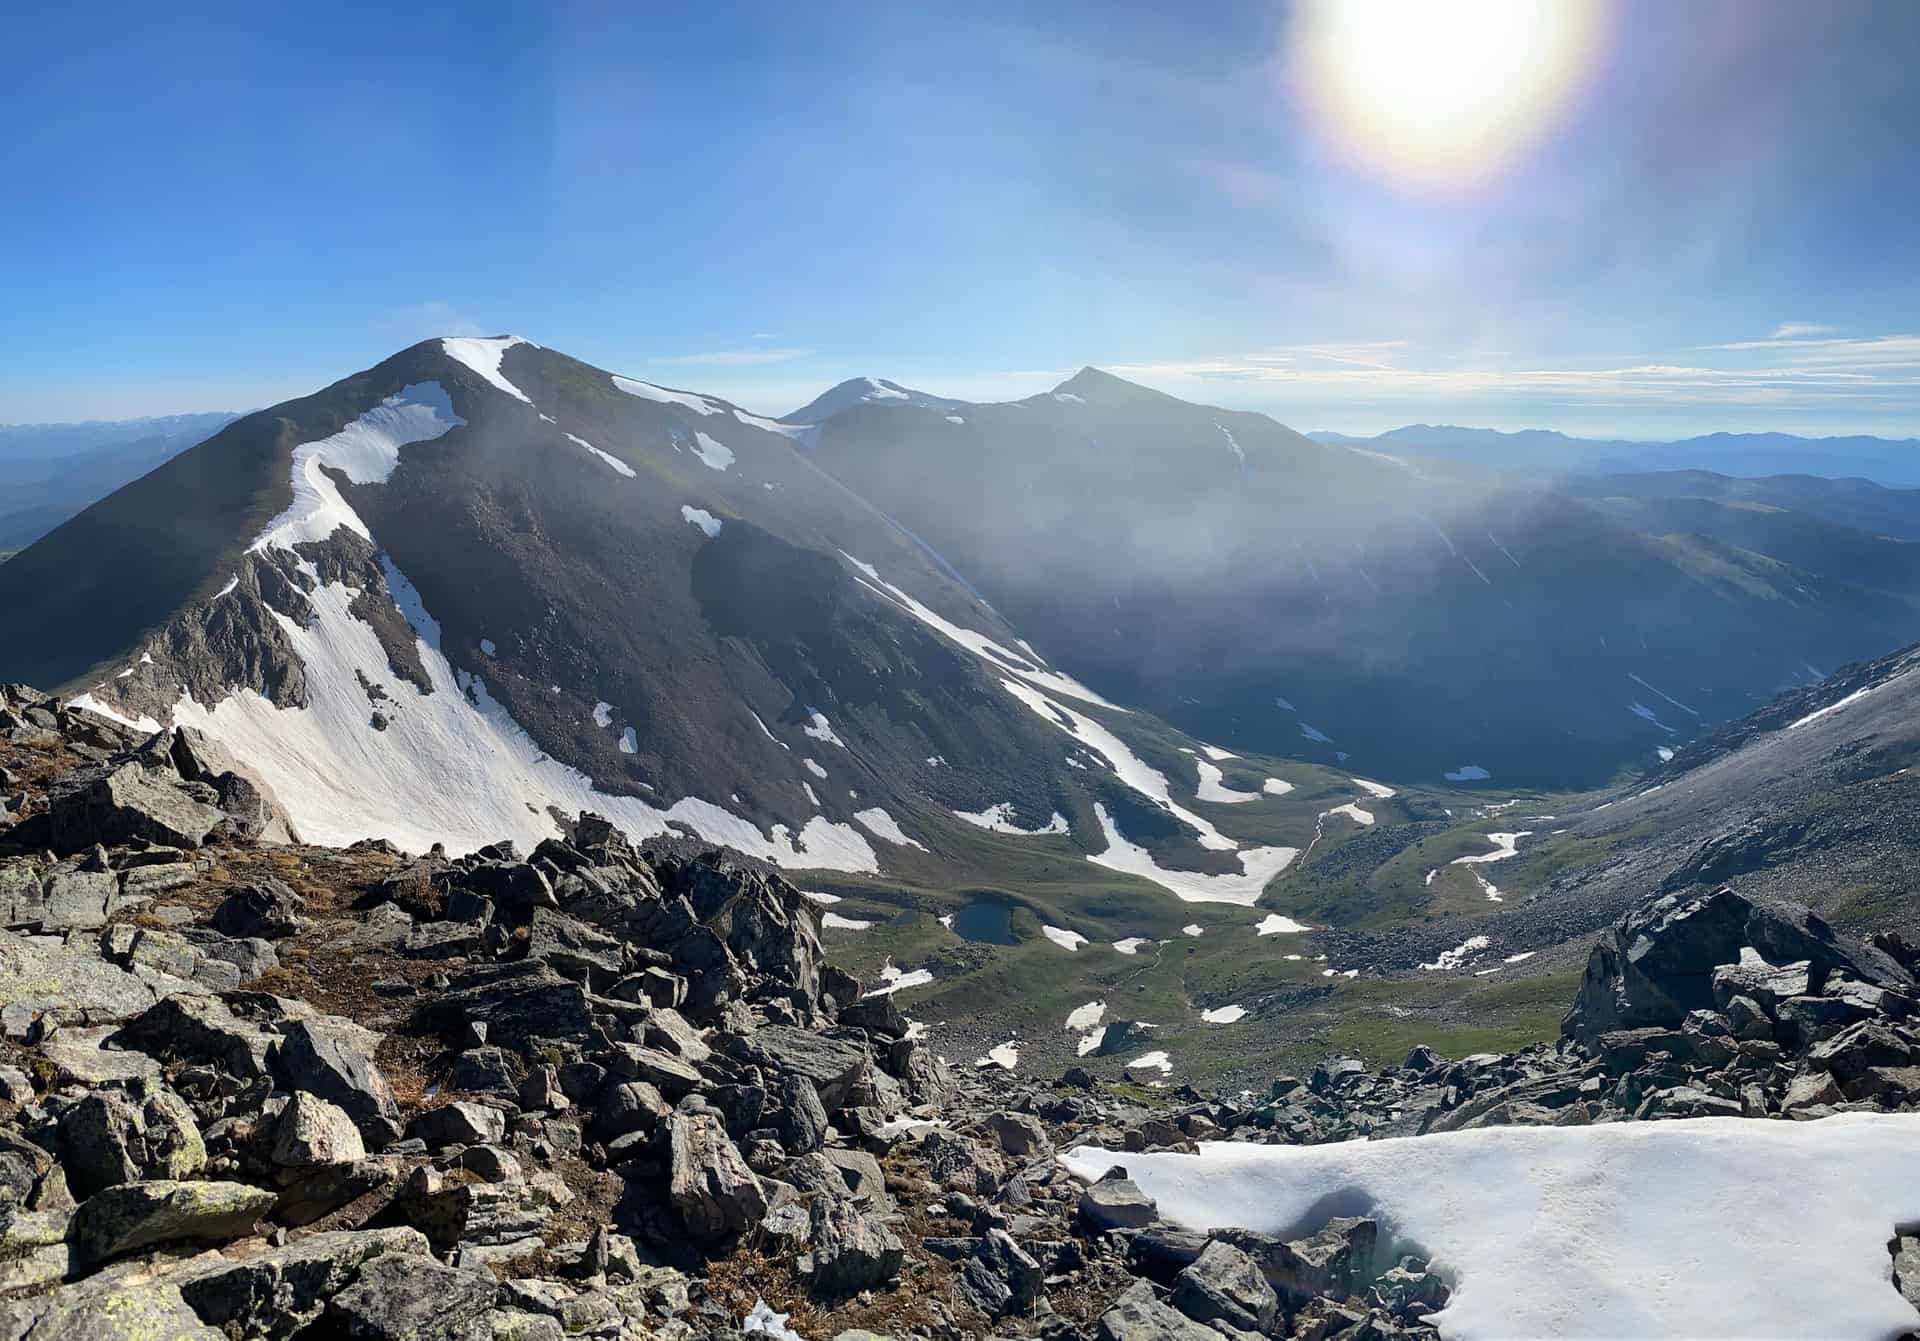
After soaking in the 360-degree vistas, including gazing down on Winter Park to the northwest, the return trail follows the route in reverse. As it descends, Berthoud Pass' western slopes will change as the light changes, giving you an entirely new set of images for your mind or camera. Note: be careful as the trail re-enters the forest on its way back to the trailhead; a shortcut trail opens up high on the ridge. The route reviewed here follows the ascending route in reverse, with the exception of the last 1/10-mile, which has clear views of the parking lot and minimal trail hazards.
Tips & Resources for Hiking Mt. Flora and Mt. Eva above Berthoud Pass
- Trail Map: Mt. Flora to Mt. Eva Hike
- Packing List: Always pack the 10 Essentials. Download our Hiking Guide to get the list and dayhiking packing checklist.
- Colorado Road Conditions: Colorado Road Conditions
- After the Hike: Venture down into Winter Park, under 20min to the north of Berthoud Pass along Highway 40.
Weather
Map & Driving Directions
Click for Driving Directions
Crater Lake Hike in the Indian Peaks Wilderness
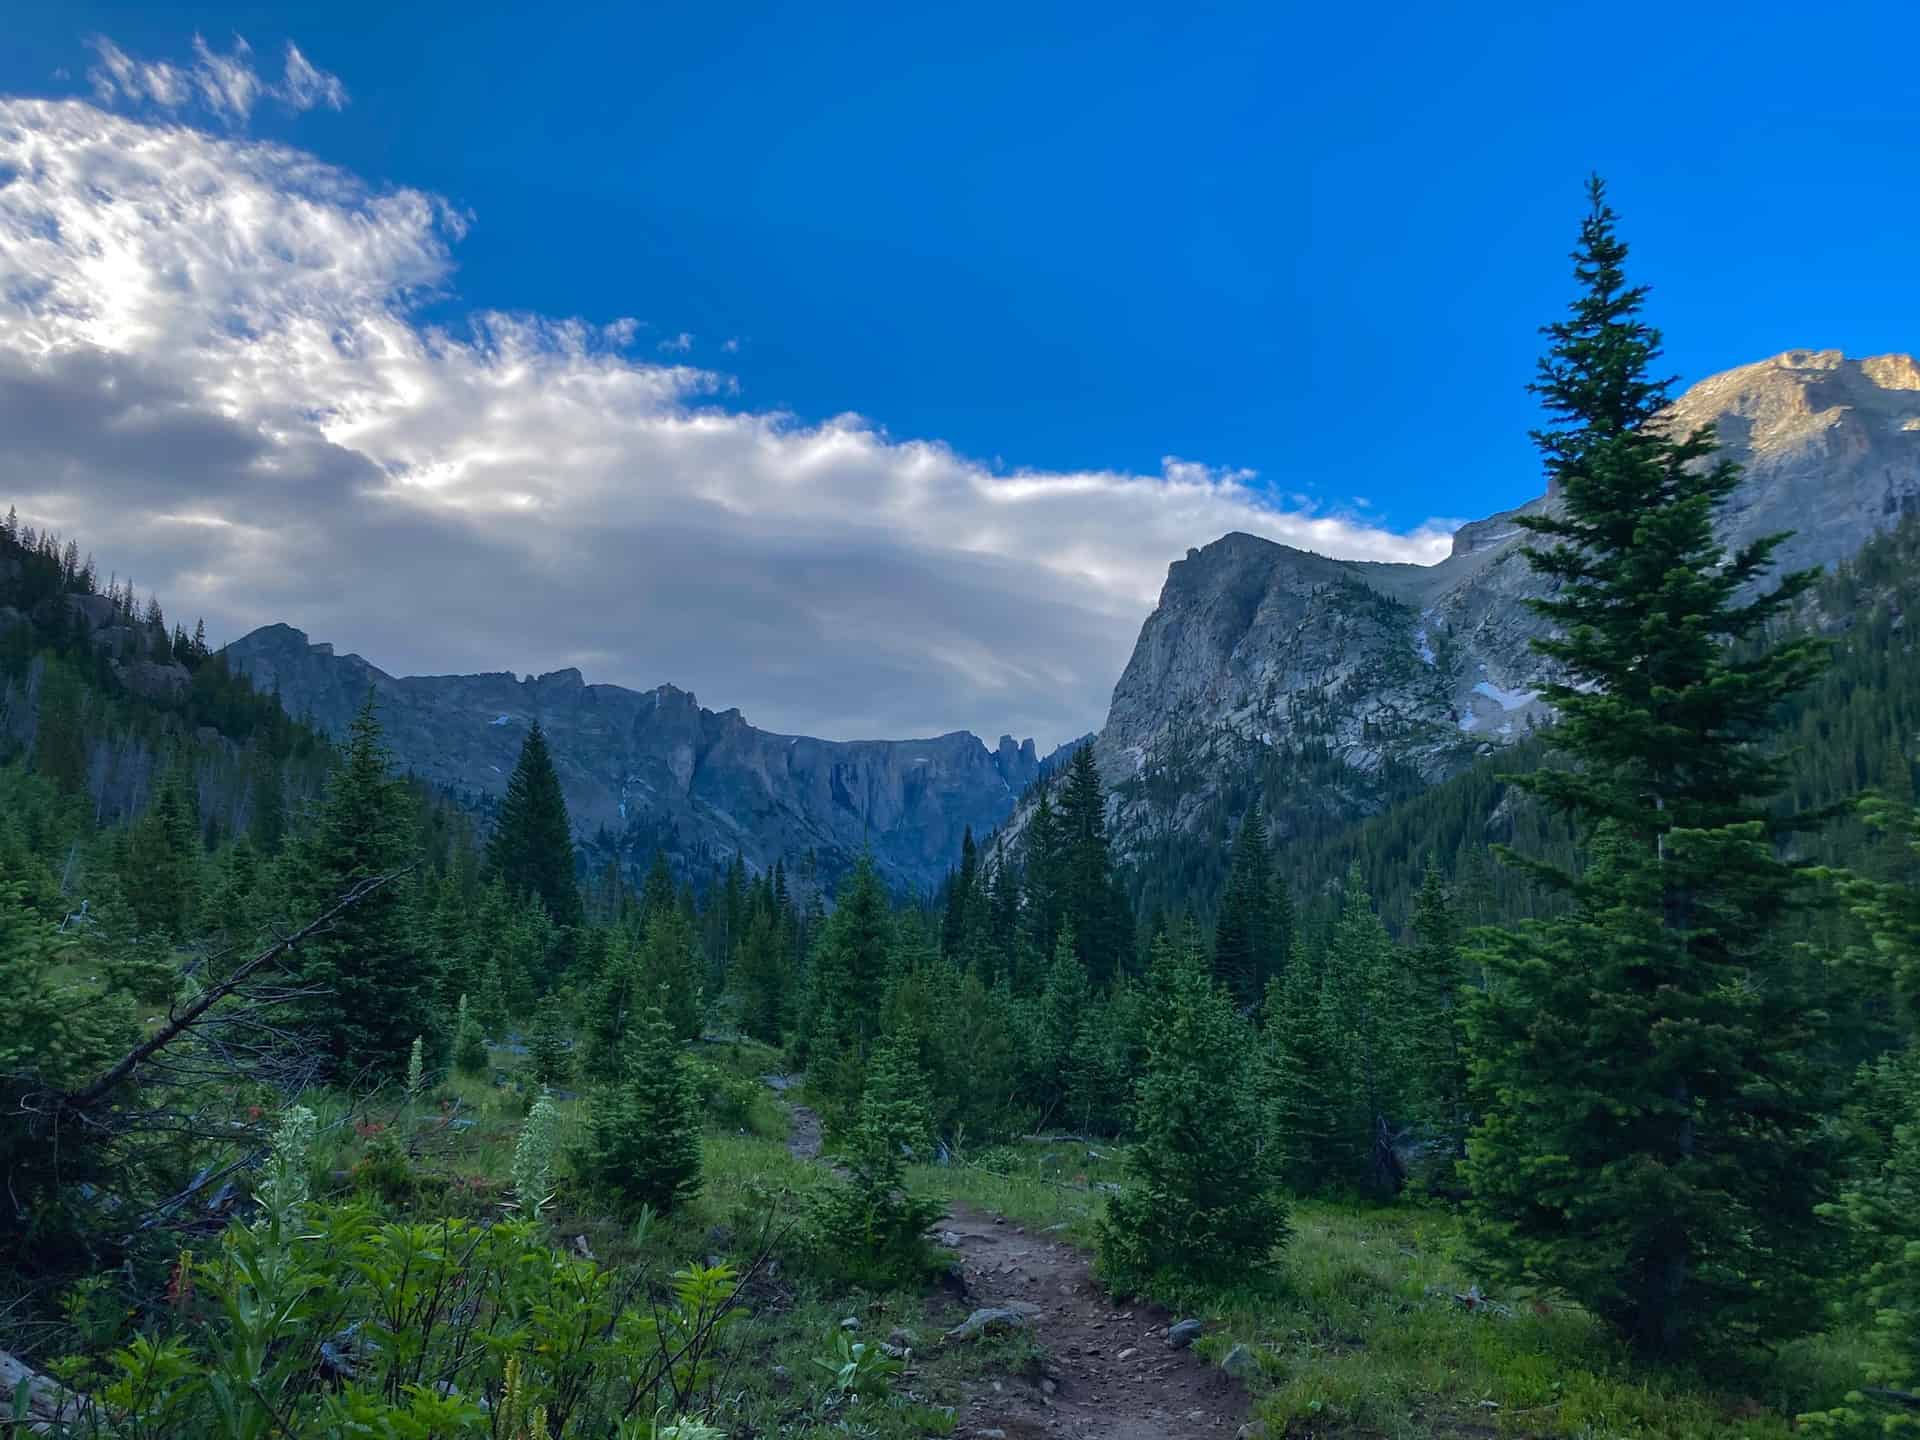
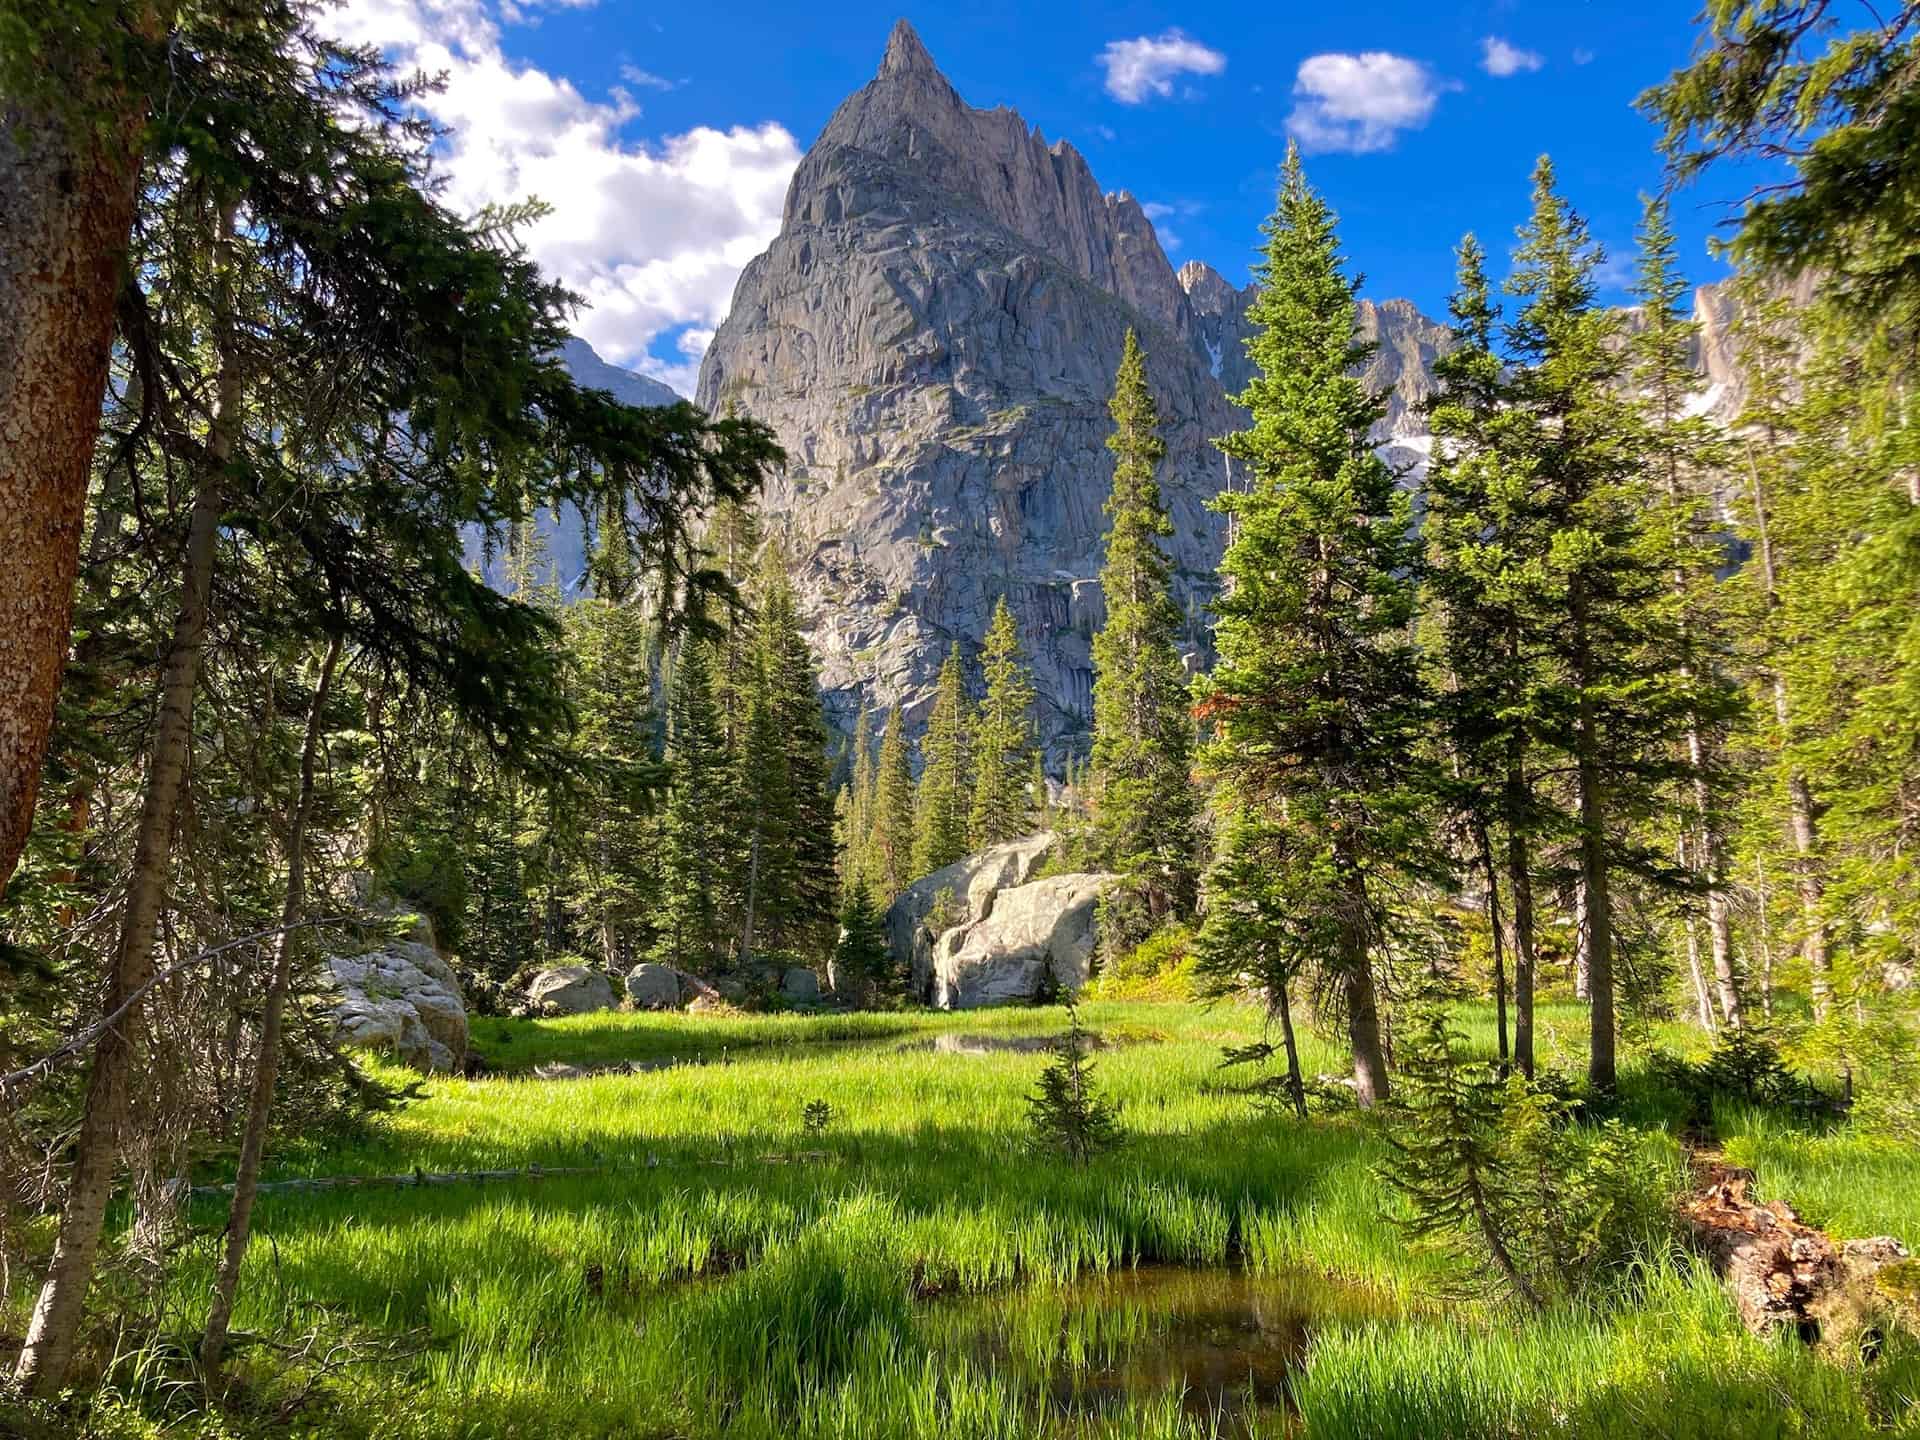
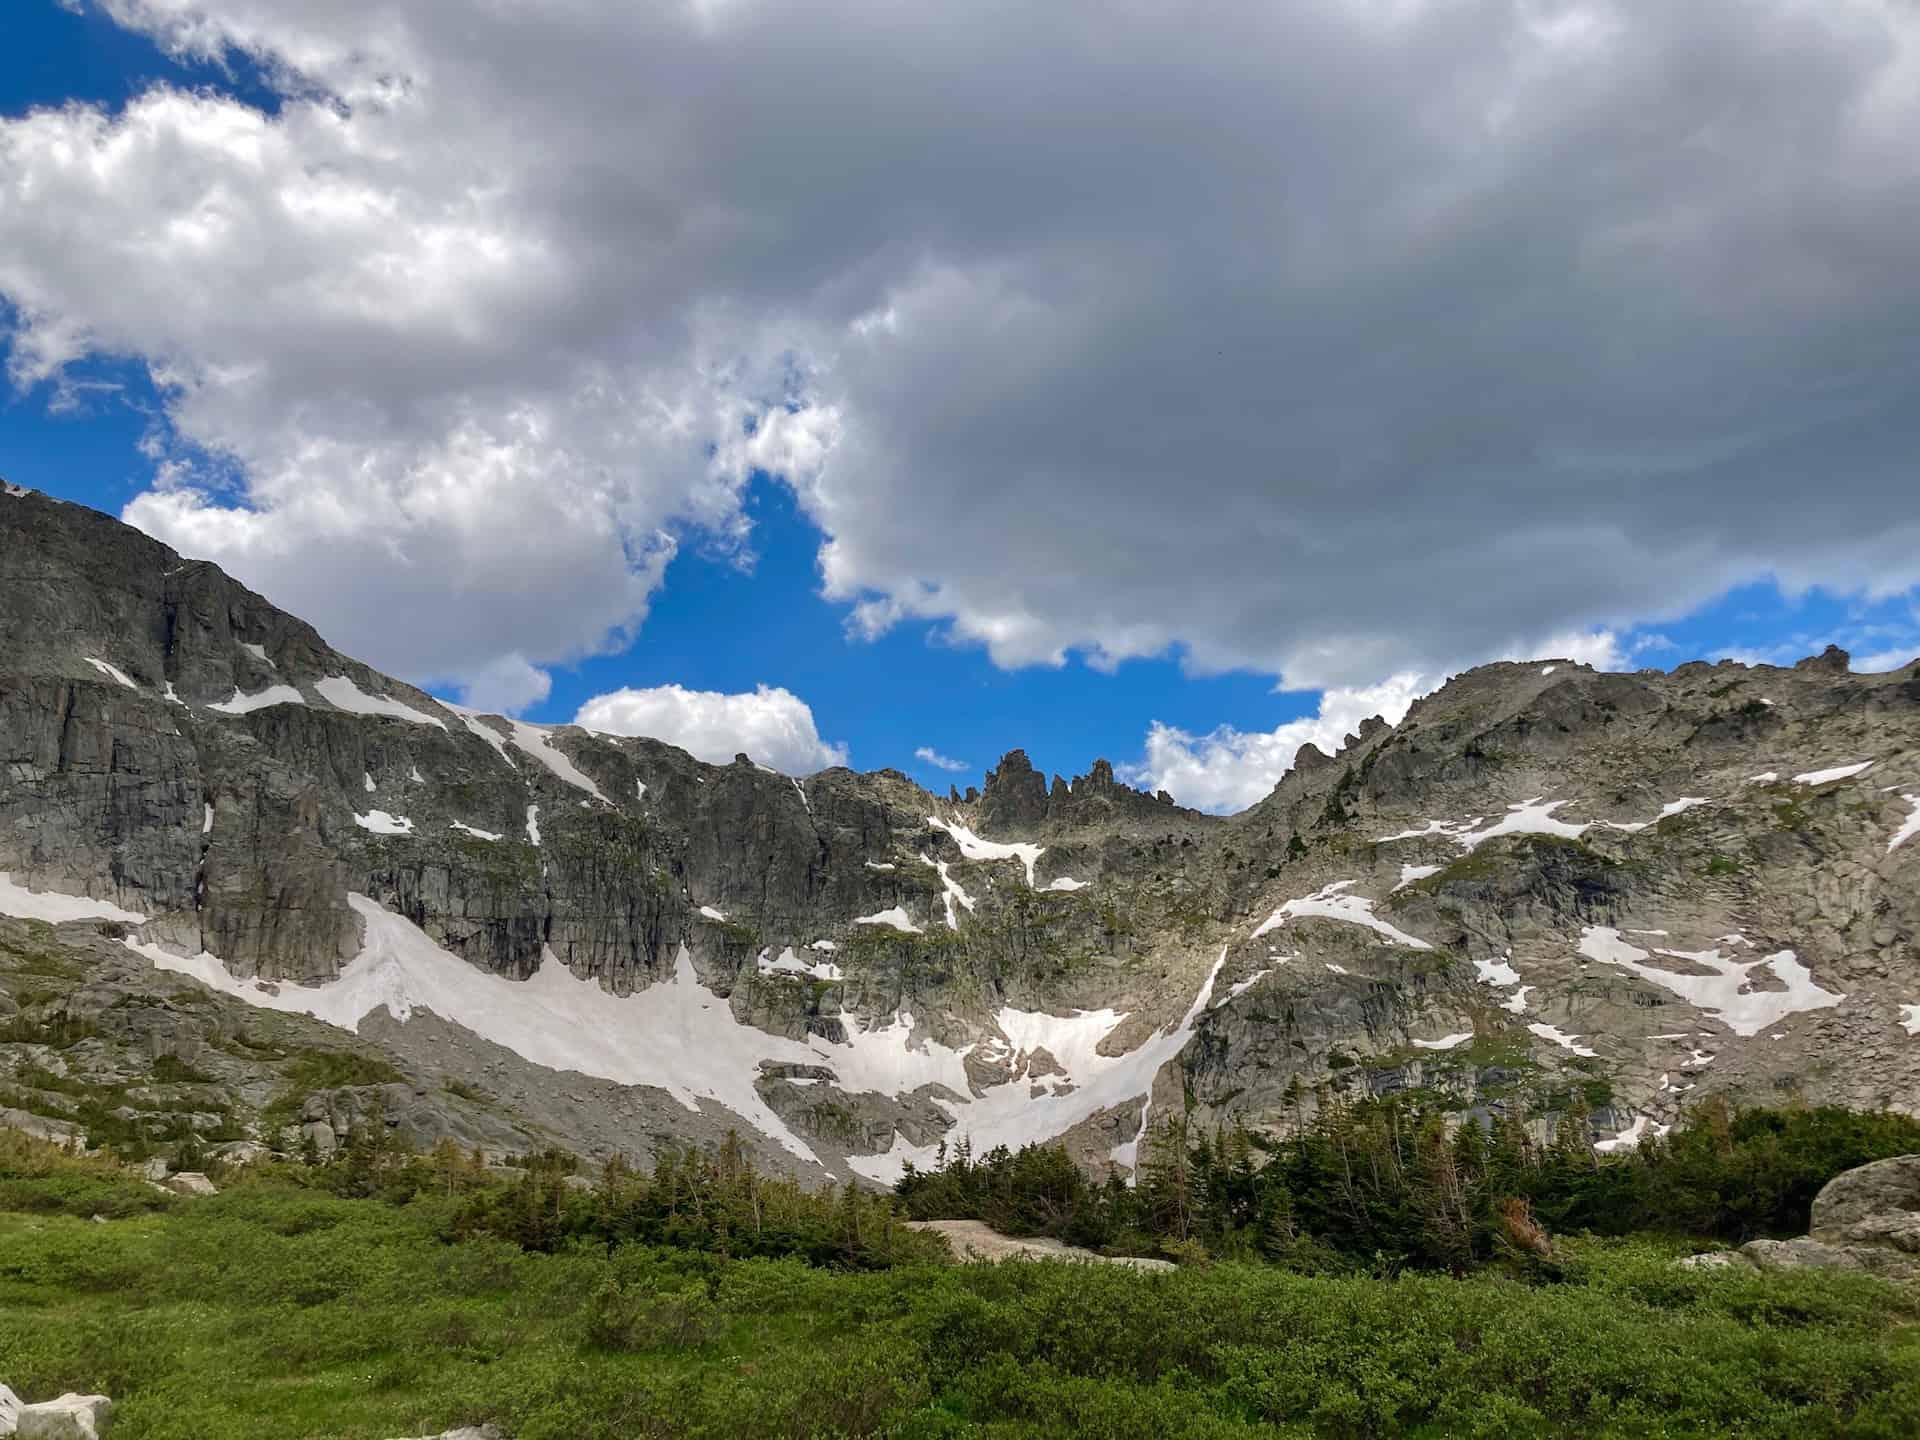
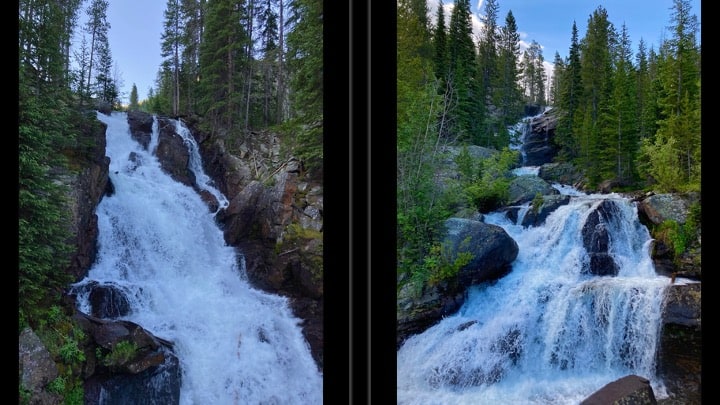
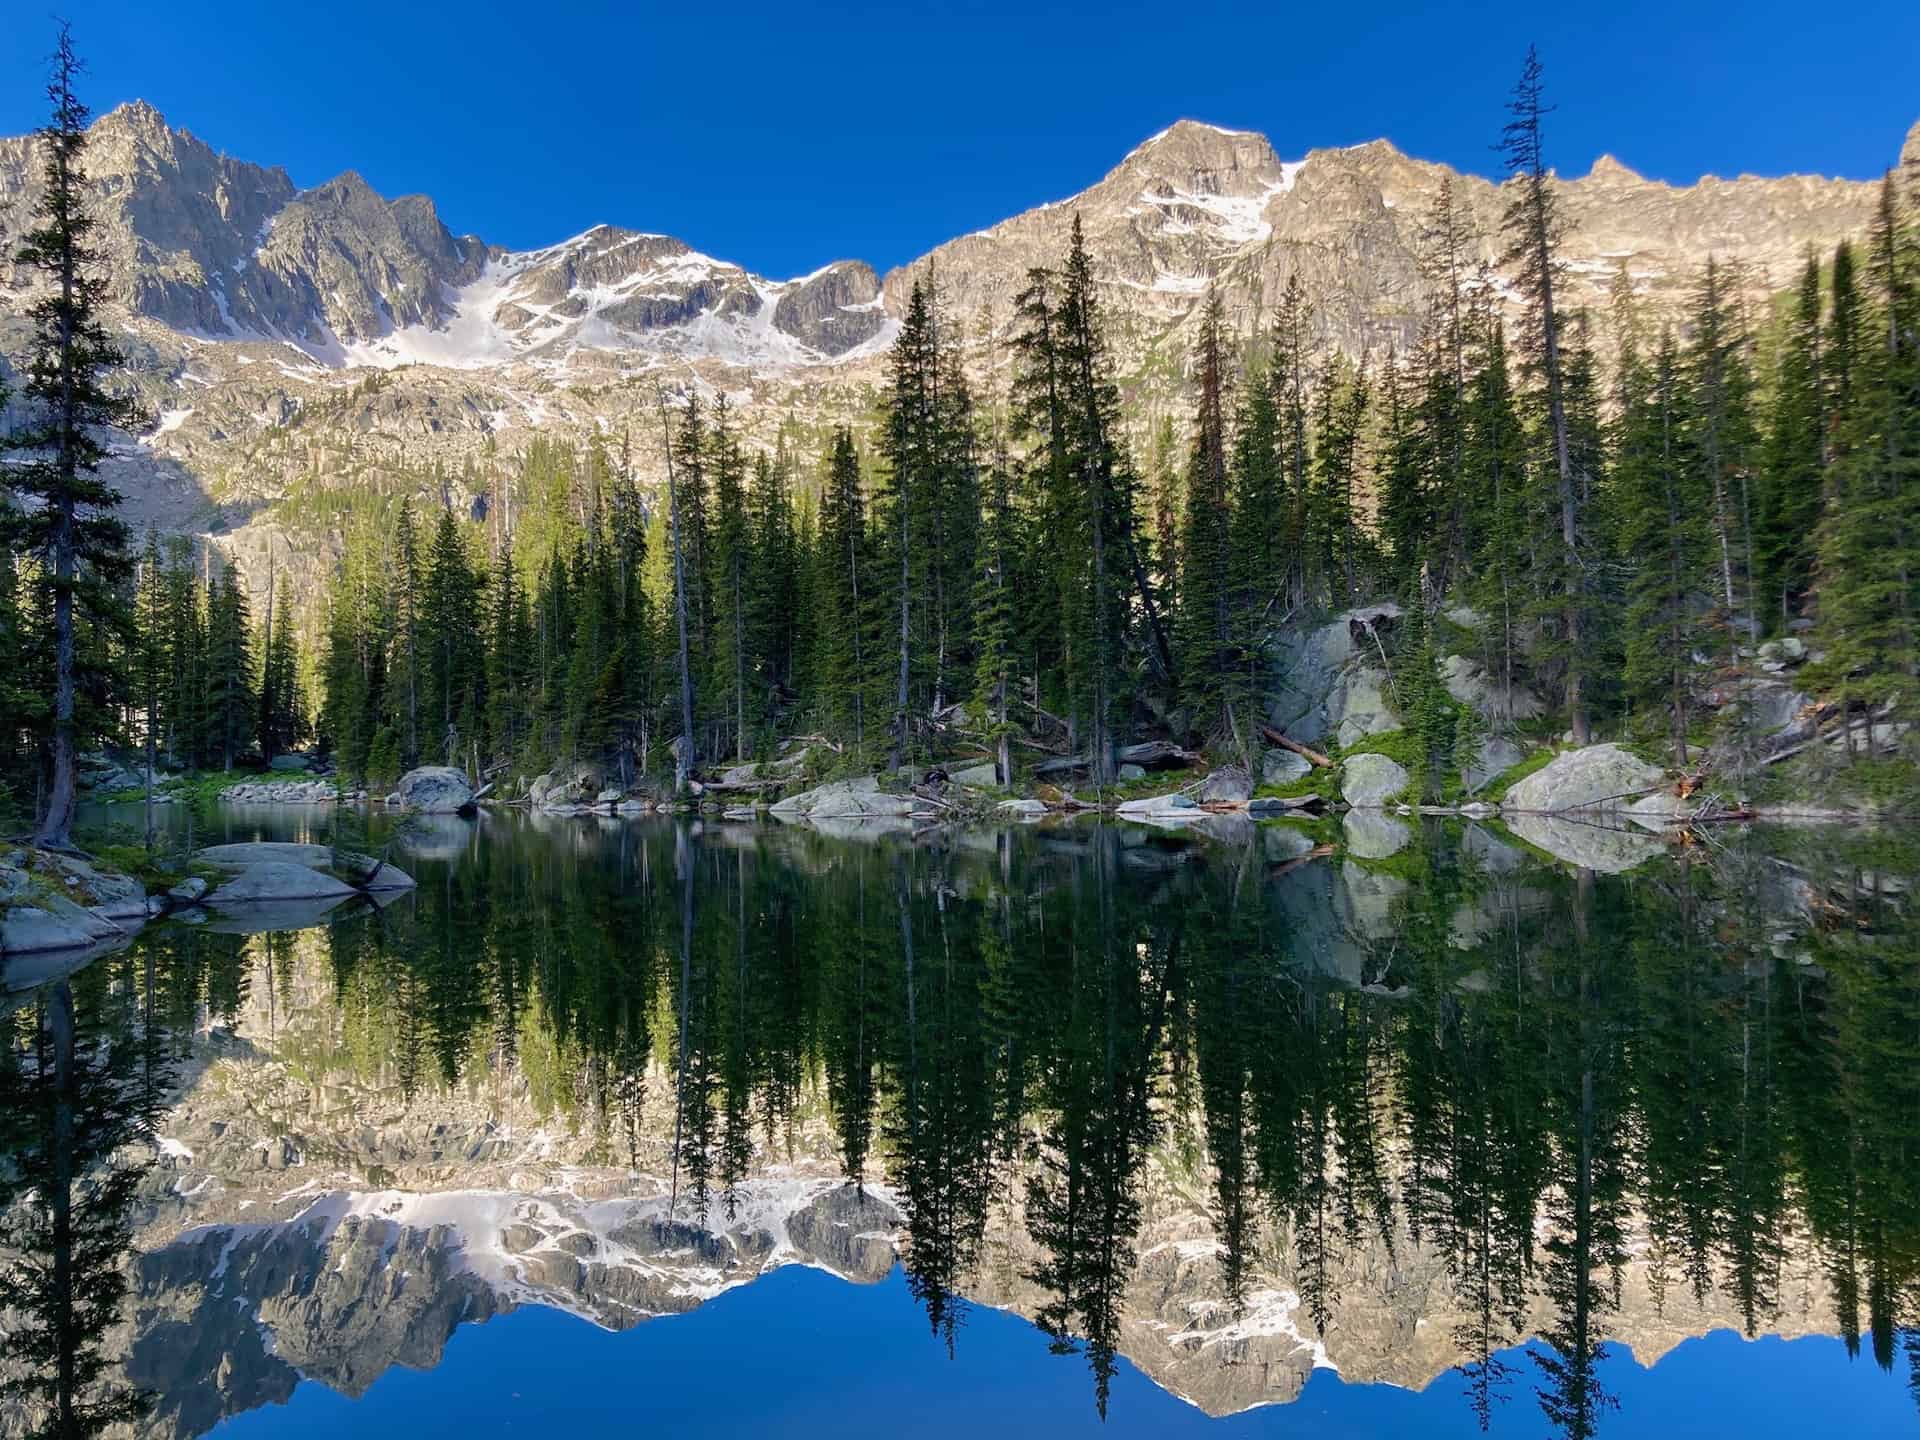
California may boast Yosemite, but Colorado offers the Indian Peaks Wilderness valley. And within this wilderness, one happens upon an arresting sight -- Mirror Lake and Crater Lake, dutifully monitored by the impressive Lone Eagle Peak. Long considered an iconic range, the Indian Peaks give hikers an endless stream of prime photography, wildflowers, and "Look at that!" moments. From the trailhead to Mirror Lake hikers encounter a half-dozen waterfalls, any one of which would capture all-star status on another trail!
Explore the full Crater Lake Hike profile below for trail map, driving directions, and more tips and details to help you enjoy this bucket list hike just west of Denver.
Trail Snapshot: Crater Lake via Mirror Lake
| Hike Distance | 15 miles Round Trip |
|---|---|
| Difficulty | Difficult |
| Duration | Approx 7-8hrs |
| Trail Type | Out and Back |
| Starting Elevation | 8,400′ |
| Elevation Gain | Approx +2,500′ |
| Seasons | Year Round |
| Dogs | Allowed On Leash |
| Crater Lake Hike Map | Click for Trail Map of Crater Lake Hike |
| Denver Drive Time | 2.5 hours |
| Driving Directions to Monarch Lake Trailhead | Click for Google Map |
| Town Nearest Hike | Granby and Grand Lake, Colorado |
| Beauty | Indian Peaks Wilderness, wildflowers, waterfalls, lakes |
| Activities | Hiking, Snowshoeing, Camping | Fee | Entrance Fee or National Parks Pass Required |
Parking & Trailhead Information for Crater Lake Hike
From Denver, head west on I-70 to exit 232 for Highway 40W. Climb up the gorgeous Berthoud Pass and through Winter Park on to Granby, CO. Barely out of Granby, look for Highway 34 off to the right, heading northeast. Follow this for five miles to Route 6; turn right onto Route 6. If you do not have an annual National Park pass ("America the Beautiful" pass), a self-pay station sits off to the left as you enter. The U.S. Forest Service does regularly check for passes or purchased day-use permits. To reach the Monarch Lake Trailhead, continue on Route 6 for another nine miles. With campers, hikers, and sightseers, the lot fills quickly.
The Hike: Crater Lake Hike in the Indian Peaks Wilderness
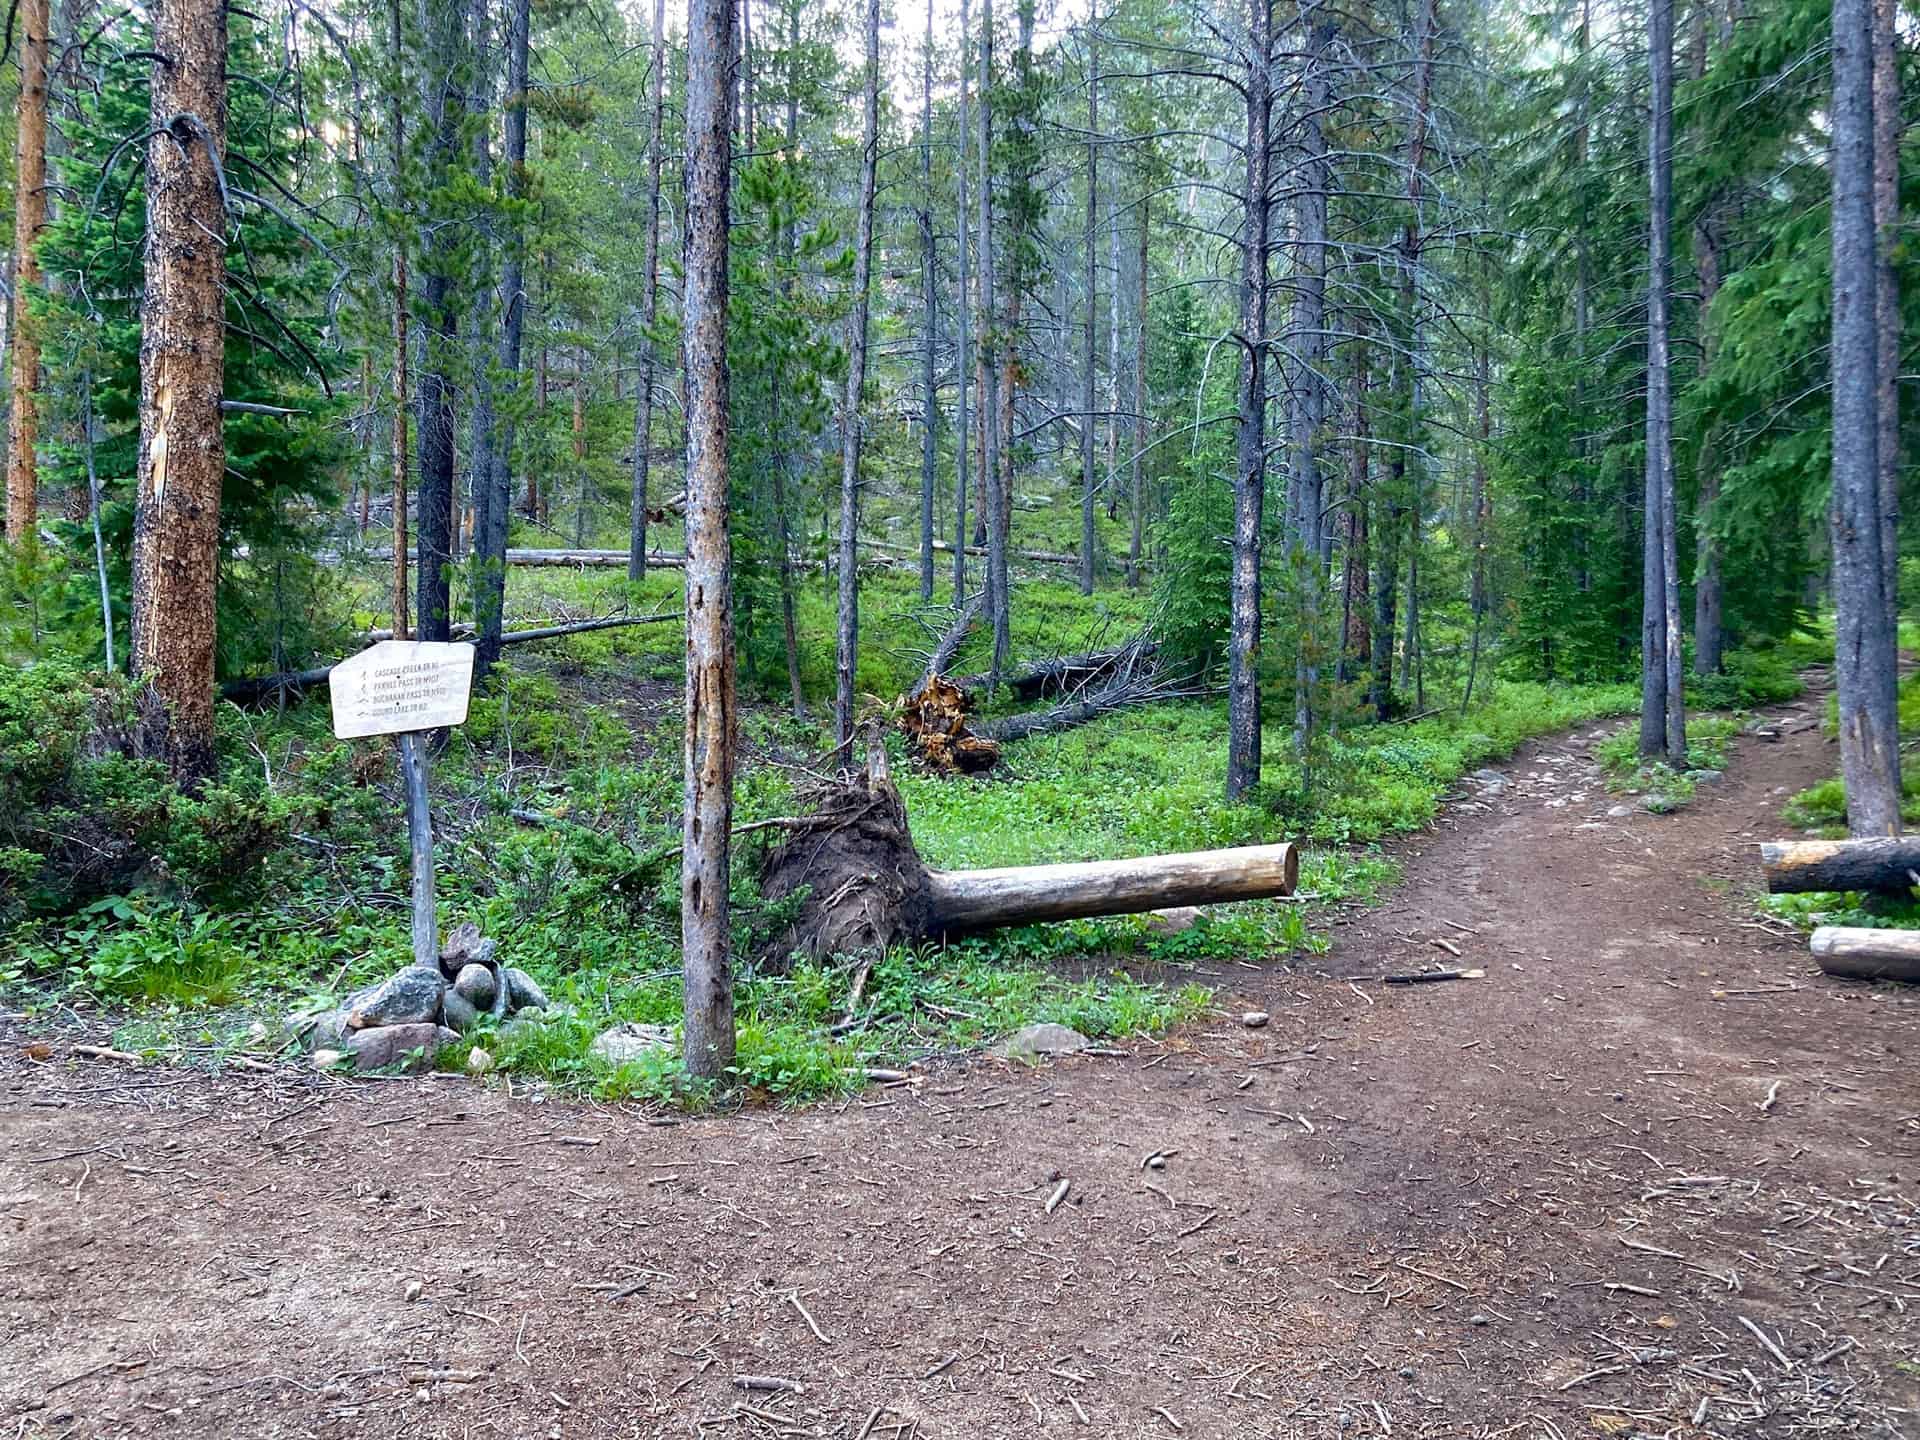
Beginning from the eastern edge of the Monarch Lake Trailhead parking area, the trail commences immediately after metal gate leading to the lake. At the lake, a three-panel sign orients visitors to the recreation area. Staying left, hugging the northern rim of the lake, the trail proceeds along the shore with views into the valley soon to be explored. At 1.5 miles, a juncture peels off to the right to circumnavigate the lake; this trail stays left and begins a moderate climb up through Hell Canyon, along Buchannan Creek. While the name feels foreboding, the trek is quite pleasant as it ascends through a forest with periodic windows down onto the rushing creek. The first key junction appears at 3.5 miles, where the trail stays straight, remaining on the Cascade Creek Trail:
The trail continues gently through the forest, and the waterfalls start punctuating the creek's flow. Time and again, hikers will have reason to stop, listen, and marvel at water crashing down from 10-50ft or more above. Many of the falls tempt travelers to walk up close...be VERY attentive. The falls show no mercy if you take a dip!
Over the next three to 3.5 miles the trail gains approximately 1,200, but the scenery so powerfully captures one's sense of awe that the ascent passes unnoticed. Wildflowers, valley floors etched with streams, creek crossings on logs, peaks and crags and more waterfalls...the sights never stop. The only thing stopping hikers is another key junction, this time for the turnoff (to the right) for Crater Lake Trail:
Staying right and feeling another ascent, push on for 1 mile toward Mirror Lake:
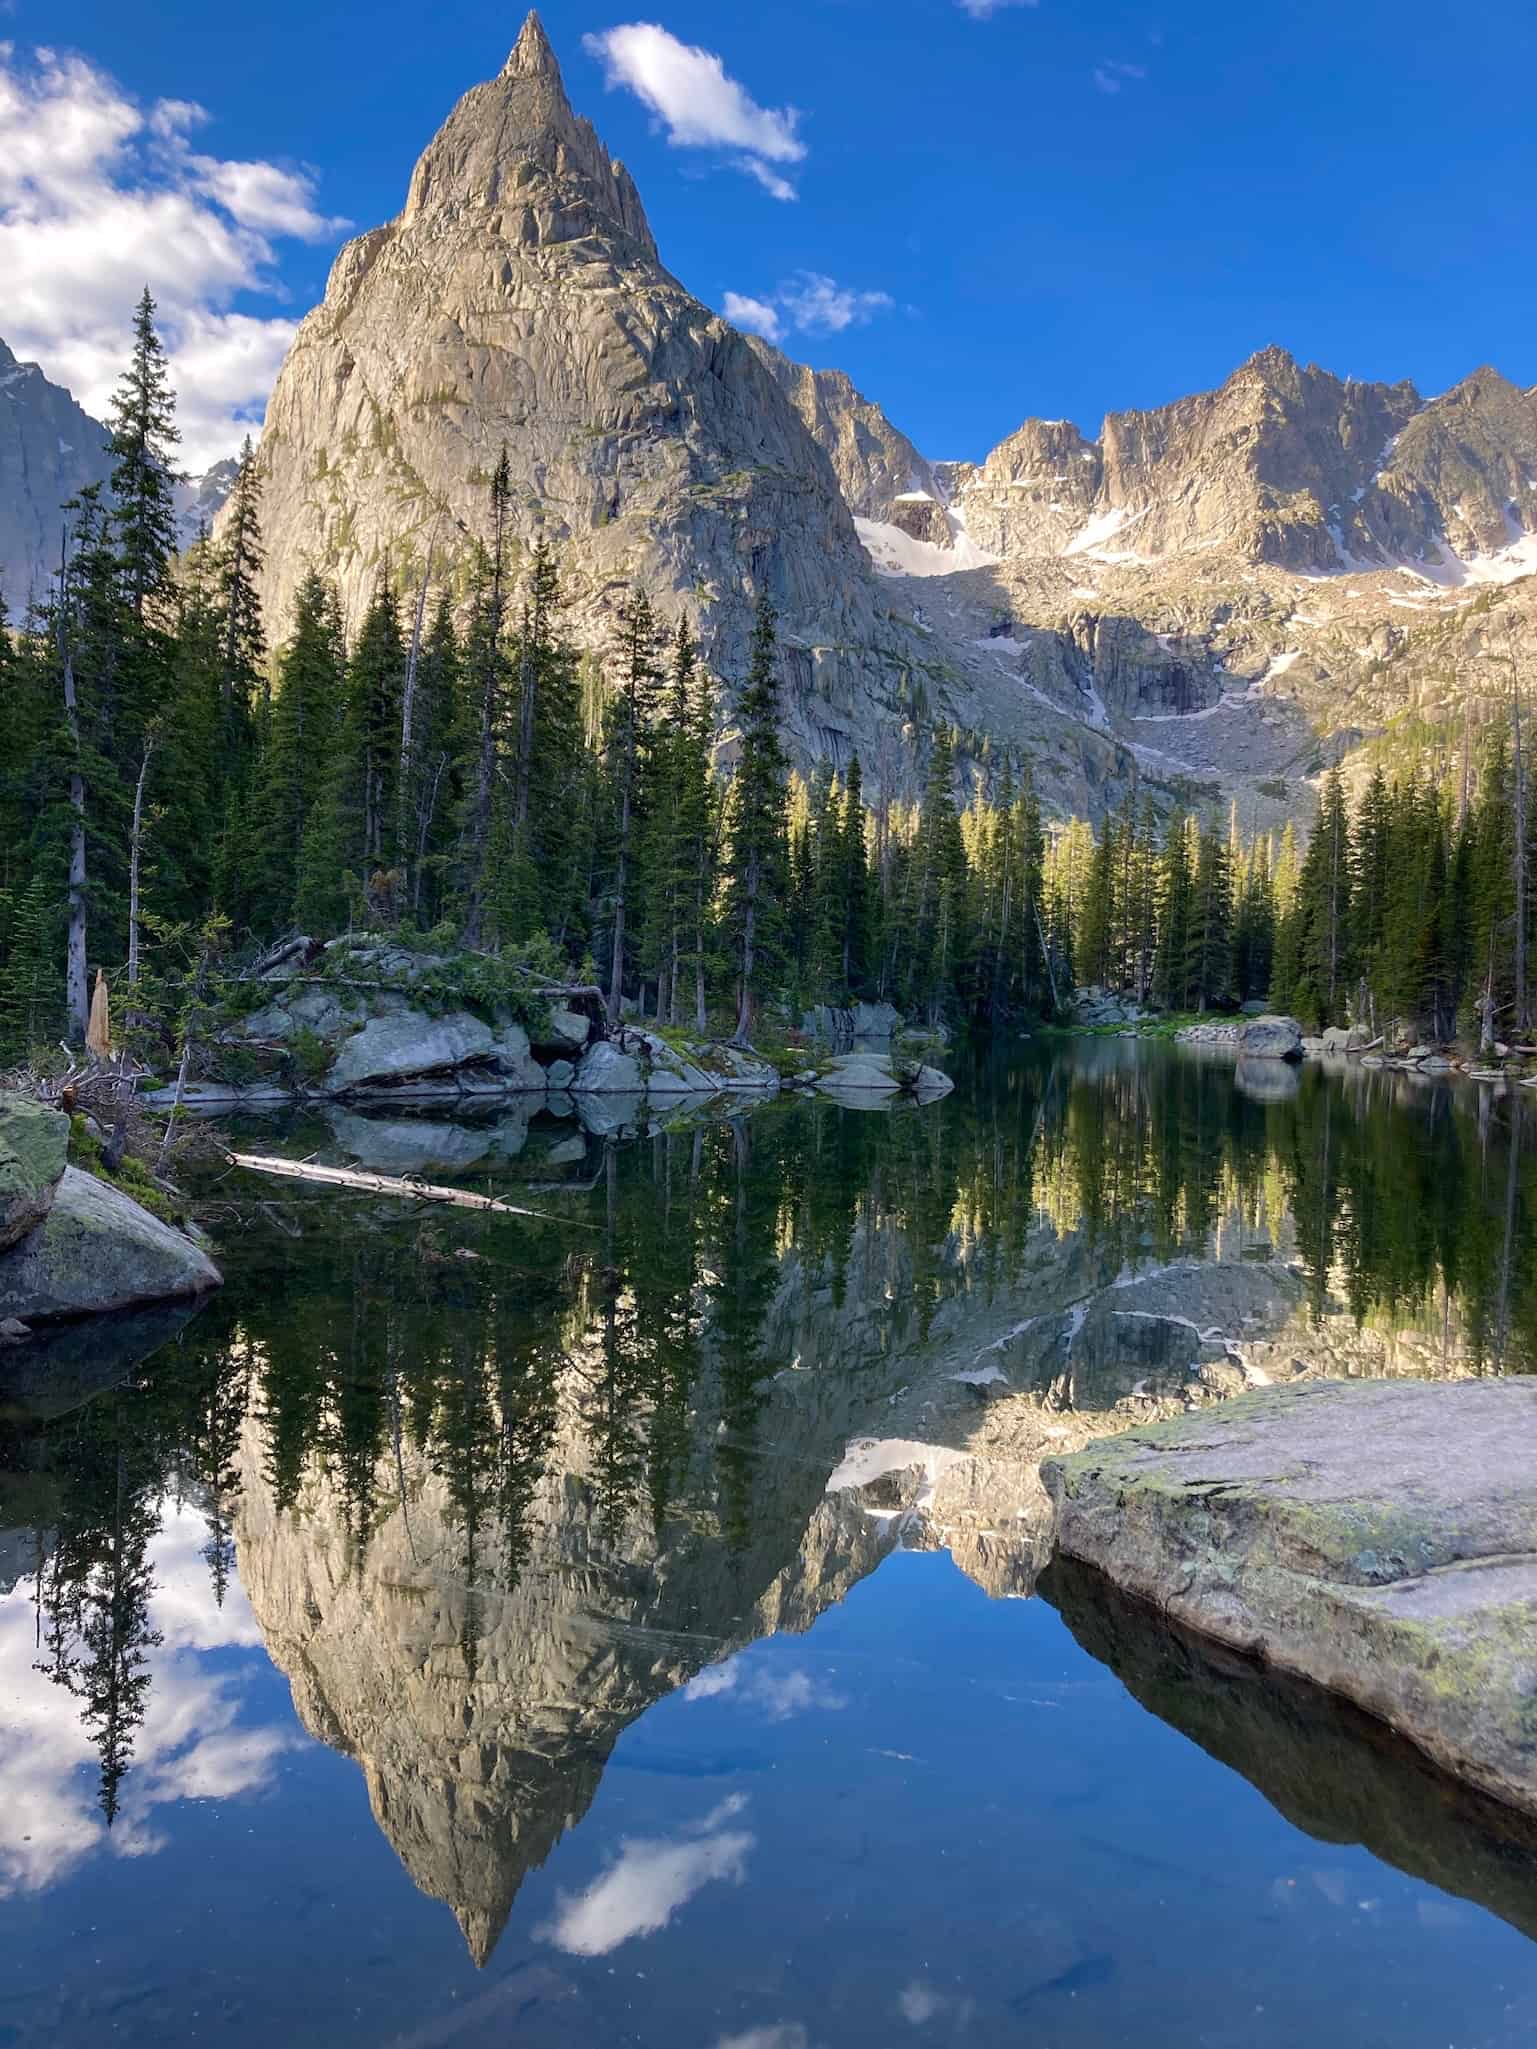
Barely 1/4-mile beyond this, take in the majestic setting of Crater Lake:
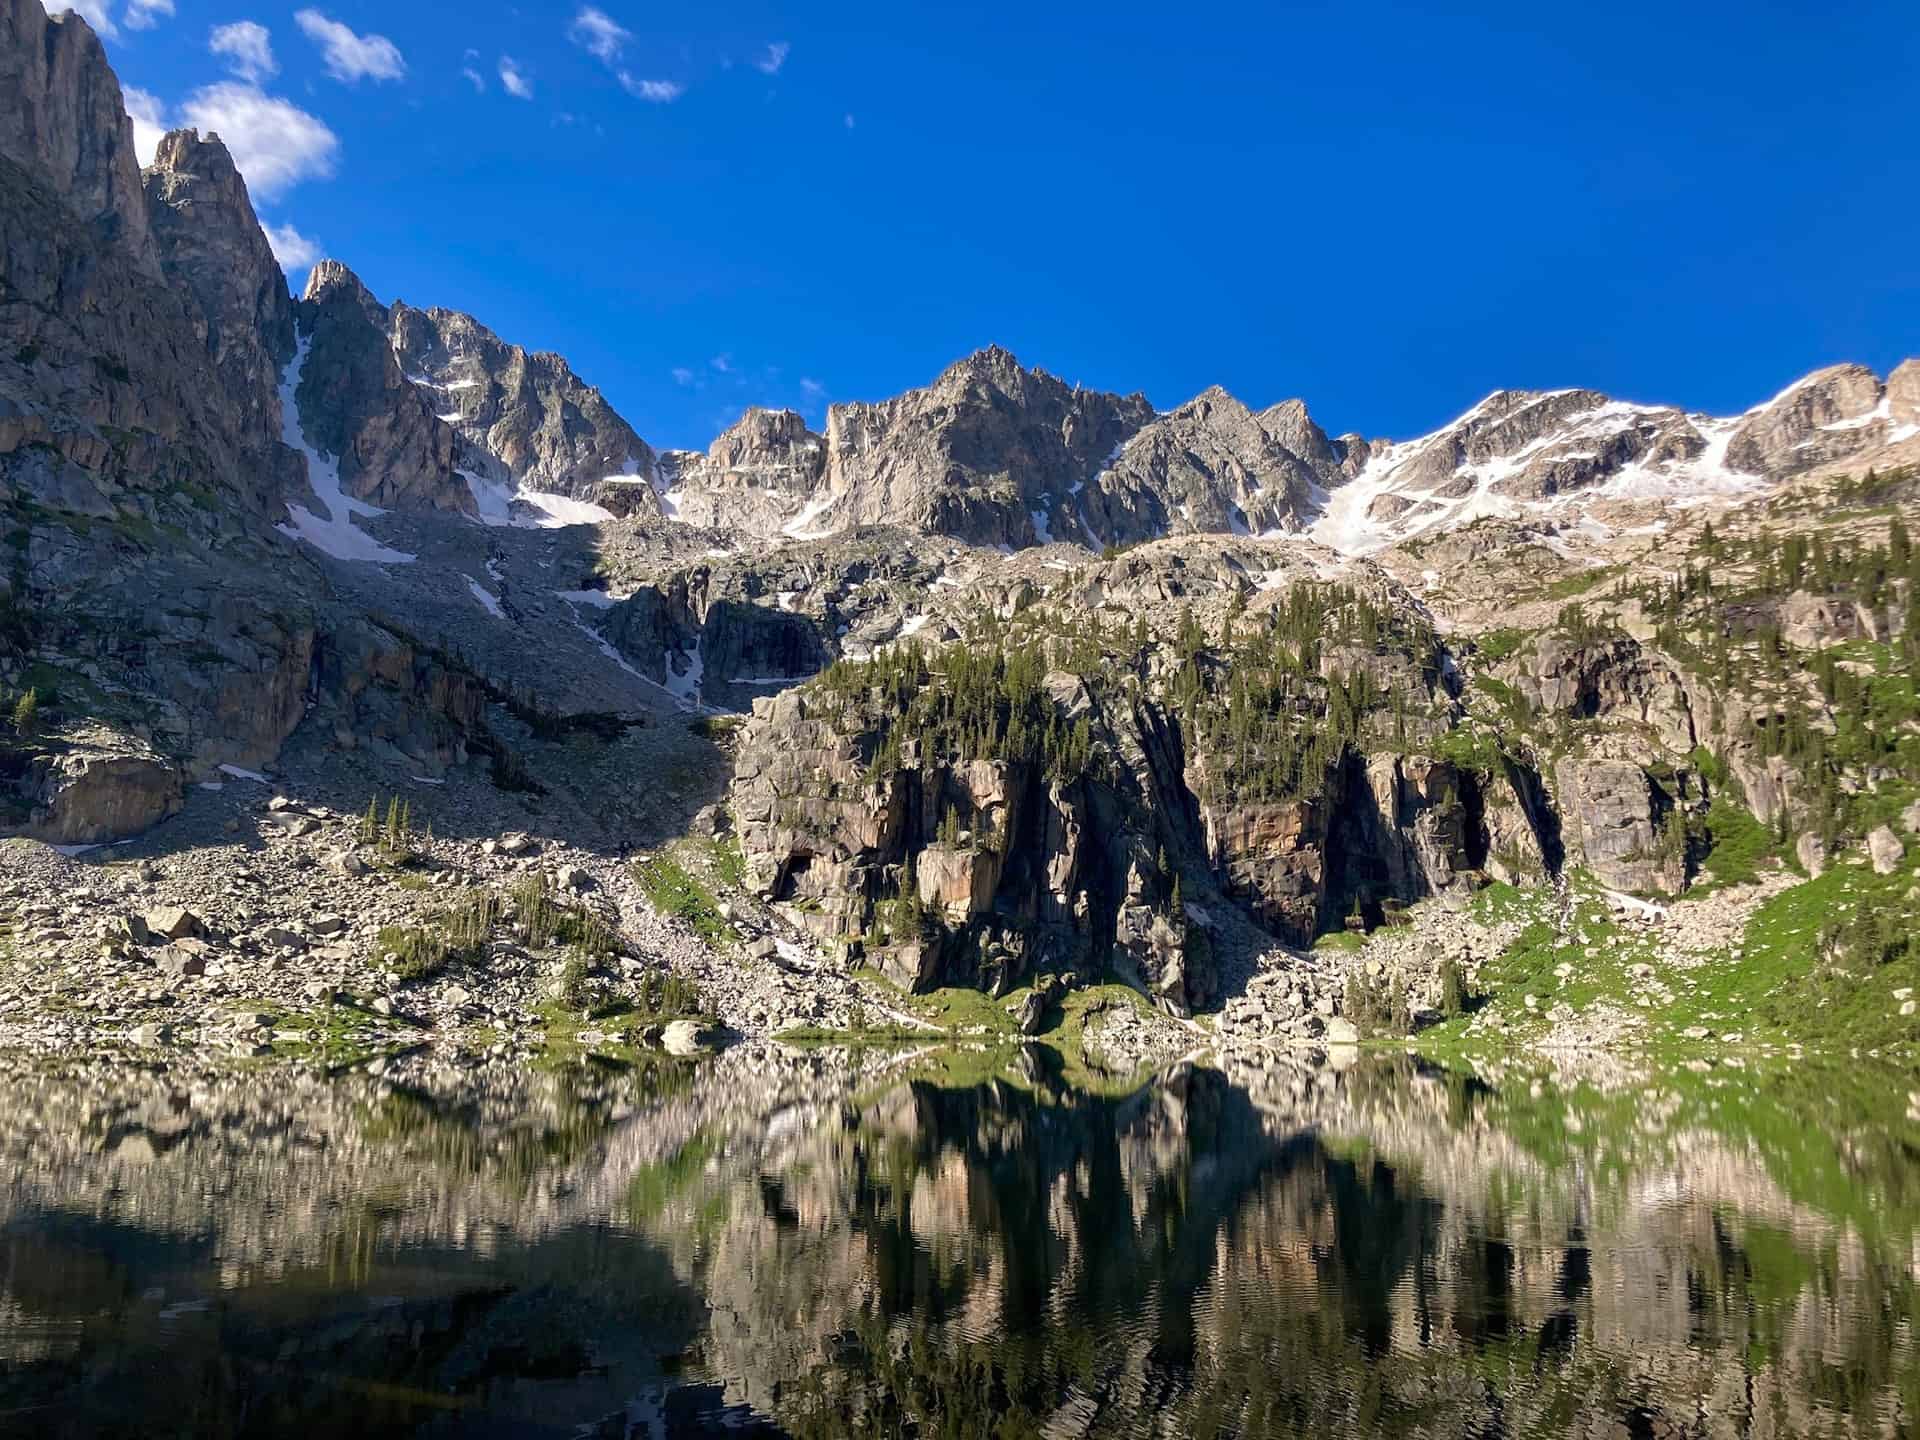
By far the hardest part of the hike now hits -- the decision to return to the trailhead! Given the effort required to reach Crater Lake, hikers often linger and grab a snack from their pack. Wise and attentive backcountry explorers will take note of the time, assuring themselves of sufficient daylight for a safe return hike. Weather can shift quickly in the wilderness, and rushing back over 7-8 miles increases risk of injury. Plan ahead. However, all cautions in hand, with diligent prep work, the Crater Lake Hike via Mirror Lake stands among the best of all wilderness hikes in Colorado.
Tips & Resources for Hiking to Crater Lake in the Indian Peaks Wilderness
- TIP: The adventurous soul may consider cresting Pawnee Pass for views down onto Brainard Lake Recreation Area, one of the most popular summer destinations. Brainard contains the beloved Long, Mitchell, Blue, and Isabelle Lakes. Wise hikers may have to choose between Crater Lake OR Pawnee Pass, as doing both in the same day is extremely strenuous.
- Trail Map: Crater Lake Hike
- Packing List: Always pack the 10 Essentials. Download our Hiking Guide to get the list and dayhiking packing checklist. Additionally, take some time to review our 10 Winter Hiking Tips.
- Colorado Road Conditions: Colorado Road Conditions
- After the Hike: Scoot up to Grand Lake (10 miles north on Highway 34) or drop down into Winter Park (27 miles back toward Denver). Grand Lake has a delightful downtown boardwalk and borders Rocky Mountain National Park. If time permits, a drive up and over Trail Ridge Road puts one in touch with national history and world-class views.
Weather
Map & Driving Directions
Click for Driving Directions
Seven Bridges to Kineo Mountain Loop
Immensely popular in the summer, the Seven Bridges trail beckons hikers up and across North Cheyenne Creek multiple times, meandering by and over tumbling creek waterfalls. The route described below launches from the Seven Bridges trail out onto a loop around Kineo Mountain, reaching a connection point with the Mt. Buckhorn hike. These two loops, along with the Section 16 hike, create opportunity for a longer figure-8 adventure, or even a double-helix hike for those wanting an all-day excursion.
Due to its easily accessible trailhead, crowds are common -- those wanting a simpler, quieter experience aim for an early morning start or a winter hike. Depending on recent weather in winter months, traction may be required, but the frozen waterfalls, snow-laden evergreens, and shimmering valley views make it worth it. Explore the full Seven Bridges to Kineo Mountain Hike profile below for trail map, driving directions, and more tips and details to help you enjoy this year-round adventure just south of Denver.
Trail Snapshot: Seven Bridges to Kineo Mountain Loop
| Hike Distance | 7.5 miles Round Trip |
|---|---|
| Difficulty | Moderate to Difficult |
| Duration | Approx 4hr |
| Trail Type | Loop |
| Starting Elevation | 7,500′ |
| Elevation Gain | Approx +1,600′ |
| Seasons | Year Round |
| Dogs | Allowed On Leash |
| Hike Trail Map | Click for Trail Map of the Seven Bridges to Kineo Mountain Hike |
| Denver Drive Time | 90 minutes |
| Driving Directions to Seven Bridges Trailhead | Click for Google Map |
| Town Nearest Hike | Manitou Springs and Colorado Springs, Colorado |
| Beauty | waterfalls, backcountry valleys, views of Colorado Springs |
| Activities | Hiking, Biking, Snowshoeing |
Parking & Trailhead Information for Seven Bridges Trail
From Denver, cruising south on I-25, take exit 140 for Tejon Street. After turning right onto Tejon, curve slightly right through the traffic circle to jump onto Cheyenne Blvd. In 2.5 miles, stay right and begin the ascent up North Cheyenne Canyon Road. About 3 miles up the road a large dirt parking lot sits at the junction of Cheyenne Canyon Road, Gold Camp Road, and High Drive (gated). (Note: just prior to reaching this junction, daytime sightseers can stop at Helen Hunt Falls.) The Seven Bridges parking lot fills fast and sometimes attracts unscrupulous thieves, so we recommend going early and placing valuables securely out of sight.
The Hike: Seven Bridges to Kineo Mountain Loop
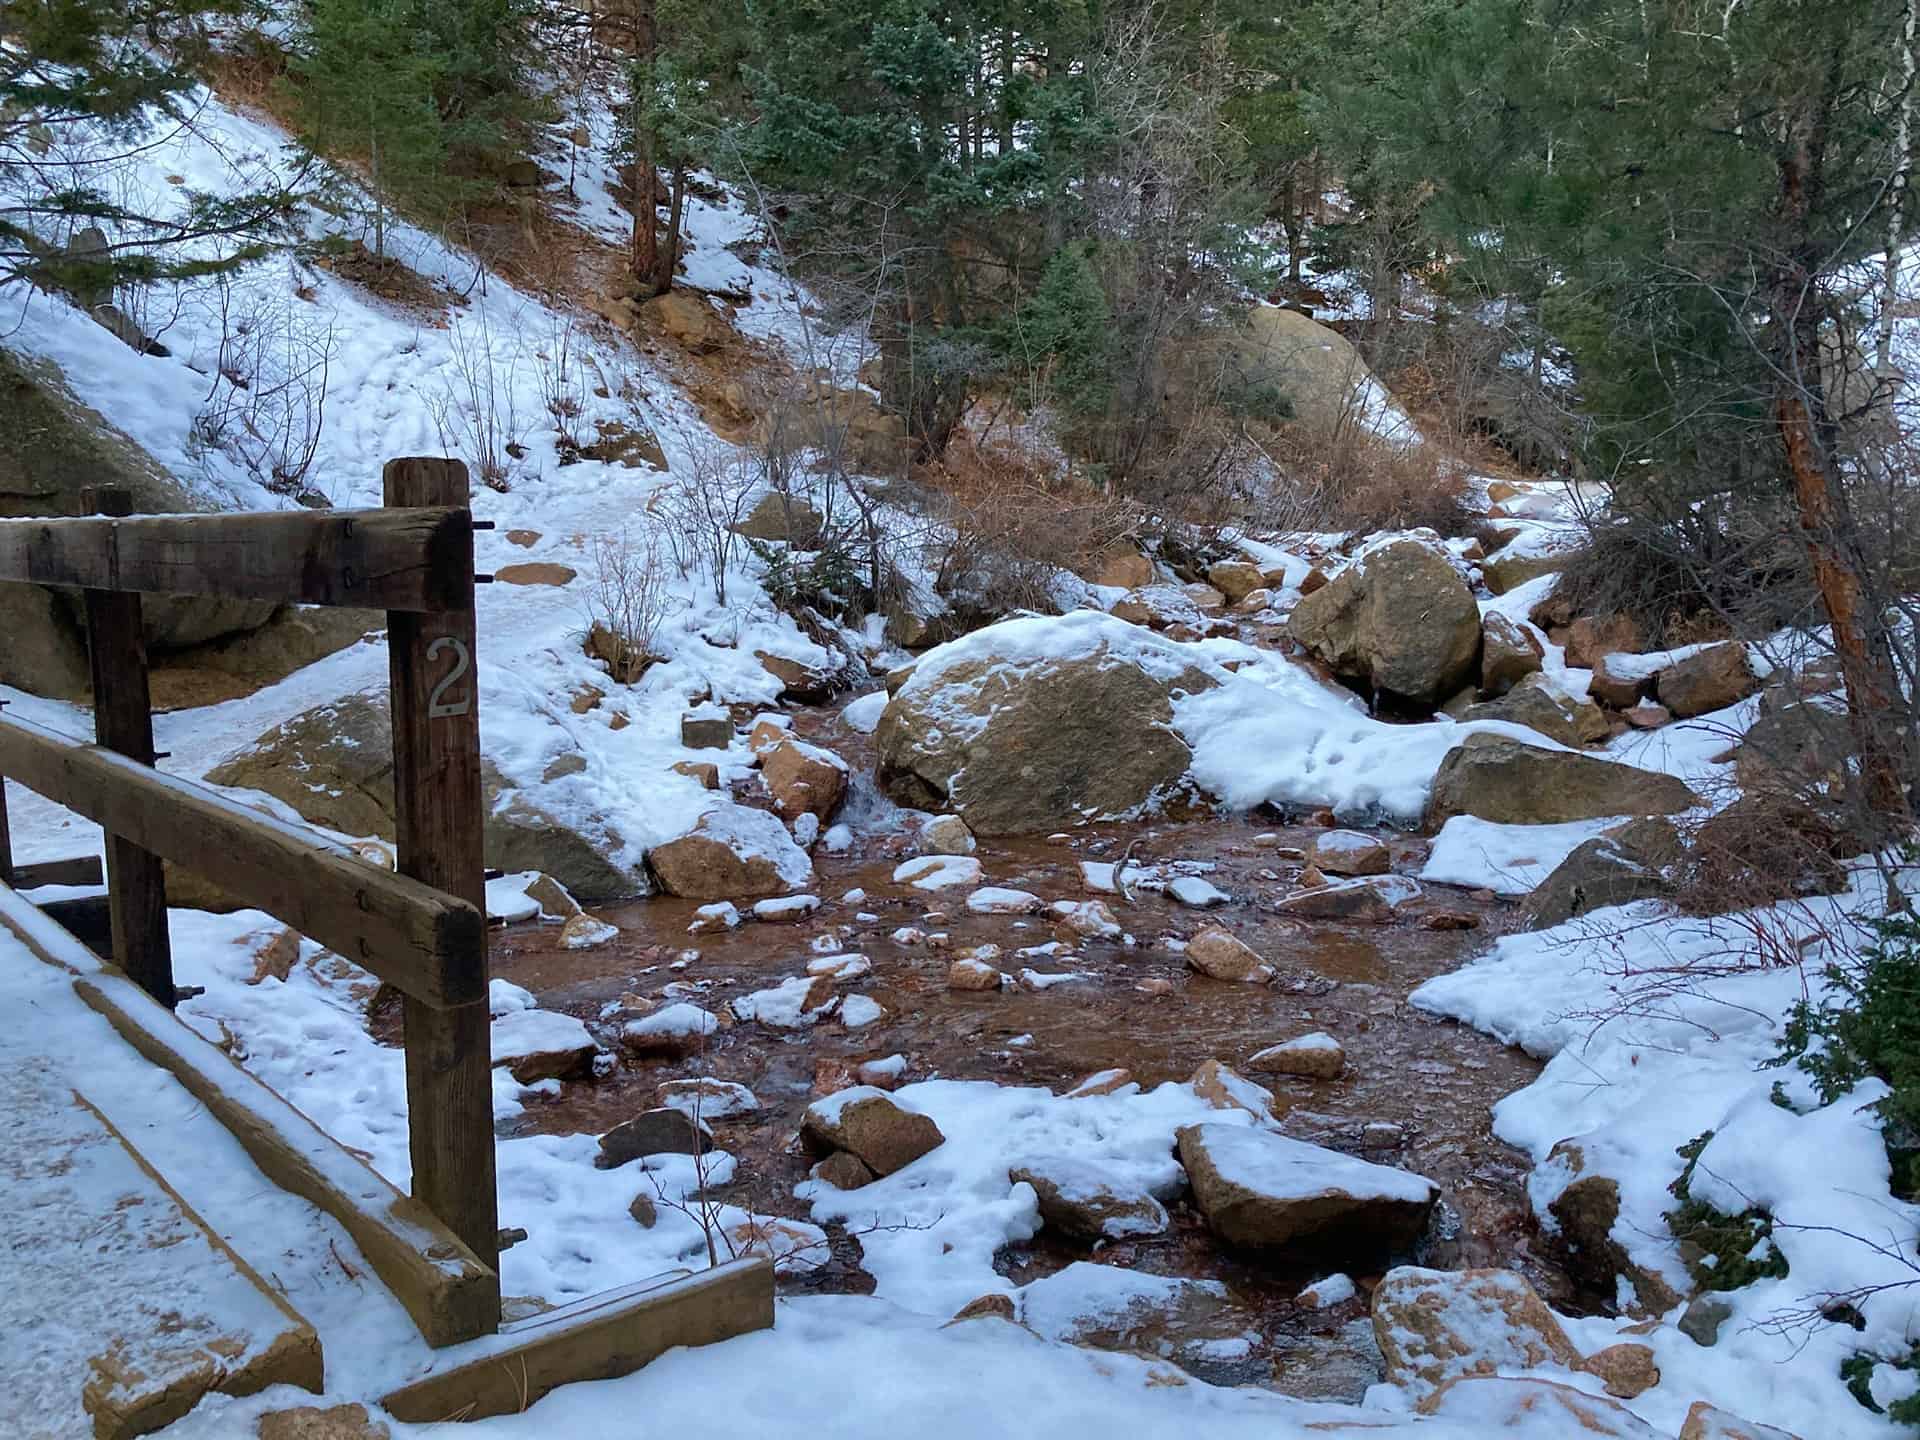
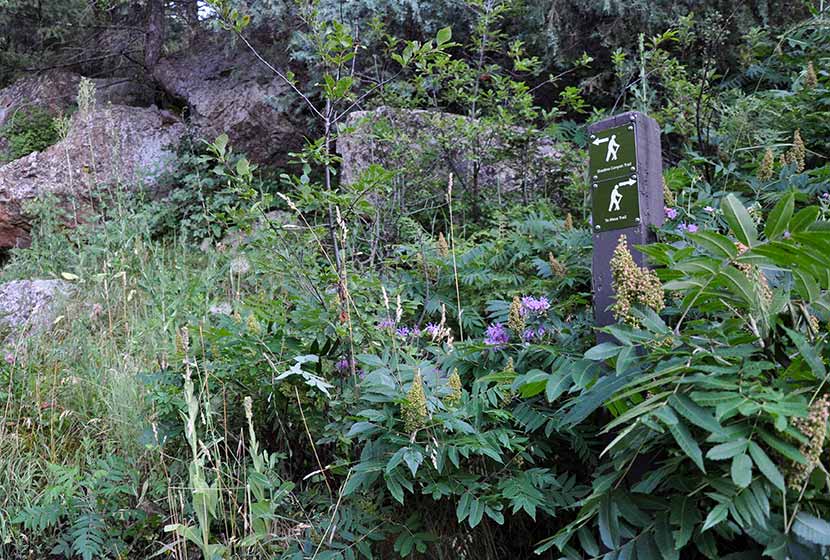
The trail commences at the far end of the parking lot, beyond a stout gate, heading up the decommissioned section of Gold Camp Road. At about 3/4-mile, the road crosses North Cheyenne Creek and immediately after, on the left, appears the Seven Bridges Trail (#662) junction.
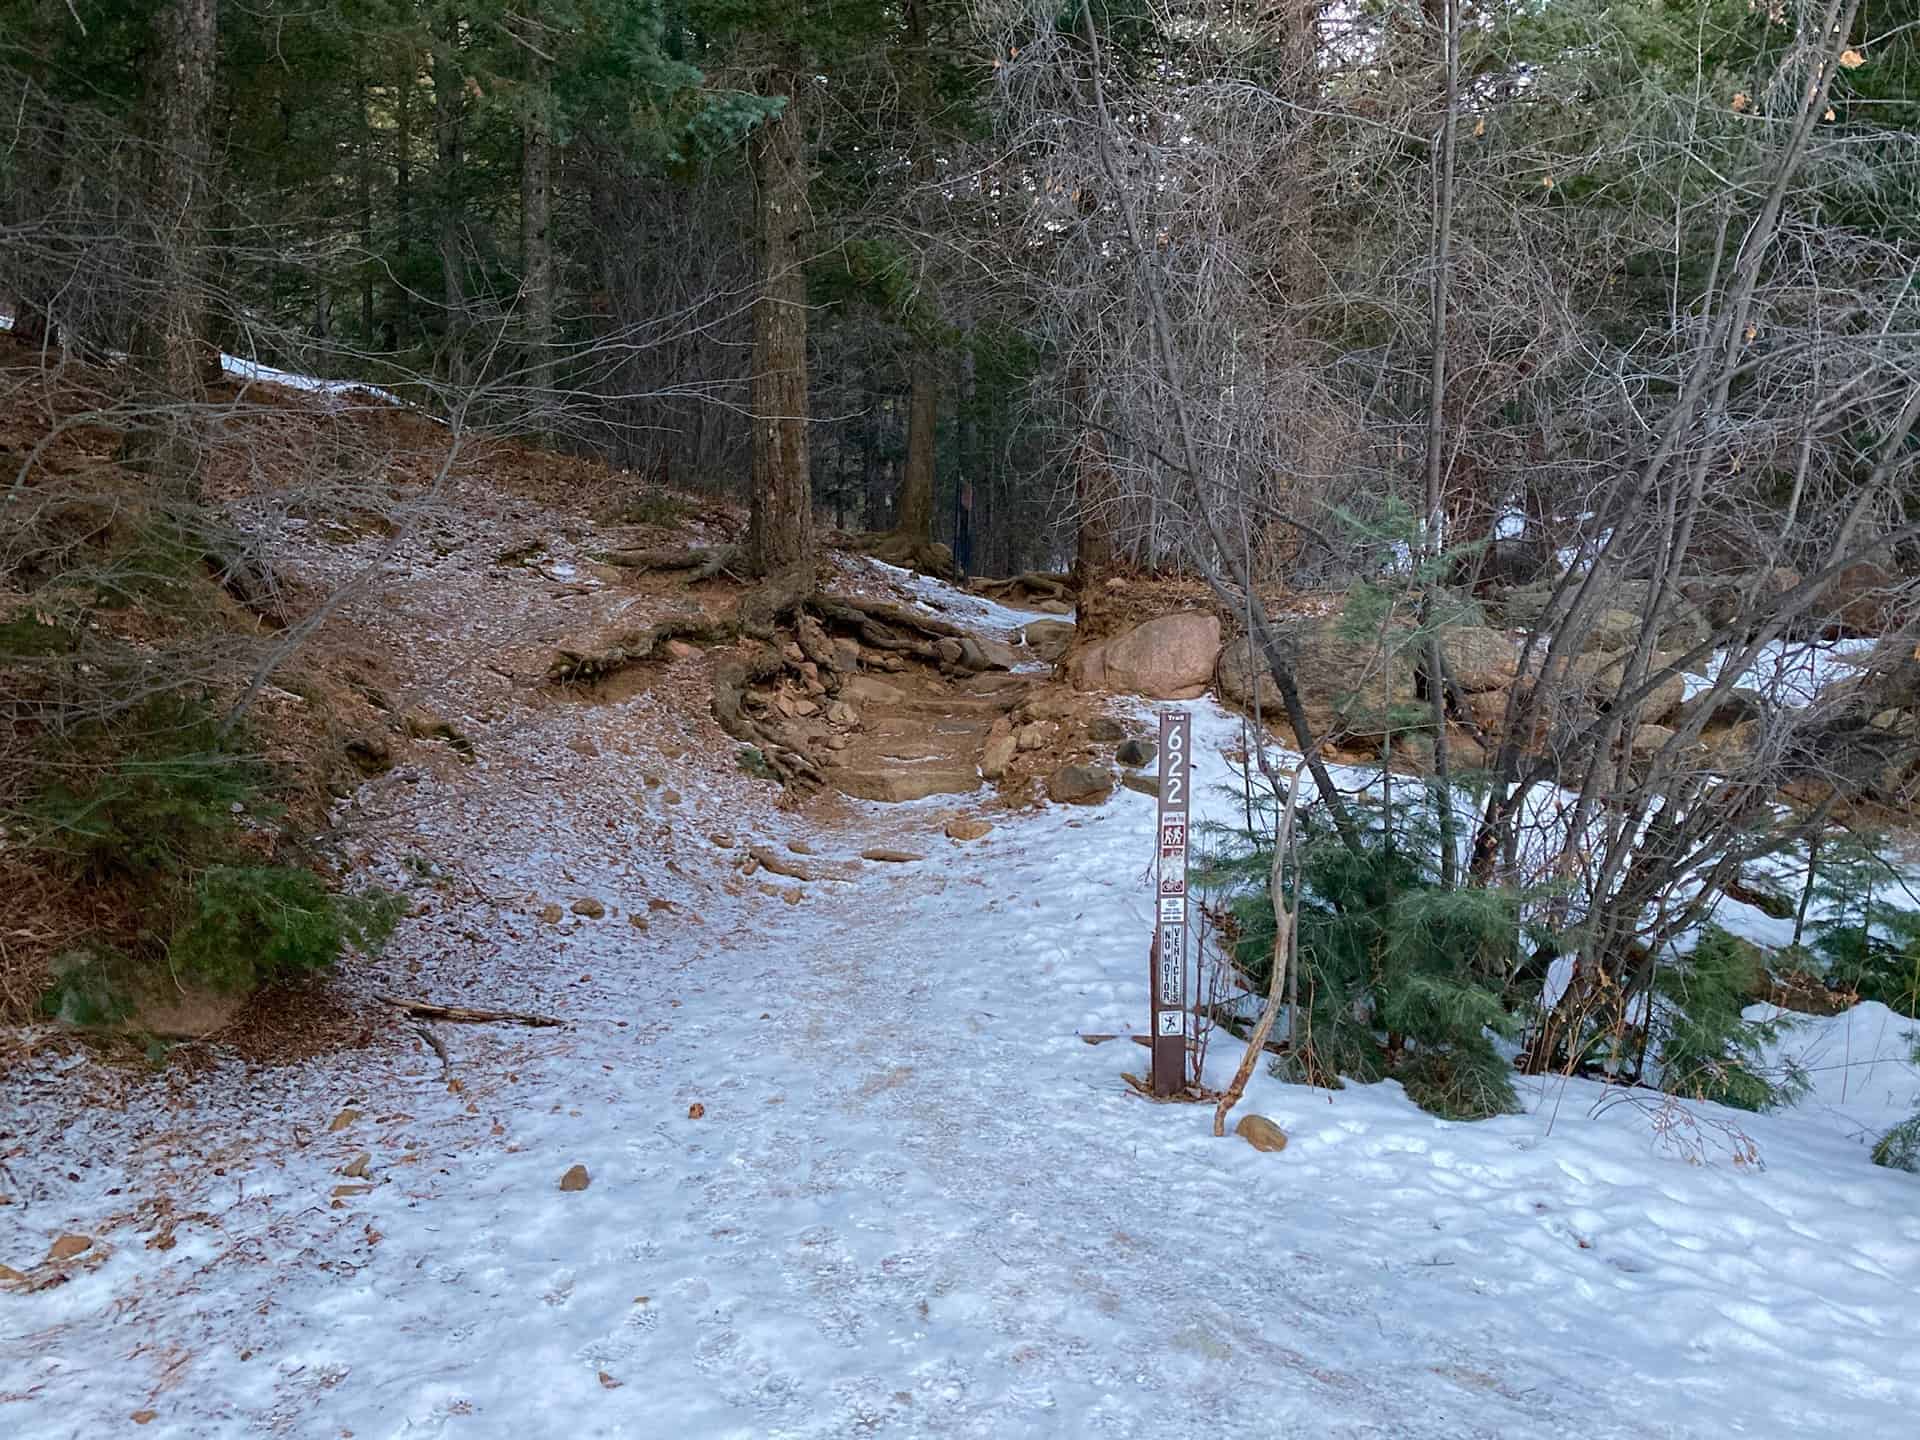
Over the next 1/4-mile, Trail 662 follows the creek, crossing it seven times. This short stint offers nearly endless opportunities to stop, listen, marvel and wonder. After Bridge #7, the trail steepens considerably as it stretches toward its junction with the overlapping Jones Park (#701) / Kineo Mountain / Captain Jack's (#667) trails. Just under 1.5 miles ahead, a bypass trail curves off to the right, marked by bright fuchsia blazes. Taking this bypass reduces the total hike lengthy by approximately 3/4-mile. If staying straight to reach the multi-trail junction, continue for another 1/4-mile along the creek and then turn sharply right onto Trail 701/667. The route levels and lingers along the backcountry ridge through evergreen and aspens, providing respite from the steady ascent.

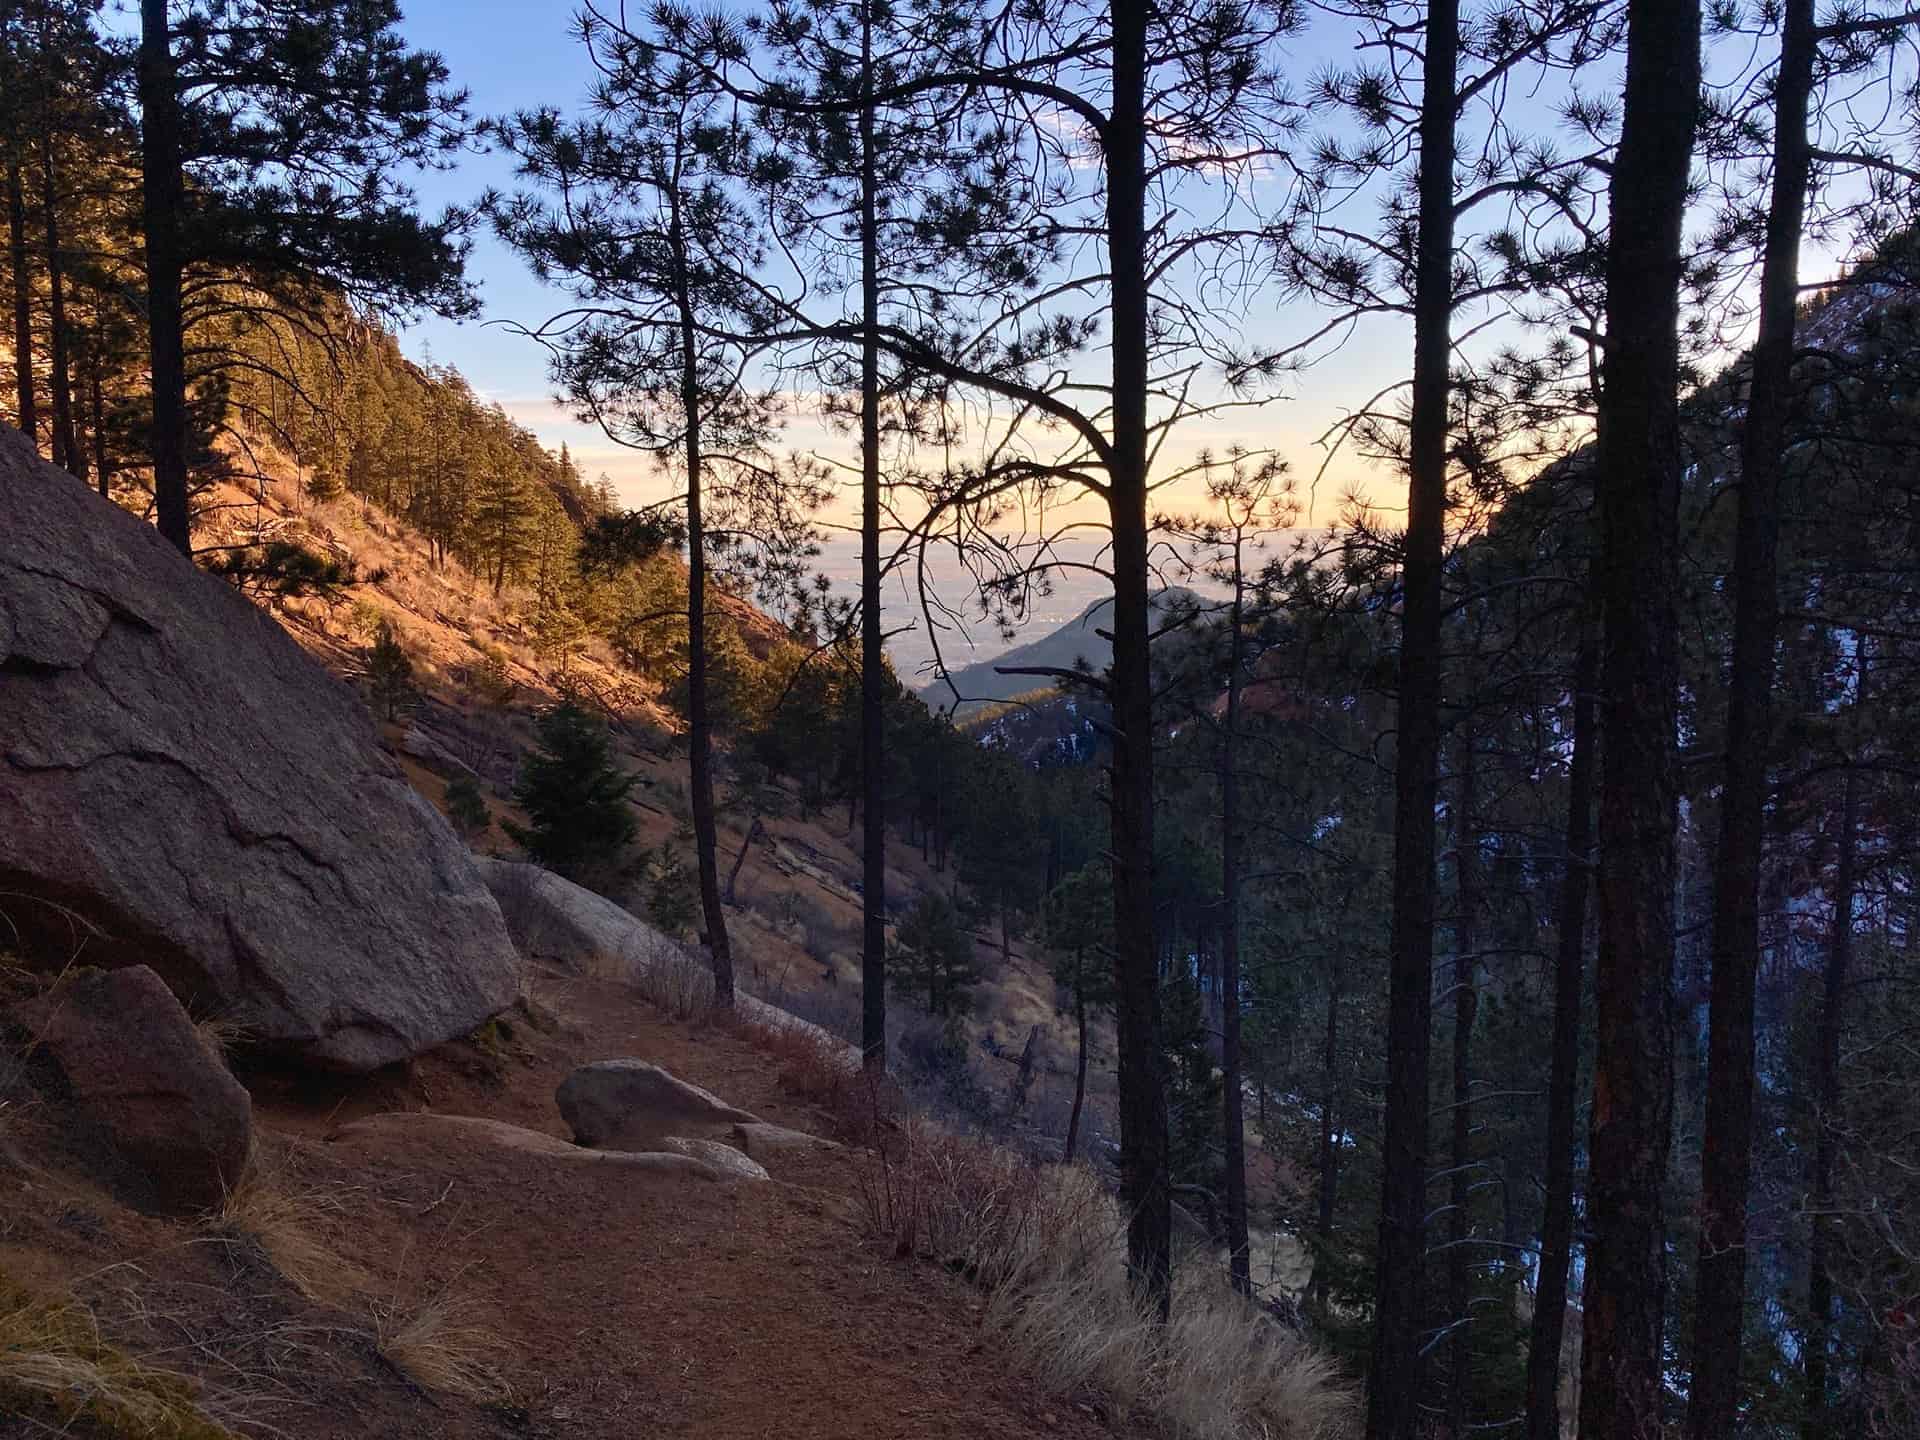
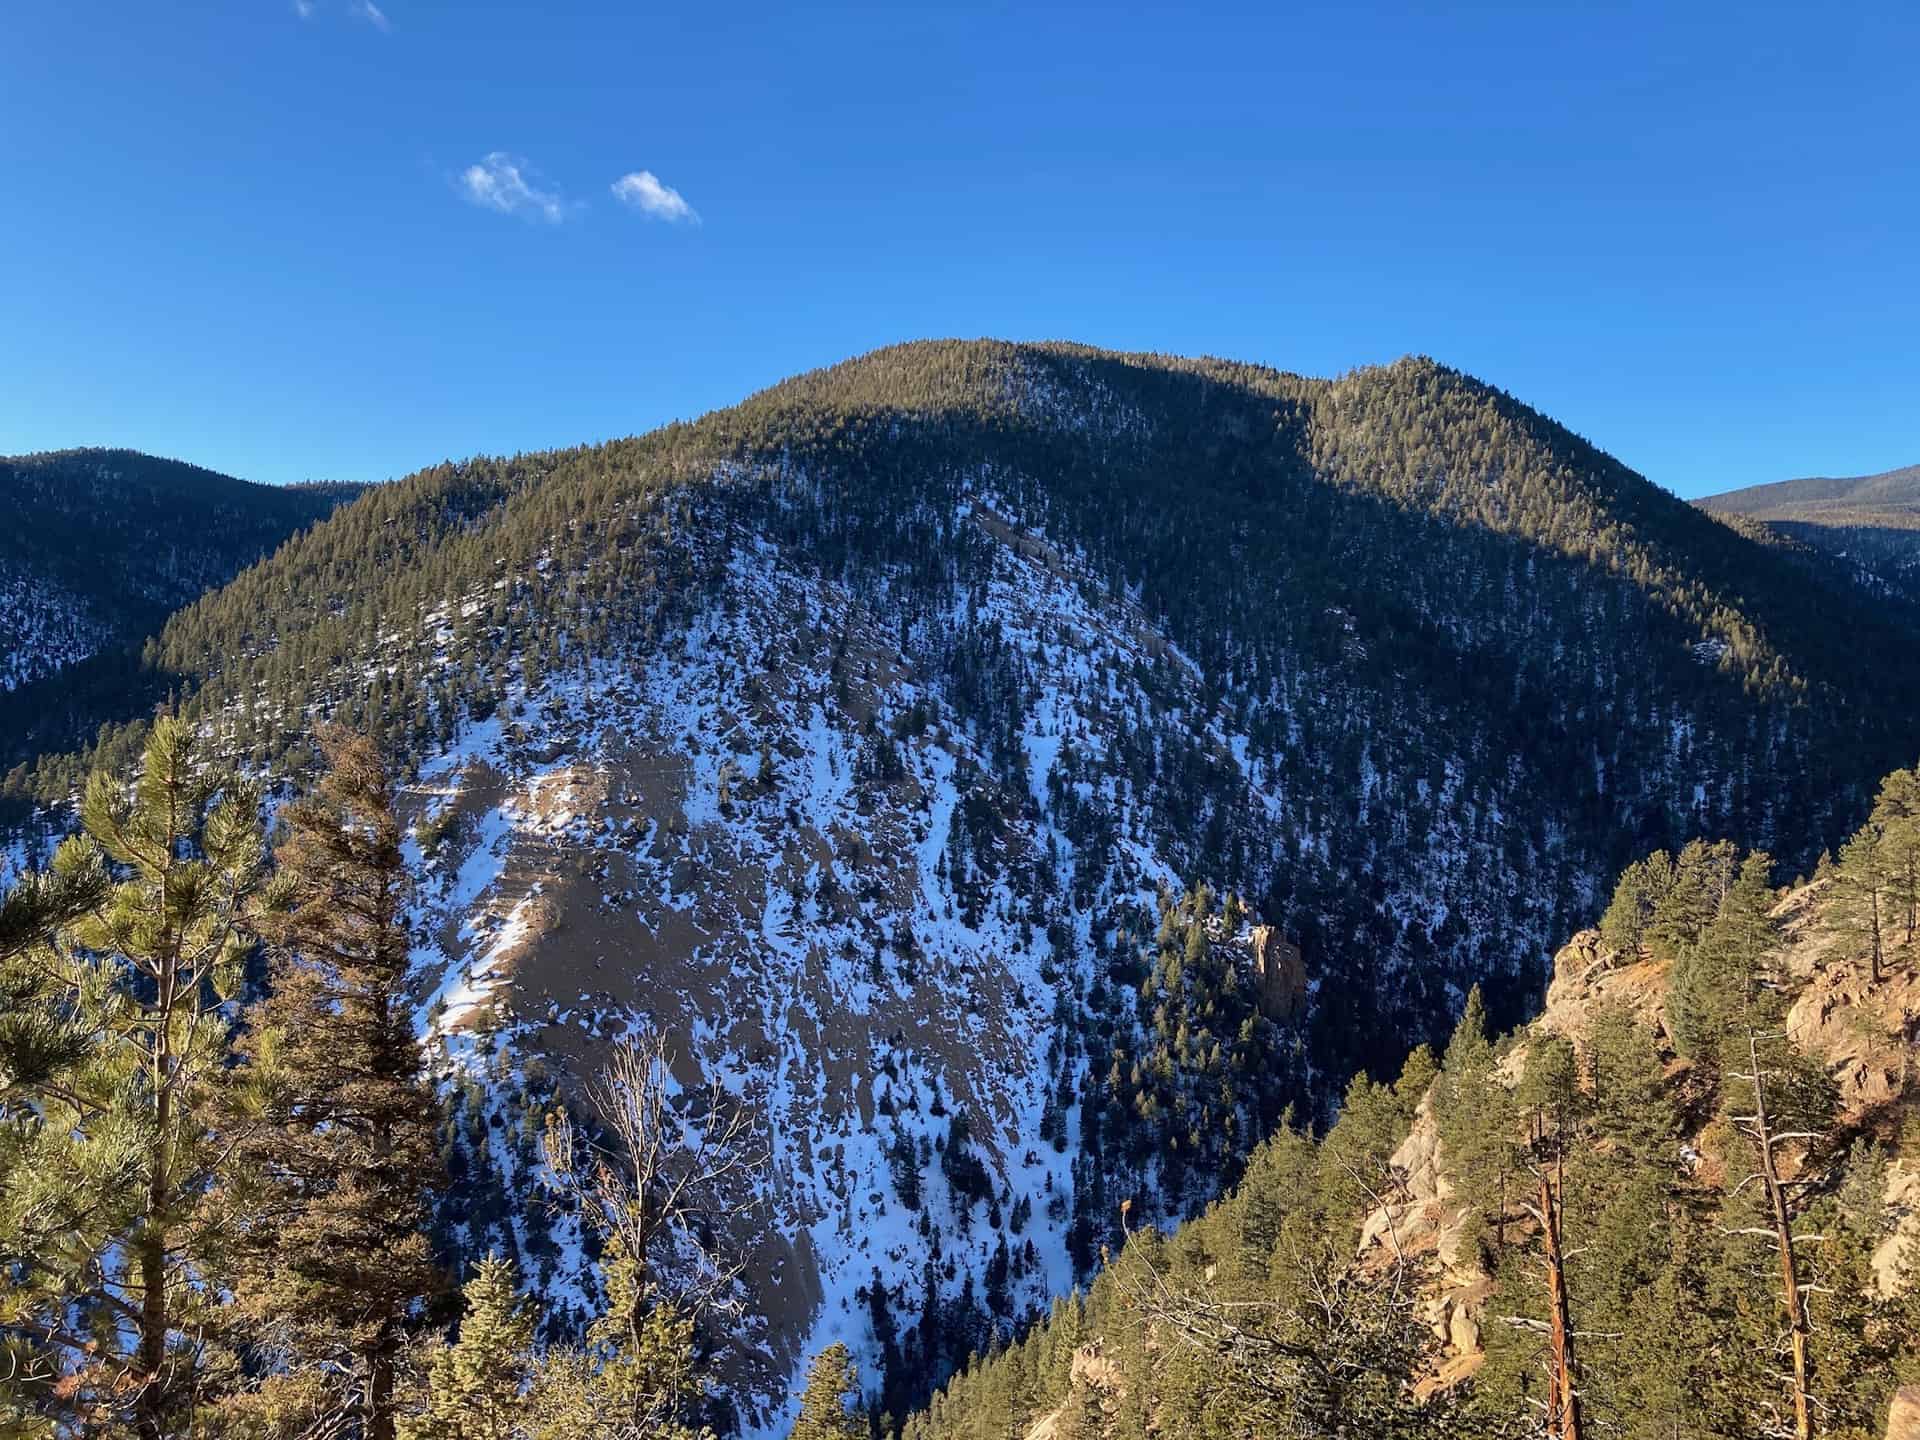
Now the joyful task is simply plodding along a valley ridge for about 2.5 miles, up to the connection with the Mt. Buckhorn hike trail. The route weaves in and out of trees, punctuating the hike with vistas of the trail hiked 2.5 miles ago, etched into the opposite valley wall.
After the junction with Bear Creek Trail (#666), the Kineo Mountain loop continues by swinging back right, down the slope onto Trail 776 (Buckhorn Trail). Following this for about 1 mile, another bypass greets hikers on the left, permitting them to quickly regain Gold Camp Road and stroll back to the parking lot.
Tips & Resources for Hiking the Seven Bridges to Kineo Mountain Loop
- TIP: Parking fills fast, but an early start helps noticeably. Once back to the vehicle after the hike, a drive down Gold Camp Road cruises through chiseled tunnels and by more trailheads, used by hikers and bikers alike. Please note: this stretch of road is maintained but not paved and has several narrow turns. Do not drive this return route unless accustomed to mountain driving.
- Trail Map: Seven Bridges to Kineo Mountain Hike
- Packing List: Always pack the 10 Essentials. Download our Hiking Guide to get the list and dayhiking packing checklist. Additionally, take some time to review our 10 Winter Hiking Tips.
- Colorado Road Conditions: Colorado Road Conditions
- After the Hike: A local favorite, Wild Goose Meeting House (or their counterpart, Good Neighbors Meeting House), captures the essence of downtown COS. Grab a craft coffee and chef-level dish, or later in the day, a local beer on tap. For unique local fare, consider Edelweiss, a Old World treat.
Weather
Map & Driving Directions
Click for Driving Directions
Indian Creek Loop Hike
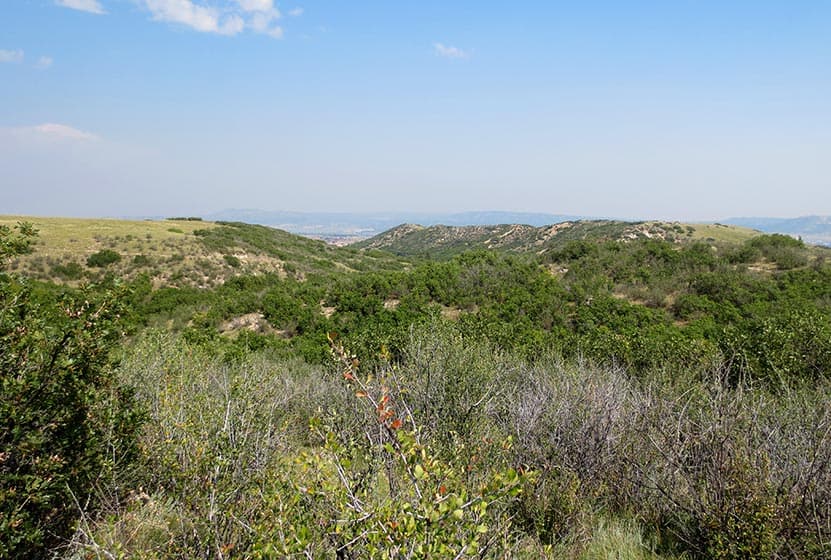
The Indian Creek Trail is tucked away outside of Sedalia, CO, just under an hour's drive from Denver, you find a trailhead leading to a vast internal system of trails that links up to the Colorado Trail, Roxborough State Park, and Nelson Ranch Open Space. The number of configurations you can devise awaits your creativity...and endurance! The Indian Creek Campground opens the door to trails meandering up and through the Pike National Forest with frequent vistas out into the valleys west and north. Explore the full Indian Creek Loop hike profile below for trail map, driving directions, and more tips and details to help you enjoy this adventure in the San Isabel National Forest.
Trail Snapshot: INDIAN CREEK LOOP
| Hike Distance | 7.5 miles Round Trip |
|---|---|
| Difficulty | Moderate |
| Duration | Approx 3-4hr |
| Trail Type | Loop |
| Starting Elevation | 7300′ |
| Elevation Gain | Approx +1300′ |
| Seasons | All Year |
| Dogs | Allowed On Leash |
| Hike Trail Map | Click for Trail Map of Indian Creek Loop |
| Denver Drive Time | 55 min |
| Driving Directions to Indian Creek Loop | Click for Google Map |
| Town Nearest Hike | Sedalia, Colorado |
| Beauty | Pine Forest, Streams, Colorado Trail |
| Activities | Hiking, Photography, Wildflowers |
| Fee | Entrance Fee or State Parks Pass Required for Roxborough State Park segment |
Parking & Trailhead Information for Indian Creek
The easiest waypoint for GPS is the Indian Creek Campground, which sits just west of the Rampart Range Riding Area on Highway 67. Once you pass the Rampart Range entrance the road curves and winds down a hill; at the bottom the parking lot appears off to the right with a lone bathroom. Park here; do not go up the road to the actual campground. The trailhead begins about 15 paces beyond the bathroom, up the hill. Look for the sign for Trail #800.
The Hike: Indian Creek Loop
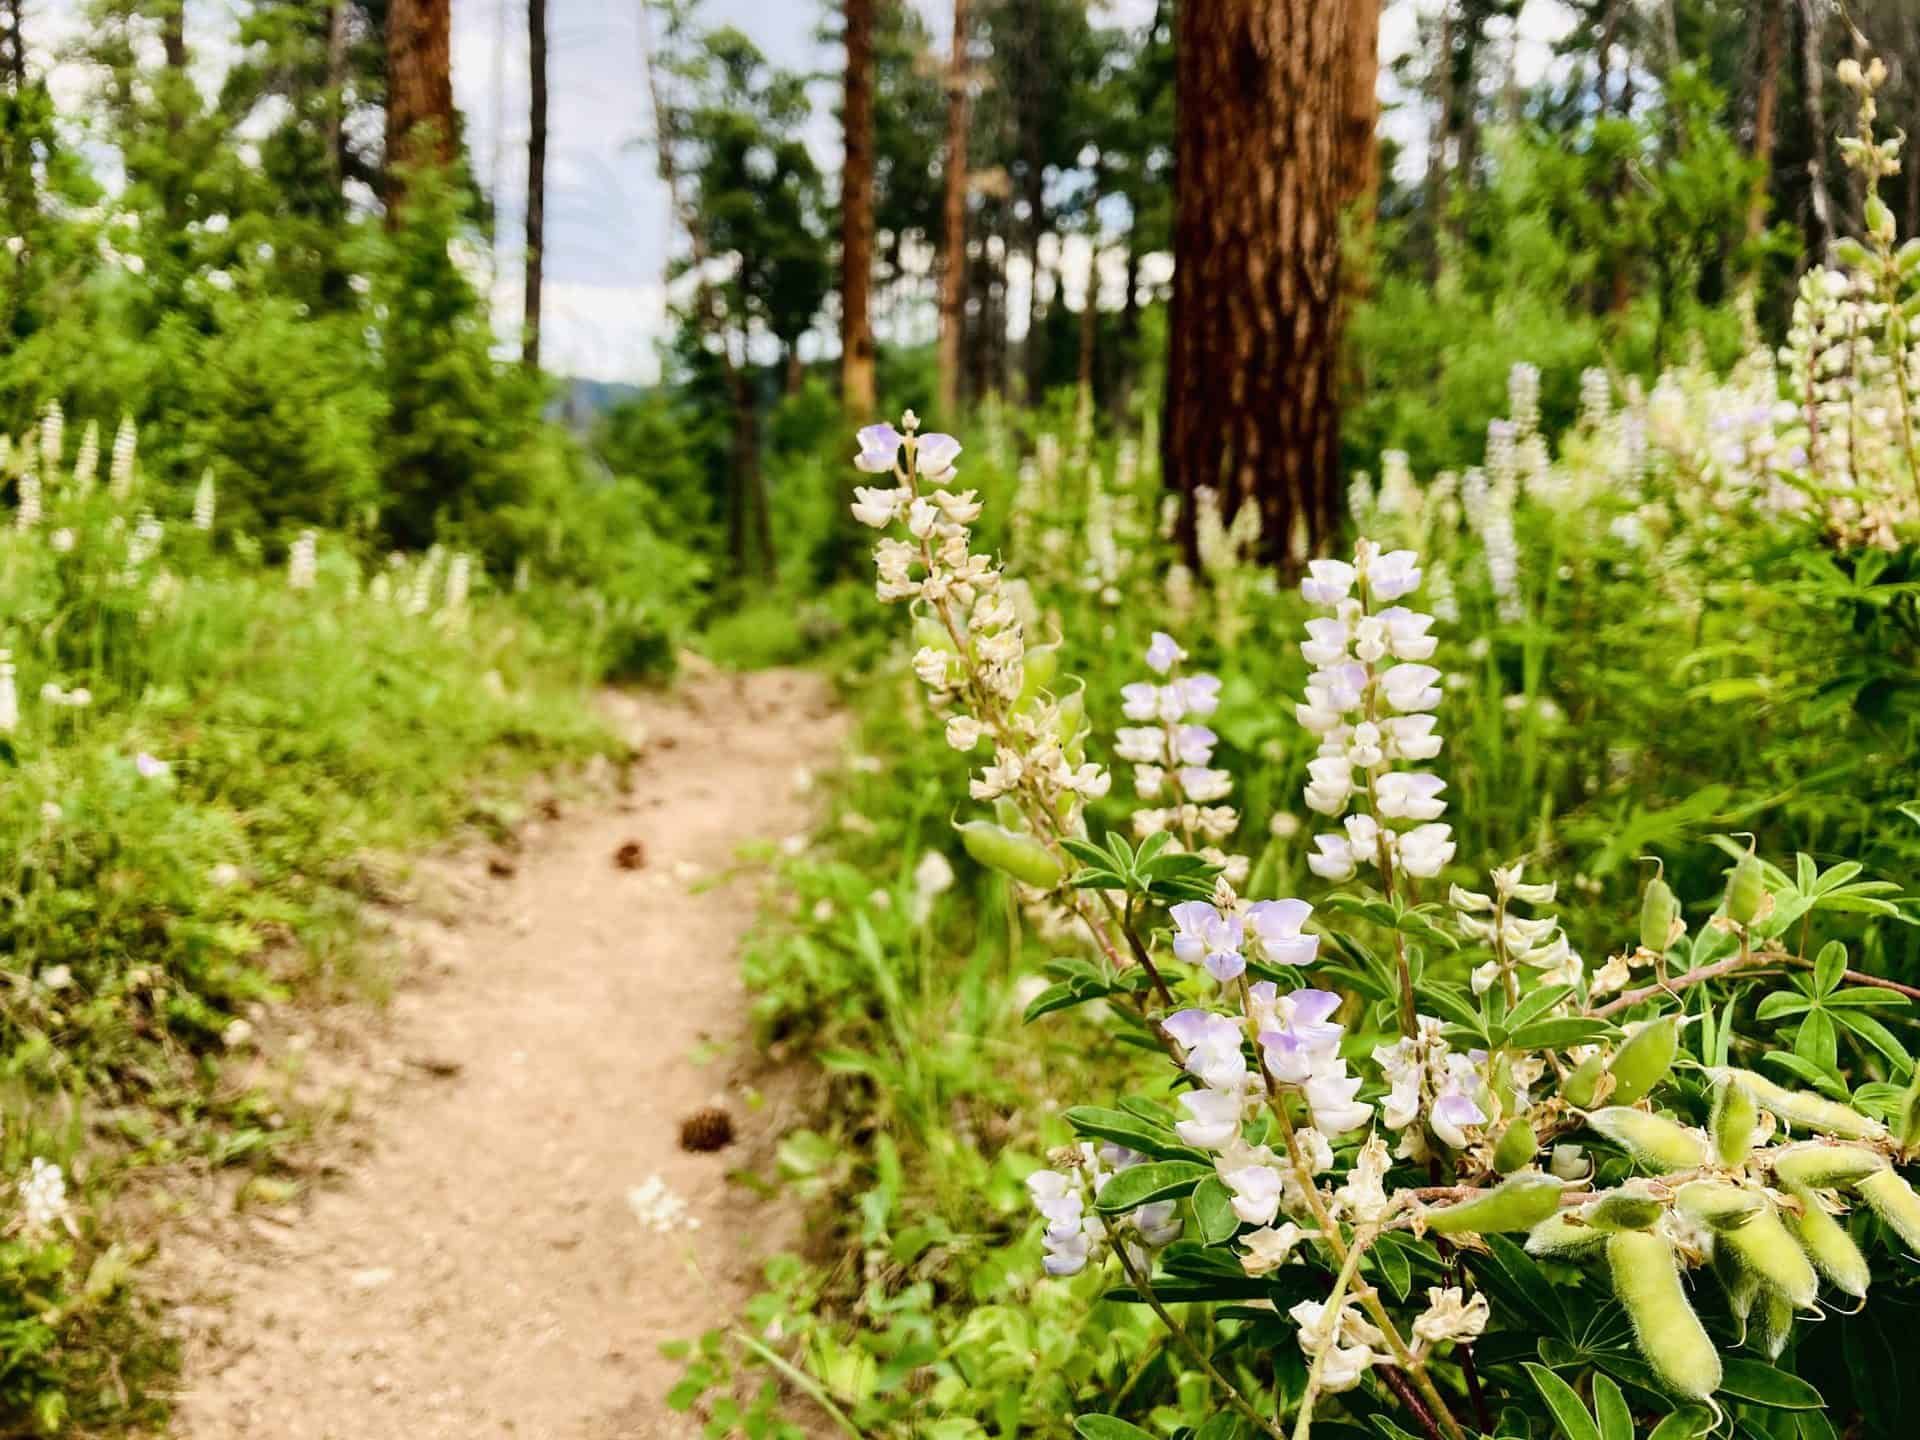
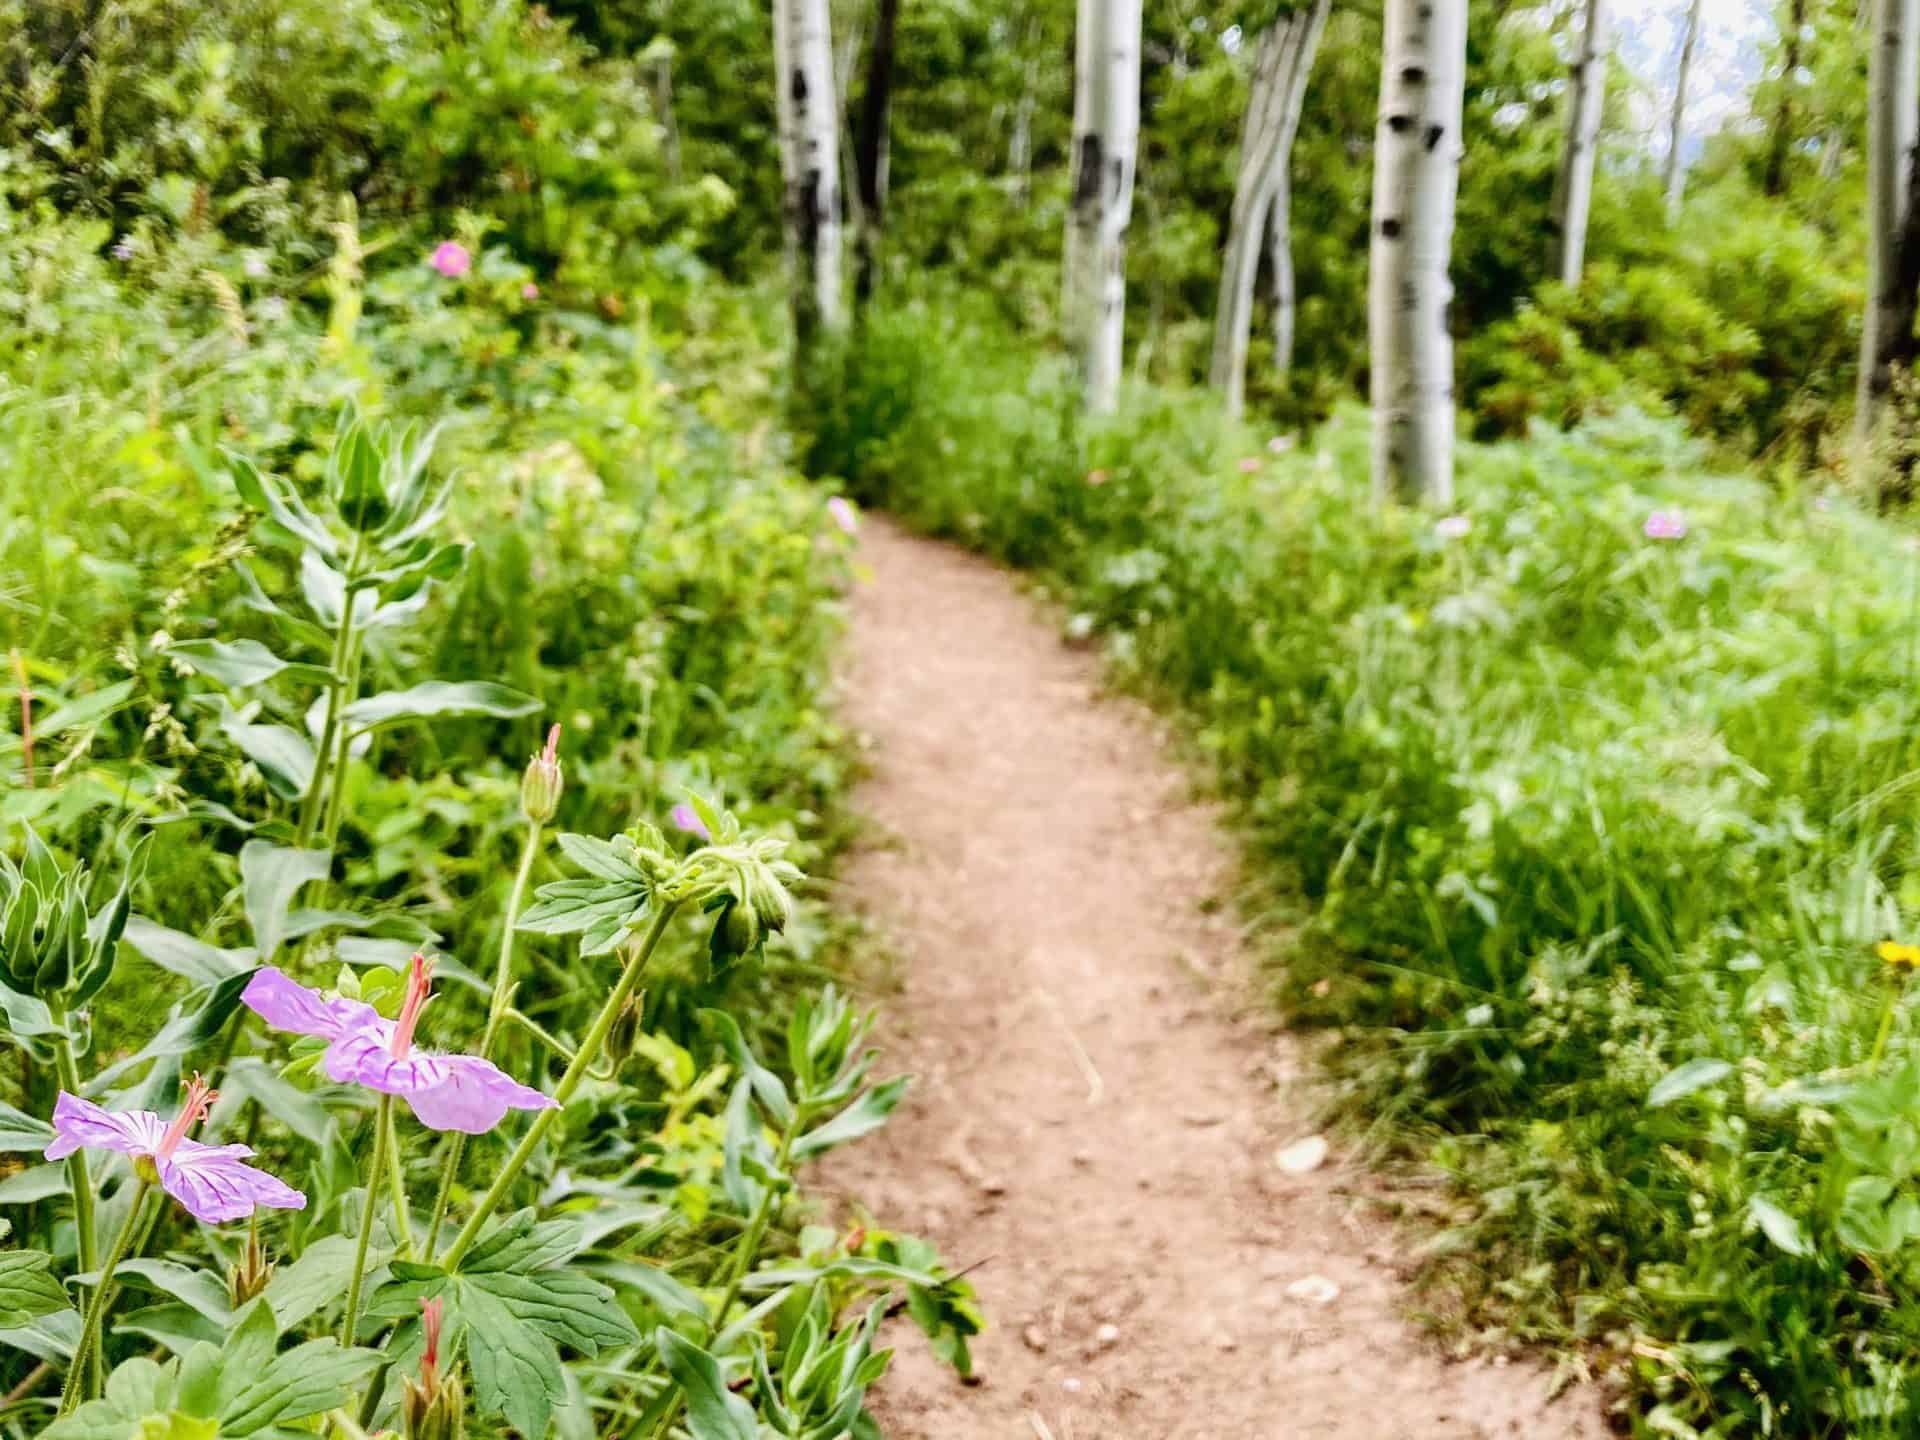
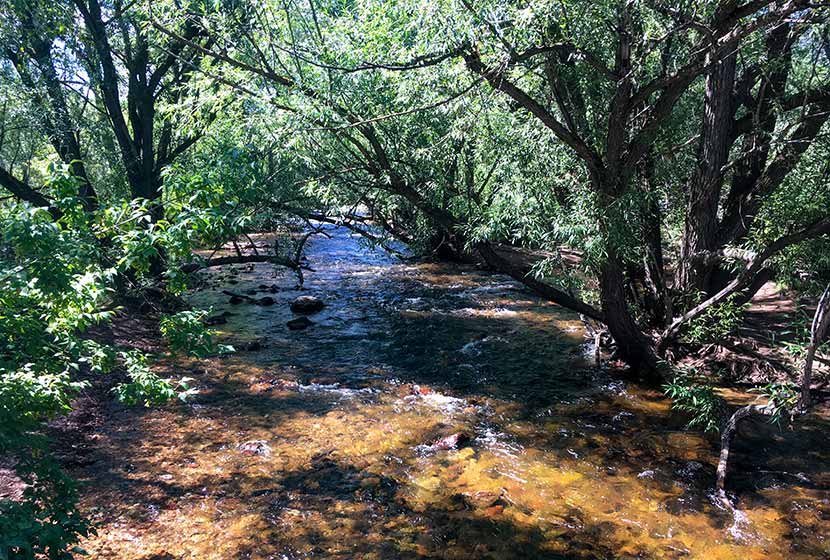
The trail begins winding through aspen, oak, and evergreen. You'll immediately notice the clean, earthy air rising up from the forest floor. The initial stretch of the trail provides ample shade, and at approximately 0.5 mile, the trail opens up to its first vista. As the trail turns sharply right, the unofficial trail bends left up a small hill to a clearing with views down into the valley and a massive lean-to teepee tree.
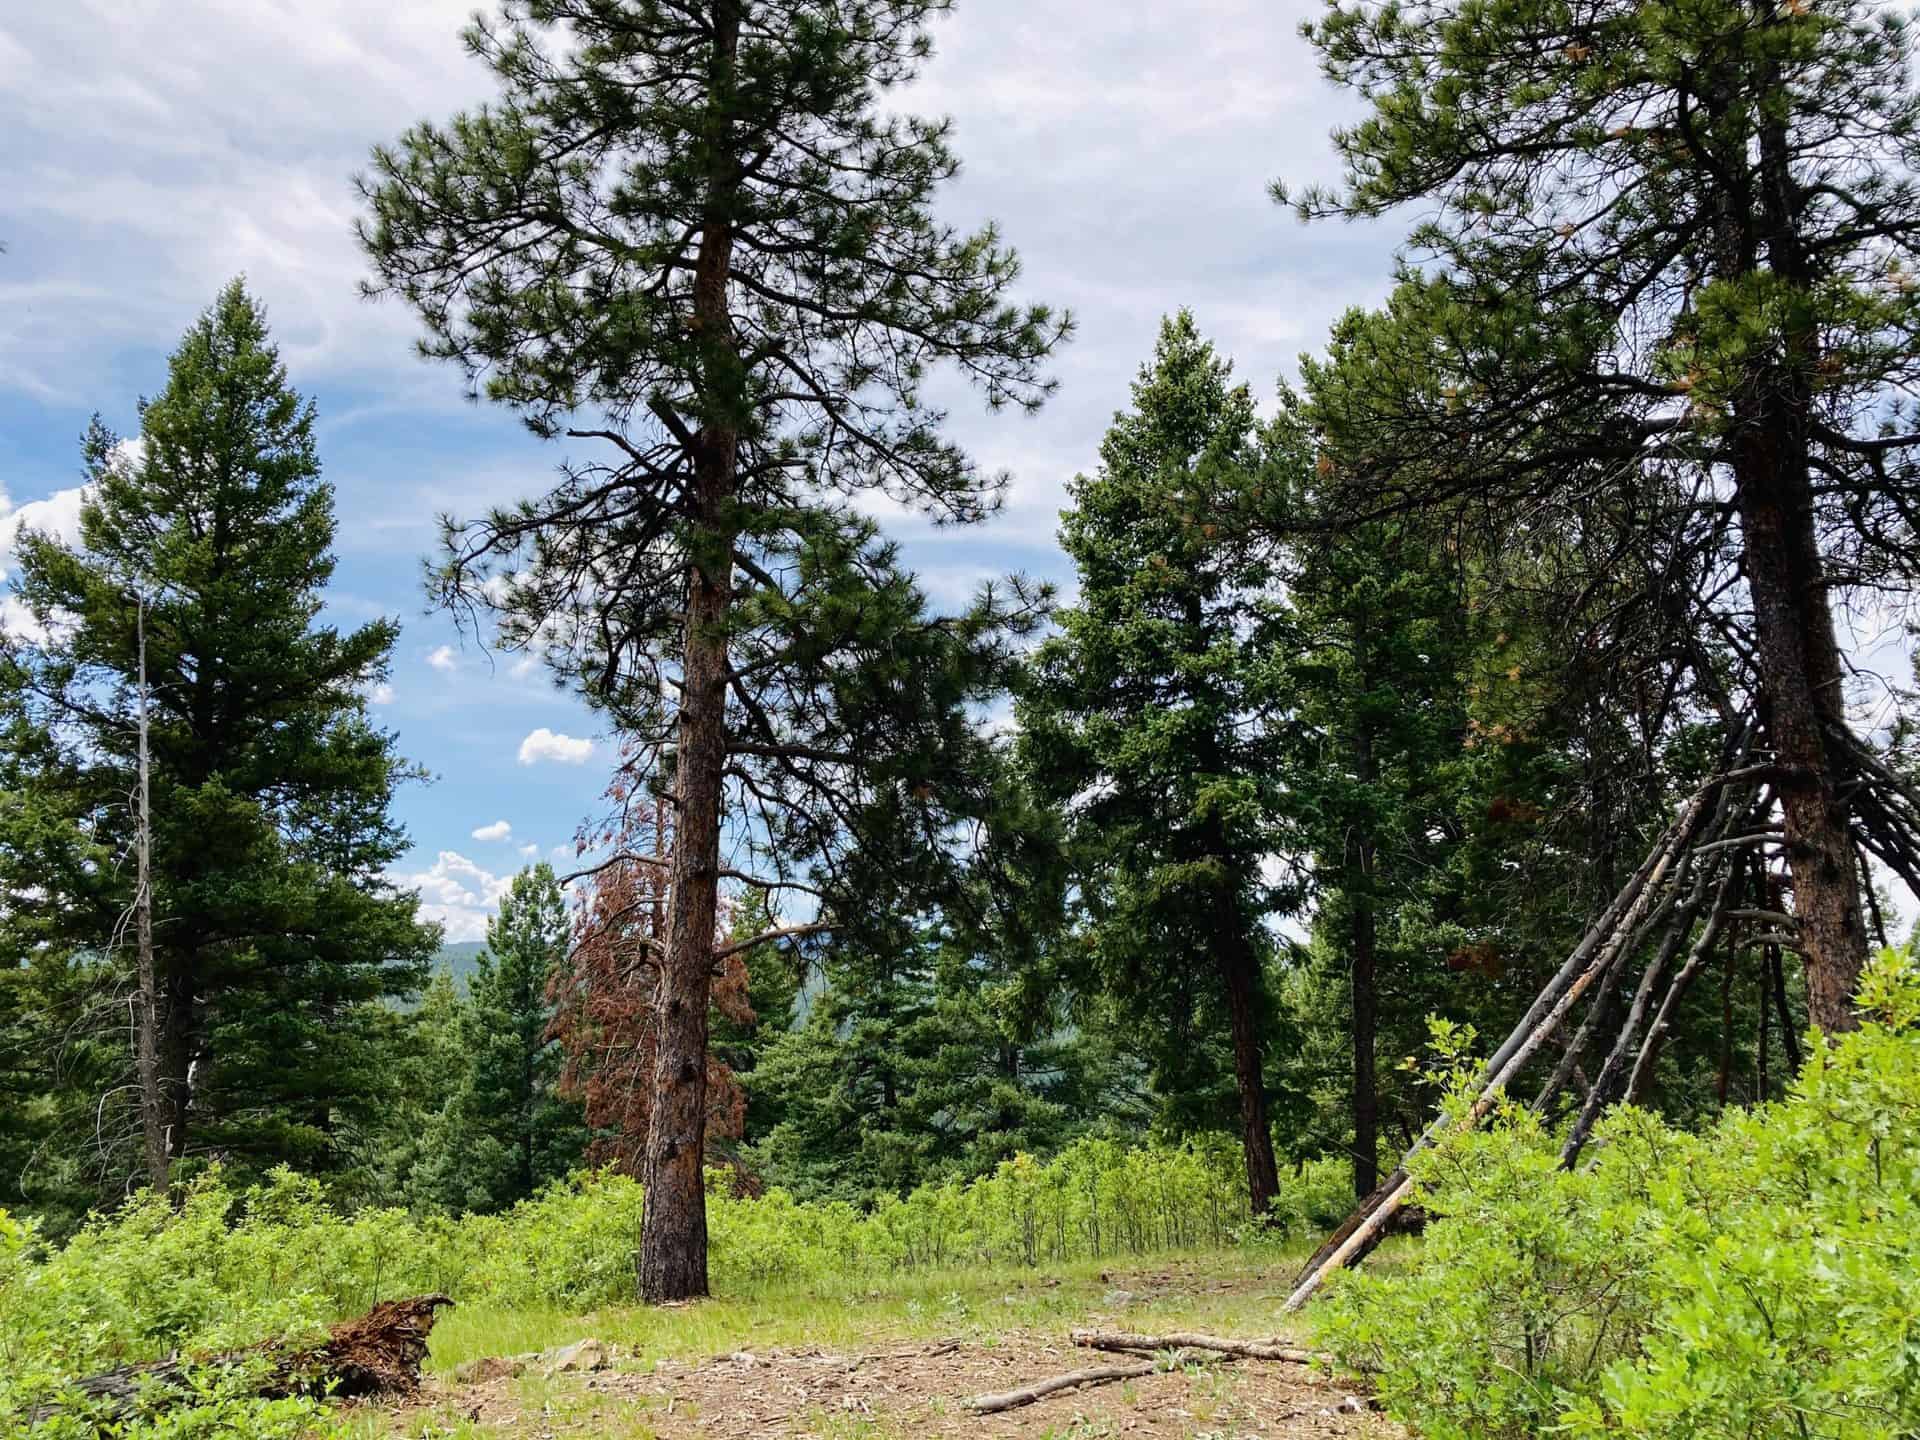
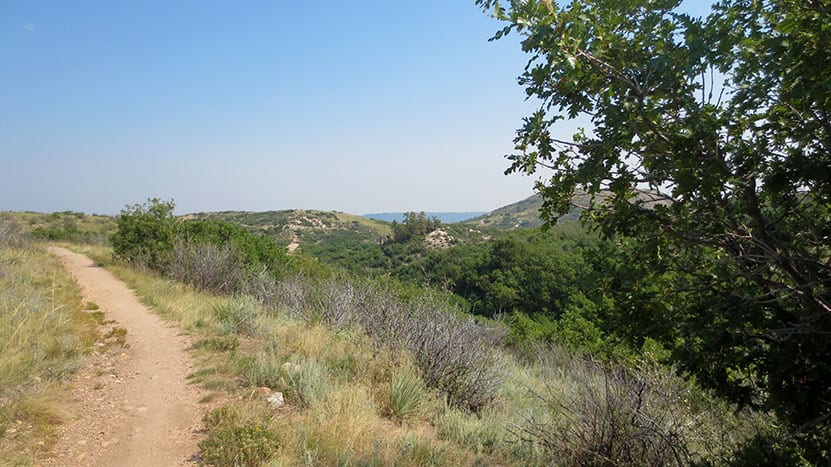
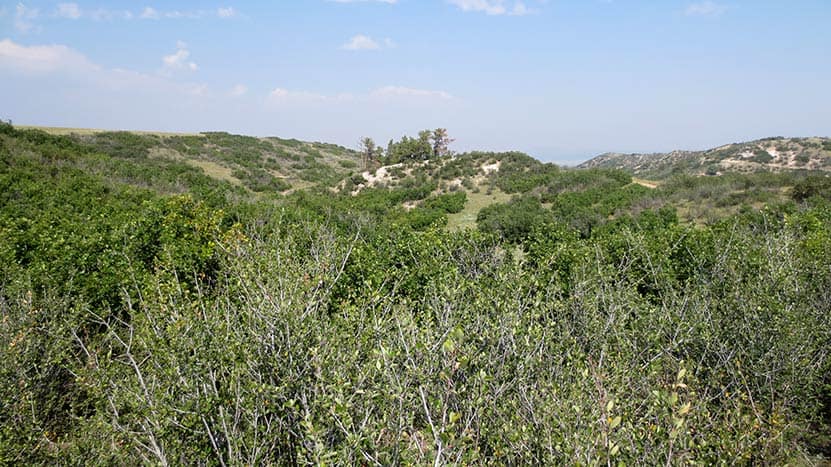
Continuing up, soon another vista opens up off to the left with sight line down the valley and onto the next ridge line, and then at approximately 1.5 mile the trail reaches a junction with the fire road (FR) and Ringtail Trail. (If you follow Ringtail toward Thomas Hill, the trails opens up to th north. On a clear day you can see the skyscrapers of downtown Denver!) Staying straight to continue on the FR, the trail descends to approximately 2.3 mile to reach the next trail junction. Here you have options: take a sharp left to join Steven's Gulch Trail (the present track), veer right toward Roxborough State Park, or stay straight for a longer loop that will wrap back around to the present track. As the trail descends to the left, it reveals a snug little meadow swimming in prairie grasses--perfect playground for the deer often passing through.
Now, the hike becomes pure descent to approximately 4.25 mile and the junction with the Colorado Trail. (This is where the longer loop mentioned above rejoins the present track.) You know you're close when you spy an old broken down cabin nestled along the shore of the stream. Here, the loop route goes left onto the Colorado Trail.
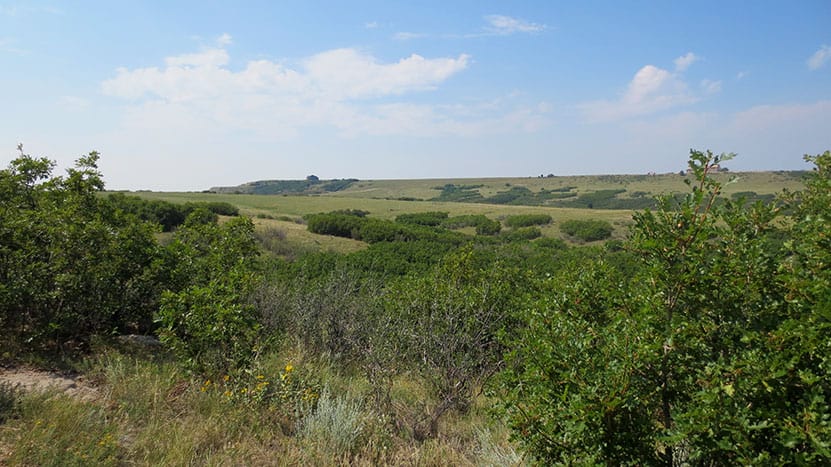
All along the descent and this return ascent, thick foliage, flowers, ferns, and the occasional patch or puddle of mud keep you company. It's fascinating terrain that also hosts horse riders from time to time, so watch your step! At 5.0 mile the Colorado Trail continues straight but an alternate Indian Creek Trail pulls sharply right. Staying straight on the Colorado Trail the trail begins another descent.
While this loop hike follows a stream almost all the way, you get the pleasure of a stream crossing at approximately 6.25 mile when it meets up with Bear Creek. From here the trail bends its way up and out of the shallow canyon, past the equestrian stables and campground, and back to the parking lot.
Tips & Resources for Hiking Indian Creek Loop
- TIP: Wildlife is active in this area. Be sure to let someone know your hiking itinerary, or take a hiking partner with you.
- TIP: Familiarize yourself with the various trail junctions that intersect in this area. You can trek to Roxborough, connect to the Colorado Trail, or end up in an open space...on accident if you're not aware! Also, keep an eye on the weather as it can change suddenly along the Front Range.
- Trail Map: Indian Creek Loop
- Packing List: Always pack the 10 Essentials. Download our Hiking Guide to get the list and dayhiking packing checklist.
- Colorado Road Conditions: Colorado Road Conditions
- After the Hike: If you need breakfast, hit up the local fave, O'Brien's Cafe, or catch a pizza-pie at PieZano's
Weather
Map & Driving Directions
Click for Driving Directions
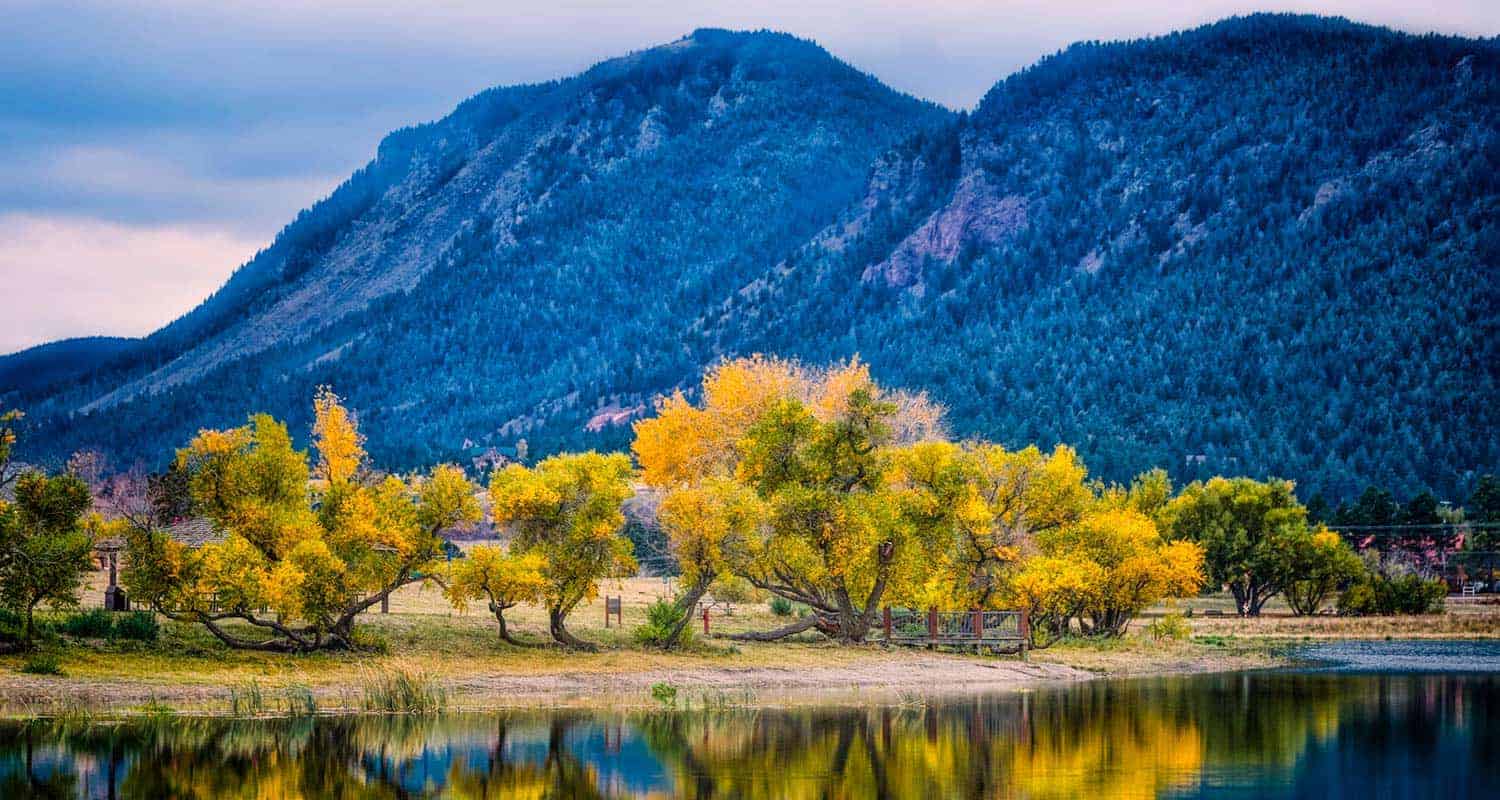
Santa Fe Regional Trail in Palmer Lake
The Santa Fe Regional Trail begins in Palmer Lake, Colorado, about 1 hour South of Denver. It's an easy trail with 17 miles from Palmer Lake to Colorado Springs along the old path of the Santa Fe Railroad. Explore the full Santa Fe Regional Trail hike profile below for trail map, driving directions, and more tips and details to help you enjoy this hike or bike adventure near Colorado Springs.
Trail Snapshot: Santa Fe Regional Trail
| Hike Distance | 1 to 17 miles one-way |
|---|---|
| Difficulty | Easy |
| Duration | Approx 1 hour+ |
| Trail Type | Out-and Back |
| Starting Elevation | 7200′ |
| Elevation Gain | Approx -900′ from Palmer Lake to Edmondson Trailhead |
| Seasons | Year Round |
| Dogs | Allowed On Leash |
| Hike Trail Map | Click for Trail Map of Santa Fe Regional Trail |
| Denver Drive Time | 1 hr |
| Driving Directions to Santa Fe Regional Trail Trailhead | Click for Google Map |
| Town Nearest Hike | Palmer Lake, Colorado and Colorado Springs |
| Beauty | Air Force Academy, Views of Pikes Peak |
| Activities | Hiking, Cycling, Trail Running |
Parking & Trailhead Information: Santa Fe Regional Trail
From Denver, take Interstate 25 south through Castle Rock and Larkspur, exiting onto County Line Road/Palmer Divide Road at exit 163, taking a right onto County Line Road. Stay on County Line Road for about 2.5 miles. Just before crossing the railroad tracks, the entrance to Palmer Lake Regional Recreation Area will be on your left. You'll see a sign and the first parking area. Drive past this parking lot to the larger lot. Here, at this south lot, you'll find restrooms, a playground, and the trailhead for the Santa Fe Regional Trail.
The Hike: Santa Fe Regional Trail
The Santa Fe Regional Trail begins in Palmer Lake and runs South for 17 miles where it merges with the Pikes Peak Greenway Trail. Because the trail follows the railroad grade of an abandoned railroad line, its relatively level, descending about 900 feet on its 17 mile course into Colorado Springs. This makes for a nice family bike ride, especially if you take two cars and drop a shuttle car off at the Edmondson Trailhead on the northern end of Colorado Springs. Here's a map link of both trailheads , and a link to the Edmondson Trailhead with driving directions from Denver.
North Trail Segment
In Palmer Lake, you have North and South hiking options. You can go North via the Santa Fe to Greenland Trail Link to pick up the Greenland Trail which winds through the wild green meadows and towering buttes south of Larkspur. That stretch from Palmer Lake to the Greenland Open Space Trailhead is 5.4 miles.
South Trail Segment
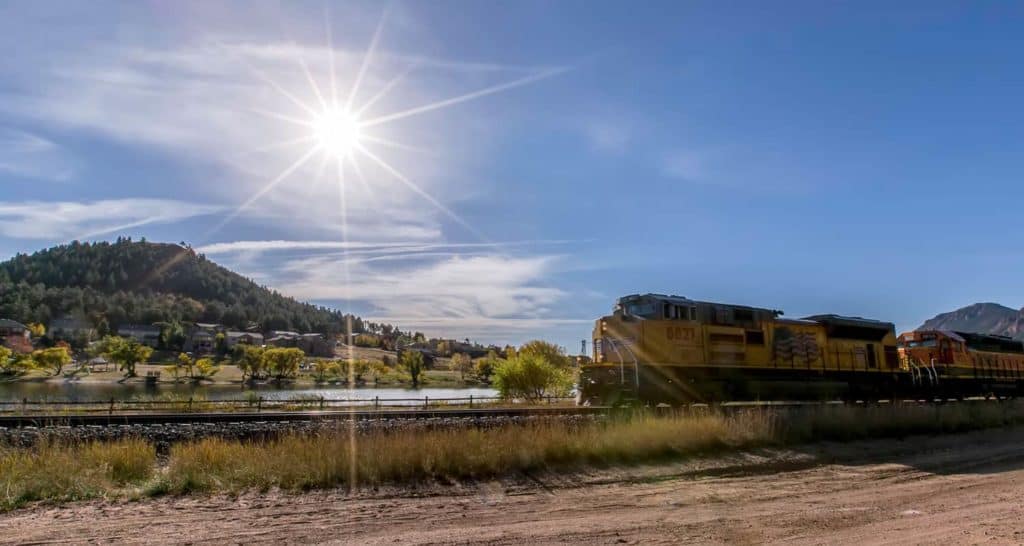
The South Trail segment of the Santa Fe Regional Trail runs through Palmer Lake and the town of Monument. Just south of Baptist Road the trail enters the Air Force Academy and runs parallel for a while with interstate 25. Then the trail makes a hard bend to the west, taking hikers and bikers away from the noise of the roads and winding
through into the draw of Monument Creek. It then bends its way behind (West of) the Air Force Academy airfield. This segment gives visitors a unique view of the Academy seen by few people. The trail then exits the Academy and enters the City of Colorado Springs. Just south of the Edmondson Trailhead, the Santa Fe Regional Trail merges onto the Pikes Peak Greenway.
Tips & Resources for Hiking Santa Fe Regional Trail
- TIP: Bike helmets are required on the Air Force Academy segment of the Santa Fe Regional Trail
- TIP: Be sure to pack the sunscreen because there is no shade on the trail.
- Trail Map: Santa Fe Regional Trail
- Packing List: Always pack the 10 Essentials. Download our Hiking Guide to get the list and dayhiking packing checklist.
- Colorado Road Conditions: Colorado Road Conditions
- Photo: We would like to express our gratitude to Christopher Rosenberger for sharing such an amazing photographs of this hike to in Palmer Lake.
- After the Hike: Rock House Ice Cream in Palmer Lake
Weather
Driving Directions
Map to Santa Fe Regional Trailhead
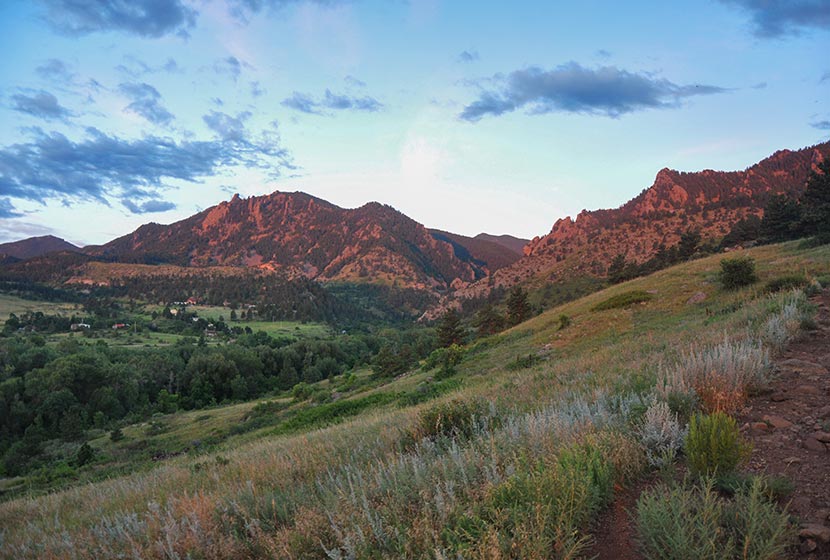
South Boulder Peak
South Boulder Peak is a demanding 3.7-mile hike (one-way) situated above the South Mesa in the famous Flatirons region near Boulder Colorado. Hikers can bag nearby Bear Peak on the same trip and return via Fern Canyon to make an 8.7 mile loop. Explore the full South Bolder Peak hike profile below for the trail map, driving directions, and more tips and details to help you enjoy this adventure near Boulder, Colorado.
South Boulder Peak Trail Snapshot
| Hike Distance | 7.4 Miles Round Trip or approx. 8.7 Mile Loop |
|---|---|
| Difficulty | Difficult |
| Duration | Approx 3-5 hrs |
| Trail Type | Out and Back or Loop Option |
| Starting Elevation | 5650′ |
| Elevation Gain | Approx +2900′ South Boulder Peak 8550' |
| Seasons | Year Round |
| Dogs | Allowed On Leash |
| Hike Trail Map | Click for a Map South Boulder Peak and South Mesa Trailhead |
| Denver Drive Time | 45 Minutes |
| Driving Directions to South Boulder Peak via South Mesa Trailhead | Click for Google Map |
| Town Nearest Hike | Boulder, Colorado |
| Beauty | Peak Top Views, Canyon, Wildflowers, Sunrise, Meadows, Wildlife: Deer, Bear, Birding. |
| Activities | Hiking, Trail Running, Photography |
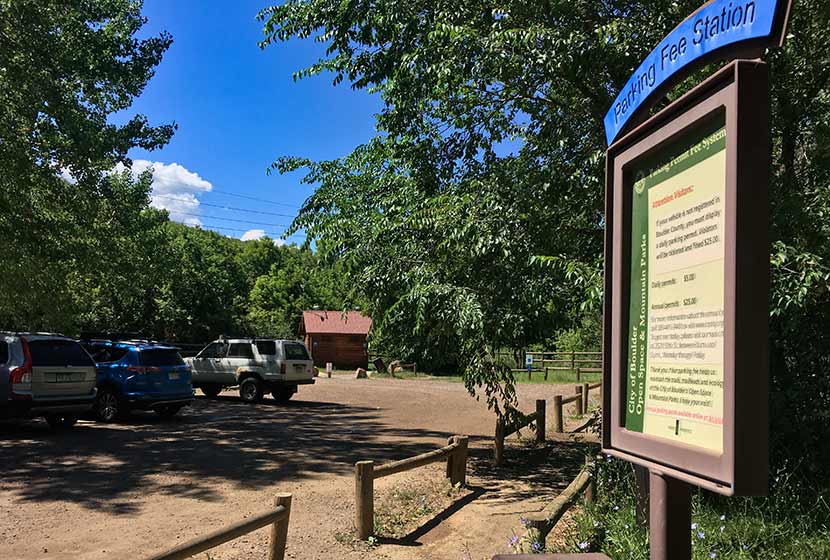
Parking & Trailhead Information for South Boulder Peak
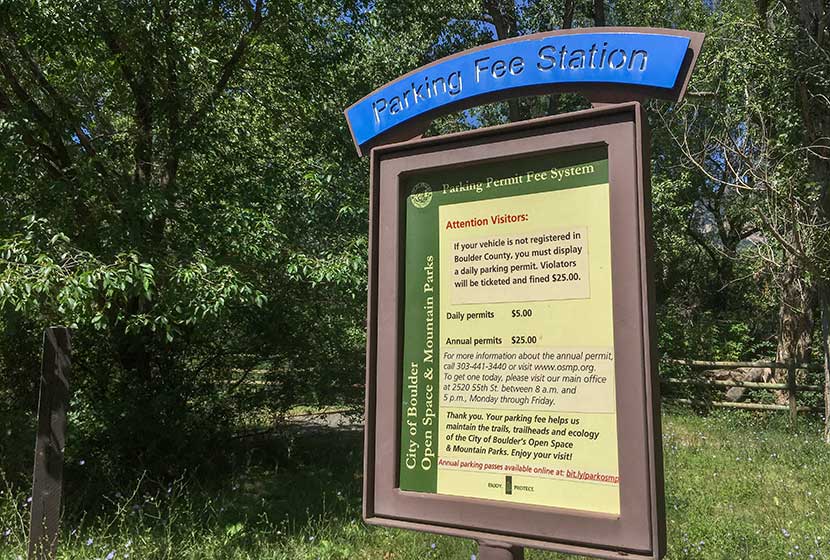
The trail to South Boulder Peak begins at the South Mesa Trailhead off of Eldorado Springs Drive just South of Boulder, Colorado. From Denver, drive North on interstate 25 to 36 toward Boulder. Take the McCaslin Blvd exit and then go South/West onto McCaslin. At the intersection of McCaslin and Marshall, take a right onto Marshall Road. Marshall will eventually intersect with Eldorado Springs Drive. Take a left onto Eldorado Springs Drive. About two miles down the road, you'll find the South Mesa Trailhead on the right. The South Mesa Trailhead is a part of the Boulder County Open Space and requires a daily parking fee, or an annual pass. I went online and bought an annual parking pass through the Open Space website. This gives you access to all the southern fee parking areas as well as the parking areas on Flagstaff Mountain. There are restrooms at the trailhead but not potable water.
The Hike: South Boulder Peak
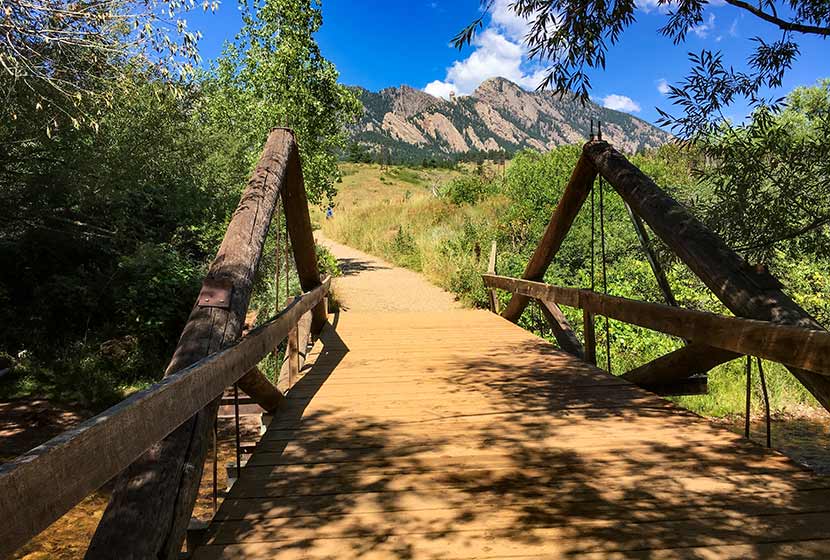
If you study a map of the South Mesa area, you'll notice that it's a complex network of trails. Tis is great for exploring the mesa, but when summiting a peak, you'll want to preserve as much energy as possible by taking the most direct route. The first trail choice presents itself after crossing the bridge over small bridge that spans Boulder Creek.
We took the Homestead Trail, a 1.3 mile segment to a connector segment of the Mesa Trail. It will be marked "Mesa Trail" and have an arrow pointing left to the Shadow Canyon Trail and Right to the Towhee Trail. The way to South Boulder Peak will be to head left toward Shadow Canyon. During this first segment, you'll gain great views down into the entrance of Eldorado Canyon .
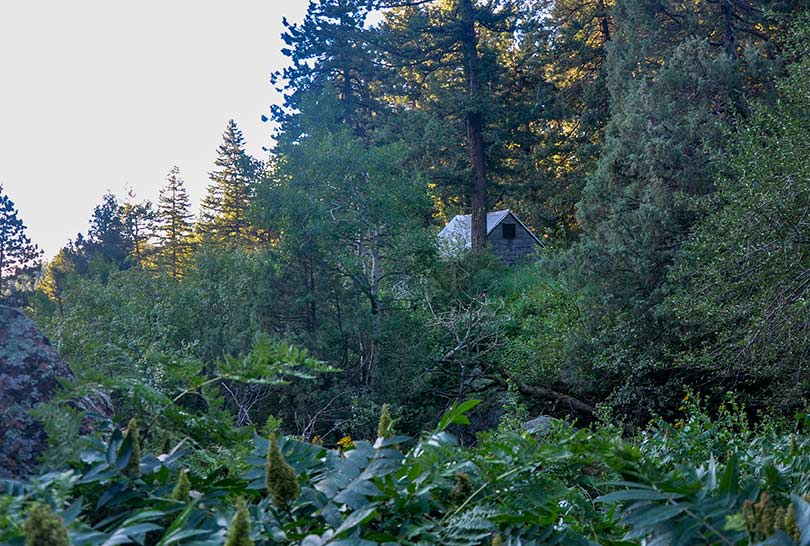
The first 0.4-mile segment of the Shadow Canyon South Trail is gradual. At any of the other trail intersections keep taking those marked "Shadow Canyon." Eventually, the trail leads into a densely wooded ravine where an old cabin is tucked away in the undergrowth
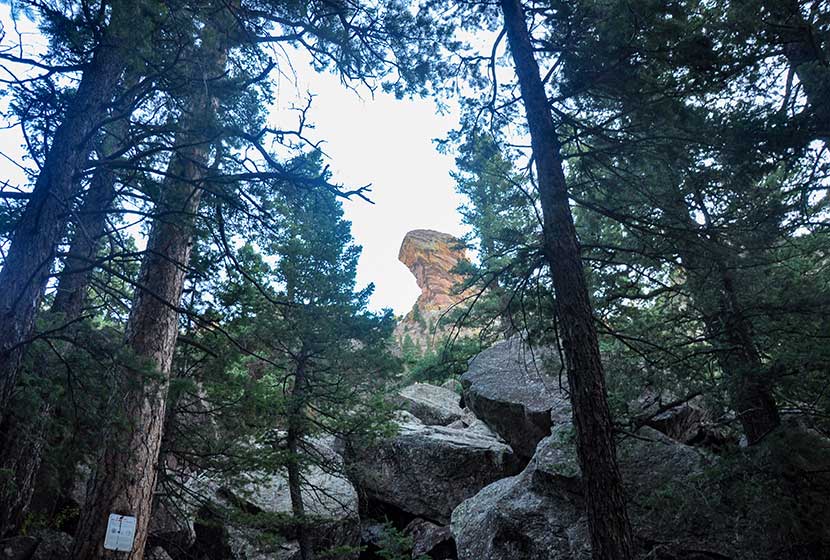
You'll know when you've entered Shadow Canyon because the trail becomes steep and demanding. It's more humid, too, so the rock can get slippery. Be mindful of your steps and prepared to ascend over a mile of fairly rugged terrain.
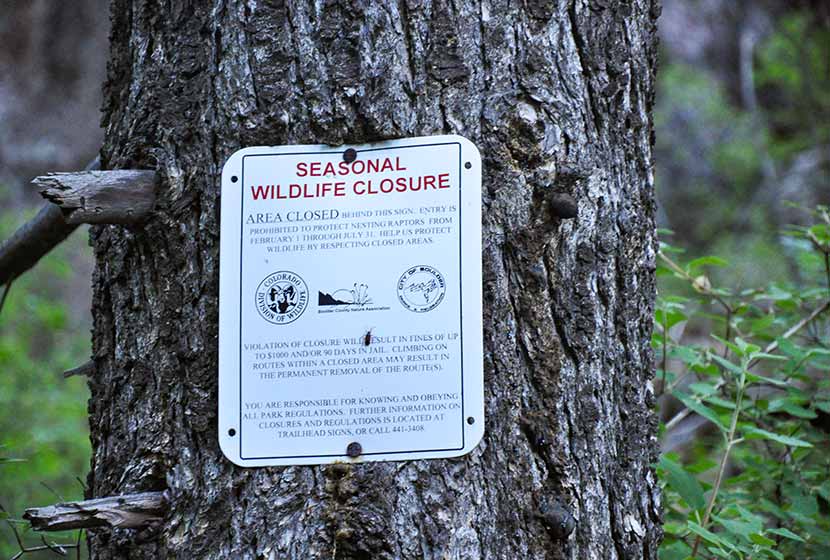
Shadow canyon is an access point for a prominent rock formation, Devils Thumb. Seasonal closures (see photo below) protect nesting raptors. Be sure to stay out of this area from Feb. 1st to July 31st. The Shadow Canyon Trail is not closed during this time, but refrain from going off-trail or taking social trails in the closure area during these periods.
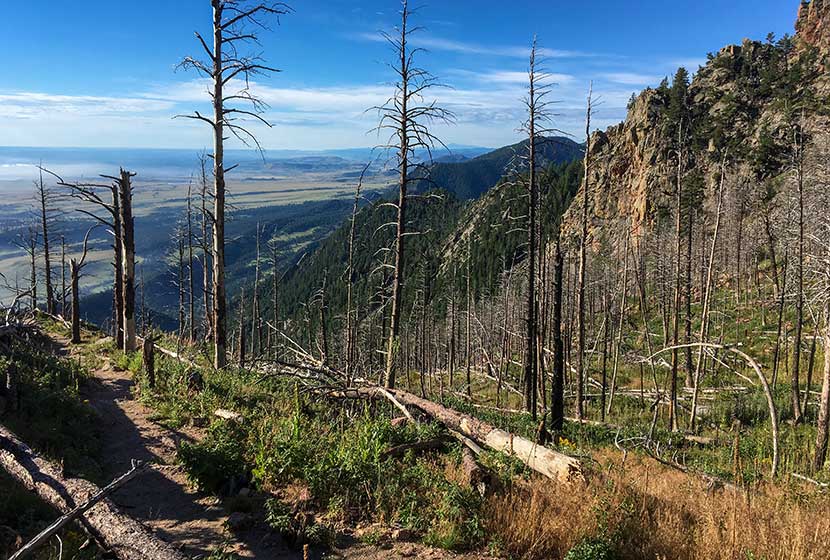
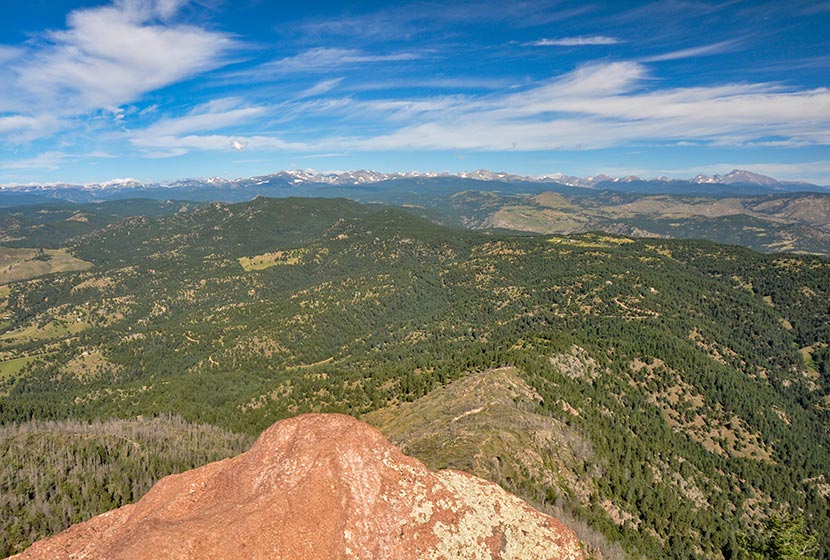
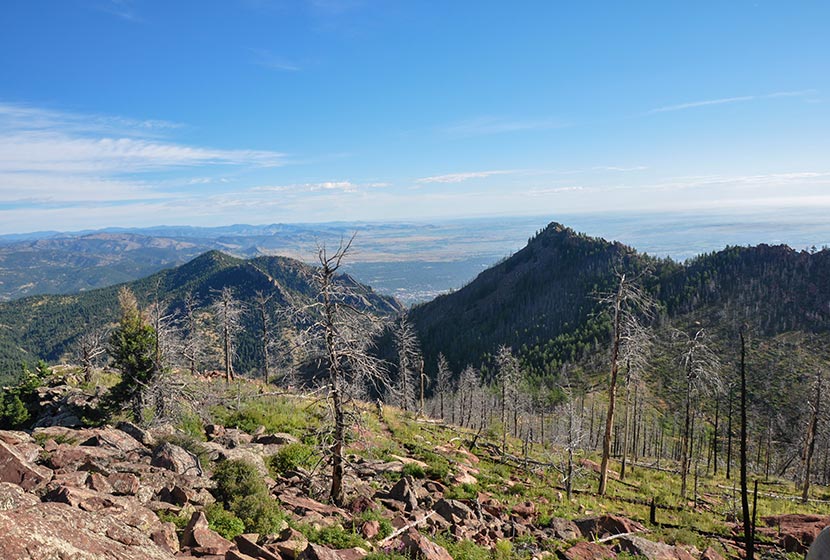
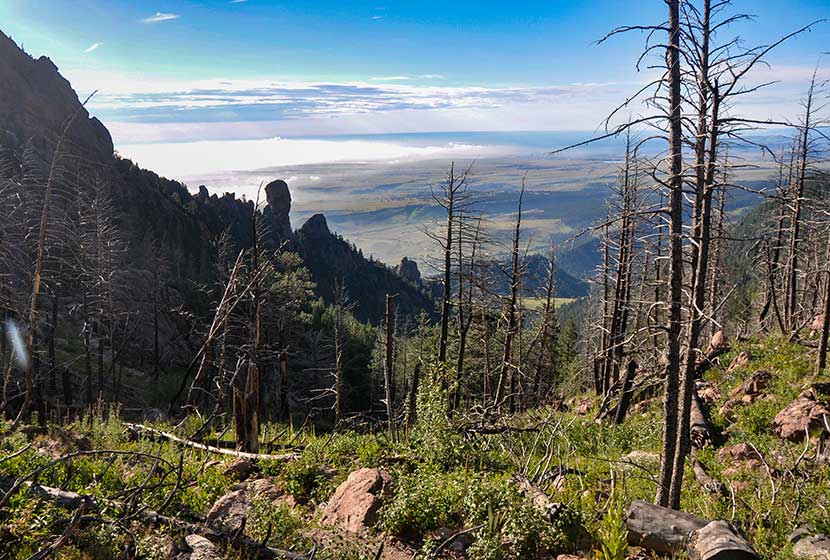
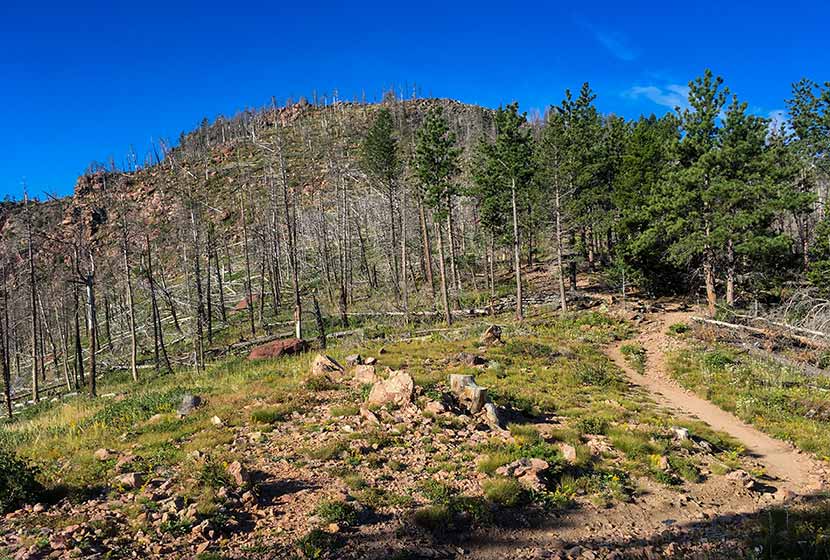
The trail pops out of the canyon onto saddle between South Boulder Peak and Bear Peak. The first thing you'll notice is a burn area that stretches all the way to the top of South Boulder Peak. It's the result of the 2012 Flagstaff fire.
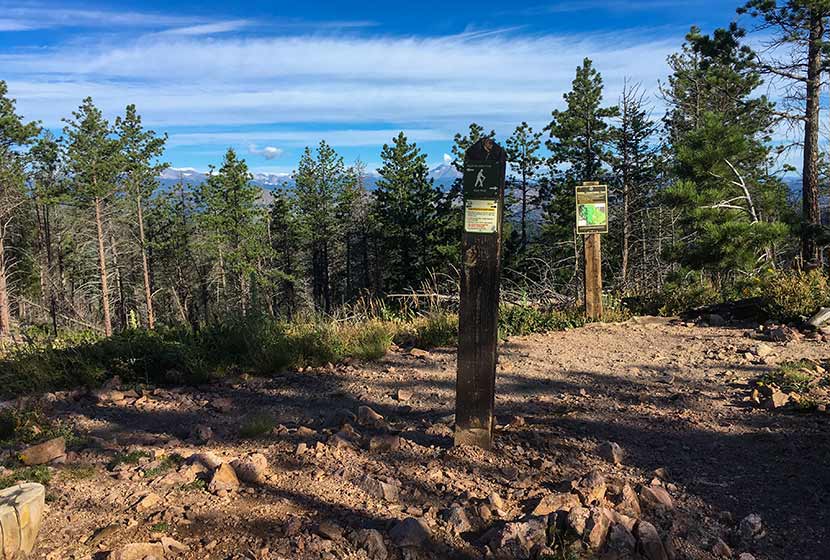
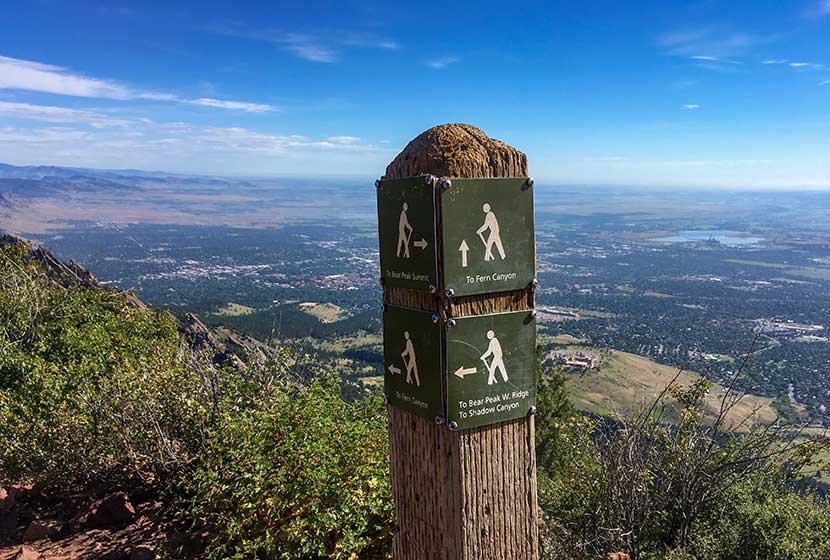
At the saddle ridge, another trail sign notes the way to South Boulder Peak, a 0.3 mile trail climbs to the summit. You'll notice that the trail to the right leads the same distance to Bear Peak.
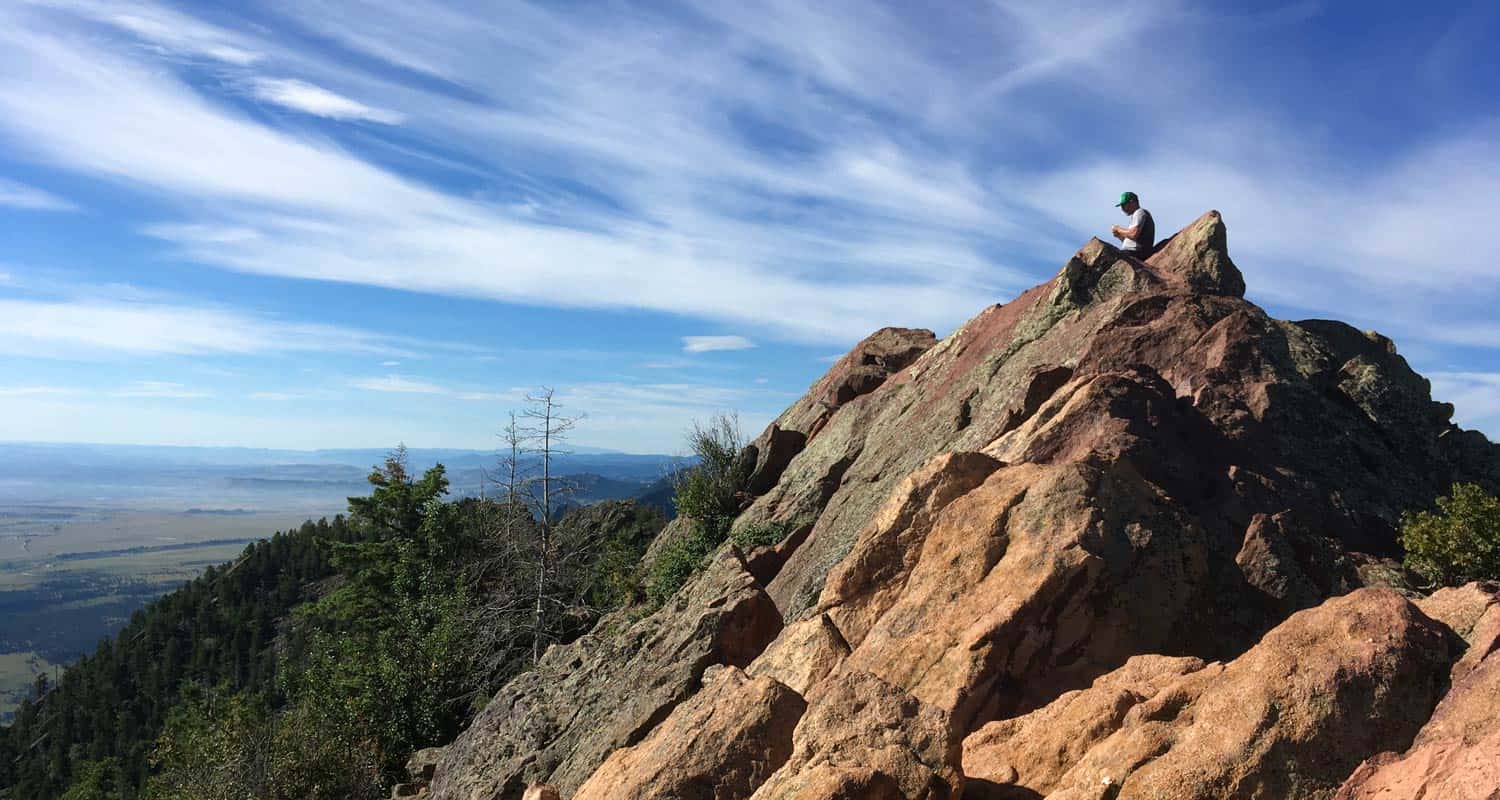
At points, the trail becomes difficult to discern and requires a little bit of bouldering to make it to the top. Whenever I'm in these rocky segments, I try to be mindful of those behind me. It's easy to inadvertently cause a rock to shift and tumble toward the hikers below. Most of the rock is stable, but it's smart to be aware as you navigate these kinds of areas. The back side of the summit is exposed, so do not approach or descend the peak via this route. And be mindful of the exposure while on the peak.
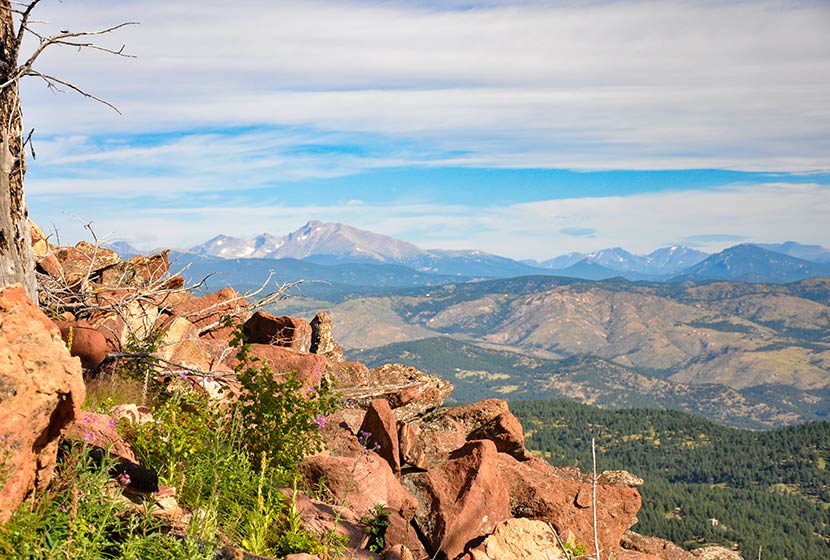
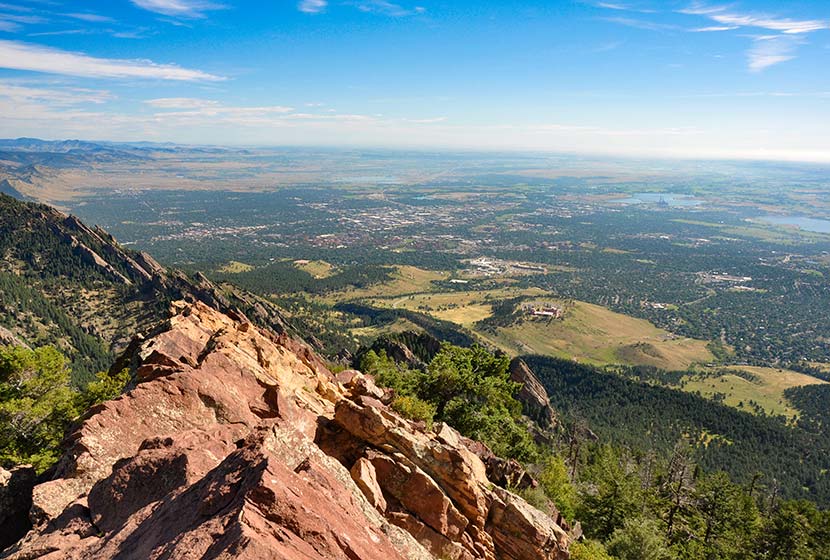
The pink granite summit offers 360 degree panoramic views (see the video below).
You can also see the summit of Bear Peak just 0.6-mile to the Northeast. If you want to summit Bear Peak, be sure to review our Bear Peak Hike Profile.
From the summit of South Boulder Peak your options are to 1) Descend via the approach route (7.4 miles round trip), 2) Summit Bear Peak and return via the approach route (8 miles total), or 3) Summit Bear Peak and return via Fern Canyon (approx. 8.7 miles). It's important to know that the descent into Fern Canyon is more demanding than the return via Shadow Canyon. For the loop route via Fern Canyon, explore our Bear Peak Trail Profile.
Tips & Resources for Hiking to South Boulder Peak
- Hiking with Your Dog: Though dogs are allowed on leash, I wouldn't put South Boulder Peak on the dog-friendly list because of the rocky area at the summit and the ascent up fern canyon.
- TIP: Be ready for the hike down to be demanding on your knees and ankles, especially if you choose to descend via Fern Canyon. Trekking poles would be helpful.
- Weather: As with all hikes on the Front Range, especially peak hikes, be weather aware. Thunderstorms can emerge suddenly, especially in the early afternoon in the Summer months.
- Trail Map: South Boulder Peak Map from South Mesa Trailhead
- Packing List: Always pack the 10 Essentials. Download our Hiking Guide to get the list and dayhiking packing checklist.
- Colorado Road Conditions: Colorado Road Conditions
- After the Hike Cafe: Walnut Cafe in Boulder
- After the Hike Brewery: Sanitas Brewing Company
Weather
Map & Driving Directions
Click for Driving Directions

Bear Peak Near Boulder
Bear Peak is a demanding 7.4-mile hike (round trip) through the broad meadows of South Mesa, up through the rocky trail of shadow canyon, to the granite summit with sweeping 360 degree views of the Colorado Front Range. Hikers can summit South Boulder Peak on your way and make a loop hike out of your adventure by returning via Fern Canyon. Explore the full Bear Peak hike profile below for the trail map, driving directions, and more tips and details to help you enjoy this adventure near Boulder, Colorado.
Bear Peak Trail Snapshot
| Hike Distance | 7.4 Miles Round Trip or 8.4 Mile Loop |
|---|---|
| Difficulty | Difficult |
| Duration | Approx 3-5 hrs |
| Trail Type | Out and Back and Loop Option |
| Starting Elevation | 5650′ |
| Elevation Gain | Approx +2800′ Bear Peak 8461' |
| Seasons | Year Round |
| Dogs | Allowed On Leash |
| Hike Trail Map | Click for a Map Bear Peak and South Mesa Trailhead |
| Denver Drive Time | 45 Minutes |
| Driving Directions to Bear Peak from South Mesa Trailhead | Click for Google Map |
| Town Nearest Hike | Boulder, Colorado |
| Beauty | Peak Top Views, Canyon, Wildflowers, Sunrise, Meadows, Wildlife: Deer, Bear, Birding. |
| Activities | Hiking, Trail Running, Photography |
Parking & Trailhead Information for Bear Peak
Access to Bear Peak is from the South Mesa Trailhead off of Eldorado Springs Drive just South of Boulder. From Denver, drive North on interstate 25 to 36 toward Boulder. Take the McCaslin Blvd exit and then go South/West onto McCaslin. At the intersection of McCaslin and Marshall, take a right onto Marshall Road. Marshall will intersect with Eldorado Springs Drive. Here, take a left onto Eldorado Springs Drive. About two miles down the road, you'll find the South Mesa Trailhead on your right. The South Mesa Trailhead is a part of the Boulder County Open Space and requires a daily parking fee, or an annual pass. I went online and bought an annual parking pass through the Open Space website. This gives you access to all the southern fee parking areas as well as the parking areas on Flagstaff Mountain. There are restrooms at the trailhead.
The Hike: Bear Peak
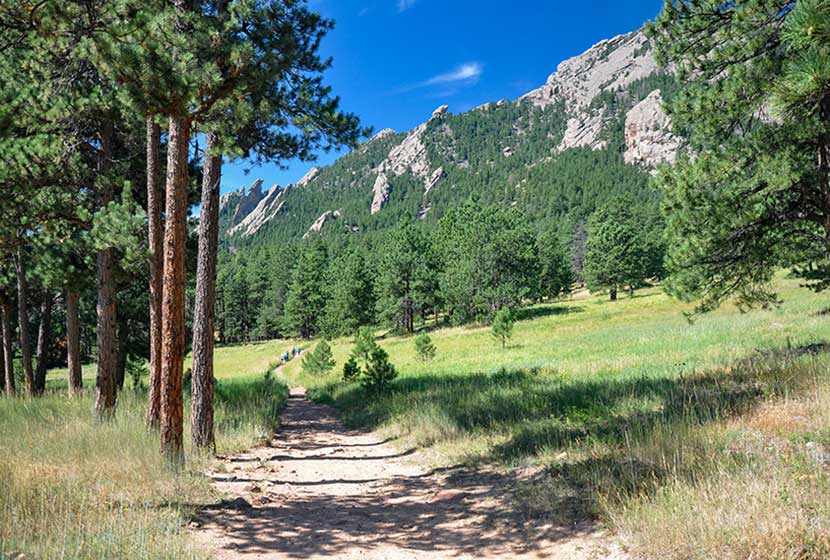
From the South Mesa Trailhead, the trail leads across a small bridge spanning over Boulder Creek. Willow trees arch over the stream making it worth a short pause to take in the sounds of water before you set off across the meadows of South Mesa. There are many trail options, but the most direct is to take the Homestead Trail, which heads West across a gentle grade toward Shadow Canyon.
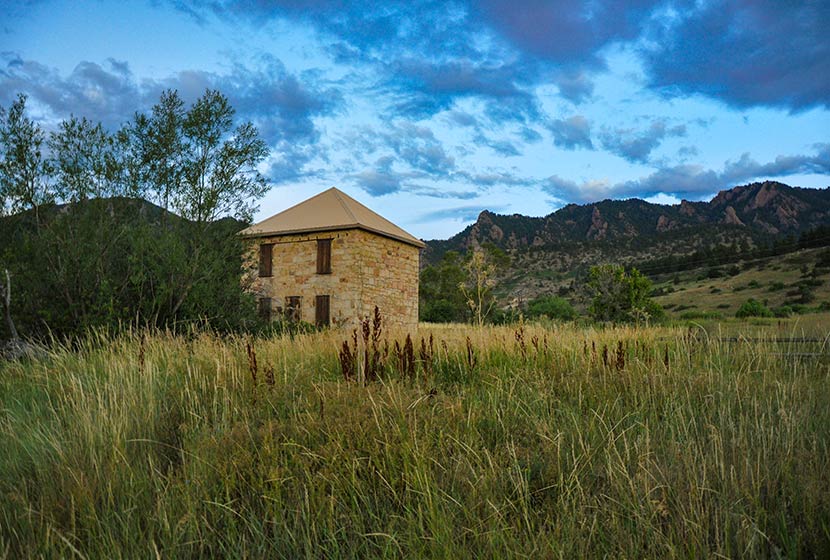
This first mile or so of the hike is easy and offers stunning views of the Flatirons and views of the entrance of Eldorado Canyon. An old stone building, part of an early homestead is the first marker you'll pass early in the hike.
After about 1.3 miles, the trail will split. Take the left (West) trail, which leads to the South Shadow Canyon Trail. After about a 1/2 mile, you'll encounter a 2nd trail split. The Shadow Canyon Trail will again bear to the left and begin heading up steeper terrain.
As the trail ascends, you soon leave the meadow and enter into more dense ponderosa pine forest. The vegetation in the understory grows tall and green at the entrance to the canyon. You'll see another cabin with a metal roof (pictured below). Soon past the cabin will be another important trail juncture. Again, the trail up Shadow Canyon will bear left (West).
Once in Shadow Canyon, the trail now becomes much more steep and requires navigating over rock and tree roots. This segment of the trail traveling up through the canyon is over a mile, so be ready for a steady and demanding climb.
The canyon is an access route for Devils Thumb, a prominent rock formation along this ridge. There are seasonal closures (see photo below) because of nesting raptors. Be sure to stay out of this area from Feb. 1st to July 31st. You are welcome to stay on the Shadow Canyon trail--it's not closed during this time--but refrain from going off-trail or taking social trails during this time up to Devils Thumb.
Eventually, the trail emerges from the canyon onto the saddle between South Boulder Peak and Bear Peak. This area is marked by a burn area, and in the late summer, raspberry plants grow trailside full of ripe berries. The burn was ignited by lightning in June of 2012. Named the Flagstaff Fire, it consumed about 300 acres before being contained by firefighters.
Another trail sign notes the way to Bear Peak, a 0.3 mile trail segment curving North up the back of the summit.
You'll notice more burn area on the left (West) side of the trail. The rock on the trail becomes increasingly brittle as you go, so be aware of those hiking below you and be sure to hike on the most secure and durable surfaces.
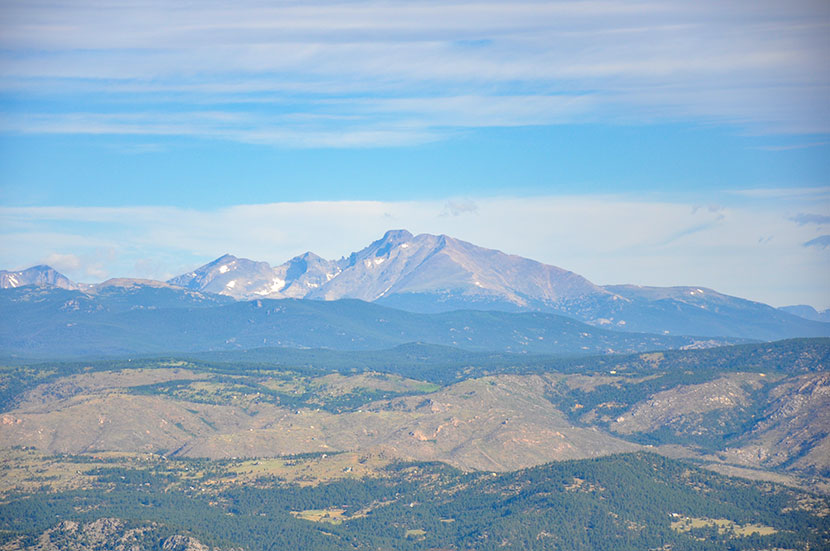
The final segment requires a scramble along about 25 yards of angled rock. Take your time and scope out the safest route to the summit. Most peaks along the Front Range have broad tops, but Bear Peak is tapered to a point with exposure on all sides. Several USGS markers are set into the rock (I think I counted 3--which is unusual). The views are great, both to the East and to the mountains in the West.
There are two options for the return hike: 1) to hike the 3.7 miles back through Shadow Canyon, retracing the same trails, or 2) to make a loop out of the hike by descending via Fern Canyon (about 4.7-mile return). The rest of this profile will follow the Fern Canyon to Mesa Trail return.
A sign marking the trail down Fern Canyon is located right at the base of Bear Peak (where the trail turns into a scramble up the summit). The descent into Fern Canyon is very steep and the rock is very loose. Hikers will also encounter people making their way up the trail, so be sure to move off to the side and grant right-of-way to hikers who are doing the harder work of ascending the trail. I would not recommend hiking up to Bear Peak from this route because the trail is way more demanding than the Shadow Canyon approach.

After about 1/2 of a mile descending this steep saddle, the trail will bear right (East) into Fern Canyon via a series of switchbacks. Eventually, the trail will emerge from Fern Canyon back onto the more gentle slopes of South Mesa. Look for signs for the Mesa Trail, and follow them South back to the South Mesa Trailhead.
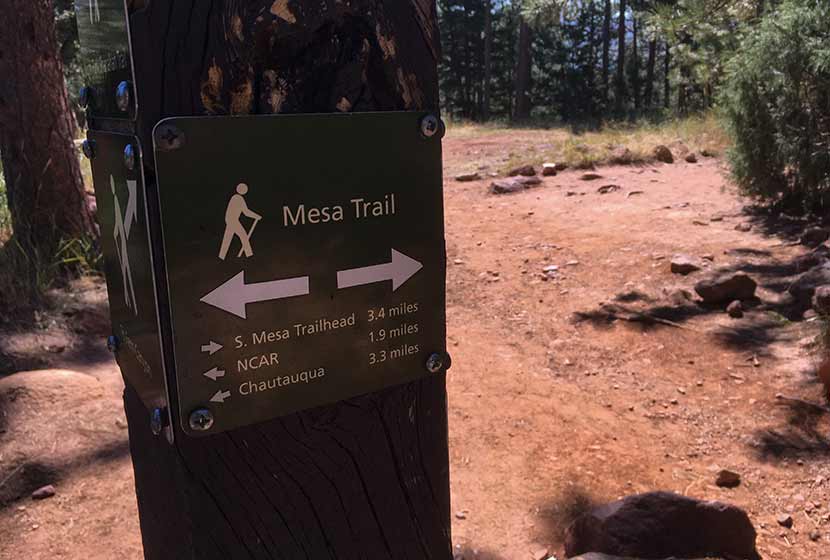
The hike back on the Mesa Trail travels in and out of the shade of Ponderosa pines and along the pink and orange Flatiron mountains that make this area so spectacular. We took the Upper Bluestem trail to some small connector trails leading back to the trailhead. Another approach is stay on the Mesa Trail (see map) until it connects back to the Homestead Trail.
Tips & Resources for Hiking to Bear Peak
- Weather: As with all hikes on the Front Range, especially peak hikes, be weather aware. Thunderstorms can emerge suddenly, especially in the early afternoon in the Summer months.
- Hiking with Your Dog: Though dogs are allowed on leash, and I've encountered people hiking with their dogs on the trails up to Bear Peak, I wouldn't put Bear Peak on the dog-friendly list because of the steep rock at the summit summit and the difficulty of the terrain leading up through the canyons.
- TIP: Be ready for a hike that is really demanding on your legs, especially the descent through Fern or Shadow Canyon. Trekking poles would be helpful on the descent.
- TIP: Hike to South Boulder Peak. It adds just 0.6 mile to your trip.
- Trail Map: Bear Peak Map from South Mesa Trailhead
- Packing List: Always pack the 10 Essentials. Download our Hiking Guide to get the list and dayhiking packing checklist.
- Colorado Road Conditions: Colorado Road Conditions
- After the Hike Cafe: Walnut Cafe in Boulder
- After the Hike Brewery: Sanitas Brewing Company
Weather
Map & Driving Directions
Click for Driving Directions
Ridgeline Open Space Hike
Ridgeline Open Space is nestled in the Meadows residential area of Castle Rock. This network of over 13 miles of trails winds through elevated grasslands and gamble oak with a backdrop of distant snow-capped peaks of the Front Range. Hike it or bike it for a quick escape from the work week. Explore the full Ridgeline Open Space hike profile below for trail map, driving directions, and more tips and details to help you enjoy this adventure in Castle Rock.
Trail Snapshot: Ridgeline Open Space Trail near Castle Rock, Colorado
| Hike Distance | 1 to 13.4 miles |
|---|---|
| Difficulty | Easy |
| Duration | Approx 1hr+ |
| Trail Type | Multiple Loops and Out and Back Options |
| Starting Elevation | 6600′ |
| Elevation Gain | Approx +200′ |
| Seasons | Year Round |
| Dogs | Allowed On Leash |
| Hike Trail Map | Click for a Map of Ridgeling Open Space Trails |
| Denver Drive Time | 40 min |
| Driving Directions to Meyer Homestead Trailhead | Click for Google Map |
| Town Nearest Hike | Castle Rock, Colorado |
| Beauty | grasslands, small stands of pine trees, mountain views, wildflowers, wildlife: rattlesnake, western bluebirds |
| Activities | Hiking, mountain biking, trail running |
Parking & Trailhead Information for Ridgeline Open Space
From Denver, follow Interstate 25 south to Castle Rock and take Exit 182 and go west on Wolfensberger Road. Turn right onto Coachline and follow this until to Ridgeline Open Space Trailhead (on the left-side of the road). There is a restroom and map at the trailhead. Alternatively, hikers can park at Bison Park in Castle Rock and access one of the several neighborhood access trails that lead into Ridgeline Open Space.
The Hike: Ridgeline Open Space
Ridgeline Open Space is one of our family's favorite places to hike because it's right in our backyard here in Castle Rock. The residents of Castle Rock also use the 13.4 miles of trail for trail running and mountain biking. It's quite a labyrinth of trails, but because it's located right in the heart of a residential area, it's hard to get lost (if you stay on the trail). There are maps posted at several junctions and trailheads along the network in the case you need to reorient yourself. Or print the map from the link above and bring it with you.
Our approach is usually to go up to Ridgeline for an afternoon and see where the trails take us. You'll likely encounter mountain bikers along the trail. Most are locals and are very considerate of hikers. Less considerate are the rattlesnakes. I've yet to run into one, but my neighbor was stopped short by a rattler recently while trail running. Rattlesnakes are only aggressive when threatened, but they are easy to stumble upon because they are so well camouflaged. So, keep your eyes peeled as you hike. Mountain Lions also frequent the area--like most trails along the Front Range--because of the plentiful deer population. It's wise to always keep your kids near when hiking and not running up the trail ahead on their own. This is just good practice on any trail, but I mention it because we have seen Mountain Lion prints in the mud on one of the western trail segments.
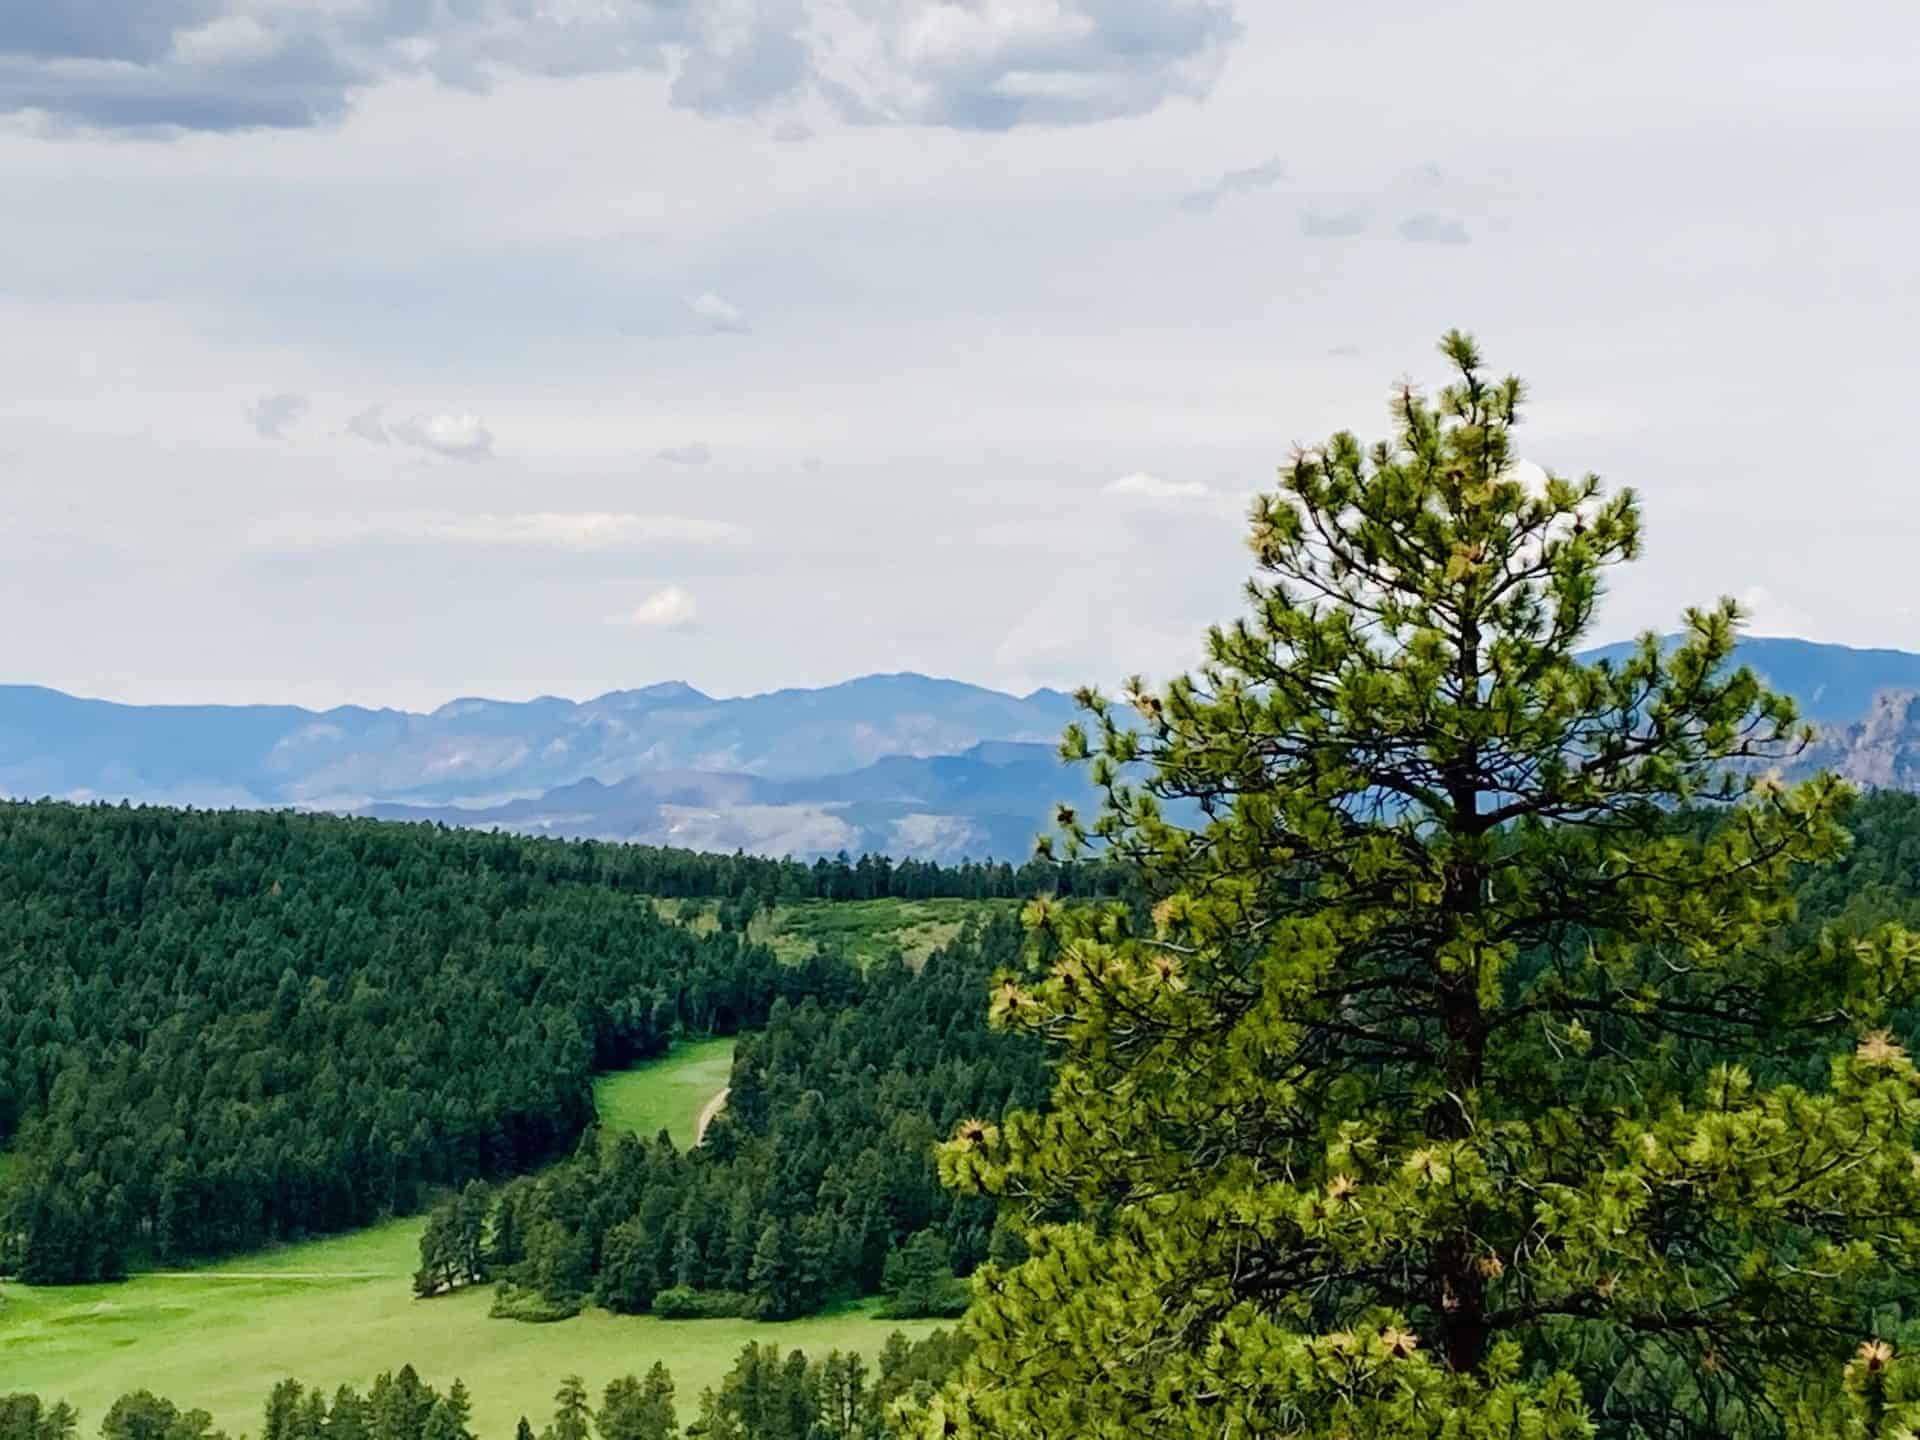
Ridgeline is aptly named because it is situated above the town and offers great views out to Longs Peak, Indian Peaks, Mt. Evans, Devil's Head to the west, and Pikes Peak to the south. Deer bed down in the grass between the gamble oak and birds flit from tree to tree along the trails.
Tips & Resources for Hiking the Ridgeline Open Space Trail
- Rattlesnakes: Keep an eye out for rattlesnakes that sun themselves on rock and the packed, warm surface of the trail.
- Hiking with Kids: As always, hike as a group, keeping small children near you. Mountain lions live in the area (as with most front-range hikes), and the sight of a small creature running alone on the trail can signal a lion's prey response.
- Sunscreen: This hike is 100% exposed to the sun's rays, so be sure to wear a hat and apply that sunscreen.
- More Hikes in Castle Rock Colorado: Castle Rock Trail, Waterfall at Castlewood Canyon, East Plum Creek Trail.
- Trail Map for Ridgeline Open Space Trail near Castle Rock: Trail Map Link
- Packing List: Always pack the 10 Essentials. Download our Hiking Guide to get the list and dayhiking packing checklist.
- Colorado Road Conditions: Colorado Road Conditions
- After the Hike: Crave Burgers
Weather
Map & Driving Directions
Click for Driving Directions
St. Vrain Mountain Hike
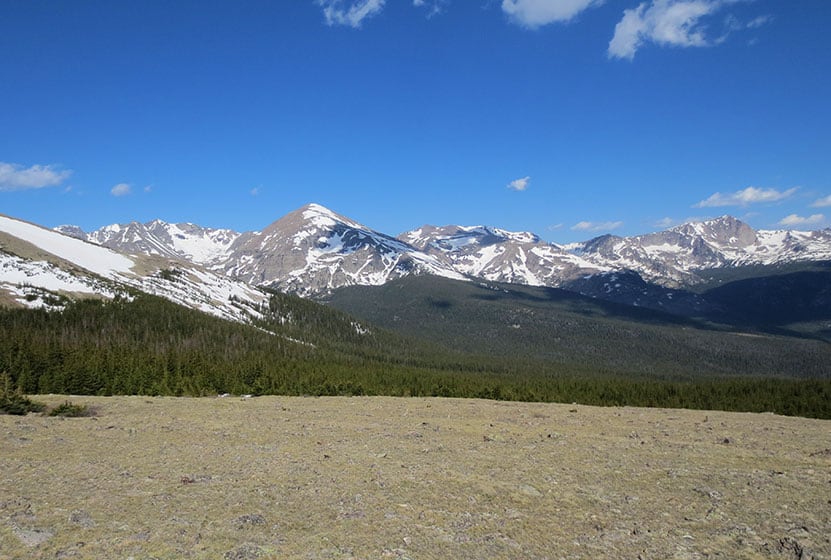
The St. Vrain Mountain trail is just a 3-mile hike into Indian Peaks Wilderness to stunning views of the rocky peaks of Wild Basin. Hike up and additional 1.5 miles from the RMNP boundary to the summit of St. Vrain mountain for 360-degree panoramic views of a wildflower-laden wilderness. Explore the full St. Vrain Mountain hike profile below for trail map, driving directions, and more.
Trail Snapshot: St. Vrain Mountain Hike
| Hike Distance | 9 miles Round Trip |
|---|---|
| Difficulty | Difficult |
| Duration | Approx 5-6 hrs |
| Trail Type | Out and Back |
| Starting Elevation | 8,800′ |
| Elevation Gain | Approx +3,200′to Summit of St. Vrain Mountain |
| Seasons | June-Sept. |
| Dogs | Allowed On Leash |
| Hike Trail Map | Click for a Map of St. Vrain Mountain Trail |
| Denver Drive Time | 1 hr 30 min |
| Driving Directions to St. Vrain Mountain Trailhead | Click for Google Map |
| Town Nearest Hike | Allenspark, Colorado |
| Beauty | Cascades, Panoramic Views, Wildflowers, Summit |
| Activities | Hiking, snowshoeing, photography |
Parking & Trailhead Information for St. Vrain Mountain
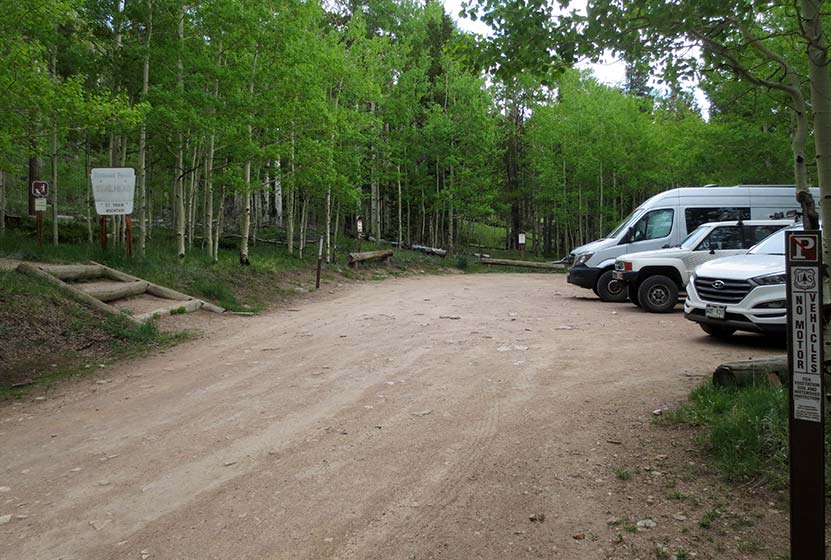
From Denver, take Interstate 25 to either 36 or 66 to Lyons. In Lyons, follow 7 to Allenspark. In Allenspark, turn left onto Ski Road - FR-107. This will be marked with a street sign and a home-crafted sign made out of an old pair of skis. Follow this dirt road as is weaves through Allenspark then a series of dispersed cabins for about 2 miles until the road terminates at the trailhead. There is parking for only about 8 vehicles at the trailhead. There is additional parking along the road, but make sure that you're not blocking cabin drives or tearing up the roadside. You may have to park a ways back down the road if crowded. I hiked this on the weekend and the lot was full around 8 AM. There are not restrooms or potable water at the trailhead.
The Hike: St. Vrain Mountain Trail
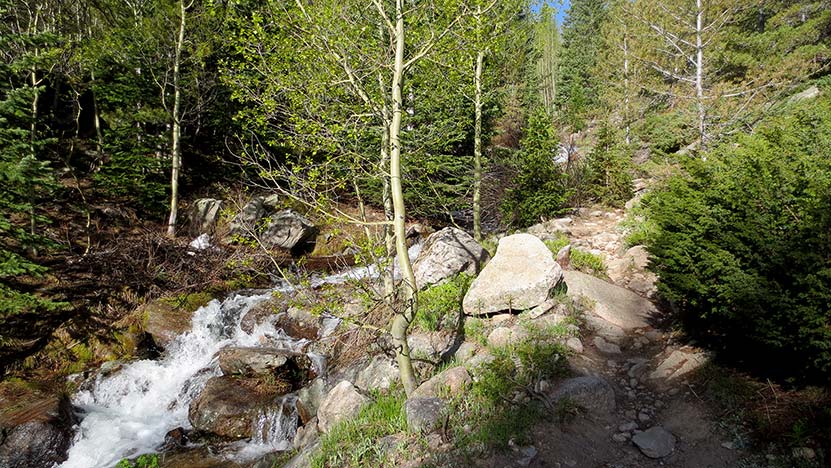
The hike begins in the shade of aspen, spruce, and lodgepole pine forest. This first segment is easy and gradual, getting steeper as the sounds of distant St. Vrain Creek grow louder and closer. Wildflowers become more prevalent and soon the trail begins to follow right alongside the course of the creek.
Then the switchbacks begin. I hiked this in late-May after a Winter when our snowpack was below normal. So it was snow-free until around mile 2. From about mile 2 to mile 3, intermittent snow covered about 3/4 of the trail. I didn't bring snowshoes but had it been early May, I definitely would have needed a pair. Trekking poles were essential for negotiating the trail and to keep from post-holing up to my waist. It could be done without poles, but I'd definitely recommend having them.
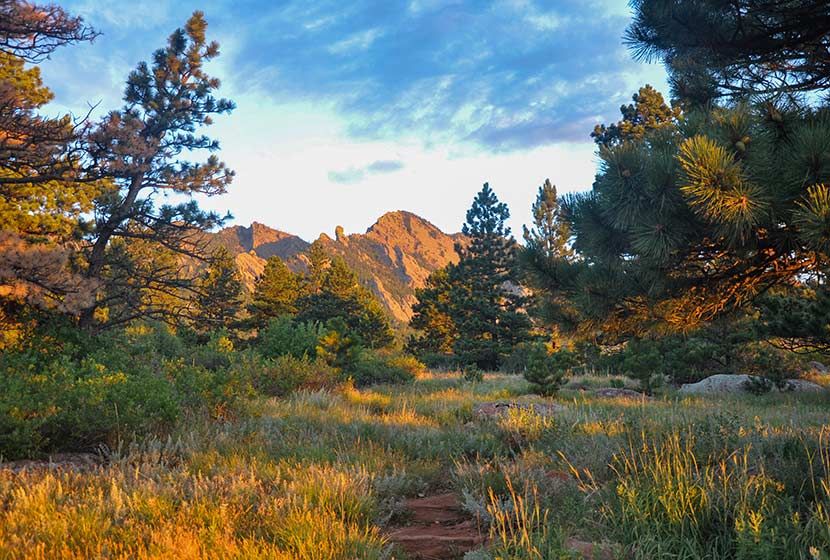
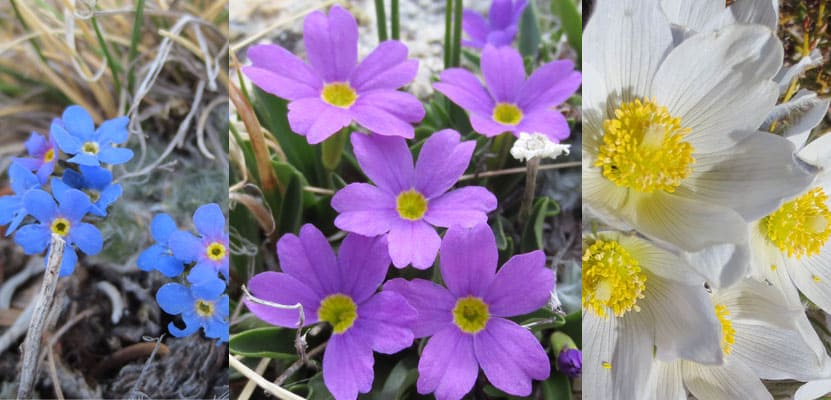
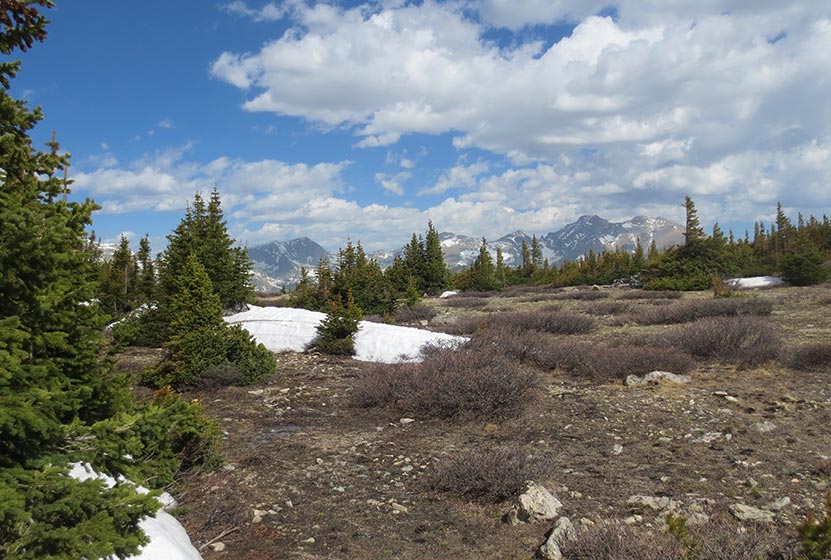
At treeline, things open up to blue skies and high-country tundra brightened by the many colors of summer wildflowers. In early-May, these were just beginning to bloom. However, come mid-June, the creek alongside the trail and these upper reaches of high-country should be replete with wildflowers.
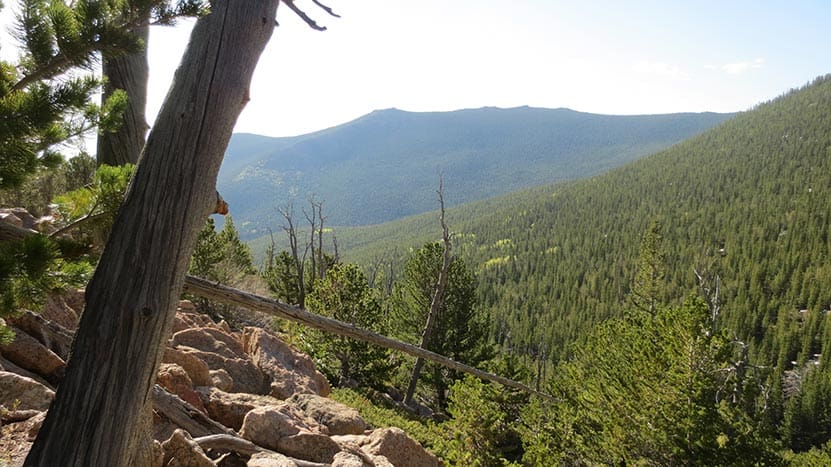
Once you crest the saddle, the views are outstanding. To the Northwest, the entire Wild Basin of Rocky Mountain National Park opens up before you. To the North, you'll find Meadow Mountain, elevation 11,632'. I met a local from Allenspark along the trail and he said the views from the summit of Meadow Mountain rival those of St. Vrain because of the perspective looking down into the Wild Basin area.
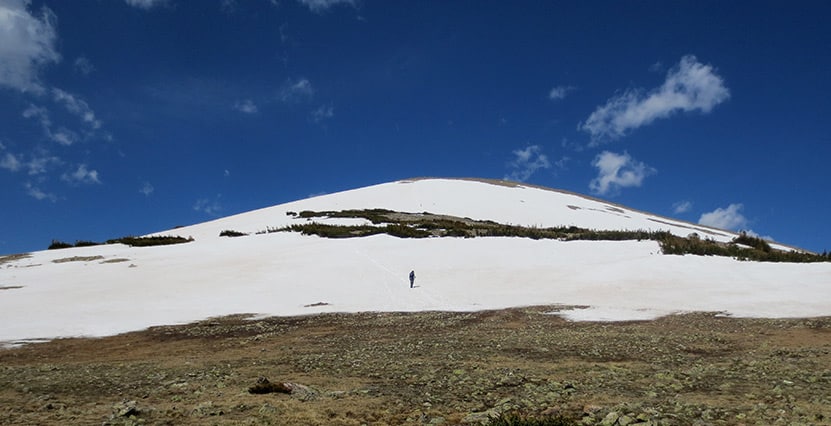
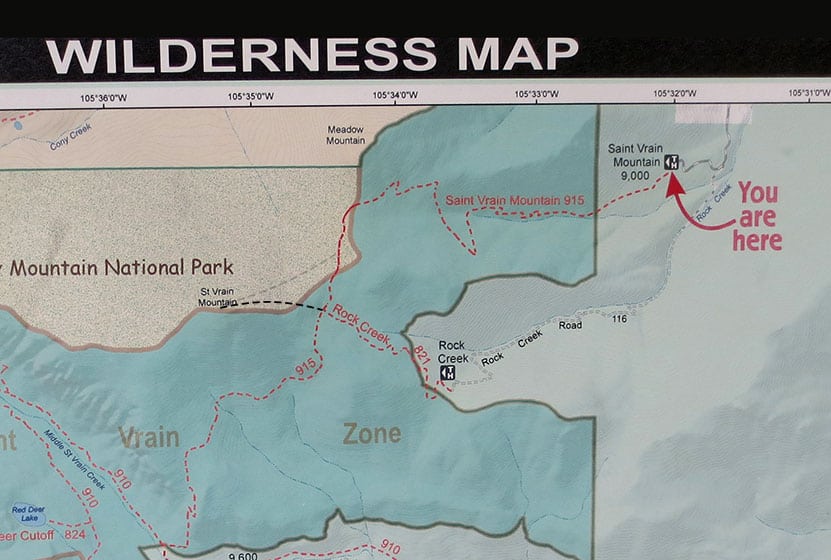
At mile 3, the trail enters Rocky Mountain National Park. From this point, I could see a faint trail in the snow leading up the rounded ridgeline of St. Vrain Mountain. It's about a 1/2 mile hike from the main trail to the summit with about 700 feet of elevation gain.
Below is a photo of the map found at the trailhead. I've added a dark-black dashed line to indicate the trail that goes from the junction with the Rock Creek Trail to the summit. The lighter-grey dashed line indicates the path hikers were taking across the snow to the slopes of St. Vrain Mountain. Be sure to hike on durable surfaces (snow, rock, trails) on the summit approach to protect the fragile tundra environment.
Tips & Resources for Hiking St. Vrain Mountain Trail
- TIP: Trekking Poles are a must on this trail. They will be especially helpful to negotiate the snow that covers the upper reaches of the trail in late-Spring through early Summer.
- TIP: Apply sunscreen as the trail is mostly exposed to the sun.
- Similar Hikes: Flattop Mountain, Windy Peak, Carpenter Peak.
- Trail Map: St. Vrain Mountain Trail
- Packing List: Always pack the 10 Essentials. Download our Hiking Guide to get the list and dayhiking packing checklist.
- Colorado Road Conditions: Colorado Road Conditions
- After the Hike: Meadow Mountain Cafe in Allenspark, CO
Weather
Map & Driving Directions
Click for Driving Directions