Crystal Mill Hike: Iconic Colorado
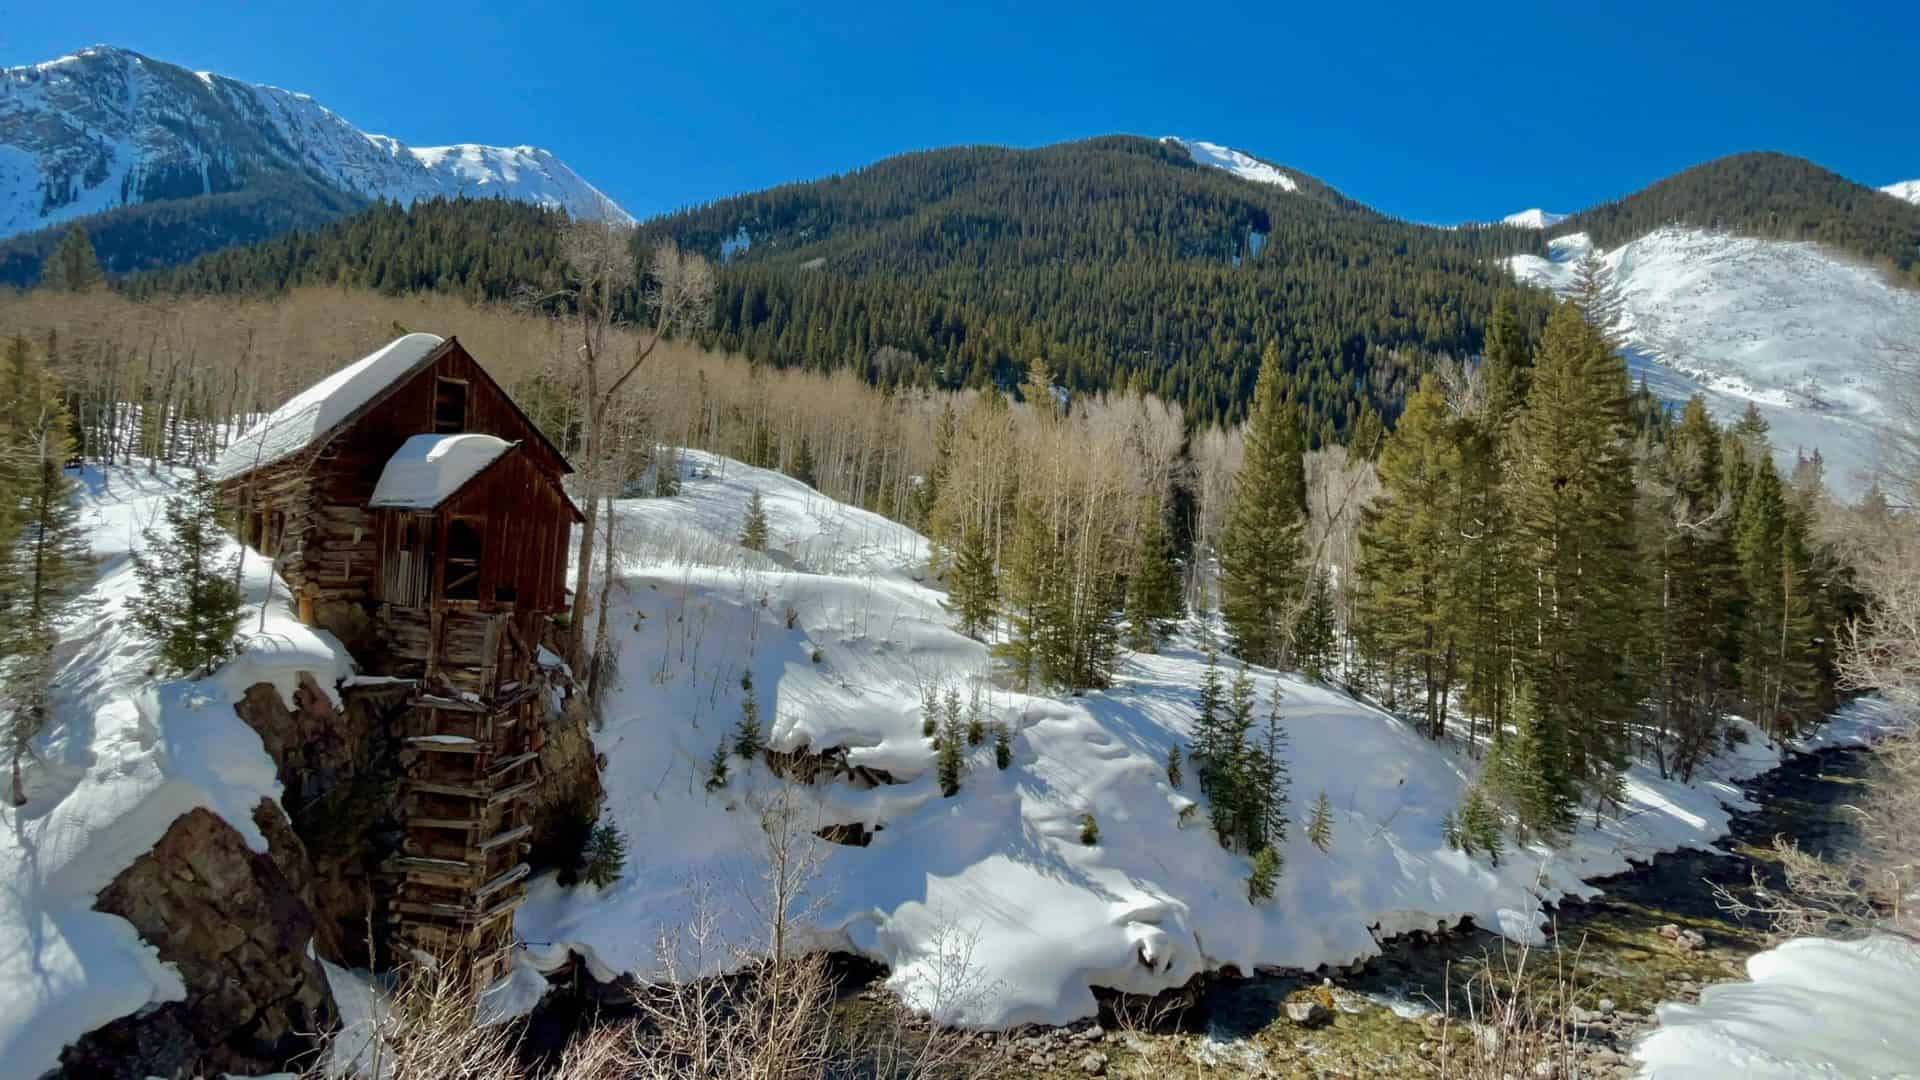
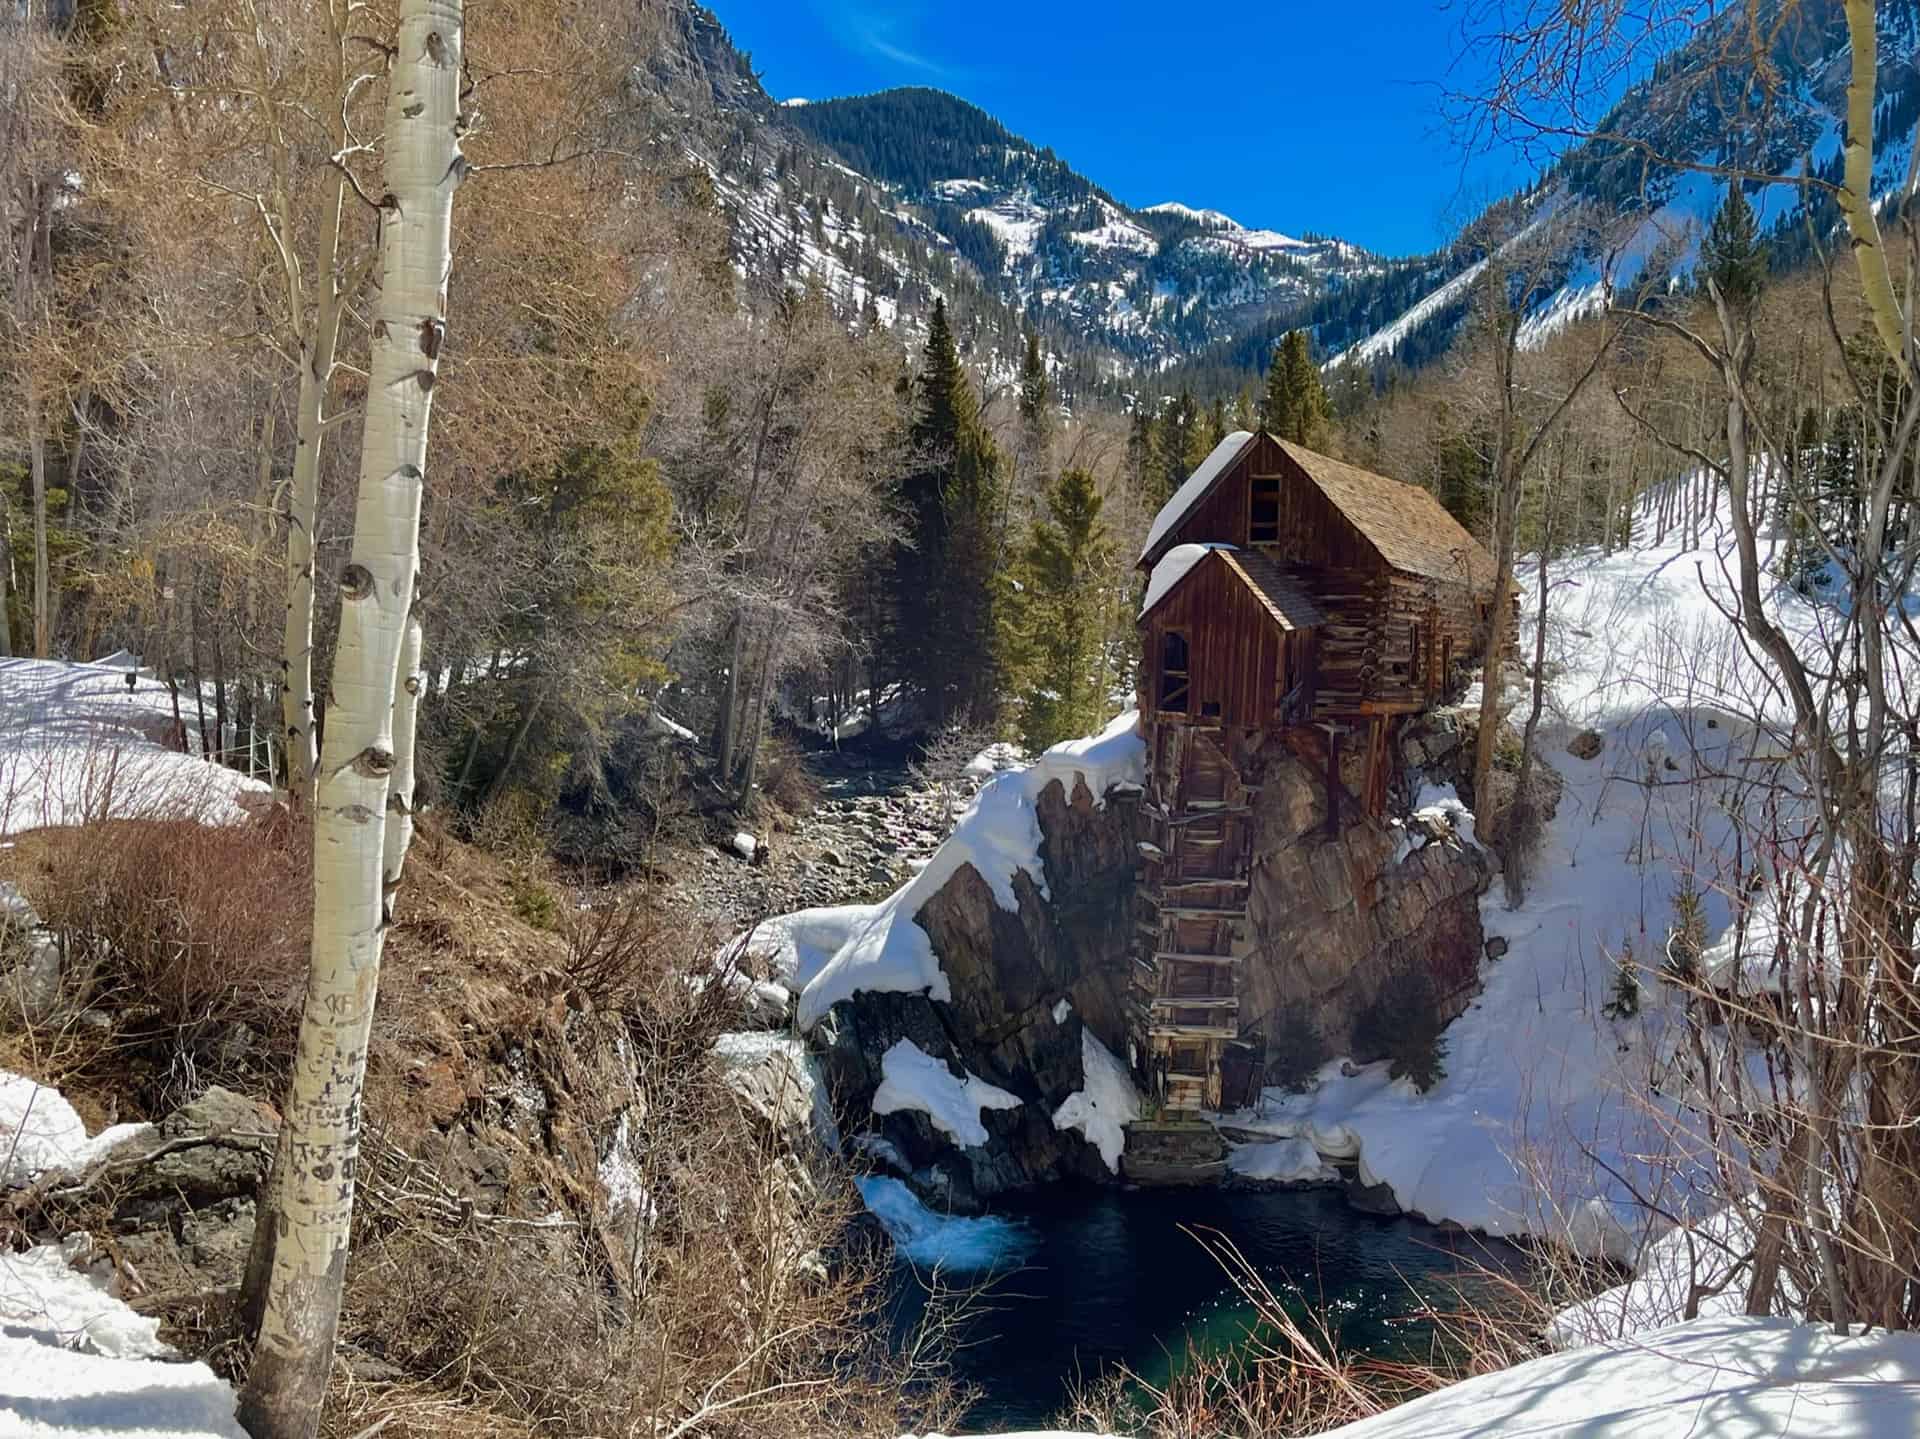
You've likely seen the photo, but may not have known how to reach it: Crystal Mill. The legendary Old West structure, built in 1892 during the silver boom, stands tall - yet precariously as ever - in the gorgeous back county of the White River National Forest. The Crystal Mill remains one of the most photographed places in the state, and appears on many Top 10 lists for the mountain west, weaving its way into the heart of locals and tourists alike.
The storied mill carries its mystery into the present day. Efforts are underway as of 2021 to preserve it. Up until now, the landowners and waves of volunteers performed small repairs to stabilize it. More than just a pretty photo spot, this Instagrammer's dream also supports layers of the local economy. When visiting, you will see a donation box for an opportunity to contribute to its preservation. Also, if you want to proceed beyond the rope at the site, you need to pop into the General Store in Marble to secure and sign a waiver (as of this post, it cost $10). Please be respectful to the private property owners along the entirety of FR314.
Explore the full Crystal Mill Hike profile below for trail map, driving directions, and more tips and details to help you enjoy this classic Colorado site!
Trail Snapshot: Crystal Mill Hike
| Hike Distance | 9 miles Round Trip |
|---|---|
| Difficulty | Easy to Moderate |
| Duration | Approx 4-5hr |
| Trail Type | Out-and-Back |
| Starting Elevation | 8,150′ |
| Elevation Gain | Approx +850′ |
| Seasons | All Seasons |
| Dogs | Allowed On Leash |
| Hike Trail Map | Click for Trail Map of Crystal Mill Hike |
| Denver Drive Time | approx. 4 hours |
| Driving Directions to Marble, CO | Click for Google Map |
| Town Nearest Hike | Marble, Colorado |
| Beauty | River valley, iconic Crystal Mill, Ghost Town |
| Activities | Hiking, Snowshoeing |
Parking & Trailhead Information for Crystal Mill
From Denver, heading west on I-70, take exit 116 toward Snowmass/Aspen, which is State Route 82. Follow 82 East for approximately 12 miles to the turn off for State Route 133, appearing on the right. Follow 133 South through Carbondale and proceed for approximately 21 miles. The road passes through Redstone, where curious travelers can visit the historic "Coke Ovens". (Nope, this is not the soft drink or the narcotic!) Shortly after, turn left onto County Road 3. About six miles down CR3 the road enters Mable, CO.
County Road 3 becomes Park Street; curve left (north) onto West 2nd Street, then right (east) on West 2nd Street. Turn left (north) onto West 1st Street, then right onto Main Street. Turn left (north) on East 2nd Street, then right (east) on Silver Street, heading toward and around Beaver Lake. (If all of that sounds remarkably confusing, rest easy. Marble is very small, and there are signs indicating the direction toward Crystal Mill. It's simpler than it reads!) After the lake, at what visibly feels like the end of the street, there is a small parking lot on the left. A sign designates the rest of the road is suitable for high clearance vehicles, only.
Note: Along the way, about 18 miles after the turnoff onto 133 South and just beyond Redstone, the Hayes Creek Falls Waterfall graces the side of the road. This optional stop provides a burst of refreshment from the drive -- or from the 9-mile Crystal Mill Hike!
The Hike: Crystal Mill
From the parking lot, the trail begins by continuing straight up the road to the east. Slightly beyond the 3/4-mile mark, the road splits. Up and to the left leads to Lead King Basin; the Crystal Mill hike follows the road to the right and down the hill, along Forest Road 314 (look for the small brown sign with "314" aligned vertically), a.k.a. CR3.
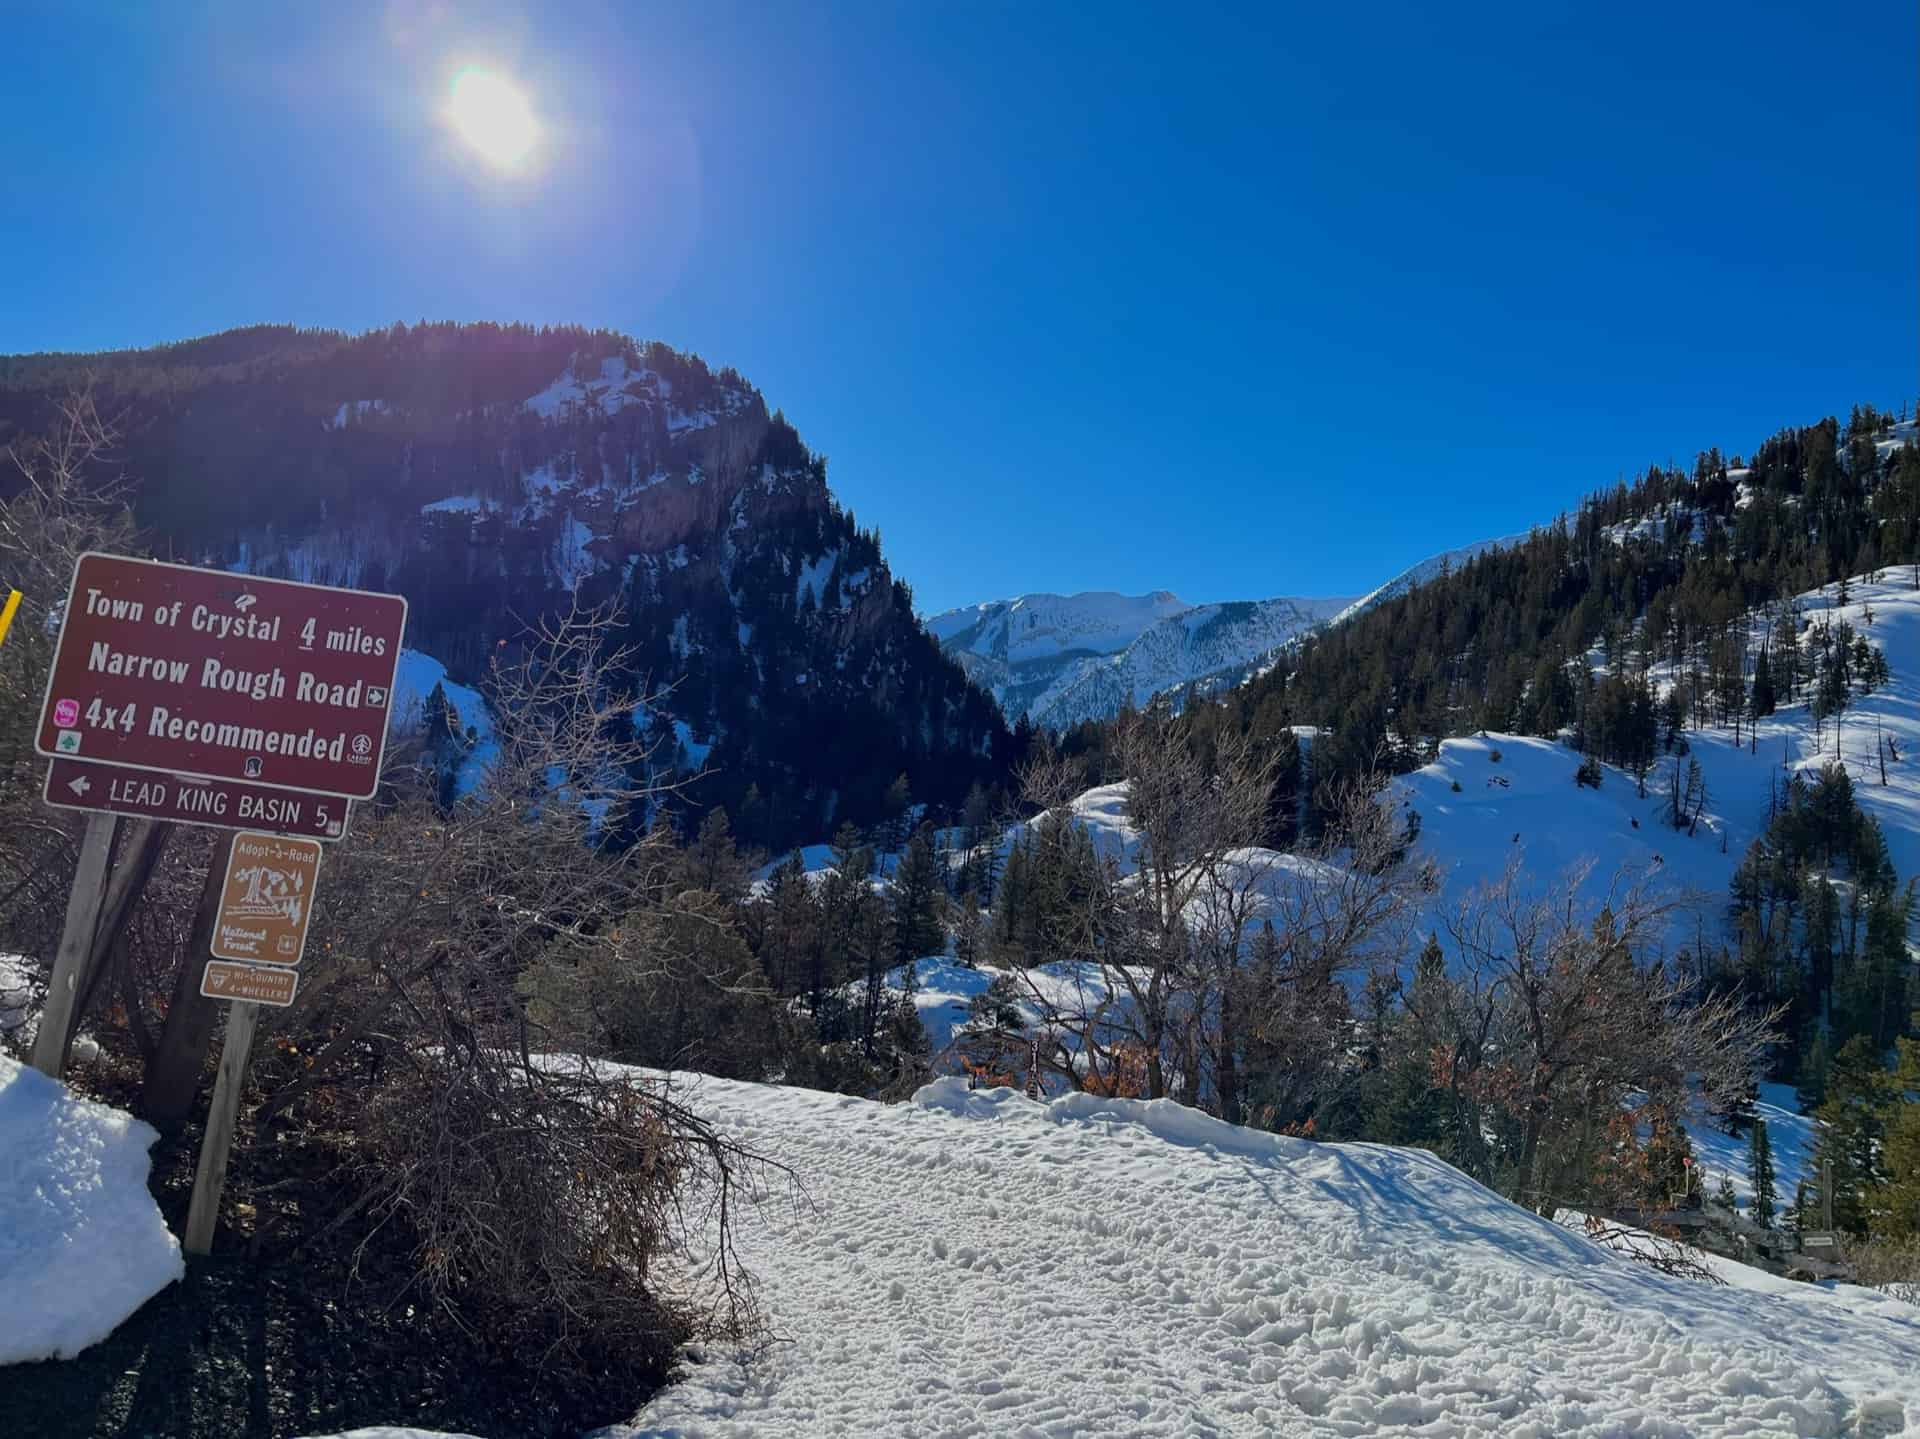
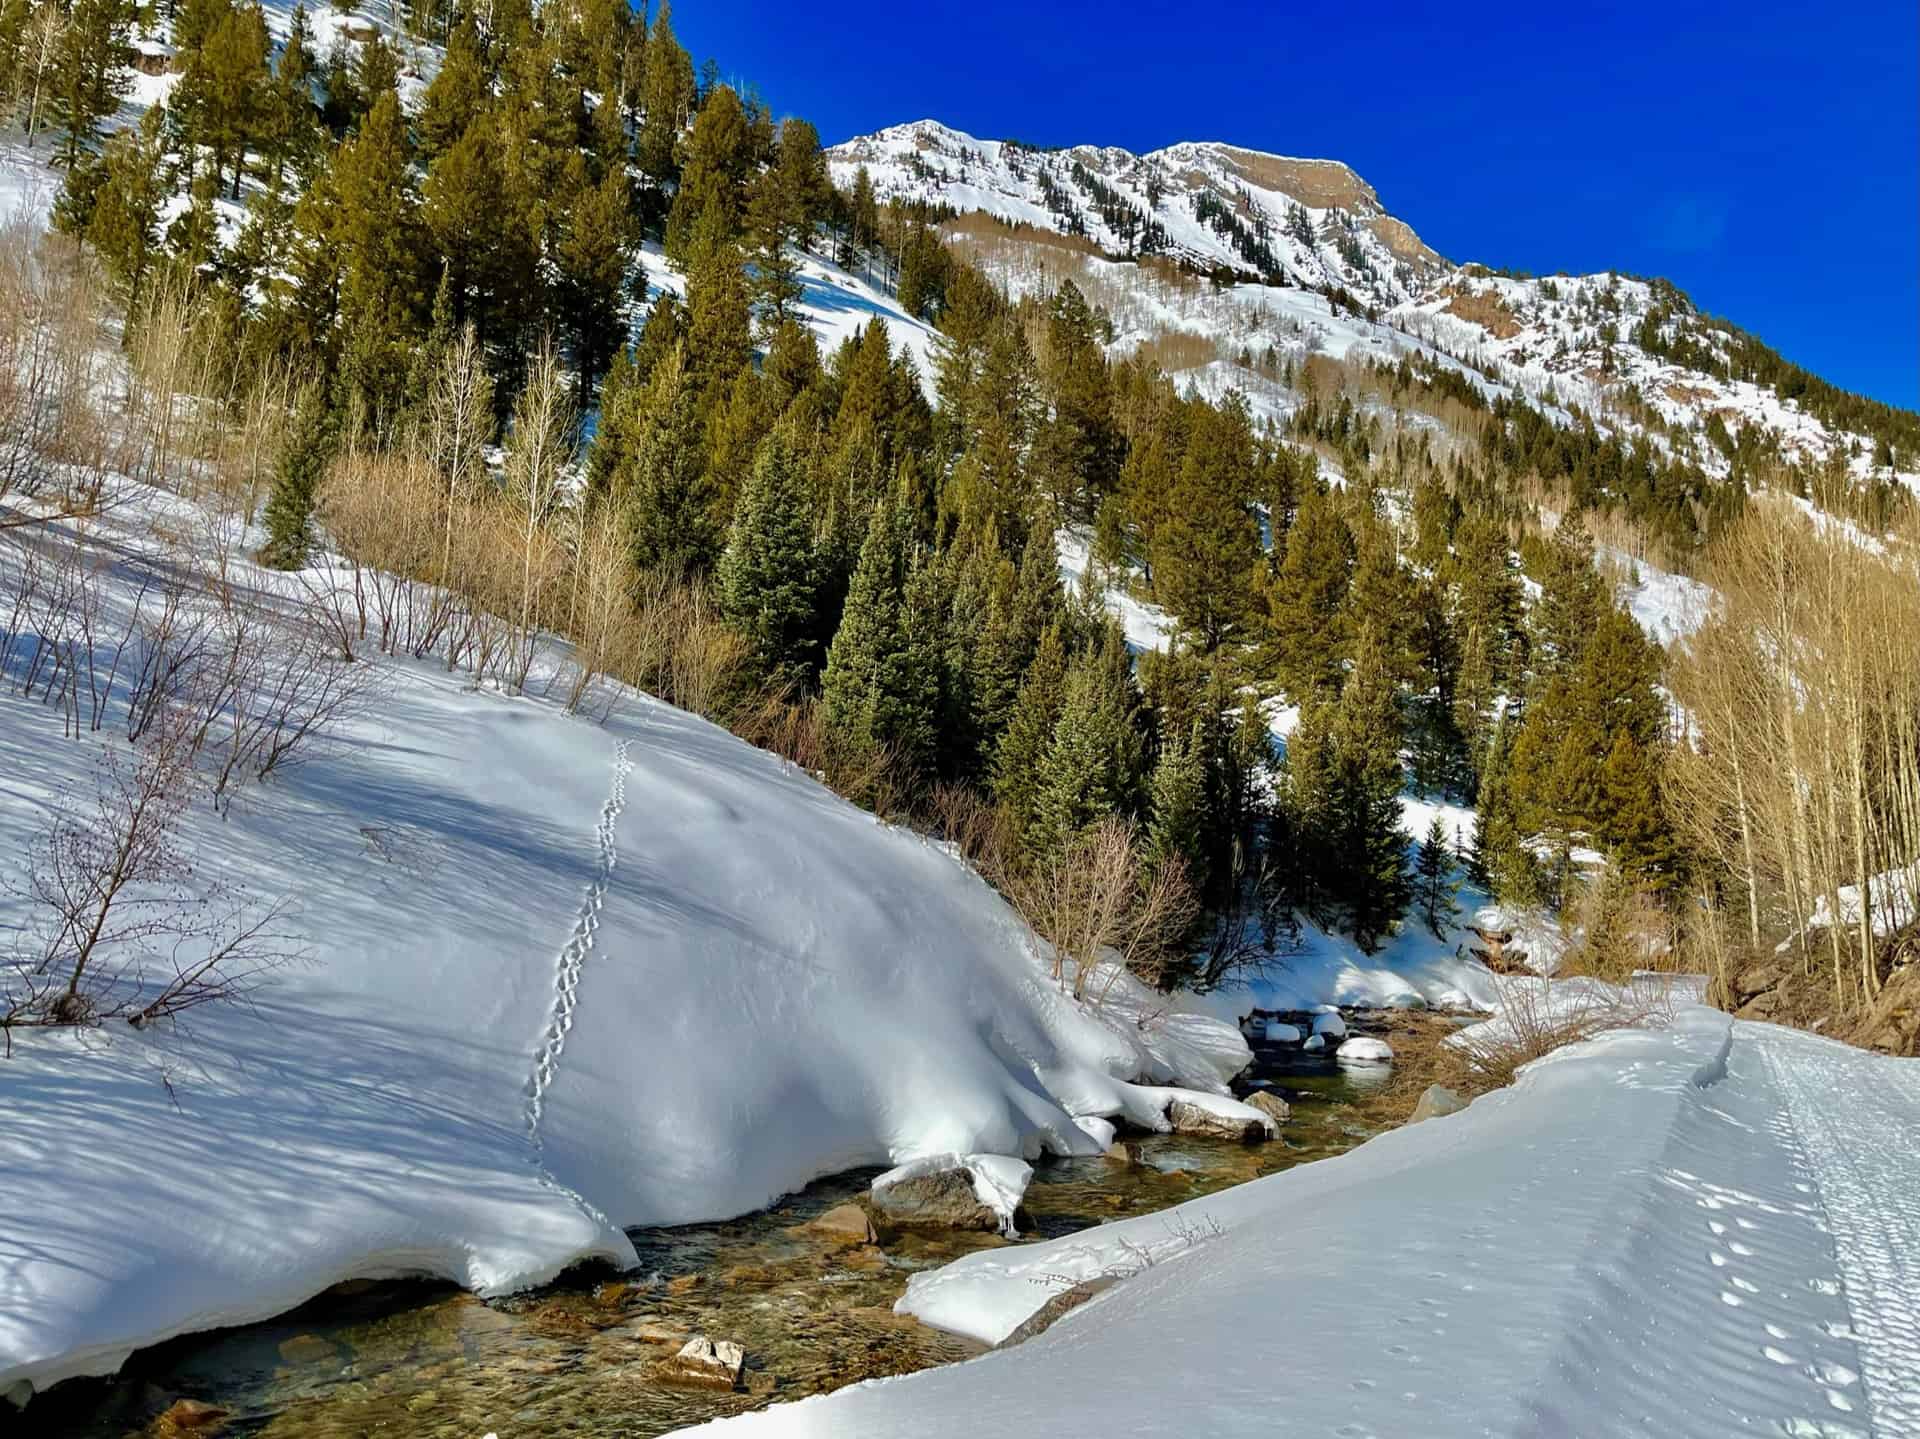
Now, set the cruise control. The stroll from here clocks just under 4 miles one-way. During the summer, the path often attracts ATVs and 4x4 enthusiasts; the fall brings breath-taking aspen colors and their fans. This post documents a winter trek, on which a single snowmobile passed by. Within this blessed solitude, the river basin, Crystal Mill, and the ghost town of Crystal stood frozen in time and silence. On that note, wise hikers will double-check the Colorado Avalanche Information Center prior to stepping out in adventure. While this route typically poses minimal risk, be alert to the slopes above the road and learn the signs of compromised snow fields. At the 1-1/4 mile mark, the trail wraps around the right side of Lizard Lake, often a destination in itself.
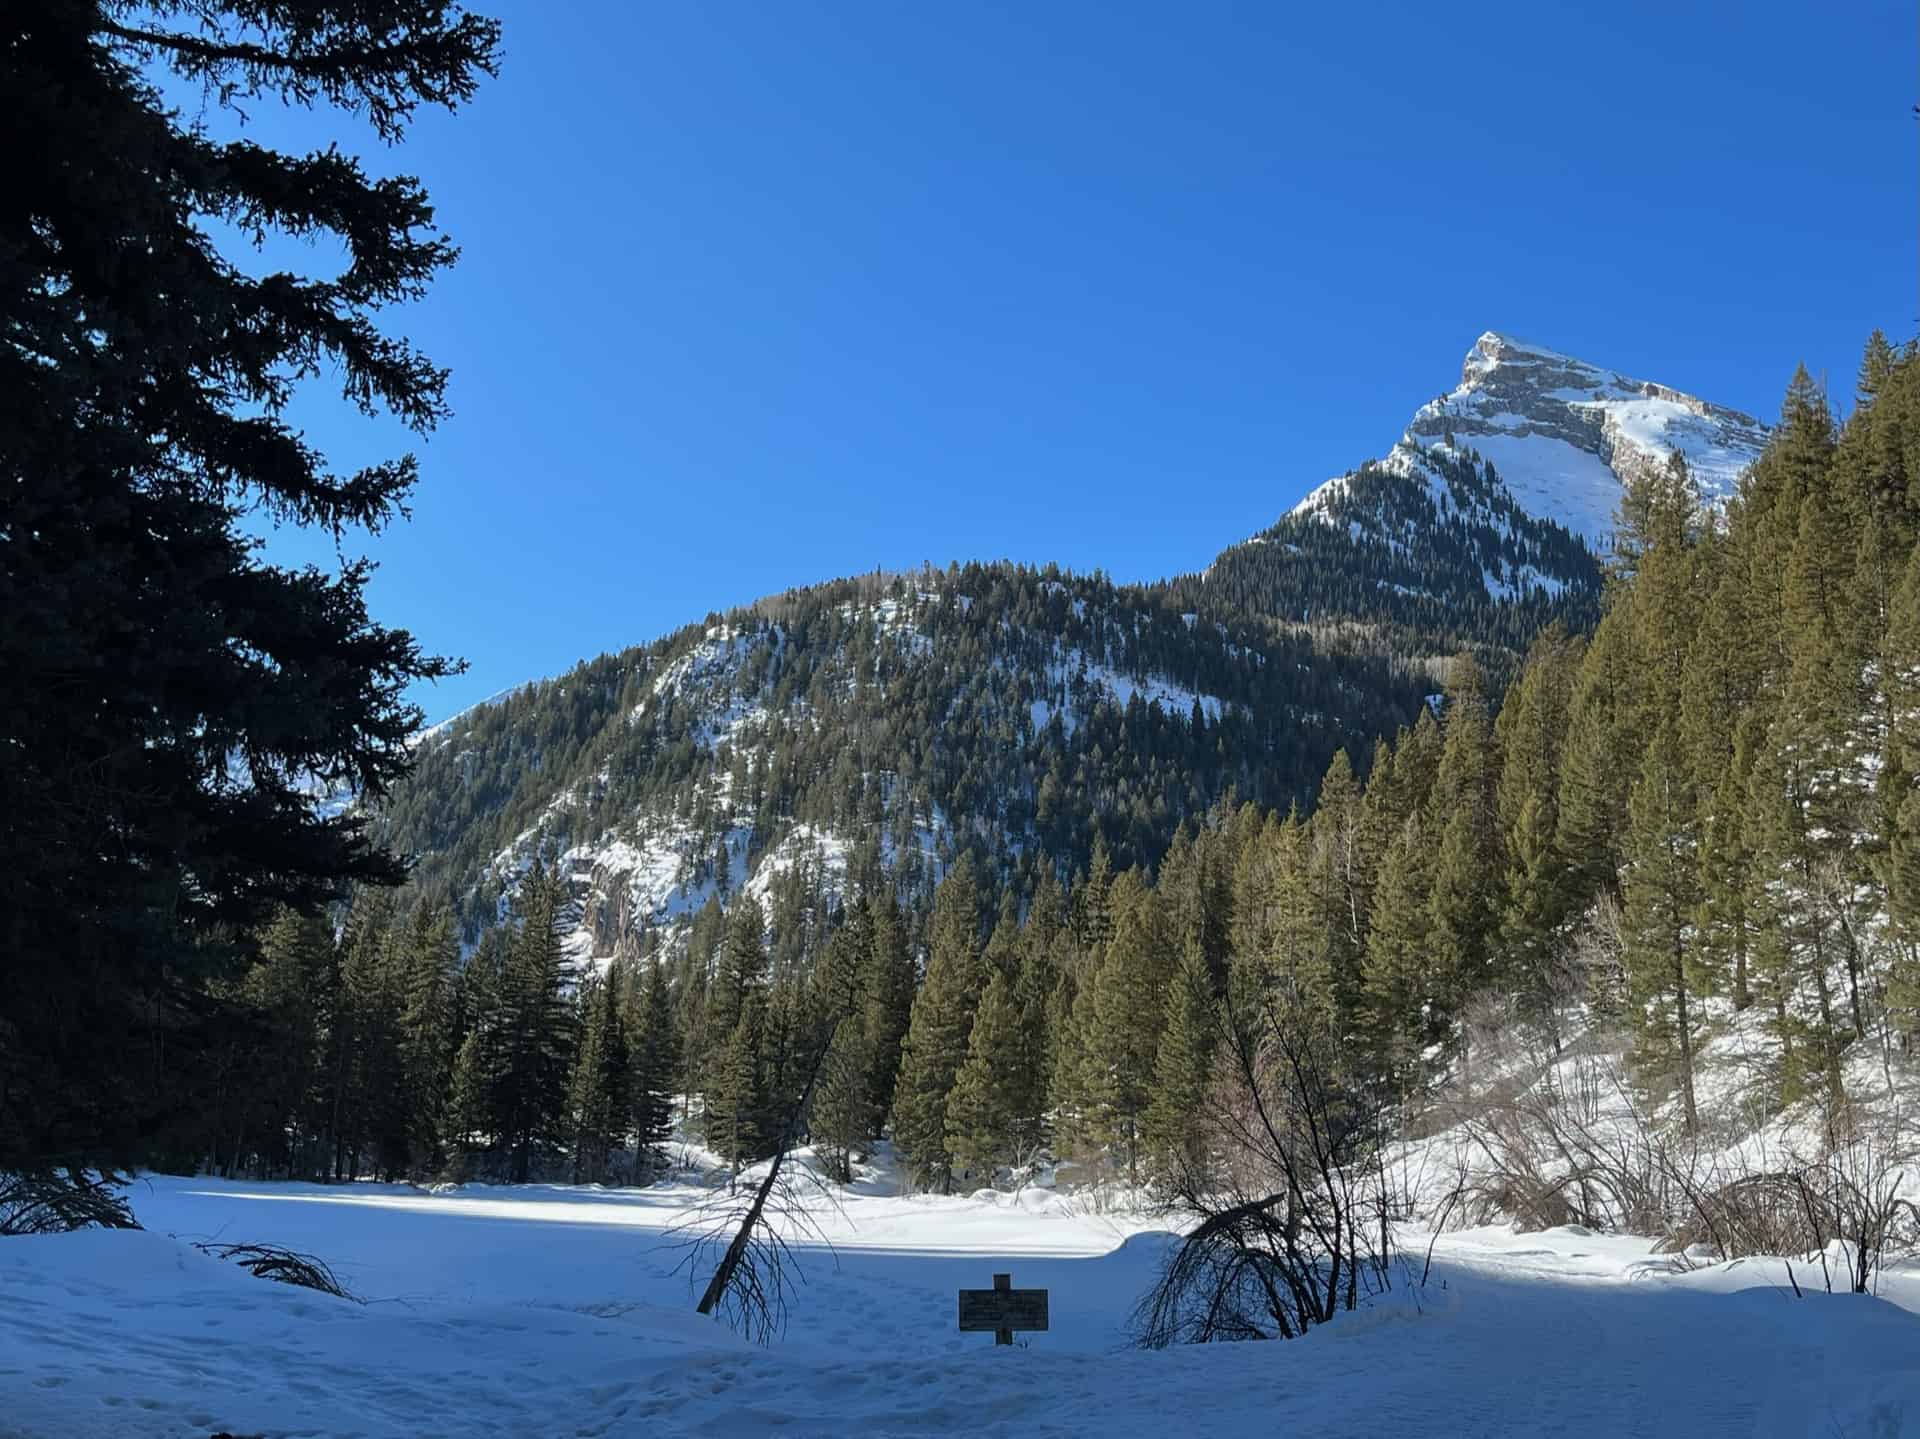
From the southeast end of the lake, the trail drifts leisurely on a ridge above Crystal River. No matter the season, the river valley floor sparkles. With gentle elevation changes and no risk of taking a wrong turn, hiking the remaining 3-1/4 miles is pure delight. Upon reaching the mill, the awe-inspiring nature of this historic landmark is impossible to miss. And if time and weather permit, those with energy and curiosity can continue up the road another a few paces to the actual town of Crystal. During the summer months, this often serves as an outpost for impromptu picnics. To return to the trailhead, reverse the route.
Crystal Mill resides on my Mom's all-time "Must see!" list in Colorado. Whether by foot or 4x4, I hope she gets to see it and take 1,000 pictures.
Tips & Resources for Hiking to the Crystal Mill
- TIP: While the remote location deters some, the sheer popularity of the site beckons people from all over. The small parking lot fills fast in summer and autumn, and even in the winter it can be full. Consider a mid-week visit or plan to go early.
- Trail Map: Crystal Mill Hike
- Packing List: Always pack the 10 Essentials. Download our Hiking Guide to get the list and dayhiking packing checklist. Additionally, take some time to review our 10 Winter Hiking Tips.
- Colorado Road Conditions: Colorado Road Conditions
- After the Hike: Get some back country BBQ at Slow Groovin'! Just note carefully that they operate from May 1st - October 31st.
Weather
Map & Driving Directions
Click for Driving Directions
Mayflower Gulch Trail near Copper Mountain
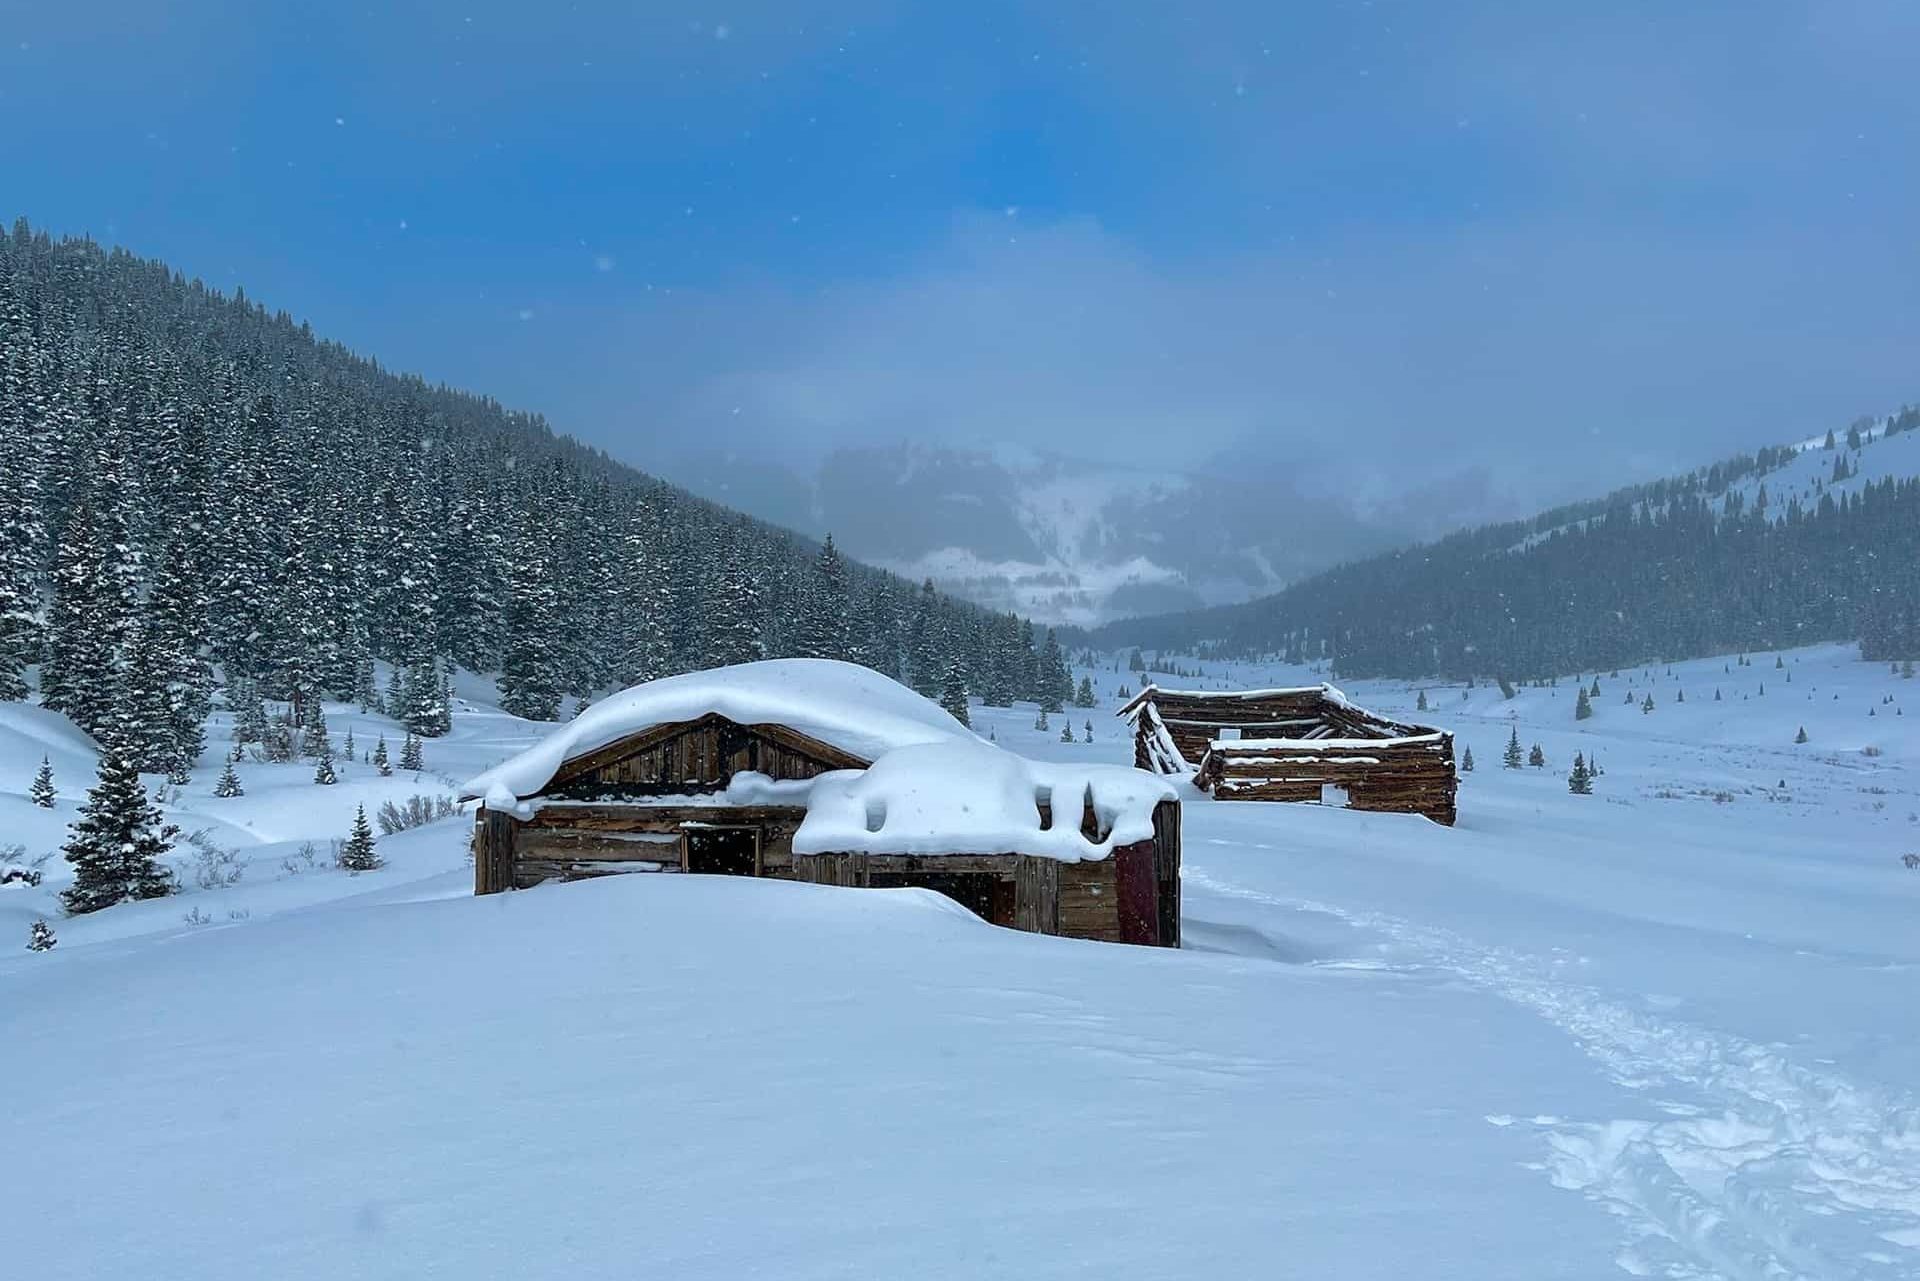
Easy parking. Gentle elevation. Three miles round trip. And a ghost town? The Mayflower Gulch Trail gives you all this and a shockingly gorgeous basin to behold. On top of all this, the hike works well for families, especially if there exists any curiosity about the old west. The spacious gulch invites visitors to wander around and discover the fringes...a running stream, abandoned mines, and ridge line views. Caution: DO NOT inspect abandoned mines or even walk too closely; enjoy them from a distance! They can have unstable internal structures and entrances.
Explore the full Mayflower Gulch Hike profile below for trail map, driving directions, and more tips and details to help you enjoy this old west adventure near Denver.
Trail Snapshot: Mayflower Gulch Trail
| Hike Distance | 3 miles Round Trip (longer if exploring) |
|---|---|
| Difficulty | Easy to Moderate |
| Duration | Approx 2-3hr |
| Trail Type | Out-and-Back |
| Starting Elevation | 11,000′ |
| Elevation Gain | Approx +600′ |
| Seasons | All Seasons |
| Dogs | Allowed On Leash |
| Hike Trail Map | Click for Trail Map of Mayflower Gulch Hike |
| Denver Drive Time | 1.5 hours |
| Driving Directions to Mayflower Gulch | Click for Google Map |
| Town Nearest Hike | Copper Mountain, Colorado |
| Beauty | Valley basin, 13ers, Ghost Town |
| Activities | Hiking, Snowshoeing, Cross-country skiing |
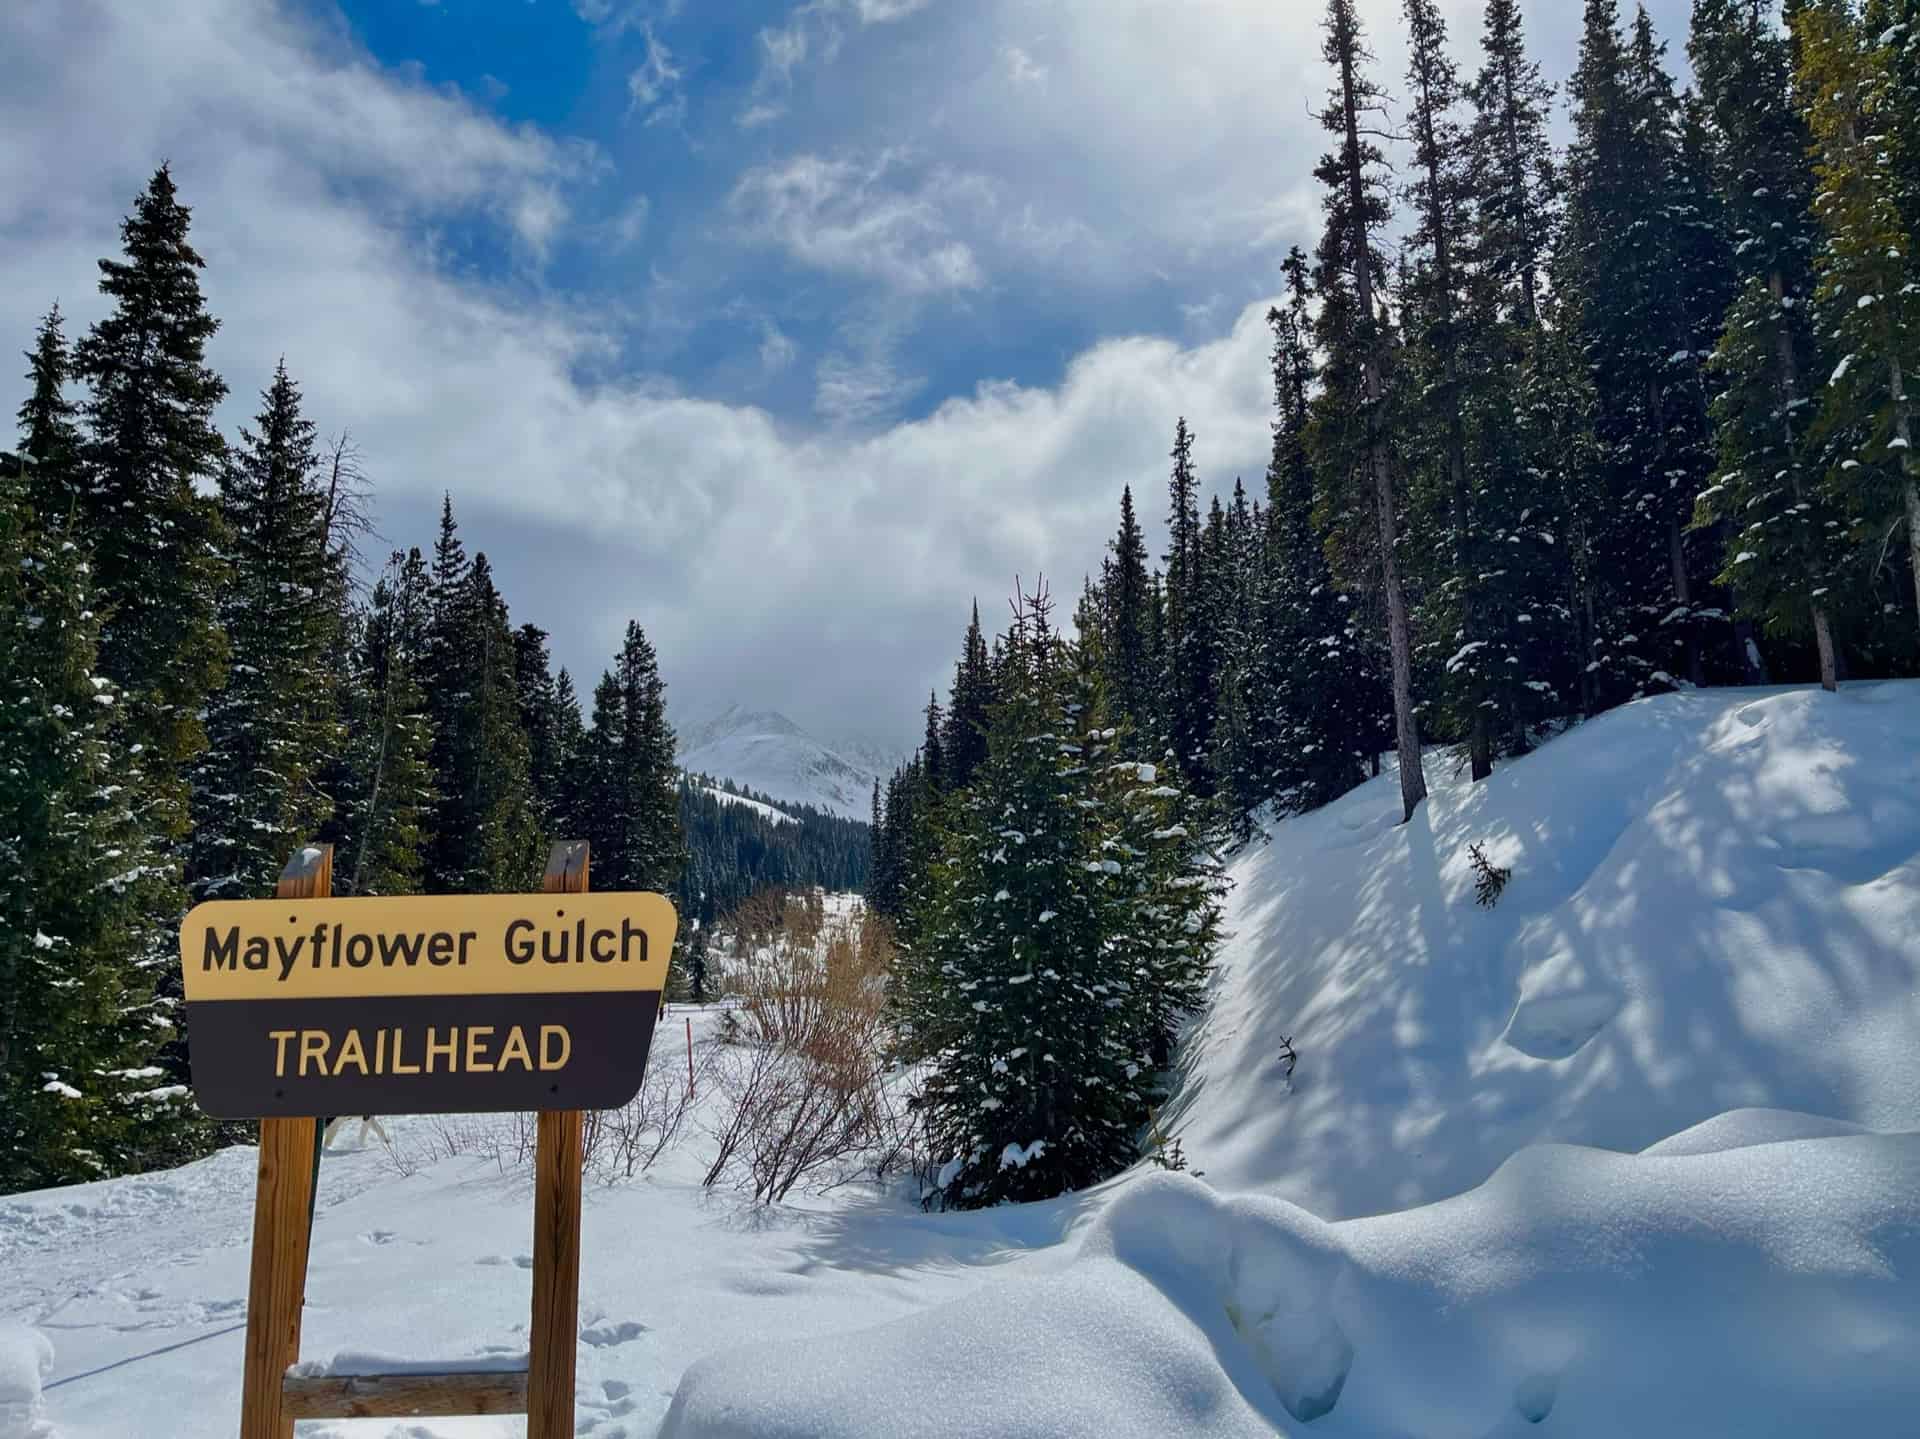
Parking & Trailhead Information for Mayflower Gulch
From Denver, heading west on I-70, exit 195 for Copper Mountain. The road curves to the left, heading south into the resort area. Only six miles later along Highway 91, the free parking appears on the left (east), immediately after a short bridge over Mayflower Creek.
The Hike: Mayflower Gulch Trail
From the trailhead marker, the trail proceeds straight for approximately 1.5 miles. It's that simple! Meandering through pines, bordering the actual Mayflower Creek, hikers can devote almost all of their attention toward experiencing the trail and its surroundings. A mining remnant about 1/2-way up foreshadows the ghost town and abandoned mines in the peak-ringed basin. 4x4 vehicles are permitted along this route during the summer, so keep an ear open. Immediately before the valley floor, a gate and small parking lot indicate the destination reached.
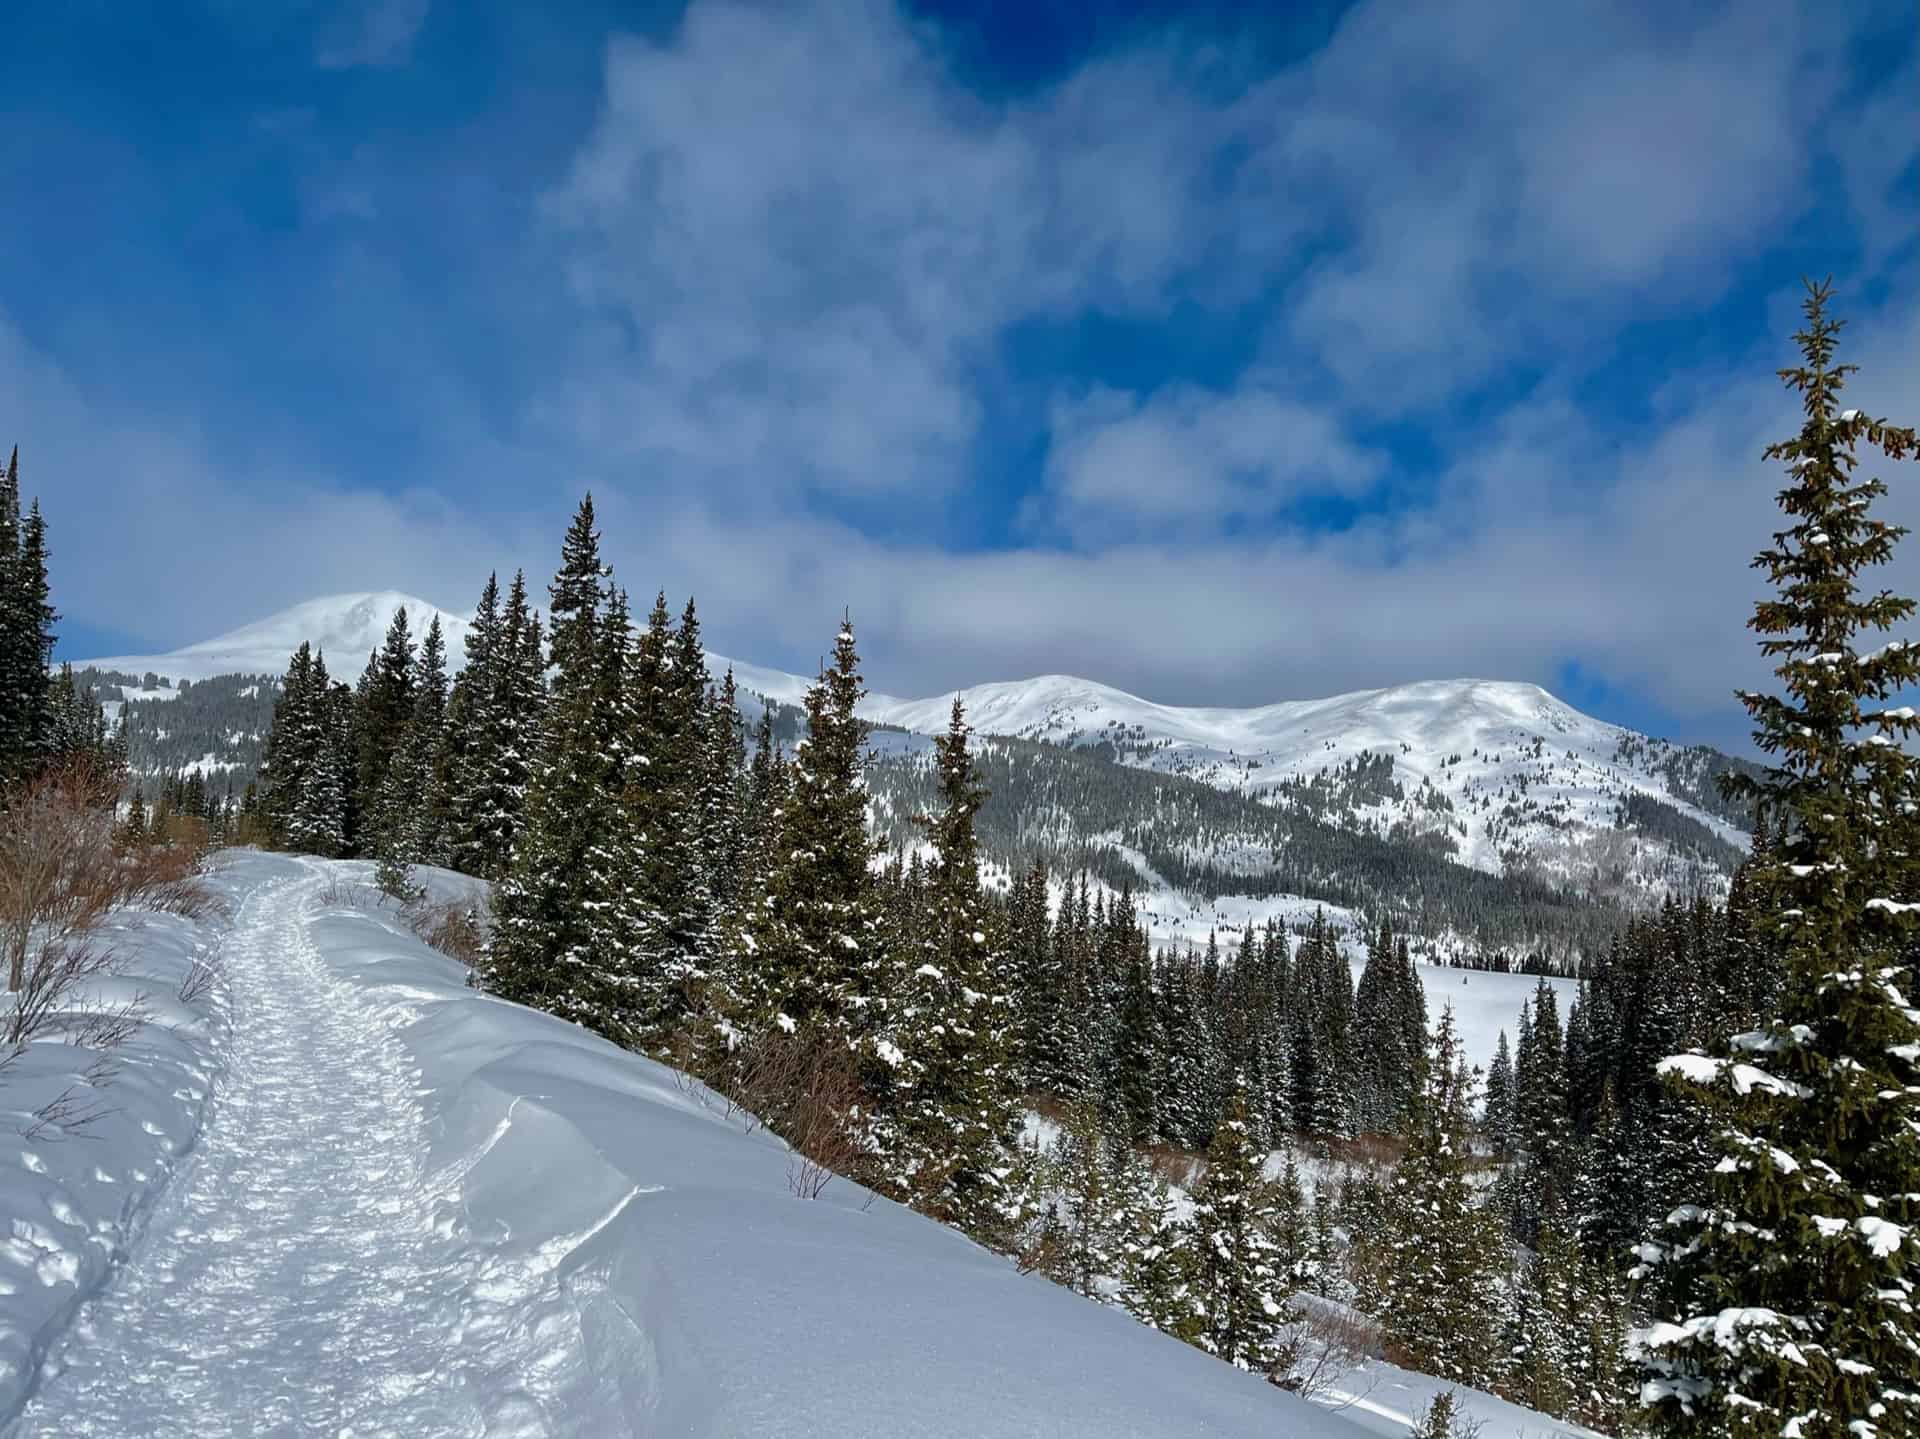
Some advanced hikers double-back and gain the ridge to the north. (Note: do not attempt without GPS, a reliable map, and alerting others to the plan.) This leads up to Atlantic Peak, a 13er sitting between two others -- Pacific Peak to the north and Fletcher Mountain to the south. Both Atlantic Peak and Fletcher Mountain tower over the gulch, so whether one views them from above or below, they greet visitors with majesty. After strolling the valley floor and taking in the gorgeous views, the return hike simply reverses the route, following the trail back down and out of the valley.
Tips & Resources for Hiking Mayflower Gulch
- TIP: Due to the ease of access, parking can fill fast, even in the winter. Also in the winter or early spring, "ski traffic" along I-70 can be unusually heavy on weekends during the morning and evenings. Therefore, this makes an excellent mid-week rest day to take a break from the slopes!
- Trail Map: Mayflower Gulch Trail
- Packing List: Always pack the 10 Essentials. Download our Hiking Guide to get the list and dayhiking packing checklist. Additionally, take some time to review our 10 Winter Hiking Tips.
- Colorado Road Conditions: Colorado Road Conditions
- After the Hike: Summer or winter, grab a slice at Mamma's Italiano! If there were a rebel's daughter who camped in the ghost town up in the gulch, she'd likely eat here and blend in with the menagerie of visitors.
Weather
Map & Driving Directions
Click for Driving Directions
Beaver Brook Trail at Windy Saddle Park
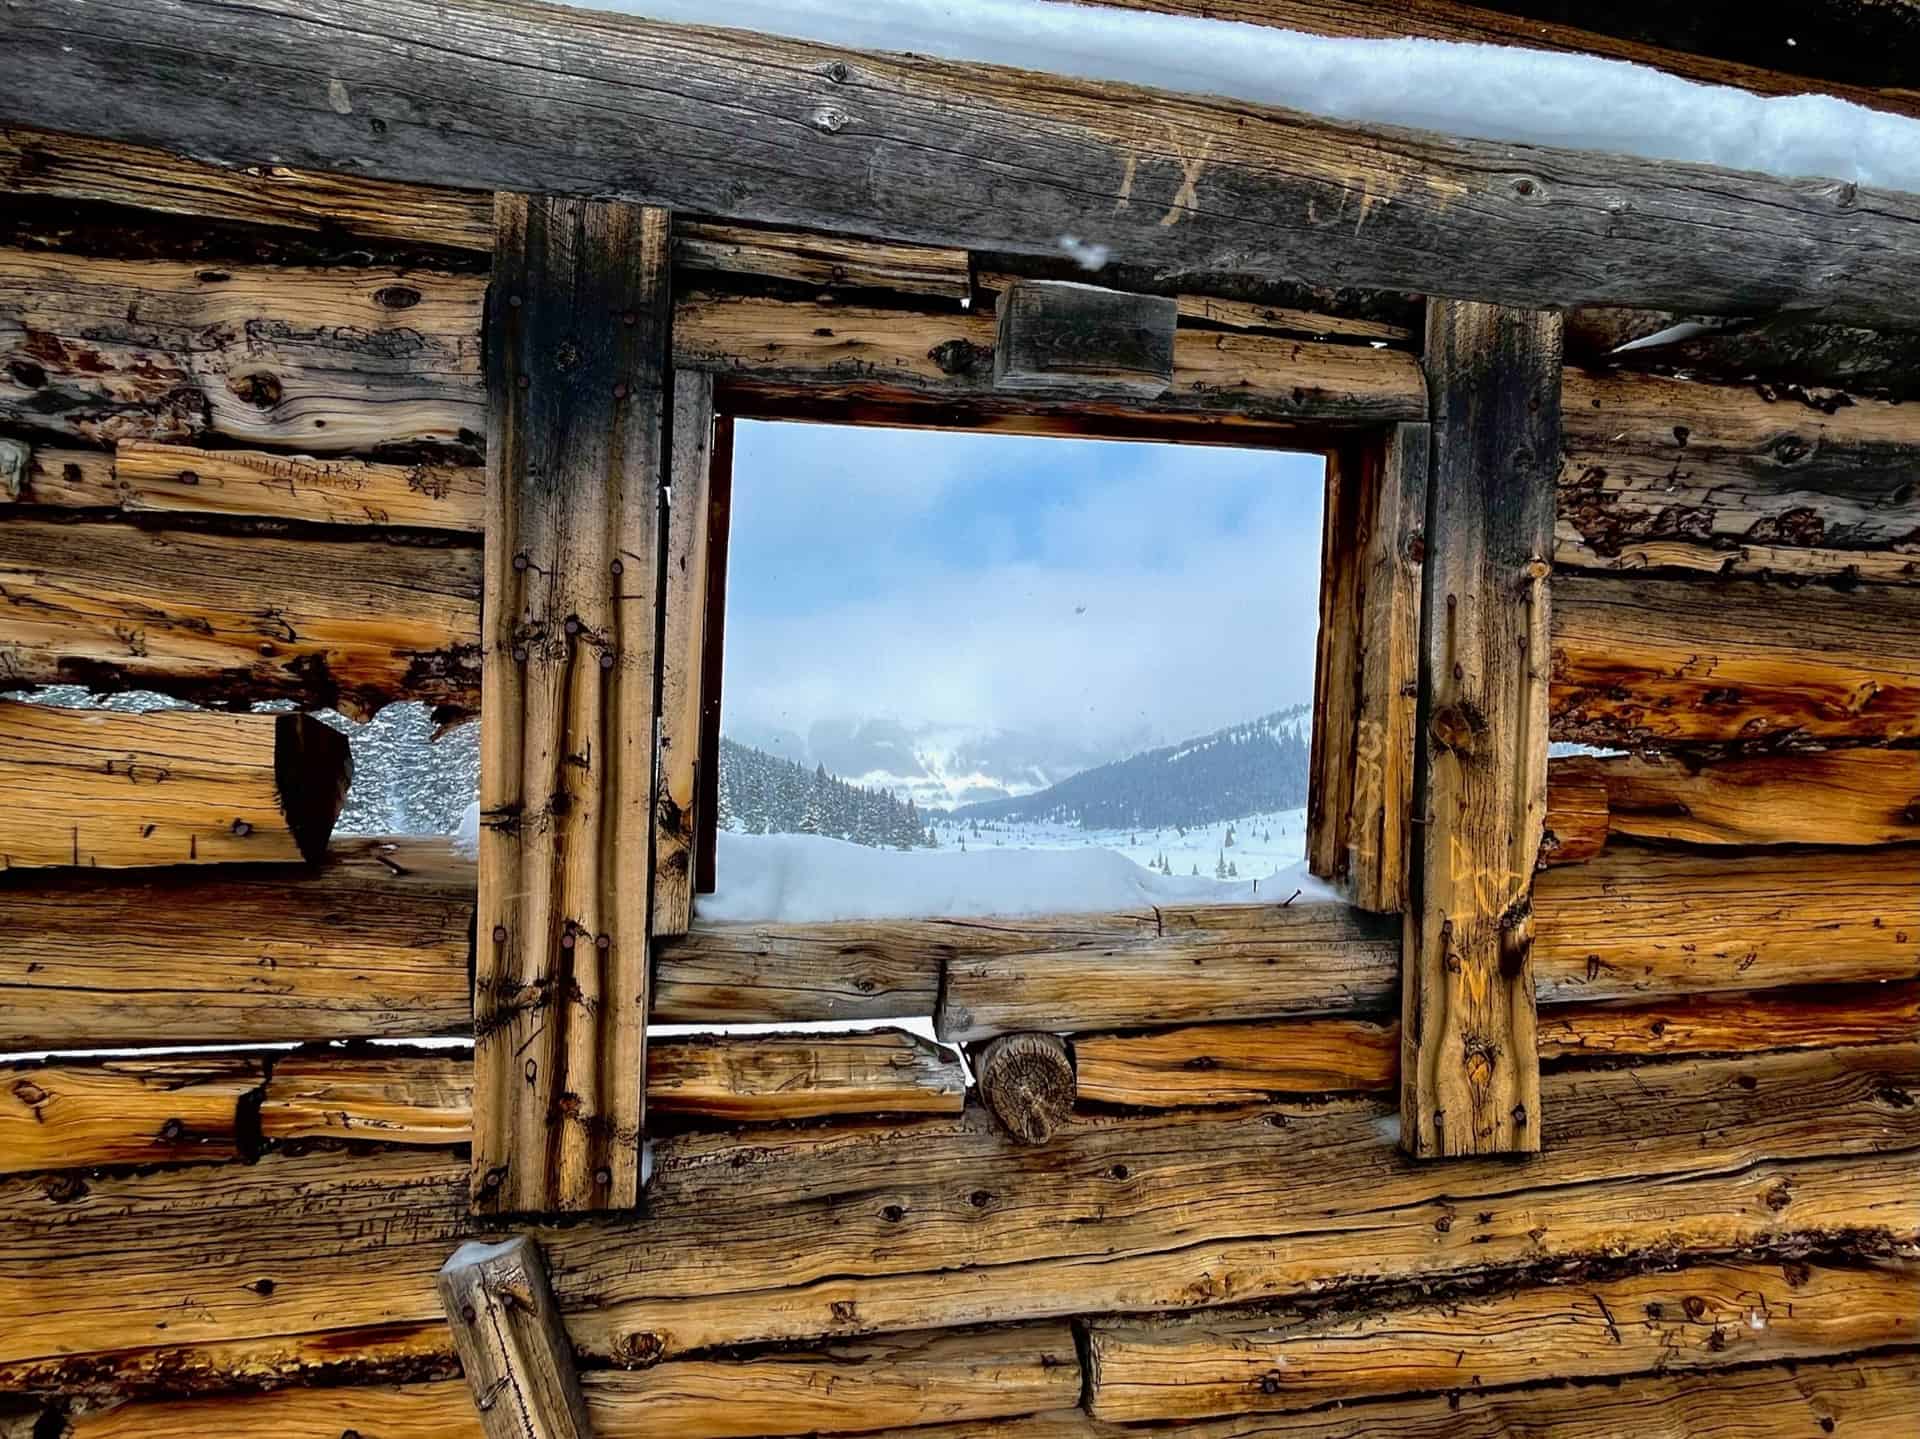
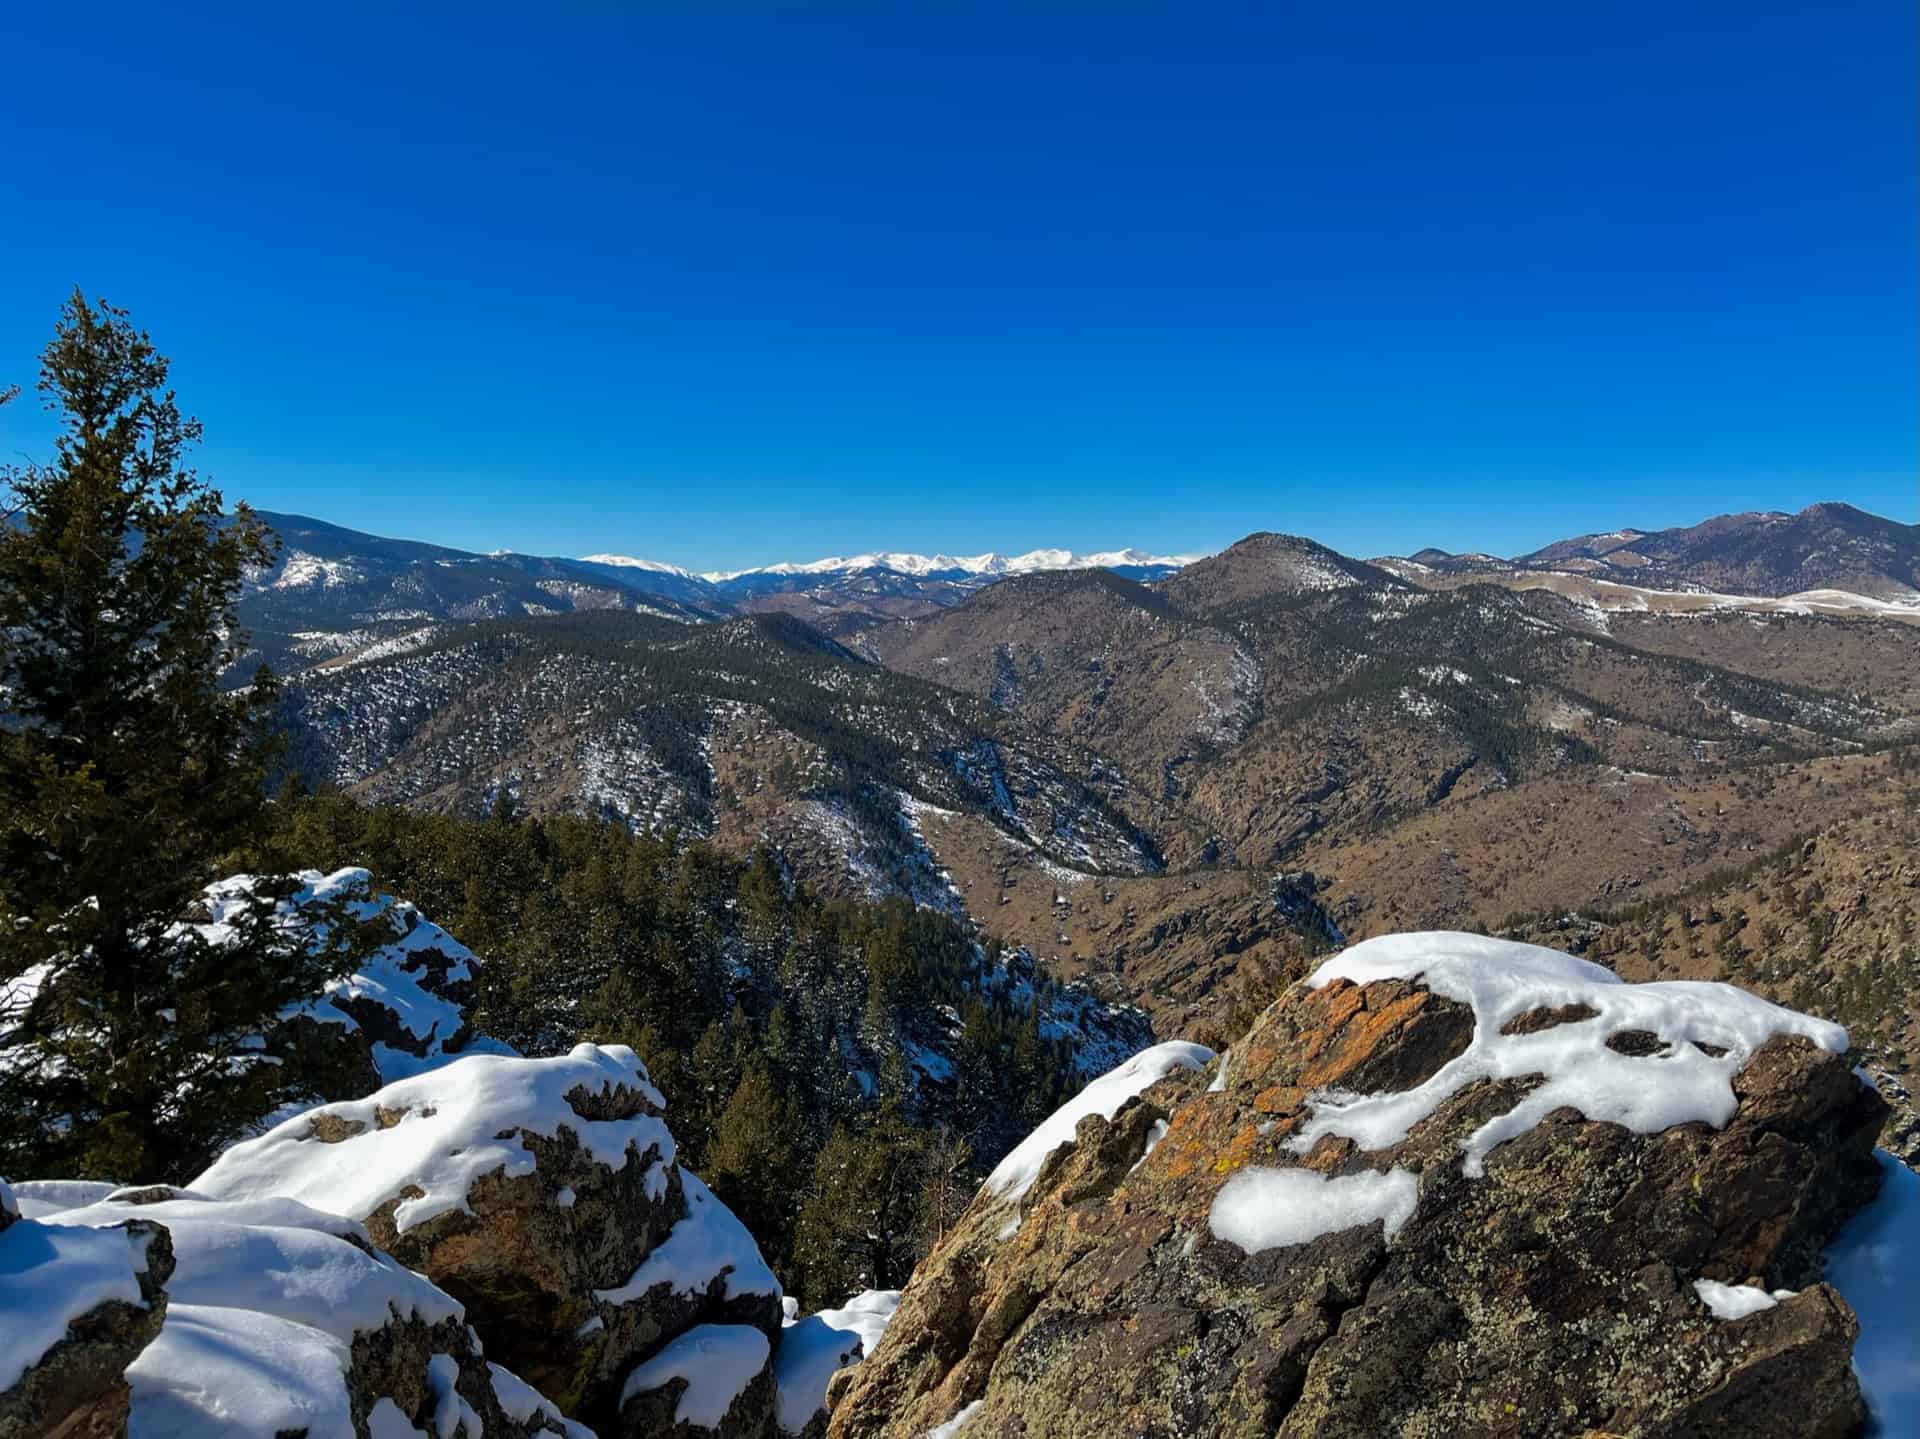
One aspect that commends the Beaver Brook Trail hike to all ranges of ability and interest is its ease of editing. Need a short stroll to clear the mind? Take a stretch to the first vista and turn around. Ready to engage in a healthy, keep-your-wits challenge? Press ahead to the highest point on the trail, which this post describes. The undulating elevation, and the carousel of pine-lined trail, rock ledges, and bursts of expansive valley views entreat hikers to take one more step. (For an exceptionally demanding trek, start with Chimney Gulch Hike).
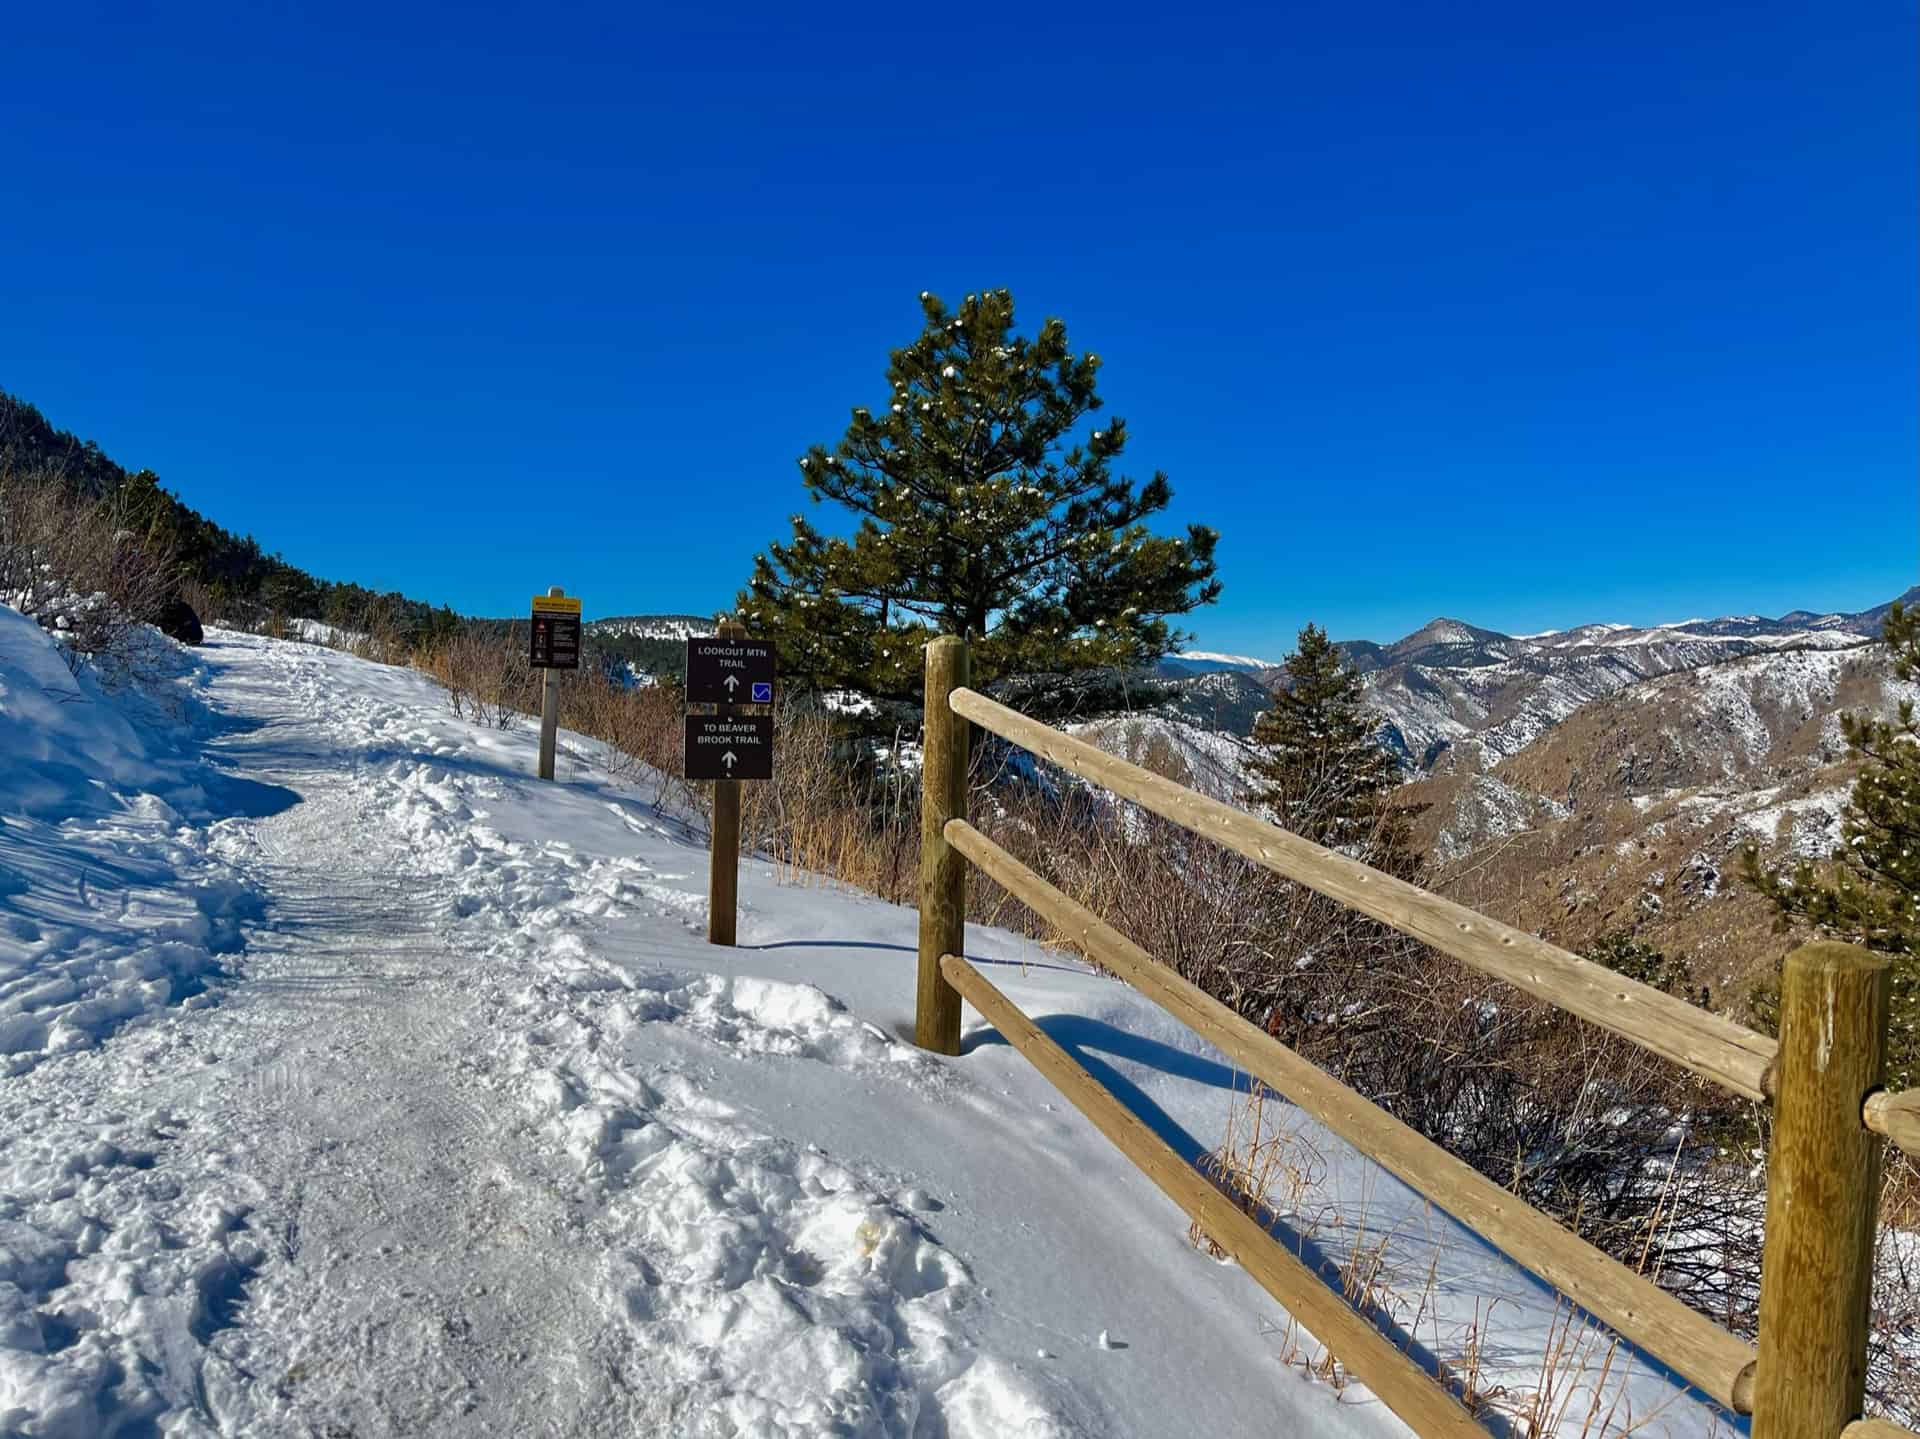
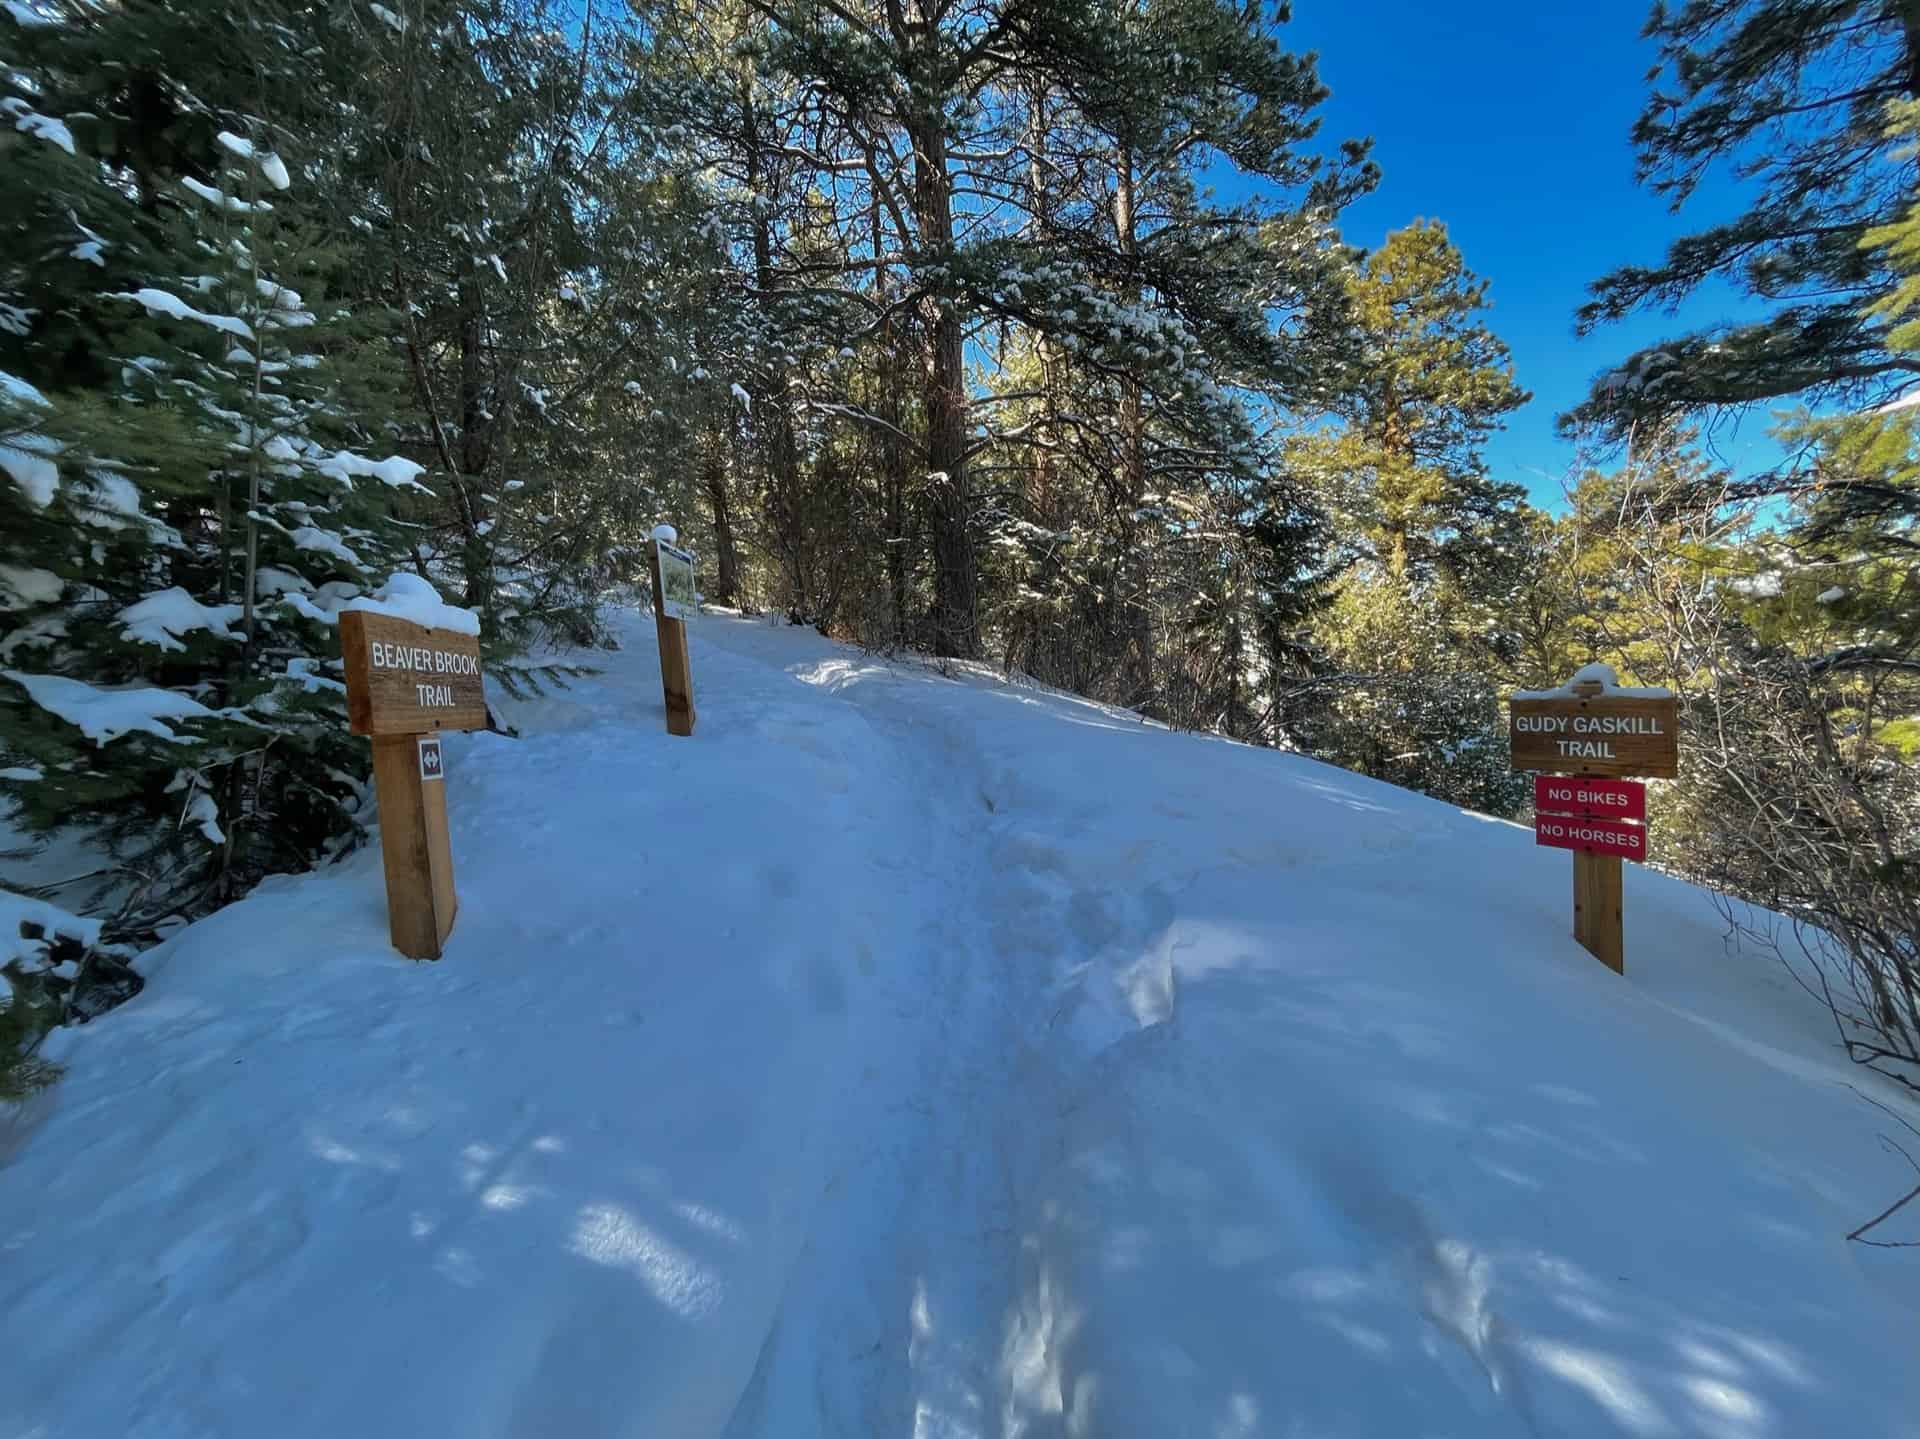
Another advantage may surprise many...the entire length of the formal Beaver Brook Trail remains "HIKE ONLY." Hikers can stroll without any worry of bikers or skiers. Situated just below the local landmark, Lookout Mountain, the Beaver Brook Trail begins at a split in the Lookout Mountain Trail. Explore the full Beaver Brook hike profile below for trail map, driving directions, and more tips and details to help you enjoy this adventure in Windy Saddle Park near Denver.
Trail Snapshot: Beaver Brook Trail at Windy Saddle Park
| Hike Distance | 11 miles Round Trip (modifiable) |
|---|---|
| Difficulty | Moderate to Difficult |
| Duration | Approx 3+ hrs |
| Trail Type | Out and Back |
| Seasons | All Season |
| Dogs | Allowed On Leash |
| Hike Trail Map | Click for a Map of Windy Saddle Trailhead, or use this 3D Topographical Map to view the entire length of the trail. |
| Denver Drive Time | 35 min |
| Driving Directions to Windy Saddle Trailhead | Click for Google Map |
| Town Nearest Hike | Golden, Colorado |
| Beauty | Rocky Mountain vista at top, views of Golden & Denver |
| Activities | Hiking, trail running |
The Hike: Beaver Brook Trail
Note: The Beaver Brook Trail continues for almost another 3.5 miles to the official Beaver Brook Trailhead, at Genesee Park, off the Chief Hosa exit on I-70 (Exit 253). Hikes may also start from this location and go toward Windy Saddle. Along the way, multiple side trails, all well-marked, invite further adventure.
Easily accessible from Denver - on average, just a 35 minute drive - this trail empowers the hiker to adjust the length and demands based on the day. Nearly every 1/2-mile the route wraps around a valley wall, giving way to inspiring views of the Rockies. From time to time, Highway 6 (between Golden and Idaho Springs) pops up. The elevation hovers between 6800ft and 7200ft almost the full length; the exception comes at the end, when this route pushes up to 7400ft, then scales to 7750ft to reach the payoff perch.
Tips & Resources for Hiking the Beaver Brook Trail
- TIP: JeffCo designated the entirety of Beaver Brook Trail as "HIKE ONLY." However, dogs are permitted on-leash. Unlike Chimney Gulch, the Beaver Brook trail offers a quiet, semi-solitary hike.
- TIP: The parking lot is small. Many times, people come and just take in the views and then leave after 15-20min, but some park to hike and keep their spot all day. Consider coming early, or late, and seasonally the trail will be less crowded in winter.
- Trail Map: Beaver Brook Trail Hike
- Packing List: Always pack the 10 Essentials. Download our Hiking Guide to get the list and dayhiking packing checklist. Additionally, take some time to review our 10 Winter Hiking Tips.
- Colorado Road Conditions: Colorado Road Conditions
- After the Hike: Keep the adventure alive! Visit the The Buffalo Bill Museum and Grave.
Weather
Map & Driving Directions for Windy Saddle Trailhead
Click for Driving Directions
Mt. Buckhorn hike near Colorado Springs
The Mt. Buckhorn Hike, taking the shape of what hikers often call a "lollipop loop," forms the bridge between the Section 16 hike and the Seven Bridges & Kineo Mountain hike.
As with those hikes, the surprising aspect is its immediacy -- within minutes of turning off the highway the trailhead appears. And if parking has filled, other options await in the vicinity. Explore the full Mt. Buckhorn Hike profile below for trail map, driving directions, and more tips and details to help you enjoy this year-round adventure just south of Denver.
Trail Snapshot: Mt. Buckhorn Lollipop Loop
| Hike Distance | 6.25 miles Round Trip |
|---|---|
| Difficulty | Moderate to Difficult |
| Duration | Approx 3-4hr |
| Trail Type | Loop |
| Starting Elevation | 6,600′ |
| Elevation Gain | Approx +1,600′ |
| Seasons | Year Round |
| Dogs | Allowed On Leash |
| Hike Trail Map | Click for Trail Map of the Mt. Buckhorn Hike |
| Denver Drive Time | 1.25 hours |
| Driving Directions to Mt. Buckhorn Trailhead | Click for Google Map |
| Town Nearest Hike | Manitou Springs and Colorado Springs, Colorado |
| Beauty | backcountry valleys, views of Colorado Springs |
| Activities | Hiking, Biking, Snowshoeing |
Parking & Trailhead Information for Section 16 Trail
From Denver, cruising south on I-25, take exit 141 for Highway 24 West. After approximately 1.5 miles, turn left (south) onto 21st Street, and then shortly thereafter, right (west) onto Lower Gold Camp Road. Turning left at the 4-way stop (junction with Bear Creek Road), the Bear Creek Canyon pullout parking trailhead appears on the left just prior to the 3-way junction with a bend of Gold Camp Road. This parking lot offers head-in spots and fills fast; other pullout parking lots dot the road before and after this one.
The Hike: Mt. Buckhorn Lollipop Loop Hike
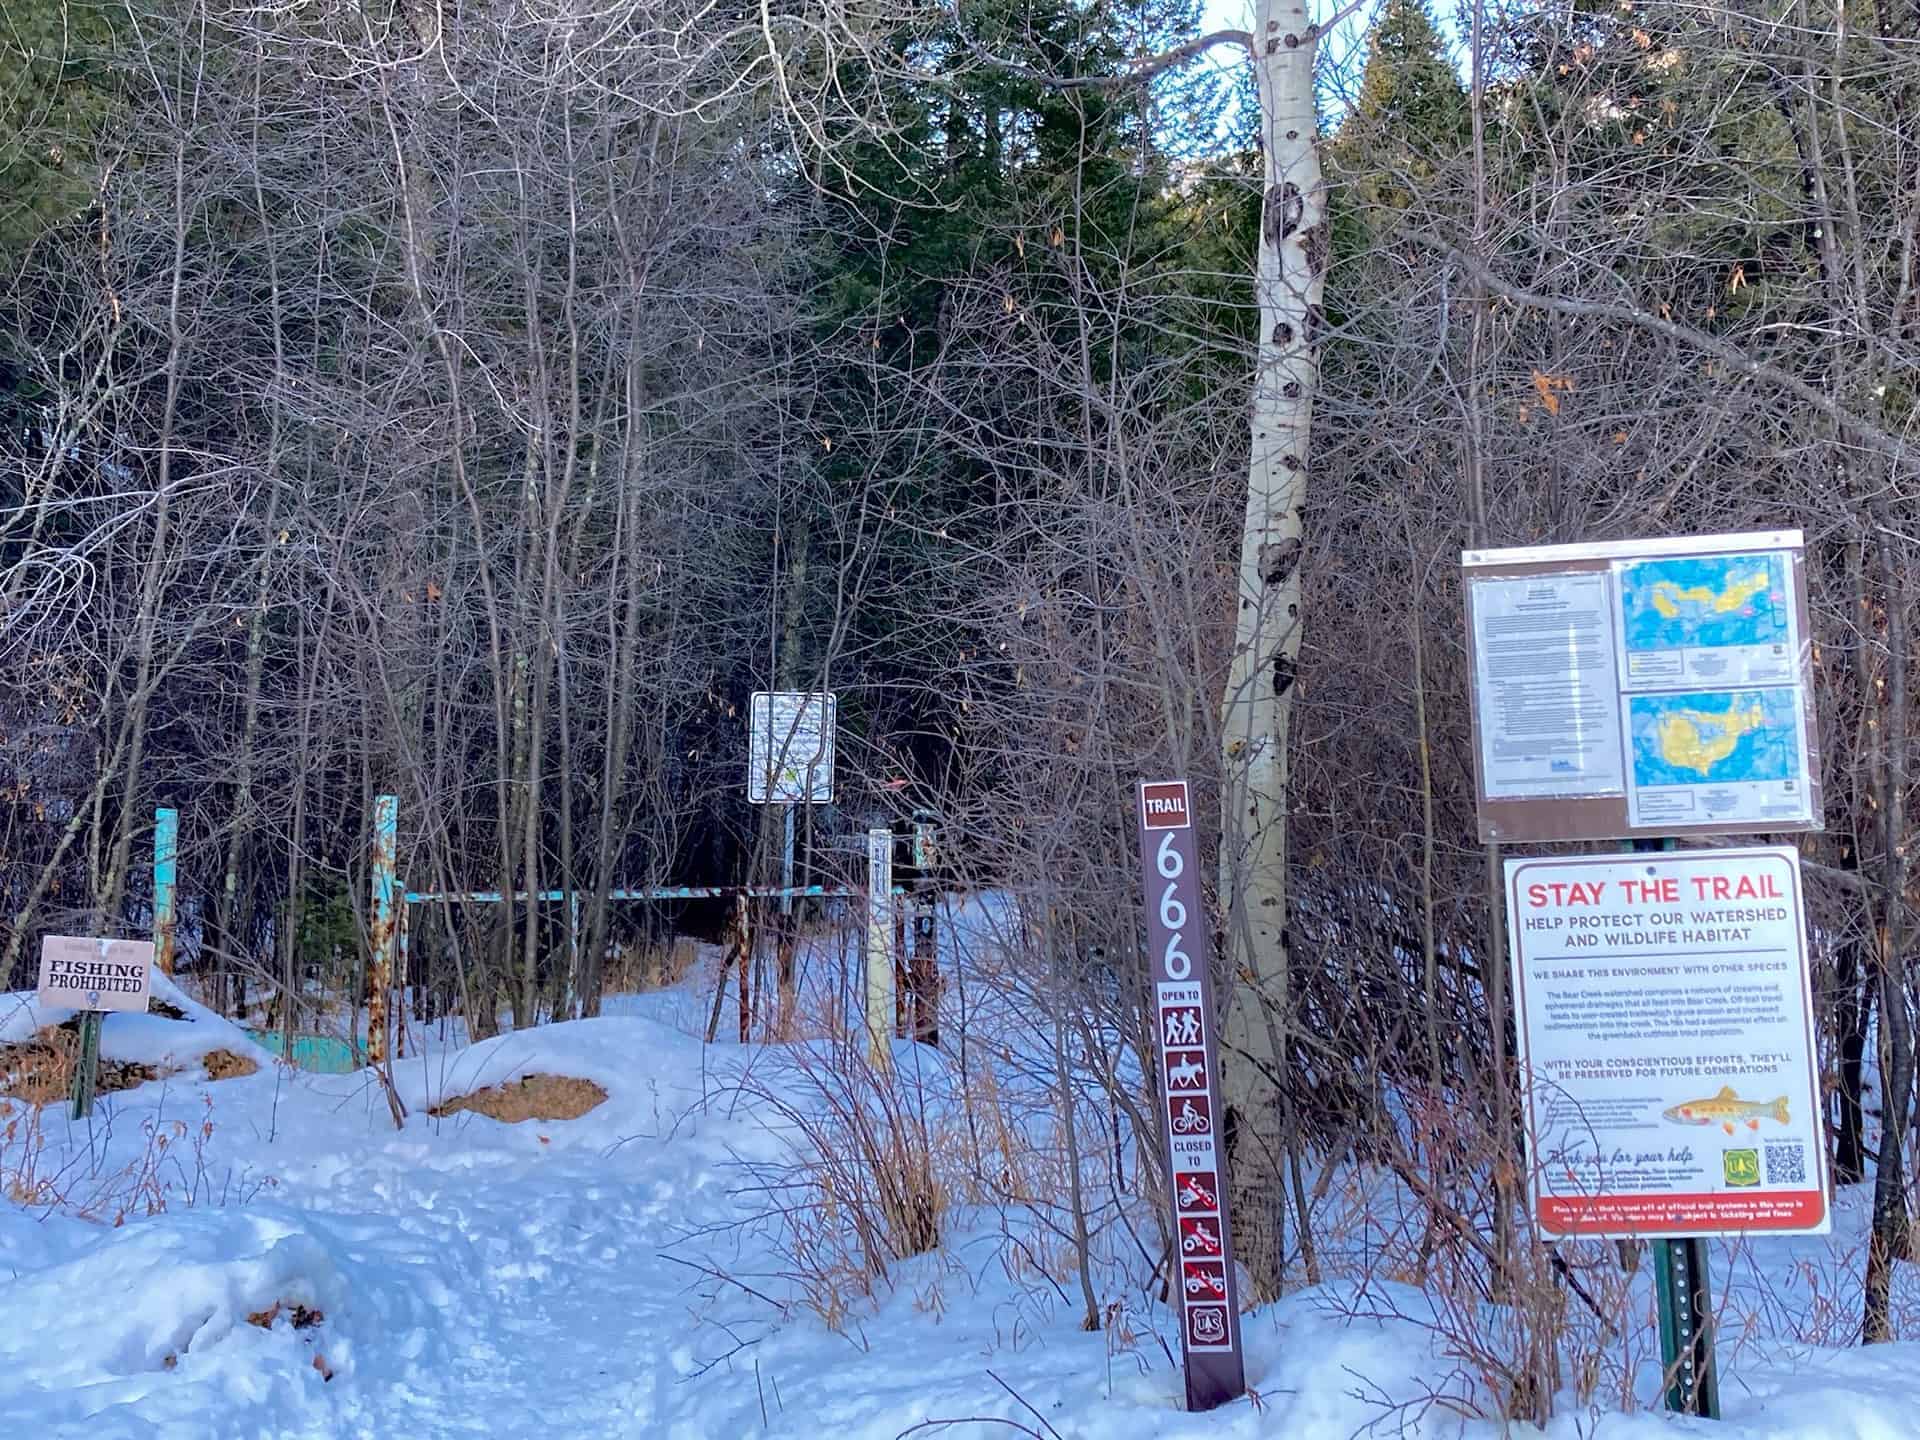
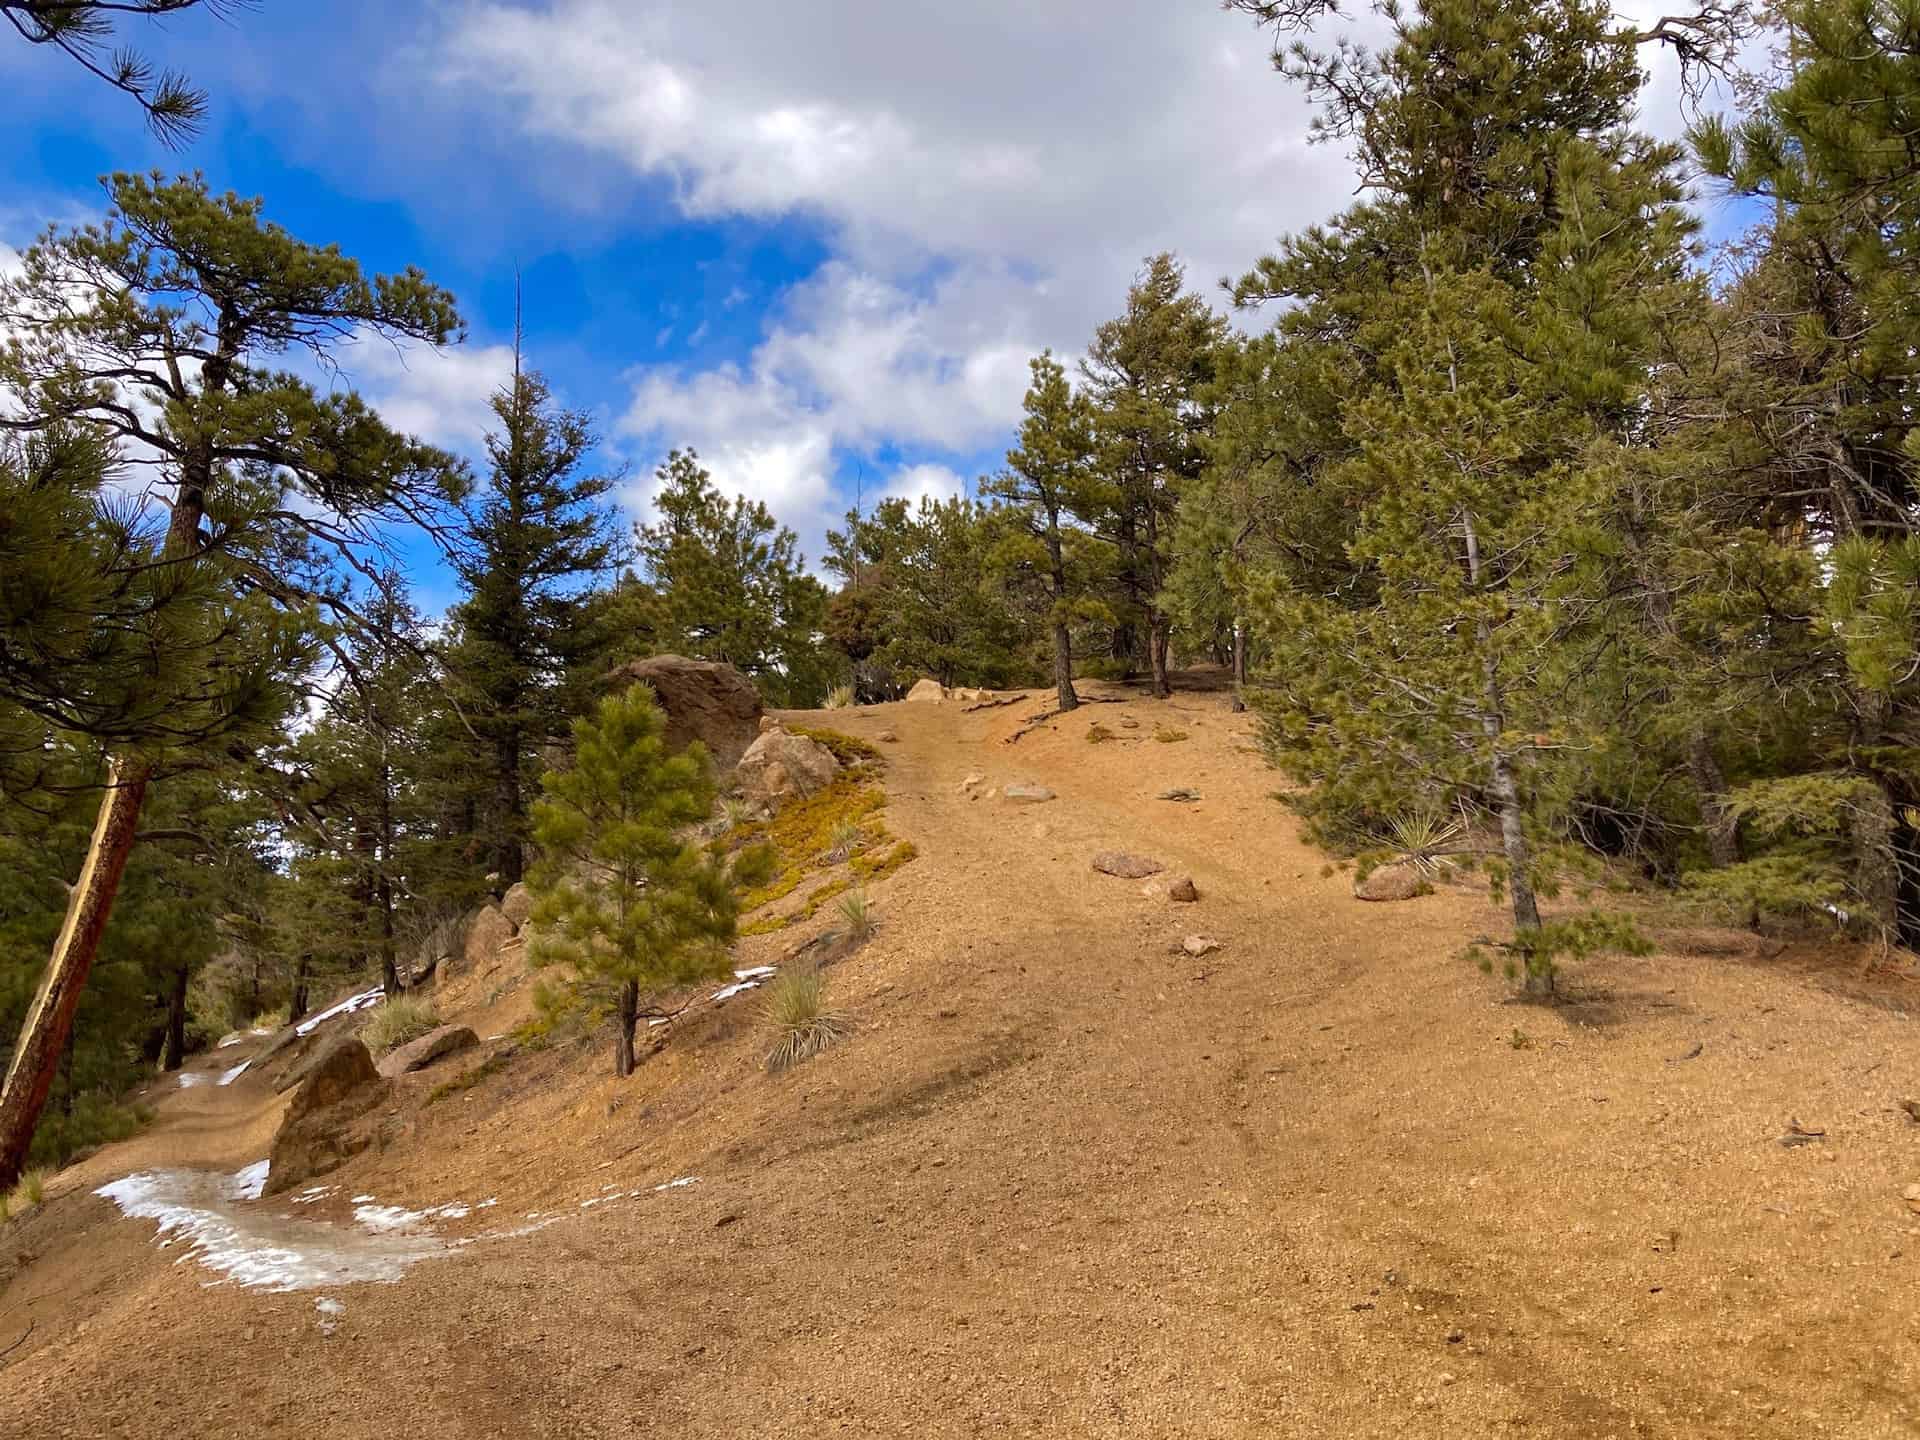
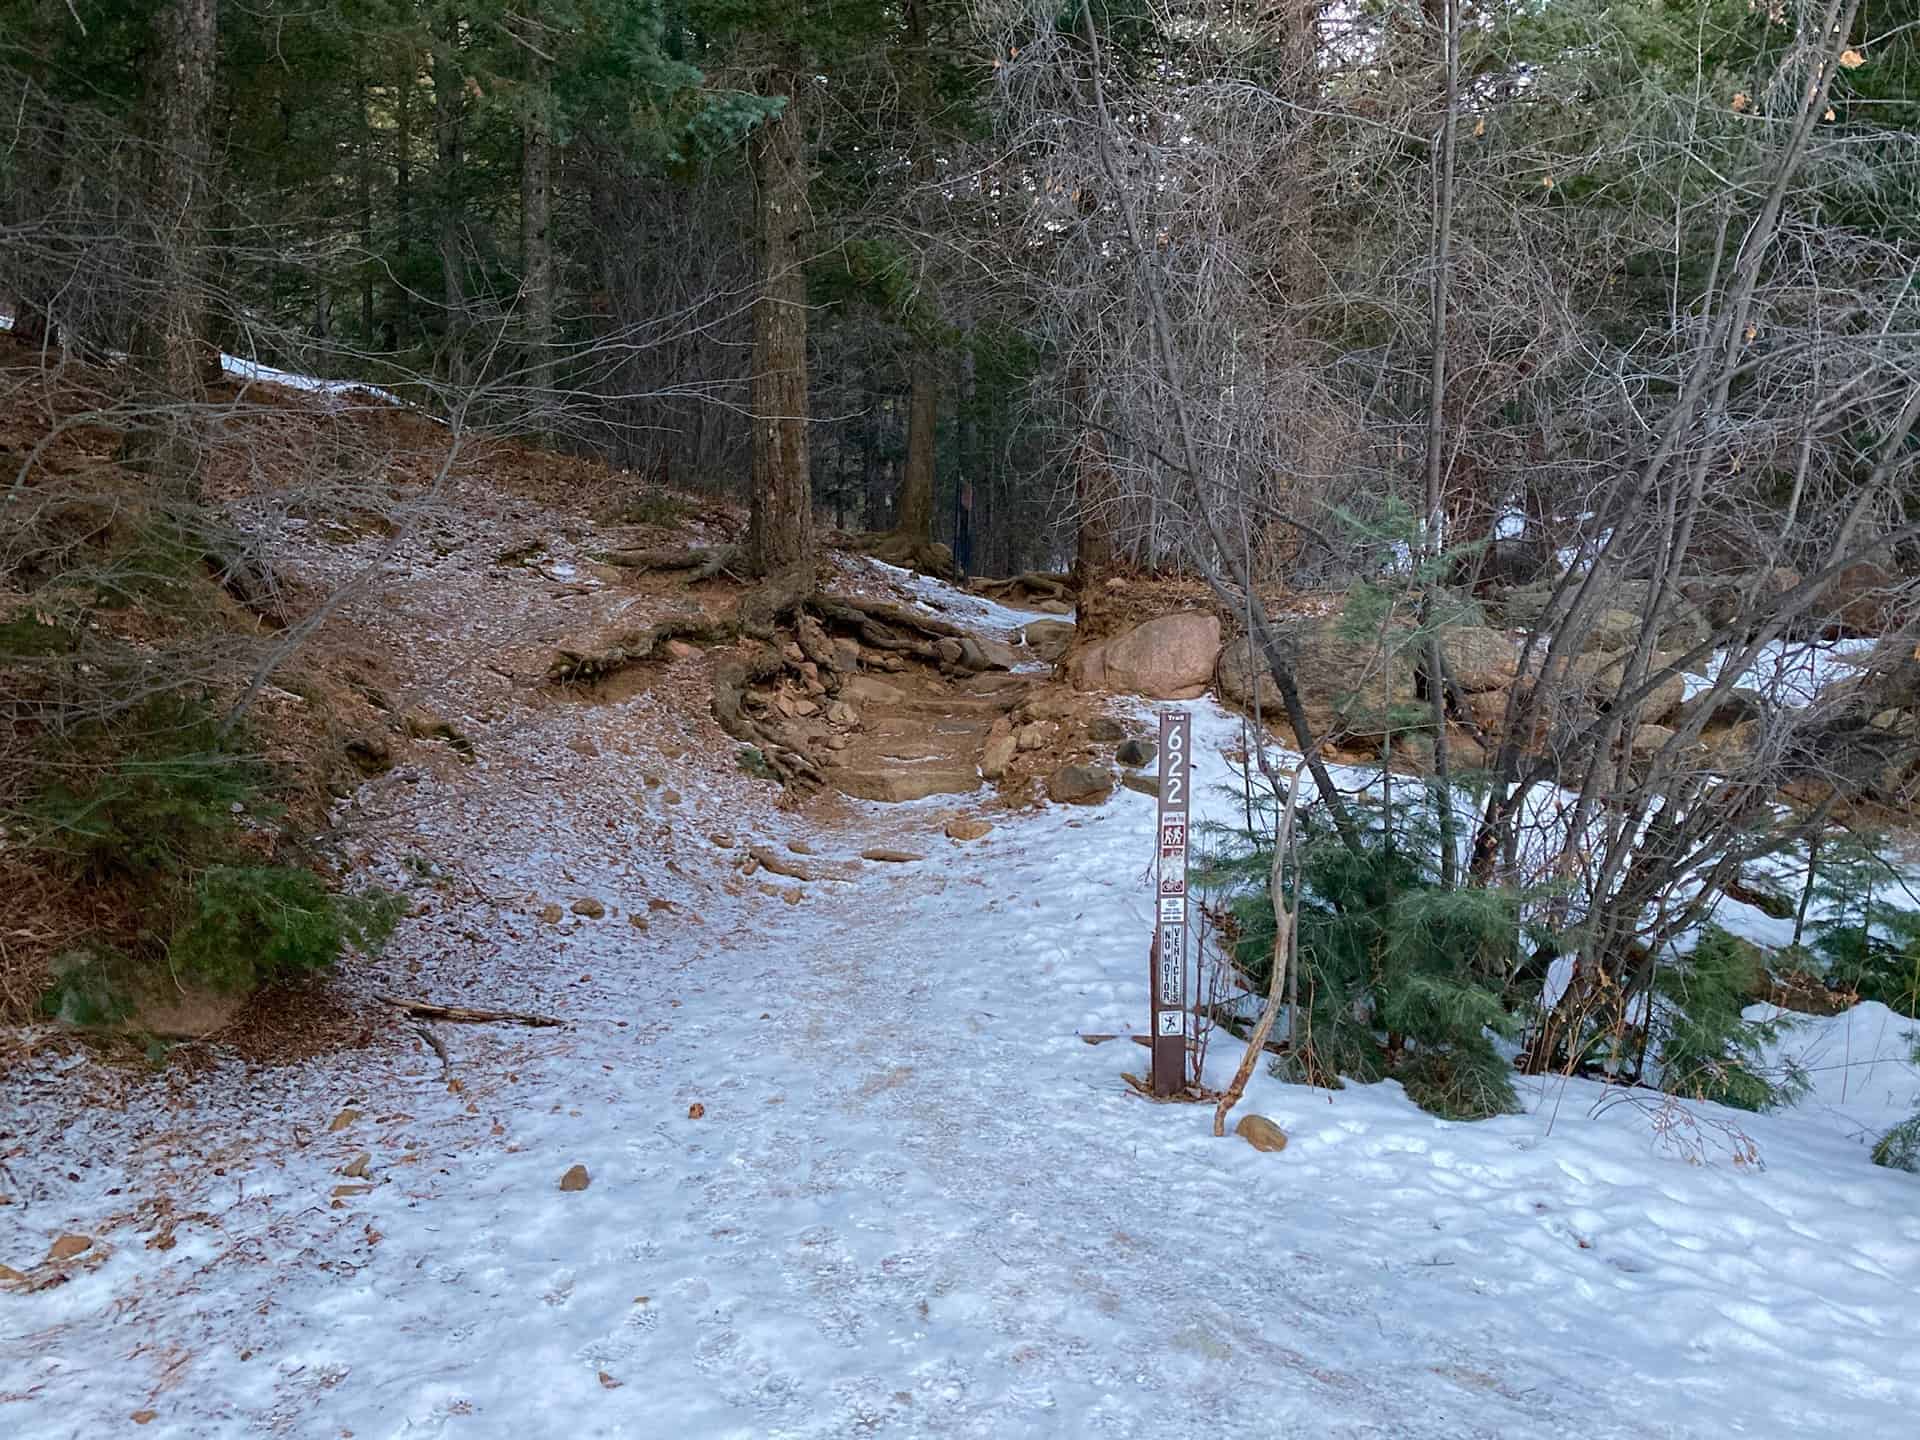
Leaving the parking lot, continuing toward the junction with Gold Camp Road, the route joins High Drive. High Drive meanders up into the backcountry past split-rail fences, over rock bridges, and through wide slot canyons. At approximately the 1-mile mark, less than 1/4-mile past the Section 16 Hike trail junction, the junction for the ominously named Trail 666 branches off to the right.
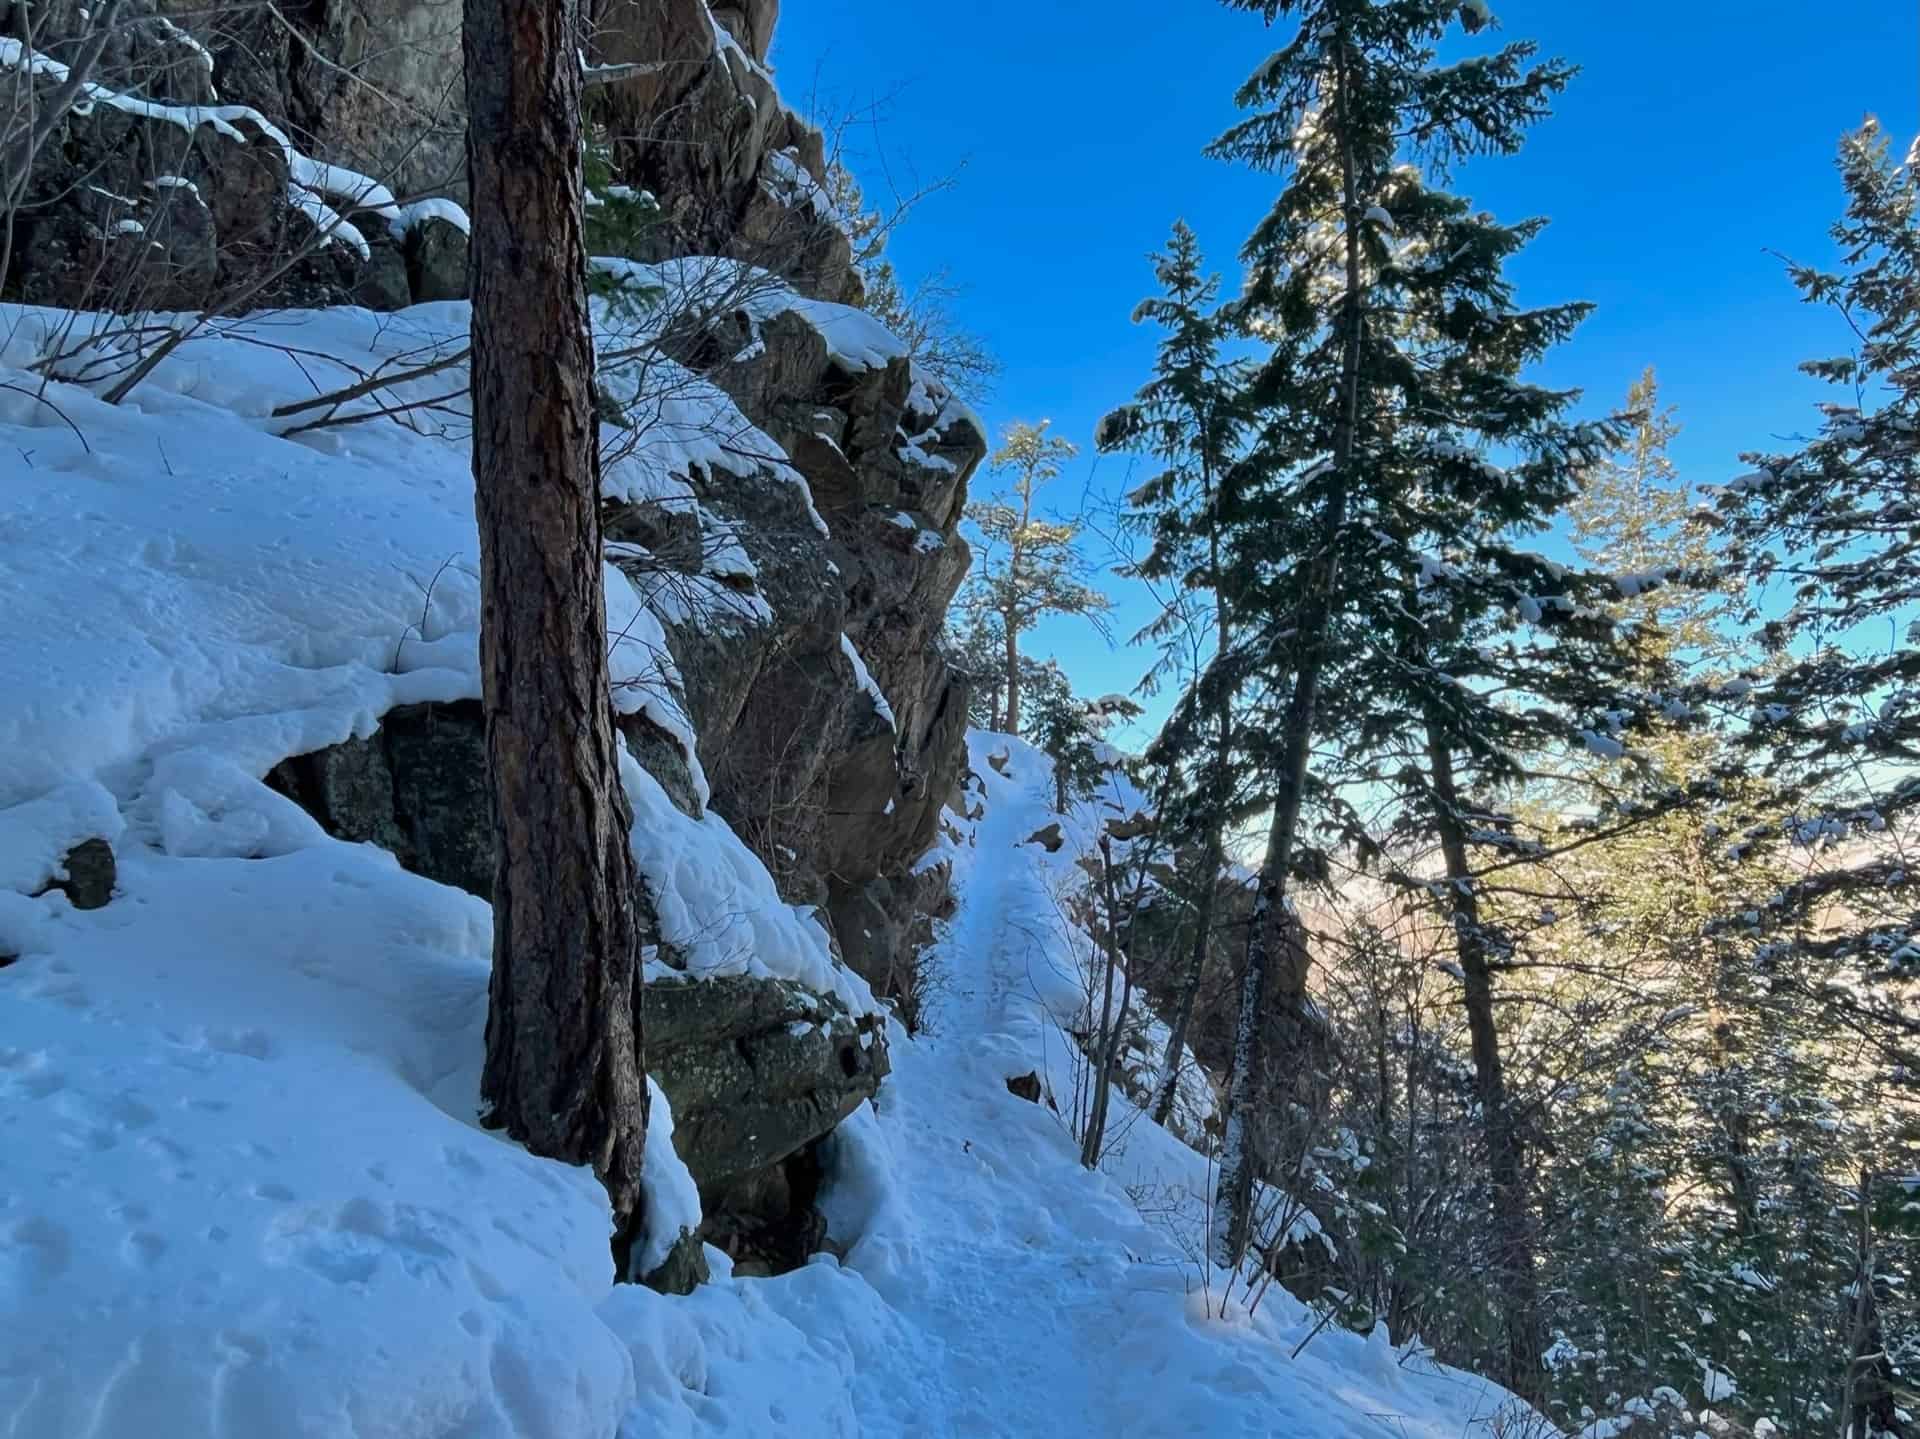
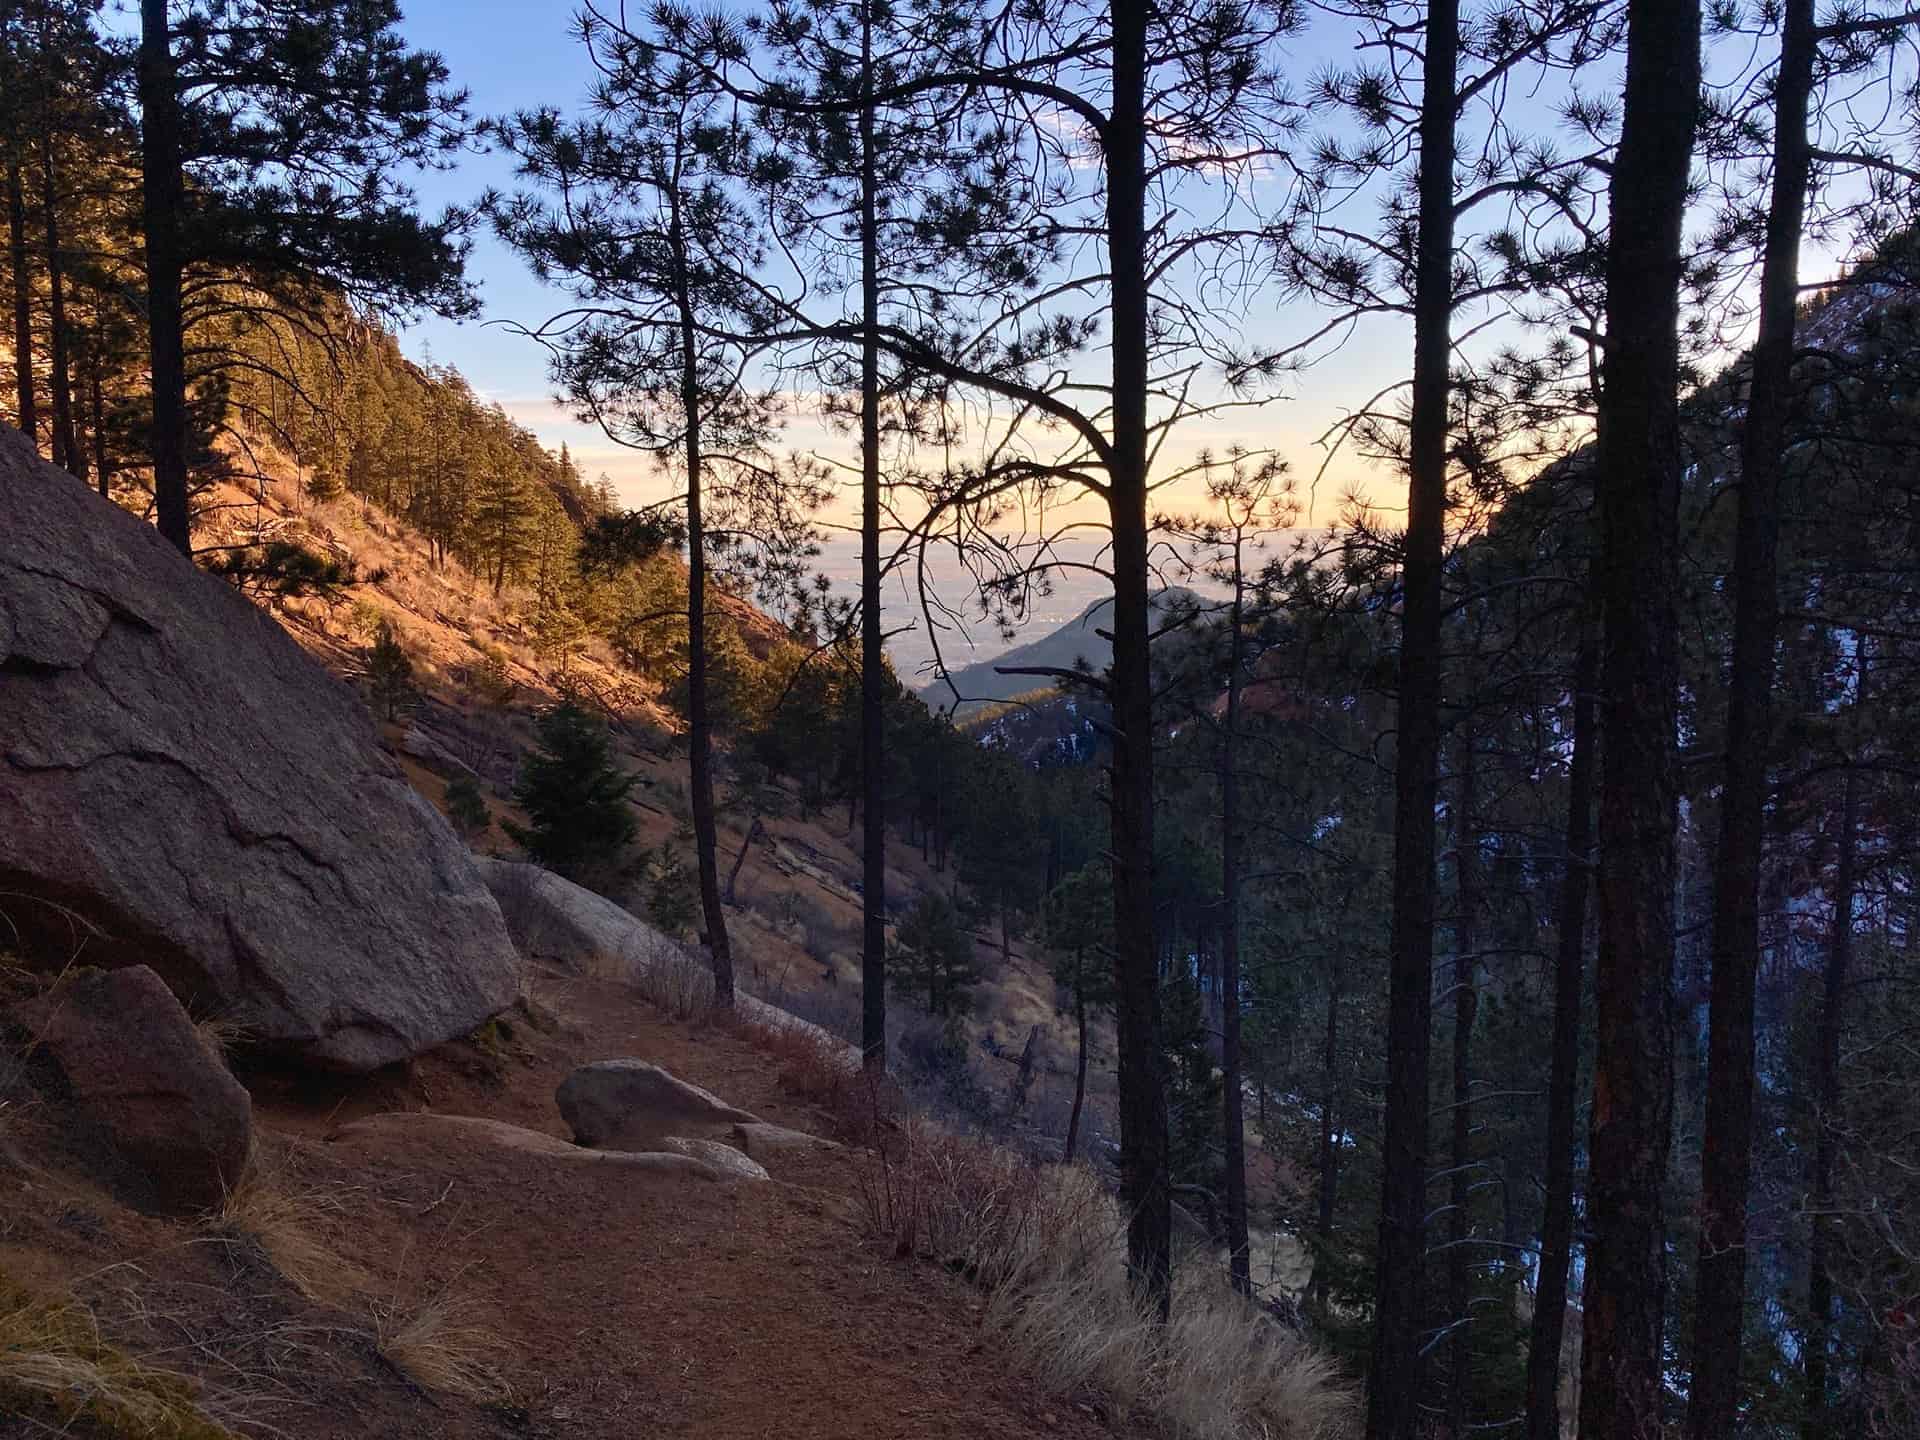
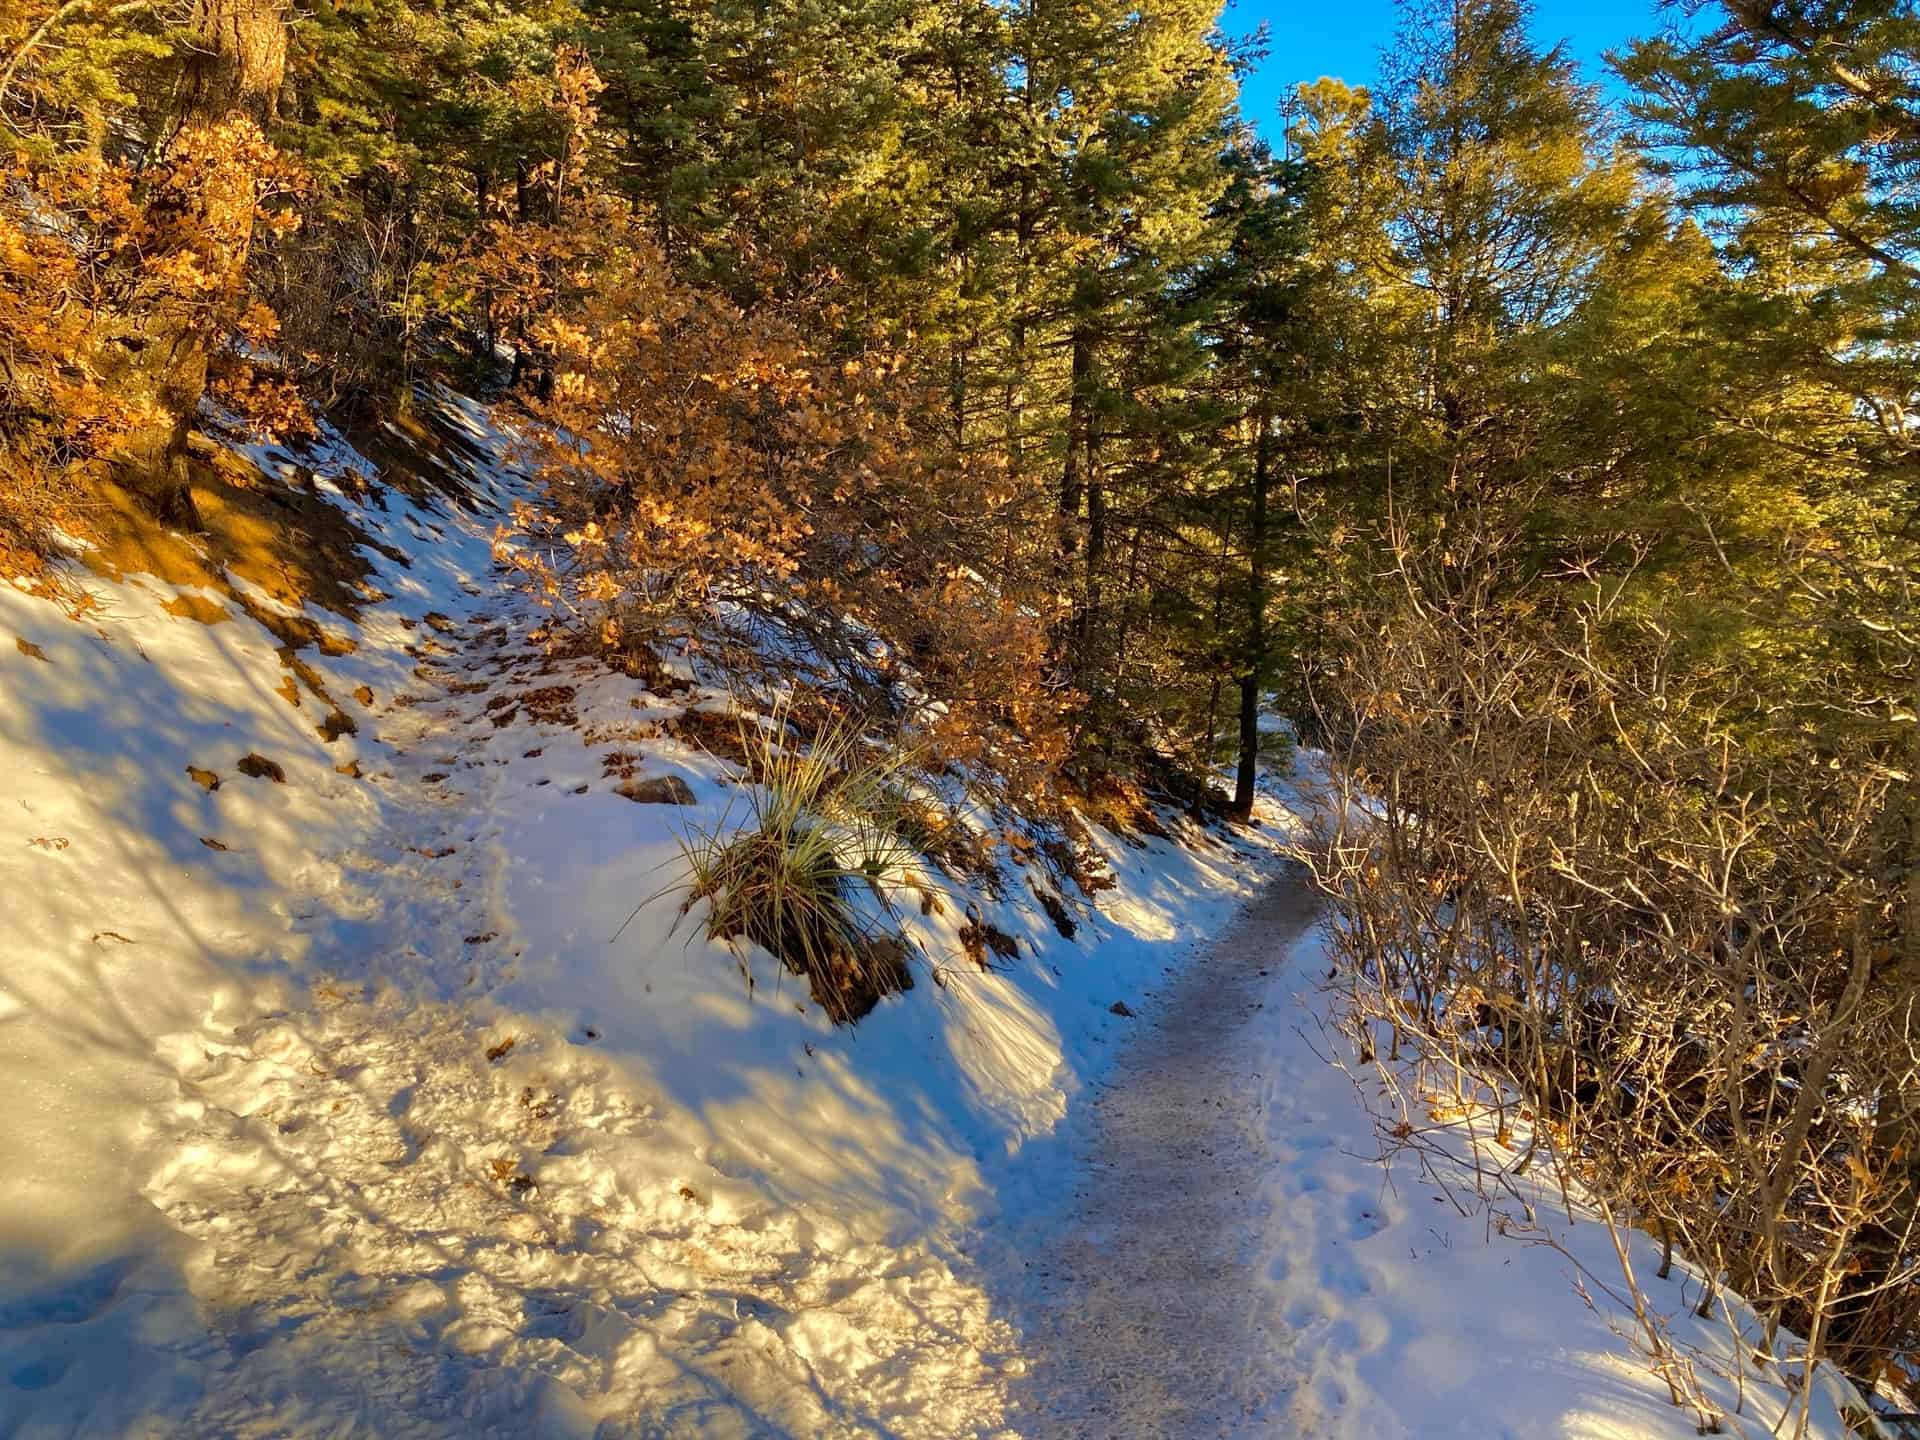
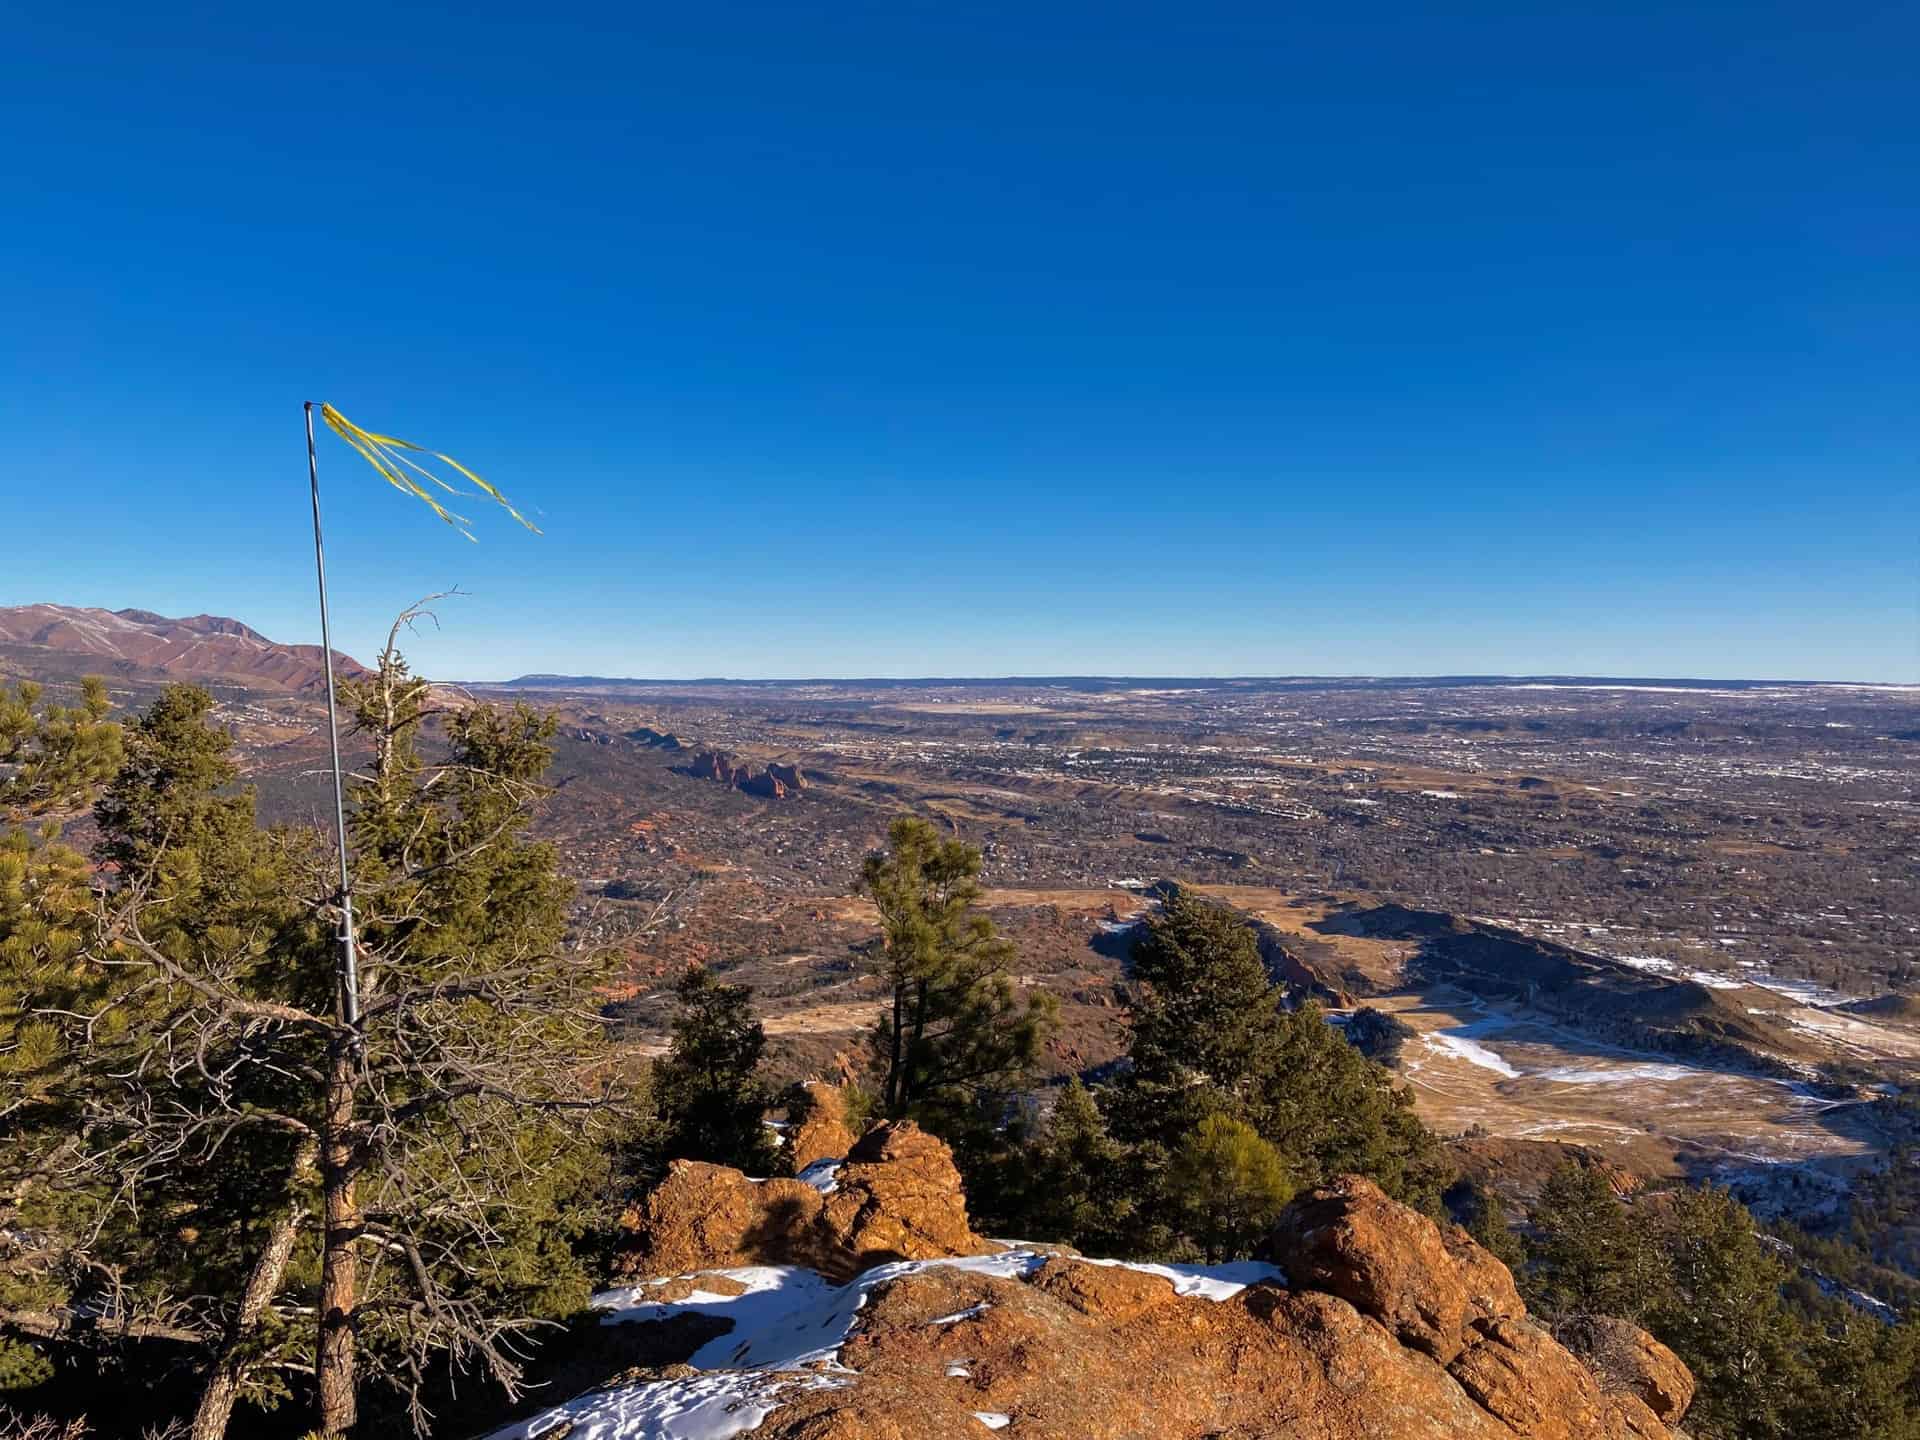
Over the next 1.5 miles, Trail 666 traces the valley wall, gracing hikers with unobstructed views of the basin below, crags on the opposite valley wall, and view of Colorado Springs in the rearview mirror. After ascending nearly 1,000ft, the route meets the junction with Trail 776. Taking a sharp left, Trail 776 tugs toward a 180-degree turn up the valley slope.
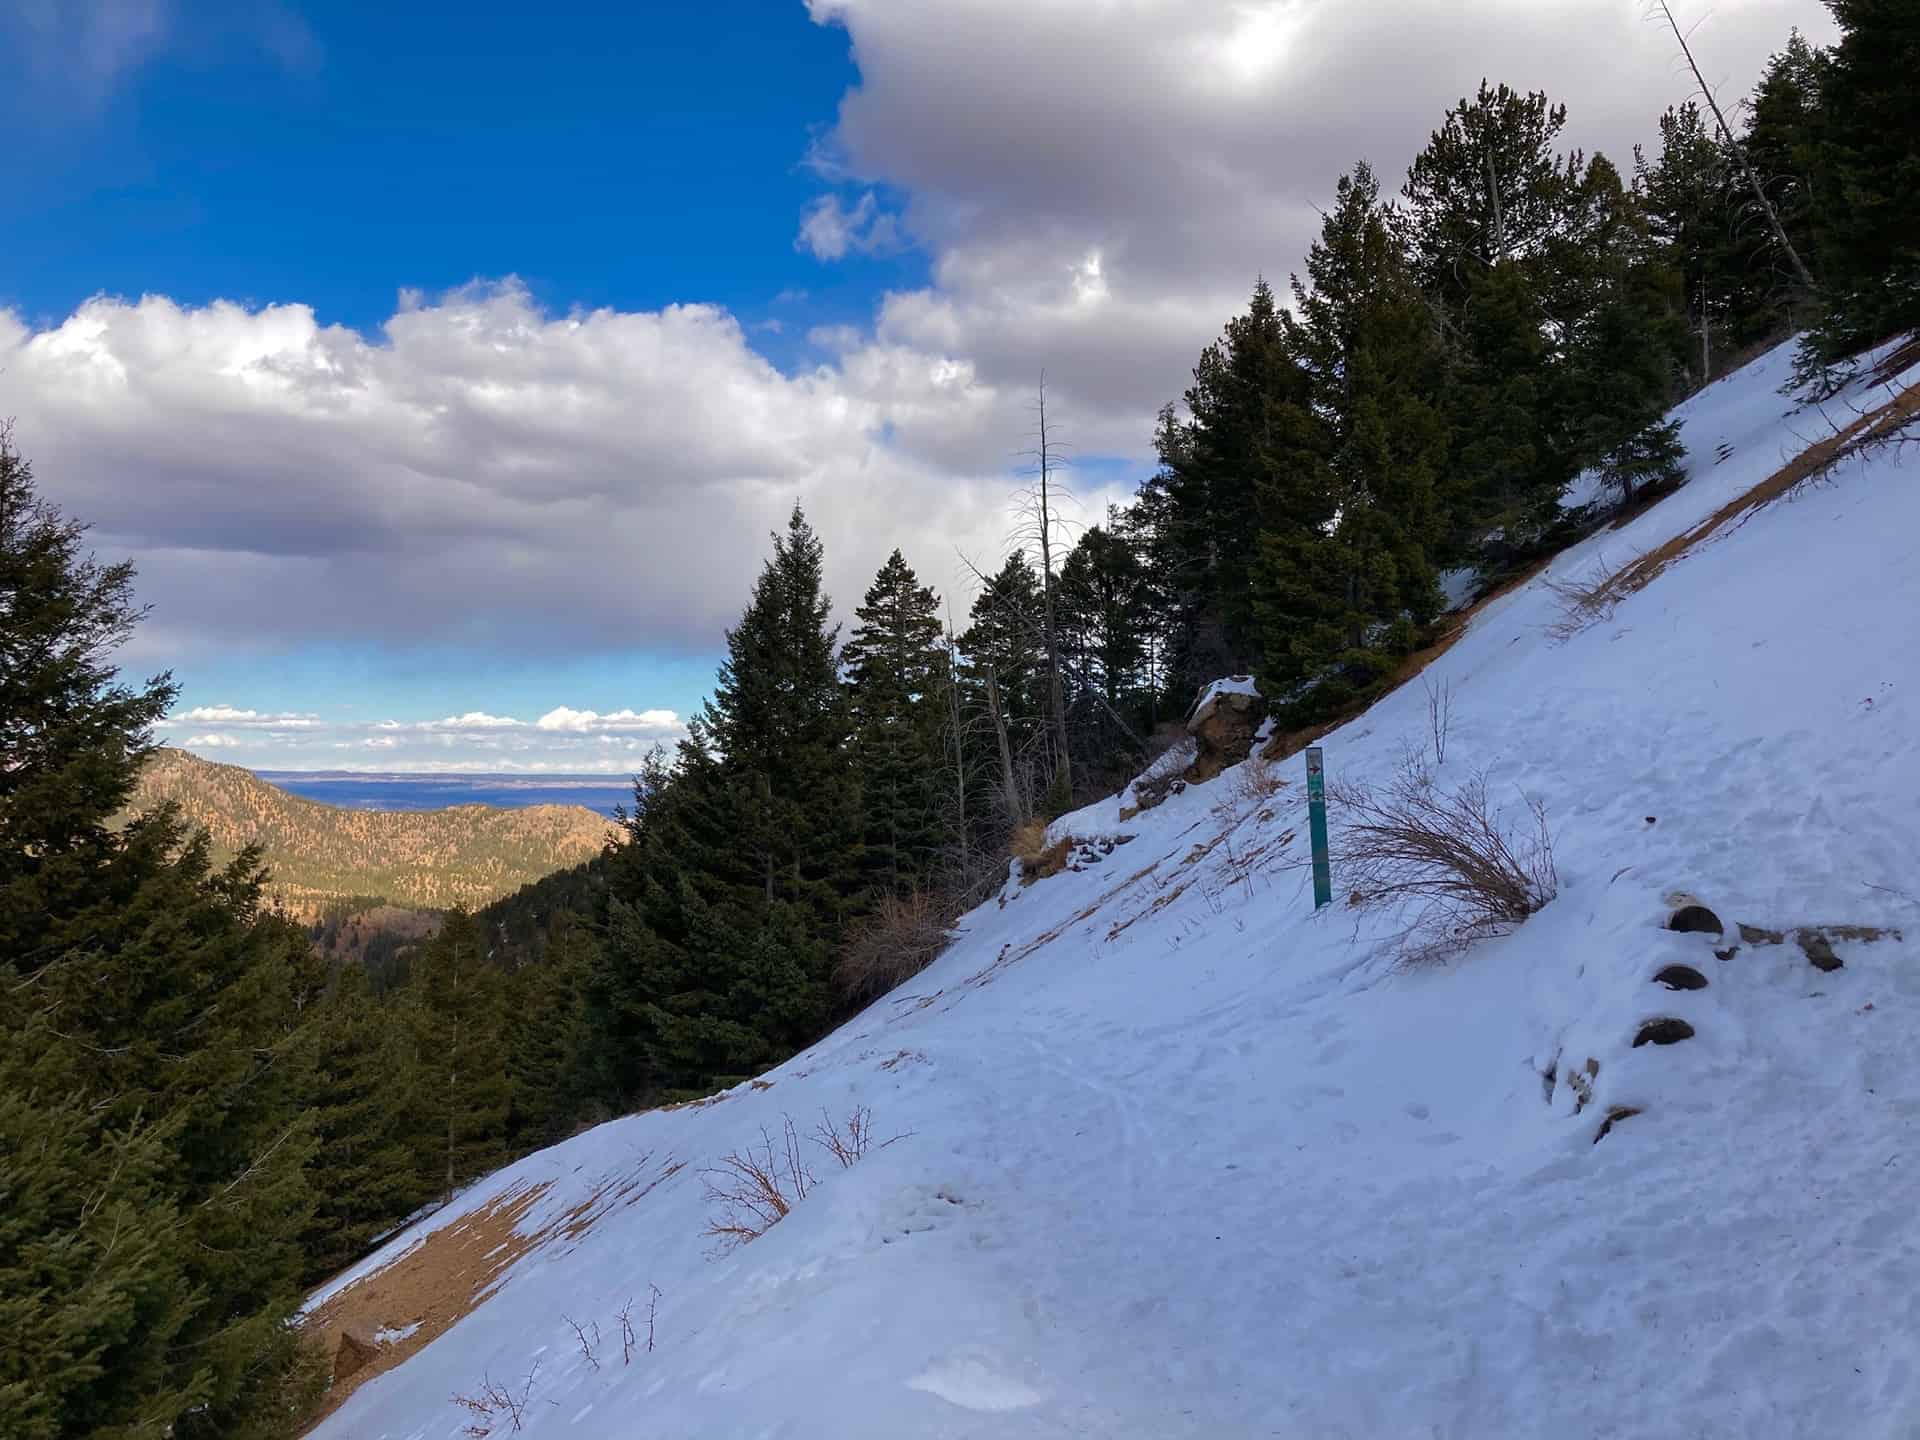
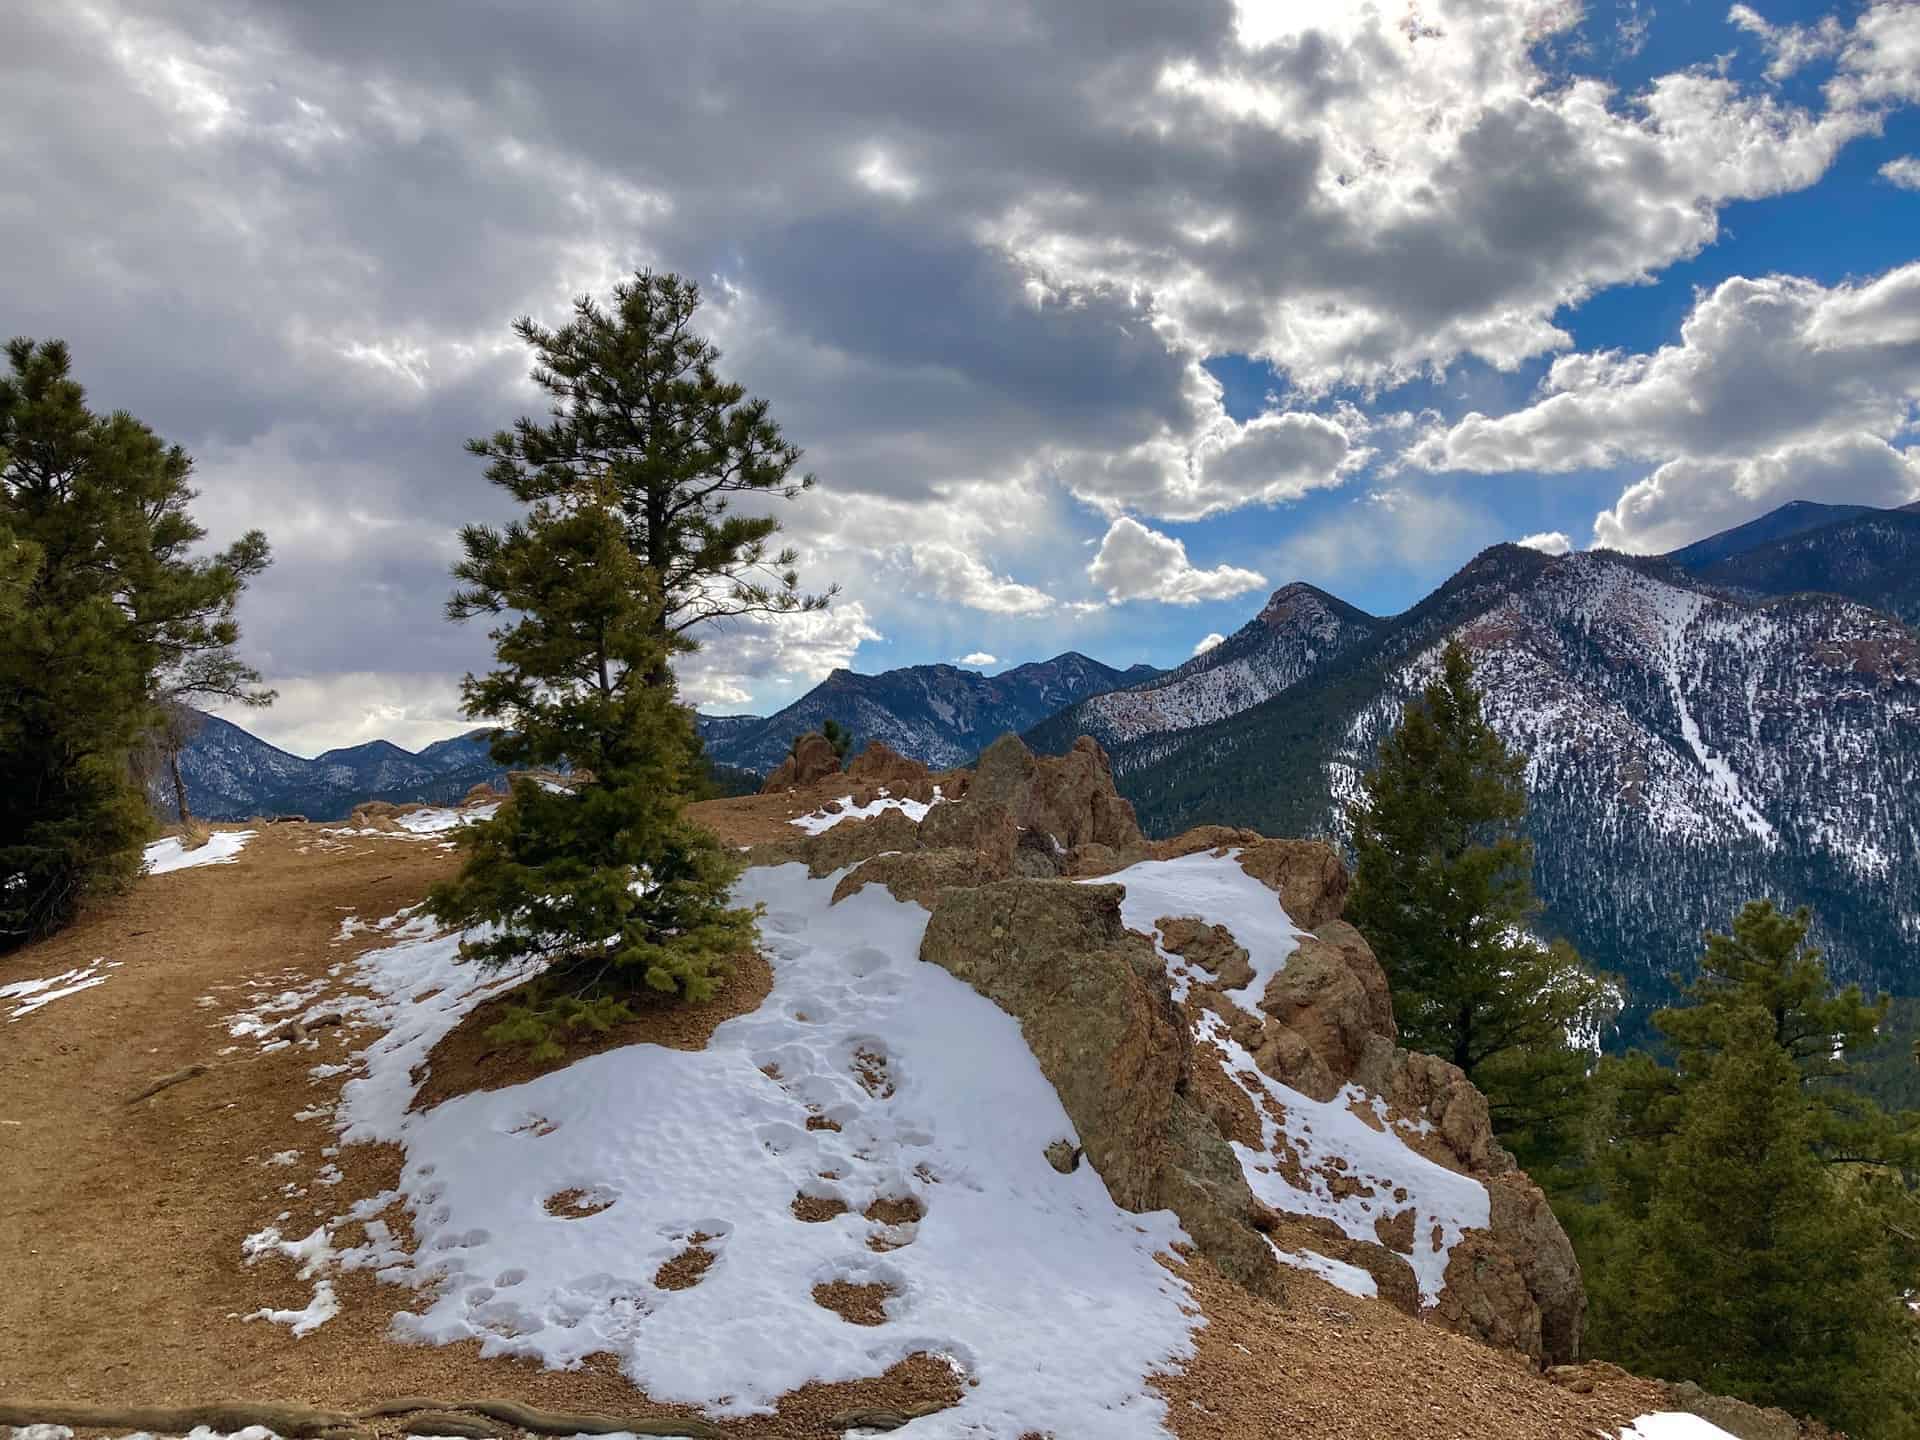
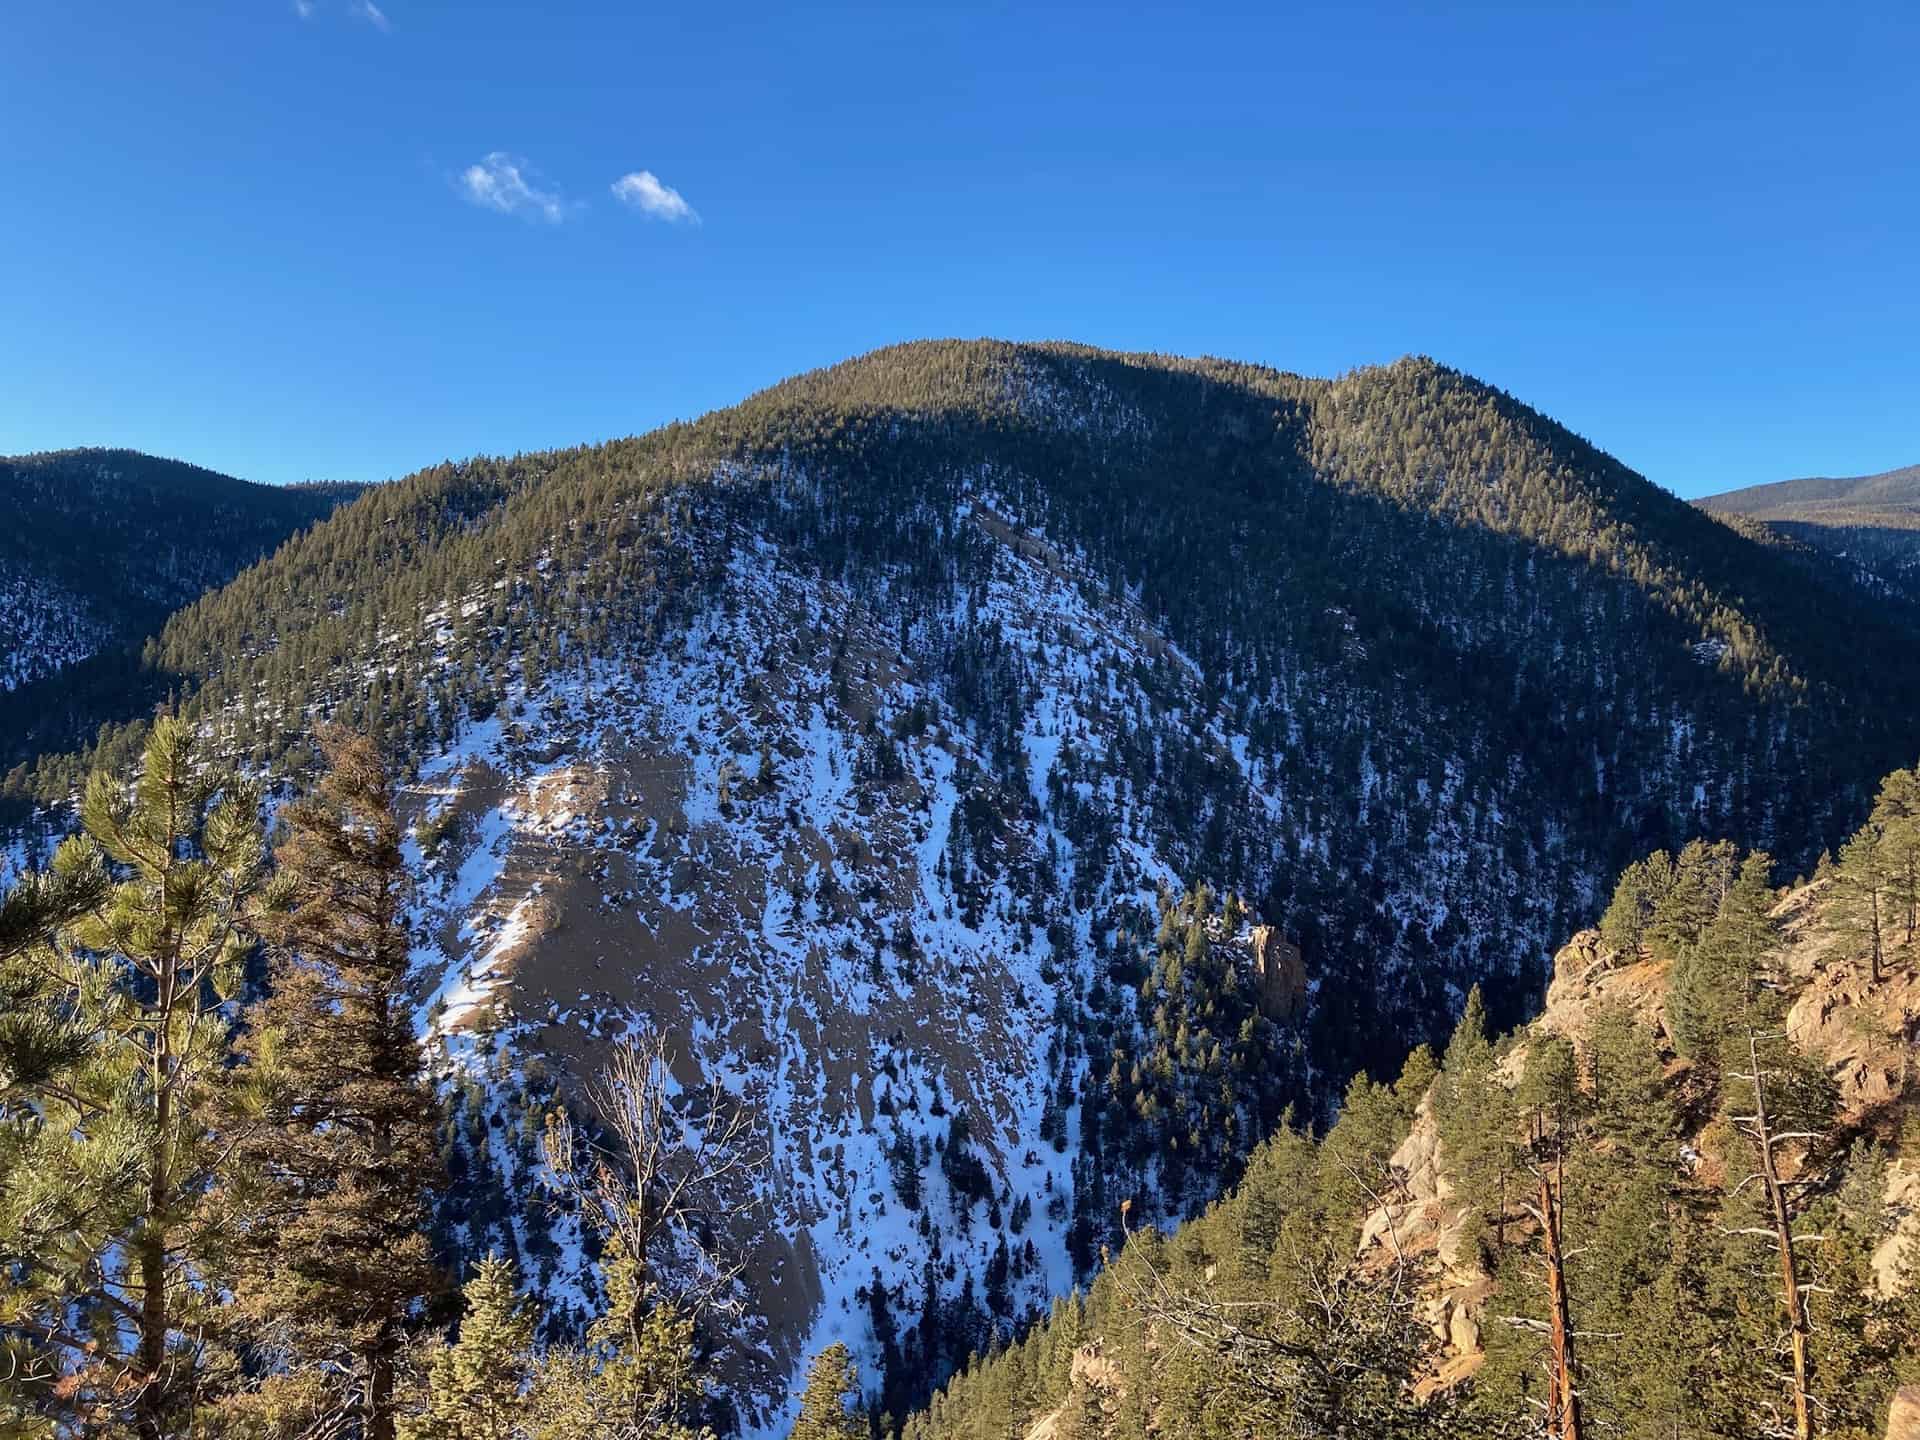
Now as the trail levels, more vistas break open to hikers' delight. Approximately 1/2-mile up the trail, another key junction helps guide the backcountry adventurer. Trail 776 (aka Buckhorn Trail) crosses paths with Trail 667 (Upper Captain Jack's Trail). Here one finds the connecting point to the Seven Bridges & Kineo Mountain hike. Staying slightly left by joining Trail 667, the route moves further into the backcountry and a stunning new valley. At the end of the elevation shelf, approximately 1/3-mile ahead, those with energy and gumption can trek to the top of Mt. Buckhorn. This adds about 1/2-mile total to the hike.
Continuing along Trail 667, the route begins its steady descent to meet up again with High Drive, but at a different juncture. At High Drive, a broad open space with signage and fencing, the lollipop loop turns left down the wide High Drive road and rolls 1.5-miles back to where Trail 666 first appeared. (Note carefully that Trail 667 (Captain Jack's) crosses over High Drive and resumes climbing up the facing ridge. Taking the trail, instead of High Drive, will pull hikers far into the backcountry and away from the originating parking pullout.)
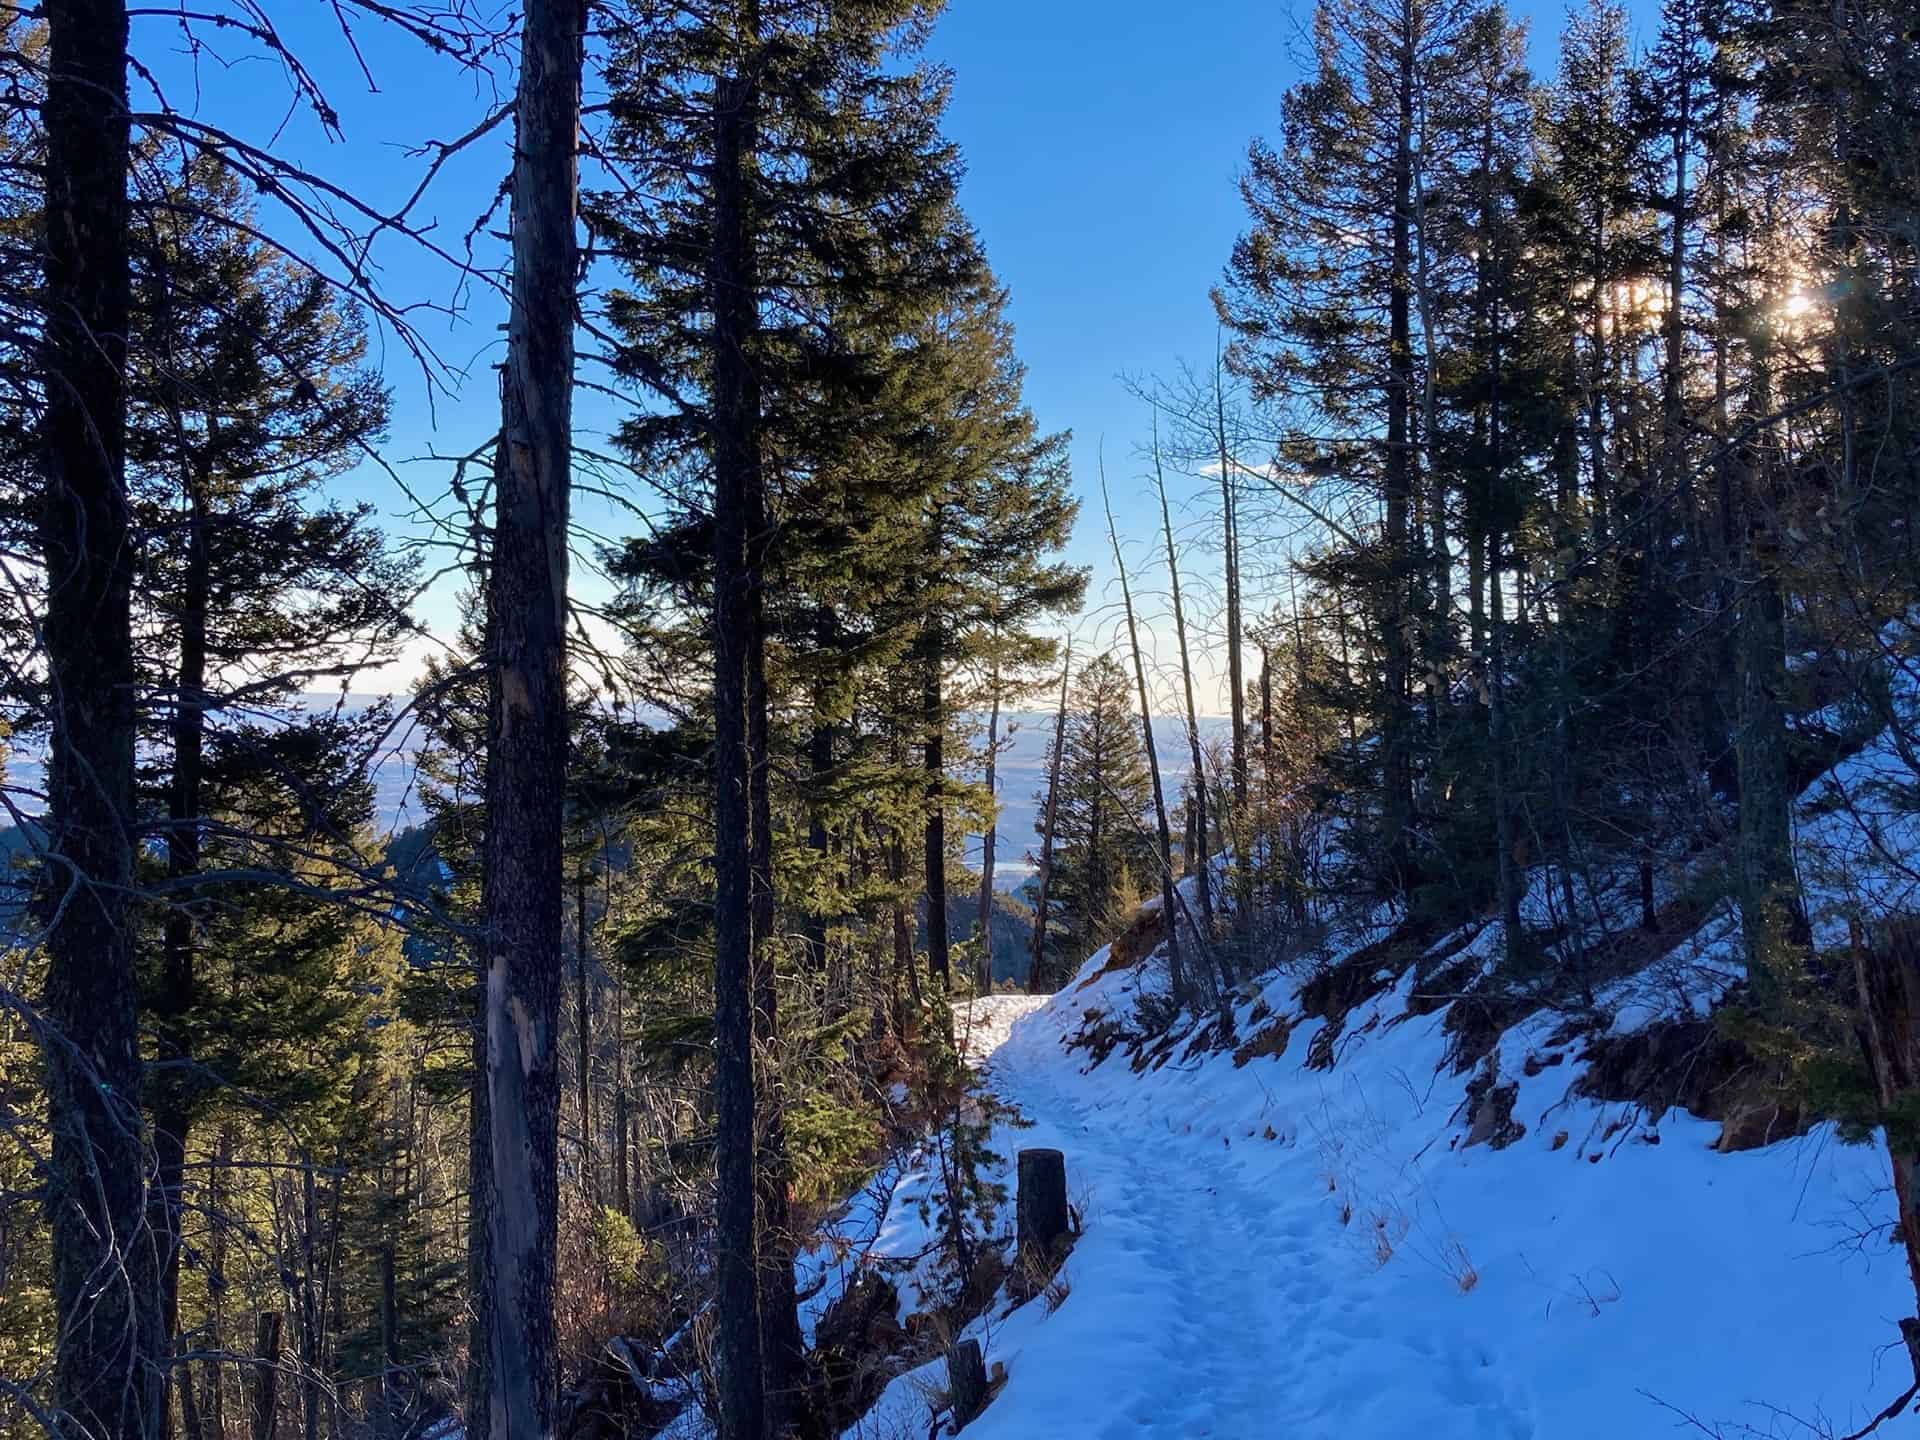
The last part of the Mt. Buckhorn lollipop loop hike simply follows High Drive all the way. Generally staying straight, with a couple hard curves along the way, the trail flows back down and out approximately 2.5 miles to the parking pullout.
Tips & Resources for Hiking Mt. Buckhorn near Colorado Springs
- TIP: Parking fills fast, but an early start helps noticeably.
- Trail Map: Mt. Buckhorn Hike
- Packing List: Always pack the 10 Essentials. Download our Hiking Guide to get the list and dayhiking packing checklist. Additionally, take some time to review our 10 Winter Hiking Tips.
- Colorado Road Conditions: Colorado Road Conditions
- After the Hike: A local favorite, Wild Goose Meeting House (or their counterpart, Good Neighbors Meeting House), captures the essence of downtown COS. Grab a craft coffee and chef-level dish, or later in the day, a local beer on tap. For a quick grab-n-go, consider Wimberger's Old World Bakery and Delicatessen, on the way out from the trailhead.

Weather
Map & Driving Directions
Click for Driving Directions
Seven Bridges to Kineo Mountain Loop
Immensely popular in the summer, the Seven Bridges trail beckons hikers up and across North Cheyenne Creek multiple times, meandering by and over tumbling creek waterfalls. The route described below launches from the Seven Bridges trail out onto a loop around Kineo Mountain, reaching a connection point with the Mt. Buckhorn hike. These two loops, along with the Section 16 hike, create opportunity for a longer figure-8 adventure, or even a double-helix hike for those wanting an all-day excursion.
Due to its easily accessible trailhead, crowds are common -- those wanting a simpler, quieter experience aim for an early morning start or a winter hike. Depending on recent weather in winter months, traction may be required, but the frozen waterfalls, snow-laden evergreens, and shimmering valley views make it worth it. Explore the full Seven Bridges to Kineo Mountain Hike profile below for trail map, driving directions, and more tips and details to help you enjoy this year-round adventure just south of Denver.
Trail Snapshot: Seven Bridges to Kineo Mountain Loop
| Hike Distance | 7.5 miles Round Trip |
|---|---|
| Difficulty | Moderate to Difficult |
| Duration | Approx 4hr |
| Trail Type | Loop |
| Starting Elevation | 7,500′ |
| Elevation Gain | Approx +1,600′ |
| Seasons | Year Round |
| Dogs | Allowed On Leash |
| Hike Trail Map | Click for Trail Map of the Seven Bridges to Kineo Mountain Hike |
| Denver Drive Time | 90 minutes |
| Driving Directions to Seven Bridges Trailhead | Click for Google Map |
| Town Nearest Hike | Manitou Springs and Colorado Springs, Colorado |
| Beauty | waterfalls, backcountry valleys, views of Colorado Springs |
| Activities | Hiking, Biking, Snowshoeing |
Parking & Trailhead Information for Seven Bridges Trail
From Denver, cruising south on I-25, take exit 140 for Tejon Street. After turning right onto Tejon, curve slightly right through the traffic circle to jump onto Cheyenne Blvd. In 2.5 miles, stay right and begin the ascent up North Cheyenne Canyon Road. About 3 miles up the road a large dirt parking lot sits at the junction of Cheyenne Canyon Road, Gold Camp Road, and High Drive (gated). (Note: just prior to reaching this junction, daytime sightseers can stop at Helen Hunt Falls.) The Seven Bridges parking lot fills fast and sometimes attracts unscrupulous thieves, so we recommend going early and placing valuables securely out of sight.
The Hike: Seven Bridges to Kineo Mountain Loop
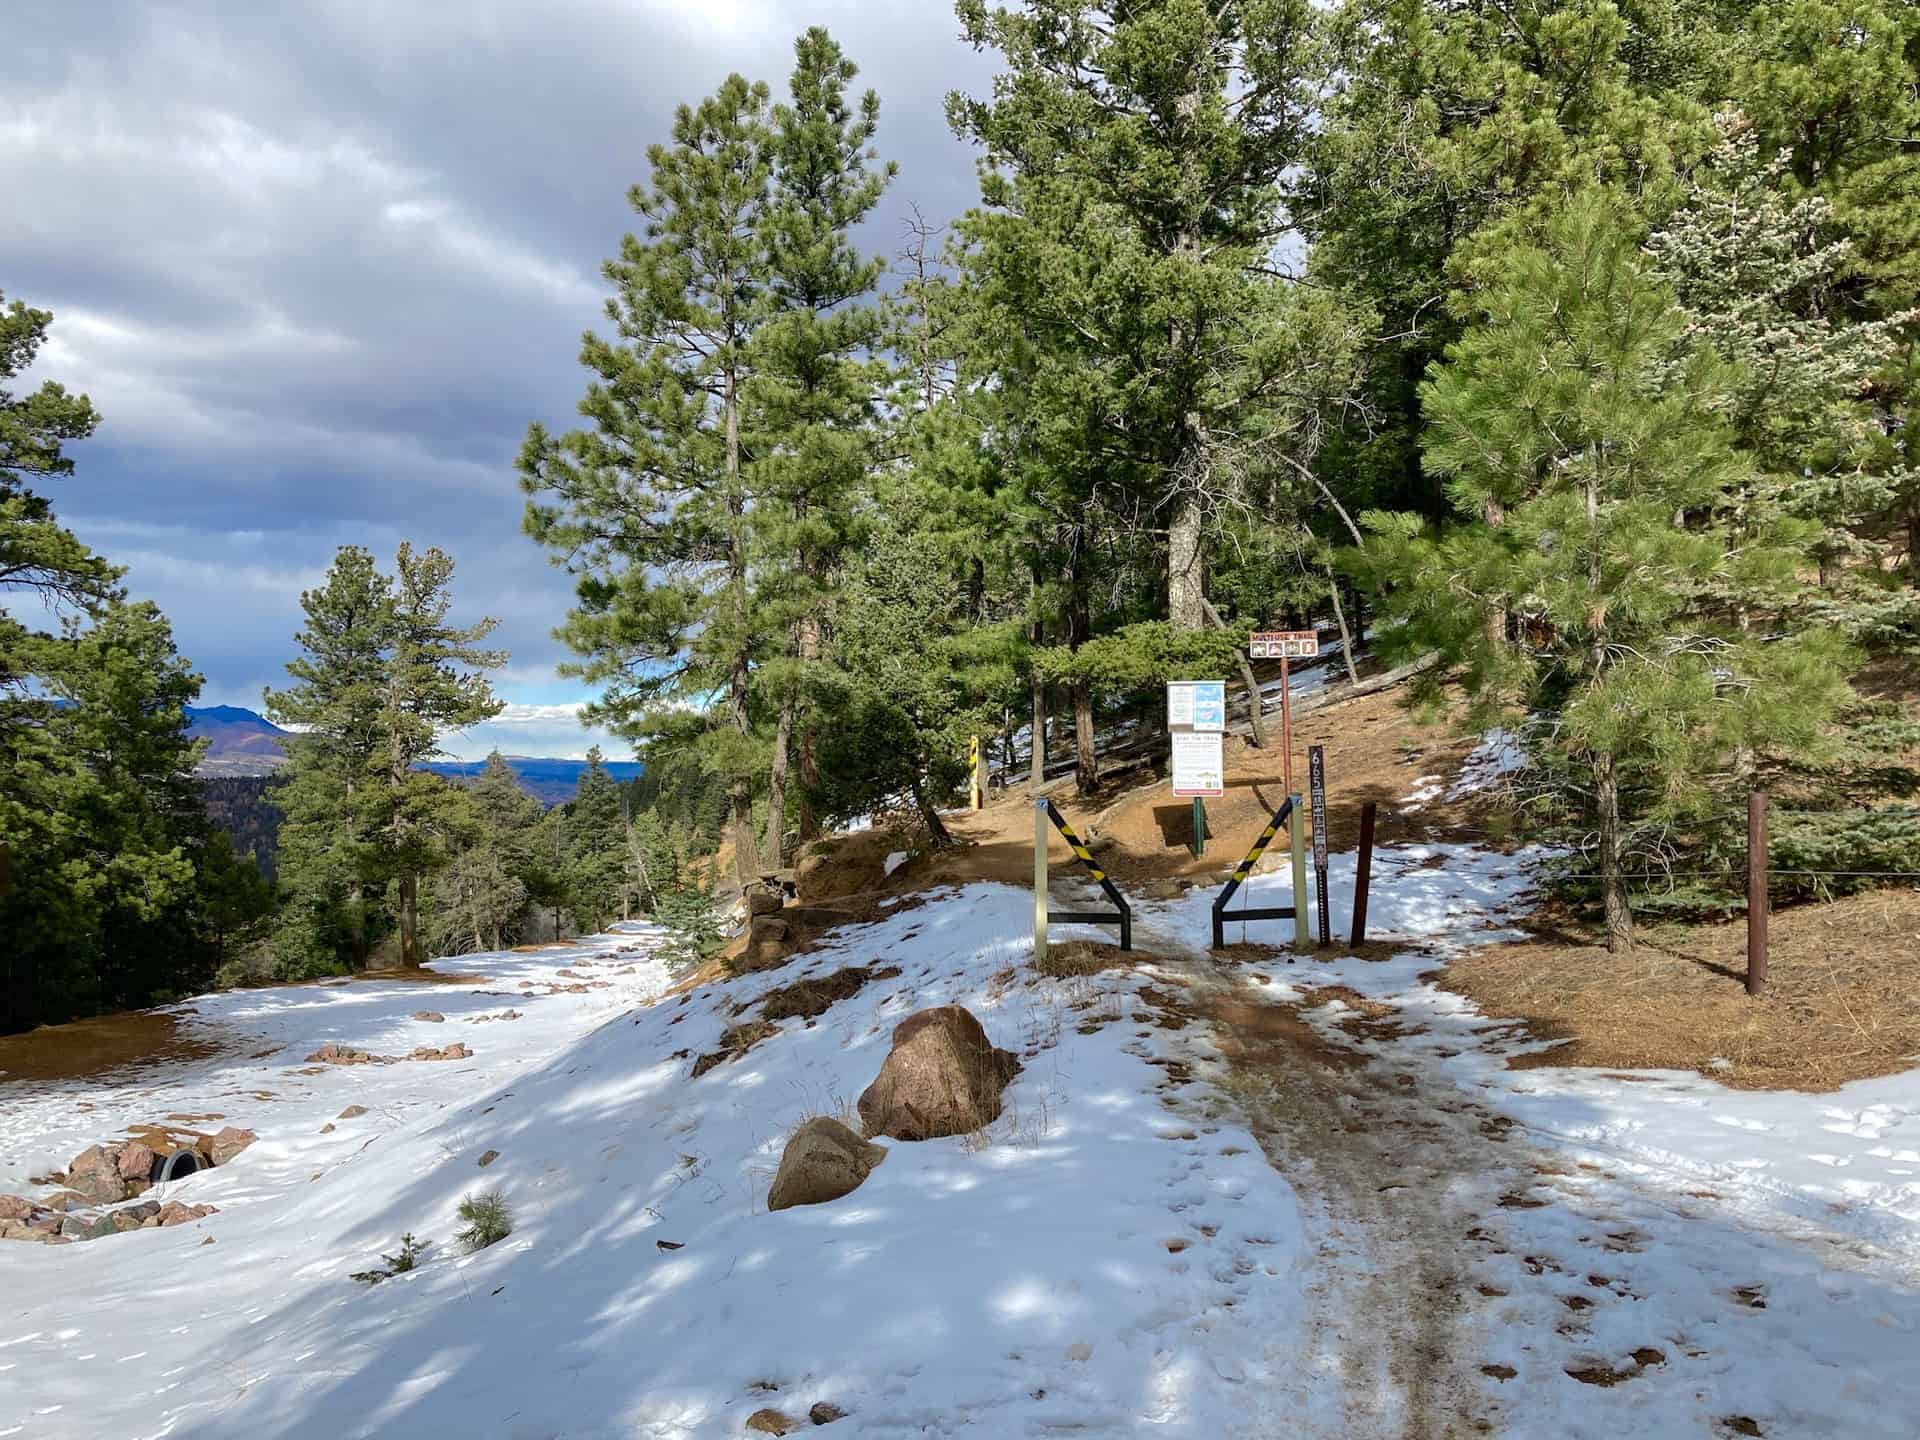
The trail commences at the far end of the parking lot, beyond a stout gate, heading up the decommissioned section of Gold Camp Road. At about 3/4-mile, the road crosses North Cheyenne Creek and immediately after, on the left, appears the Seven Bridges Trail (#662) junction.
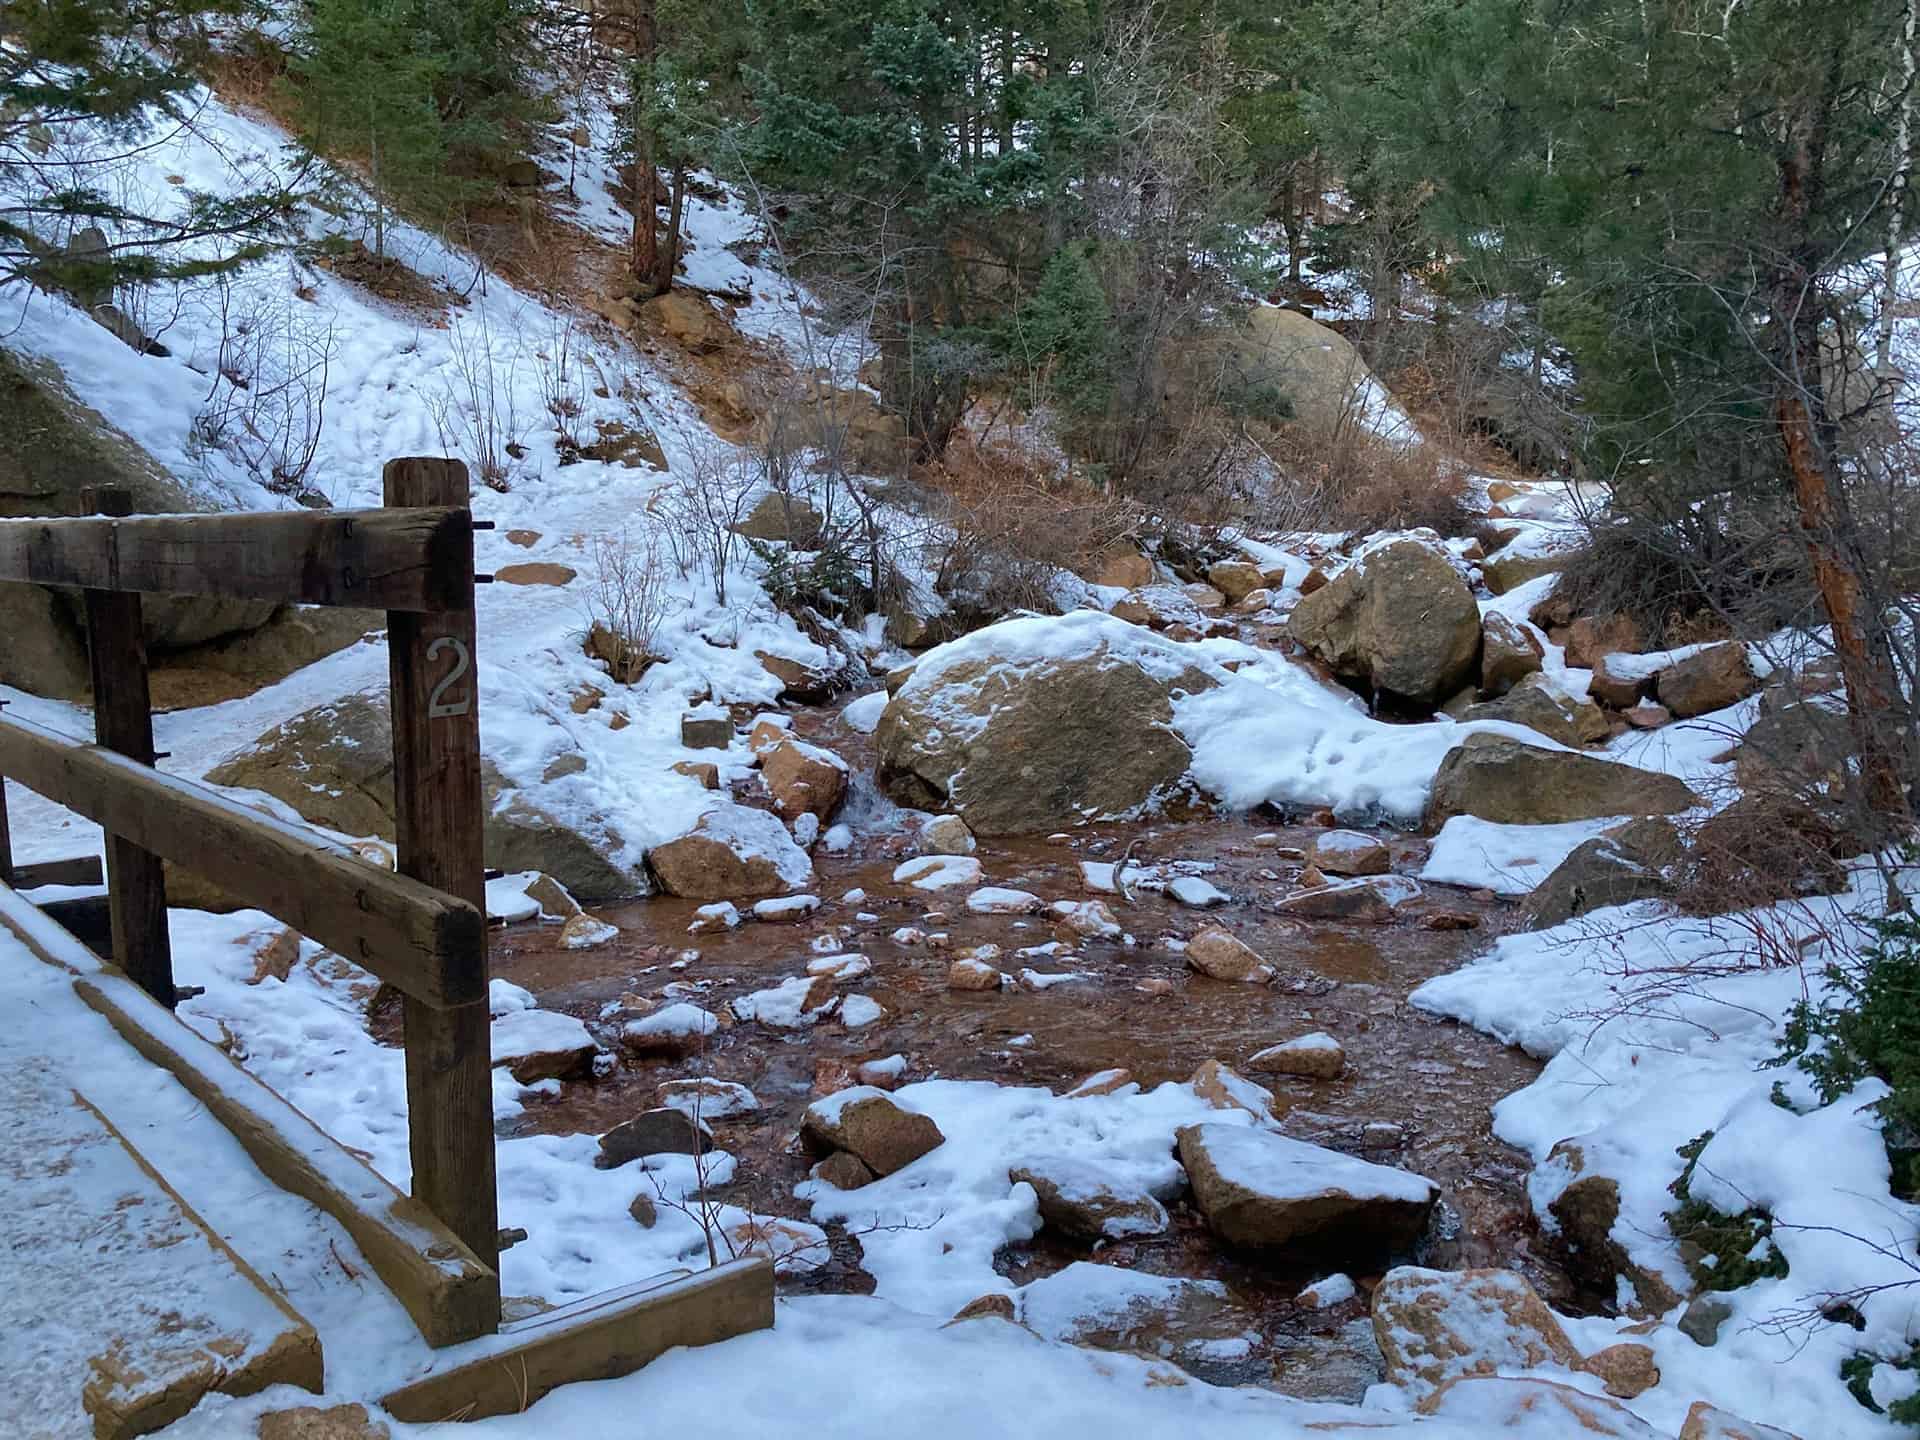
Over the next 1/4-mile, Trail 662 follows the creek, crossing it seven times. This short stint offers nearly endless opportunities to stop, listen, marvel and wonder. After Bridge #7, the trail steepens considerably as it stretches toward its junction with the overlapping Jones Park (#701) / Kineo Mountain / Captain Jack's (#667) trails. Just under 1.5 miles ahead, a bypass trail curves off to the right, marked by bright fuchsia blazes. Taking this bypass reduces the total hike lengthy by approximately 3/4-mile. If staying straight to reach the multi-trail junction, continue for another 1/4-mile along the creek and then turn sharply right onto Trail 701/667. The route levels and lingers along the backcountry ridge through evergreen and aspens, providing respite from the steady ascent.

Now the joyful task is simply plodding along a valley ridge for about 2.5 miles, up to the connection with the Mt. Buckhorn hike trail. The route weaves in and out of trees, punctuating the hike with vistas of the trail hiked 2.5 miles ago, etched into the opposite valley wall.
After the junction with Bear Creek Trail (#666), the Kineo Mountain loop continues by swinging back right, down the slope onto Trail 776 (Buckhorn Trail). Following this for about 1 mile, another bypass greets hikers on the left, permitting them to quickly regain Gold Camp Road and stroll back to the parking lot.
Tips & Resources for Hiking the Seven Bridges to Kineo Mountain Loop
- TIP: Parking fills fast, but an early start helps noticeably. Once back to the vehicle after the hike, a drive down Gold Camp Road cruises through chiseled tunnels and by more trailheads, used by hikers and bikers alike. Please note: this stretch of road is maintained but not paved and has several narrow turns. Do not drive this return route unless accustomed to mountain driving.
- Trail Map: Seven Bridges to Kineo Mountain Hike
- Packing List: Always pack the 10 Essentials. Download our Hiking Guide to get the list and dayhiking packing checklist. Additionally, take some time to review our 10 Winter Hiking Tips.
- Colorado Road Conditions: Colorado Road Conditions
- After the Hike: A local favorite, Wild Goose Meeting House (or their counterpart, Good Neighbors Meeting House), captures the essence of downtown COS. Grab a craft coffee and chef-level dish, or later in the day, a local beer on tap. For unique local fare, consider Edelweiss, a Old World treat.
Weather
Map & Driving Directions
Click for Driving Directions
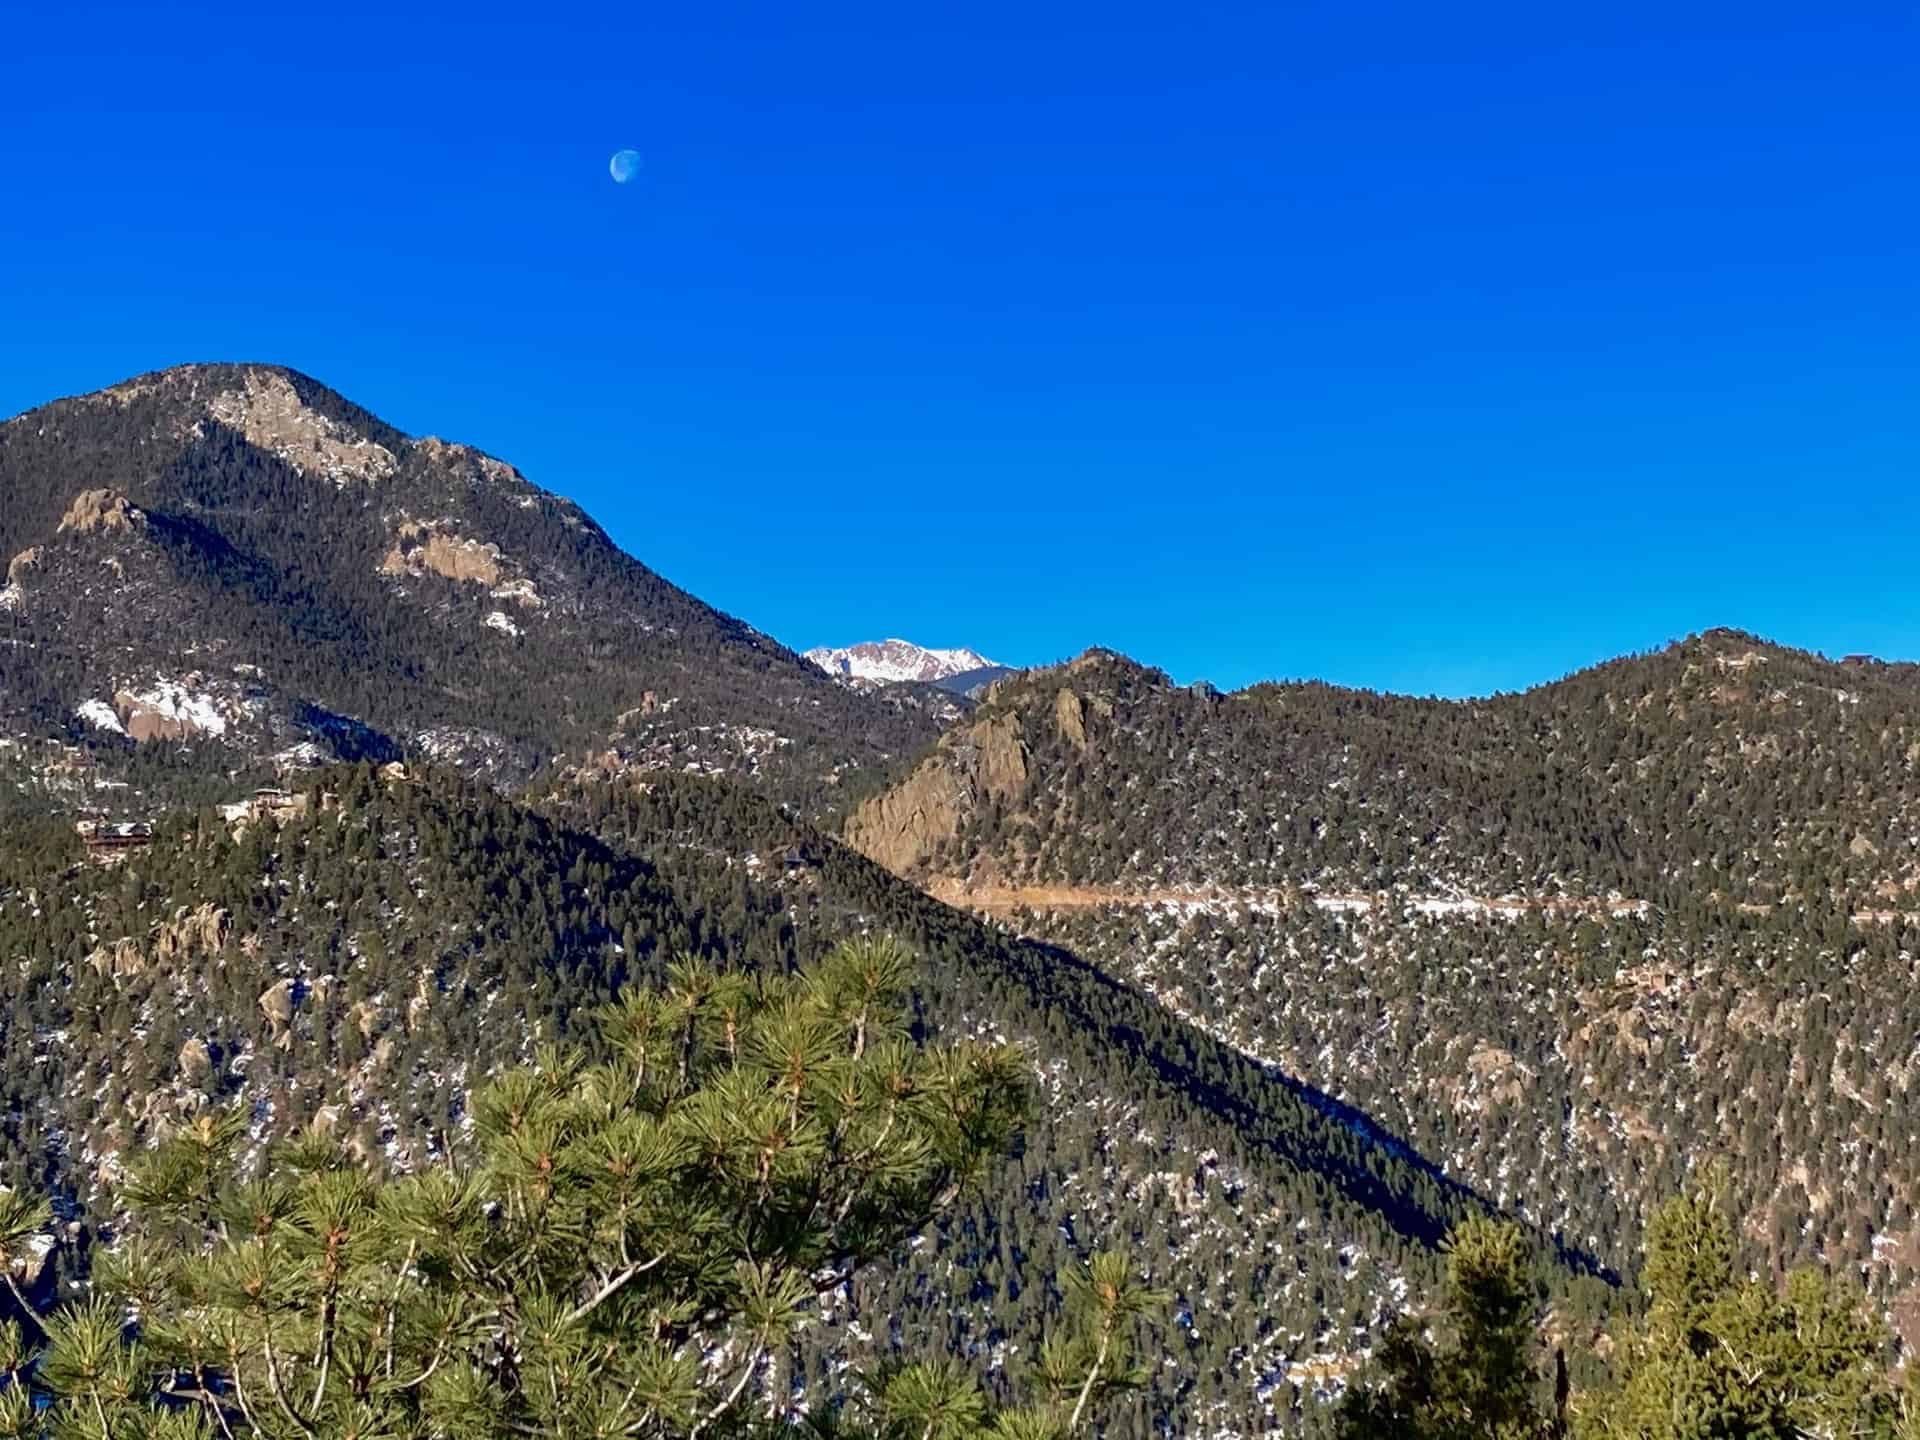
Section 16 Hike near Manitou Springs
Nestled between Manitou Springs on the west and Colorado Springs on the east, the Manitou Section 16 Open Space overlaps with the Red Rock Canyon Open Space to the north, just off Highway 24. Both of these systems connect to two other regional parks, creating a massive complex of trails that delights hikers of all ages and abilities. This route follows three trails through two territories for one heckuva hike! For the eager, this route can be augmented with the Mt. Buckhorn hike, and even the Seven Bridges & Kineo Mountain hike for the all-day trekker.
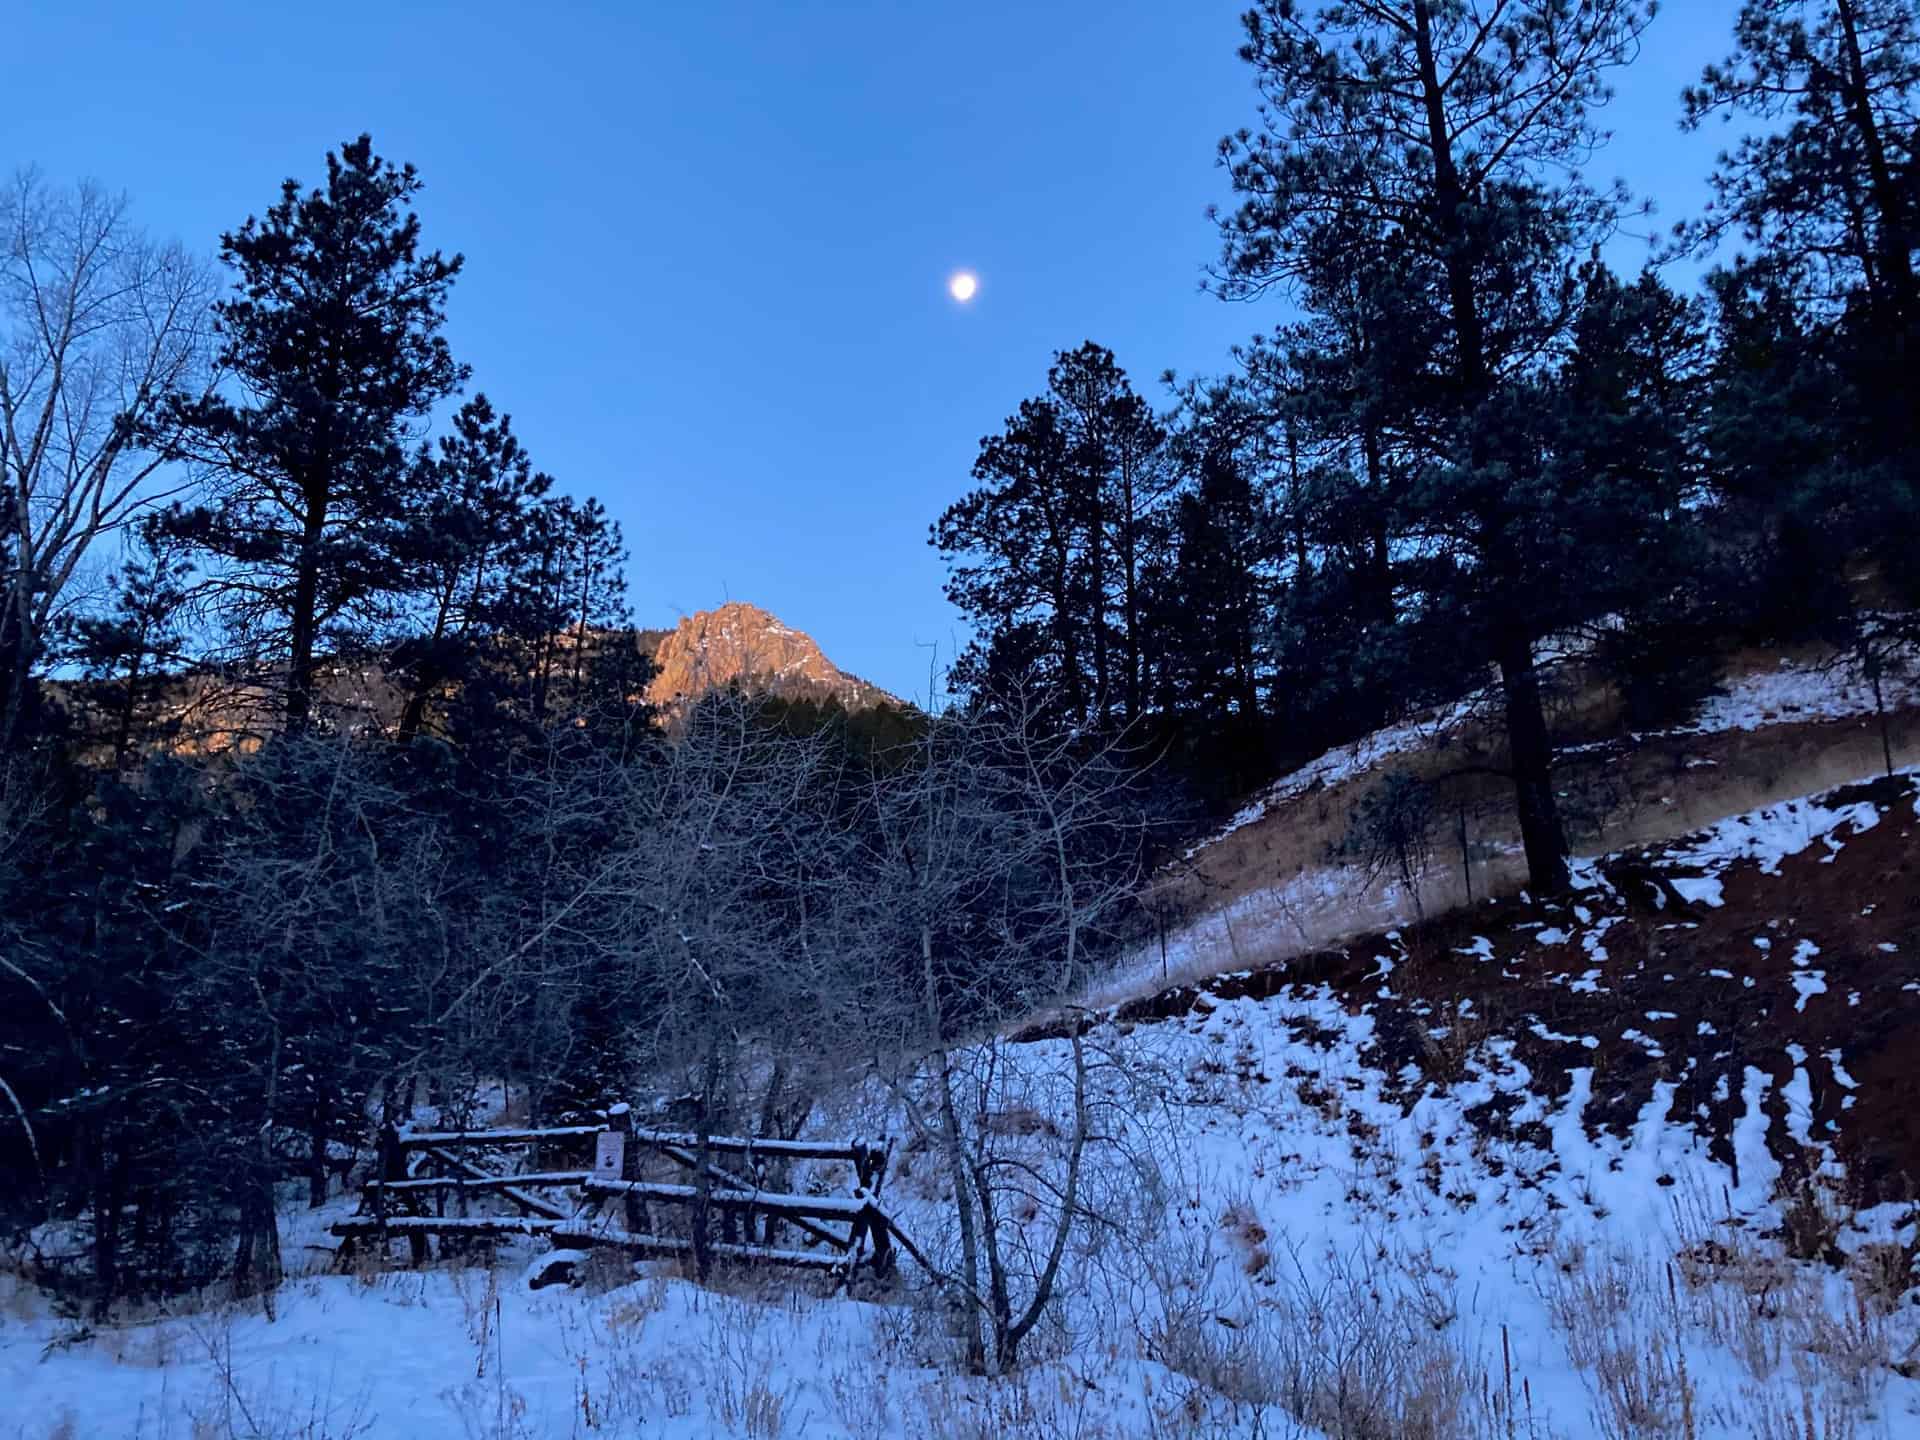
The surprising aspect of this Section 16 hike is its immediacy -- within minutes of turning off the highway the trailhead appears. Within minutes of leaving the trailhead the cityscape disappears. Even better, this hike delights hikers in all seasons: the new growth of spring, the full blossom of summer, the changing colors of fall, and the magically reflective light of winter's snow. Explore the full Section 16 Hike profile below for trail map, driving directions, and more tips and details to help you enjoy this year-round adventure just south of Denver.
Trail Snapshot: Section 16 Trail
| Hike Distance | 5.5-6.25 miles Round Trip |
|---|---|
| Difficulty | Moderate |
| Duration | Approx 3-4hr |
| Trail Type | Loop |
| Starting Elevation | 6,600′ |
| Elevation Gain | Approx +1,300′ |
| Seasons | Year Round |
| Dogs | Allowed On Leash |
| Hike Trail Map | Click for Trail Map of Section 16 Hike |
| Denver Drive Time | 1.25 hours |
| Driving Directions to Section 16 Trailhead (Section 16) | Click for Google Map |
| Town Nearest Hike | Manitou Springs and Colorado Springs, Colorado |
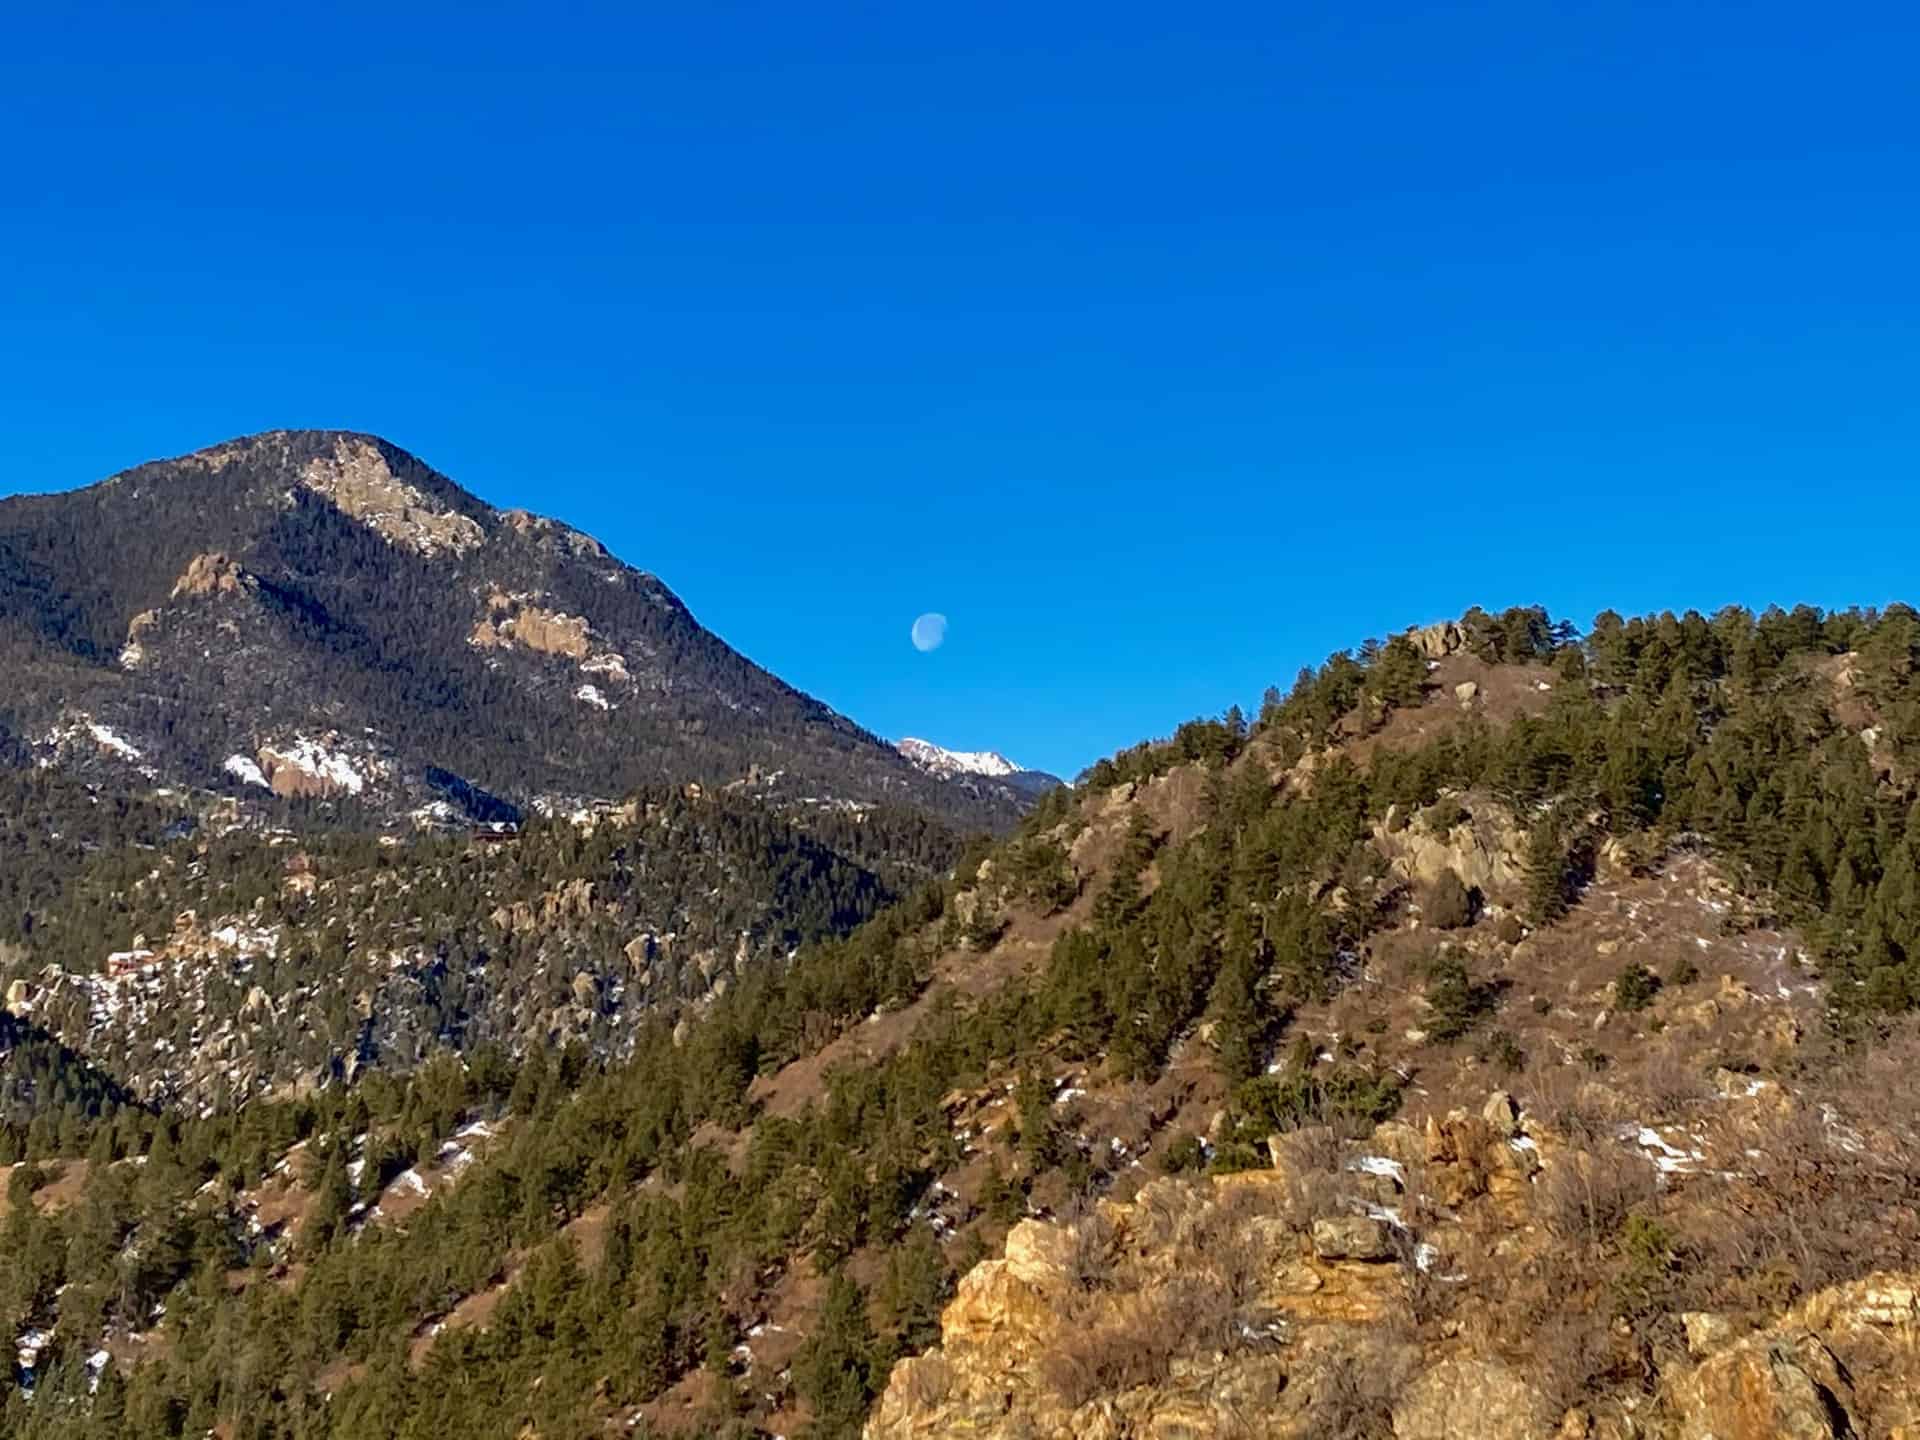
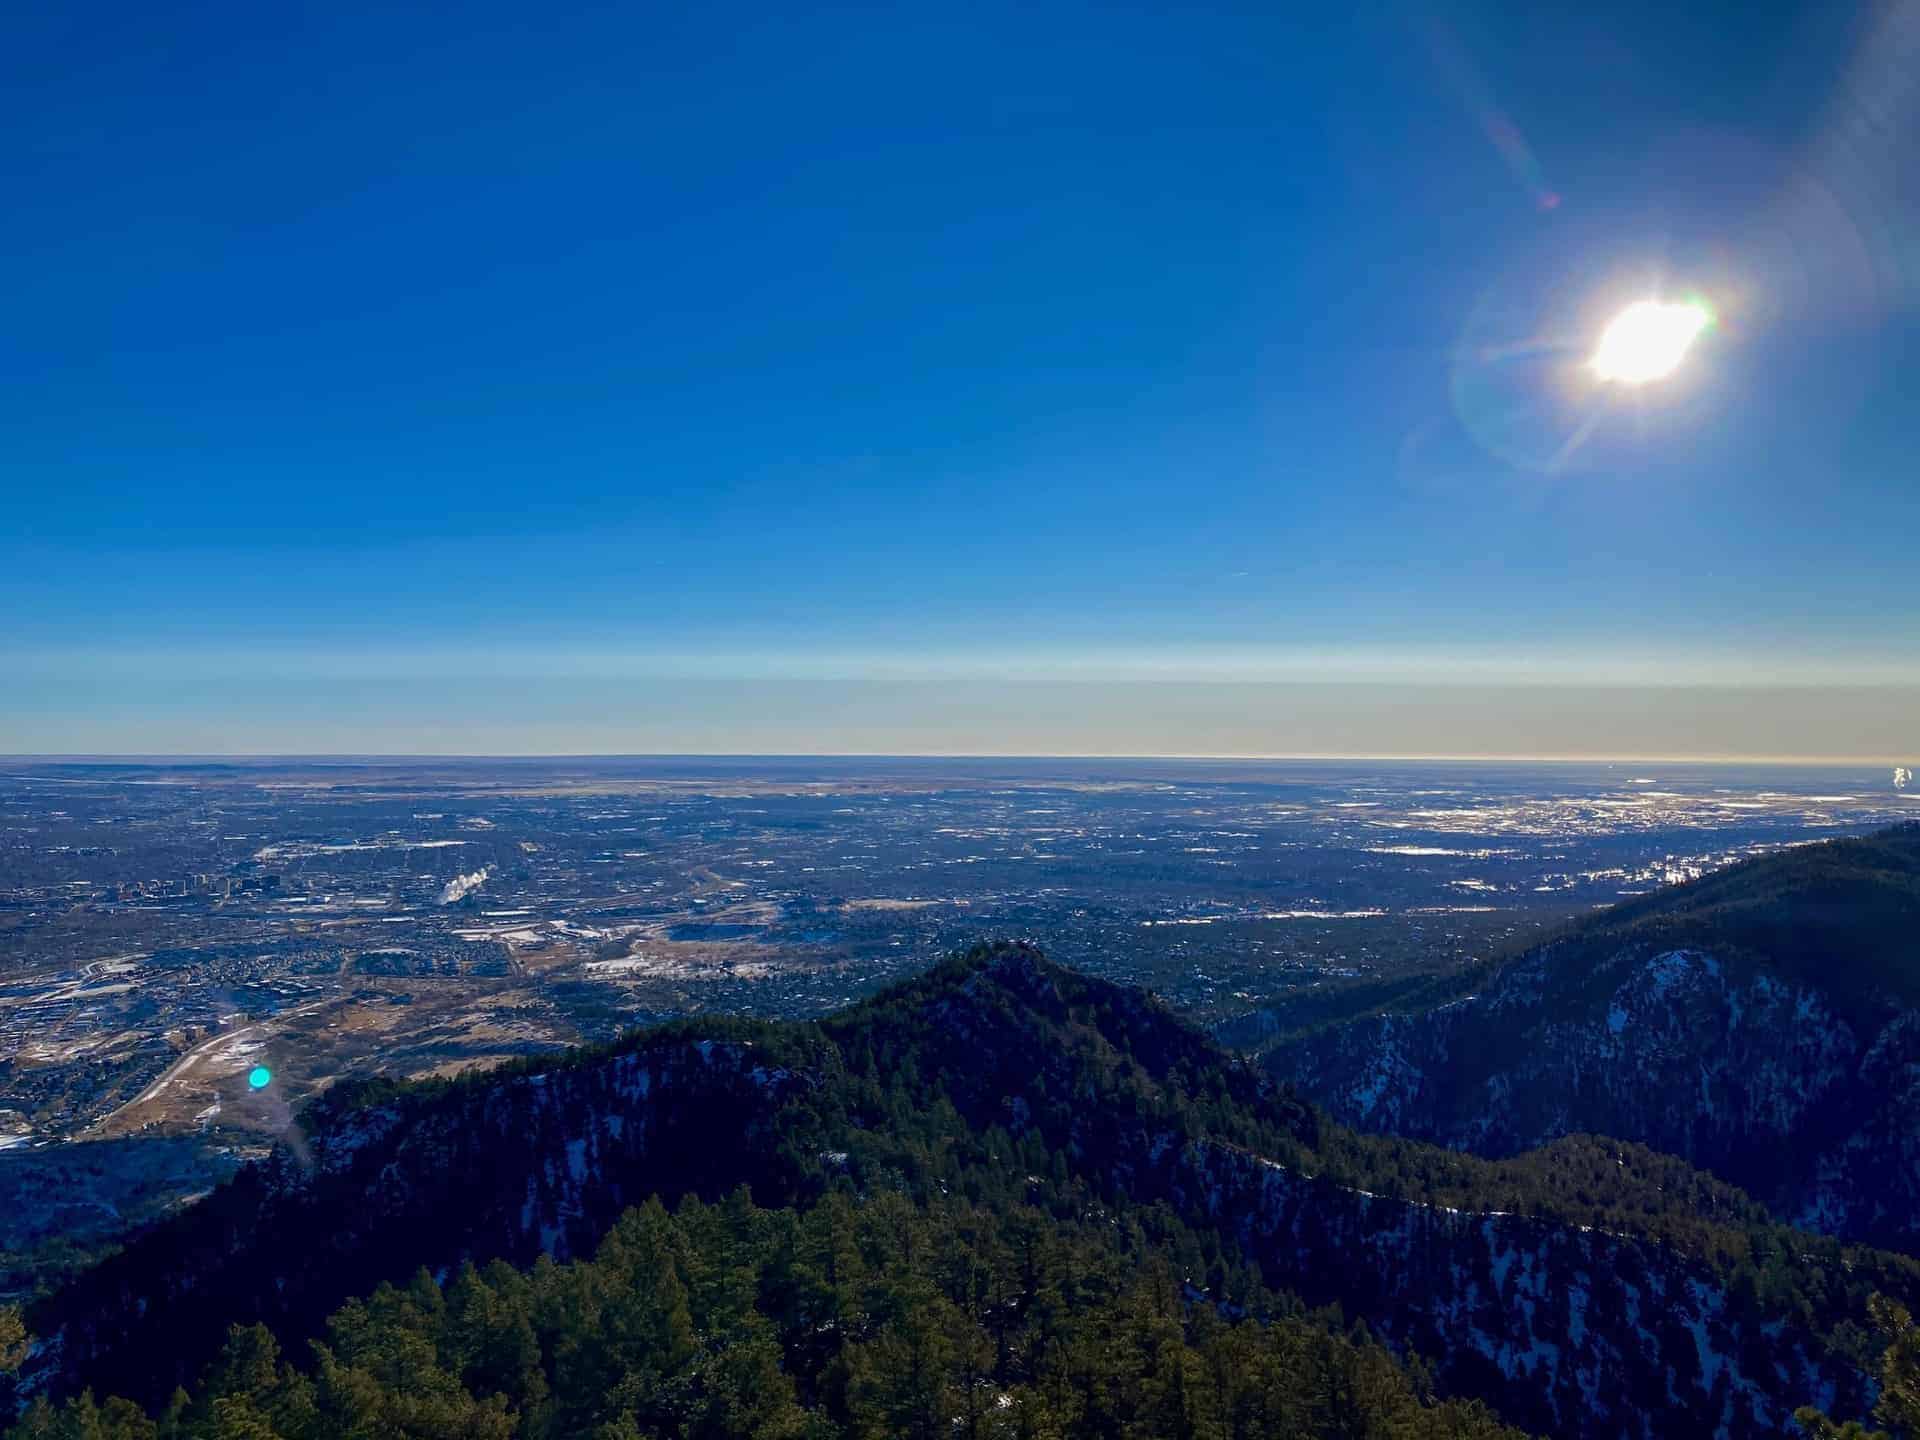
| Beauty | Pike's Peak, views of Colorado Springs |
| Activities | Hiking, Biking, Snowshoeing |
Parking & Trailhead Information for Section 16 Trail
From Denver, cruising south on I-25, take exit 141 for Highway 24 West. After approximately 1.5 miles, turn left (south) onto 21st Street, and then shortly thereafter, right (west) onto Lower Gold Camp Road. Staying straight through the 4-way stop (junction with Bear Creek Road), the Palmer Red Rock (Section 16 Open Space) trailhead is just under one mile up on the right. This parking lot offers about a dozen head-in spots and fills fast; another pullout parking lot is available up the road on the left.
The Hike: Section 16 Trail in Red Rock Canyon Open Space
While many hikers jump straight into the trek by ascending the stairs at the trailhead, taking a counter-clockwise tack, the following notes describe a clockwise path. This direction provides a spectacular viewing angle on Pike's Peak, and positions hikers for a fun descent through the trees at the end.
Leaving the parking lot, continuing up Gold Camp Road (which actually heads southwest), the route joins High Drive after 1/4-mile just as the road turns sharply left. High Drive meanders up into the backcountry past split-rail fences, over rock bridges, and through wide slot canyons. At approximately the 1-mile mark, the junction for the Section 16 Trail branches off to the right.
Now on Section 16 trail officially, the trail weaves in and out of forest, gently ascending toward a top elevation of nearly 7,900ft. At this point, around the 3.5 miles, watch for a connector trail shooting off to the left. For the curious, a short jaunt out and back affords sweeping views of peaks around Manitou Springs, as well as Garden of the Gods outside Colorado Springs.
Staying right and beginning a descent, the Section 16 Trail continues another 3/4-mile to an excellent excursion on an unmarked overlook trail. The tributary is heavily trafficked and easy to identify: it runs straight out from the main trail just prior to a moderate lefthand descent deep into the forest and rounds of switchbacks. The overlook ridge out-and-back adds approximately 3/4-mile to the overall milage of this loop. Once at the ridge edge, the sprawling plains of Colorado Springs spread out like a carpet from the forest's edge. Turning back toward the main trail, hikers gaze on Pike's Peak, perched between two converging foothill peaks.
The last part of the Section 16 Hike loop presents hikers with multiple connector trails. Generally staying straight, the trail flows back down and out of the valley approximately 2.25 miles to the parking lot.
Tips & Resources for Hiking Section 16 in the Red Rock Canyon Open Space
- TIP: The two connecting open space trail systems remain popular all year long. Parking fills fast, but an early start helps noticeably. Also, consider carrying a complete map that displays the many connector trails, such as this Red Rock Canyon Open Space Trail Map.
- Trail Map: Section 16 Hike
- Packing List: Always pack the 10 Essentials. Download our Hiking Guide to get the list and dayhiking packing checklist. Additionally, take some time to review our 10 Winter Hiking Tips.
- Colorado Road Conditions: Colorado Road Conditions
- After the Hike: A local favorite, Wild Goose Meeting House (or their counterpart, Good Neighbors Meeting House), captures the essence of downtown COS. Grab a craft coffee and chef-level dish, or later in the day, a local beer on tap. For a quick grab-n-go, consider Wimberger's Old World Bakery and Delicatessen, on the way out from the trailhead.
Weather
Map & Driving Directions
Click for Driving Directions
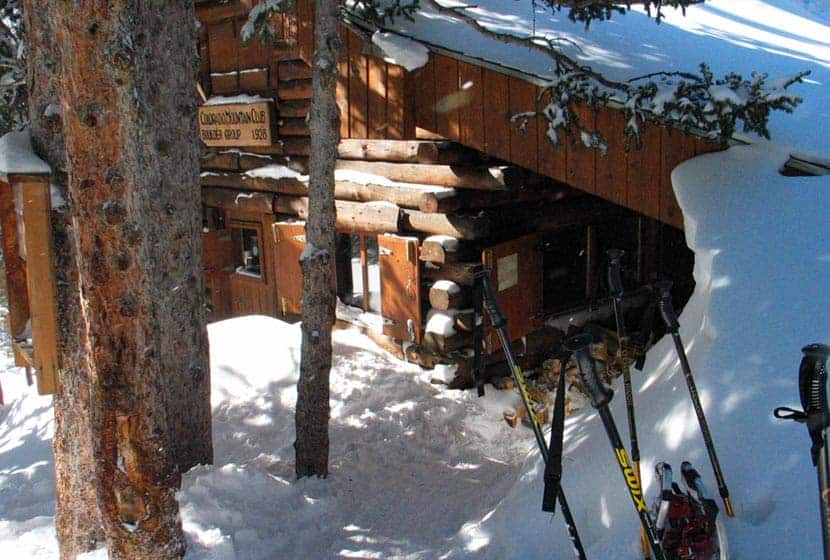
Brainard Lake CMC Cabin Hike
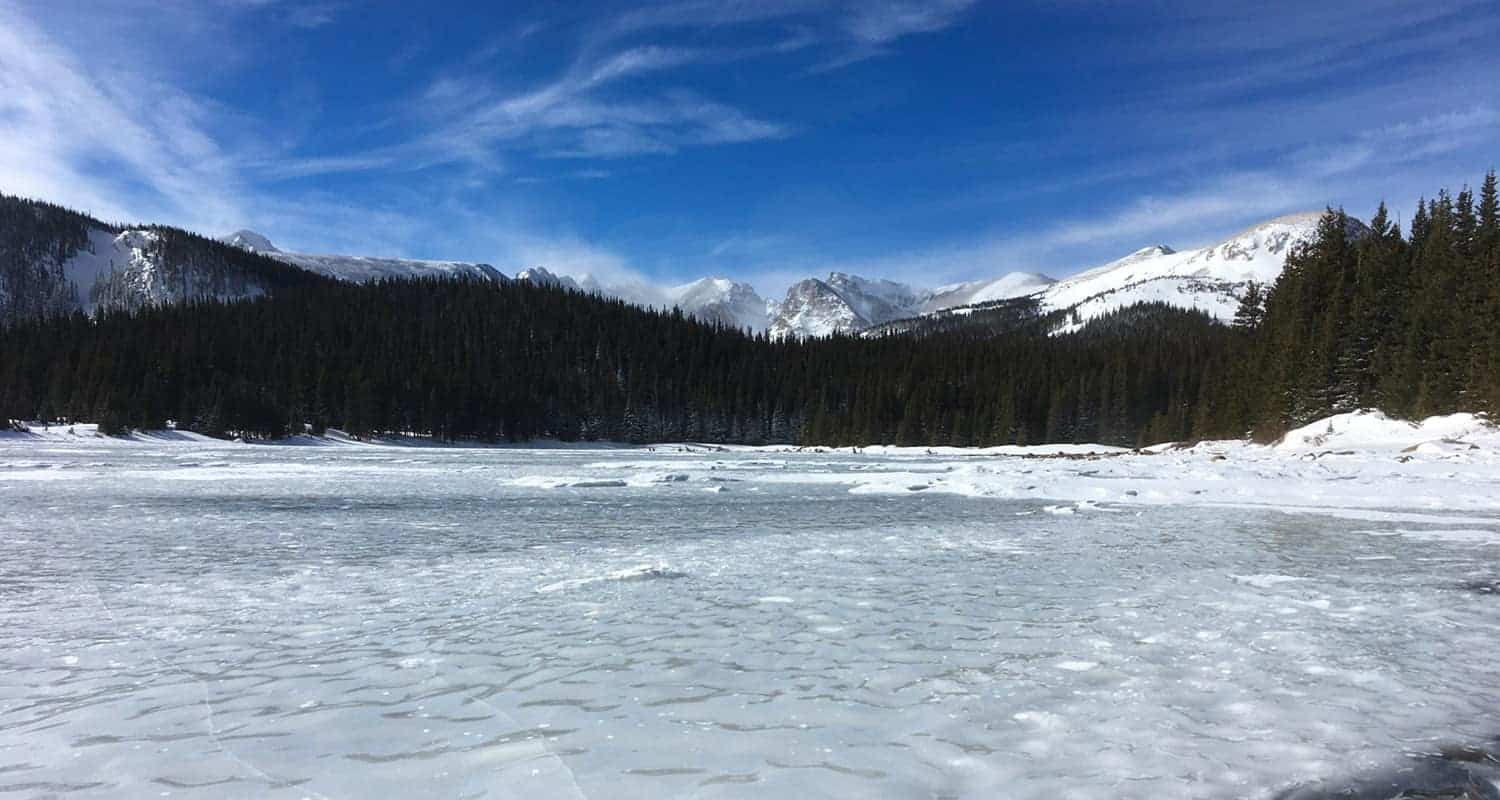
The CMC Cabin at Brainard Lake makes for a perfect winter snowshoe, a challenging ski in, or an easy Summer hike from the Gateway Trailhead. It's a 3-mile route in to the cabin to take in views of the beauty of Brainard Lake and surrounding snow-capped Rocky Mountains. This trail profile looks at two different 6-mile round-trip routes: a winter route via the Snowshoe Trail, and a summer route via the Waldrop Trail.
Trail Snapshot: Brainard Lake CMC Cabin Hike
| Hike Distance | 6 Miles Round Trip |
|---|---|
| Difficulty | Easy |
| Duration | Approx 2-4 depending on conditions |
| Trail Type | Out-and-Back |
| Starting Elevation | 10,080′ |
| Elevation Gain | Approx +400′ |
| Seasons | Snowshoe Trail: Winter Only Trail; Waldrop/St. Vrain Spring to Fall |
| Dogs | Only allowed on Brainard Lake Road from Nov. 15 through April 30 |
| Hike Trail Map: Winter Trails | Click for Trail Map of Brainard Lake Winter Trails |
| Hike Trail Map: Summer Trails | Click for Trail Map of Brainard Lake Summer Trails |
| Denver Drive Time | 1hr 20min |
| Driving Directions to Brainard Lake, Gateway Trailhead | Click for Google Map |
| Town Nearest Hike | Nederland, Colorado |
| Beauty | Mountain and Lake Views |
| Activities | Cross Country Skiing and Snowshoeing in Winter Months, Hiking in Spring to Fall |
Parking & Trailhead Information for Brainard Lake CMC Cabin
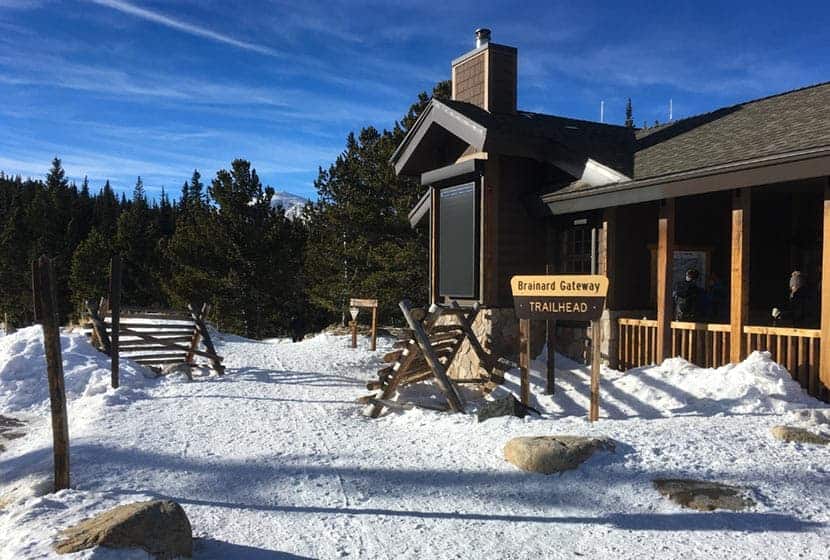
Both of these Winter and Summer adventures start at the Gateway Trailhead, also known as the Brainard Lake Winter Lot. I've found that guidebooks and maps get confused with the name. But from hiking here a few times, this is the most current info. The trailhead is massive, with tons of parking and year-round restroom facilities. However, parking in the Winter months can fill by around 9am on the weekends because this trail system around Brainard Lake is probably the most popular snowshoe and non-groomed cross-country skiing destination near Denver. There are no fees to park at the Gateway Trailhead. There are fees during the Summer months for going through the gate station to the lots nearer to Brainard Lake.
From Denver, take Interstate 25 North to 36 West toward Boulder. You'll drive through Boulder on 36/28th Street as it goes North, then taking a left onto Lee Hill Road. This leads west where it makes a hard bend left and climbs into the foothills. Eventually, after about 6 miles it will dead end at a junction with Lefthand Canyon Drive. Take a left onto Lefthand Canyon and get ready for a winding drive for about 10 miles. Drive carefully here and be on alert for cyclists and motorcycles. Because it's in shadow most of the day, the road can get pretty icy and packed with snow in sections during the Winter. You'll pass through the little town of Ward, Colorado, that looks a lot like an 1800's Colorado mining settlement. There is a roadside art gallery and a coffee and ice cream place. Lefthand Canyon Drive stops where it meets up with CO-72. Take a right onto CO-72, then make an almost immediate left onto Brainard Lake Road. Proceed for about 2.5 miles and you'll find the Gateway Trailhead on your right.
The Hike: Gateway Trailhead to CMC Cabiin
Winter Snowshoe Trail to CMC Cabin
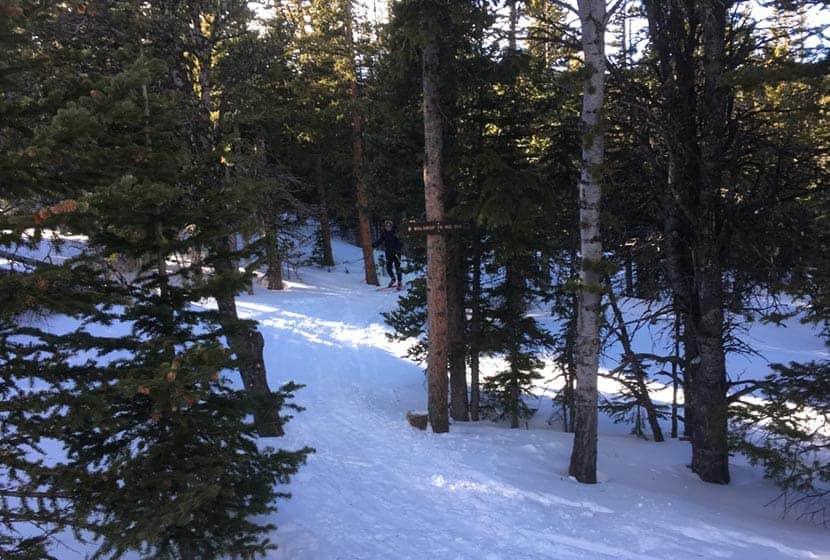
In the Winter, snowshoers will follow the Snowshoe Trail for 3 miles to the CMC Cabin. This is a Winter-only trail and dogs are prohibited. Many of the other trails in this area are Ski-only. The trails can be a bit of a maze, so I recommend printing off a trail map or having an app with you (no service, so download the map) so that you can stay oriented.
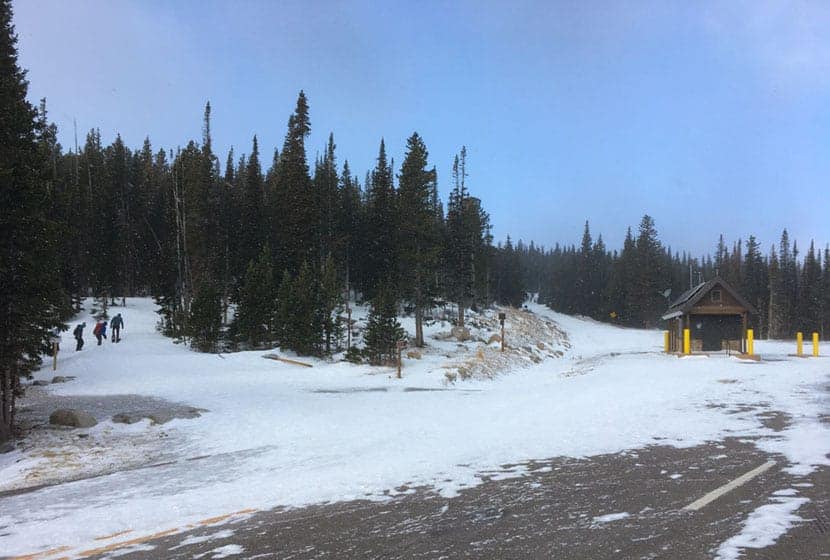
Finding the trail may be the most difficult part. Hike or snowshoe back out to the main road and head toward the gatehouse. When facing the gatehouse, the trail begins just before it on the left/south side of the road (see photo above). But why not just hike the road in, especially if it's covered with snow? The road is definitely an option and more direct route. Dogs are also allowed on the road, but the road is broad and open to wind, which can be chillng. The difference between the road and trail can be dramatic when it comes to keeping warm in the shield of the trees.
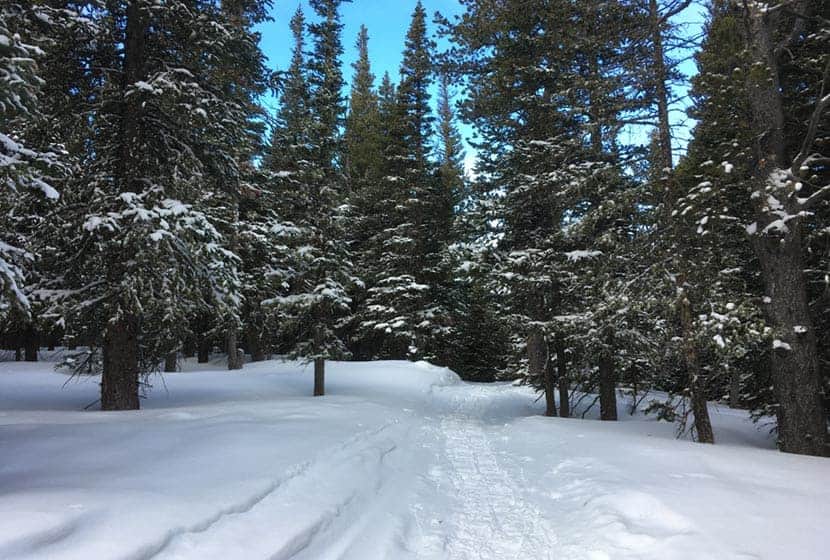
The trail will run past Red Rock Lake as it stays on the south side of Brainard Lake Road. This segement is about 1 mile before it turns North and merges with the road. You'll go left on the road proceeding for a short distnaceon it until you see signs on your right/north for the Snowshoe Trail. Keep your eyes peeled for signange at the next junction that will point your left/west to continue on the northern segment of the Snowshoe Trail.
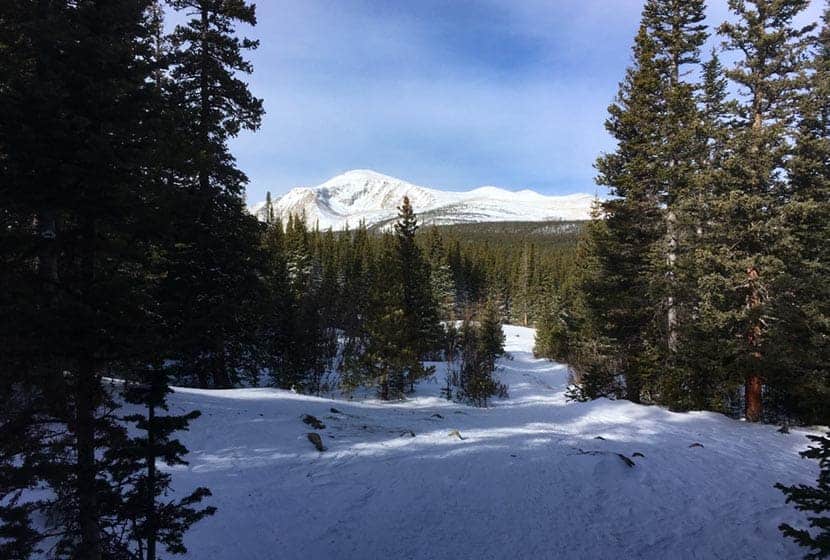
The trail will eventually emerge back out onto the road crossing the bridge over Mitchell Creek. Here is where you'll be able to take in views of Brainard Lake and the snow-covered mountains of Indian Peaks. Look for signage tht will point you to the last segment of the Snowshoe Trail which will be on your right/north. This final trail segment will take you to the CMC Cabin. In the Winter months, the cabin is availabe as a warming hut to thaw out your cold toes and spend time getting refreshed before snowshing the 3 miles back to your car.
Summer Waldrop Trail to CMC Cabin
This next route can be taken in the Summer as a hike. In the Winter months, it's a ski-only trail, and quite demanding. If you plan on cross-country skiing this, it's not for beginners and you probably should have a backcountry cross-country ski so that you have a wider base to allow you to navigate all the ups and downs. In the Spring, their will likely still be a lot of snow on the trail, but in the Summer, this Waldrop route to the CMC cabin is a nice easy to moderate hike.
To pick up the Waldrop Trail, hike or ski out to Brainard Lake Road, follow the to the Gatehouse entrance area. You willfind signage for the Waldrop Trail on the right side of the road after passing the gatehouse and before Red Rock Lakes. The trail first heads almost directly North before bending back to the west through dense forest.
After about 2 miles, you'll encounter an open area with a junction with several other trails. This will point you to continue on the Waldrop Trail and notes that it's 1/2 mile to the South St. Vrain Trail.
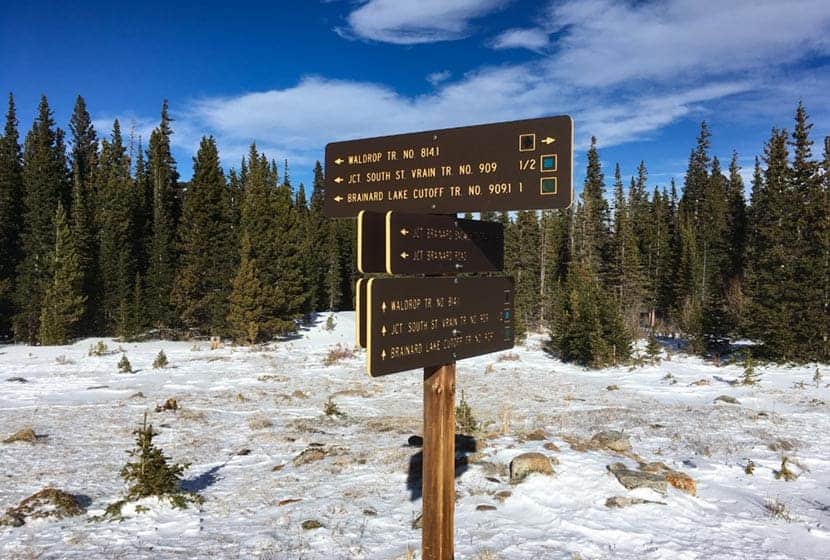
Hike or Ski this 1/2 mile segment on the Waldrop until it intersects with the South St. Vrain Trail, then go left/west onto the South St. Vrain Trail. This final segment will bend south toward the lake and the cabin. Follow the signs to the cabin. If you are skiing in, then warm up at the CMC Cabin. If it's Summer, you have a lot of return options, so check out the Brainard Lake Summer Trail Map to decide your route. If hiking back the way you came in, this makes for a total distance of about 6 miles.

Tips & Resources for Hiking at Brainard Lake
- CMC Cabin: The CMC cabin can be reserved for overnights. See details on the CMC Boulder page for the Brainard Cabin.
- Time: Winter travel can take longer than the usual 2 miles per hour hiking speed, so plan on it taking longer than usual..
- Winter Conditions: Weather can change in an instant at this altitude in the mountains and this can be especially deceptive during the Fall and Spring months when its warmer. Be sure to pack and dress for extreme winter conditions. Check the weather and keep an eye on the sky.
- Winter Trail Ettiquette: On multi-use trails where you see ski tracks, avoid snowshoing or hiking over top of the ski tracks. Instead, hike to the side to preserve these tracks for skiers. It makes a big difference for them. Allow skiers traveling downhill the right of way.
- Packing List: Always pack the 10 Essentials. Download our Hiking Guide to get the list and dayhiking packing checklist.
- Colorado Road Conditions: Colorado Road Conditions
- Photo: We would like to express our gratitude to Laura Scudder for sharing her photo of the Brainard Lake CMC Cabin.
- After the Hike: Woodfired Pizza at Crosscut Pizza and Taphouse in Nederland
Weather
Map & Driving Directions
Mesa Trail to Bear Canyon Creek
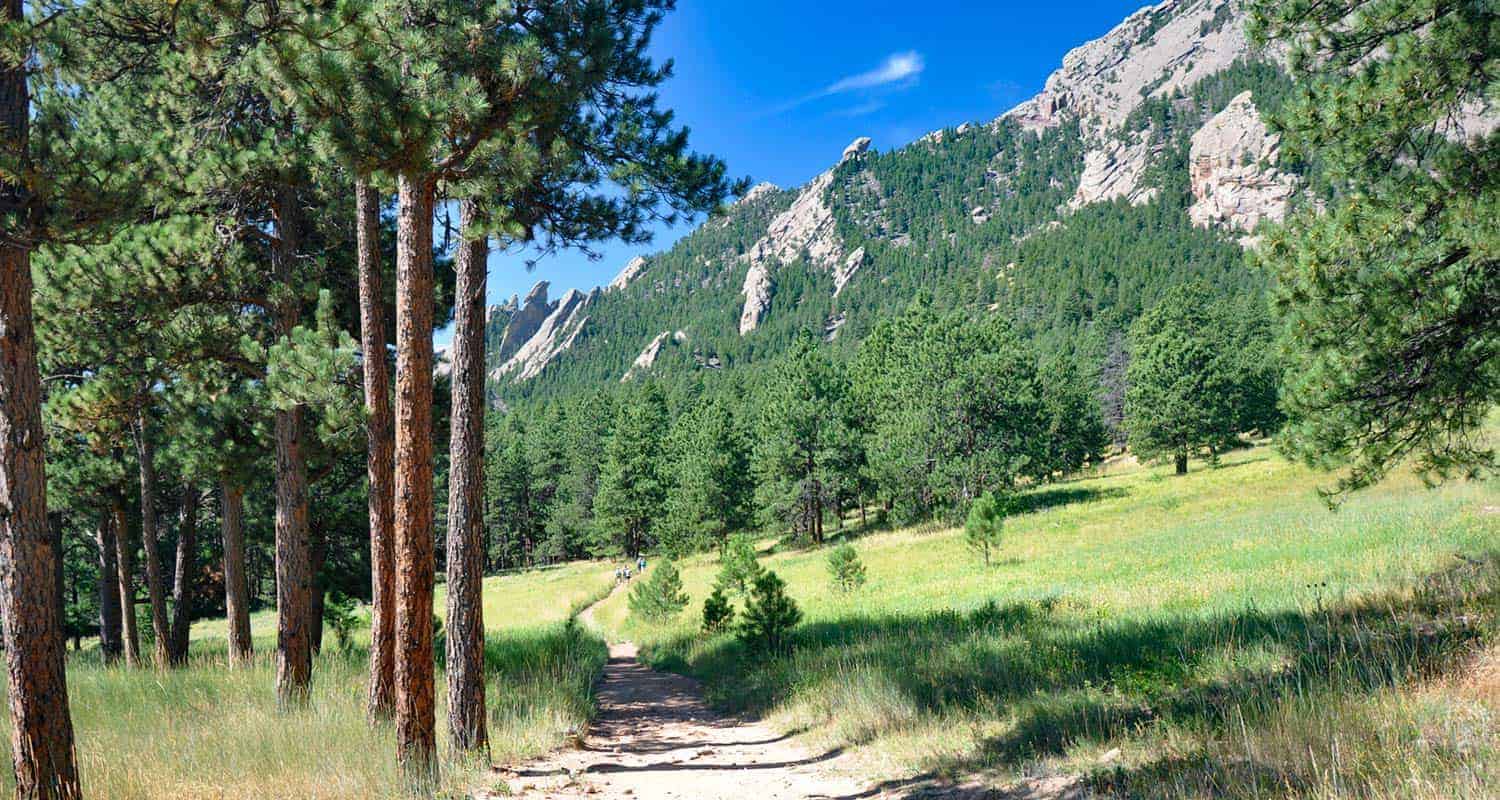
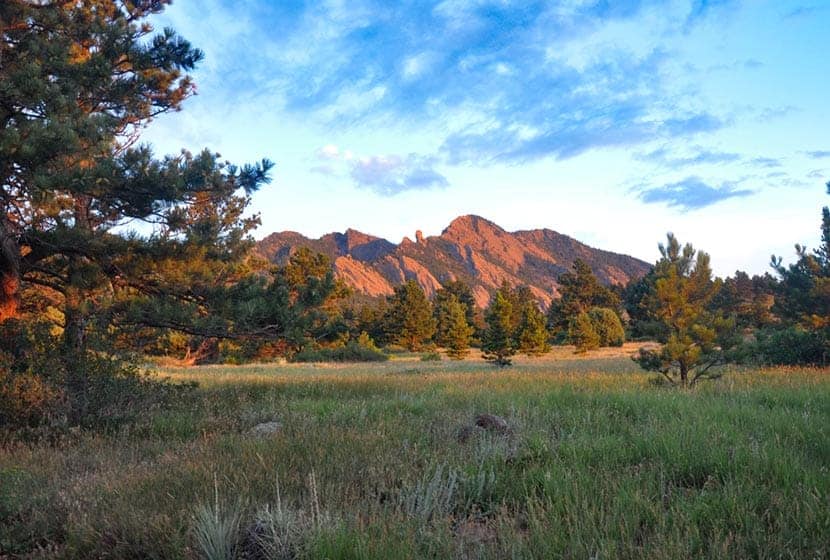
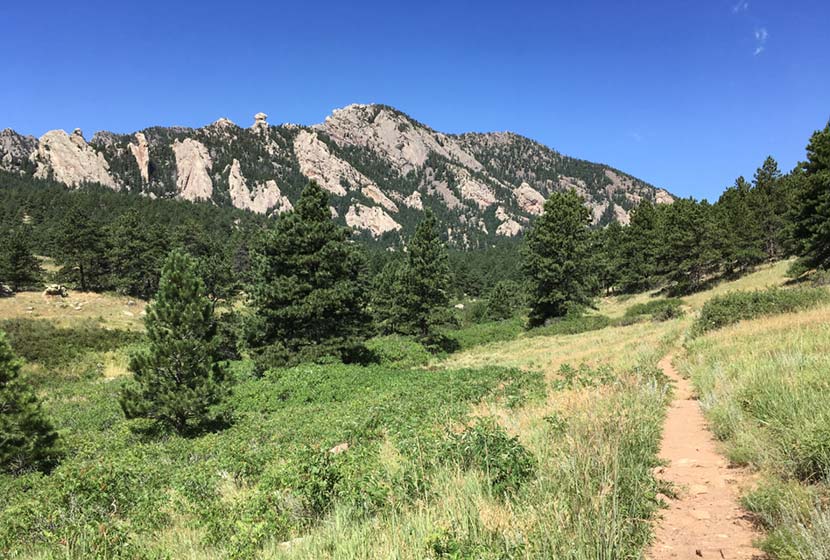
The Mesa Trail south of Boulder, Colorado, rambles across wild open country at the base of the iconic Flatirons. Hike a 4.1 mile loop or an 8.4 mile out-and-back option through pine woods, verdant creek draws, and flowering meadows. Explore the full Mesa Trail profile for this southern segment of one of our favorite dog-friendly hikes near Denver.
Trail Snapshot: Mesa Trail South
| Hike Distance | 8.4 miles Round Trip |
|---|---|
| Difficulty | Easy to Moderate |
| Duration | Approx 4 hours |
| Trail Type | Out-And-Back |
| Starting Elevation | 5650′ |
| Elevation Gain | Approx +900′ |
| Seasons | Year Round |
| For Closure Updates: | Boulder Open Space Closures |
| Dogs | Allowed On Leash |
| Hike Trail Map | Click for Trail Map of the Mesa Trail near Boulder |
| Denver Drive Time | 45 min |
| Driving Directions to South Mesa Trailhead | Click for Google Map |
| Town Nearest Hike | Boulder, Colorado |
| Beauty | Wildflowers, Sunrise, Meadows, Rock Formations, Wildlife: Deer, Bear, Birding. |
| Activities | Hiking, Trail Running, Photography |
Parking & Trailhead Information for the South Mesa Trailhead
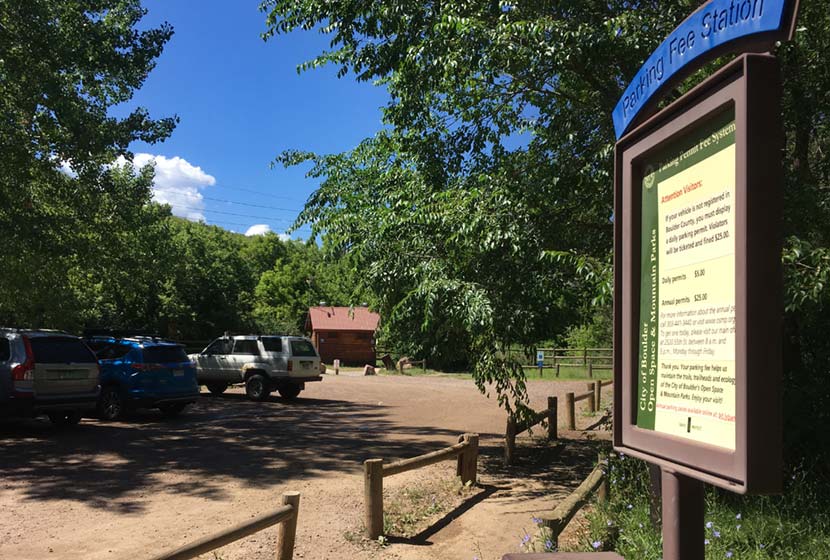
Access to South Mesa is from the South Mesa Trailhead off of Eldorado Springs Drive just South of Boulder. From Denver, drive North on interstate 25 to 36 toward Boulder. Take the McCaslin Blvd exit and then go south/west onto McCaslin. At the intersection of McCaslin and Marshall, take a right onto Marshall Road. Marshall will intersect with Eldorado Springs Drive. Here, take a left onto Eldorado Springs Drive. About two miles down the road, you’ll find the South Mesa Trailhead on your right. The South Mesa Trailhead is a part of the Boulder County Open Space and requires a daily parking fee, or an annual pass. I went online and bought an annual parking pass through the Open Space website. This gives you access to all the southern fee parking areas as well as the parking areas on Flagstaff Mountain. There are restrooms at the trailhead.
Alternatively, you can park at NCAR and hike south to the South Mesa Trailhead. If you want to hike this one-way without a return, you can park a car at NCAR or the South Mesa Trailhead. The National Center for Atmospheric Research (NCAR) Trailhead is located about 40 minutes North of Denver. From Denver, follow U.S. Route 36 to Boulder. Take the exit for Table Mesa Drive and follow it west. It will wind through a neighborhood to the end as it winds through the neighborhood and past Bear Creek Elementary School. The road will turn into the Drive for NCAR which winds up and around to a large parking area at the lab.
Waypoints and Hike Options for the South Mesa Hike
- South Mesa Trailhead to NCAR Trailhead 4.7 Miles - One-Way
- South Mesa Trailhead to Bear Canyon Creek and Back - 8.4 Miles
- South Mesa to Bluestem Loop 4.1 Miles - One-Way
- South Mesa to Chautauqua Park 6.75 Miles - One-Way
The Hike: Mesa Trail to Bear Canyon Creek
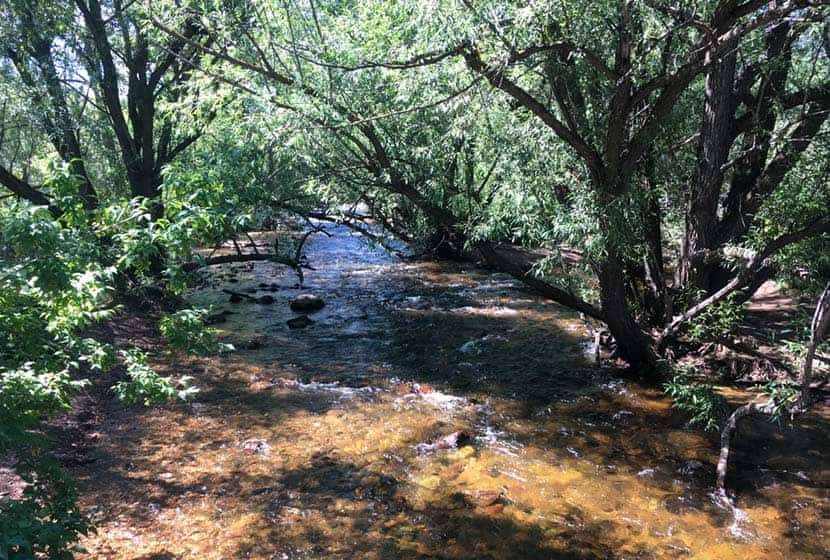
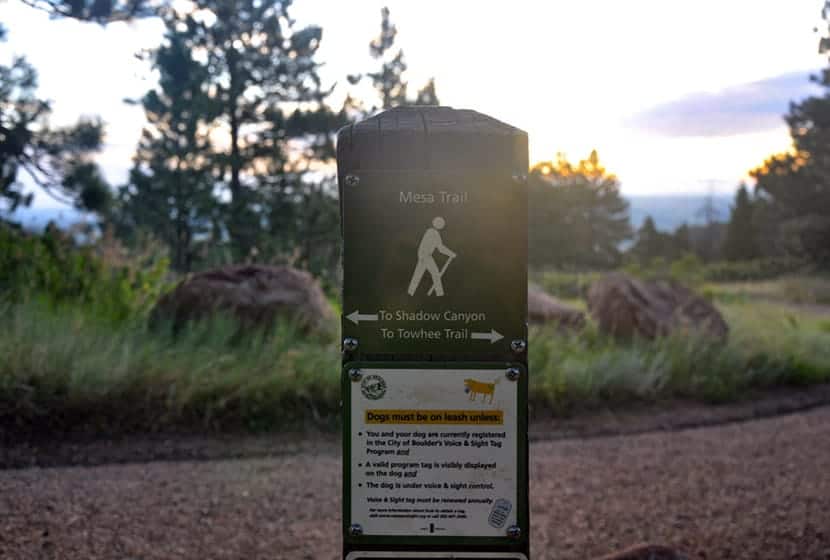
From the South Mesa Trailhead just East of Eldorado Springs, this hike begins along the banks of Boulder Creek (pictured above). Cross the bridge and pause to take in the willow trees bending over the creek and creating a tunnel of green above the silver waters. You'll cross another footbridge and emerge onto a broad trail. Soon, you'll come to the first trail junction with the Towhee and Homestead Trails. The Towhee cuts off a bit of distance and will take you back to the Mesa Trail, or just keep following the signs for the Mesa Trail as it wraps around to the west. Either way, the trails will both merge back onto the main Mesa Trail.
The Homestead trail heads west to Shadow Canyon and takes hikers up toward South Boulder and Bear Peaks. Both are more challenging hikes and provide incredible views out to the plains and west to snowcapped peaks.
This area of the South Mesa has a lot of side trails and options, so the most important thing to keep in mind is that the Mesa Trail, over its course runs north/south all the way up to Chautauqua Park.
Before you hike, be sure to review the map to get a feel for the area. The trails weave round, so it's easy to just meander around and take in the meadows and surrounding peaks. The trails are all well-marked, so when in doubt, just look for signs indicating the Mesa Trail and continue hiking north (with the foothills on your left). There are a lot of options for shorter hikes, but we will detail the journey up the Bear Creek Canyon and back.
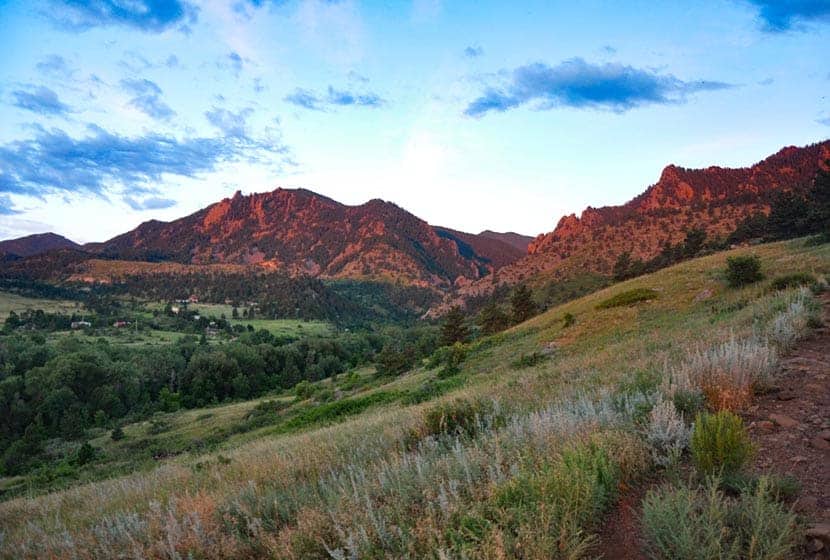
Early on, you'll gain a great view down into the entrance to Eldorado Canyon. The morning light brings out the pink granite of this range of sharp and angular foothill rock.
The Mesa trail then heads west and up along a gentle slope, then bends north to run parallel with the eastern flanks of the Flatiron range. Along the foothills to the left, you'll see Devils Thumb and the summit of Bear Peak.
As the Mesa Trail continues north, open sky gives way to the shade and scents of ponderosa pine trees then opens back to meadows again. In the Spring, wildflowers push up through the meadow grasses and unique fuana thrives in the unique zone where the foothills of the Front range meet the meadows. It feels humind in verdant creeks draws and dry when you emerge back onto the open Mesa.
If you would like to shorten your hike and make this into a loop hike, at around mile 2, you can take the Bluestem Trail back toward the trailhead. Otherwise, continue north on the Mesa Trail.
This is one of our favorite dog-friendly hikes near Boulder, and it's quite popular with dog owners on the weekends. In fact, just south of the intersection with the Bluestem, just shy of mile 2, there is a spring you'll find a small spring. It's a great place for your pup to get a drink to refuel for the rest of the hike. These trails also allow you to hike with your dog off-leash, if you've taken the Voice and Sight class and have a current Voice and Sight tag issued by Boulder county. You can get more info on this at the Boulder County Open Space site.
The trail will go up and down through several draws, then eventually cross Bear Creek. Here you are about a mile from the NCAR parking lot. If you've parked a car at NCAR, you can then shuttle back for your other vehicle, making this a 4.7 mile hike.
Bear Creek is the turn around point for this trail profile, making it an 8.4 mile out-and-back journey. However, if you want to add a cave to your adventure, continue north, then west for about 1.2 miles following the signs to Mallory Cave. If you have your dog with you, I would not recommend this extra jaunt as the terrain is rocky and steep.

Return south on the Mesa Trail and take the Bluestem Trail to cut off a bit of extra hiking.
Tips & Resources for Hiking the Mesa Trail
- Sunscreen: We added this hike to our list of hikes with shade, but there are still open segments, so sunscreen is still needed.
- Go on a Weekday: The South Mesa Trail system is busy on the weekends. So, if you are looking for some solitude, try a weekday
- Trail Map: South Mesa Trail System Map
- Packing List: Always pack the 10 Essentials. Download our Hiking Guide to get the list and dayhiking packing checklist.
- Colorado Road Conditions: Colorado Road Conditions
- After the Hike Cafe: Walnut Cafe in Boulder
- After the Hike Brewery: Sanitas Brewing Company
Weather
Map & Driving Directions
Click for Driving Directions
Eagles View Hike in Reynolds Park
The Eagles View Loop hike in Reynolds Park is a 4-mile, moderate, loop trail to a scenic outlook. The trail ascends through meadows and ponderosa pine forest to views of Pikes Peak and the sawtooth spires and peaks of the Rampart Range. Explore the full Reynolds Park Eagle View Loop hike profile below for trail map, driving directions, and more tips and details to help you enjoy this adventure near Conifer, Colorado.
Trail Snapshot: Reynolds Park Eagle View Loop
| Hike Distance | 4 or 4.4 miles Round Trip |
|---|---|
| Difficulty | Moderate |
| Duration | Approx. 2 hours |
| Trail Type | Loop |
| Starting Elevation | 7,250'′ |
| Elevation Gain | Approx +900′ |
| Seasons | Year Round |
| Dogs | Allowed On Leash |
| Hike Trail Map | Click for a Map of Eagles View Loop at Reynolds Park |
| Denver Drive Time | Approx. 50 min |
| Driving Directions to Reynolds Park | Click for Google Map |
| Town Nearest Hike | Conifer, Colorado |
| Beauty | Scenic Overlook, Aspen woodlands, Views of Pikes Peak and Cathedral Spires |
| Activities | Hiking, Trail Running, Equestrian Trails, Photography |
Parking & Trailhead Information for Reynolds Park
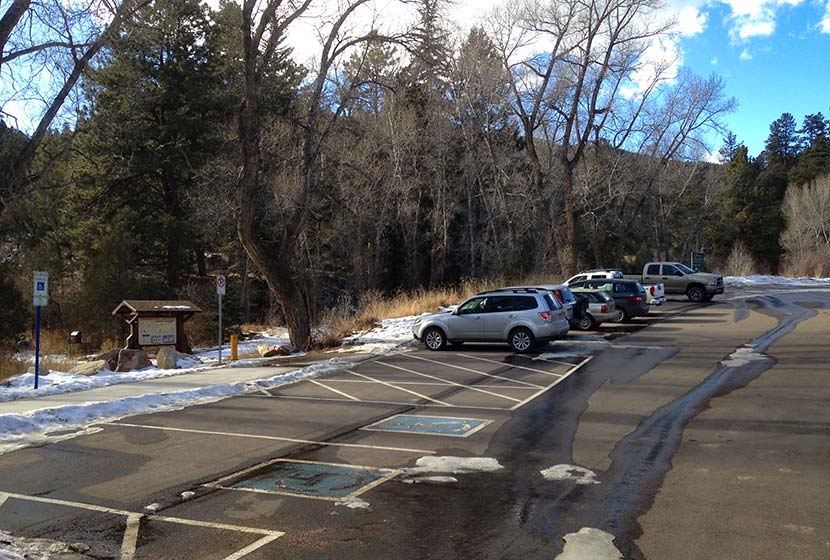
I really enjoy the drive into Reynolds Park, particularly for the last stretch descending to the trailhead. The trailhead is about 50 minutes from downtown Denver. From Denver, take 285 South to Conifer, Colorado taking the Kennedy Gulch exit. At the exit, you'll take a left onto Kennedy Gulch Road, which will go under the 285 overpass. At the next stop sign, you'll see a red barn in front of you and an entrance to 285 on your right. Here, you'll take a left onto Foxton Road. This is where that beautiful stretch of road begins. Drive for about 5 miles and the Reynolds Park parking area will be on your right. The parking area can hold about 45 vehicles. There are restrooms, picnic tables, and grills at the trailhead.
The Hike: Eagles View Loop at Reynolds Park
This loop hike gives hikers the most extensive exploration of the larger West side of Reynolds park. Begin by taking the main trail found on the south end of the parking lot (near the restrooms). It's wider than the other trails. At the first junction, take a right onto the Elkhorn Trail. This will lead through a mix of wooded areas and meadow.

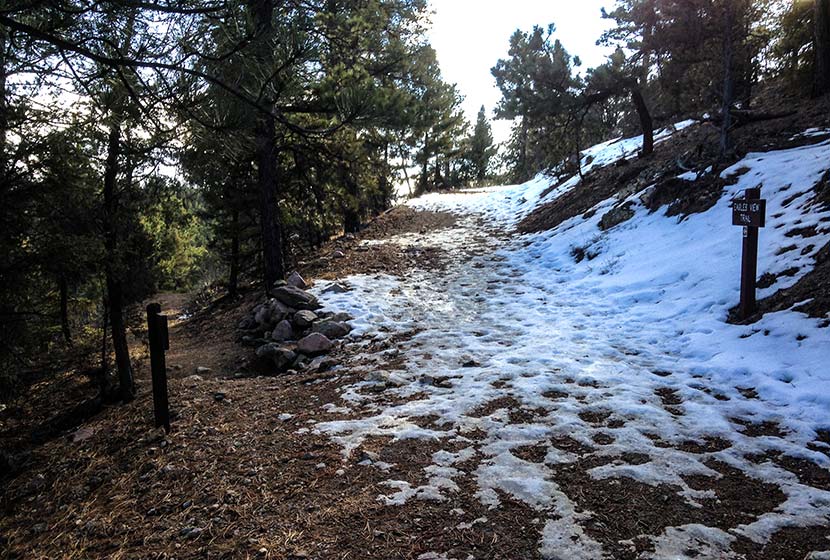
Hikers will travel about 0.3 mile on this segment of the Elkhorn Trail until it intersects with the Ravens Roost Trail. Here, take the Ravens Roost trail which is more steep, ascending for 0.6 of a mile up to the next junction with the Eagles View Trail. Both the Ravens Roost and Eagles View trails are Hiker and Equestrian Only (no bikes, but dogs are allowed). You'll travel through stands of ponderosa pine. Look for Clarks Nutcracker and Stellar Jays as you hike. At the junction, the Eagles View Trail will bear to the right (pictured below).

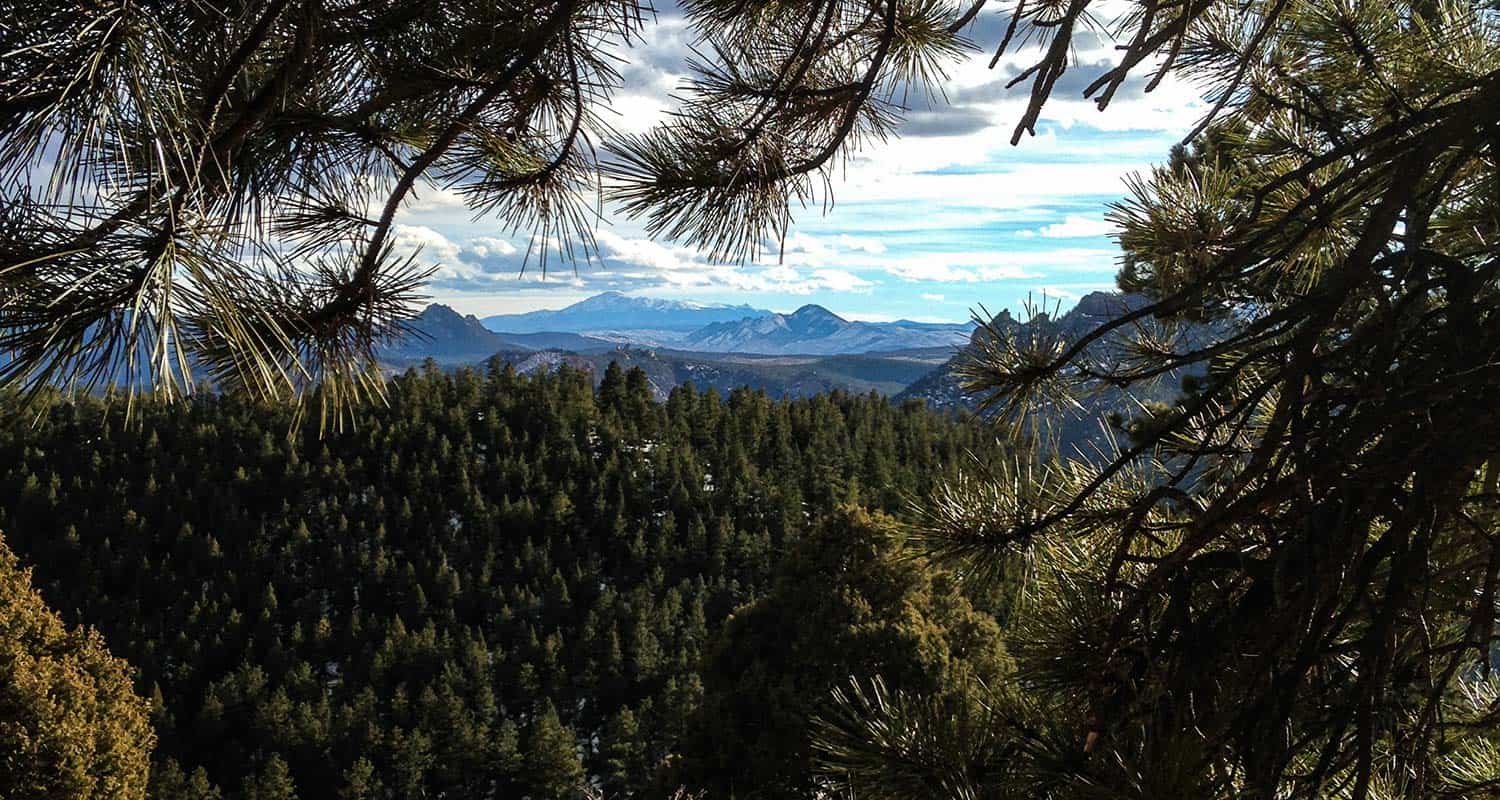
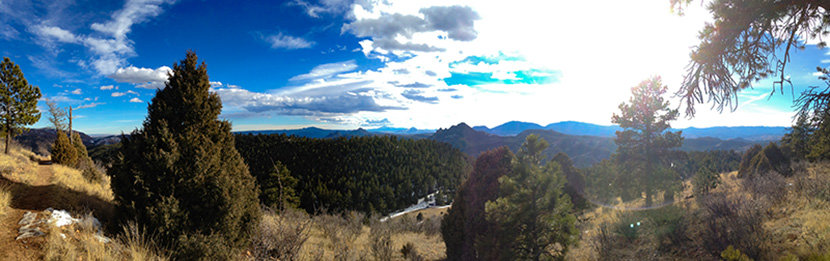
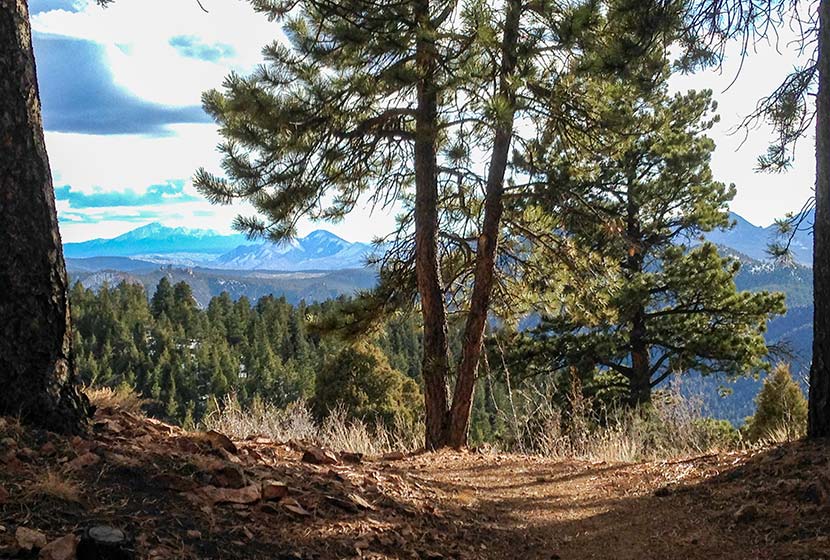
The trail will eventually open up to panoramic views, with the Eagles View scenic viewpoint being the best.
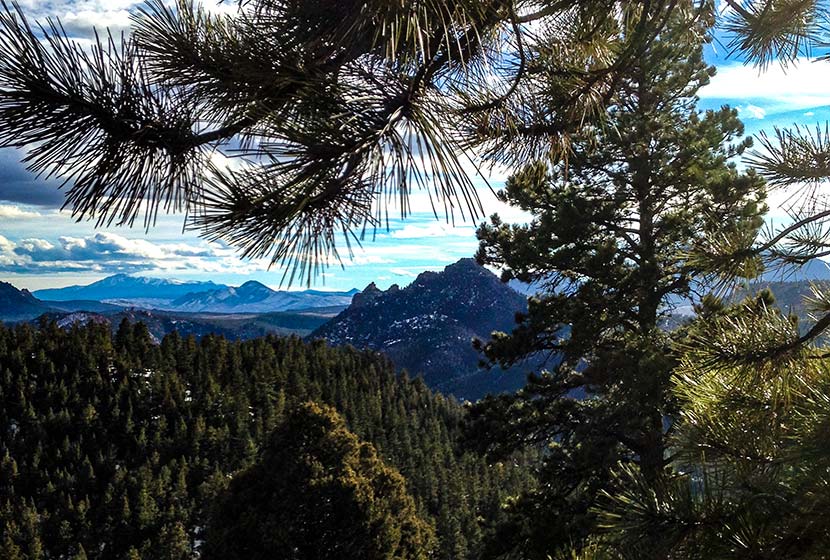
At the viewpoint, there are expansive views of the Rampart Range, and pikes Peak to the South. The Rampart Range is a low mountain range that stretches from south of Denver to Colorado Springs. The range is characterized by scraggy granite peaks jutting out of green forested foothills. At sunrise the granite rock formations light up orange and pink, and look like a series of castles or the rampart wall of a giant ancient fortress. My favorite view of the Rampart Range is from the Devils Head trail and from the Fire Lookout Tower up on Devils Head. It's the tallest peak in the range with an elevation of 9632 feet.
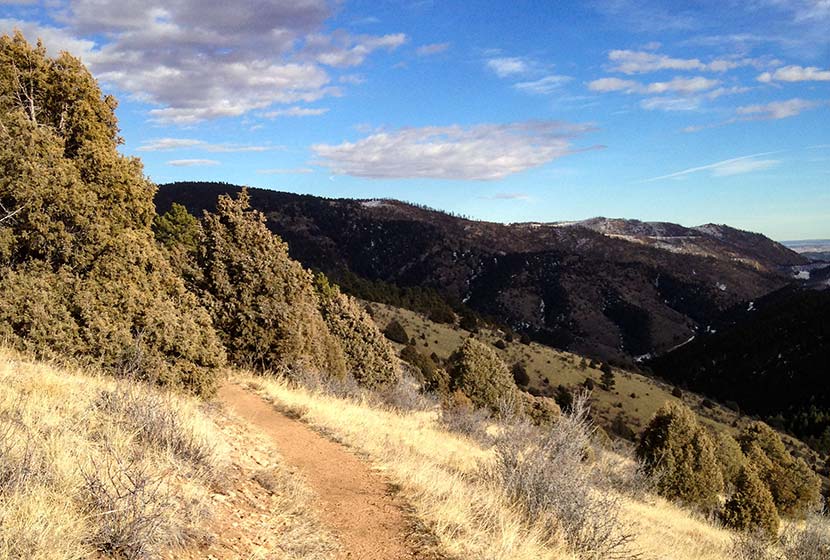
From the scenic point at Eagles View, the trail begins to descend and wind its way north. Pause on this segment to take in the views into the valley below and out to the distant plains in the East.
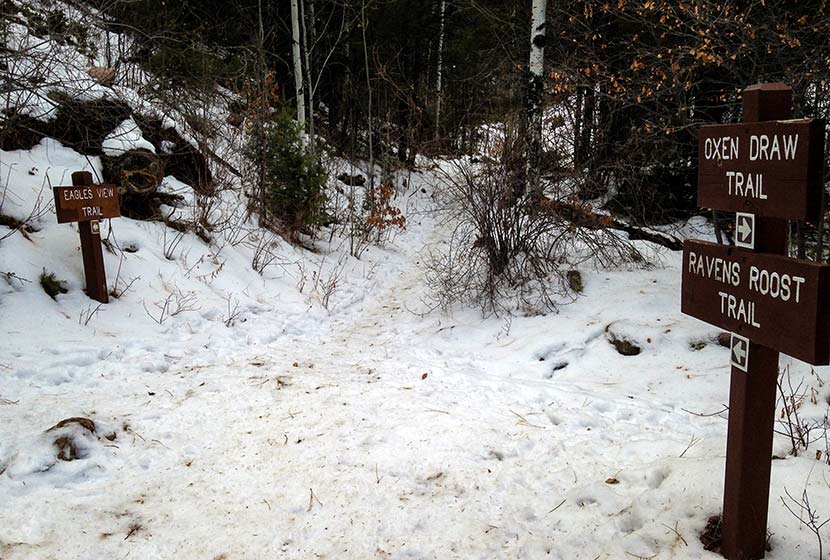
Eventually, the trail will come to another juncture with the Ravens Roost (south segment) and the Oxen Draw Trail. Both are options back to the Trailhead. Taking the Ravens Roost trail makes for a longer 4.4 miles total. Taking the Oxen Draw trail will make your total trip around 4 miles.
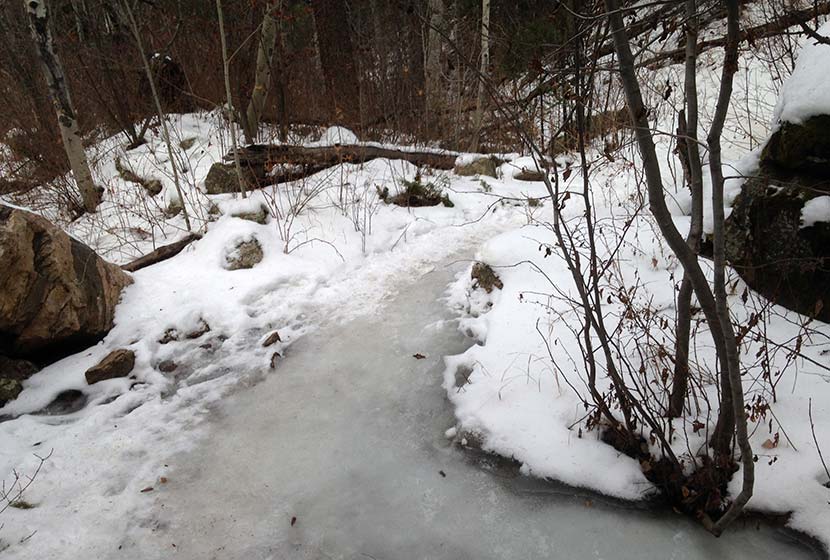
When I hikes this in the Winter, the Oxen Draw Trail got quite icy from a recent thaw and freeze. I'm assuming this is pretty normal for this shaded area of the park during the cold months. I wish I had brought my traction devices because the trail had some steep and sketchy, ice-coated segments. I had my trekking poles, and they helped, but it was difficult to navigate.
You may notice that I've marked this as a dog-friendly hike. Most of the year that's true, but these icy segments of the Oxen Draw Trail in the Winter may not be the best for your best friend. Overall, though this hike has proven to be one of the lesser traveled trails near Denver--especially on a weekday. Be sure to watch the video below to get a feel for the hike.
Tips & Resources for Hiking at Reynolds Park in Jefferson County
- Trekking Poles and Traction: If you are hiking in the Winter or Spring, the this trail (as you can see from the photos above) can get icy and muddy. Trekking Poles and Traction Devices are recommended for these seasons. I'm a huge fan of trekking poles because they take so much impact off the knees when hiking and backpacking, and they allow us to navigate more demanding terrain. Check out Trekking Pole options at REI.
- Camping: There are 5 tent camping areas on the East end of Reynolds Park that require only a short hike in and make for a good way to introduce your kids or family to a weekend camping trip without having to travel far from Denver. You can reserve a campsite at the Idylease Campground at the Jefferson County Parks Reservations Page. The campground is just a 1/2 mile hike in and has restrooms--but no drinking water--available at the site.
- Trail Map: Reynolds Park in Jefferson County Park Map
- Packing List: Always pack the 10 Essentials. Download our Hiking Guide to get the list and dayhiking packing checklist.
- Colorado Road Conditions: Colorado Road Conditions
- After the Hike: Scooters Smokehouse BBQ
Weather
Map & Driving Directions to Reynolds Park
Click for Driving Directions
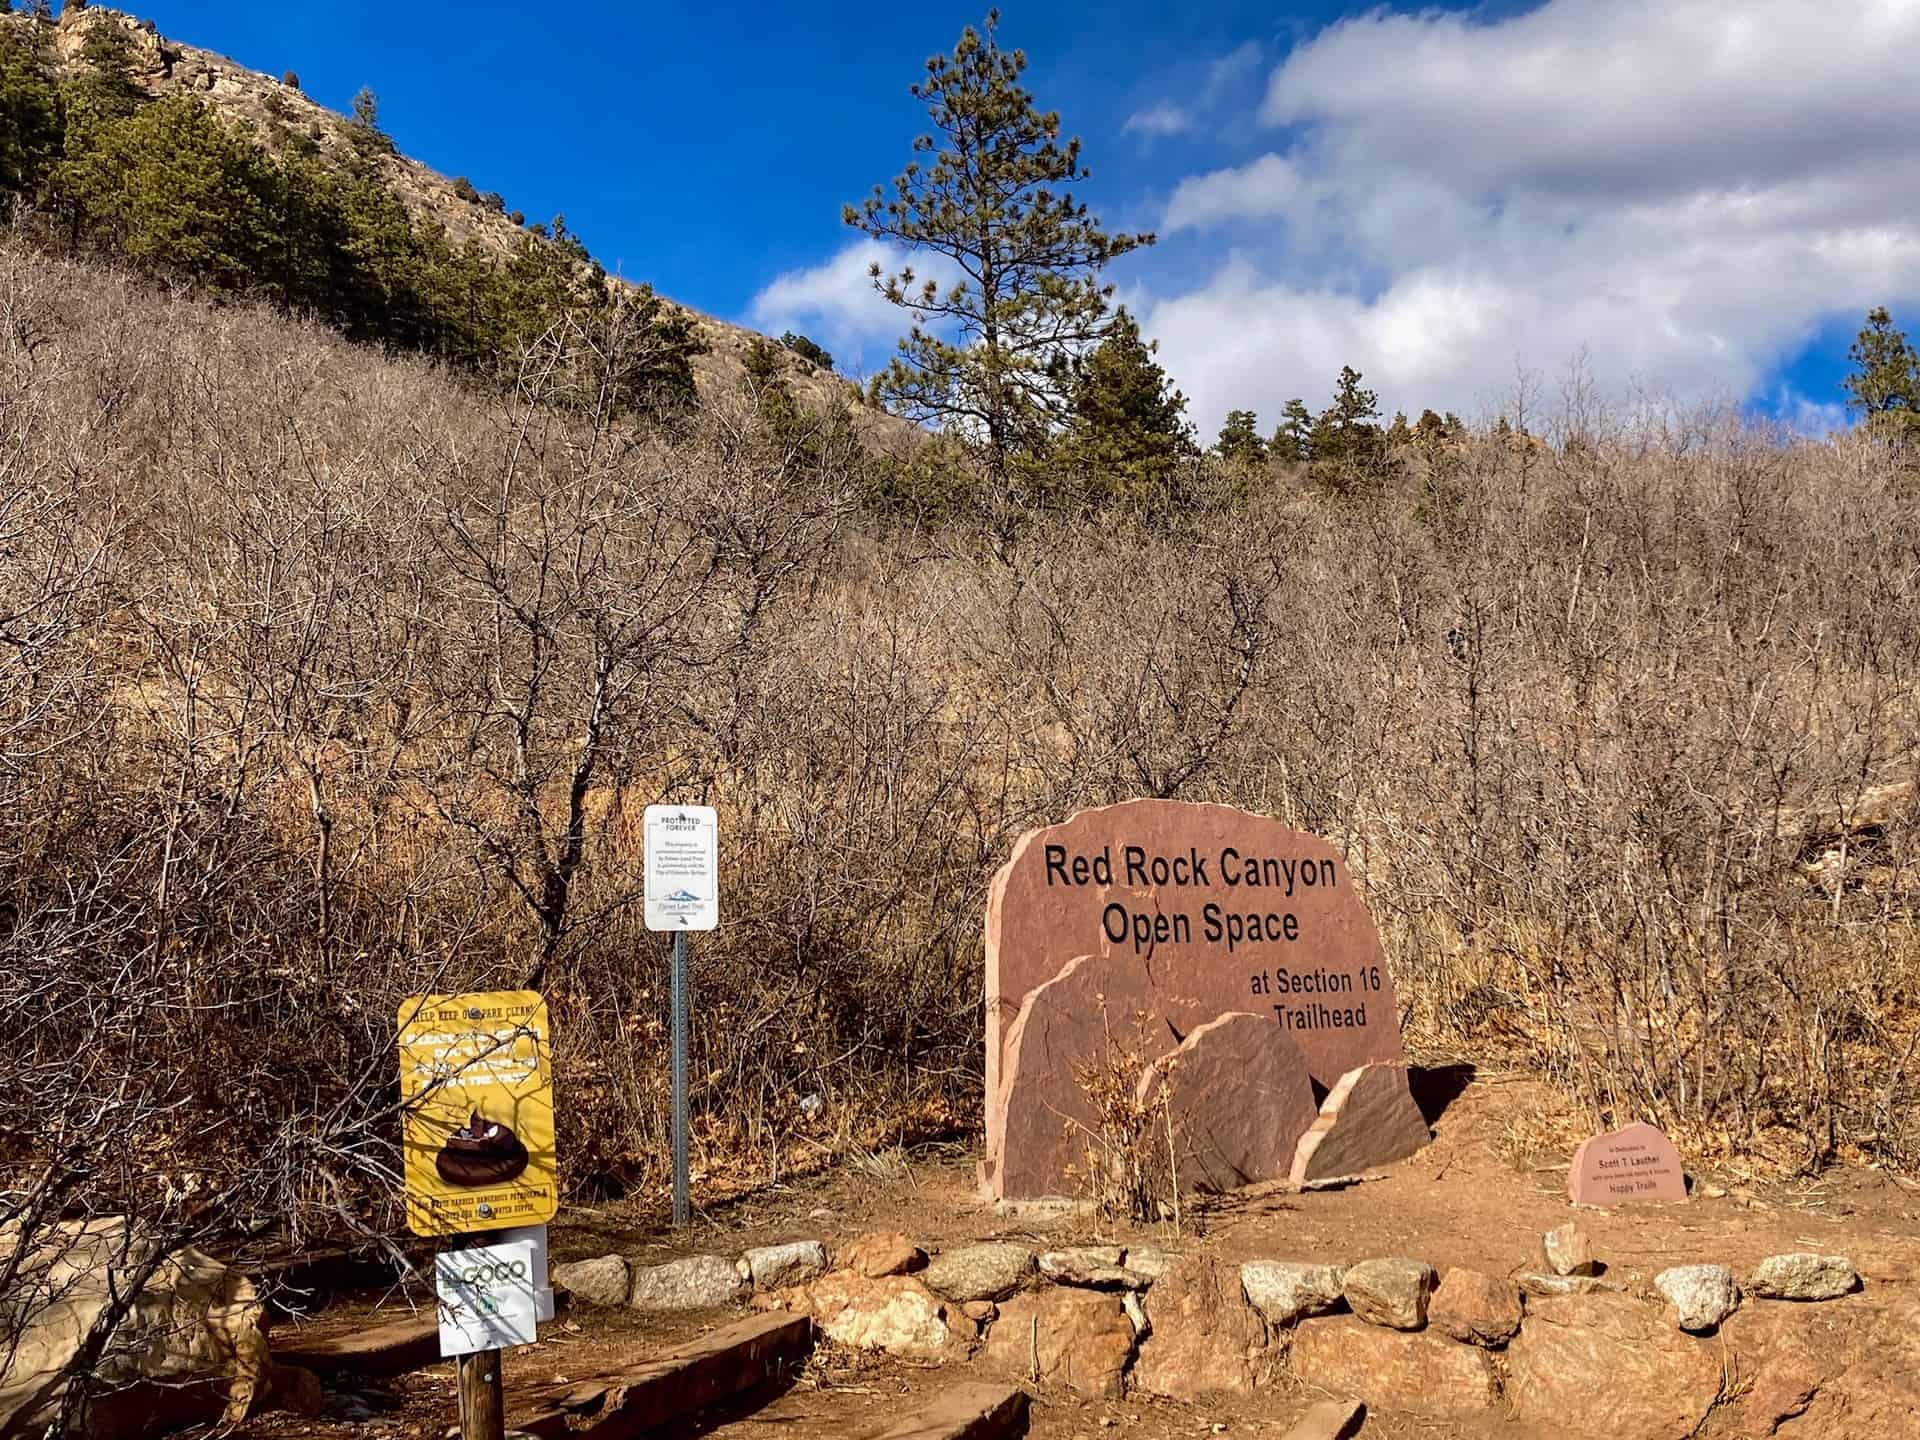
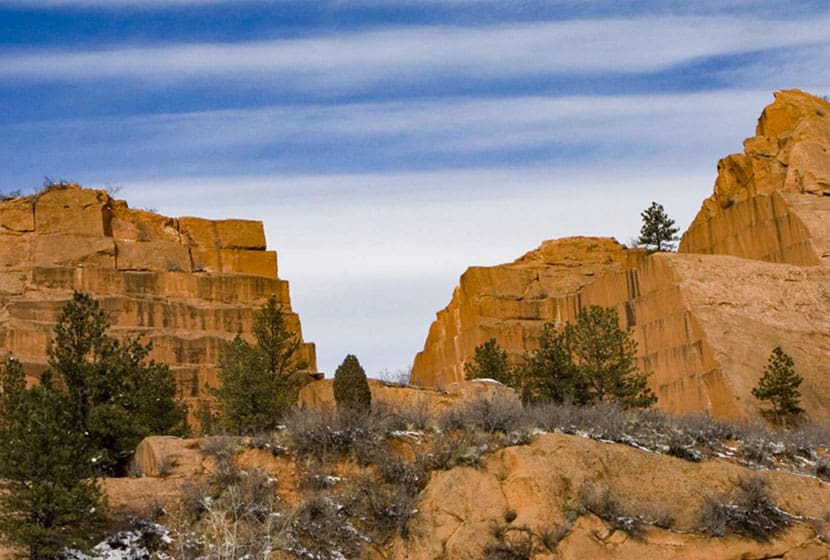
Red Rock Canyon Hikes
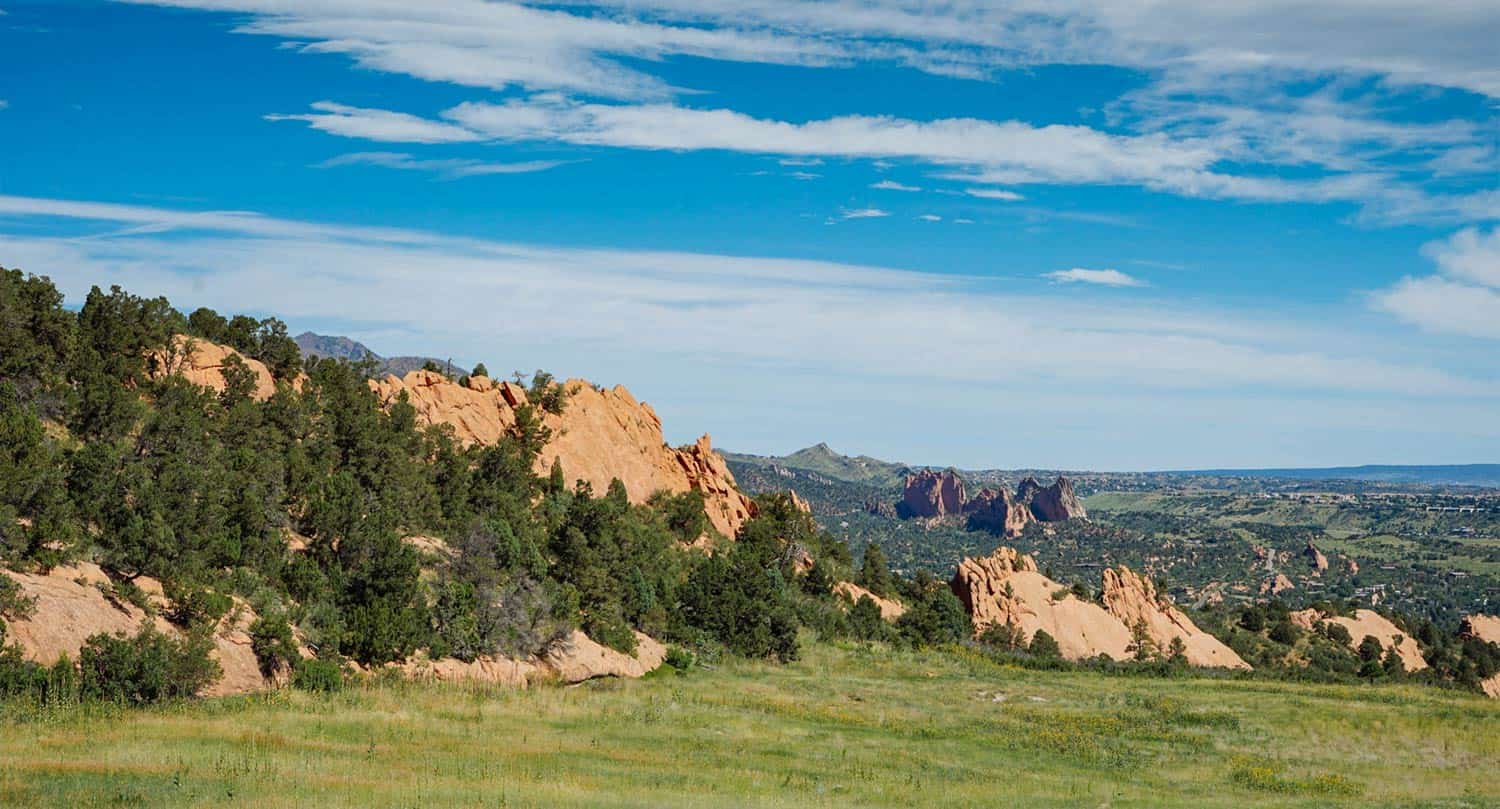
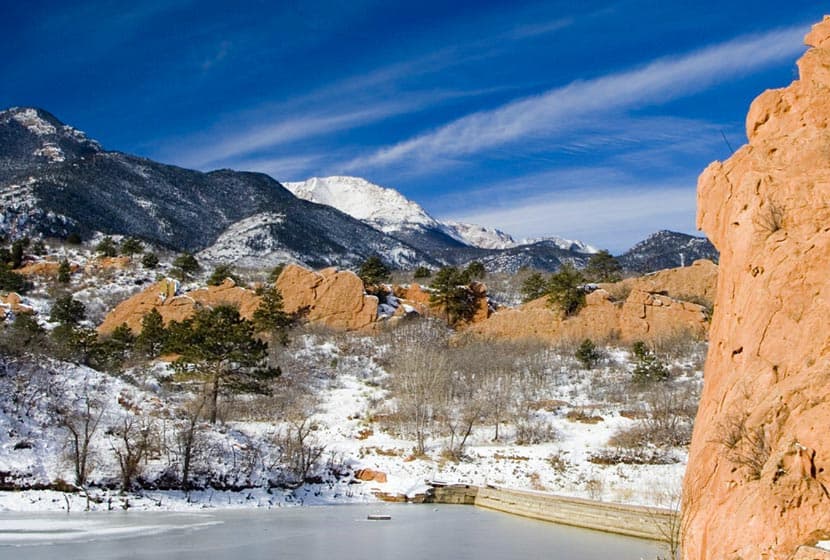
Red Rock Canyon Open Space features miles of easy hiking trails just a few miles west of Colorado Springs with views of Pikes Peak to the West and Garden of the Gods to the North. The park has two off-leash dog trails and most other trails are accessible to and shared by hikers, trail runners, and mountain bikers. Check out the full Red Rock Canyon Open Space hike profile below for trail map, driving directions, and more five different hike options to explore at this park near Colorado Springs.
Trail Snapshot: Red Rock Canyon Open Space
| Hike Distance | 1 to 3.3 miles Round Trip |
|---|---|
| Difficulty | Easy |
| Duration | Approx 1-2 hours |
| Trail Type | Loops and Out and Back Options |
| Starting Elevation | 6100′ |
| Elevation Gain | Approx +100′to +900' |
| Seasons | Year Round |
| Dogs | Allowed On Leash, Off Leash in Designated Areas |
| Hike Trail Map | Click for a Map of Red Rock Canyon Open Space |
| Denver Drive Time | 1hr 15min |
| Driving Directions to Red Rock Canyon Open Space | Click for Google Map |
| Town Nearest Hike | Colorado Springs, Colorado |
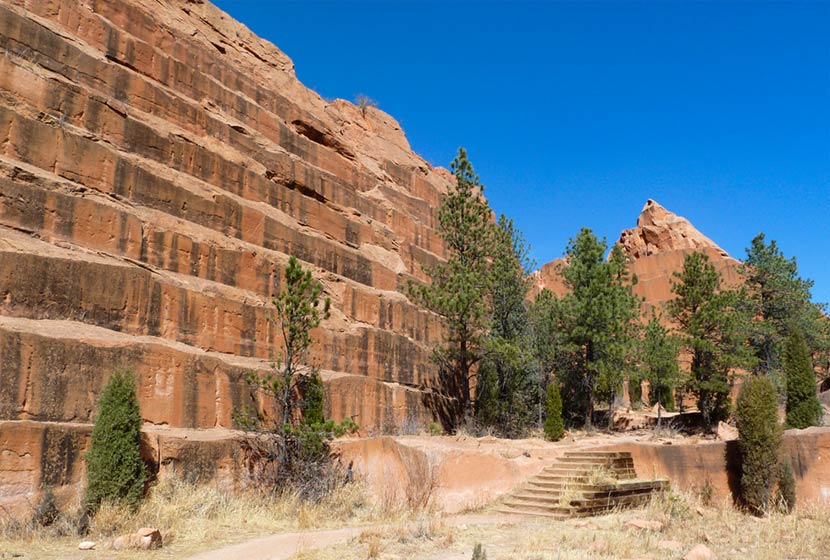
| Beauty | Red rock formations, migratory birds, ruins of red rock quarry, pond area, and deer. |
| Activities | hiking, mountain biking, trail running, snowshoeing, photography |
Parking & Trailhead Information for Red Rock Canyon Open Space
From Denver, take Interstate 25 south to Colorado Springs, taking the Cimarron St/24 West. Proceed about 3 miles West on Cimarron/24 and take a left onto Ridge Road. At the roundabout, take a left (by going around 3/4 of the roundabout). The parking lot and trailhead for Red Rock Canyon will be on your right.
From the trailhead hikers can pick up two of the main trail arteries, the Mesa Trail that works its way through the middle of the park, and the Red Rock Canyon Trail, which runs along the east side. Both lead toward the most popular destination, the quarry.
5 Hike Options in Red Rock Canyon Open Space
-
-
The Dog Loops: 1/2 and 1 mile
-
The upper dog loop is an approximately one-mile curcuit, while the lower is about 1/2mile. Both are great options for a quick walk with the dog after work in a space set aside for off-leash exercise and play. You'll find these two off-leash dog trails immediately South of the parking lot.
-
-
Contemplative-Sand Canyon Loop: 1.75 miles
-
This short loop hike offers more peace and quite because it's tucked away along some of the red rock formations, and the Contemplative Trail segment is designated a hiker-only trail. Pick up the Contemplative trail by starting at the Sand Canyon Trail (West end of the parking lot). This will lead to the Contemplative Trail. You can hike the Contemplative Trail out-and-back, but hikers also have a loop option by joining back up with the Sand Canyon Trail and taking it back to the parking lot.
-
-
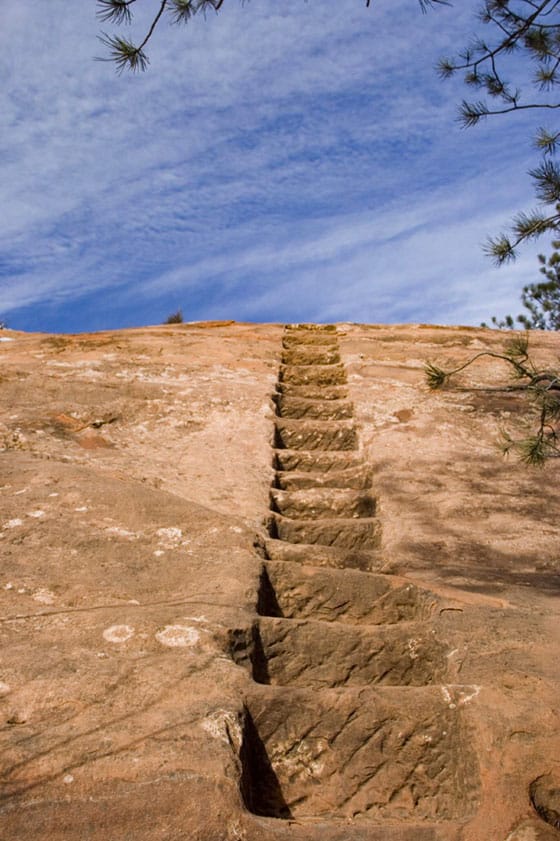
The Quarry Loop: 2 Miles
-
The most interesting destination in Red Rock Canyon is the old Quarry. If you've been in downtown Denver or Colorado Springs, you've probably seen old houses and buildings built with Red Rock cut from quarries like this one. One 2-mile loop option starts by taking the Red Rock Canyon trail to the east side of the Quarry (pick this trail up from the East end of the parking lot). This will run along to the back side of the quarry where you can take the old miner's steps up the side of the red rock. Once up and over, take the Quarry Pass Trail to the Mesa Trail, and hike the Mesa Trail North back to the parking area.
-
-
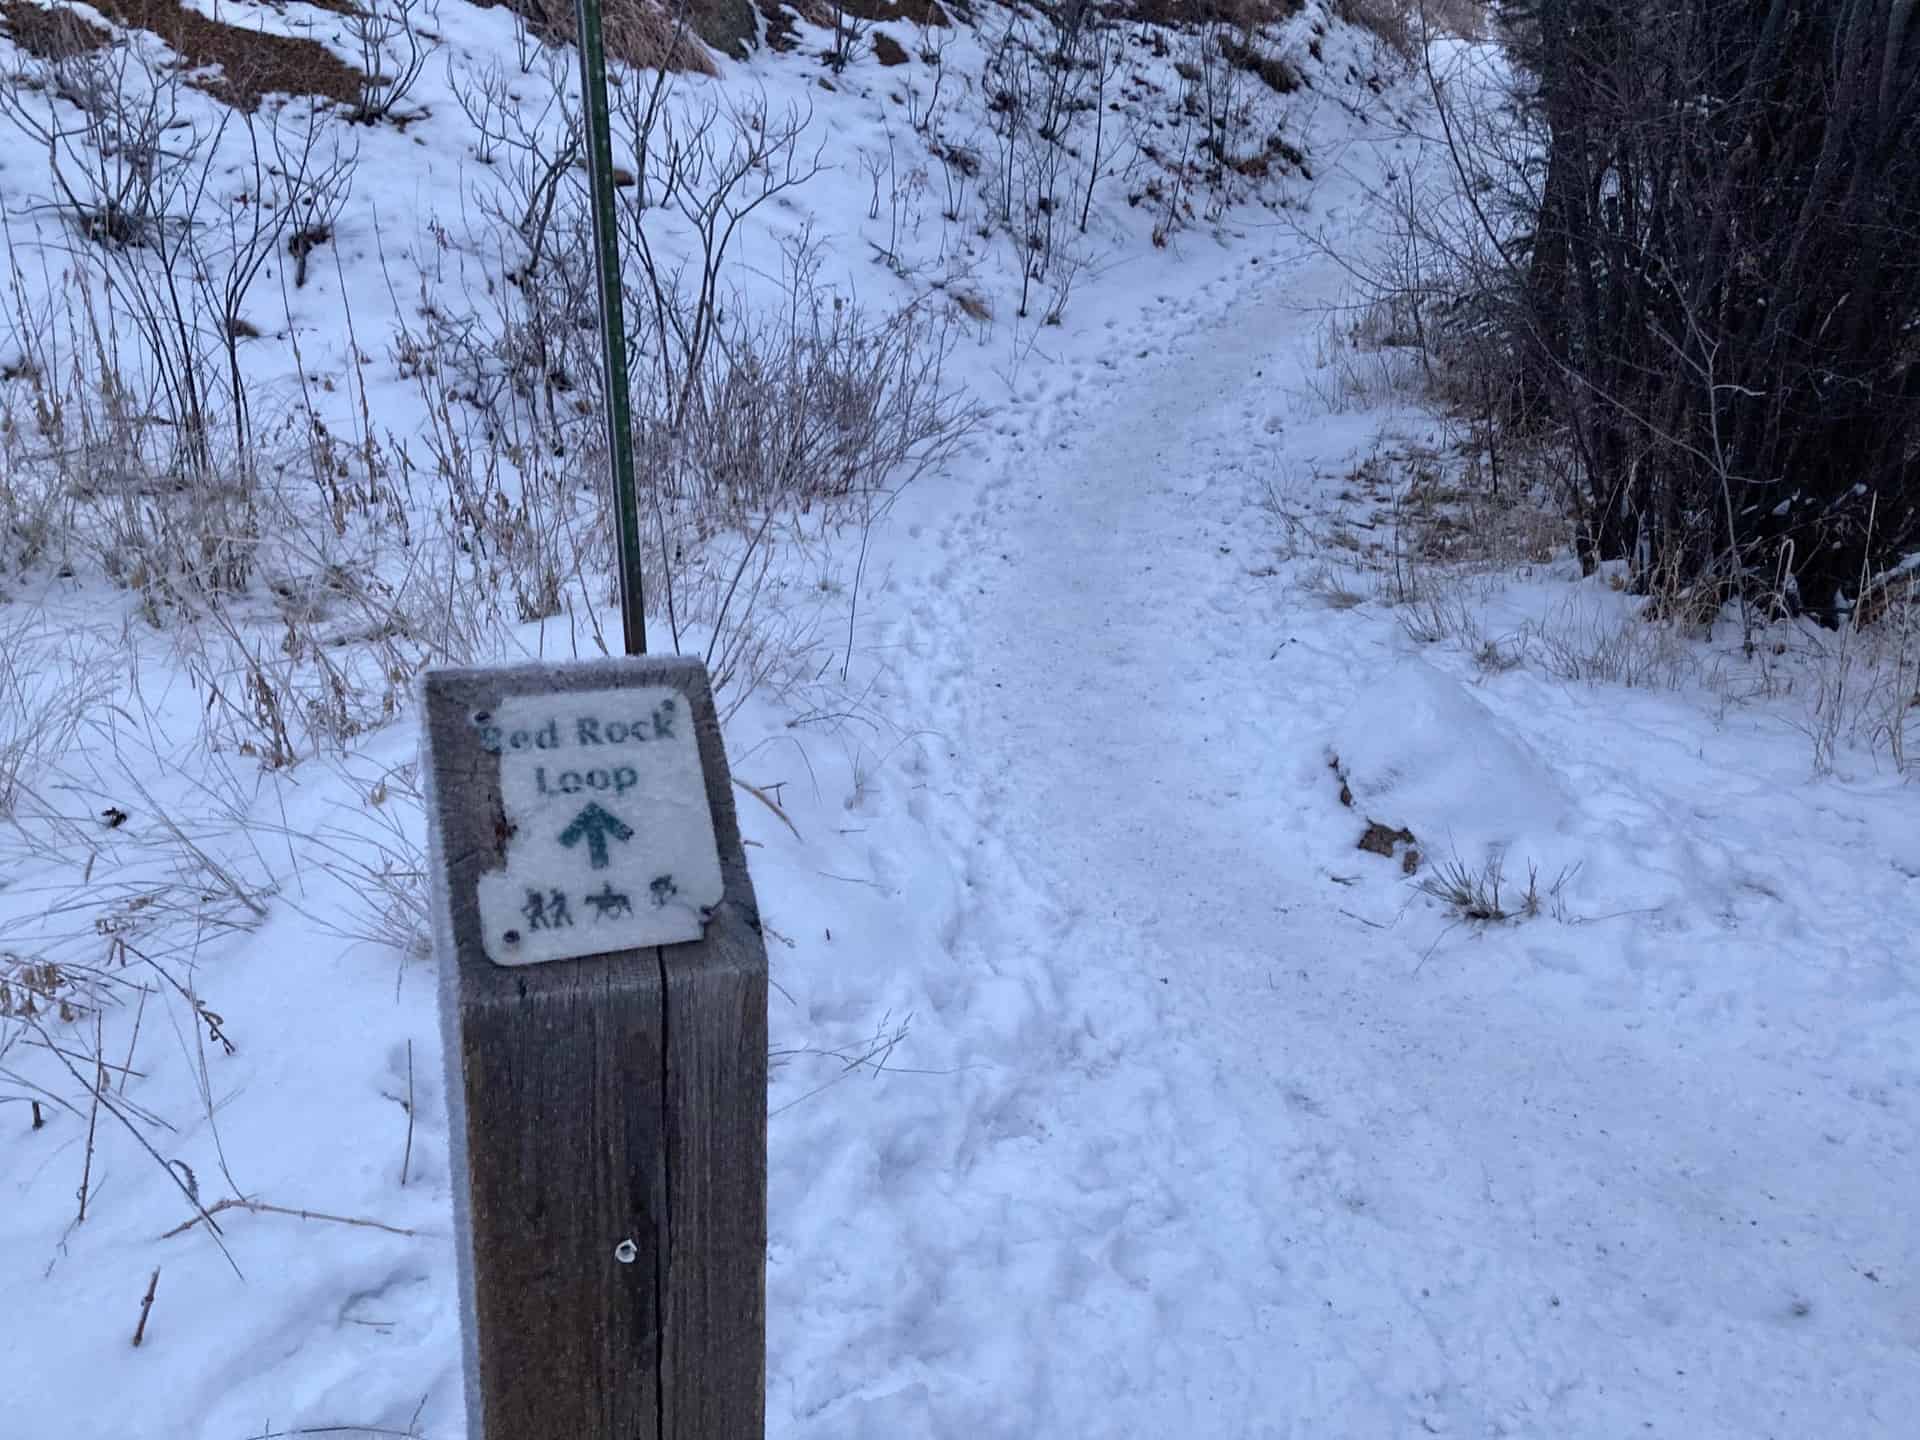
Hogback Valley-Lion Loop: 3.3 Miles
-
Starting at the east parking lot, pick up the Lower Hogback Tail. The trail will lead up to the Red Rock Rim Trail, then the Hogback Valley Trail taking you into a mesa of meadows with views into Colorado Springs and of Pikes Peak. Take a trail map with you as several trails will tie in together. Connect with the Lion Trail (the upper Codell Trail is more demanding, so be aware of this if choosing that option). Taking the Lion Trail North (right), it will lead back towards the parking area.
-
-
Mesa-Greenlee Loop: 3 Miles
-
This is probably the best hike in the park because it takes hikers through the heart of Red Rock Canyon along the gentle ridge of mesa where you can take in expansive views up to Pikes Peak and out to Garden of the Gods. Start at the Mesa Trail, taking it to the Southern end of the park where it connects with the Greenlee Trail. Return North via the Greenlee Trail to make this a 3 mile loop hike.
Tips & Resources for Hiking Red Rock Canyon Open Space
- TIP: The Southern end trails at Red Rock Canyon connect up with the following area trails: Intemann Trail, and Palmer Red Rock Trail, and others that lead south into Bear Creek Park.
- Nearby Hikes: The Crags Hike, Garden of the Gods Trails, and Helen Hunt Falls.
- Trail Map: Red Rock Canyon Open Space
- Packing List: Always pack the 10 Essentials. Download our Hiking Guide to get the list and dayhiking packing checklist.
- Colorado Road Conditions: Colorado Road Conditions
- Photo: We would like to express our gratitude to Brian Schultze, Sfgamchick, and Cody Wellons for sharing such an amazing photographs of this hike in Colorado Springs.
- After the Hike: Bristol Brewing Company
Weather
Map & Driving Directions
Click for Driving Directions