Bear Peak Near Boulder
Bear Peak is a demanding 7.4-mile hike (round trip) through the broad meadows of South Mesa, up through the rocky trail of shadow canyon, to the granite summit with sweeping 360 degree views of the Colorado Front Range. Hikers can summit South Boulder Peak on your way and make a loop hike out of your adventure by returning via Fern Canyon. Explore the full Bear Peak hike profile below for the trail map, driving directions, and more tips and details to help you enjoy this adventure near Boulder, Colorado.
Bear Peak Trail Snapshot
| Hike Distance | 7.4 Miles Round Trip or 8.4 Mile Loop |
|---|---|
| Difficulty | Difficult |
| Duration | Approx 3-5 hrs |
| Trail Type | Out and Back and Loop Option |
| Starting Elevation | 5650′ |
| Elevation Gain | Approx +2800′ Bear Peak 8461' |
| Seasons | Year Round |
| Dogs | Allowed On Leash |
| Hike Trail Map | Click for a Map Bear Peak and South Mesa Trailhead |
| Denver Drive Time | 45 Minutes |
| Driving Directions to Bear Peak from South Mesa Trailhead | Click for Google Map |
| Town Nearest Hike | Boulder, Colorado |
| Beauty | Peak Top Views, Canyon, Wildflowers, Sunrise, Meadows, Wildlife: Deer, Bear, Birding. |
| Activities | Hiking, Trail Running, Photography |
Parking & Trailhead Information for Bear Peak
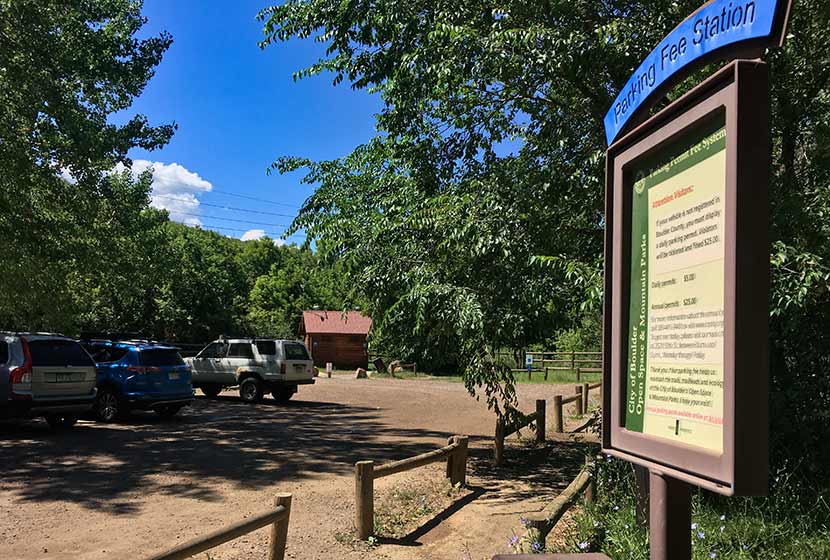
Access to Bear Peak is from the South Mesa Trailhead off of Eldorado Springs Drive just South of Boulder. From Denver, drive North on interstate 25 to 36 toward Boulder. Take the McCaslin Blvd exit and then go South/West onto McCaslin. At the intersection of McCaslin and Marshall, take a right onto Marshall Road. Marshall will intersect with Eldorado Springs Drive. Here, take a left onto Eldorado Springs Drive. About two miles down the road, you'll find the South Mesa Trailhead on your right. The South Mesa Trailhead is a part of the Boulder County Open Space and requires a daily parking fee, or an annual pass. I went online and bought an annual parking pass through the Open Space website. This gives you access to all the southern fee parking areas as well as the parking areas on Flagstaff Mountain. There are restrooms at the trailhead.
The Hike: Bear Peak
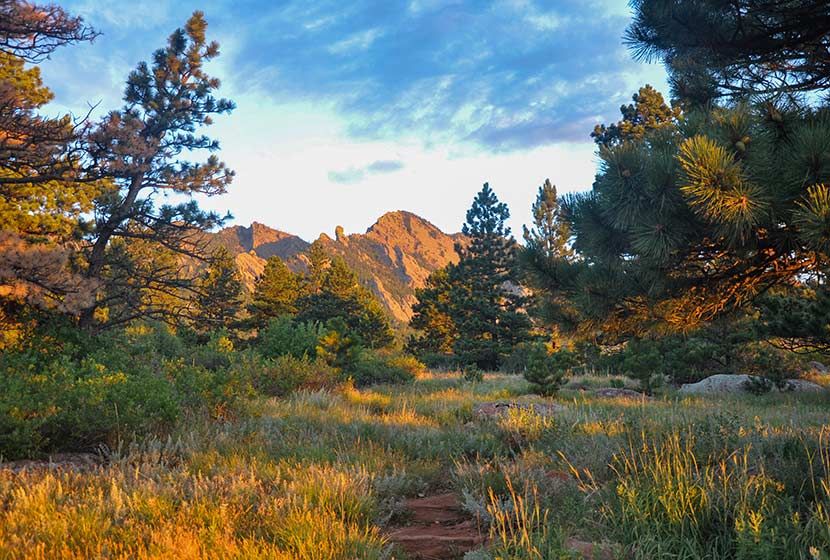
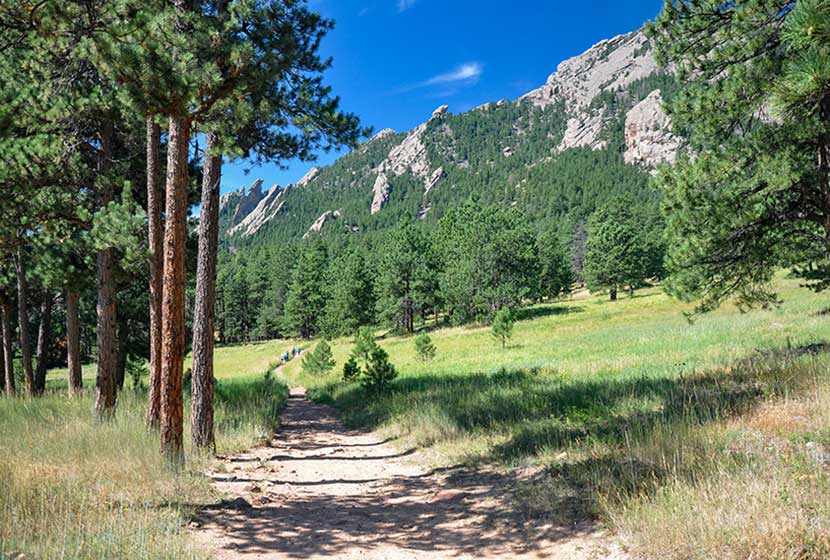
From the South Mesa Trailhead, the trail leads across a small bridge spanning over Boulder Creek. Willow trees arch over the stream making it worth a short pause to take in the sounds of water before you set off across the meadows of South Mesa. There are many trail options, but the most direct is to take the Homestead Trail, which heads West across a gentle grade toward Shadow Canyon.
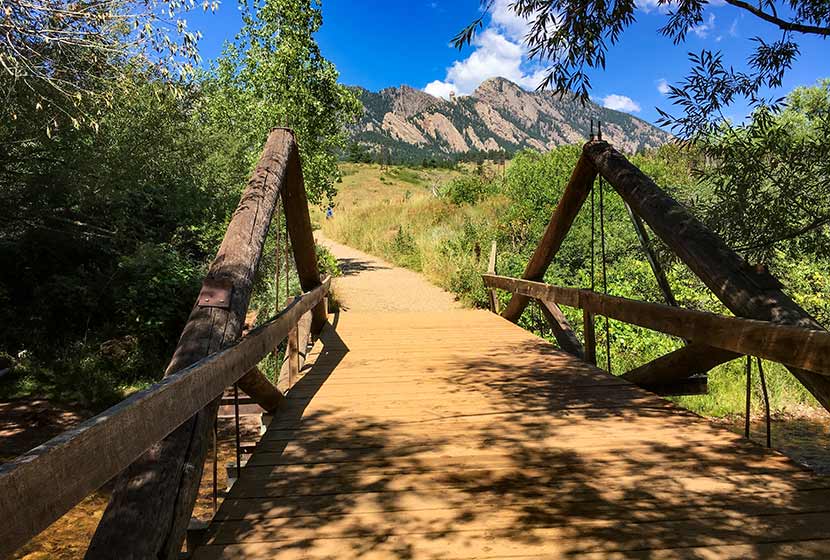
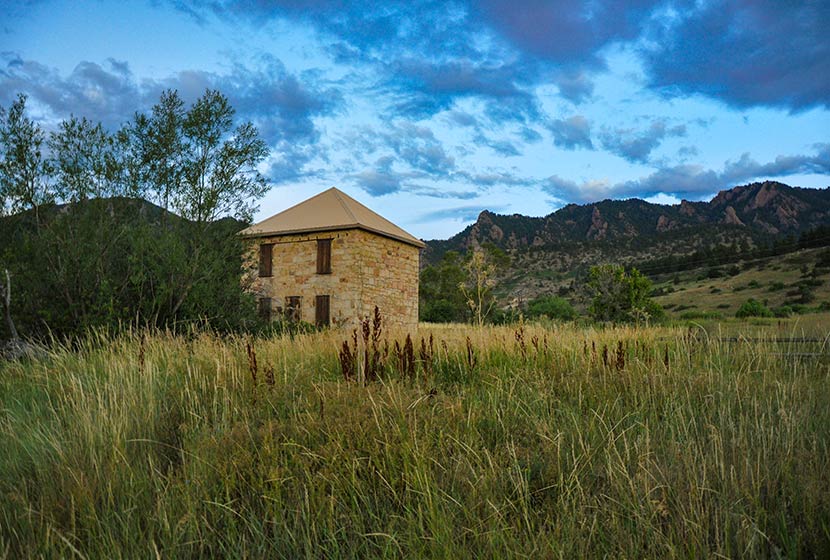
This first mile or so of the hike is easy and offers stunning views of the Flatirons and views of the entrance of Eldorado Canyon. An old stone building, part of an early homestead is the first marker you'll pass early in the hike.
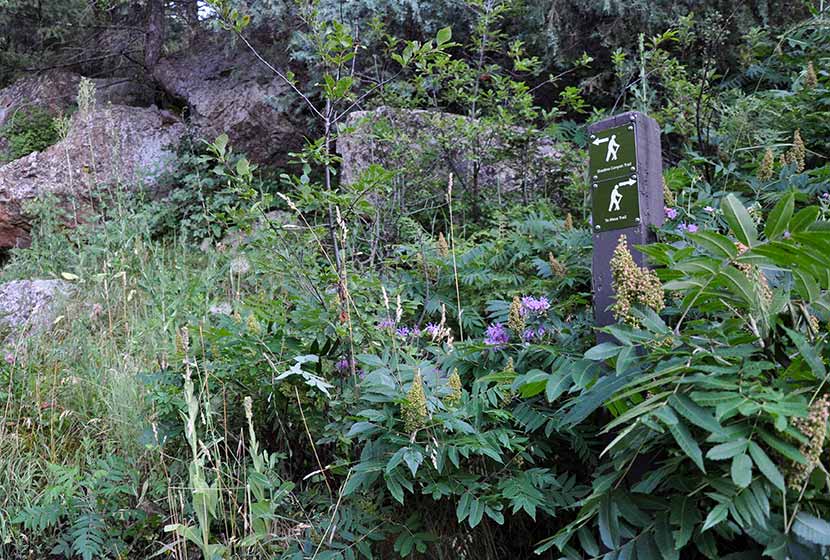
After about 1.3 miles, the trail will split. Take the left (West) trail, which leads to the South Shadow Canyon Trail. After about a 1/2 mile, you'll encounter a 2nd trail split. The Shadow Canyon Trail will again bear to the left and begin heading up steeper terrain.
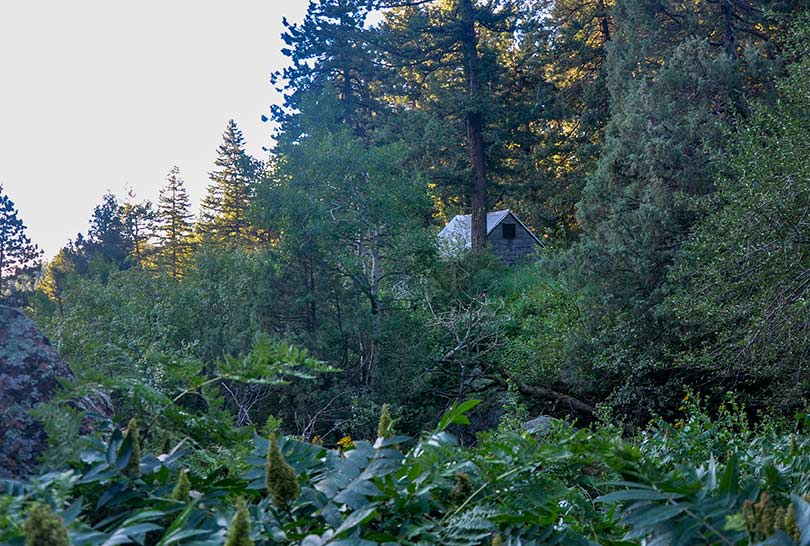
As the trail ascends, you soon leave the meadow and enter into more dense ponderosa pine forest. The vegetation in the understory grows tall and green at the entrance to the canyon. You'll see another cabin with a metal roof (pictured below). Soon past the cabin will be another important trail juncture. Again, the trail up Shadow Canyon will bear left (West).

Once in Shadow Canyon, the trail now becomes much more steep and requires navigating over rock and tree roots. This segment of the trail traveling up through the canyon is over a mile, so be ready for a steady and demanding climb.
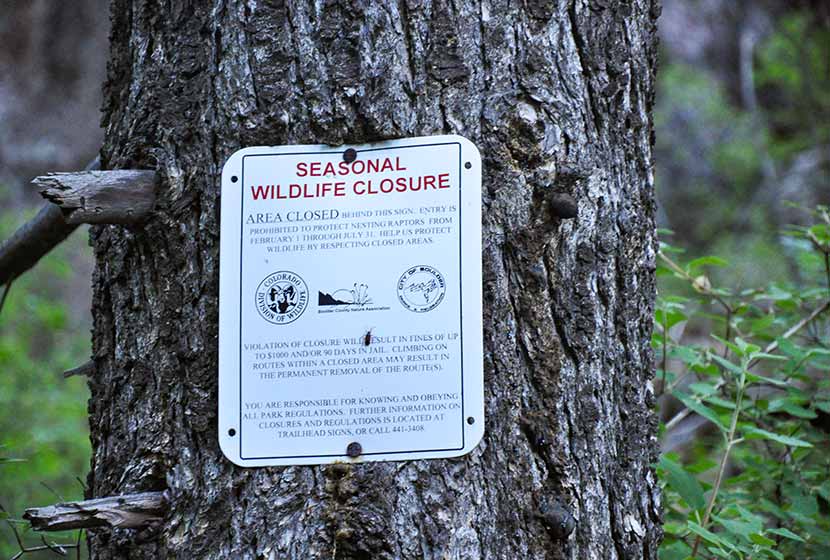
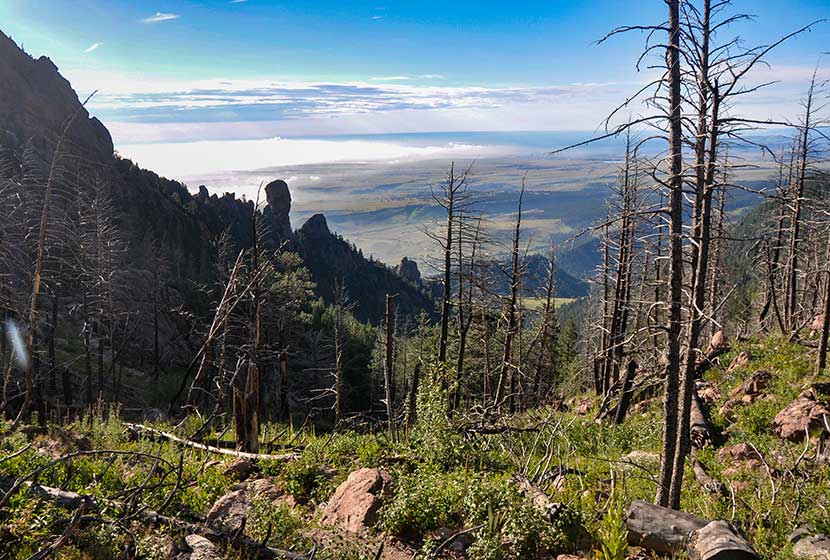
The canyon is an access route for Devils Thumb, a prominent rock formation along this ridge. There are seasonal closures (see photo below) because of nesting raptors. Be sure to stay out of this area from Feb. 1st to July 31st. You are welcome to stay on the Shadow Canyon trail--it's not closed during this time--but refrain from going off-trail or taking social trails during this time up to Devils Thumb.
Eventually, the trail emerges from the canyon onto the saddle between South Boulder Peak and Bear Peak. This area is marked by a burn area, and in the late summer, raspberry plants grow trailside full of ripe berries. The burn was ignited by lightning in June of 2012. Named the Flagstaff Fire, it consumed about 300 acres before being contained by firefighters.
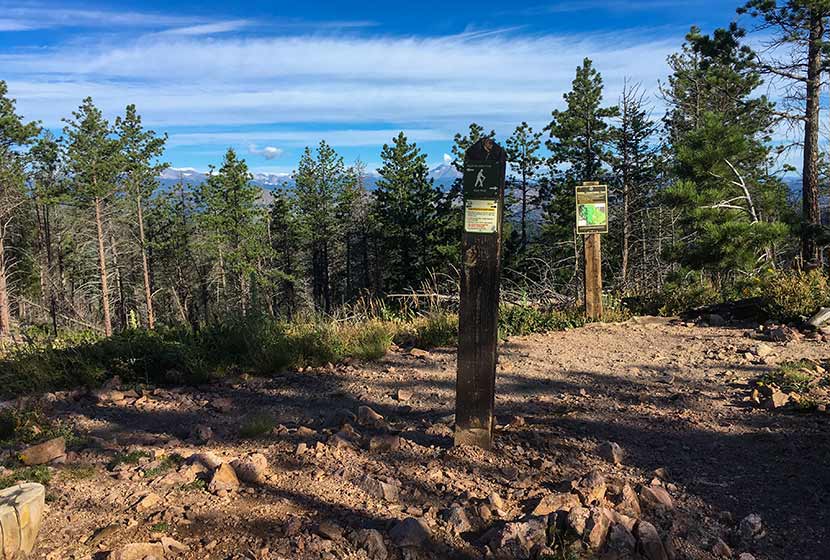
Another trail sign notes the way to Bear Peak, a 0.3 mile trail segment curving North up the back of the summit.
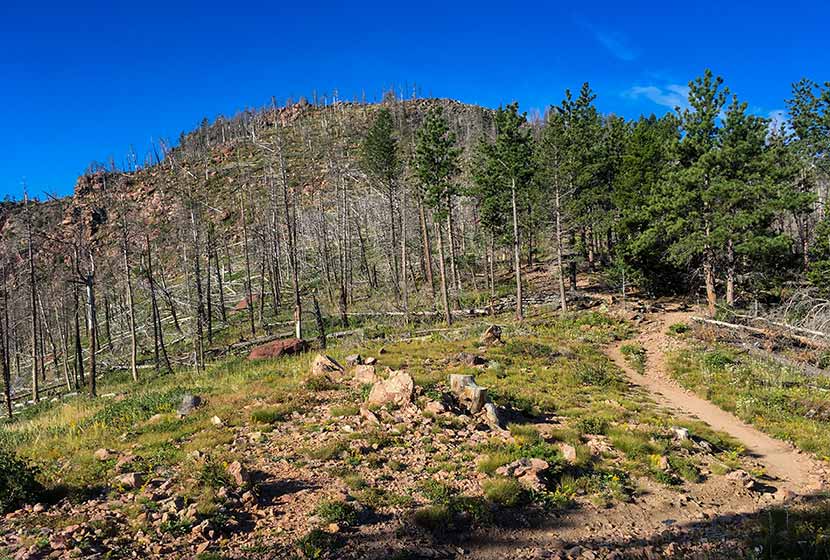
You'll notice more burn area on the left (West) side of the trail. The rock on the trail becomes increasingly brittle as you go, so be aware of those hiking below you and be sure to hike on the most secure and durable surfaces.
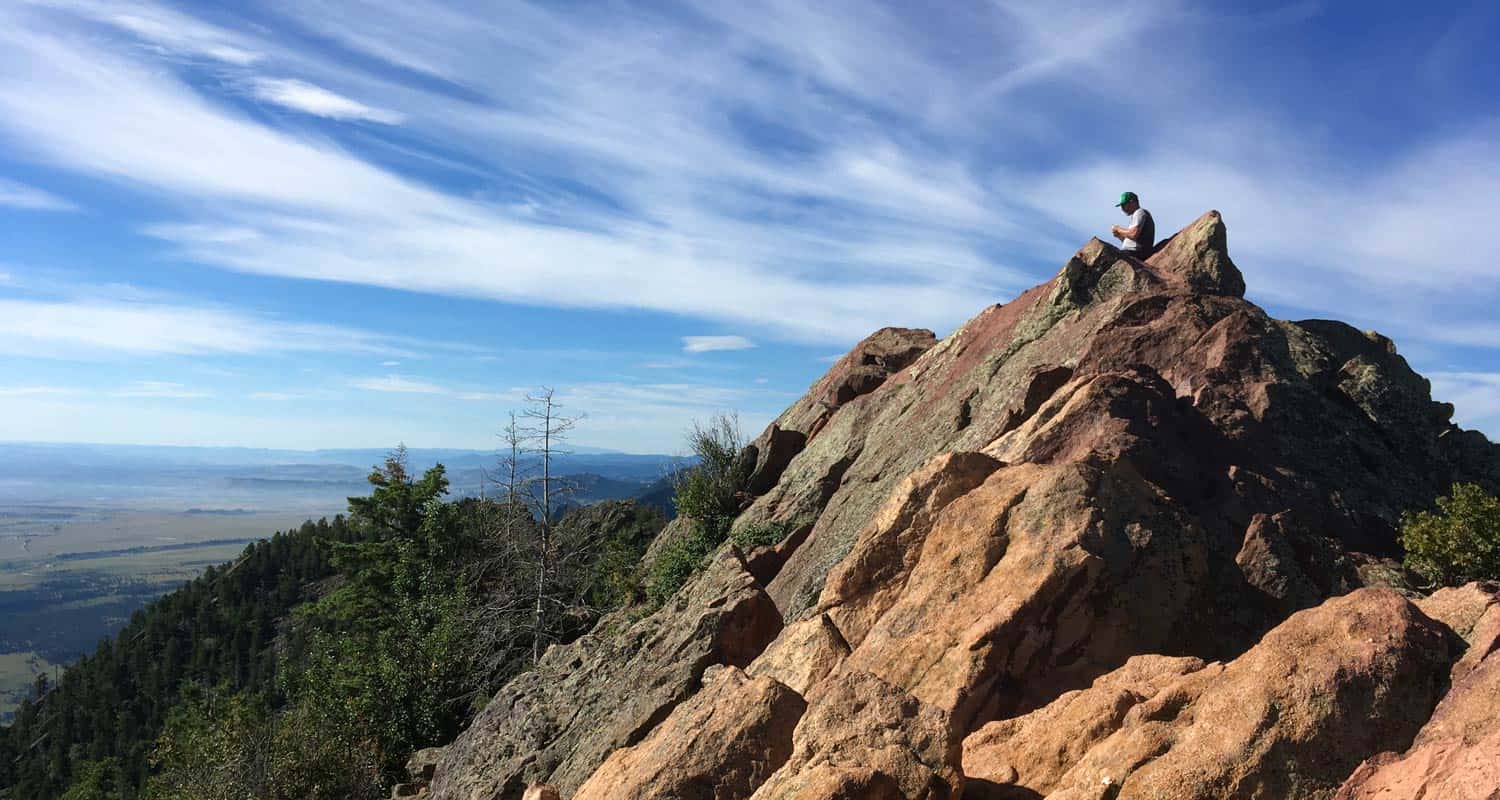
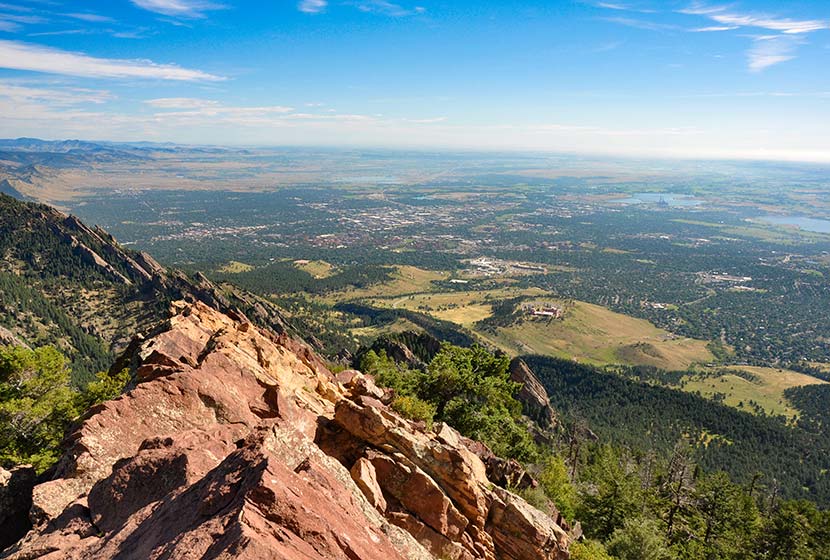
The final segment requires a scramble along about 25 yards of angled rock. Take your time and scope out the safest route to the summit. Most peaks along the Front Range have broad tops, but Bear Peak is tapered to a point with exposure on all sides. Several USGS markers are set into the rock (I think I counted 3--which is unusual). The views are great, both to the East and to the mountains in the West.
There are two options for the return hike: 1) to hike the 3.7 miles back through Shadow Canyon, retracing the same trails, or 2) to make a loop out of the hike by descending via Fern Canyon (about 4.7-mile return). The rest of this profile will follow the Fern Canyon to Mesa Trail return.
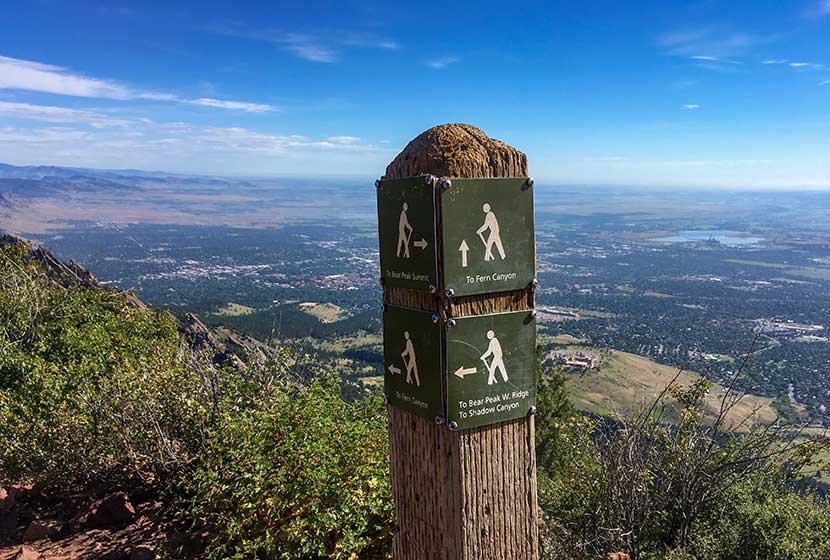
A sign marking the trail down Fern Canyon is located right at the base of Bear Peak (where the trail turns into a scramble up the summit). The descent into Fern Canyon is very steep and the rock is very loose. Hikers will also encounter people making their way up the trail, so be sure to move off to the side and grant right-of-way to hikers who are doing the harder work of ascending the trail. I would not recommend hiking up to Bear Peak from this route because the trail is way more demanding than the Shadow Canyon approach.

After about 1/2 of a mile descending this steep saddle, the trail will bear right (East) into Fern Canyon via a series of switchbacks. Eventually, the trail will emerge from Fern Canyon back onto the more gentle slopes of South Mesa. Look for signs for the Mesa Trail, and follow them South back to the South Mesa Trailhead.
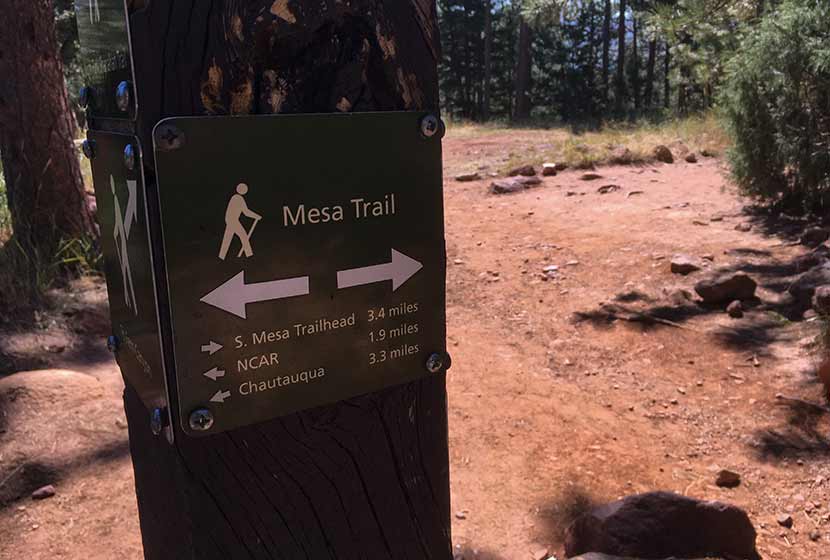
The hike back on the Mesa Trail travels in and out of the shade of Ponderosa pines and along the pink and orange Flatiron mountains that make this area so spectacular. We took the Upper Bluestem trail to some small connector trails leading back to the trailhead. Another approach is stay on the Mesa Trail (see map) until it connects back to the Homestead Trail.
Tips & Resources for Hiking to Bear Peak
- Weather: As with all hikes on the Front Range, especially peak hikes, be weather aware. Thunderstorms can emerge suddenly, especially in the early afternoon in the Summer months.
- Hiking with Your Dog: Though dogs are allowed on leash, and I've encountered people hiking with their dogs on the trails up to Bear Peak, I wouldn't put Bear Peak on the dog-friendly list because of the steep rock at the summit summit and the difficulty of the terrain leading up through the canyons.
- TIP: Be ready for a hike that is really demanding on your legs, especially the descent through Fern or Shadow Canyon. Trekking poles would be helpful on the descent.
- TIP: Hike to South Boulder Peak. It adds just 0.6 mile to your trip.
- Trail Map: Bear Peak Map from South Mesa Trailhead
- Packing List: Always pack the 10 Essentials. Download our Hiking Guide to get the list and dayhiking packing checklist.
- Colorado Road Conditions: Colorado Road Conditions
- After the Hike Cafe: Walnut Cafe in Boulder
- After the Hike Brewery: Sanitas Brewing Company
Weather
Map & Driving Directions
Click for Driving Directions

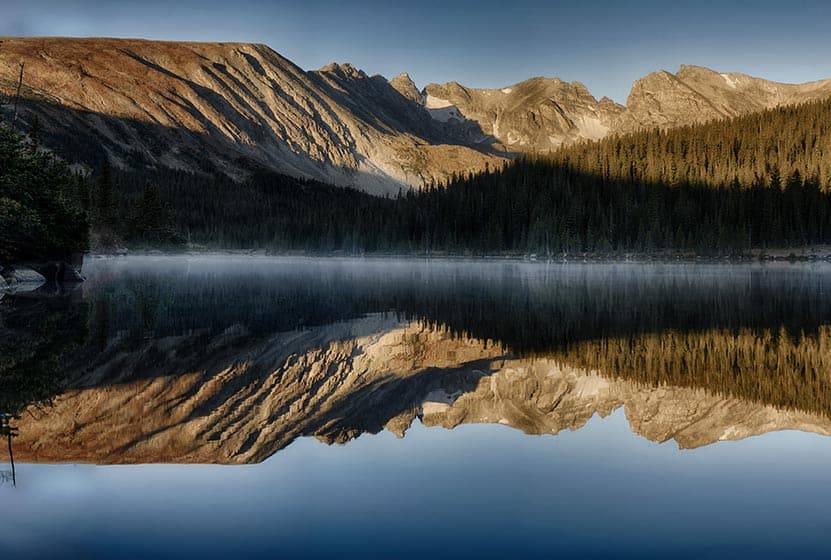
Long Lake Loop in Indian Peaks
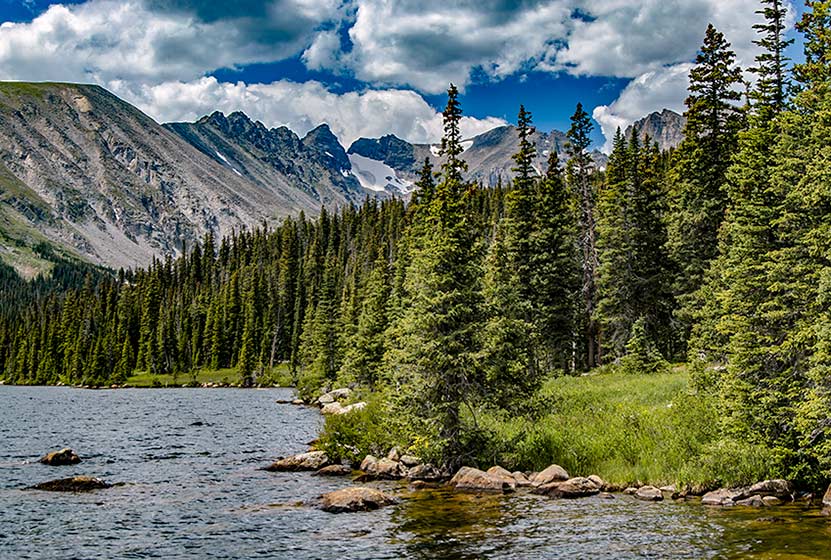
Long Lake offers an easy 1.5 mile loop hike in Indian Peaks Wilderness. Located about 1 hour West of Boulder, Colorado, Long Lake is an easy-to-access alpine lake with stunning scenery. It's a popular spot, especially in the Summer months, so be sure to read the details on access fees and the notes below on the Long Lake Trailhead. Explore the full trail profile for trail maps, driving directions to Long Lake and more.
Long Lake in Indian Peaks - Trail Snapshot
| Hike Distance | 0.6 mile or 1.5 miles |
|---|---|
| Difficulty | Easy |
| Duration | Approx 1 hr |
| Trail Type | Out and Back & Loop |
| Starting Elevation | 10,500′ |
| Elevation Gain | Approx +100′ |
| Seasons | Mid-June to Mid-Oct. Depending on Weather |
| Dogs | Dog Prohibited in specific Brainard Rec. areas and on Jean Lunning and Pawnee Pass Trails. See USFS page for details. |
| Hike Trail Map | Click for a Map of Long Lake Area in Indian Peaks |
| Denver Drive Time | 1hr 30min |
| Driving Directions to Meyer Homestead Trailhead | Click for Google Map |
| Town Nearest Hike | Ward, Colorado |
| Fee: | Entrance Fee to Brainard Rec. Area Required |
| Beauty | Lake, mountain peak views, wildflowers, moose/td> |
| Activities | Hiking, cross-country skiing, snowshoeing, photography |
Parking & Trailhead Information for Long Lake Loop
Note: This trailhead can only be reached by using Brainard Lake Road, which has seasonal closures. Because the Brainard Lake Recreation area is extremely popular, this entrance road experiences high amounts of traffic during weekends on the Summer. See the USFS page for details. For Brainard Lake Road closure status, see the Boulder Ranger District roads page.
From Boulder, Colorado, head North on US36/28th Street. Take a left onto Lee Hill Road. Lee Hill Road will dead-end at an intersection with Left-Hand Canyon Road. Take a left onto Left-Hand Canyon Road heading West. Eventually, Left-Hand Canyon Road will turn into Indiana Gulch Road and will turn into Utica Road upon entering the town of Ward, Colorado. Utica turns into Nelson Road (lots of name changes on this trip) then ends at an intersection with 72/Peak to Peak Highway. Take a right onto 72, then the almost immediate next turn will be on your left for the Brainard Lake Road. Travel on Brainard Lake Road 2.2 miles to the entry station where you will need to pay the fee for the recreation area. As you approach the lake, bear right to continue on the Brainard Lake Road for another 1/2 mile, then turn right onto Mitchell lake Road. Go less than 1/10th of a mile, then turn left onto Long Lake Road. After about 1/3 of a mile, you will have arrived at the Long Lake Trailhead and parking area.
In the winter, the Brainard Lake Recreation area is a popular snowshoeing and cross-country skiing destination. However, all parking is at the Brainard Lake Gateway Trailhead (near the access gate). It is approx. 4-miles one-way from the Brainard Lake Gateway Trailhead to the Long-Lake Trailhead.
The Hike: Long Lake Loop Hike
From the Long Lake Trailhead, it's an easy and short 0.3-mile hike to Long Lake. Returning via this trail makes this a 0.6-mile out-and-back trip. However, to really take in the best of the Rocky Mountain Scenery, we recommend doing the full 1.5-mile loop.
Having reached the northeastern edge of Long Lake, head south over a footbridge and pick up the Jean Lunning Trail. The Jean Lunning trail travels alongside the southern perimeter of Long Lake and offers stunning views of the jagged mountain peaks surrounding the lake. Eventually, the Jean Lunning trail will intersect with the Pawnee Pass Trail. Take a right on the Pawnee Pass trail to head east and back to the short connector trail that leads back to the trailhead.
Tips & Resources for Hiking Long Lake
- TIP: During the Summer, avoid the traffic by visiting Long Lake during the weekdays. Arrive at the trailhead in the early morning to secure a parking place.
- Trail Map: Brainard Lake Area, Long Lake Trail Map
- Packing List: Always pack the 10 Essentials. Download our Hiking Guide to get the list and dayhiking packing checklist.
- Colorado Road Conditions: Colorado Road Conditions
- Photo: We would like to express our gratitude to Matt Lewis and Max and Dee Berntfor sharing photographs of this hike on Long Lake
- After the Hike: Marrocco’s
Weather
Map & Driving Directions
Click for Driving Directions
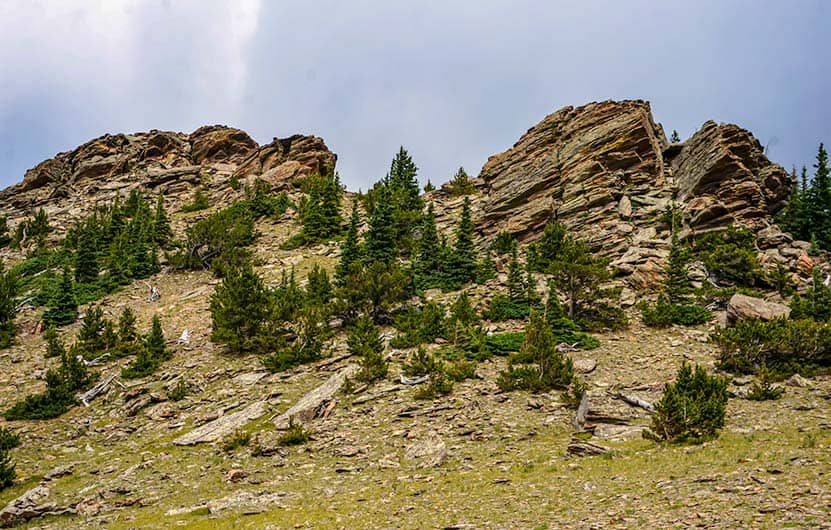
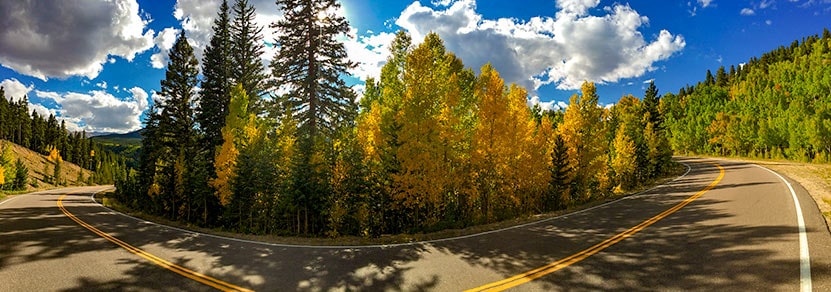
Chief Mountain Hike
Chief Mountain is a 1.5-mile hike in the mountains just one hour outside of Denver, Colorado. The Chief Mountain trail travels through alpine forest, then breaks out into high-country tundra, eventually gaining panoramic views of surrounding mountains. Chief Mountain gives hikers an incredible vantage point to survey the changing colors of Fall spread out in 360 degrees below. Explore the full Chief Mountain hike profile below for trail map, driving directions, and more tips and details to help you enjoy this adventure near Denver.
Trail Snapshot: Chief Mountain Hike
| Hike Distance | 3 miles Round Trip |
|---|---|
| Difficulty | Moderate |
| Duration | Approx 3 hrs |
| Trail Type | Out and Back |
| Starting Elevation | 10800′ |
| Elevation Gain | Approx +1000′ |
| Seasons | Year Round (weather permitting) |
| Dogs | Allowed On Leash |
| Hike Trail Map - Winter | Click for a Map of Chief Mountain Trail |
| Hike Trail Map - Summer | Click for a Map of Chief Mountain Trail |
| Denver Drive Time | 1 hr |
| Driving Directions to Chief Mountain Trailhead | Click for Google Map |
| Town Nearest Hike | Idaho Springs, Colorado |
| Beauty | Panoramic views, Rock Formations, Summer Wildflowers, Fall Colors |
| Activities | Hiking, snowshoeing, skiing, camping, photography, |
Parking & Trailhead Information for Chief Mountain Hike
From Denver, take Interstate 70 west to exit 252. This exit will funnel you onto CO-74/Evergreen Parkway headed West/Southwest for about 2 miles, where you'll take a right onto Squaw Pass Road. Squaw Pass road is paved and climbs the mountain in a series of switchback for 10.4 miles. The trailhead is easy to miss. It's a pull-out on the right-hand/North side of the road. It's worth taking a look at the parking area using satellite view on Google maps before going. You'll notice that the trail begins just a bit East of the parking area on the South side of the road. We've dropped the pin in the driving directions above at the location of the trailhead. As with all roads at this altitude, be sure to check conditions and closures before setting out.
The Hike: Chief Mountain Trail
The Chief Mountain trail begins on the south side of Squaw Pass road. The trail starts out as a steep 1/4 mile segment that takes hikers through dense alpine forest to Old Squaw Pass Road. The trail is picked up again on the other side of the dirt road and marked by signage. The trail bends now along the base of Papoose Mountain and the dense forest gives way to scattered trees and eventually into high-country tundra. Colorado's tundra ecosystems are incredibly fragile. Here the alpine flowers and lichens grow close to the ground in order to survive in the harsh winds and cold. Stay on maintained trails as it can literally take centuries for this alpine environment to recover from the damage inflicted upon it by foot traffic.
The trail should be evident, but you'll also find that it is marked by blaze marks on some of the trees. The trail becomes more demanding and steep. With each switchback new panoramas reveal distant snow-capped landscapes. Jagged rock formations grow in size as the trail gains elevation and makes its way closer to the summit.
The views are incredible at the top (see photo below). Mount Evans can be seen to the West and Squaw Mountain to the East. This is a great vantage point for taking in the changing aspens along the Front Range of Colorado. For more Fall Hikes, see our 25+ Hikes for Viewing the Changing Aspens in Colorado.
Tips & Resources for Hiking the Chief Mountain Trail
- TIP: Because this hike is popular especially on summer weekends, get there early or do it during weekdays.
- Trail Map for Chief Mountain Trail - Winter: Trail Map Link
- Trail Map for Chief Mountain Trail - Summer: Trail Map Link
- Packing List: Always pack the 10 Essentials. Download our Hiking Guide to get the list and dayhiking packing checklist.
- Colorado Road Conditions: Colorado Road Conditions
- Photo: We would like to express our gratitude to Rick Pawela and CL Baker for sharing photo of this hike on Chief Mountain.
- After the Hike: Beau Jo's Pizza in Idaho Springs
Weather
Map & Driving Directions
Click for Driving Directions
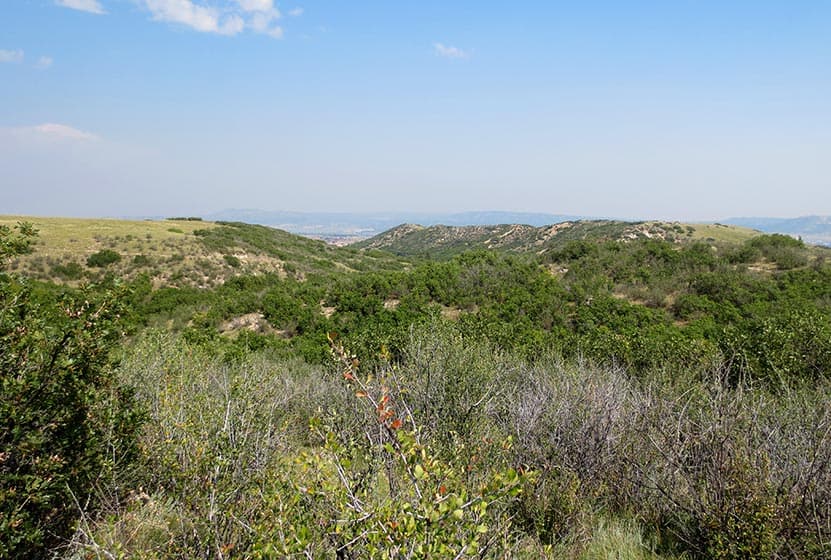
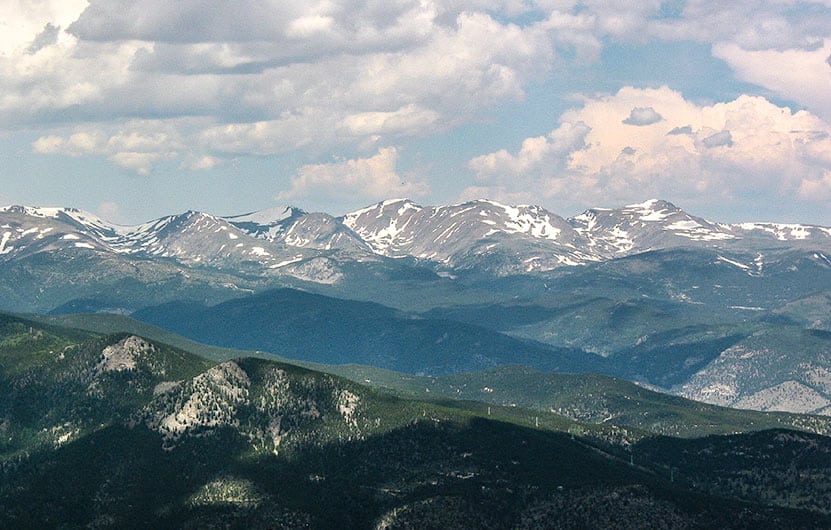
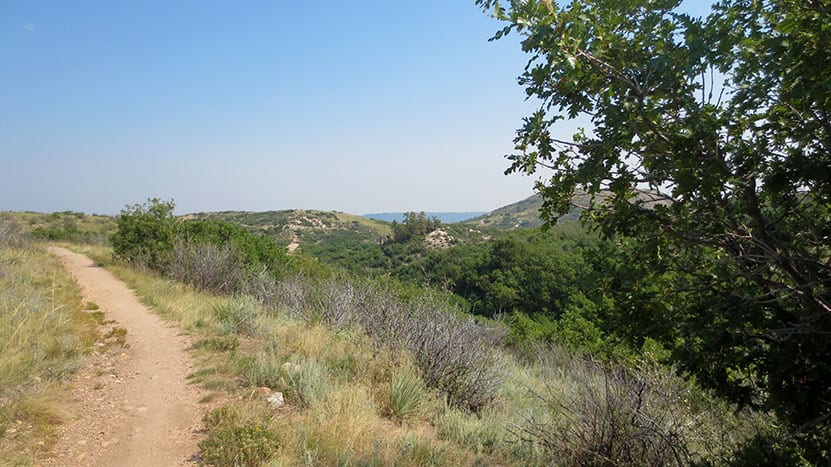
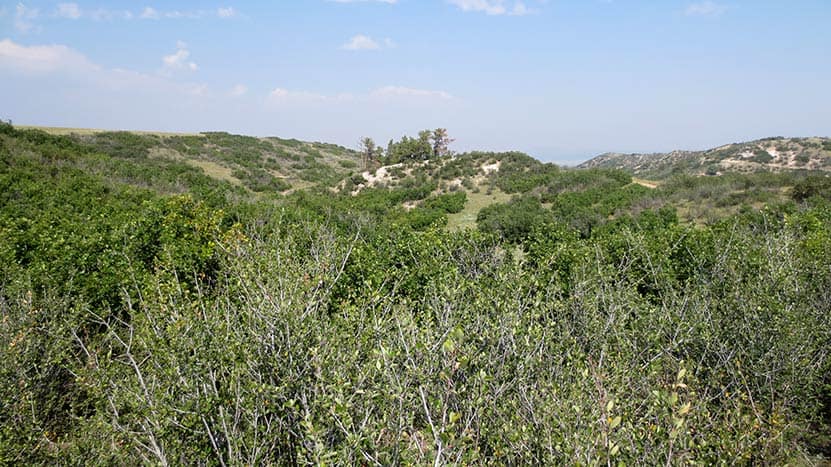
Ridgeline Open Space Hike
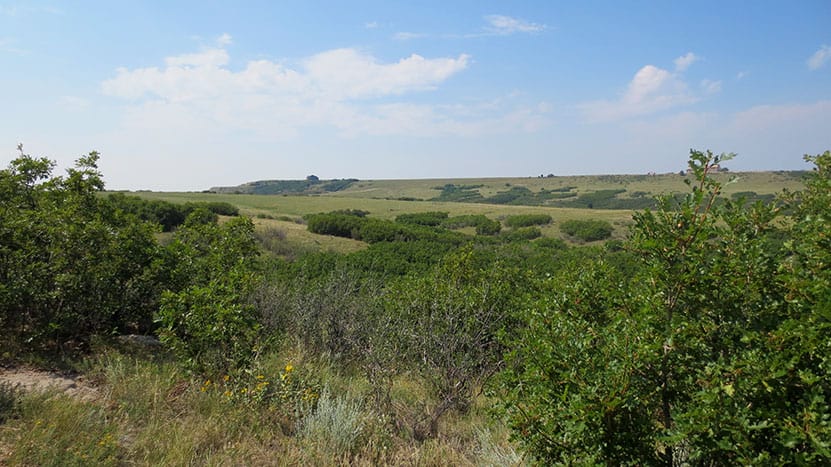
Ridgeline Open Space is nestled in the Meadows residential area of Castle Rock. This network of over 13 miles of trails winds through elevated grasslands and gamble oak with a backdrop of distant snow-capped peaks of the Front Range. Hike it or bike it for a quick escape from the work week. Explore the full Ridgeline Open Space hike profile below for trail map, driving directions, and more tips and details to help you enjoy this adventure in Castle Rock.
Trail Snapshot: Ridgeline Open Space Trail near Castle Rock, Colorado
| Hike Distance | 1 to 13.4 miles |
|---|---|
| Difficulty | Easy |
| Duration | Approx 1hr+ |
| Trail Type | Multiple Loops and Out and Back Options |
| Starting Elevation | 6600′ |
| Elevation Gain | Approx +200′ |
| Seasons | Year Round |
| Dogs | Allowed On Leash |
| Hike Trail Map | Click for a Map of Ridgeling Open Space Trails |
| Denver Drive Time | 40 min |
| Driving Directions to Meyer Homestead Trailhead | Click for Google Map |
| Town Nearest Hike | Castle Rock, Colorado |
| Beauty | grasslands, small stands of pine trees, mountain views, wildflowers, wildlife: rattlesnake, western bluebirds |
| Activities | Hiking, mountain biking, trail running |
Parking & Trailhead Information for Ridgeline Open Space
From Denver, follow Interstate 25 south to Castle Rock and take Exit 182 and go west on Wolfensberger Road. Turn right onto Coachline and follow this until to Ridgeline Open Space Trailhead (on the left-side of the road). There is a restroom and map at the trailhead. Alternatively, hikers can park at Bison Park in Castle Rock and access one of the several neighborhood access trails that lead into Ridgeline Open Space.
The Hike: Ridgeline Open Space
Ridgeline Open Space is one of our family's favorite places to hike because it's right in our backyard here in Castle Rock. The residents of Castle Rock also use the 13.4 miles of trail for trail running and mountain biking. It's quite a labyrinth of trails, but because it's located right in the heart of a residential area, it's hard to get lost (if you stay on the trail). There are maps posted at several junctions and trailheads along the network in the case you need to reorient yourself. Or print the map from the link above and bring it with you.
Our approach is usually to go up to Ridgeline for an afternoon and see where the trails take us. You'll likely encounter mountain bikers along the trail. Most are locals and are very considerate of hikers. Less considerate are the rattlesnakes. I've yet to run into one, but my neighbor was stopped short by a rattler recently while trail running. Rattlesnakes are only aggressive when threatened, but they are easy to stumble upon because they are so well camouflaged. So, keep your eyes peeled as you hike. Mountain Lions also frequent the area--like most trails along the Front Range--because of the plentiful deer population. It's wise to always keep your kids near when hiking and not running up the trail ahead on their own. This is just good practice on any trail, but I mention it because we have seen Mountain Lion prints in the mud on one of the western trail segments.
Ridgeline is aptly named because it is situated above the town and offers great views out to Longs Peak, Indian Peaks, Mt. Evans, Devil's Head to the west, and Pikes Peak to the south. Deer bed down in the grass between the gamble oak and birds flit from tree to tree along the trails.
Tips & Resources for Hiking the Ridgeline Open Space Trail
- Rattlesnakes: Keep an eye out for rattlesnakes that sun themselves on rock and the packed, warm surface of the trail.
- Hiking with Kids: As always, hike as a group, keeping small children near you. Mountain lions live in the area (as with most front-range hikes), and the sight of a small creature running alone on the trail can signal a lion's prey response.
- Sunscreen: This hike is 100% exposed to the sun's rays, so be sure to wear a hat and apply that sunscreen.
- More Hikes in Castle Rock Colorado: Castle Rock Trail, Waterfall at Castlewood Canyon, East Plum Creek Trail.
- Trail Map for Ridgeline Open Space Trail near Castle Rock: Trail Map Link
- Packing List: Always pack the 10 Essentials. Download our Hiking Guide to get the list and dayhiking packing checklist.
- Colorado Road Conditions: Colorado Road Conditions
- After the Hike: Crave Burgers
Weather
Map & Driving Directions
Click for Driving Directions
St. Vrain Mountain Hike
The St. Vrain Mountain trail is just a 3-mile hike into Indian Peaks Wilderness to stunning views of the rocky peaks of Wild Basin. Hike up and additional 1.5 miles from the RMNP boundary to the summit of St. Vrain mountain for 360-degree panoramic views of a wildflower-laden wilderness. Explore the full St. Vrain Mountain hike profile below for trail map, driving directions, and more.
Trail Snapshot: St. Vrain Mountain Hike
| Hike Distance | 9 miles Round Trip |
|---|---|
| Difficulty | Difficult |
| Duration | Approx 5-6 hrs |
| Trail Type | Out and Back |
| Starting Elevation | 8,800′ |
| Elevation Gain | Approx +3,200′to Summit of St. Vrain Mountain |
| Seasons | June-Sept. |
| Dogs | Allowed On Leash |
| Hike Trail Map | Click for a Map of St. Vrain Mountain Trail |
| Denver Drive Time | 1 hr 30 min |
| Driving Directions to St. Vrain Mountain Trailhead | Click for Google Map |
| Town Nearest Hike | Allenspark, Colorado |
| Beauty | Cascades, Panoramic Views, Wildflowers, Summit |
| Activities | Hiking, snowshoeing, photography |
Parking & Trailhead Information for St. Vrain Mountain
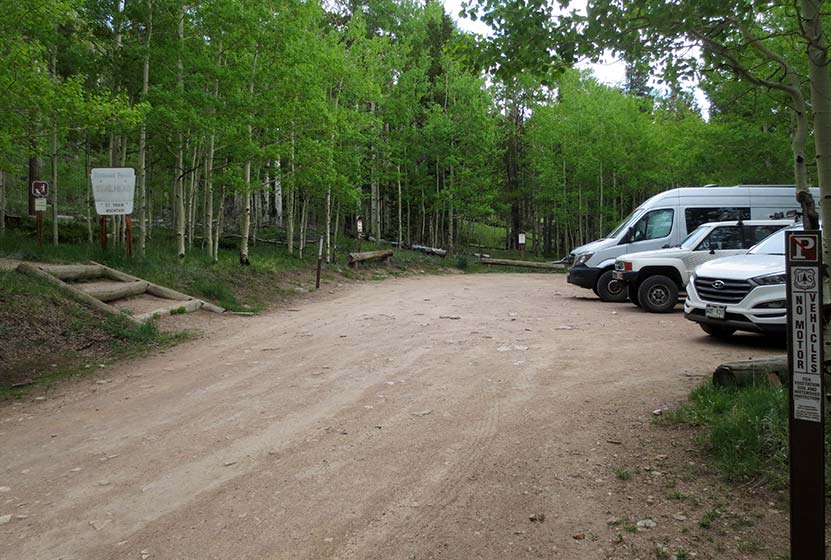
From Denver, take Interstate 25 to either 36 or 66 to Lyons. In Lyons, follow 7 to Allenspark. In Allenspark, turn left onto Ski Road - FR-107. This will be marked with a street sign and a home-crafted sign made out of an old pair of skis. Follow this dirt road as is weaves through Allenspark then a series of dispersed cabins for about 2 miles until the road terminates at the trailhead. There is parking for only about 8 vehicles at the trailhead. There is additional parking along the road, but make sure that you're not blocking cabin drives or tearing up the roadside. You may have to park a ways back down the road if crowded. I hiked this on the weekend and the lot was full around 8 AM. There are not restrooms or potable water at the trailhead.
The Hike: St. Vrain Mountain Trail
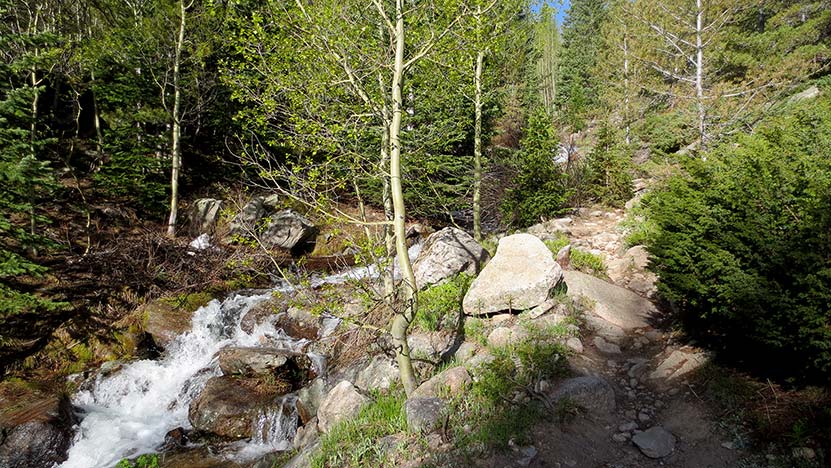
The hike begins in the shade of aspen, spruce, and lodgepole pine forest. This first segment is easy and gradual, getting steeper as the sounds of distant St. Vrain Creek grow louder and closer. Wildflowers become more prevalent and soon the trail begins to follow right alongside the course of the creek.
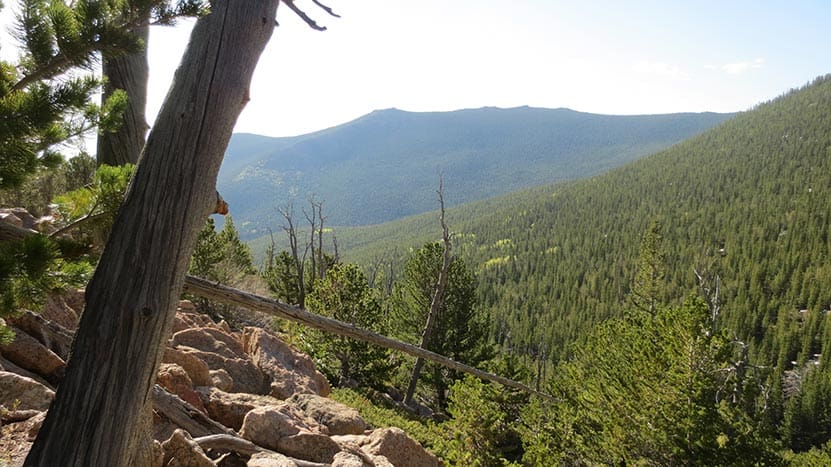
Then the switchbacks begin. I hiked this in late-May after a Winter when our snowpack was below normal. So it was snow-free until around mile 2. From about mile 2 to mile 3, intermittent snow covered about 3/4 of the trail. I didn't bring snowshoes but had it been early May, I definitely would have needed a pair. Trekking poles were essential for negotiating the trail and to keep from post-holing up to my waist. It could be done without poles, but I'd definitely recommend having them.
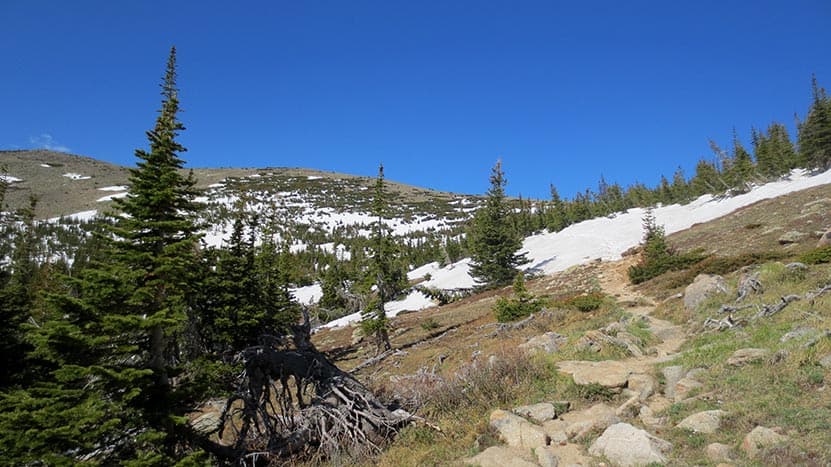
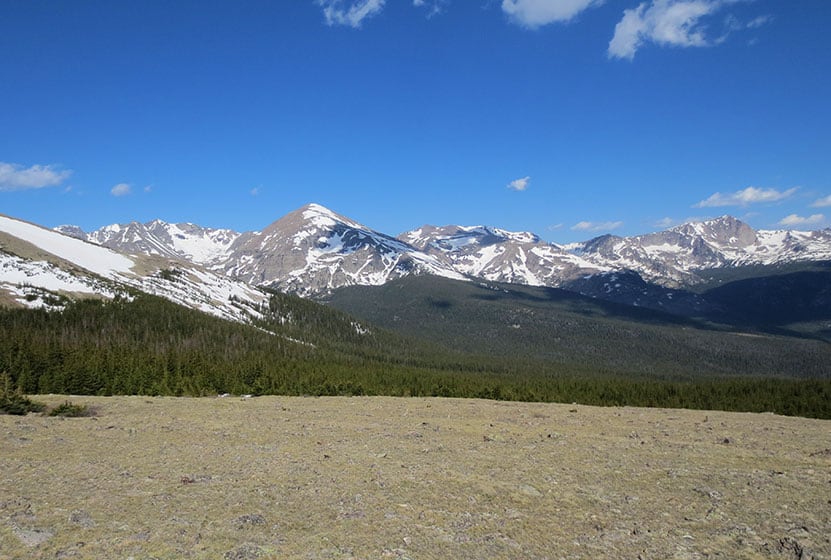
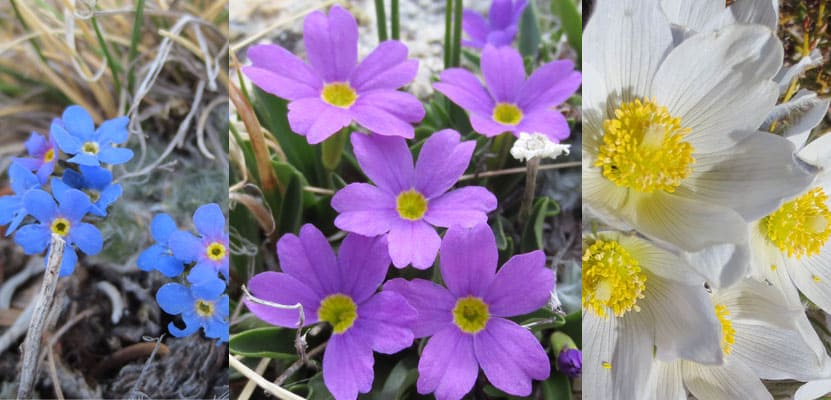
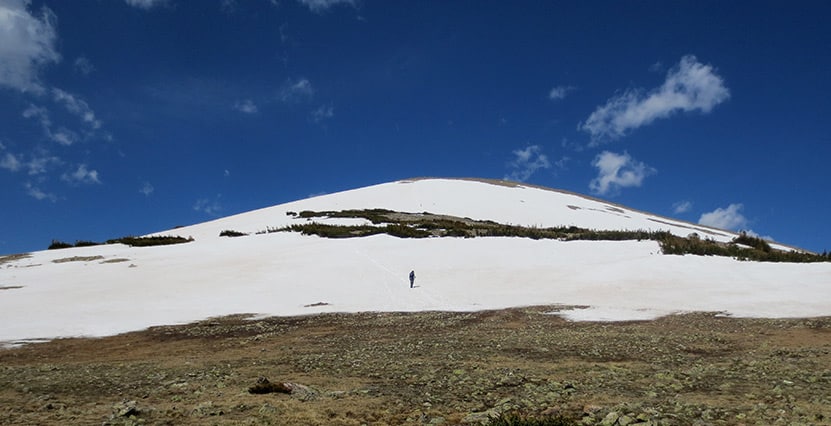
At treeline, things open up to blue skies and high-country tundra brightened by the many colors of summer wildflowers. In early-May, these were just beginning to bloom. However, come mid-June, the creek alongside the trail and these upper reaches of high-country should be replete with wildflowers.
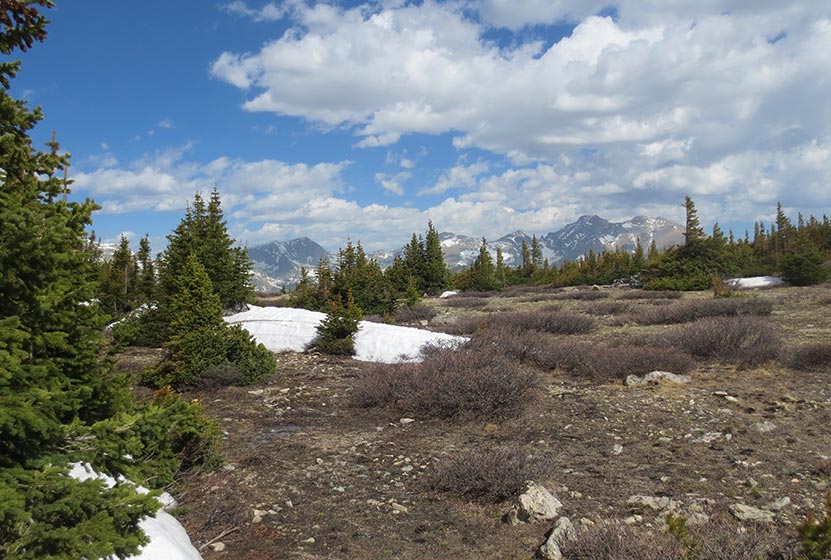
Once you crest the saddle, the views are outstanding. To the Northwest, the entire Wild Basin of Rocky Mountain National Park opens up before you. To the North, you'll find Meadow Mountain, elevation 11,632'. I met a local from Allenspark along the trail and he said the views from the summit of Meadow Mountain rival those of St. Vrain because of the perspective looking down into the Wild Basin area.
At mile 3, the trail enters Rocky Mountain National Park. From this point, I could see a faint trail in the snow leading up the rounded ridgeline of St. Vrain Mountain. It's about a 1/2 mile hike from the main trail to the summit with about 700 feet of elevation gain.
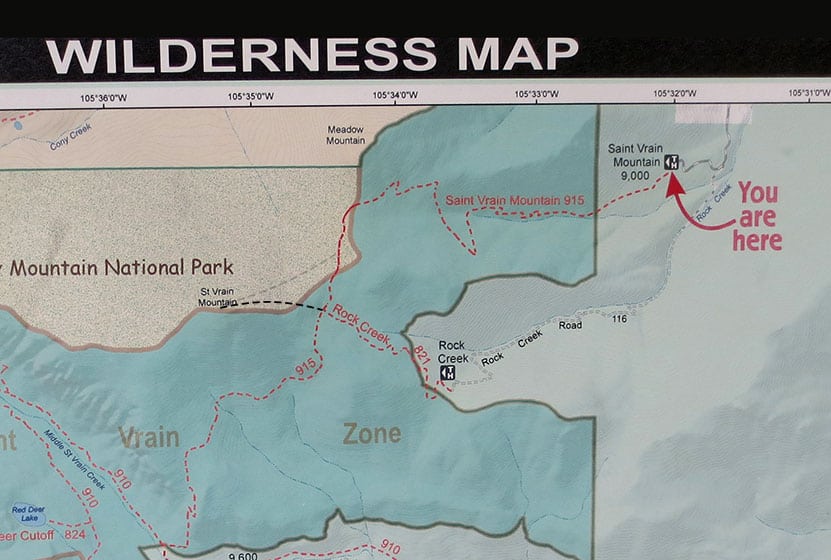
Below is a photo of the map found at the trailhead. I've added a dark-black dashed line to indicate the trail that goes from the junction with the Rock Creek Trail to the summit. The lighter-grey dashed line indicates the path hikers were taking across the snow to the slopes of St. Vrain Mountain. Be sure to hike on durable surfaces (snow, rock, trails) on the summit approach to protect the fragile tundra environment.
Tips & Resources for Hiking St. Vrain Mountain Trail
- TIP: Trekking Poles are a must on this trail. They will be especially helpful to negotiate the snow that covers the upper reaches of the trail in late-Spring through early Summer.
- TIP: Apply sunscreen as the trail is mostly exposed to the sun.
- Similar Hikes: Flattop Mountain, Windy Peak, Carpenter Peak.
- Trail Map: St. Vrain Mountain Trail
- Packing List: Always pack the 10 Essentials. Download our Hiking Guide to get the list and dayhiking packing checklist.
- Colorado Road Conditions: Colorado Road Conditions
- After the Hike: Meadow Mountain Cafe in Allenspark, CO
Weather
Map & Driving Directions
Click for Driving Directions
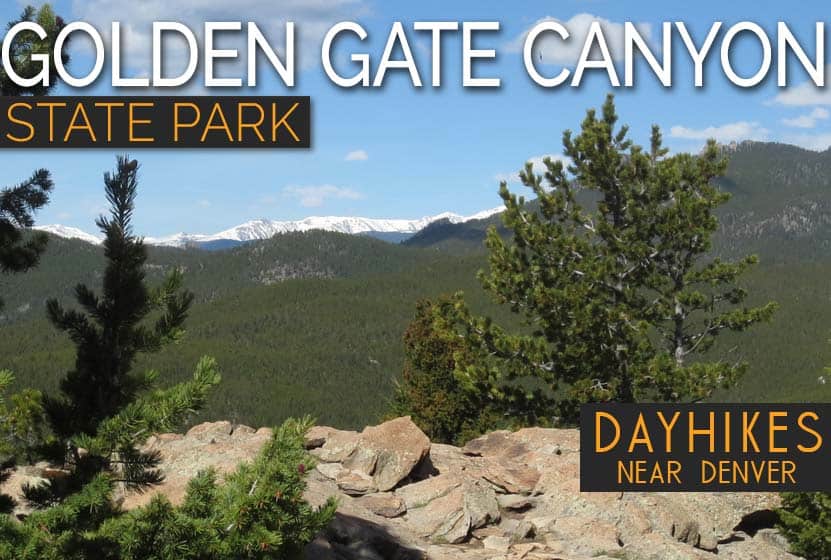
Golden Gate Canyon State Park Hiking Trails
6 Hikes in Golden Gate Canyon State Park
Located less than an hour from Denver and Boulder, Golden Gate Canyon State Park is a remarkable treasure. The park offers over 30 miles of hiking trails and some of the most accessible backcountry camping opportunities near Denver. Golden Gate is full of seasonal creeks and wildflowers, as well as promontories that open out to views of the snow-capped and lead-blue rock faces of the Rocky Mountains. The park is open year-round; however, during many years, snow may cover trails from as early as October through May. Explore this page to get familiar with several hike options and the camping facilities available in the Park.

Raccoon Loop Trail - Shaded and Family Friendly
Distance: 2.5 Miles
Difficulty: Easy
The Raccoon Loop Trail is an easy, 2.5-mile loop hike in Golden Gate Canyon State Park. Because it's short and has a variety of scenery, the Racoon Loop makes for an enjoyable hike for families. Most hikes near Denver are quite exposed to the sun, but this hike offers a good deal of shade. The trail boasts panoramic views of snow-capped peaks, glades of aspen trees, wildflowers, and seasonal brooks.
![]()

Blue Grouse Trail - A Short Adventure
Distance: 1.6 Miles Round Trip
Difficulty: Easy to Moderate
Blue Grouse Trail in Golden Gate Canyon State Park is another short hike of easy to moderate difficulty. If you are looking for a short adventure to gains views of green foothills and changing aspens, then this is for you. While not a spectacular hike, the Blue Grouse trail is easy to access and can be used as an access point to other trails and camping sites available in the park.
![]()

Forgotten Valley Hike - Homestead Ruins
Distance: 3 Miles Round Trip
Difficulty: Moderate
A favorite destination hike in Golden Gate Canyon State Park, hikers can put together a segment of the Burro Trail and Mountain Lion trail to access this old homestead and pond situated in Forgotten Valley. Nearby are several reservable campsites and a backcountry shelter, making this area a perfect place to camp before exploring the many miles of trails in the park.
![]()

Horseshoe Trail to Frazer Meadow
Distance: 3.6 Miles Round Trip
Difficulty: Moderate
Another trail to some of Golden Gate Canyon's camping areas, this out-and-back trail takes hikers through Greenfield Meadows and terminates at Frazer Meadow. Much of the trail follows alongside a seasonal creek that runs through the main valley. Aspen trees, meadows, wildflowers, and shaded trail segments are all highlights of this hike in the heart of the park.
![]()

Beaver Loop Trail
Distance: 2.8 Miles
Difficulty: Moderate to Difficult
The Beaver Loop trail can be picked up right from the visitor center at Golden Gate. It is a 2.8-mile loop with an out-and-back option of hiking over to Slough Pond. While it's a short hike, it requires about 1000' of elevation gain, making it a more demanding hike. Like so many of the hikes in Golden Gate, the Beaver Loop offers a beautiful panorama of distant, snow-capped mountains in the west.
![]()

Windy Peak Trail - A Great Vantage Point
Distance: 6.4 Miles
Difficulty: Moderate to Difficult
Another great destination hike, the way up to Windy Peak combines a few trails to create a loop hike with a spur trail leading to the top of Windy Peak. Windy Peak is an incredible vantage point for taking in the snow-capped Rockies and western skies. The eastern segment of this hike is replete with wildflowers during the summer.
![]()
Camping in Golden Gate Canyon State Park
Golden Gate Canyon offers a variety of camping options, making the park a great place for those new to backpacking to test their equipment and to get a feel for what a longer trip into the mountains might require. Families looking to try out camping for the first time can car-camp or hike short distances to some of the backcountry sites. All sites require reservation and a Colorado State Parks Pass. There are less demanding options such as cabins and yurts available. All sites, cabins, and campsites can be booked at the Colorado State Park's reservation page. Here's a quick overview of the camping options at Golden Gate Canyon State Park:
- 20 Backcountry Campsites: Brochure and Map of Backcountry Sites
- 5 Cabins: Located at Reverend's Ridge, no hike in required, year-round, max occupancy of 6, heated, electricity, water and restrooms nearby, showers available in Summer season
- 2 Yurts: Located at Reverend's Ridge, No hike-in required, year-round, max occupancy of 6, heated, electricity, water and restrooms nearby, showers available in Summer season
- 97 Campsites at Reverend's Ridge: No hike-in or short walk required, accommodates campers, trailers, and some RV spaces, limited sites available during Winter months, max occupancy of 6 per site, water and restrooms nearby, showers available in Summer season
- 35 Campsites at Aspen Meadows: Tent camping only, closed during Winter months, max occupancy of 6 per site, water pump and vault toilets
Weather
Map & Driving Directions
Click for Driving Directions
Beaver Loop Hike in Golden Gate Canyon
The Beaver Loop is a moderate 2.3-mile loop hike in Golden Gate Canyon State Park views of the snow-capped Rocky Mountains in the West. Add a short segment to Slough Pond to make this a 3-mile hike. Explore the trail profile for a trail map, driving directions, and tips for this hike near Golden, CO
Trail Snapshot: Beaver Loop in Golden Gate Canyon State Park
| Hike Distance | 2.3 miles |
|---|---|
| Difficulty | Moderate |
| Duration | Approx 1 hr |
| Trail Type | Loop |
| Starting Elevation | 8200′ |
| Elevation Gain | Approx +1050′ |
| Seasons | Best hiked May to October |
| Dogs | Allowed on 6' Leash |
| Hike Trail Map | Click for a Map of Golden Gate Canyon Trails |
| Denver Drive Time | 45 min |
| Driving Directions to Visitor Center | Click for Google Map |
| Town Nearest Hike | Golden, Colorado |
| Beauty | Views of Continental Divide, Treamont Mountain and Indian Peaks Wilderness Area, steep inclines, wildflowers, aspen trees< |
| Activities | Hiking, photography, snowshoeing in winter, picnic area, reservable camping shelter |
| Fee | Colorado State Parks Pass Required |
Parking & Trailhead Information for the Beaver Loop Hike
From Denver, take US-6 West to Golden. Just outside Golden, US-6 will turn left (West) into Clear Creek Canyon; it's at this intersection that you'll continue North on 93. After 1.3 miles on 93, turn left onto Golden Gate Canyon Road. Now, prepare for the rest of your drive being pretty windy. After 12.7 miles on Golden Gate Canyon Road, it will intersect with Crawford Gulch Road on a wide curve. Turn right onto Crawford Gulch road and the visitor center for Golden Gate Canyon State Park will be on your immediate right. This is the best parking area for the Beaver Loop. However, the parking here fills up fast, especially on the weekends. Another option is to park at the Ralston Roost Trailhead, located about 0.2 mile further down the road (see the State Park Map Link above). A third option is to begin your hike at Slough Pond. This will add about 3/4 of a mile to your hike, making it closer to a 3-mile trip.
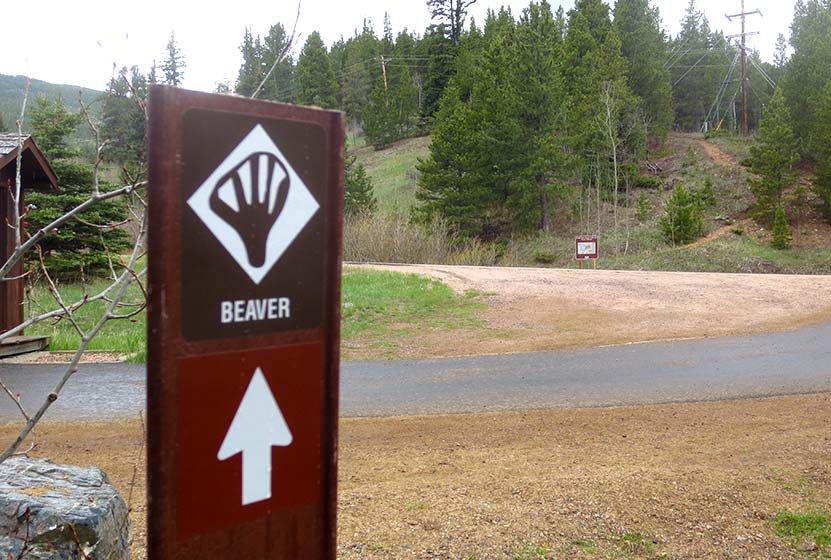
The Beaver Loop Trailhead Across Golden Gate Canyon Road from the Visitor Center
The Hike: The Beaver Loop Hike in Golden Gate Canyon
The Visitor Center at Golden Gate is worth exploring. Kids will be fascinated by the trout in the man-made creek and small pond surrounding the building. The Beaver Trail can be picked up just South of the Visitor Center by taking one of the paths around the perimeter of the building. The trail begins under the powerlines on the opposite side of Golden Gate Canyon road. Exercise caution crossing the road as vehicles may be descending the hill and not be looking out for pedestrians. Be alert for cyclists, as they frequent the road and come down the hill at high speeds.
First Trail Fork on the Beaver Loop
At the first trail fork, hikers have the option of taking the loop clockwise or counter-clockwise. I hiked this clockwise, taking the trail towards the shelter. The clockwise route offers a more gentle ascent, but steep descent on the back side of the loop. Taking it counter-clockwise will mean a steeper ascent and a more gentle descent on the way back, which is probably easier on the knees, but a more demanding climb.
You'll notice that the State Park trail map rates this trail as "most difficult." It's important to note that these ratings are relative to the other trails in the park. I 've classified the Beaver Loop as medium/moderate because, while it does have over 1000' of elevation gain, it is only a 2.3-mile hike. Add about 3/4 of a mile if you make the out-and-back trip out to Slough Pond. See our Hikes by Difficulty page for more hikes and the basic criteria we use to classify hikes. It should be noted that difficulty will differ by persons, so be sure to review the details of a hike before attempting it.
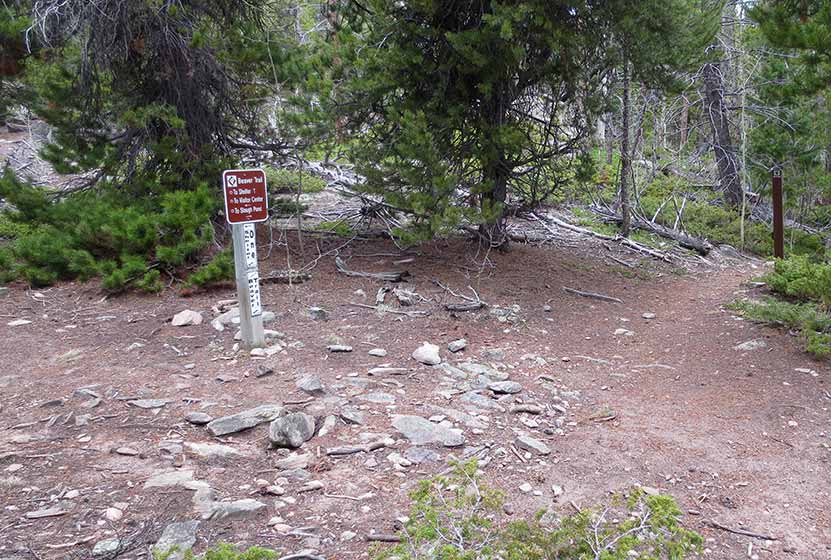
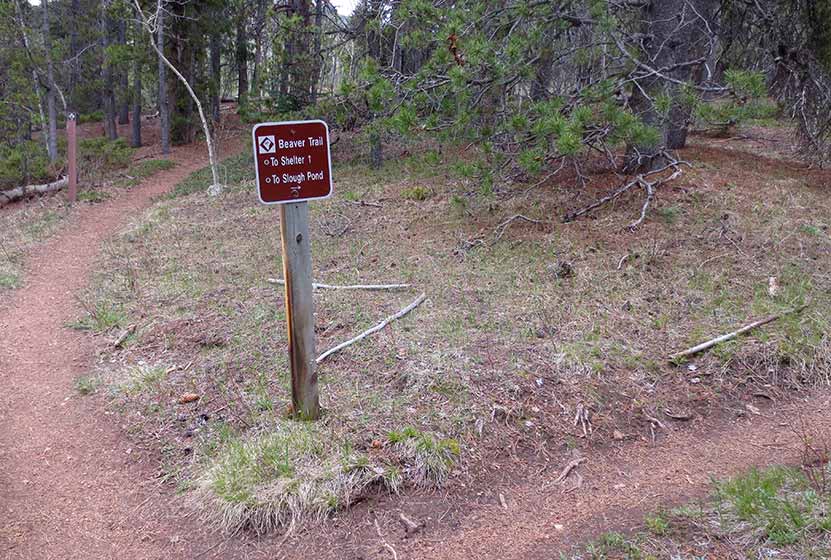
Sign Indicating Spur Trail to Shelter
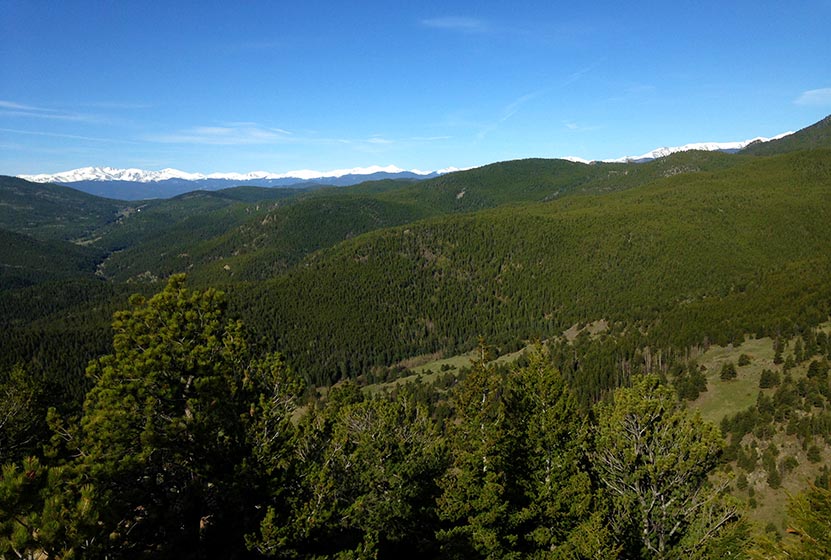
At approximately 1 mile into the loop, hikers will encounter a sign (pictured above) pointing to a 0.5-mile spur trail leading to a backcountry shelter. A permit is required to camp here and can be purchased online at the Golden Gate Canyon fees page. Continuing on the loop, the trail will soon lead to an overlook of views to the West. During most of the year, snow-capped peaks appear above a verdant green valley in these western foothills.
After the overlook, the trail begins a steep descent. I had brought my trekking poles (I always bring them), and was glad that I did. I would imagine that this trail gets slicked over with ice and hardened snow during the winter, making it really difficult to navigate. The trail then leads down to an intersection with the Slough Pond trail.
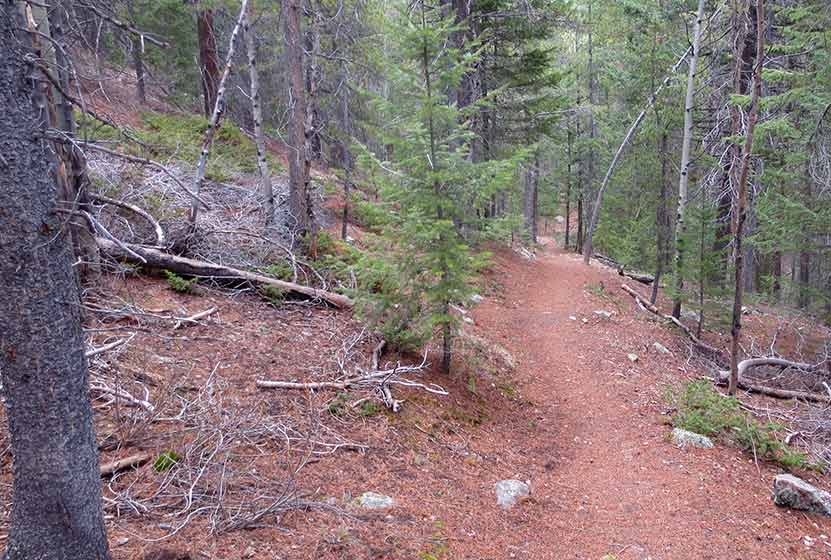
Downhill Trail Segment on the Beaver Loop
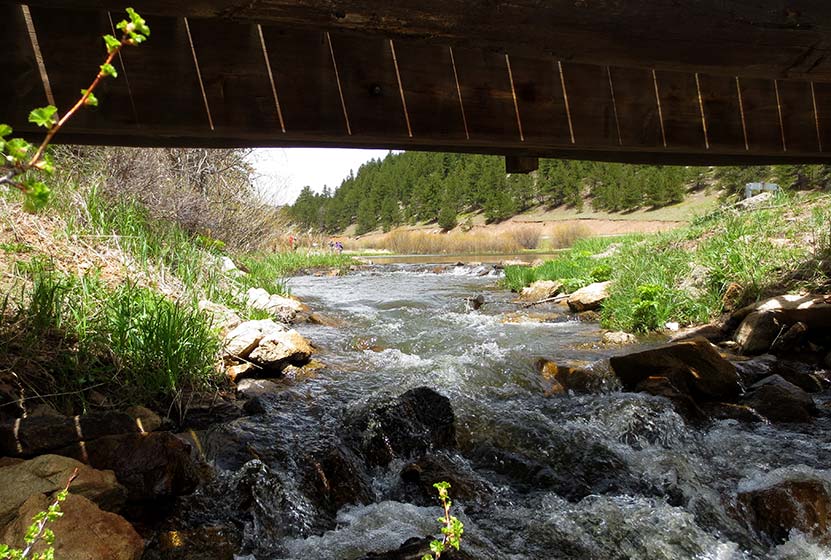
At this intersection at the bottom of the hill, you have the option of making the trip over to Slough Pond. The hike over to Slough Pond is pleasant and mostly flat. At the pond, a quaint creek flows out of the pond and under a footbridge. Slough Pond is a popular fishing spot and a great place for kids to learn to bait a hook. As mentioned above, adding this out-and-back segment to the hike, makes this closer to a 3 mile hike.
Tips & Resources for Hiking the Beaver Loop Hike
- TIP: Don't forget to bring food and water along this hike for refuelling.
- TIP: Pick up a paper map at the visitor center before hiking.
- TIP: Trekking poles will be a big help on the steeper portions of the trail. Traction devices are recommended for winter weather..
- Trail Map: Golden Gate Canyon Trail Map
- Packing List: Always pack the 10 Essentials. Download our Hiking Guide to get the list and dayhiking packing checklist.
- Colorado Road Conditions: Colorado Road Conditions
- After the Hike: Windy Saddle Cafe in Golden, Colorado
Weather
Map & Driving Directions
Click for Driving Directions to Visitor Center
Heil Valley Ranch Ponderosa Loop Hike
Heil Valley Ranch near Boulder offers this rewarding lollipop-loop hike which features views of distant snowcapped mountains and geological features unique to this section of Colorado. Nestled in the foothills between Boulder and Lyons this singletrack trail is a great destination for both hikers and mountain bikers. However, soil erosion has required occasional trail closures, so be sure to check out the Boulder County Open Space Twitter feed for trail conditions. Explore the full Heil Valley Ranch hike profile below for trail map, driving directions, and more tips and details to help you enjoy this adventure in the Boulder County, Colorado.
Trail Snapshot: Heil Valley Ranch Ponderosa Loop
| Hike Distance | 7.6 miles Round Trip |
|---|---|
| Difficulty | Moderate |
| Duration | Approx 4 hrs |
| Trail Type | Lollipop-Loop |
| Starting Elevation | 6000′ |
| Elevation Gain | Approx +1000′ |
| Seasons | Year Round |
| Dogs | Dogs Not Allowed |
| Hike Trail Map | Click for a Map of Heil Valley Ranch |
| Denver Drive Time | 50 min |
| Driving Directions to Heil Valley Ranch Trailhead | Click for Google Map |
| Town Nearest Hike | Boulder, Colorado |
| Beauty | Views to snowcapped peaks, unique geology, wildlife: deer, coyote, squirrel |
| Activities | Hiking, mountain biking, and photography |
Parking & Trailhead Information for Heil Valley Ranch Hike
From Boulder, follow US 36 West toward Lyons, turn left onto Left Hand Canyon Drive. After 0.7 mile, turn right onto Geer Canyon Drive. After approx. 1.2 miles, you'll come around a curve and see a sign for Heil Valley Ranch. The parking area is on the right/North side of the roach.
The Hike: Ponderosa Loop at Heil Valley Ranch Trail
There are two trails located at the north end of the parking area, the Wapiti and the Lichen. For this longer loop hike, we'll be taking the Wapiti up to the Ponderosa loop. This trail is found just to the left/west of the Lichen Loop trail. These should be well-marked by signs and the Lichen loop trail will immediately cross a footbridge. The Lichen loop is a great option for families with small children being just 1.3-mile loop with about 230' of elevation gain over the course of the hike.
Taking the Wapiti trail, hikers will head North through a broad valley punctuated with Ponderosa Pine. After passing an intersection with the Lichen Loop, the Wapiti will soon enter the shade of more ponderosa pines as it makes its way through more rocky and steep terrain. At 2.5 miles in, the Wapiti will meet up with the Ponderosa Loop Trail.
The Ponderosa loop segment offers a great set of views, beginning with views of snowcapped peaks in the west. We recommend taking the Ponderosa loop counter-clockwise, which will take you up to a high point then back down into a beautiful meadow with views all the way out to Left-Hand Reservoir. A second overlook is gained after this section, providing great views out to Indian Peaks Wilderness and Longs Peak in the North. The trail will meet back up with the Wapiti trail for a descent back to the trailhead.
Tips & Resources for Hiking the Heil Valley Ranch Trail
- TIP: Keep alert for mountain bikers as much of the trail is singletrack and a popular mountain biking area..
- Trail Map for Heil Valley Ranch Trail near Boulder: Trail Map Link
- Packing List: Always pack the 10 Essentials. Download our Hiking Guide to get the list and dayhiking packing checklist.
- Colorado Road Conditions: Colorado Road Conditions
- Photo: We would like to express our gratitude to Jonathan Reyes for sharing such great photographs of this hike at Heil Valley Ranch.
- After the Hike: The Parkway Cafe
Weather
Map & Driving Directions
Click for Driving Directions
Carpenter Peak Hike in Roxborough State Park
The hike up Carpenter Peak in Roxborough State Park is a strenuous 3.1 mile journey (one-way) to a foothill summit that overlooks the red rock formations of Fountain Valley. You'll also gain 360 degree panoramic views of Denver, east to the plains, and west to distant snow-capped peaks. In this Colorado trail profile, you'll find driving directions, trail map, and more tips and details to help you enjoy this adventure in Roxborough State Park.
Trail Snapshot: Carpenter Peak Hike at Roxborough State Park
| Hike Distance | 6.2 Mile Round Trip |
|---|---|
| Difficulty | Moderate |
| Duration | 3-4 hours |
| Trail Type | Out and Back |
| Starting Elevation | 6200' |
| Elevation Gain | Approx. +960' |
| Seasons | Year Round |
| Dogs | Prohibited in Roxborough State Park |
| Hike Trail Map | Click for a Map of Roxborough State Park |
| Denver Drive Time | 45 min |
| Driving Directions to Roxborough State Park | Click for Google Map |
| Town Nearest Hike | Littleton, Colorado |
| Beauty | Red rock formations, meadows, wildlife: mule deer, eagles, foxes, birds |
| Activities | Hiking, birdwatching, Visitors’ Center |
| Fee | Entrance Fee or State Parks Pass Required |
Parking and Trailhead Information
The last two miles of access road into Roxborough State Park are a maintained dirt road, but it can get washboarded and can be tough on the car. Still, it's not a long drive in. Undulating green hills can be seen in the east where deer and antelope graze. Roxborough State Park can fill up during it's busiest hours on the weekend. If that's the case, you can wait until enough vehicles exit the park then drive in. The peak times appear to be are around 10AM-2PM on the weekends. If the line looks long, you can always turn around and head over to Waterton Canyon or to South Valley Park--both are great options.
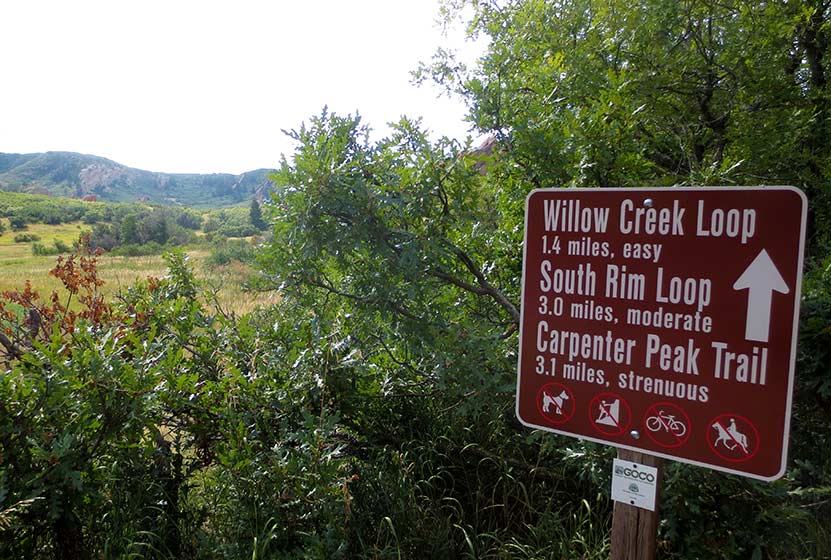
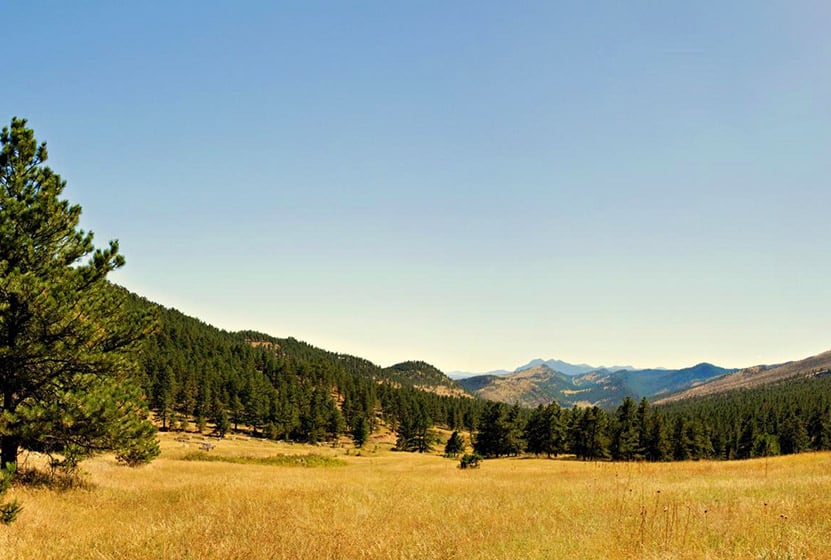
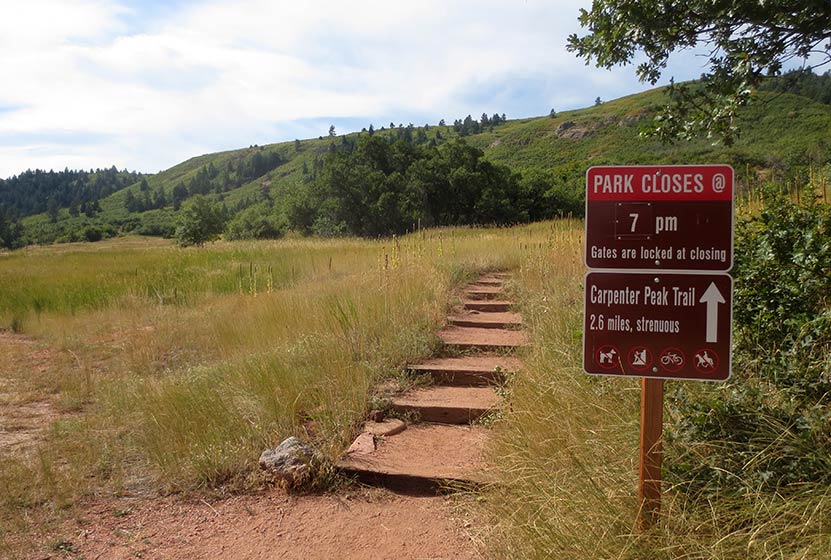
The hike up to Carpenter Peak begins just southwest of the Roxborough State Park visitor center. Clear signage marks this access to Carpenter Peak, the Willow Creek, and South Rim Trails (pictured above). Soon the trail enters a corridor of scrub oak which provides shade for this first short segment of the hike. There is a great deal of poison ivy in this corridor, so be sure to avoid going off trail. Just short of 0.5 mile into the hike, the trail will open up to a large meadow among the red rock. Continue following the signs for Carpenter Peak.
The trail will soon cross a dirt road and begin its way west. This is the most steep and demanding segment of trail. We've classified this as a moderate hike in difficulty, but for those who are from out-of-town or who are not in the best of shape, it may be considered difficult.
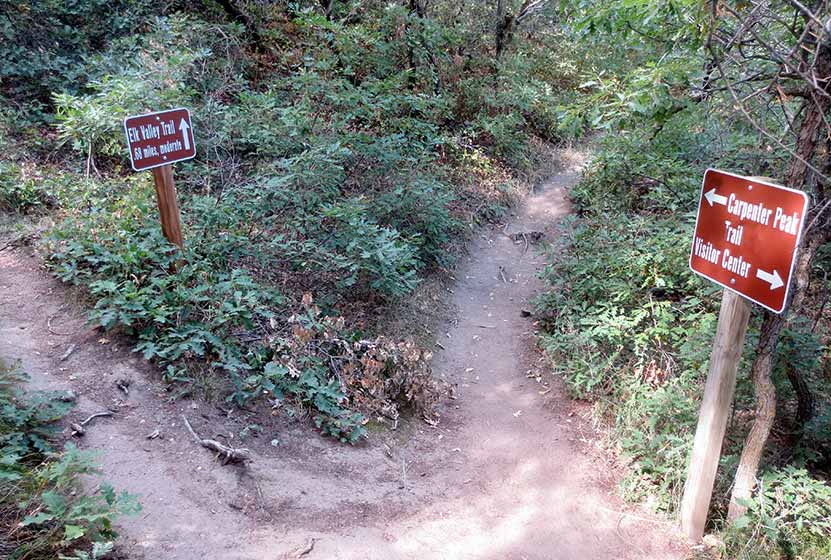
At 1.7 mile, the trail will come to a Y intersection (pictured above). The trail to the left leads to Elk Meadows, and the trail for Carpenter Peak leads to the right. The trail now winds along the hillsides with switchbacks that open up to expansive views of the red rock formations that make Roxborough Park Denver's Garden of the Gods.
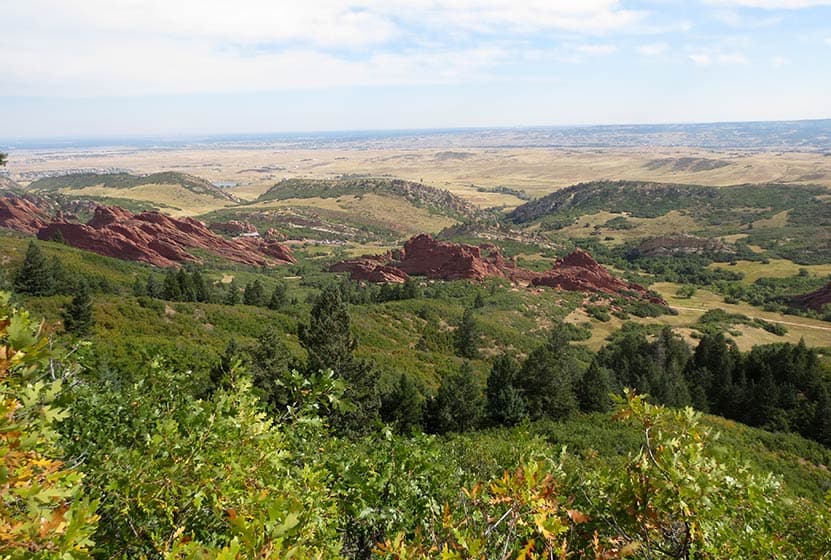
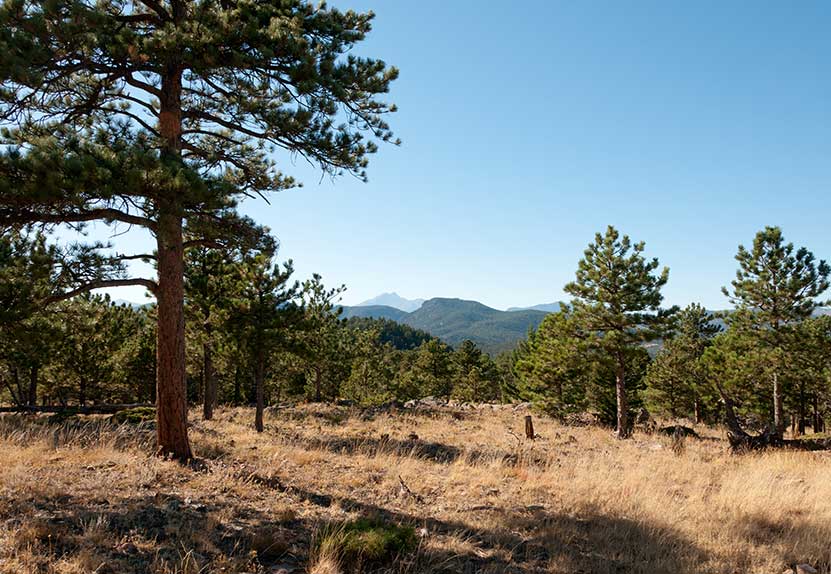
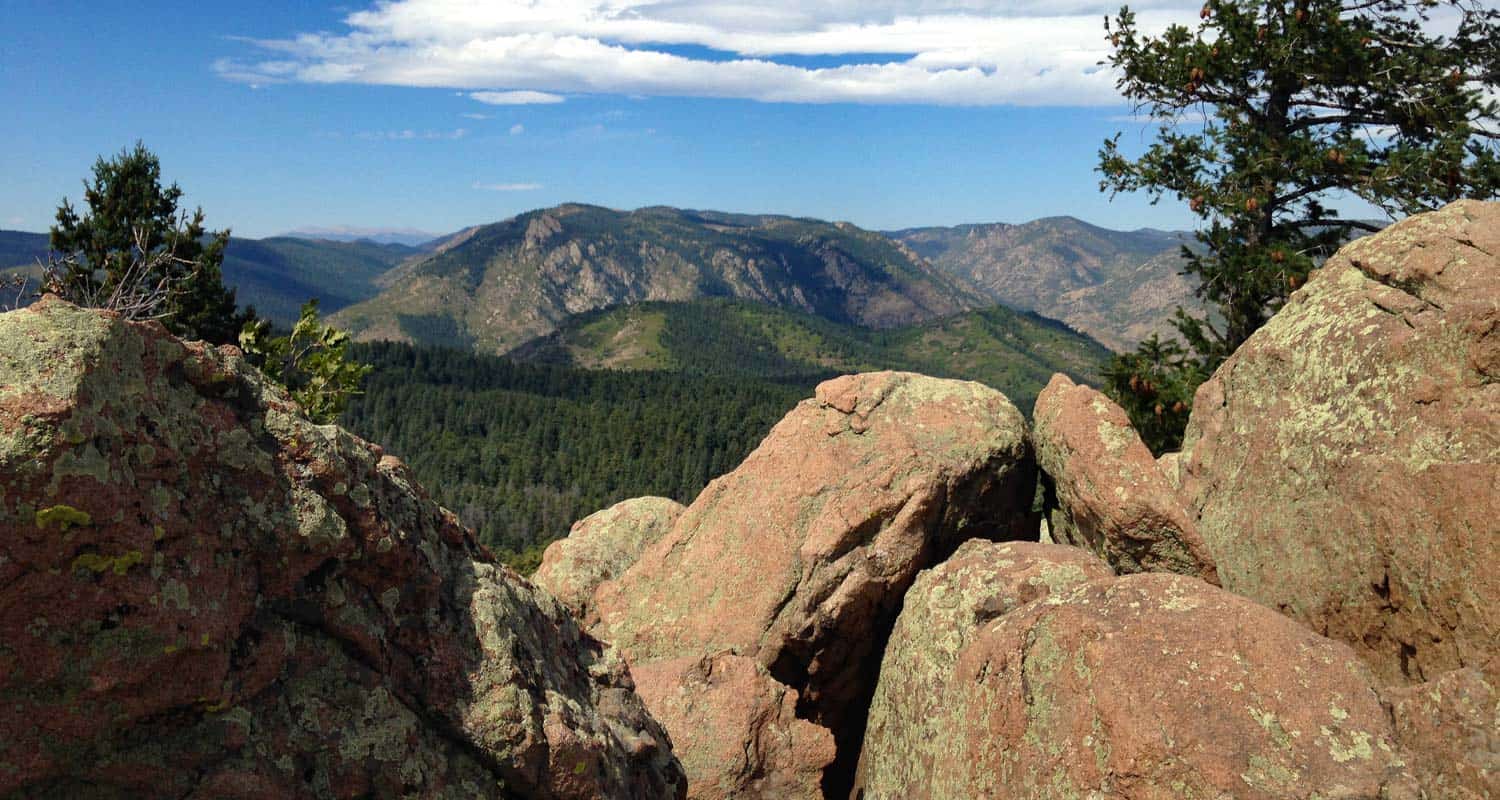
After gaining the ridge at mile 3, hikers will encounter a final intersection. Again, there is clear signage pointing the way right to Carpenter peak, now just a few hundred yards further. At the summit, you'll be able to take in a 360 degree panorama of Denver, Roxborough State Park, the plains, and distant mountains in the west. I particularly enjoy the views from here over to the mountains that surround Waterton Canyon. In the Spring and early Summer, a few western peaks will still still show their snow caps.
The return route follows the same trails back down to the visitor center.
Tips & Resources for Hiking to Carpenter Peak in Roxborough
- Posion Ivy: Because there is a significant amount of poison ivy that grows out to the edges of parts of this trail, it's wise to wash your clothing soon after your return home as poison ivy can affect people by indirect contact.
- Hiking in Winter: If you plan to hike Carpenter Peak in the winter, it is advised that you have traction devices like YakTrax because much of the trail will be in shadow, and ice will likely form on the trail.
- Trail Map for Roxborough State Park: Trail Map Link
- Packing List: Always pack the 10 Essentials. Download our Hiking Guide to get list and dayhiking packing checklist.
- Colorado Road Conditions: Colorado Road Conditions
- After the Hike: Waterton Tavern in Roxborough
Weather
Map & Driving Directions
Click for Driving Directions
Raccoon Loop Hike in Golden Gate Canyon State Park
Our kids loved this 2.5 mile loop hike in Golden Gate Canyon State Park. The trail sports lots of shade, panoramic views of snowcapped peaks, wildflowers, and trickling brooks. Be sure to see the details below regarding an annual raptor closure that detours one segment of this hike. Explore the full Raccoon Loop Hike profile for trail map, driving directions, and many of the details you need to enjoy this adventure in Golden Gate Canyon State Park.
Trail Snapshot: Raccoon Trail Loop at Golden Gate Canyon
| Hike Distance | 2.5 miles |
|---|---|
| Difficulty | Easy |
| Duration | Approx 1.5 hr |
| Trail Type | Loop |
| Starting Elevation | 9120′ |
| Elevation Gain | Approx +500′ |
| Seasons | Year Round |
| Dogs | Allowed On 6' Leash |
| Hike Trail Map | Click for a Map of Golden Gate Canyon State Park |
| Denver Drive Time | 1 hr |
| Driving Directions to Panorama Point Trailhead | Click for Google Map |
| Driving Directions to Reverends Ridge Campground Trailhead | Click for Google Map |
| Town Nearest Hike | Golden, Colorado |
| Beauty | Mountain range views of snowcapped peaks, wildflowers, aspens |
| Activities | Hiking, mountain biking, photography, snowshoeing in winter |
| Fee | Colorado State Parks Pass Required |
Parking & Trailhead Information for the Raccoon Loop Hike
You can begin your hike at either the Panorama Point Trailhead or at the Reverend Ridge Campground Trailhead. Our family hiked this from the Panorama Point Trailhead. Though parking is limited, there is additional parking located directly across the street in a dirt lot. Reverend Ridge Trailhead, while a larger parking area, can fill up fast because it is located at the campground. Either one, however, is a good option. Driving directions for both trailheads are located in the trail snapshot above.
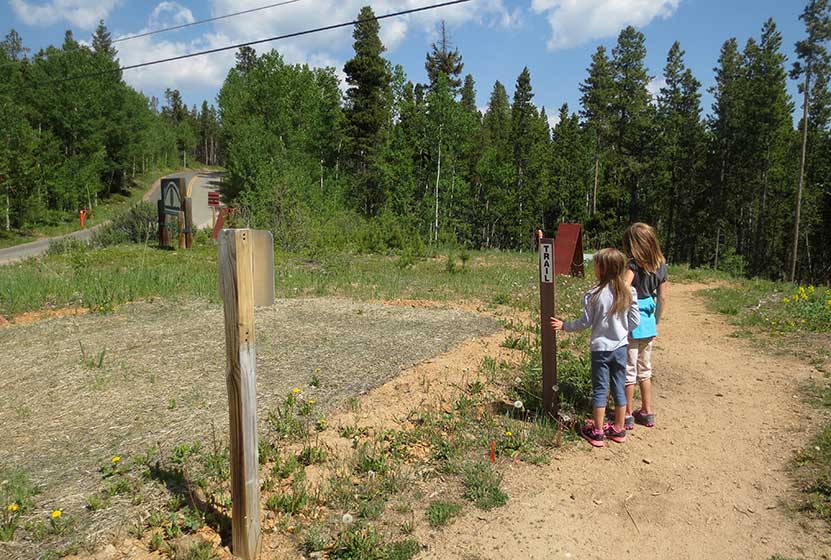
The Hike: The Raccoon Loop Hike in Golden Gate Canyon
We hiked the Raccoon Loop counter-clockwise from the Panorama Point Trailhead and found it to be easy to moderate in difficulty. Our kids (at the time of this post) are 5 and 8. Both were wearing tennis shoes and did well on the trail. There was a steep segment with loose rock, where our youngest needed me to hold her hand as she navigated here way down the trail.
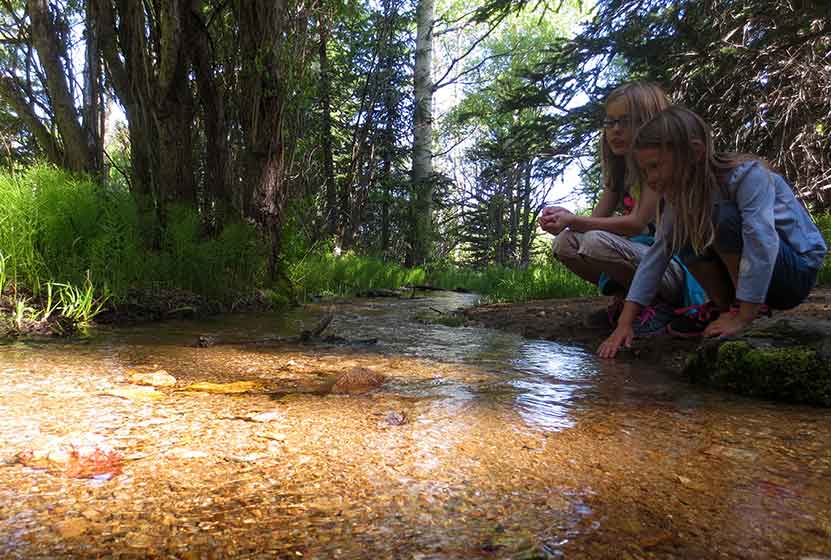
The trail begins with incredible views of the snowcapped Indian Peaks stretched out against the western sky. Soon, views of Thorodin Mountain and Starr peak dominate the landscape as the trail winds to the east and crosses a seasonal brook. Raccoon Trail then gently drops into aspen groves and green meadows full of wildflowers.
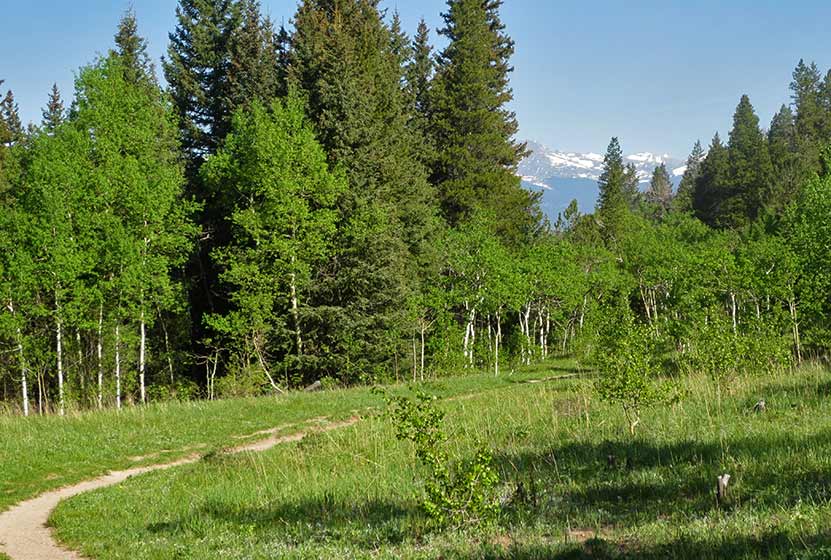
Entering a more mature stand of aspens, the trail begins a more steep descent. This is where hikers will want to watch their footing on the loose rock and gravel surface of the trail. After this short descent, the trail crosses another brook over a small footbridge, then begins to climb a bit further west before turning sharply to the south.
Shortly after the brook is where we encountered the closure of approximately 0.5 mile of the Raccoon trail. These closures are announced on the front page of the Golden Gate Canyon State Park website, and we knew about it before making our trip.
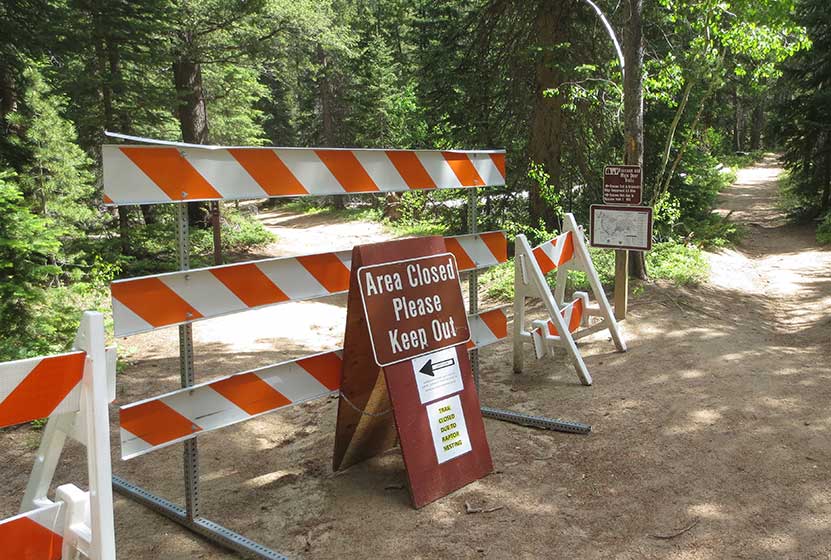
This rerouted us up to the Reverend Ridge Campground, then required that we hike down State Park Road for about 0.5 mile until we were able to pick up the Raccoon Trail again. Because the detour wasn't clearly marked, we've provided an image of the normal route vs. the detour route we took below.
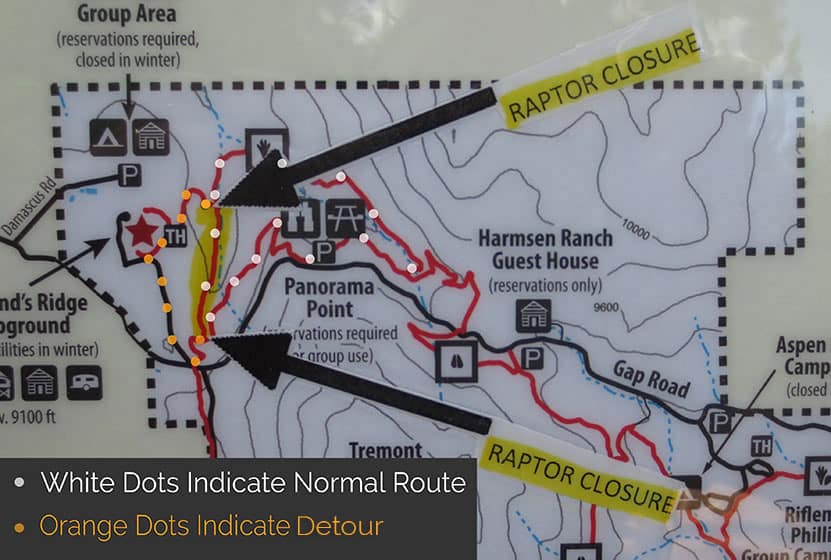
It probably goes without saying, but do exercise caution when walking the road, and assume that cars will not see you. There are several sharp turns/switchbacks. We were able to pick up the trail down where the road comes to a stop sign, then hike back to Panorama Point. The detour adds approximately 1 mile to the original hike, making this into a 3.5 mile loop hike.
This last section had some elevation gain, but still was moderate in difficulty. This is a great hike for visiting friends and family, but those who have not acclimatized to the altitude, or who are not in the best shape, may find this last part challenging. There is a bench strategically placed on the ascent, and rocks where you can rest your legs.
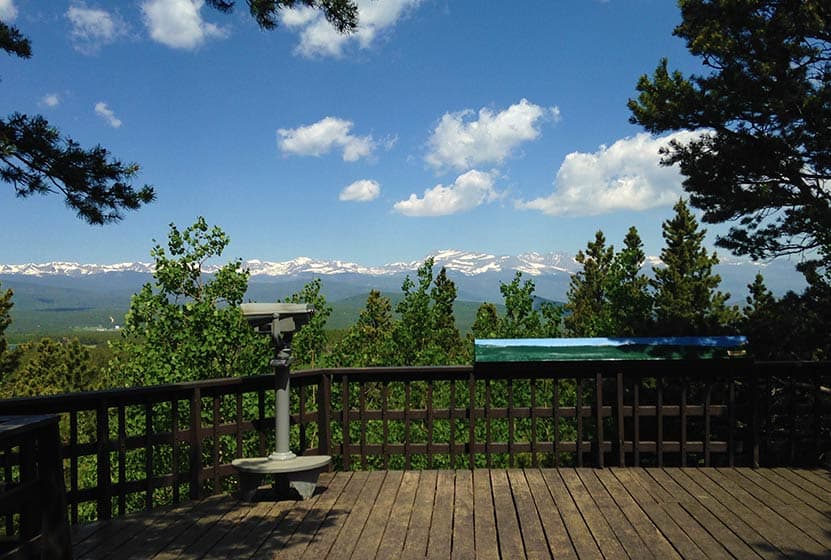
At Panorama Point, hikers will find a large deck and viewing area. It's one of the best accessible views you'll get of the Front Range near Denver.
Tips & Resources for Hiking the Raccoon Loop Hike
- Be Aware of Closures: The Raccoon Loop has seasonal closures when raptors are nesting. However, it's just one segment of the trail that is closed, and a (not-so-well-marked) detour is available.
- Look out for Mtn Bikers: We always find mountain bikers to be considerate on the trails near Denver. There is an established etiquette and they will call their pass. Still, it's good to know that this trail is popular with both mountain bikers and hikers, so keep your eyes and ears peeled and give them plenty of room to pass.
- Trail Map for Golden Gate Canyon State Park: Trail Map Link
- Packing List: Always pack the 10 Essentials. Download our Hiking Guide to get the list and dayhiking packing checklist.
- Colorado Road Conditions: Colorado Road Conditions
- After the Hike: Windy Saddle Cafe in Golden, Colorado
Weather
Map & Driving Directions
Click for Driving Directions to Panorama Point Trailhead