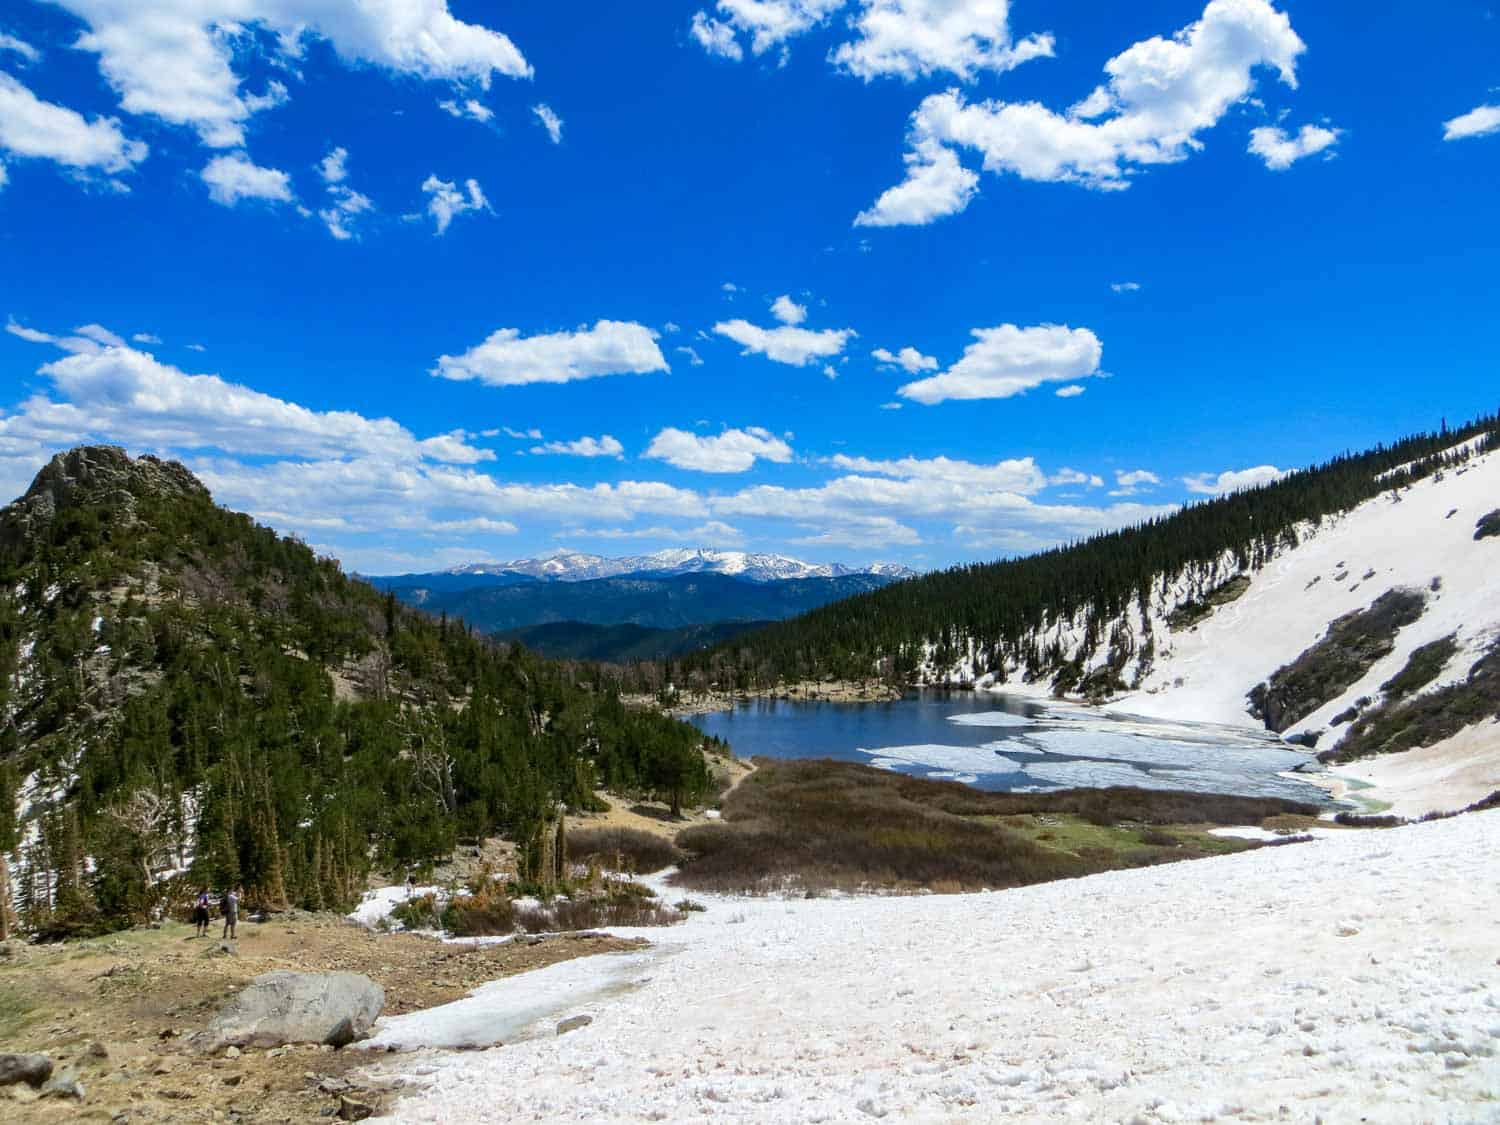
St. Mary’s Glacier near Idaho Springs, Colorado
The hike up to St. Mary’s Glacier ascends through a beautiful forest and ends with stunning panoramic views--the kind you expect from a perfect short hike in Colorado. If you walk around St. Mary's lake then hike up the glacier, you will gain incredible views of the Rocky Mountains to the west. It is a quick hike--1.5 miles round-trip if you climb to the top, but only about 1 mile round trip if you only hike the lake and back. The St. Mary's Glacier trailhead is about an hour from Denver and a great way to beat the summer heat, as there’s snow above the lake year-round.
ST. MARY'S GLACIER TRAIL SNAPSHOT
| Hike Distance | Approx. 1.5 mile Round Trip |
|---|---|
| Difficulty | Easy to Moderate |
| Duration | Approx 2 hr Round Trip |
| Trail Type | Out and Back |
| Elevation Gain | Approx. +1200' to base of the Glacier |
| Seasons | Late Spring to Early Fall |
| Dogs | Allowed On Leash |
| Hike Trail Map | Click for a Map of St. Mary’s Glacier near Idaho Springs, Colorado |
| Denver Drive Time | 55 min |
| Driving Directions to St. Mary’s Glacier near Idaho Springs, Colorado | Click for Google Map |
| Town Nearest Hike | Idaho Springs, Colorado |
| Beauty | Forest hike, year-round snow, glacier, lake, bristlecone pine, mountain range views |
| Activities | Hiking, picnics, mountain biking, skiing and snowboarding on glacier, snowshoeing in the winter |
| Video | Click For a Video of St. Mary’s Glacier hike |
| Fee | $20 Parking Fee |
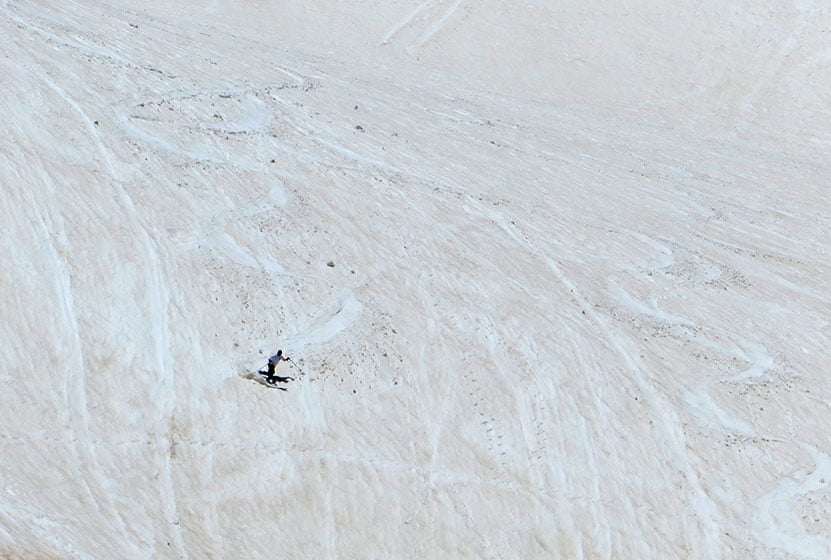
It was the first day of June, and when I arrived at the base of St. Mary's Glacier, I could see snowboarders and skiers zig-zagging their way down its slopes! Even the trail up to St. Mary's lake was still decorated with snow. We only made it about halfway up the glacier as it was very slick and I didn’t have my Yaktrax, but the views we got from (almost to) the saddle at top of the glacier were incredible.
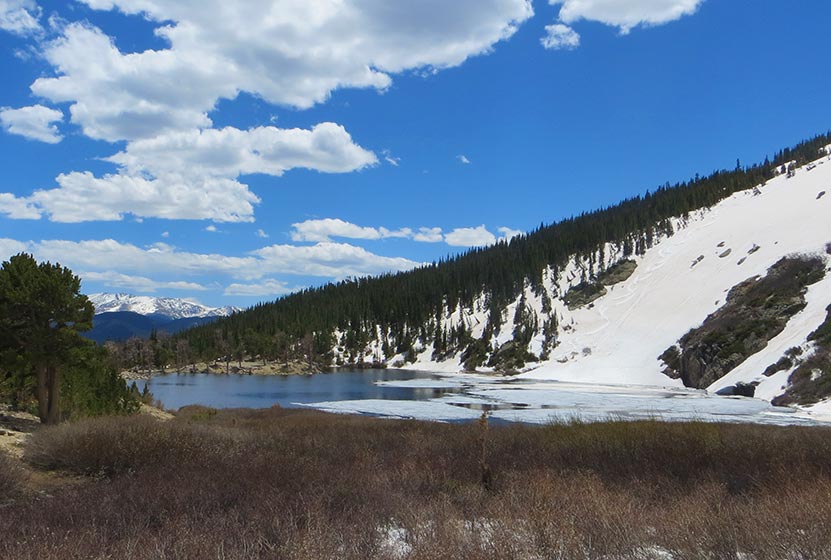
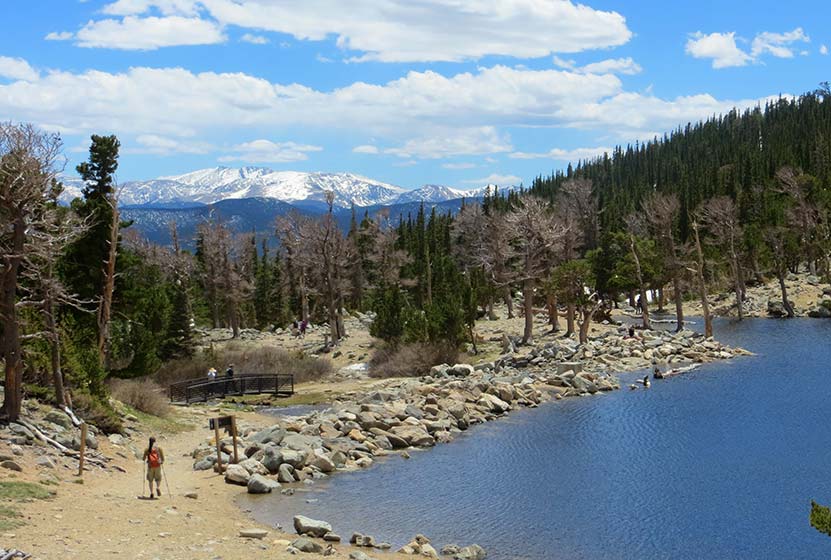
Just St. Mary's Lake alone is breathtaking – especially in the morning calm, as it reflects the glacier in its mirror surface. It's a wonderful place to have a picnic before beginning the rocky descent back down the mountain. If you walk around the right side of St. Mary's Lake, you'll come to a bridge that takes you over a small stream – this is how you pick up the trail to hike up the glacier.
How to Get the Best Experience when Hiking to St. Mary's Glacier
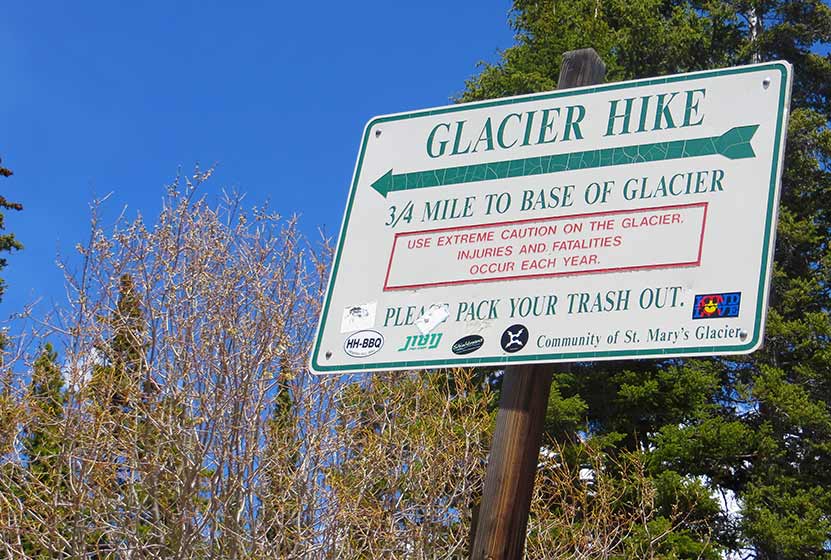
First is parking at the St. Mary's Glacier Trailhead (this is important): There are two parking lots for the trailhead (one south of the trailhead which is fairly large and one north of it that’s smaller) and both require you to pay a $20 fee and display a permit on your windshield. Permits are easily obtained from marked posts in both parking lots, but you’ll need to bring your own pen to write down your license plate number on the fee envelope. Restrooms in the parking lots are a giant bonus and seemed (today, at least) to be very well-maintained. Do not park along the road as it interferes with access to homes and heavy fines are assessed.
The trail up to St. Mary's Glacier is surprisingly short - just about three-quarters of a mile to the top of the glacier - but the route is extremely rocky, and at times, it could be difficult for smaller children to scramble over larger rocks. The lower portion of the trail is quite dry, but as you ascend to the glacier there is a lot of wet and deep snow to traverse through. I’d recommend wearing hiking boots, or at the very least wearing water-resistant/treated shoes with good traction. The winter season at St. Mary's would surely demand snowshoes. If you are hiking in the winter, exercise real caution. Because this hike feels short and is accessible from the interstate, it's easy to forget that you are in an alpine environment. Be sure to stay the trail because this is an area where avalanches are possible on the neighboring slopes.
The trailhead to the St. Mary’s Glacier is well-marked, but after that there are no more signs for the trail itself. I’ve heard folks on the trail say that as long as you’re climbing upwards you’ll eventually reach the glacier, but this type of unmarked trail may be a bit intimidating for less experienced hikers. Personally, in the winter I just follow footsteps in the snow and in the summer I follow the small stream upwards (reduces to a light trickle of water in the late Summer) and I have always made it to the glacier just fine.
Dogs are allowed on the trail on leashes. They should really be kept leashed on the ascent and descent as the land the trail runs through is on private property. Be sure to bring some doggie bags to pick up after your best friend.
Tips & Resources for Hiking St. Mary’s Glacier near Idaho Springs, Colorado:
- Picnic Area: Pack a picnic! The St. Mary's lake is truly a stunning setting for a quick bite.
- Snowboarding Area: Bring in skis/snowboards/sleds and have a blast on the glacier.
- Ask for direction: The trail can pretty confusing of you've not hiked it before, so don’t be afraid to ask hikers coming down if you’re headed in the right direction.
- Trail Map for St. Mary’s Glacier near Idaho Springs, Colorado: Trail Map Link
- Colorado Road Conditions: Colorado Road Conditions
- After the Hike: Beau Jo's Pizza Idaho Springs
- Hike Profile Credit: We would like to express our gratitude to Leslie W., a member of the Dayhikes Near Denver Pathfinder Team, who did this hike, wrote the trip report, and took the photos you see above. Thanks, Leslie!
Weather
Map & Driving Directions
Click for Driving Directions
Mt. Galbraith Loop via the Cedar Gulch Trail
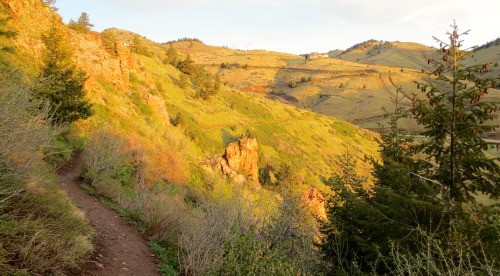
Hiking Mt. Galbraith near Golden, Colorado will spoil you with it's views into two canyons and into the City of Golden. Mount Galbraith is about 25 minutes from downtown Denver, so it makes for a quick escape from the bustle of life in town to take in the fresh air of the foothills. This Colorado hiking trail is a moderate loop great for avid hikers but still accessible for beginners. Explore the full Mt. Galbraith Loop hike profile below for trail map, driving directions, and more tips and details to help you enjoy this adventure near Golden.
Trail Snapshot: Mt. Galbraith Loop Trail Near Golden
| Hike Distance | 4.9 miles |
|---|---|
| Difficulty | Moderate |
| Duration | Approx 2 hr |
| Trail Type | Lollipop |
| Elevation Gain | Approx +1100′ |
| Seasons | Spring, Summer and Fall |
| Dogs | Allowed on Leash |
| Hike Trail Map | Click for a Map of Mount Galbraith Park |
| Denver Drive Time | 26 min |
| Driving Directions to Mt. Galbraith Trailhead | Click for Google Map |
| Town Nearest Hike | Golden, Colorado |
| Beauty | cliff-nesting golden eagle, views into Golden, big horn sheep |
| Activities | Hiking, picnics, mountain biking |
| Video | Click For a Video of Mt. Galbraith Loop |
TMt. Galbraith Loop Hike via the Cedar Gulch Trail
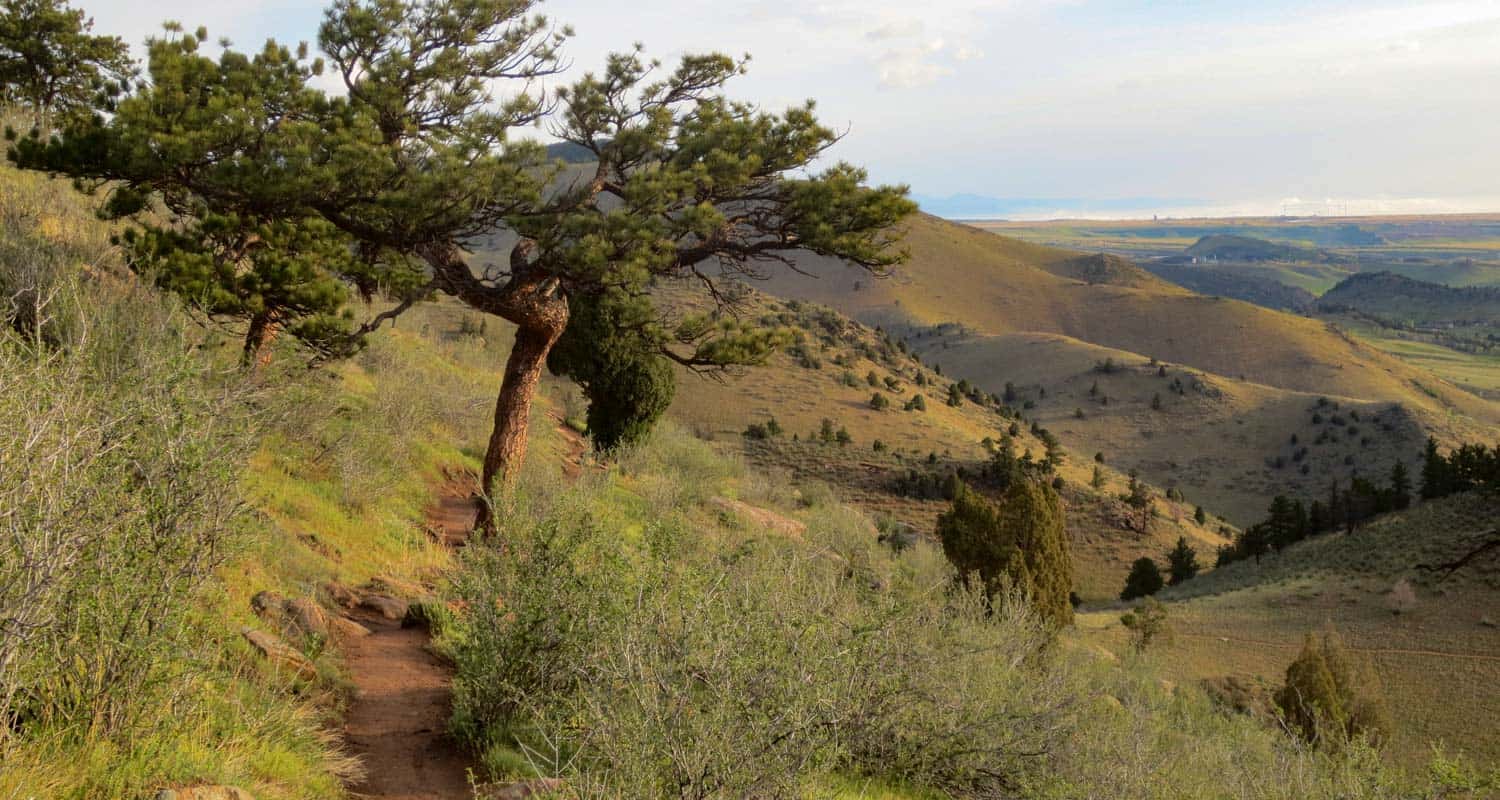
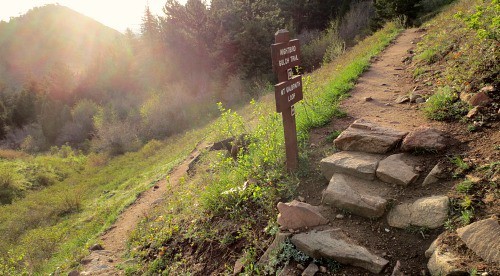
The Mt. Galbraith hike profiled here is a lollipop loop, and the out-and-back section of the Cedar Gulch trail starts in Cedar gulch along a stream. I hiked this in the early morning when the sounds of hummingbirds could be heard all along the stream bed. It makes for a perfect sunrise hike.
After crossing the stream, it's a steady, moderate climb with views into Golden Gate Canyon. In the Spring and early Summer, wildflowers will be blooming trailside.

The Cedar Gulch trail runs for 1.3 miles skirting the side of Mt. Galbraith until it hits the intersection with the loop. At this point, you can choose to take the Mt. Galbraith loop trail to the left (clockwise), or to the right (counter-clockwise). We recommend taking the clockwise (left) route which will make for a nice shaded downhill hike off the mountain.
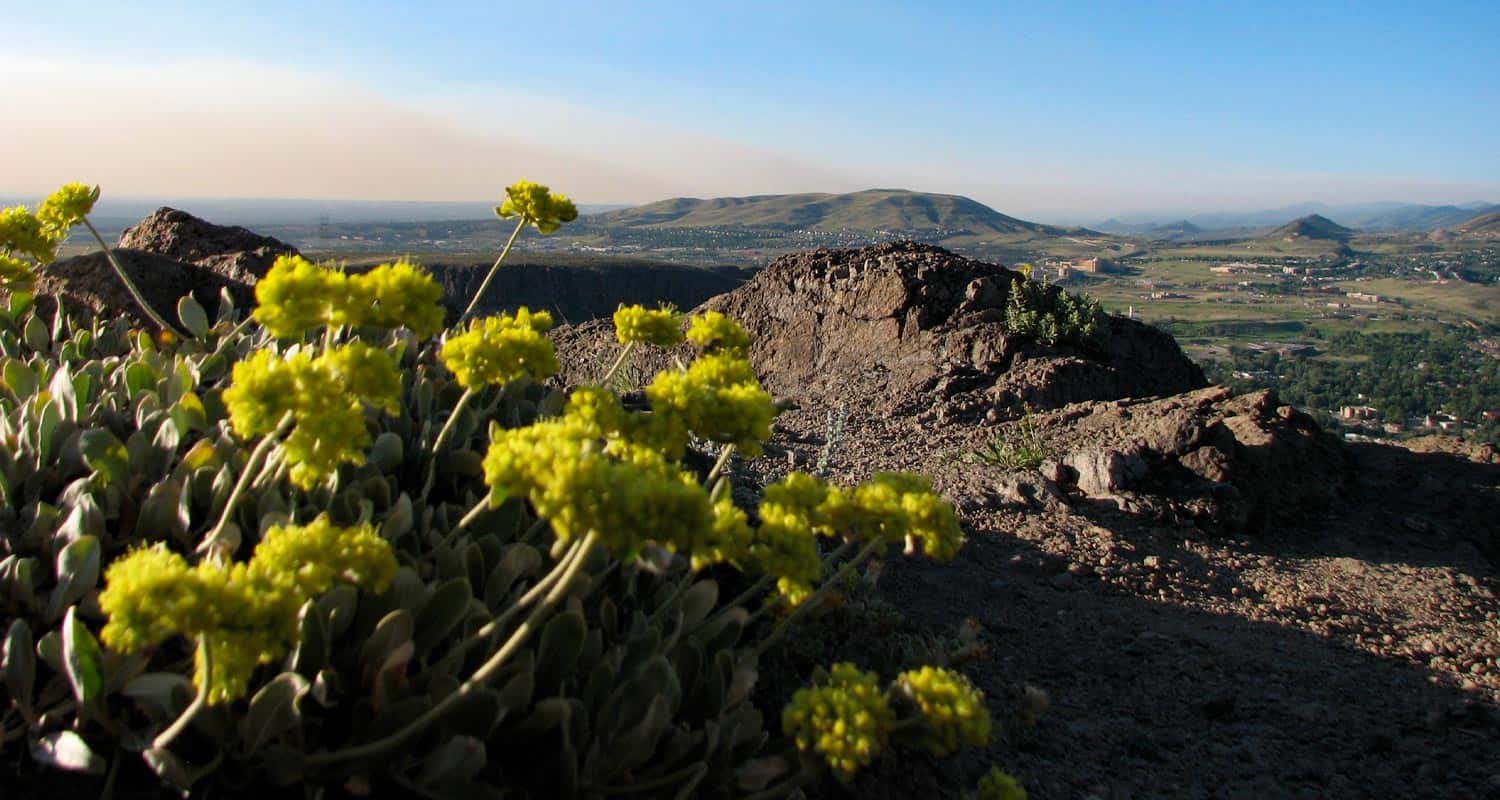
Before you hike to the backside of Mt. Galbraith, you'll get some great views into Golden, Colorado with the Coors Brewery dominating the landscape below, and views to the southwest of Clear Creek Canyon. The video below gives a short panorama from the overlook where you can look down into Golden.
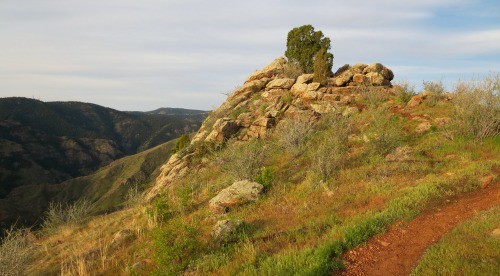
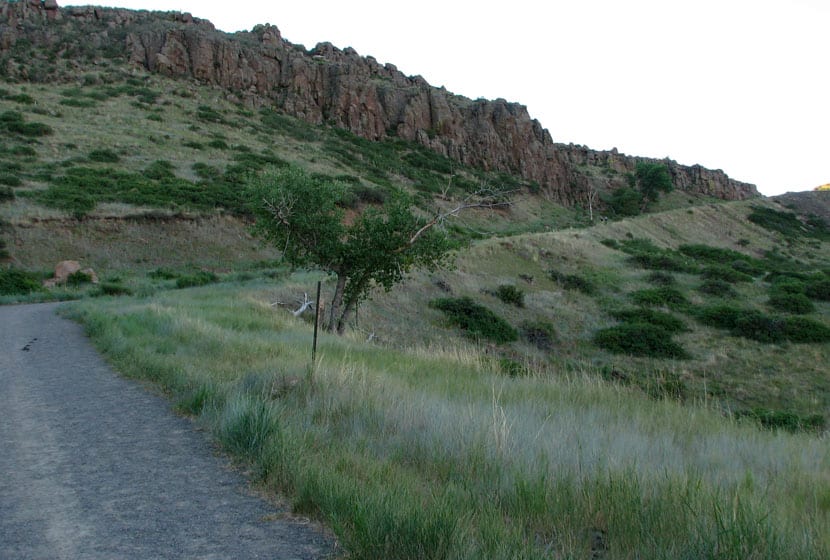
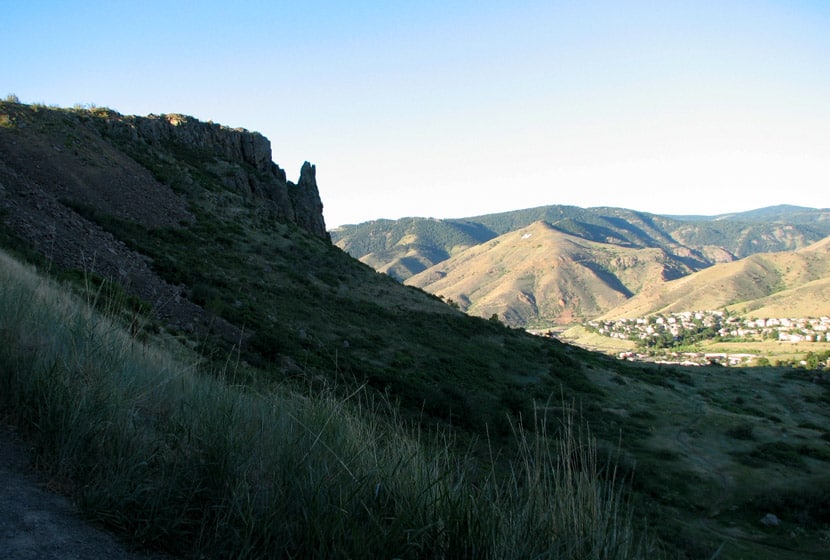
As you continue on the Mt. Galbraith, the trail will take you west until you encounter a rock outcrop (pictured below). I scrambled up to the top and got some great views of the sides of Mt. Galbraith and far down into Clear Creek Canyon. If you are hoping to see wildlife, this is where I'd recommend stopping for a while and breaking out the binoculars.
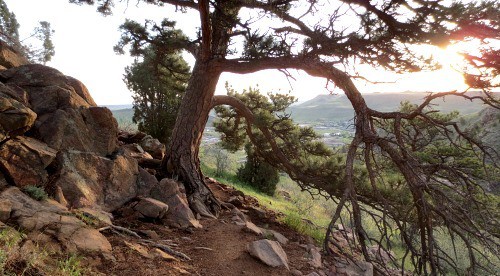
The back side of Mt. Galbraith provides a bit of shade under ponderosa pines. You'll enter a burn area, and that's when the rest of the hikes shifts to going gradually downhill. As the trail enters the canyon again the pines will transition to spruce and fir, and the trail will become more rocky. I talked with a volunteer ranger and he mentioned that this section can be a bit harrowing when it's covered with snow and ice, but on the May morning I hiked it, only small patches of snow were left.
Soon, you'll emerge from the canyon and be back on the hillside. You'll see the familiar trail intersection where you'll want to take a sharp left onto the Cedar Gulch trail which will take you back down Mt. Galbraith to the trailhead.
Tips & Resources for Hiking the Mt. Galbraith Loop Near Golden
- Packing List: Always pack the 10 Essentials. Download our Hiking Guide to get list and dayhiking packing checklist.
- TIP: The Mt. Galbraith trailhead is on the south side of the road. Be aware as you pull out and back onto Golden Gate Canyon Road, as it’s difficult to see cars coming around the bend.
- TIP: If you’re taking your dog to hike Mt. Galbraith with you, it’s a good idea to bring extra water because there is only one stream at the entrance of the trail and no where else for them to drink. However, after a rain, near the rock outcrop, you should be able to find water pooled the rock alongside the trail.
- TIP: Bring the sunscreen. Although there are a lot of trees on the western and northern sections of the loop, most of the trail is exposed to the sun.
- Keep and Eye Out for Rattlesnakes: Like many of the trails in the foothills and along the Front Range, hikers should keep their eyes out for Rattlesnakes as they will often sun themselves to keep warm on the path or along the path.
- TIP: Take it easy at the beginning of the trail. Hiking Mt. Galbraith is most challenging at the start and the rest of the trail is more peaceful and relaxing after that initial incline.
- Trail Map for Mount Galbraith Park: Trail Map Link
- Colorado Road Conditions: Colorado Road Conditions
- After the Hike: Big Daddy Bagels
Weather
Map & Driving Directions to Mt. Galbraith Trailhead
Click for Driving Directions

North Table Mountain Hike Near Golden, Colorado
When the sun rises over the North Table Mountain, you'll see this mesa rising above the town of Golden, Colorado. A vast network of trails awaits hikers, mountain bikers, and nature photographers. This is a perfect hike near Denver for when you don’t have much time on your hands but need some fresh air. While the trails on Table Mountain are accessible all year round, the best time to hike it is in the Spring and early Summer when wild flowers start to bloom. Check out our detailed description of the hike, the Table Mountain trail map, driving directions so that you can explore this unique Colorado hike.
Trail Snapshot: North Table Mountain Near Golden
| Hike Distance | 2.7 to 7.7 miles |
|---|---|
| Difficulty | Moderate |
| Duration | Approx 1-4 hrs |
| Trail Type | Loop |
| Seasons | All Year |
| Dogs | Allowed on Leash |
| Hike Trail Map | Click for a Map of North Table Mountain Park |
| Denver Drive Time | 25 min |
| Directions | Click for Google Map |
| Town Nearest Hike | Golden, Colorado |
| Beauty | Views of Denver and Golden, wildflowers, deer, golden eagles |
| Activities | Hiking, mountain biking, nature photography, climbing |
Start your tour of North Table Mountain (really it's a mesa) a few hours after the daybreak by entering the main parking lot off of Highway 93, just north of Golden, Colorado. At the trailhead, you'll find a kiosk with trail maps, and a public restroom. There are three ways you can explore the North Table Mountain, so scroll down to read the details on all three options.
Hiking North Table Mountain
#1 The (short) North Table Loop trail - 3.2 Miles
The first part of the trail starts with a wide path, a long ramp up to the top of the mesa. It's a bit of a challenge, but when you get to the top, the paths level off and are much easier. Leaving the parking lot, take the North Table Loop trail south for 0.7 miles until you reach a trail intersection. Take a left onto the Tilting Mesa trail. Follow Tilting Mesa trail for approximately 1 mile until the next trail junction. Take a left onto the Mesa Top Trail, hiking on it until it intersects with the North Table Loop trail again. Take a left onto the North Table loop trail which skirts the sides of North Table Mountain and takes you back to the trailhead.
#2 The Longer North Table Loop Routes - 6-8 Miles
Shake it up a bit: This is a longer route that combines a tour of the top of Table Mountain and a hike around the perimeter. Start the same way you would start the short table loop trail by taking the North Table Loop for 0.7 miles until you reach the Tilting Mesa trail. Follow the trail to the first unmarked intersection and then turn right. On your next intersection turn right again onto the Mesa Top trail. After about .6 mile, you'll encounter a trail intersection with the Rim Rock Trail which is closed seasonally (March 1 through July 31). Continue on the Mesa Top trail until it intersects with the North Table Loop trail which will take you all the way back to the west side of the mountain and to the parking area. This is approximately a 6 mile loop.
Adapt to a Closure Route: At the time of this post, April 2014, a segment of the Mesa Top trail is closed due to flood damage. An alternate route adds some mileage and difficulty to this loop, but that just may be what you are looking for. Here's the route: Same as above, but when on the Mesa Top Trail, take the Cottonwood Canyon Trail (right) until it links you back up with the North Table Loop trail. Then take a left back on to the North Table Loop trail which will then take you on a tour of roughly 3/4 of the perimeter of North Table Mountain. Here's a link to the North Table Mountain Trail Closure map that should help you plan this route. This Route is approximately a 7.5 mile loop.
The Straighforward Approach: The final route is pretty straightforward, just take the North Table Mountain Loop all the way around the perimeter of the mountain. This results in an approximate 7.7 mile loop.
#3 The Golden Cliffs Trail - 2.7 miles RT
If you are a climber or just looking for a shorter hike, you can take North Table Mountain trail to the Golden Cliffs trail. The Golden Cliffs are very popular Colorado rock climbing attraction. This area is actually a preserve managed by the Access fund. For more information on rock climbing the Golden Cliffs, see the Golden Cliffs page on the Mountain Project and Access Fund Sites. This is a 2.7 mile (Round Trip) out-and-back trip.
Tips for Hiking North Table Mountain:
- Wear sunscreen because there is no shade once you are atop Table Mountain.
- Camping and open fires are not permitted at North Table Mountain Park.
- Don’t forget to bring your camera. You can get some very interesting wildlife images.
- Rattlesnakes: Jefferson County Open Space notes that North Table Mountain is a known Rattlesnake habitat. They recommend downloading their Snakebite Prevention and First Aid Guide to better understand this native reptile of Colorado.
 Weather
Map and Directions to North Table Mountain West Trailheaad
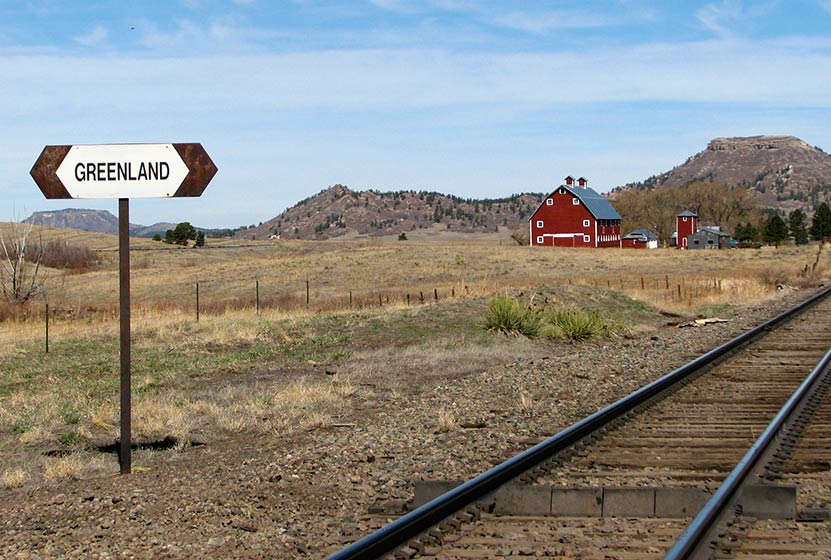
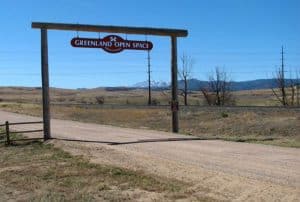
Greenland Open Space Trail Near Larkspur, Colorado
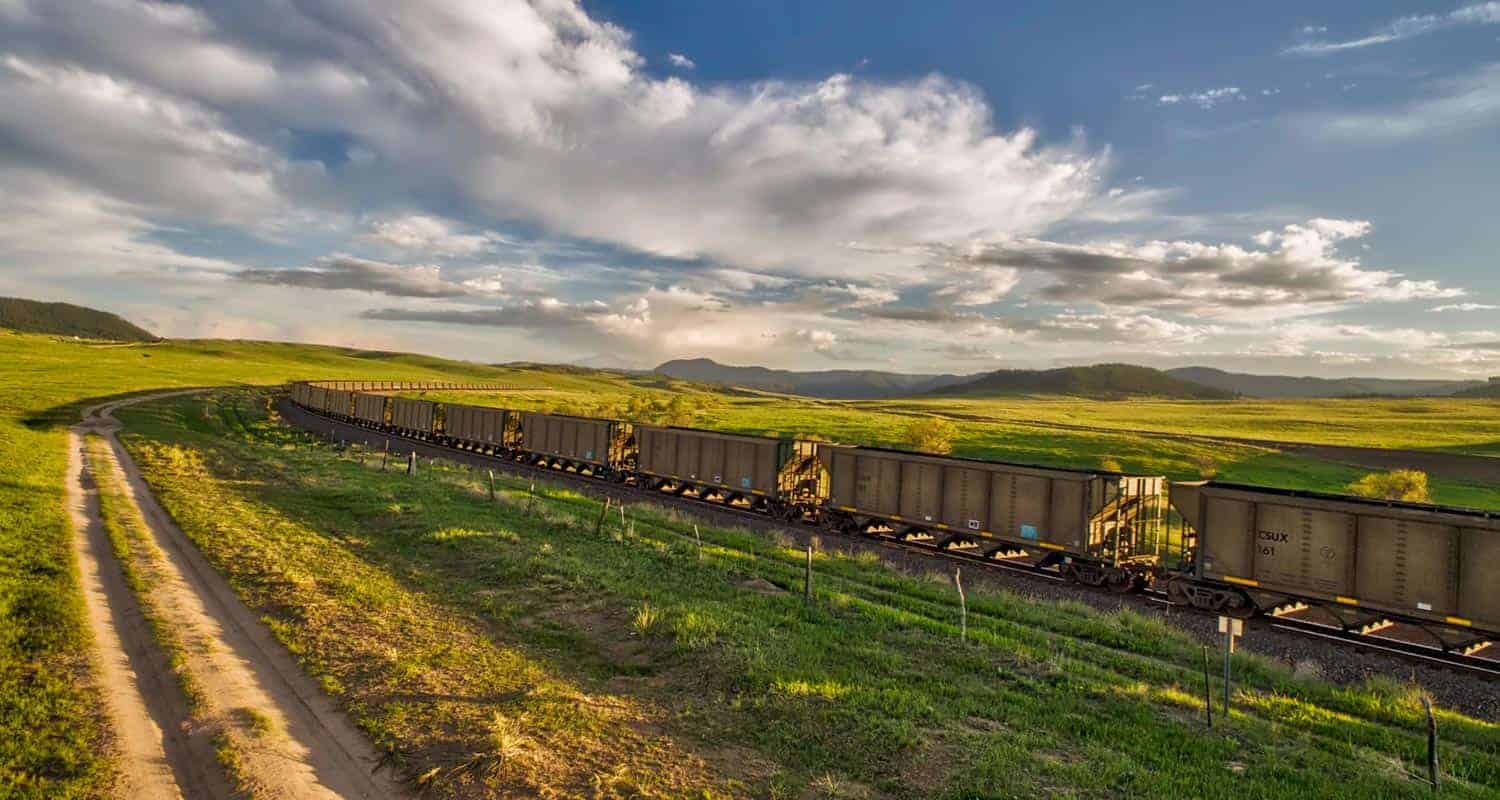
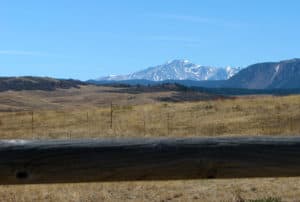
Rolling meadows stretch to spectacular views of Pikes Peak on this easy Colorado hike near Larkspur. The Greenland Trail takes you across the stunning grasslands near Larkspur, Colorado, a Douglas County Open Space that spreads across 3,600 acres of sun-drenched fields.The Greenland Open Space trailhead can be easily accessed from I-25. Check out the full trail profile below for detailed descriptions, trail map, and driving directions to this great hike along Colorado's Front Range.
Trail Snapshot: Greenland Open Space Trail Near Larkspur, Colorado
| Hike Distance | Up to 10 miles |
|---|---|
| Difficulty | Easy |
| Duration | Approx 1 to 3 hrs |
| Trail Type | Loop |
| Starting Elevation | 6908′ |
| Elevation Gain | +500′ |
| Seasons | All Year |
| Dogs | Allowed On Leash |
| Hike Trail Map | Click for a Map of Greenland Open Space Trail Near Larkspur, Colorado |
| Denver Drive Time | 46 min |
| Driving Directions to Greenland Open Space Trail Near Larkspur, Colorado | Click for Google Map |
| Town Nearest Hike | Larkspur, Colorado |
| Beauty | Grasslands, ponds and ponderosa pine forests |
| Activities | Bicycling, trail running, hiking |
| Video | Click For Video |
Greenland open space has one main trail, the Greenland Trail (appropriately named) that forms a 10 mile loop. However, your not stuck hiking the entire thing, you’ve got options. We’ll briefly profile three different ways you can hike the Greenland trail and customize it for you and your family (scroll past the video panorama for the three options).
It’s a perfect place for horseback riding. In fact, when I-25 disappears from view, you may think you’ve time-traveled back to the early 1800‘s. You can leave your trailer on the parking area, but keep in mind that Greenland open space can get very crowded on the weekends. So, get there early to make sure you’ve got a place to park.
There is also a great 17 acre off-leash dog park just to the east of the trailhead. The open space area requires fido to be on a leash. Click here for more info on the Devon Theune off-leash dog park and for a list of the others in Douglas County.
Hike Options at Greenland Open Space
#1 - Greenland Trailhead to the Santa Fe Trailhead in Palmer Lake - 5.6 Miles One Way
At the first fork in the trail, stay straight (right) on the Greenland Trail. You’ll pass a small pond and work your way through scrub oak and pines as the trail rises. At 3.5 miles you’ll see the option to turn left onto Kipps Loop. Instead of going left onto Kipps Loop, continue straight (South) on the trail. You’ll cross County Line road around 4.6 miles, then you’ll have one mile left until you arrive at the New Santa Fe Trailhead in Palmer Lake, Colorado. Out and back, this is an 11.2 mile trek across Greenland Open Space. The views of Pikes Peak and the neighboring Buttes of Spruce and Eagle Mountain mean a lot of beautiful scenery to soak in.
#2 - The Greenland Open Space Loop Trail - Approx. 10 Mile Loop
Our first tip on hiking Kipps loop is hike it counter-clockwise. This will give you a nice long and gradual two-mile descent as you are coming back into the trailhead. There’s only about 500’ of elevation gain on this hike, but your knees will be grateful at the end of the trip. Follow the same directions above, but when you get to the Kipps Loop option after 3.5 miles, take a left (East) onto the Kipps Loop of the Greenland Trail (your still officially on the Greenland Trail). The first 5 miles of the hike are uphill until you reach the high point which is at 7,400 feet. This is a great place to stop and enjoy the view. You’ll pass the gravesite of E. Kipp, and an unusual white rock formation along this eastern side of the loop. As we said before, the rest of your hike will be pretty much downhill from there back to the trailhead.
#3 - Just Explore - Approx. 1-3 Miles
Just because it’s a big loop doesn’t mean that you have to hike the entire thing. If you are hiking this as a sunset hike, you’ll likely want to keep it short. You can take either the eastern or western sides of the loop and hike until you are ready to turn around. Sunrises and sunsets are quite glorious in Greenland, and this is a great way to enjoy them.
Tips & Resources for Hiking Greenland Open Space Trail :
- TIP: There is no water on this trail so bring more than one bottle just in case. Don’t forget, dogs need plenty of water too!
- TIP: You are very exposed to lightning. Douglas County has some of the worst stats in the nation when it comes to lightning strikes, so really pay attention to the weather. Dark clouds moving over the edge of the foothills means that you should be headed back to the car.
- TIP: Bring the Sunscreen - you are also very exposed to the sun - no shade in Greenland. If you are hiking mid-day, then be sure to bring a hat and sunscreen.
- TIP: If you are snowshoeing or cross-country skiing, or even hiking in winter, be aware that drifts form along the Greenland Trail.
- TIP: There is a fantastic picnic area on the other side of the facade of the old Greenland general store.
- Trail Map for Greenland Open Space: Trail Map Link
- Photo: We would like to express our gratitude to Christopher Rosenberger for sharing such an amazing photograph of this hike to Greenland Open Space.
- Colorado Road Conditions: Colorado Road Conditions
- After the Hike: Charito’s House

Weather
Map & Driving Directions
Click for Driving Directions
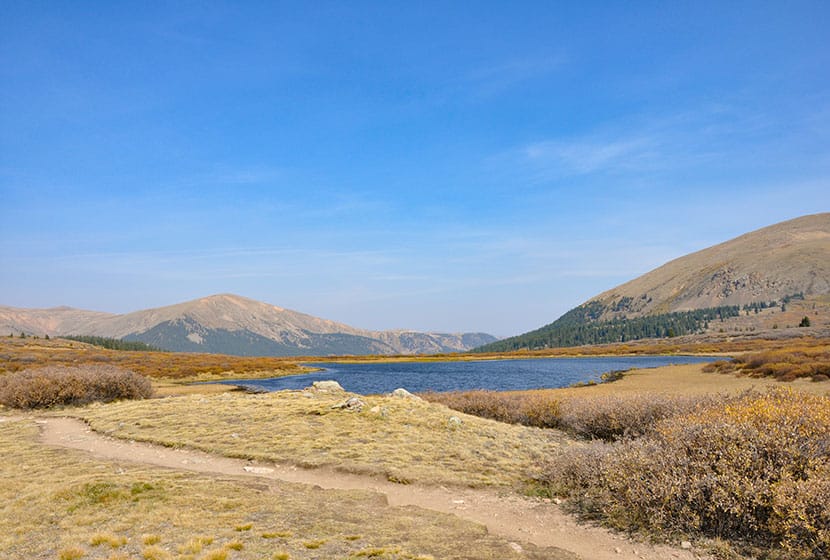
Mt. Bierstadt Trail on Guanella Pass
Summit a Fourteener, Mount Bierstadt, or go for an easy hike with your family high in Colorado's Rocky Mountains. In short, you've got options on this trail near the top of Guanella Pass. You can choose an easy stroll or a difficult hike. Explore the trail snapshot and profile below for hiking, camping, and trail map info.
Trail Snapshot: Mr. Bierstadt Hike at Guanella Pass
| Hike Distance | 1 to 7 miles Round Trip |
|---|---|
| Difficulty | Easy to Difficult |
| Duration | 1 to 6 hours |
| Trail Type | Out and Back |
| Elevation Gain | Up to 2400' |
| Seasons | Best Late Spring to Fall |
| Dogs | Allowed on Leash (avoid b/c of fragile ecosystem) |
| Hike Trail Map | Click for a Trail Map |
| Denver Drive Time | 1 hr 30 min |
| Directions | Click for Google Map |
| Town Nearest Hike | Georgetown, Colorado |
| Beauty | 14ers, high country tundra, peak top views, lakes |
| Activities | Hiking, camping, summit Mt. Bierstadt, picnic |
You've got options with the Mount Bierstadt trail. First, we'll profile the hike to the summit. Below that, you'll find some information on how to just explore the area with your family or friends, making this an easy hike high in the Colorado mountain.
Climb Your First Colorado Fourteener
Mt. Bierstadt is popular, not just because it's so close to Denver, but it's also one of the easier and more accessible of Colorado's 54 fourteen thousand foot peaks. The Mount Bierstadt trail can be accessed on the south side of Guanella Pass from the Mt Bierstadt trailhead (click here for map and directions from Denver). It's important to be aware that the weather can change in an instant in the mountains, and that snow can come in fast even in the late Spring and early Fall. As with any Day Hike, be sure to (at least) pack the 10 Essentials.
The Bierstadt trail is well marked; you'll follow signs down to a boardwalk, then to Scott Gomer Creek. After crossing the creek, the trail will become more steep, and the steepness will increase as you make your way to the summit. The trail winds gently through the tundra until you are about three miles in when the green and brown gives way to rock. Follow the west ridge up to the summit of Mount Bierstadt. For a detailed trace and profile of the Mt.Bierstadt route, see this Route #1 Bierstadt profile on 14ers.com.
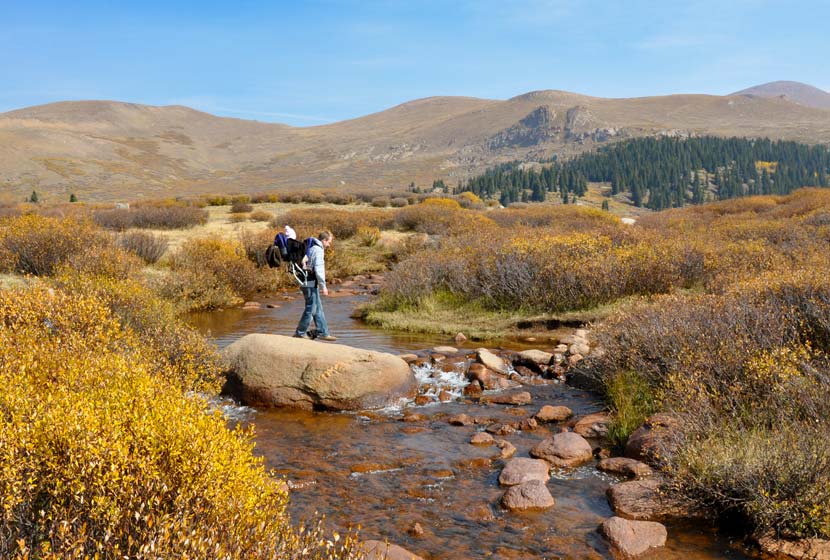
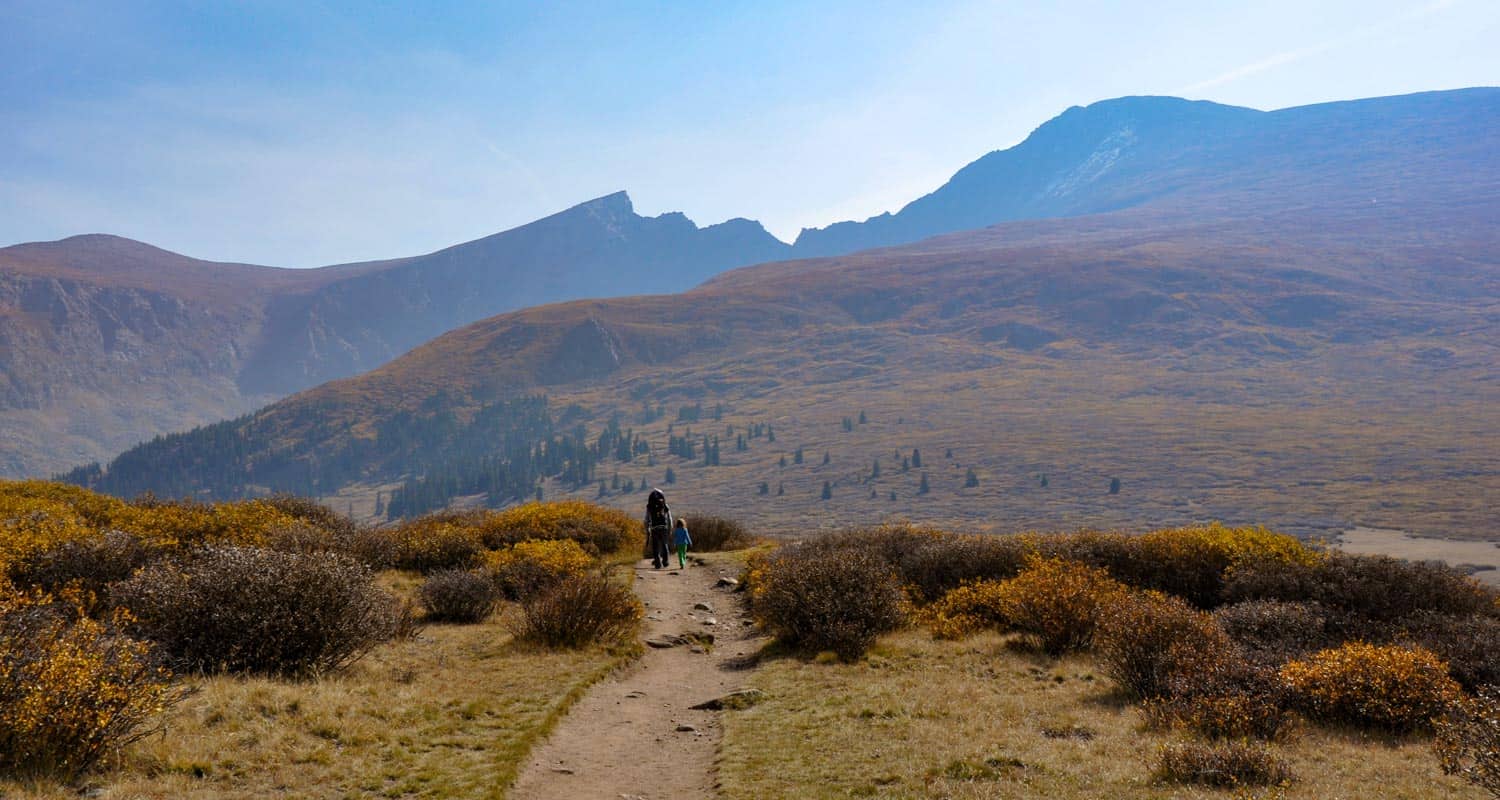
Make it an Easy Family Hike
Hiking Colorado's Bierstadt trail doesn't mean that you have to summit. In fact, the first mile of trail is really tame. It takes you over a creek, through willows, and by two small high mountain lakes. If you want to gain additional views, you can add another half mile of moderate hiking that will take you above the valley floor.
We took our 4 1/2 year old, 2 year old with us in the Fall and they loved it. Dog's on the Mount Bierstadt trail must be kept on a leash and need to be kept 100' from water sources (in short, they aren't allowed to play in the lakes and streams). In fact, because we'd recommend that you leave Fido at home because of the fragile alpine tundra ecosystem. In August of 2012, Missy, a German Shepherd, was rescued after being stranded on the peak for eight days. You can read more about her ordeal and the rescue in this Denver Post article.
Camping Near the Mt. Bierstadt Trail
There are a lot of campground sites along both sides of Guanella pass that are managed by the forest service (fee required) and dispersed camping is allowed on US Forest and wilderness areas. Below you'll find a few important links to camping information for the Mt. Bierstadt and Guanella Pass Area.
- Mt. Evans Wilderness Hiking and Camping Regulations.
- Camping Information and Regulations for the US Forest Service
- Guanella Pass Campground
- Burning Bear Campground Near Mt. Bierstadt Trail: Jennifer Mason does a nice job profiling both the Burning Bear and Whiteside campgrounds on her site.(note: Whiteside has been permanently closed)
- For More Campgrounds along Guanella Pass, use the Recreation.gov site and do a search for Guanella Pass Road
Tips & Resources for Hiking the Mt. Bierstadt Trail:
- TIP: Go Early; the parking lot at the Mt. Bierstadt Trailhead fills fast.
- TIP: If you've never summited a 14er before, be sure to read this great article by Lindsey Koehler of 5280 Magazine.
- TIP: If you plan to summit Mount Bierstadt, start early so that you can be back at the trailhead before the almost daily summer thunderstorms role in. I'd recommend starting around 6am, so that you're back at your car around 11am.
- TIP: Hiking times vary. Those who frequently make the assault on Mt. Bierstadt (even trail run it), can make it up and back in 3 hours. The average is 5hrs, but adjust for experience and how good of shape you're in
- After the Hike: Tommy Knocker Brewery
- TIP: The weather will be cooler at the trailhead than the posted Georgetown, Colorado temperature below. It will be even cooler at the summit of Mt. Beirstadt.
- Trail Map for Guanella Pass: Trail Map Link
- Colorado Road Conditions: Colorado Road Conditions
Weather
Map & Driving Directions to Trailhead for Mt. Bierstadt
Click for Driving Directions
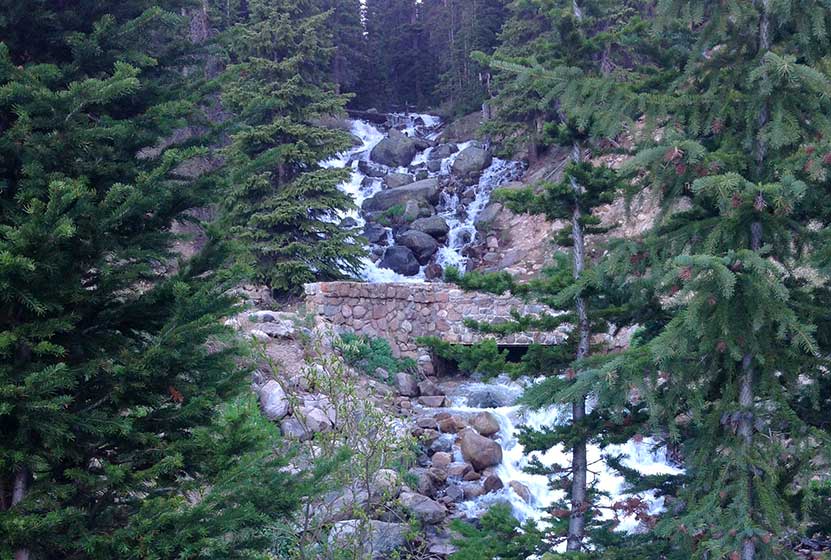
Cascades Near Berthoud Falls
Looking for a place to stop and stretch your legs on your way to Winter Park? These cascades along US 40 will refresh your spirit and are immediately accessible right off the road.There are some unmaintained trails to explore, so check out the full profile below to discover more.
Trail Snapshot: Cascades Near Berthoud Falls
| Hike Distance | 0.1 mile |
|---|---|
| Difficulty | Easy |
| Duration | 5 min |
| Trail Type | Out and Back |
| Seasons | Summer & Fall |
| Dogs | Allowed on Leash |
| Denver Drive Time | 1 hr |
| Directions | Click for Google Map |
| Town Nearest Hike | Berthoud Falls, Colorado |
| Beauty | Cascades and Mountain Views |
| Activities | Falls Viewing Area |
| Video | Click For Video |
Our family drives Highway 40 over Berthoud pass about once a month, and this little side stop is a great place to stretch your legs and listen to the water gushing down the mountainside. This beautiful cascade and stone bridge are located on the second switchback curve on highway 40 as you head towards Winter Park from Denver (south side of Berthoud pass). It's not a formal parking area (I think it's used for snow removal), but it can hold several cars after the snow has melted away in late May/early June. A small hiking trail can be discerned on the right side of the Hoop Creek, but it's not maintained. I've not hiked it, so I'm not sure how far it goes.
There are some great views looking South to Engelmann Peak and Red Mountain. There is no picnic area, and the ground is soaked in early Summer, but my guess is that you could bring a blanket in late summer and Fall and enjoy a picnic lunch by the falls.
It's unclear if this falls is where the small settlement of Berthoud Falls got its name. My guess is that this is not Berthoud Falls. Here are my two guesses on the correct location. Click here for the Google map pin locations.
1 - Where a creek runs about 1200' feet down into the settlement of Berthoud Falls. This is not a sheer drop, but it is quite steep terrain. The proximity to the settlement makes this the best choice.
2 - Where Hoop Creek and another creek meet then drop into a very steep ravine. This is a more sheer drop and is located about a mile east of the settlement of Berthoud Falls. Because it's so far from the town, it's not likely that this is the namesake However, because of the steep terrain, it may contain a legitimate waterfall, or some amazing cascades.
I'm hoping to explore these more sometime and will plan to update this post when we have more information.
If you know the history of the area or have additional information about the Berthoud Falls Waterfall, I'd appreciate it if you left a comment in the trail reports below.
Tips & Resources for Viewing the Cascades Near Berthoud Falls:
- Be Safe: The pull-off can sneak up with you and there can be a lot of traffic on the weekends. Be alert for cars.
- Picnic Areas: There are some great picnic areas at Jones Pass, bottom of US 40 near the settlement of Berthoud Falls, and along Clear Creek just east of Berthoud Falls.
- Colorado Road Conditions: Colorado Road Conditions
- After the Hike: Rocky Mountain Roastery in Winter Park
Weather
Map & Driving Directions
Click for Driving Directions
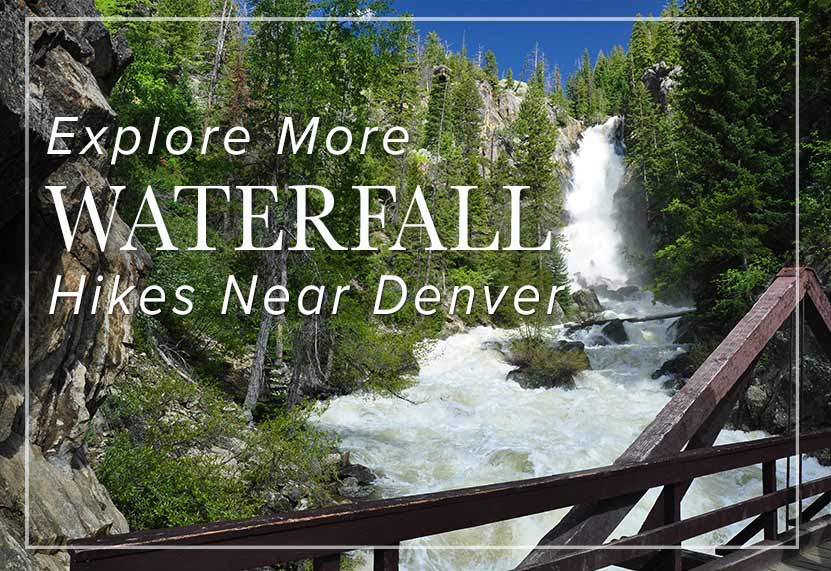
Looking for more waterfalls near Denver? Explore our more than 50 Colorado Waterfall Hikes, our favorite Waterfall Hikes in Rocky Mountain National Park, or 7 Waterfalls within One Hour of Denver.
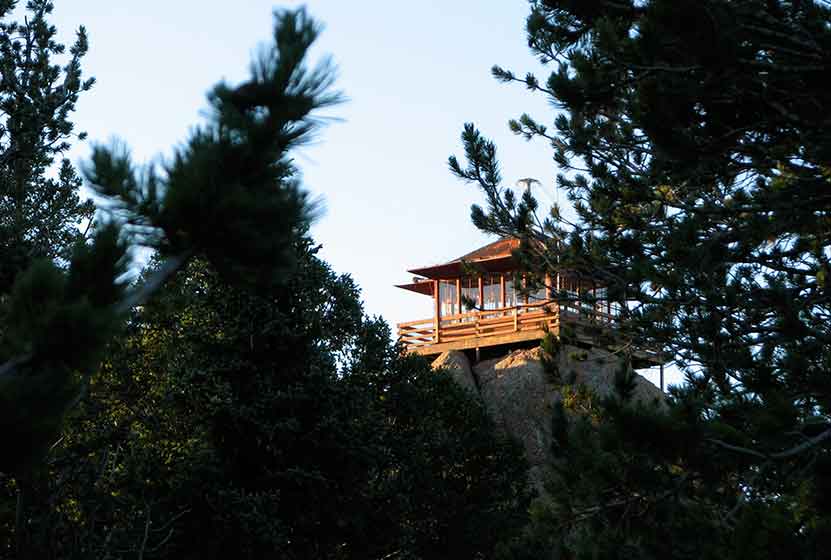
Devils Head Fire Lookout Hike
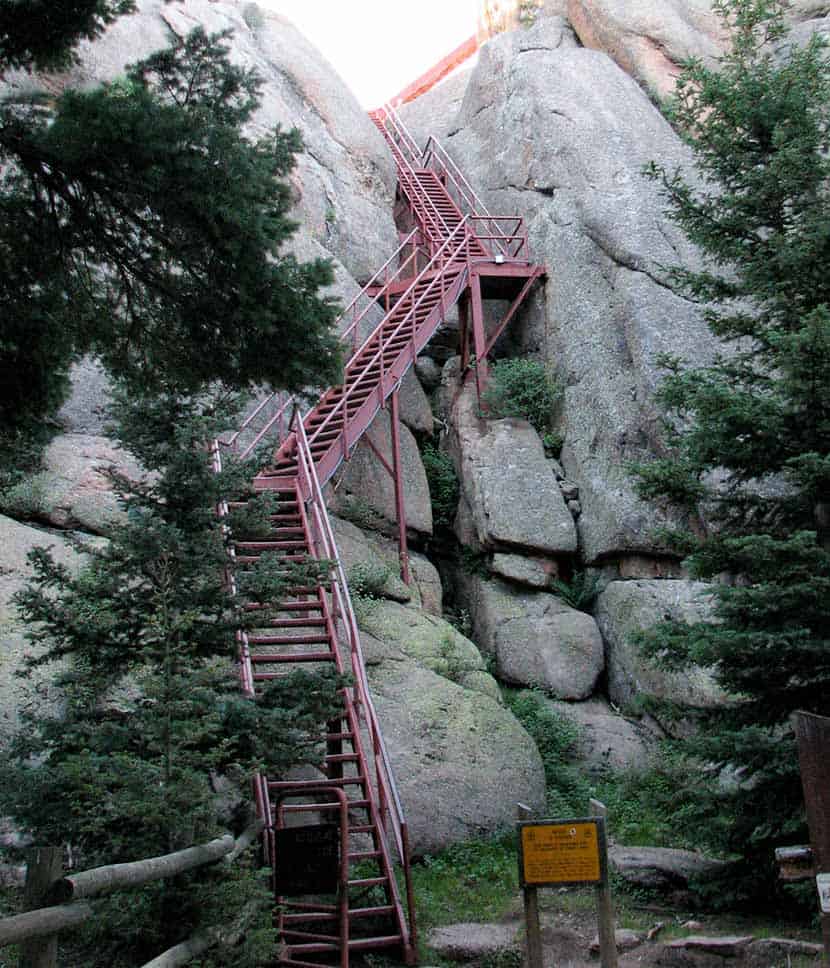
If you've not hiked to the top of the Devils head trail and climbed the 143 steps to the fire lookout, then I think you're not allowed to have one of those Colorado Native bumper stickers. The Devils Head trail is the classic Colorado Front Range hike and is just about an hour from the center of Denver. The views from the top offer a 360-degree panorama of mountains layered upon mountains. Scroll down to explore the trail profile and photos of one of the best hikes on the Colorado Front Range.
The Devil's Head Area is now open again. for the most current information, see the USFS Devils Head Page.
Devil's Head Lookout Trail Snapshot
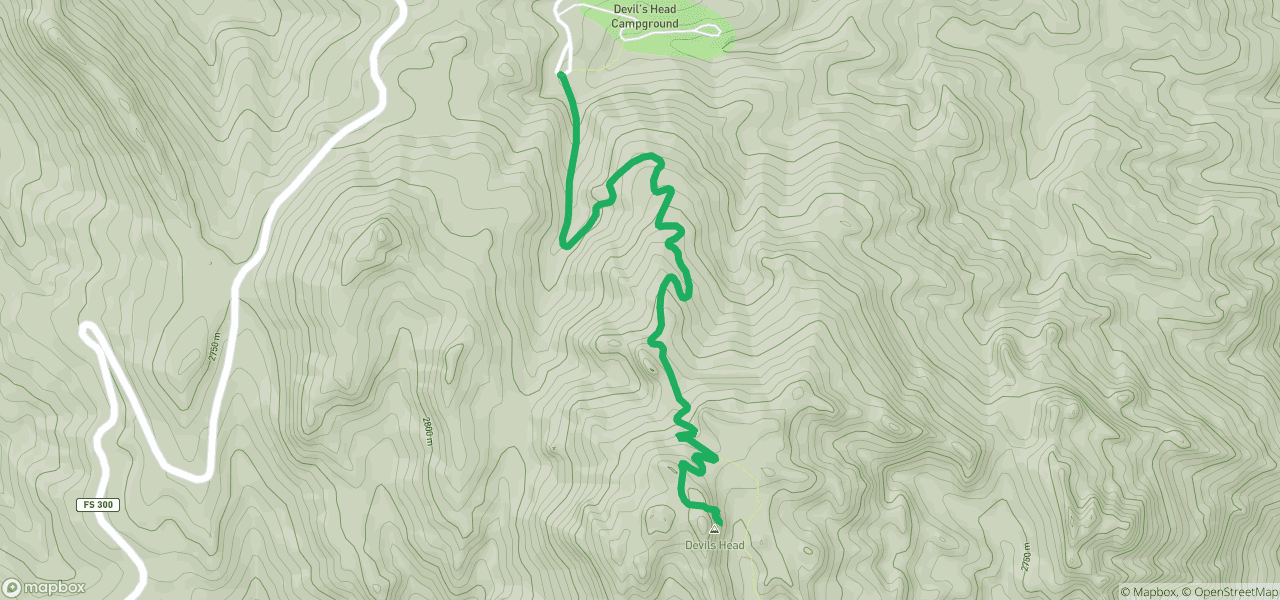
| Hike Distance | 2.8 Miles Round Trip |
|---|---|
| Difficulty | Moderate |
| Duration | 2hr + |
| Trail Type | Out and Back |
| Elevation Gain | +940′ |
| Seasons | Mid-May to Mid-September |
| Dogs | Allowed on Leash |
| Hike Trail Map | Click Here For NG Map Store |
| Denver Drive Time | 1 hr 15 min |
| Directions | Click for Google Map |
| Town Nearest Hike | Sedalia, Colorado |
| Beauty | Front Range Views, Rock Formations, 360 views, sunrise |
| Activities | Fire Tower Lookout, Picnic Area, Camping Nearby, Hiking Trails |
| Video | Click For Video |
Parking & Trailhead for Devils Head Hike
Devils Head Hike Map
The Hike: Devils Head
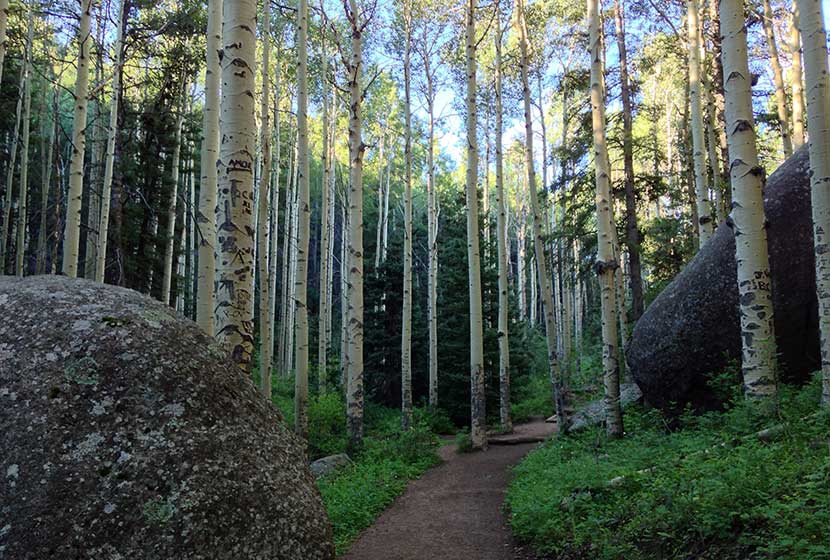
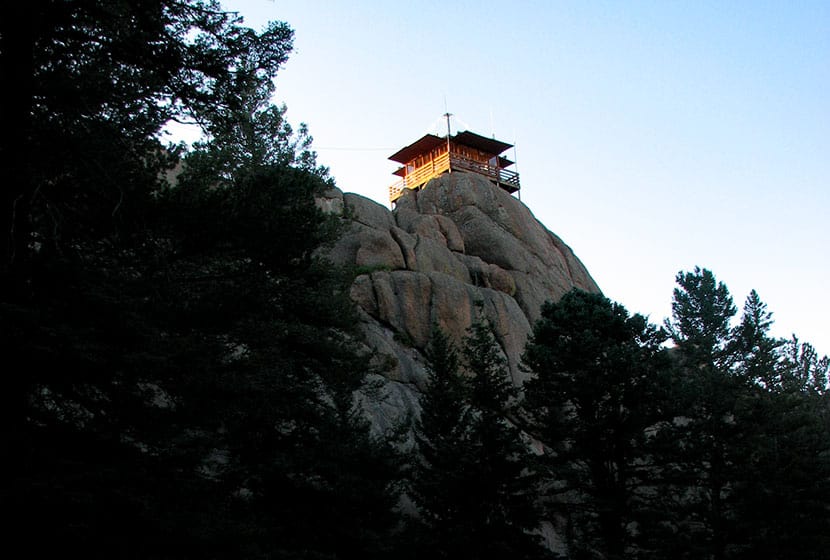
This Colorado hike begins in a glade of tall aspens, some of the biggest we've seen this close to Denver. Then the trail meanders through some unusual rock formations until the trail opens into a high meadow where a quaint ranger cabin sits nestled in the trees. Up ahead and to your left, you'll see the red steps that lead to the Devil's Head fire lookout.
The Devil's Head fire lookout is the only operational fire lookout in the state of Colorado and is over 100 years old, though the current structure was built in 1951. If you are a history buff and enjoy historical photos, check out these this site: Firelookout.org
Bill Ellis and his wife have been operating the lookout for over 25 years, and many visitors remark that their discussions with Bill are the highlight of their trip. The Denver Post did a great piece on the Ellises and the fire lookout that is worth reading -
link to the Devils Head Article by the Denver Post.
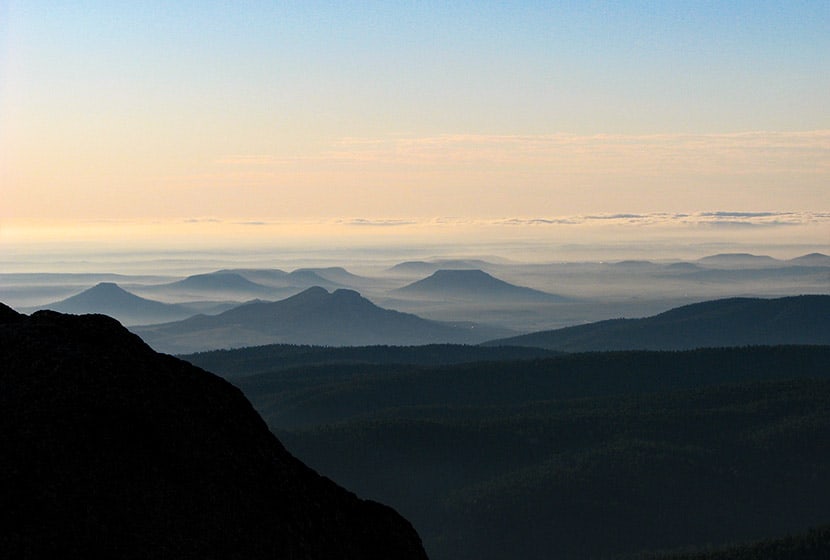
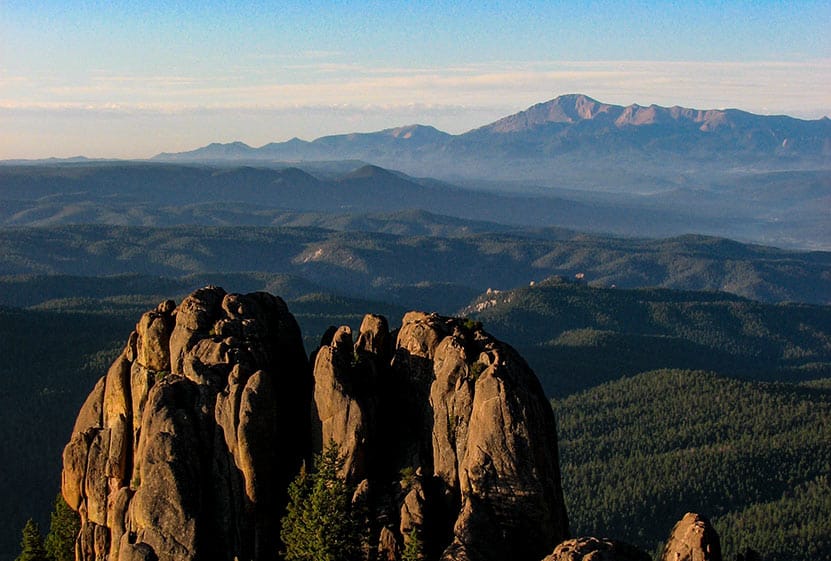
The views from Devil's head reveal features of Colorado's Front Range that are rarely discovered. My favorite is looking North down the spine of the foothills where red tinted rock formations push up from the peaks and resemble a chain of castles high above the forest.
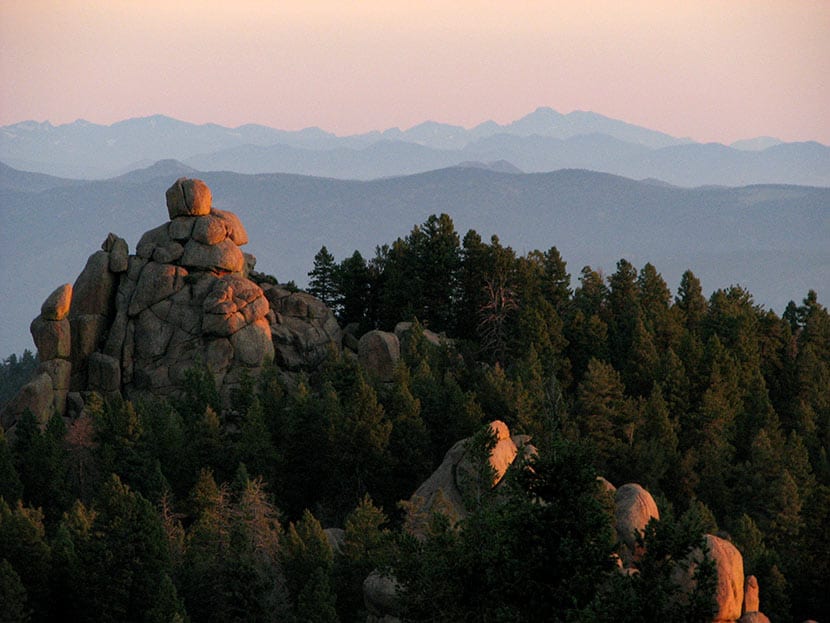
Pikes Peak dominates the landscape to the South. And the Western view from Devil's Head is riddled with the red mountains of the Tarryalls, Kenoshas, and Platte range. And there are few signs of civilization, at least not in the early morning hours when I took these photos.
Tips & Resources for Hiking Devils Head
- TIP: Go Early: Devil's Head is one of the most popular hikes on the front range. If you are hiking this on the weekend, try to get to the trailhead by 8am if you want a less crowded experience hiking Devils Head.
- TIP: Go Even Earlier for photography: The rising sun lights up the front range, and you can see hundreds of miles of mountains from the tower on Devil's Head.
- Camping: There is a USFS campground near the trailhead parking area. Some friends of ours have camped here and said it was a good experience. See the USFS Devils Head Campground site for details on camping and parking fees.
- TIP: Rough Drive: The 10 miles of Rampart Range Road can be dusty and a real washboard experience. 2WD is sufficient and this road is kept in pretty good condition, but be prepared for a less than comfortable drive on your way to Devils Head.
- TIP: Rampart Range Road is closed December 1st to about April 1st each year. You can call the South Platte Ranger District at 303.275.5610 to get the current status of the road.
- TIP: Be Lightning Aware: The front range is notorious for its lightning strikes and this is the highest point. If weather is looking bad, play it safe.
- Colorado Road Conditions: Colorado Road Conditions
- After the Hike: After the Hike: Obrien's Cafe in Sedalia
- Trail Map for Front Range USFS: Trail Map Link
Weather
Map & Driving Directions
Click for Driving Directions
Looking for more waterfalls near Denver? Explore our more than 50 Colorado Waterfall Hikes, our favorite Waterfall Hikes in Rocky Mountain National Park, or 7 Waterfalls within One Hour of Denver.
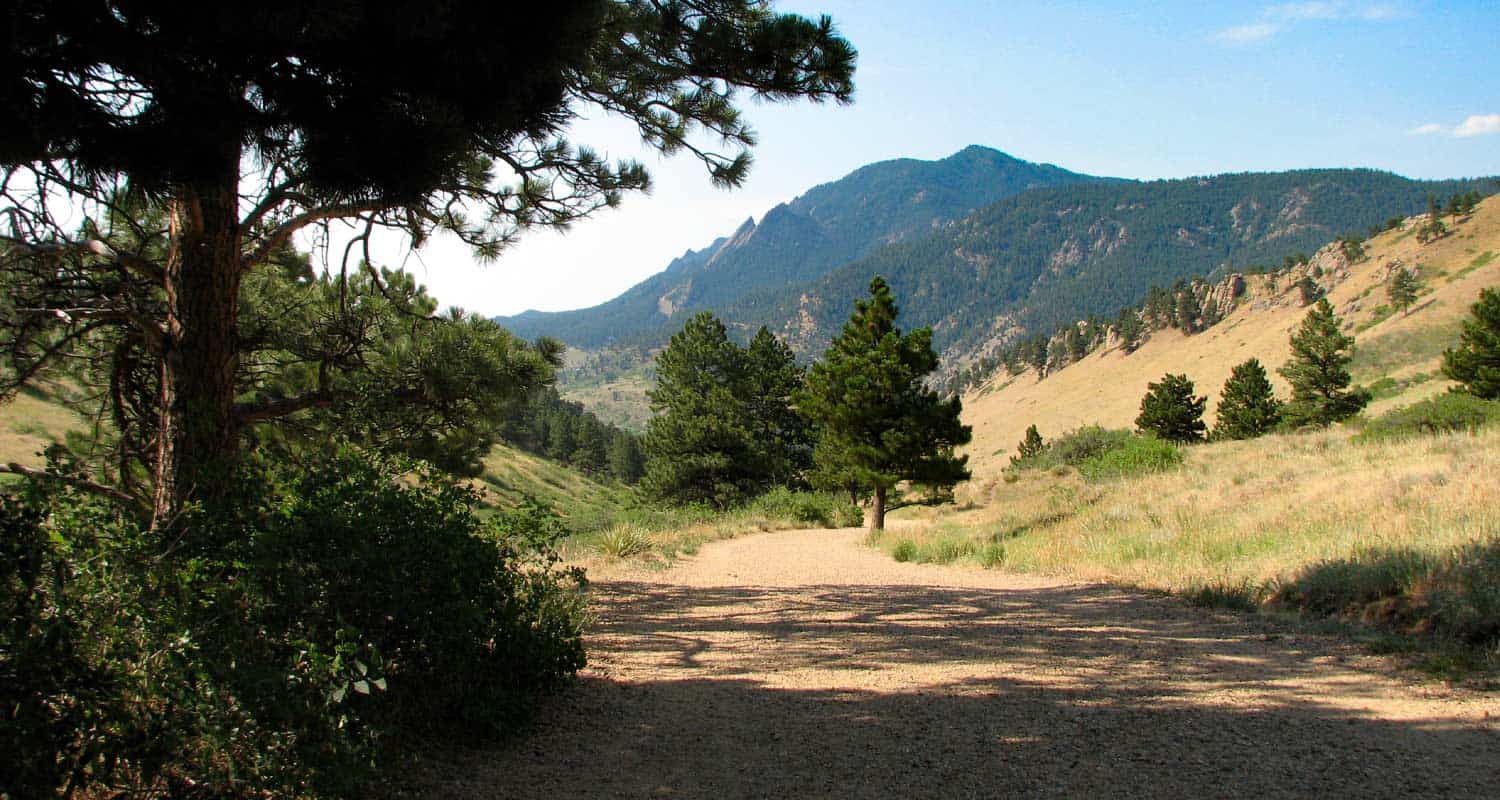
Mt. Sanitas Hike Near Boulder
If you are visiting Boulder, this is a great Colorado hike. Mt. Sanitas gives you several trail options ranging from an easy stroll along a meandering brook to a demanding trail up the mountainside. Explore the trail profile below for all the info you need on this hike near Boulder.
Trail Snapshot: Mt. Sanitas Hike in Boulder
| Hike Distance | 3.1 miles or 2 miles |
|---|---|
| Difficulty | Medium+ with Easier Options |
| Duration | Approx 2 hr |
| Trail Type | Loop |
| Elevation Gain | Approx +1343′ |
| Seasons | Year Round |
| Dogs | Allowed on Leash |
| Hike Trail Map | Click for a Trail Map |
| Denver Drive Time | 45 min |
| Directions | Click for Google Map |
| Town Nearest Hike | Boulder, Colorado |
| Beauty | Front Range mountain views, views of Boulder, wildlife: mule deer, raptors, foxes, and coyotes |
| Activities | Picnic area, horseback riding, hiking trails, climbing, No Bikes Allowed |
Mt. Sanitas offers three different hike options, ranging from the more difficult climb up the mountain, to an easy walk through a peaceful valley. Sanitas is Latin for "health", and this hike may either get you in better shape (the 3.1 mile loop), or restore your sanity (the easier options). If you are visiting Boulder, this is a great Colorado hike.
3 Hike Options at Mt. Sanitas in Boulder, Colorado
1 - The Mt. Sanitas Loop - 3.1 Mile Loop - Medium+

This is the classic hike at Boulder's Mt. Sanitas, and it's the most difficult of the three hike options because it involves a series of log and rock steps that will leave your quads and knees either thanking your for the workout or aching for a couple days afterwards. Because of this, we would give it a Medium+ difficulty rating. The prize of this Front Range Hike are the views at the top. You'll be able to look down into Boulder and get some great views of Colorado's Front Range.
2 - Mt. Sanitas Valley Hike - 2 Mile Out-and-Back - Easy
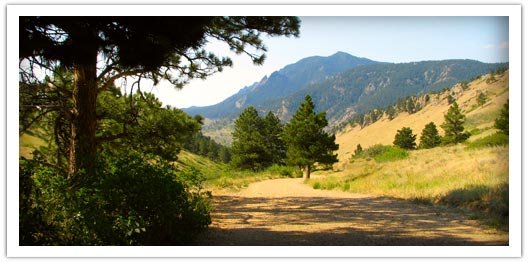
Here's the easiest option; 1 mile straight up the valley and back. The two words that best describe the Sanitas Valley trail: idyllic and busy. Dogs run about and jump in the creek that runs along the beginning of the path, runners fly by, and families talk and stroll together. The trail rises gently at first, then goes into more of an incline. We took our stroller; it worked fine, but was tough pushing the kids up the last 1/4 mile uphill. We turned around just after the Dakota Ridge Trail junction, making it a 2 mile out-and-back hike.
3 - Dakota Ridge Trail at Mt. Sanitas - 2 Mile Loop - Easy to Medium
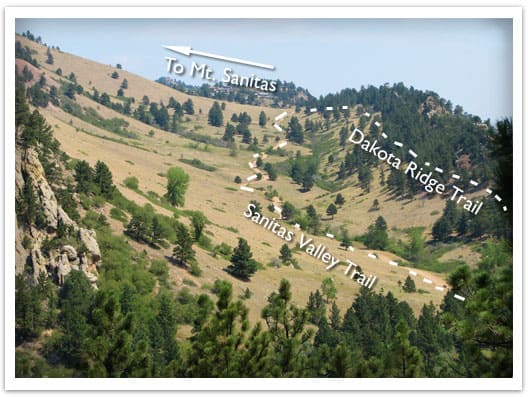
You'll find side trails running East/West off of the Sanitas Valley trail which will take you up onto the Dakota ridge, a hogback that boxes in the Sanitas Valley. You can make this an out-and-back hike, or turn it into a loop by hiking back through the valley (see photo above and the Mt. Sanitas Trail Map for the route).
Tips & Resources for Hiking Mt. Sanitas in Boulder:
- Parking: This is kind of a no-brainer, but get to the trailhead early. I think we arrived around 8am on a Saturday and grabbed the last parking spot. However, we noticed that many people were walking to the trailhead from town, so there are other parking options.
- No Shade: Bring your sunscreen; the trail is mostly exposed.
- Lots of People: If you are looking for solitude, I'd recommend trying another hike. The Mt. Sanitas trail is essentially in Boulder, and its great location means that it's quite busy.
- Trail Map for Mt. Sanitas Trail: Trail Map Link
- Colorado Road Conditions: Colorado Road Conditions
- After the Hike: Ozo Coffee
Weather
Map & Driving Directions
Click for Driving Directions
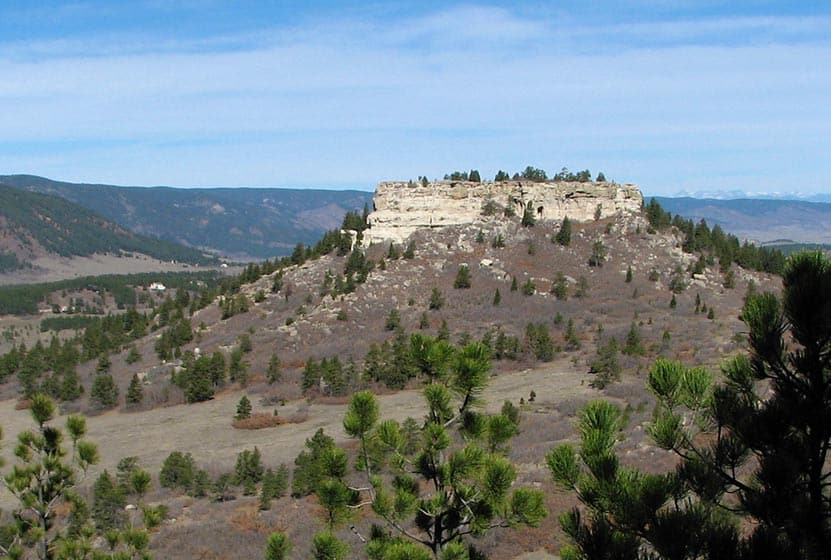
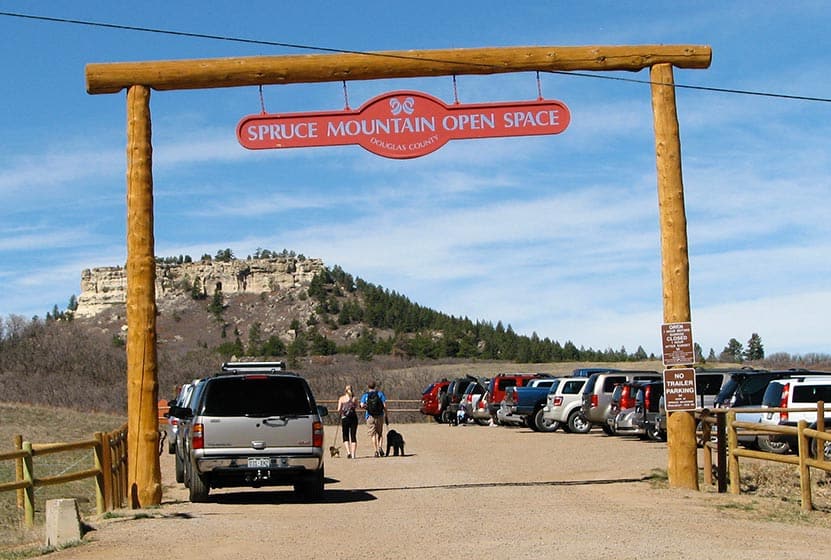
Spruce Mountain Hikes Near Larkspur
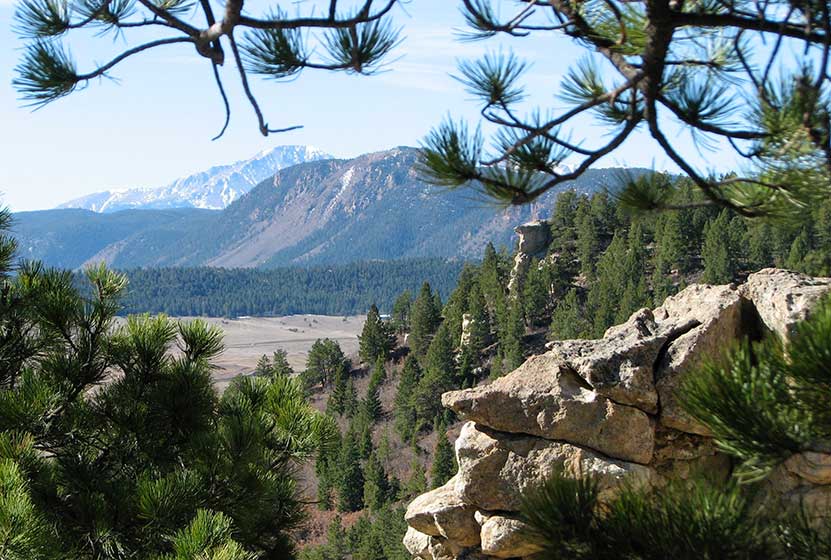
These hikes along Spruce Mountain near Larkspur, Colorado offer both expansive vista of Colorado's rolling green hills and a unique view of Pikes Peak. Spruce Mountain is a tall butte just 45 minutes south of Denver. This hiking trail follows the outer edge of the mountain giving you a great 360 degree view of the area. Check out the entire hike profile below to get acquainted with Spruce Mountain before you hike it. You'll find links to trail maps, driving directions, and all the details you'll need to strike out on this Colorado trail.
Trail Snapshot: Spruce Mountain Hikes Near Larkspur
| Hike Distance | 1.5 & 4 mile Loop |
|---|---|
| Difficulty | Moderate |
| Duration | Approx 1 hr 30 min or 4 hrs |
| Trail Type | Out & Back and Loop |
| Seasons | Spring through Fall |
| Dogs | Allowed On Leash |
| Hike Trail Map | Click for a Map of Spruce Mountain Hikes Near Larkspur |
| Denver Drive Time | 50 min |
| Driving Directions to Spruce Mountain Hikes Near Larkspur | Click for Google Map |
| Town Nearest Hike | Larkspur, Colorado |
| Beauty | Views of Pike's Peak, Views of Greenland hills and buttes, Front Range views, rock formations, views of Eagle Mountain to the north |
| Activities | Picnic table, horseback riding, mountain biking, hiking trails |
| Video | Click For Video |
Spruce Mountain offers breathtaking views of Pikes Peak, Eagle Mountain, and the rolling hills of Greenland and Larkspur. Most trails close to Denver are pretty exposed to the sun, so we were pleasantly surprised with how much shade the trees provided along the trails. Still, bring sunscreen because the South side of Spruce Mountain is a bit more exposed.
We rated this as medium in difficulty because of the first segment, which climbs about 400' in the space of about a quarter mile. After that that trail is relatively level. So, we'd put this on the easy side of medium. Because of that, this makes a great family hike close to Denver. But we'd highly recommend getting on the trail by 9am on the weekends (see the tips below).
Two Options for the Spruce Mountain Hike:
1 - 1.5+ Mile Hike to the Greenland Overlook - (out and back) Take a left where the trail forks and head up to the overlook (about 3/4 mile). This is a great first option if you have children with you. The views of Pikes Peak may be the best in Douglas County, and you can see how the family is doing and decide whether or not you want to continue on the loop hike.
2 - 4+ Mile Spruce Mountain Loop Trail - Continue west on the trail making a loop around the top of Spruce Mountain. You'll encounter fantastic views of Eagle Mountain, and the Windy Point overlook. Just a quick note that the service road may look like a shortcut back to the trailhead, but it's not. It is an option though if you would like to hike the open meadows between Eagle and Spruce mountains.
Tips & Resources for Hiking Spruce Mountain Hikes Near Larkspur :
- Speed Trap? We haven't seen the lurking cop car, but their are all the makings of a good old speed trap in Larkspur. So, take it easy. Our guess is that when the Renaissance festival is in full swing that traffic will really back up. The first reason to go early, and to probably allow more than 45 minutes for the drive.
- The Spruce Mountain Trailhead Parking Fills Fast: There is a lot of parking, but the lot was full by 11am on a Saturday. Second reason to go early.
- Great For Fido: There were more dogs on this trail than we've seen on any other, probably because most of the hike is pretty level and shaded. However, it makes for a bit of a traffic jam at times. Third reason to go early.
- Great Hike For Visiting Friends and Family: This hike has a lot of bang for the buck, and once you are up the first mile it's smooth sailing. It would be a great place to take out of towners who may be looking for a less demanding hike.
- Trail Map for Spruce Mountain Open Space: Trail Map Link
- Colorado Road Conditions: Colorado Road Conditions
- After the Hike: Charito’s House
Weather
Map & Driving Directions
Click for Driving Directions
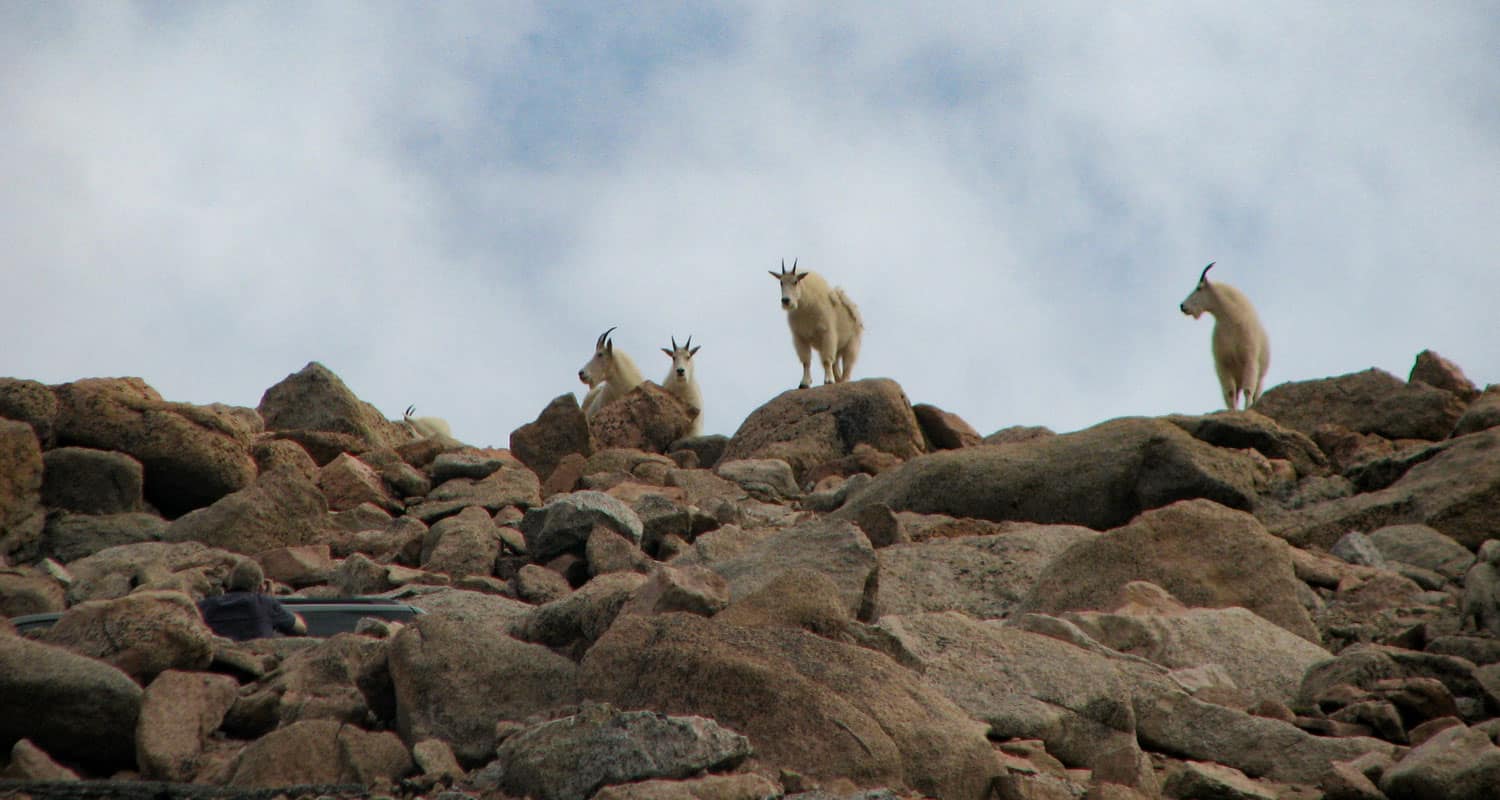
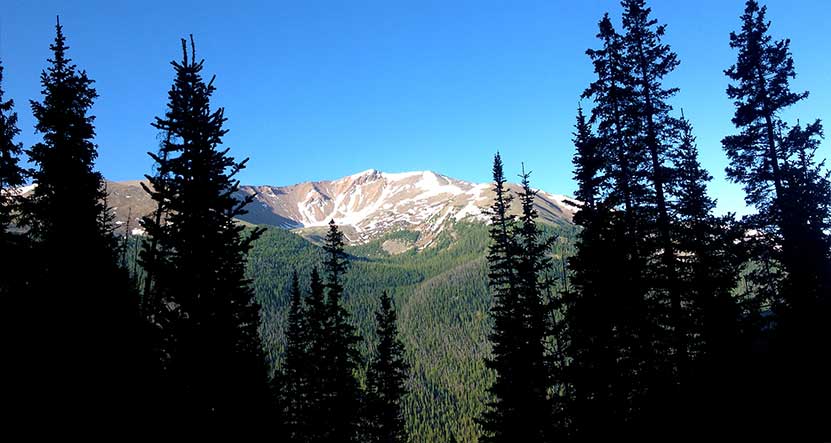
Mt. Evans Summit Hike
Mount Evans is one of Colorado's Front Range Fourteeners, and like Pikes Peak, Mt. Evans has a road that takes you to a trail just a few hundred feet shy of the summit where you are likely to see both Bighorn Sheep and Mountain Goats. The key to exploring Mount Evans is knowing the stops along the way. View our full trail profile for a suggested itinerary. Explore the full trail profile below for all the details: hiking trails, trail map, and detailed directions to the trailhead.
Trail Snapshot: Mt. Evans Summit Hike
| Hike Distance | 1/4 mile |
|---|---|
| Difficulty | Easy (but consider altitude) |
| Duration | Approx. 15-20 min |
| Trail Type | Out and Back |
| Seasons | Open early summer through Fall, Check Sites for Closure: #1 - #2 |
| Dogs | Allowed On Leash; Not Recommended bc will disturb wildlife |
| Hike Trail Map | Click for a Map of Mt. Evans Summit Hike |
| Denver Drive Time | 1 hr 40 min |
| Driving Directions to Mt. Evans Summit Hike | Click for Google Map |
| Town Nearest Hike | Idaho Springs, Colorado |
| Beauty | Lakes, mountain peak views, high country tundra, wildlife: mountain goats, bighorn sheep, marmots, & pika |
| Activities | Picnics, hiking, viewing wildlife |
| Fee Required | See Fee Schedule Link |
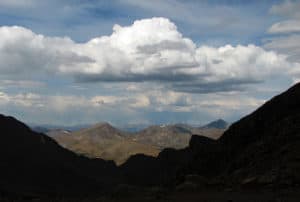
What it lacks in challenge Mt. Evans makes up in breathtaking panoramic views of the Rocky Mountains and opportunities to view wildlife up close. It isn't much of a hike, because you can summit this 14,265 foot peak in just a few minutes. Yet your trip to Mount Evans can include several stops at high mountains lakes, to view wildflowers, and to take in the expansive scenery (See our itinerary below). This is one of the best attractions near Denver for visiting friends and family, especially if you don't have the luxury or equipment to take them into the Colorado backcountry. The views are stunning and there is a good chance that you'll encounter wildlife that would usually require hours of hiking to see. Still, you are at fourteen thousand feet, so be aware of the effects of altitude, drink plenty of water, and keep an eye on the weather.
Here is our suggested Mt. Evans Adventure Itinerary
- Take The I-70 Route for a shorter Drive: Click for Directions
- Take the a bit more scenic route: Click for Directions
- First Stop, Echo Lake - We like to arrive here early in the morning when the water is like glass and before other visitors arrive. Check out our full profile on Echo Lake
- Second Stop, Mt. Goliath - After passing through the toll booth, you'll begin a drive up the winding Mt. Evans Highway. After a few miles you'll encounter a nature center Dos Chappell Nature Center at Mt. Goliath. Stop here for a short wildflower hike and to take in the views. Click for Google Map
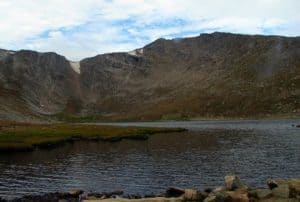
- Third Stop, Summit Lake- Grey cliff bands drop to the base of Summit Lake. It's breathtaking. Keep your eyes out for Bighorn Sheep and Mountain Goats as well. Click Here for Google Map
- Finally, the Summit of Mt. Evans.
Tips & Resources for Hiking Mt. Evans Summit Hike :
- A Better Itinerary? Because weather comes in during the early afternoon, we suggest that you start early, make a short stop at Echo Lake, then drive straight to the summit. On your way down, stop at Summit lake, then make your last stop at the nature center at Mt. Goliath.
- Do consider altitude. We avoid bringing friends who are not in good health. Be sure to have your guests drink plenty of water, and make sure they have had a day or two to get used to the altitude in the mile-high city.
- The Weather link below is for Idaho Springs. Weather at the altitude of Echo Lake may be very different, and Weather at the summit will definitely be different. Check this National Weather Service Link for more accurate forecasts.
- Looking for a more challenging Hike? Try the Chicago Lakes Hike. The trail begins at the Echo Lake Parking Lot.
- Trail Map for Mount Evans Wilderness: Trail Map Link
- Colorado Road Conditions: Colorado Road Conditions
- After the Hike: Echo Lake Lodge
Weather
Map & Driving Directions for Mount Evans
Click for Driving Directions