Summer Hiking in Colorado: Be Lightning-Aware
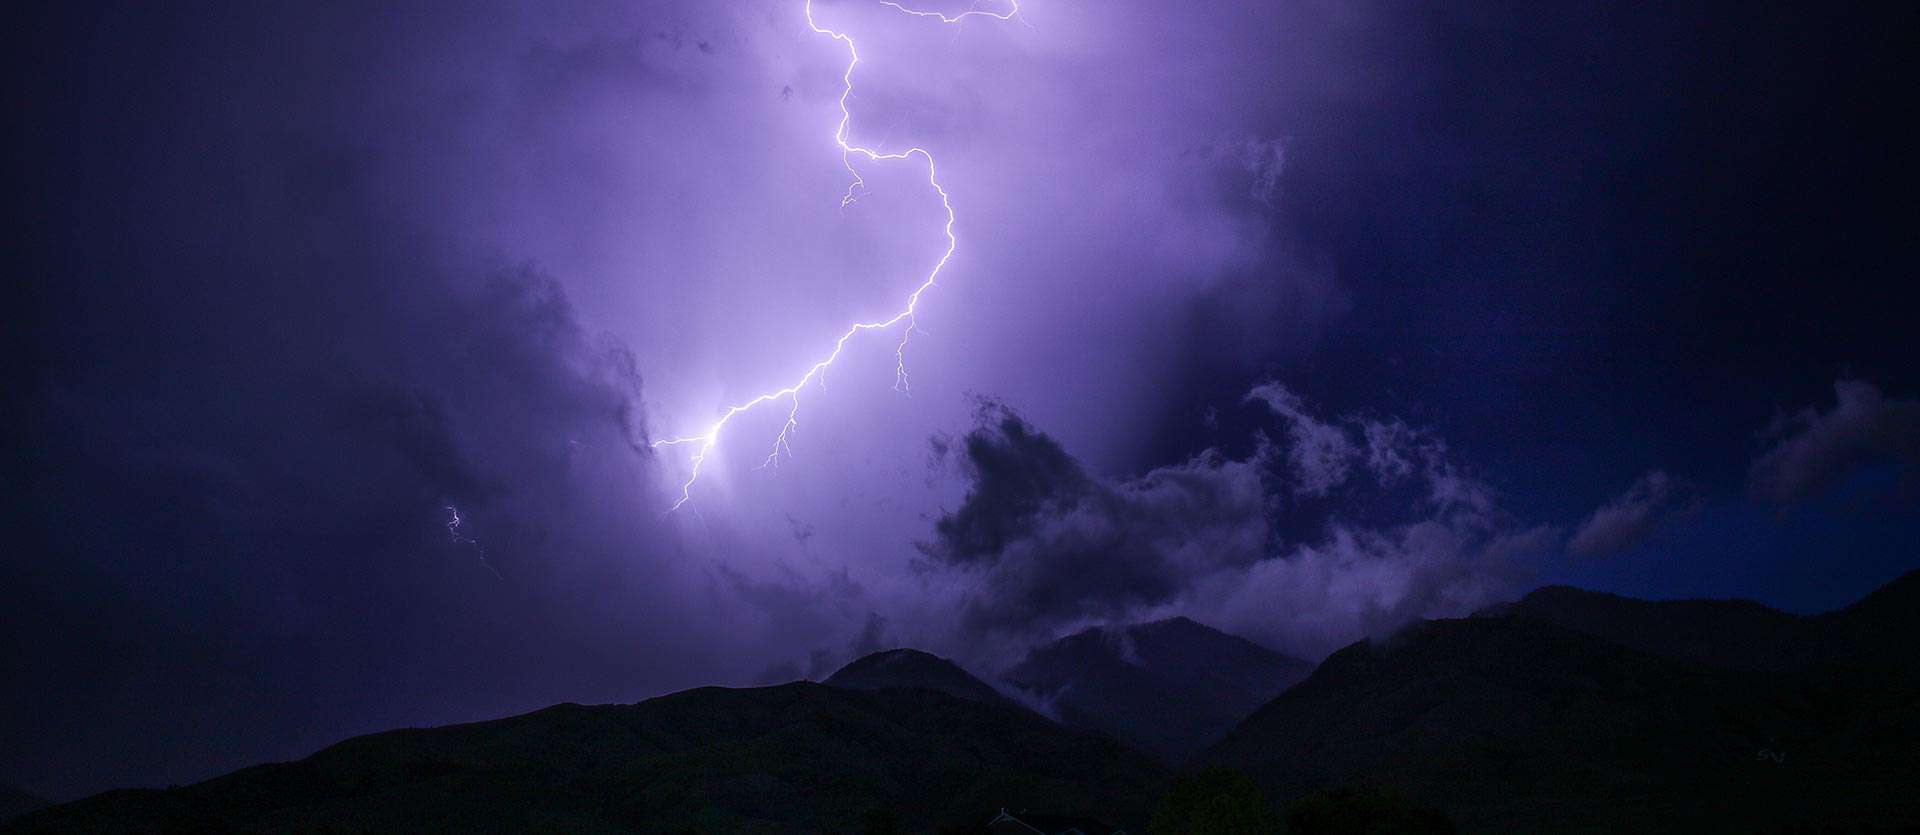
Colorado is famous for its breathtaking mountains, and hiking is one of the most popular outdoor activities in the state. However, the mountains of Colorado can be dangerous, especially during the summer months when thunderstorms are common. Two things combine to create these powerful afternoon thunderstorms: 1) All the rapidly evaporated snowmelt, and 2) how quickly the mountains heat up with the sun and push warm air into the sky. Lightning strikes are a real threat to hikers, and it's essential to take precautions to stay safe. In this post, we'll discuss some tips for lightning safety while hiking in the mountains of Colorado.
- Check the weather forecast
- Plan your hike accordingly
- Keep an eye on the sky
- Avoid open areas
- Stay away from tall objects
- Wait out the storm
Before you set out on a hike, make sure to check the weather forecast. Thunderstorms are common in Colorado during the summer months, especially in the afternoon. Most of these come through quickly between noon and 3 pm, but sometimes larger systems will settle in on the mountains and generate longer-lasting storms.If the forecast predicts heavy thunderstorms, consider postponing your hike for another day or choosing a different trail. This is another reason to hit the trail early before weather comes in.
If you decide to hike during thunderstorm season, think through your route and where you'll be during the hours where storms are most likely. Start your hike early in the morning and aim to be off the mountain by noon.
While hiking, keep an eye on the sky. If you see dark clouds gathering or hear thunder, it's time to turn back. Don't wait until it starts raining or until you see lightning to take action. Lightning can strike up to 10 miles away from a storm, so don't assume you're safe just because the storm seems far away.
If you're caught in a thunderstorm, seek shelter immediately. However, not all shelters are created equal. Avoid open areas, such as ridges or summits, as these are more likely to attract lightning. Instead, look for a sheltered area, such as a grove of trees. Stay away from rock overhangs and sheltering near water as both are conductors.
During a thunderstorm, it's essential to stay away from tall objects, such as trees or poles. These objects are more likely to be struck by lightning, and if you're nearby, you could be injured as well. If you can't find a sheltered area, crouch down low on the ground, with your feet close together and your hands on your knees. This will minimize your contact with the ground, reducing the risk of injury.
If you're caught in a thunderstorm, wait out the storm in a sheltered area. Don't attempt to hike down the mountain until the storm has passed, as you could be putting yourself in danger. Lightning can strike again after the first strike, so wait at least 30 minutes after the last thunder before leaving your sheltered area.
In conclusion, lightning safety is essential while hiking in the mountains of Colorado. By following these tips, you can minimize your risk of being struck by lightning and stay safe while enjoying the beauty of Colorado's mountains. Remember to always check the weather forecast, plan your hike accordingly, watch the sky, seek shelter in a safe area, stay away from tall objects, and wait out the storm. Happy hiking!

Leave No Trace Principles for Hiking: A Comprehensive Guide
When venturing into the great outdoors, it's important to minimize your impact on the environment to preserve the natural beauty and wildlife. Here are the seven Leave No Trace Principles for hiking that every outdoor enthusiast should be familiar with:
- Plan Ahead and Prepare
Before embarking on a hiking adventure, research the trail and familiarize yourself with the terrain, weather, and regulations. Plan your route, check the weather forecast, and make sure you have all the necessary permits and equipment. By planning ahead, you'll minimize the risk of getting lost or injured, and you'll be better equipped to minimize your impact on the environment. - Travel and Camp on Durable Surfaces
When hiking, stick to established trails to avoid trampling on fragile vegetation and disturbing wildlife. If you need to camp, choose a site that is already impacted and camp at least 200 feet from lakes and streams to minimize the risk of polluting the water. - Dispose of Waste Properly
Pack out all trash, leftover food, and litter. Don't bury trash, as it may not decompose properly and could attract animals. If you need to use the restroom, use designated facilities or dig a small hole at least 200 feet away from water sources and trails. - Leave What You Find
Avoid picking flowers or taking rocks or artifacts as souvenirs. Leave natural and cultural objects as you find them for others to enjoy. - Minimize Campfire Impact
Campfires can cause significant damage to the environment and wildlife habitats. If possible, use a lightweight stove for cooking and avoid building a campfire altogether. If you must have a campfire, use established fire rings or fire pans, and only burn small sticks and twigs. Never leave a campfire unattended, and make sure it is completely extinguished before leaving. - Respect Wildlife
Observe wildlife from a safe distance and avoid feeding or approaching them. Keep food and trash stored securely to prevent attracting animals to your campsite. If you encounter a wild animal, give it plenty of space and avoid getting between a mother and her offspring. - Be Considerate of Other Visitors
Respect other hikers' right to enjoy the outdoors by keeping noise levels down and leaving radios and other electronics at home. Yield to other hikers on the trail, and avoid hiking in large groups that can damage trails and disturb wildlife.
By following these Leave No Trace Principles, you can help preserve the natural beauty and wildlife of the great outdoors for generations to come. It's the responsibility of all outdoor enthusiasts to minimize their impact on the environment and protect the wilderness areas we love.
Crystal Mill Hike: Iconic Colorado
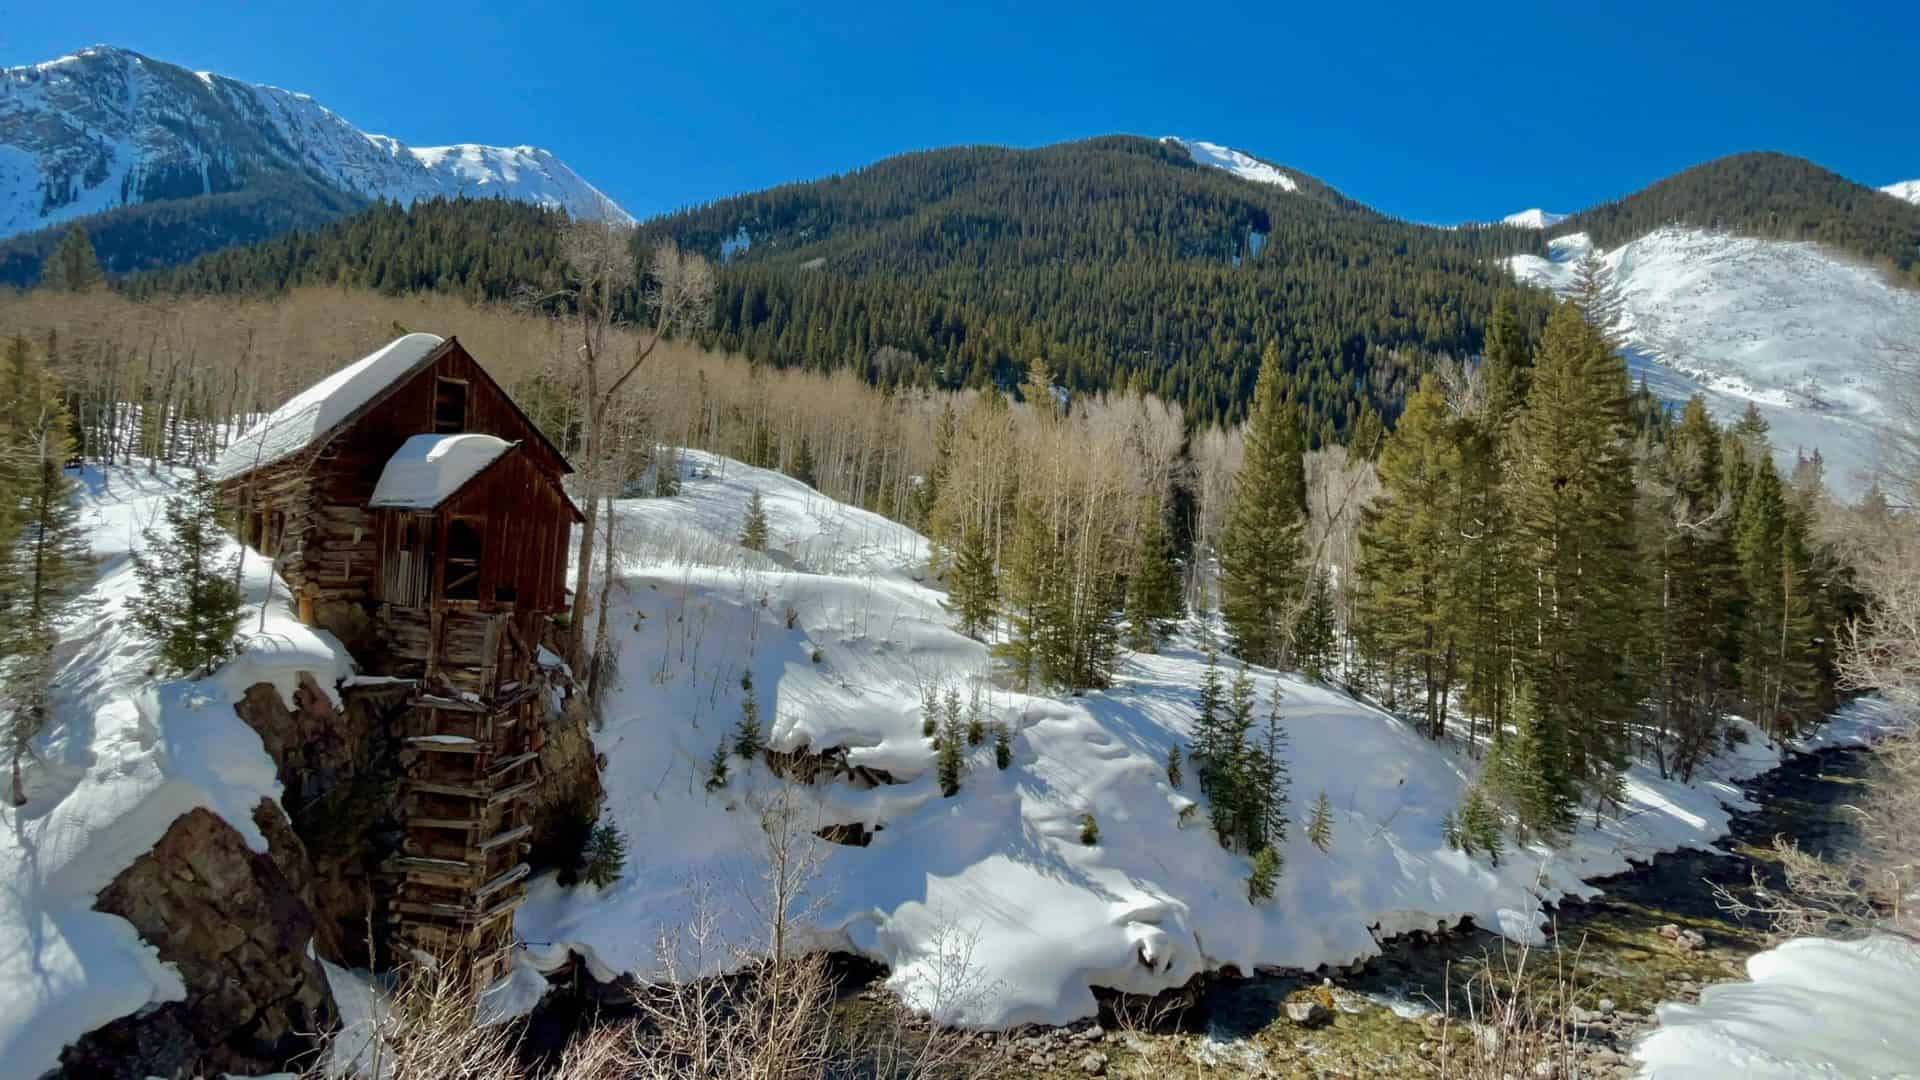
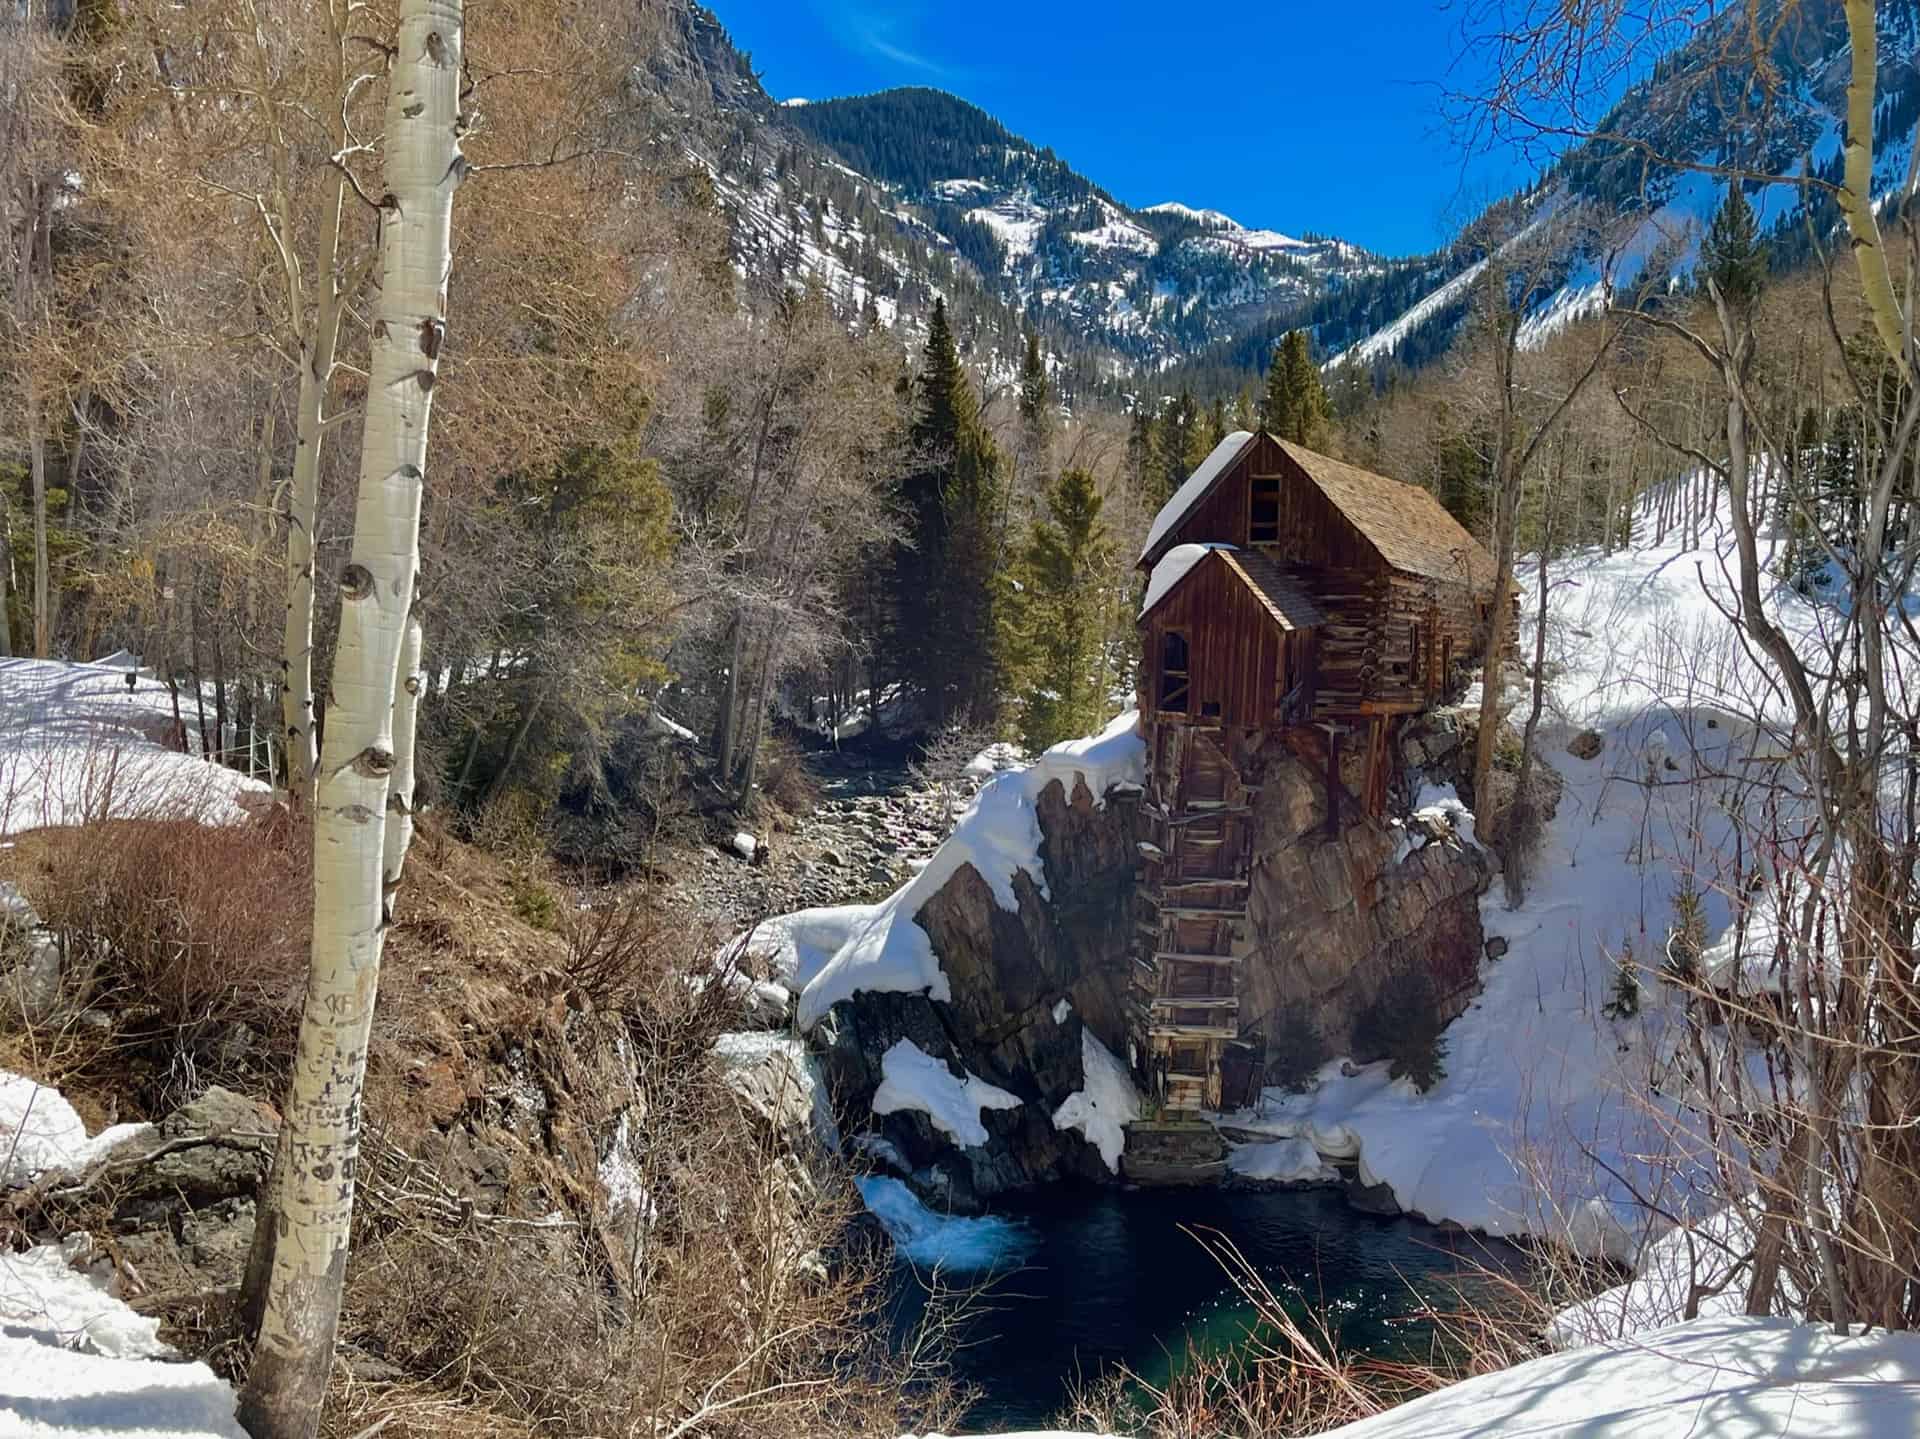
You've likely seen the photo, but may not have known how to reach it: Crystal Mill. The legendary Old West structure, built in 1892 during the silver boom, stands tall - yet precariously as ever - in the gorgeous back county of the White River National Forest. The Crystal Mill remains one of the most photographed places in the state, and appears on many Top 10 lists for the mountain west, weaving its way into the heart of locals and tourists alike.
The storied mill carries its mystery into the present day. Efforts are underway as of 2021 to preserve it. Up until now, the landowners and waves of volunteers performed small repairs to stabilize it. More than just a pretty photo spot, this Instagrammer's dream also supports layers of the local economy. When visiting, you will see a donation box for an opportunity to contribute to its preservation. Also, if you want to proceed beyond the rope at the site, you need to pop into the General Store in Marble to secure and sign a waiver (as of this post, it cost $10). Please be respectful to the private property owners along the entirety of FR314.
Explore the full Crystal Mill Hike profile below for trail map, driving directions, and more tips and details to help you enjoy this classic Colorado site!
Trail Snapshot: Crystal Mill Hike
| Hike Distance | 9 miles Round Trip |
|---|---|
| Difficulty | Easy to Moderate |
| Duration | Approx 4-5hr |
| Trail Type | Out-and-Back |
| Starting Elevation | 8,150′ |
| Elevation Gain | Approx +850′ |
| Seasons | All Seasons |
| Dogs | Allowed On Leash |
| Hike Trail Map | Click for Trail Map of Crystal Mill Hike |
| Denver Drive Time | approx. 4 hours |
| Driving Directions to Marble, CO | Click for Google Map |
| Town Nearest Hike | Marble, Colorado |
| Beauty | River valley, iconic Crystal Mill, Ghost Town |
| Activities | Hiking, Snowshoeing |
Parking & Trailhead Information for Crystal Mill
From Denver, heading west on I-70, take exit 116 toward Snowmass/Aspen, which is State Route 82. Follow 82 East for approximately 12 miles to the turn off for State Route 133, appearing on the right. Follow 133 South through Carbondale and proceed for approximately 21 miles. The road passes through Redstone, where curious travelers can visit the historic "Coke Ovens". (Nope, this is not the soft drink or the narcotic!) Shortly after, turn left onto County Road 3. About six miles down CR3 the road enters Mable, CO.
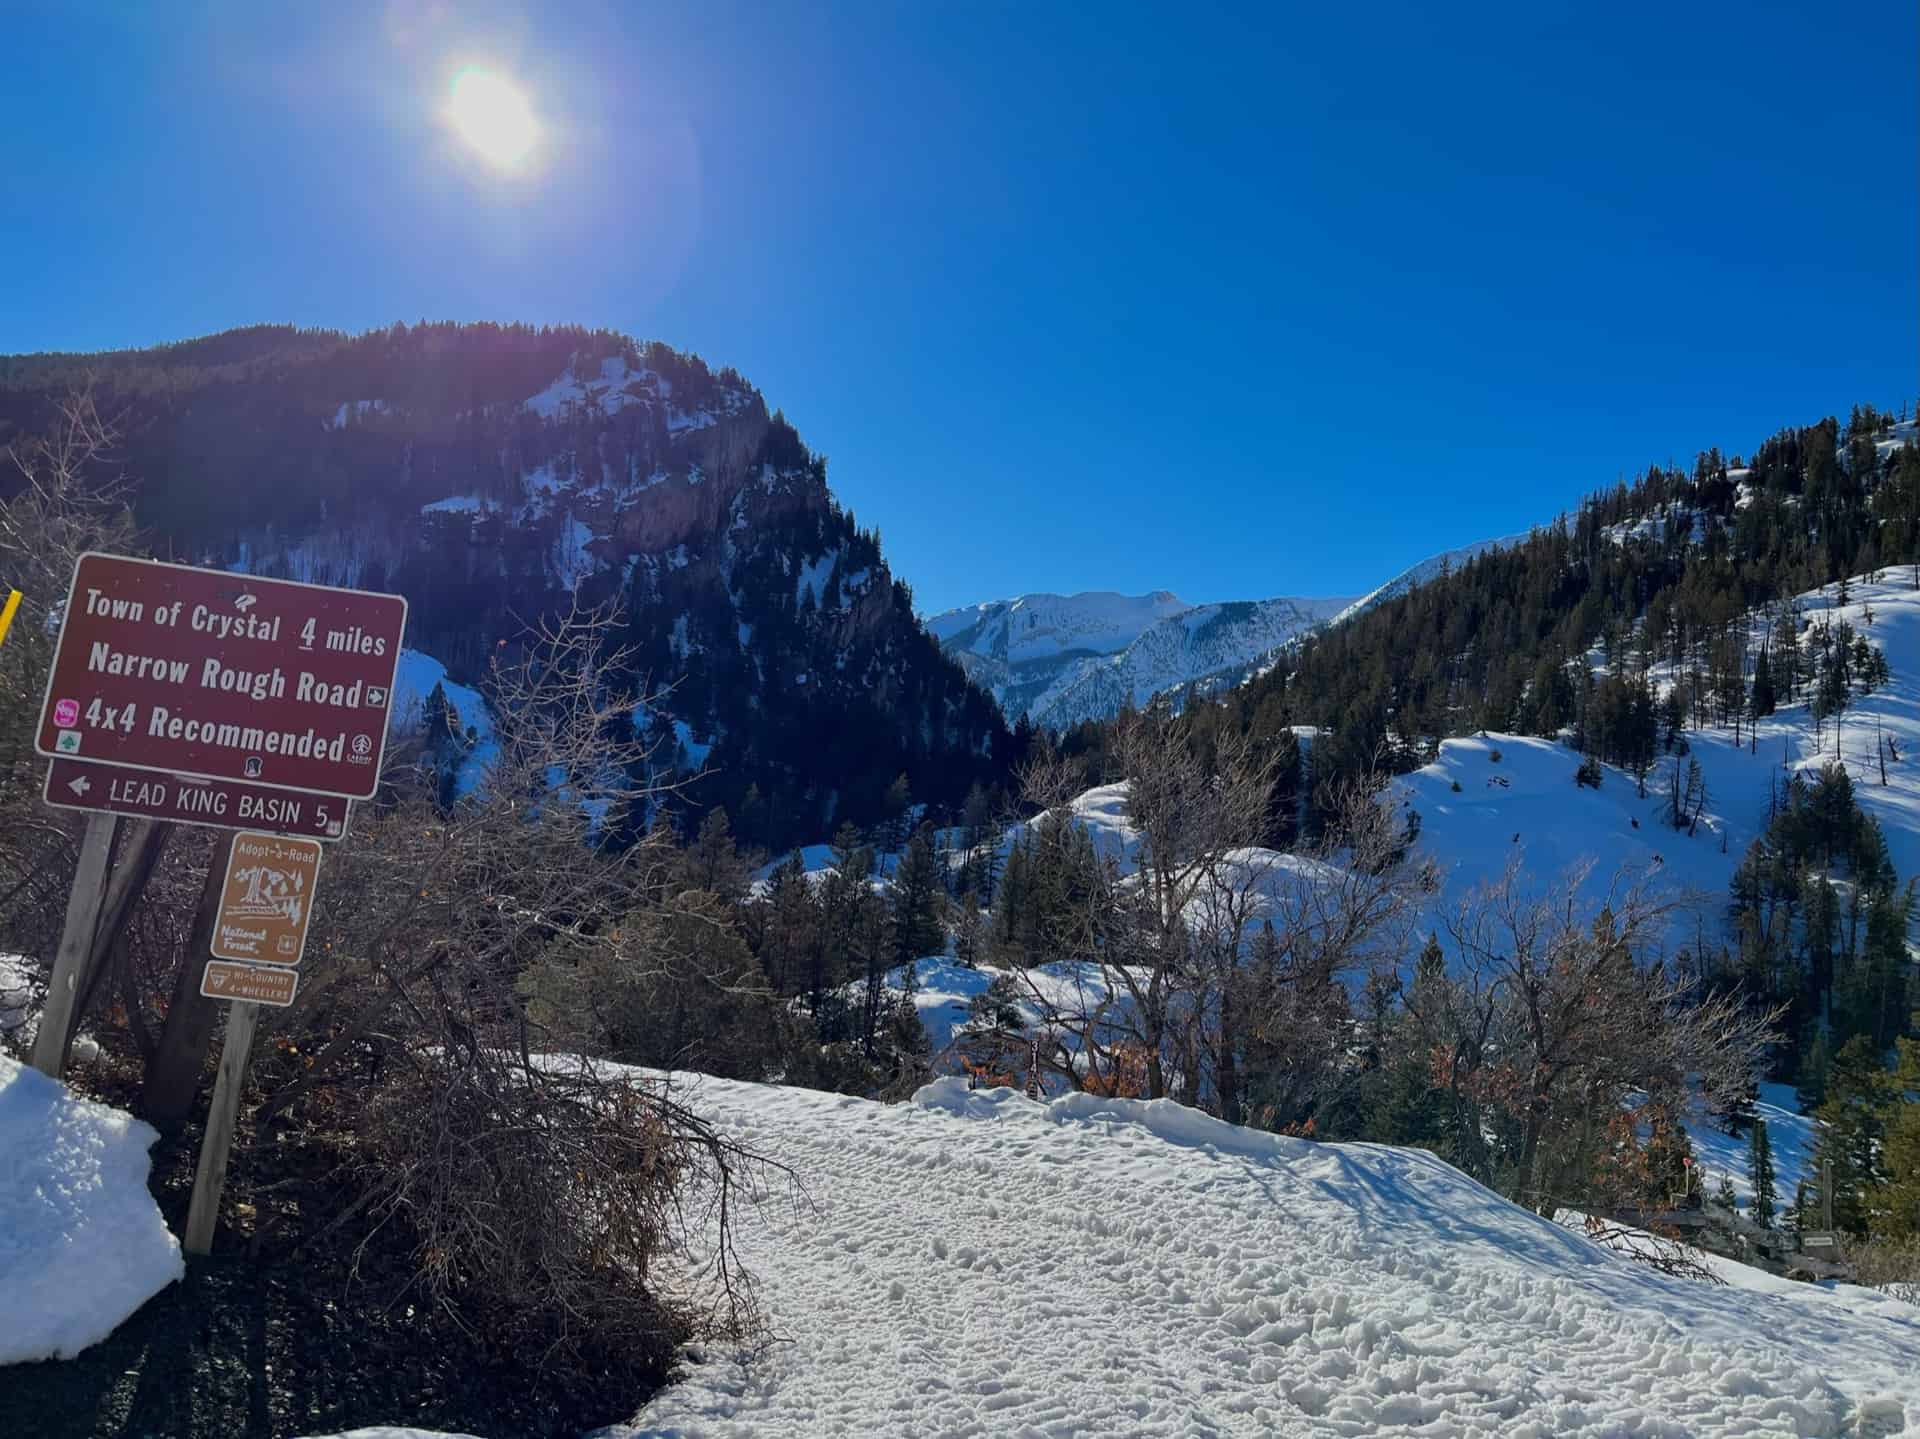
County Road 3 becomes Park Street; curve left (north) onto West 2nd Street, then right (east) on West 2nd Street. Turn left (north) onto West 1st Street, then right onto Main Street. Turn left (north) on East 2nd Street, then right (east) on Silver Street, heading toward and around Beaver Lake. (If all of that sounds remarkably confusing, rest easy. Marble is very small, and there are signs indicating the direction toward Crystal Mill. It's simpler than it reads!) After the lake, at what visibly feels like the end of the street, there is a small parking lot on the left. A sign designates the rest of the road is suitable for high clearance vehicles, only.
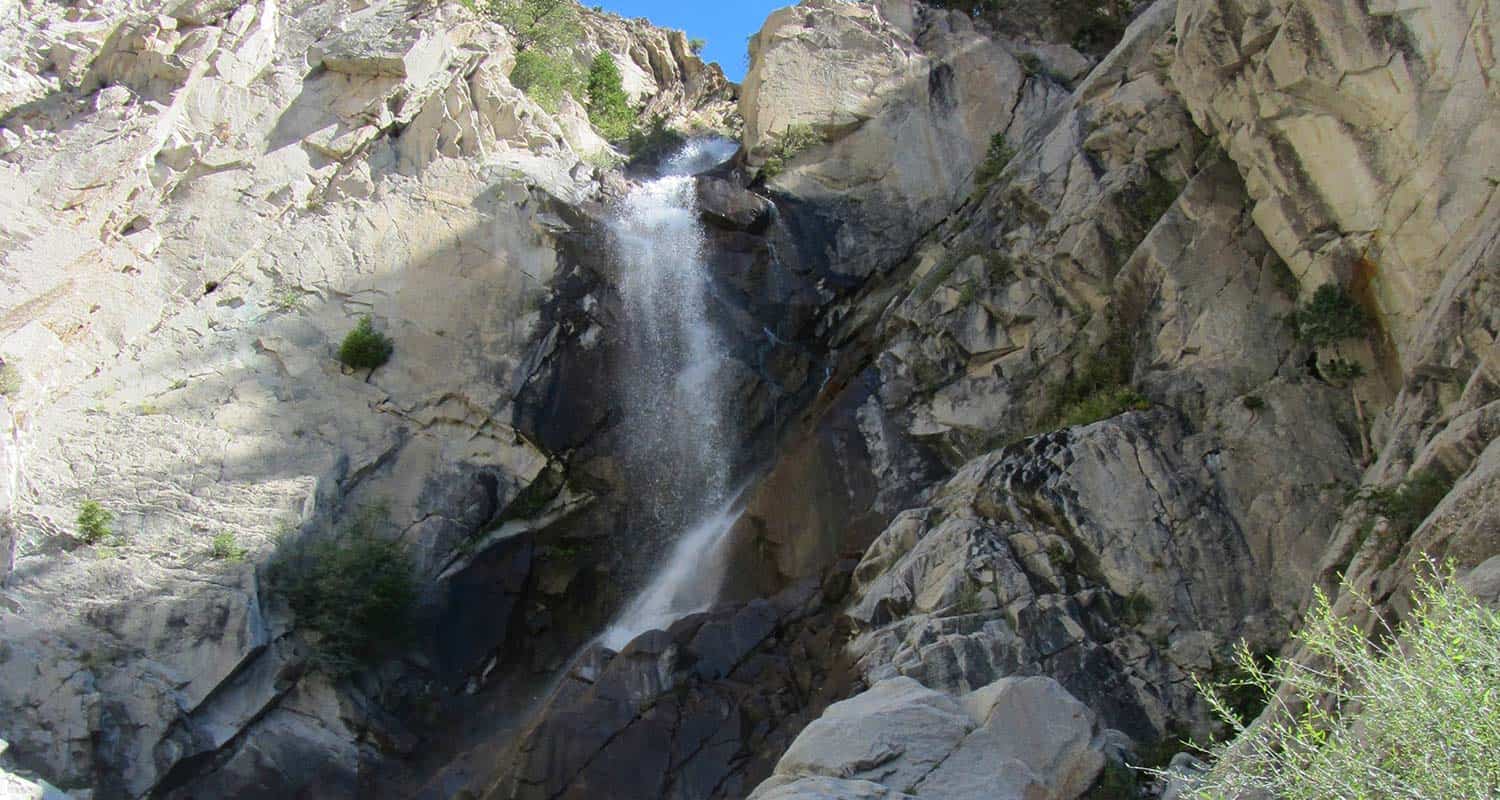
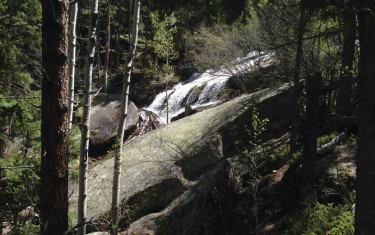
Note: Along the way, about 18 miles after the turnoff onto 133 South and just beyond Redstone, the Hayes Creek Falls Waterfall graces the side of the road. This optional stop provides a burst of refreshment from the drive -- or from the 9-mile Crystal Mill Hike!
The Hike: Crystal Mill
From the parking lot, the trail begins by continuing straight up the road to the east. Slightly beyond the 3/4-mile mark, the road splits. Up and to the left leads to Lead King Basin; the Crystal Mill hike follows the road to the right and down the hill, along Forest Road 314 (look for the small brown sign with "314" aligned vertically), a.k.a. CR3.
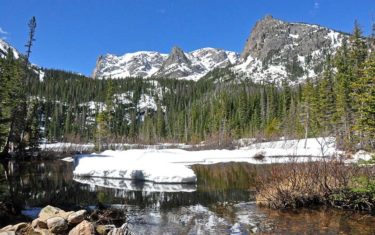
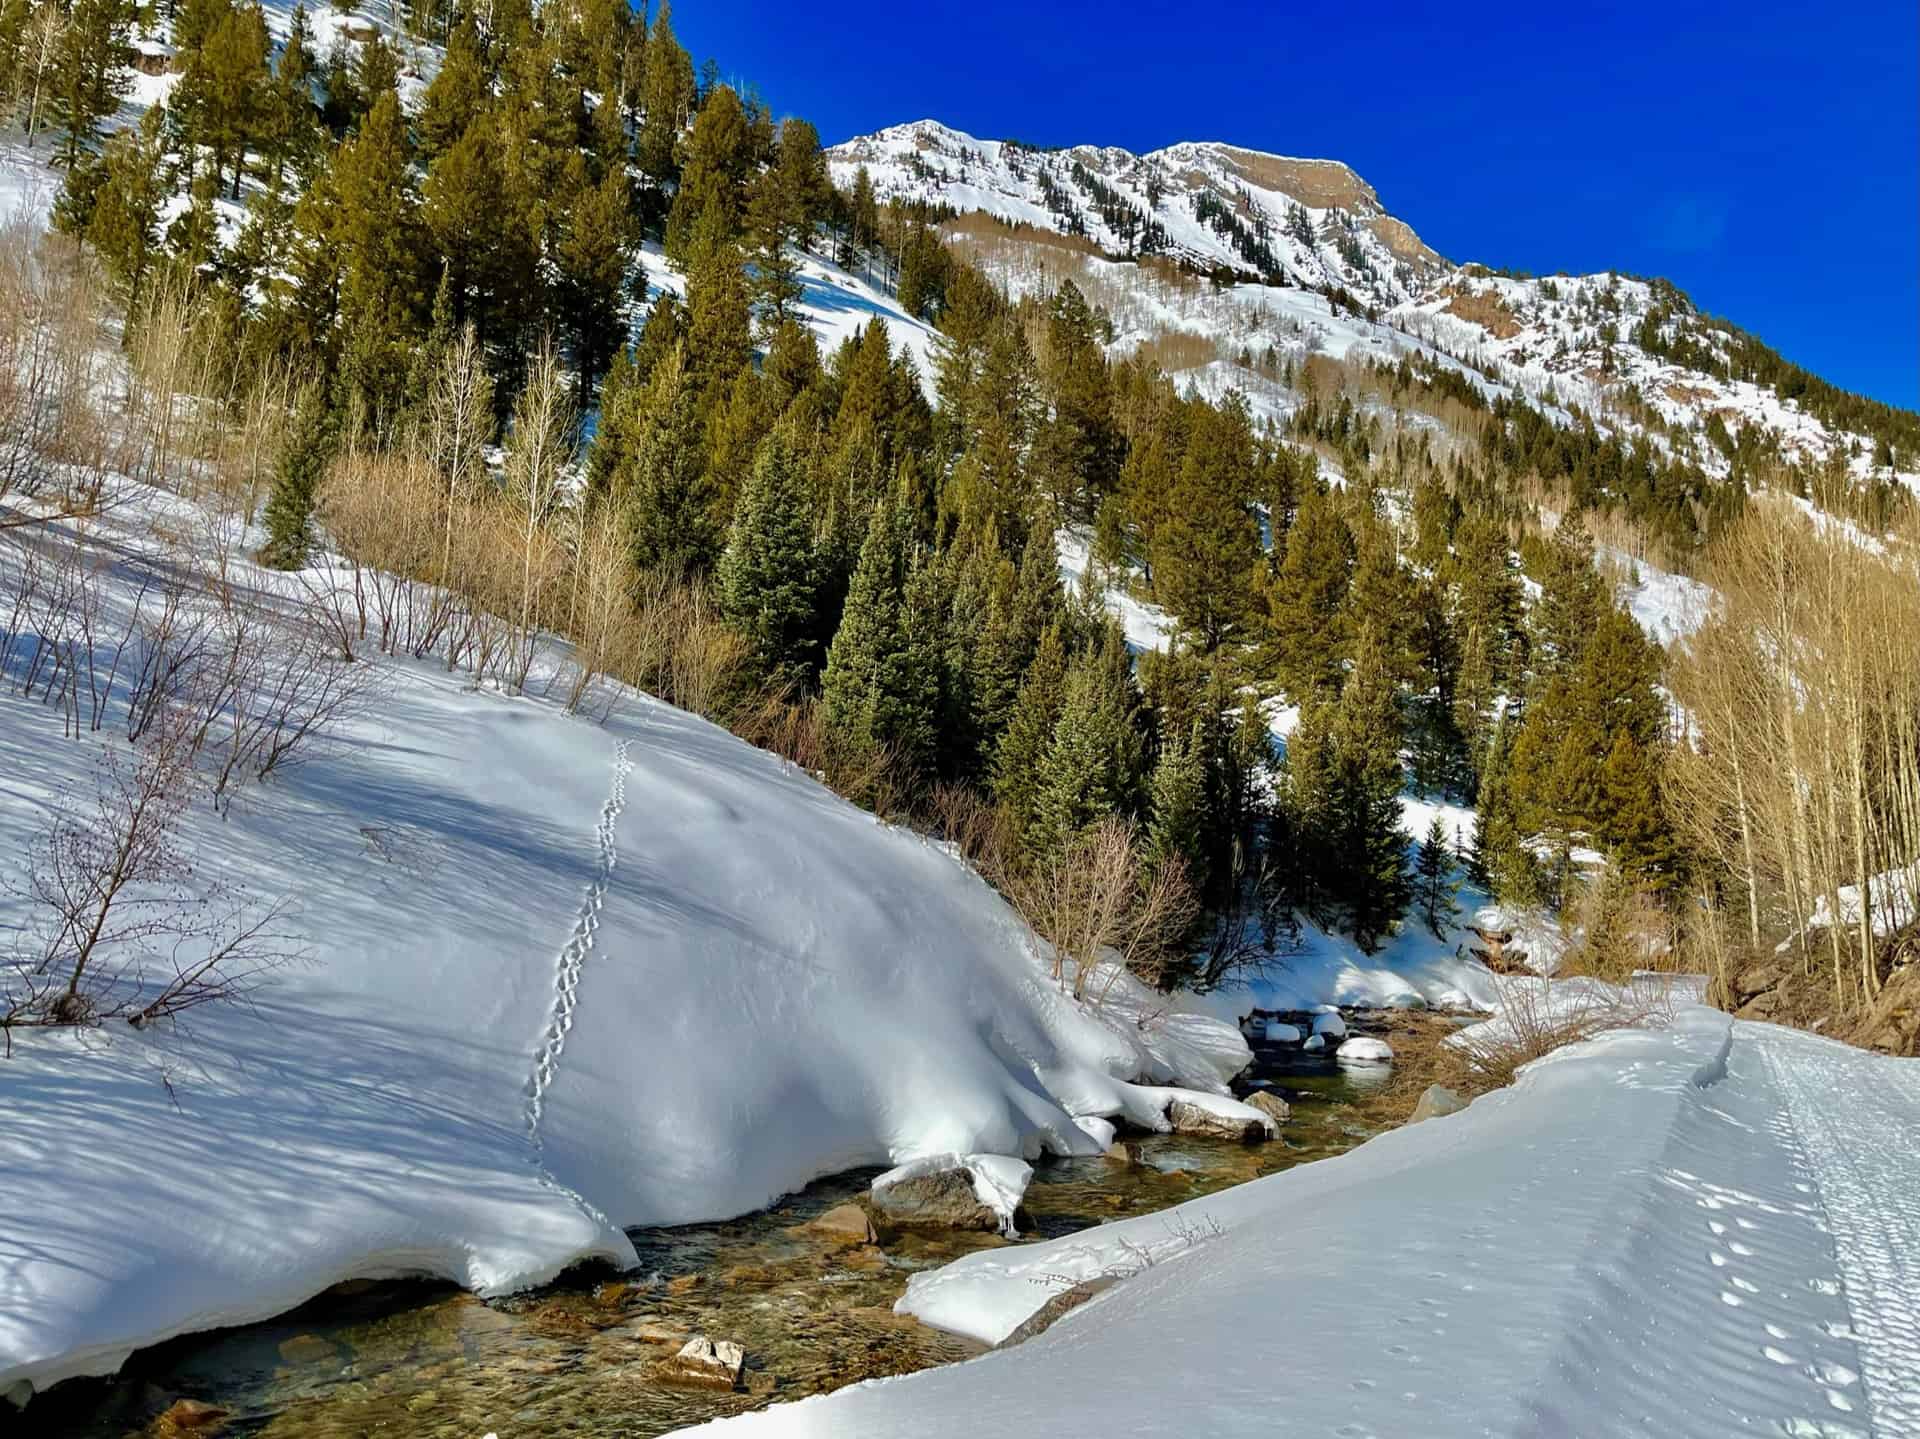
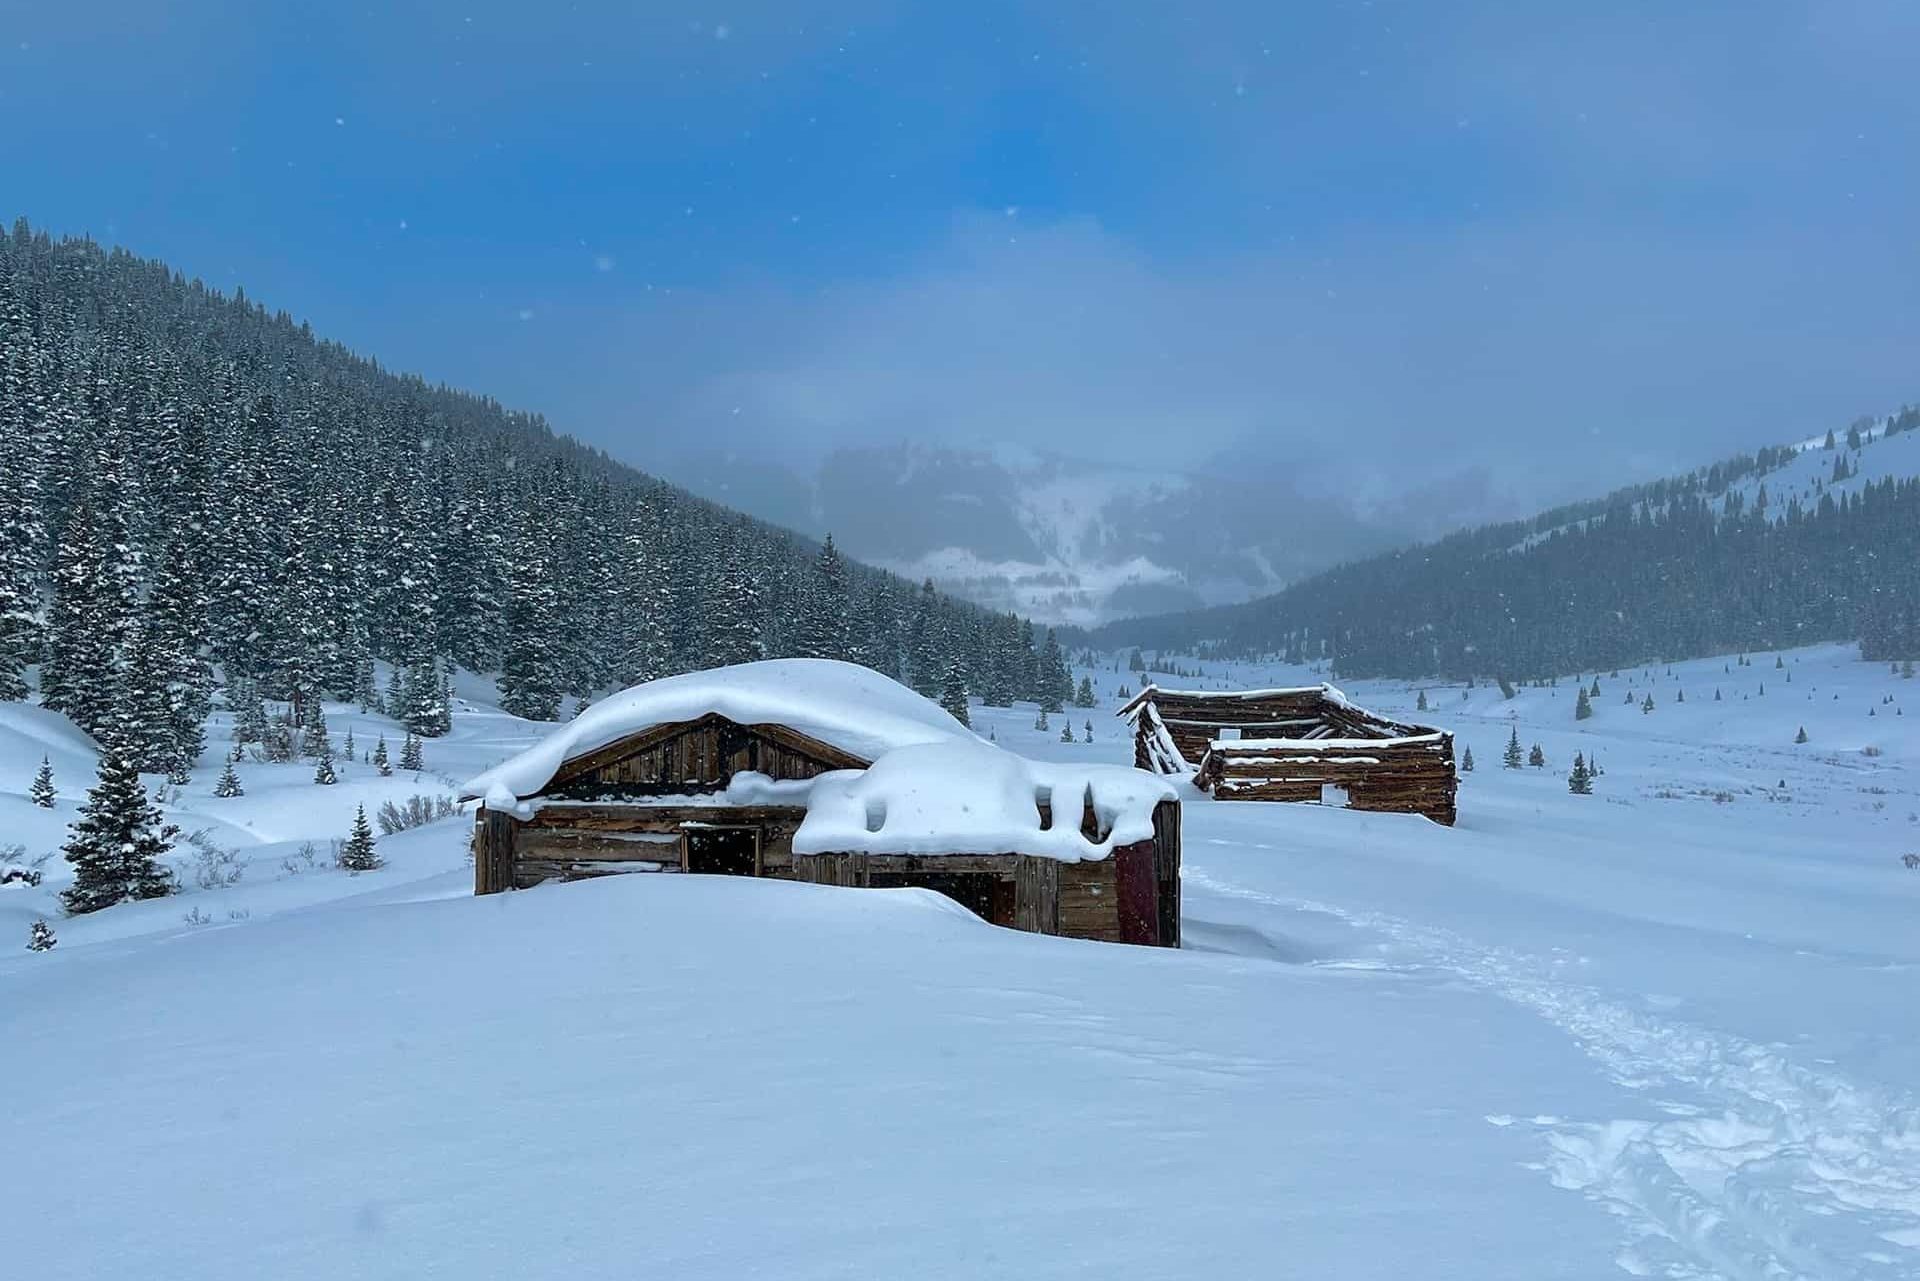
Now, set the cruise control. The stroll from here clocks just under 4 miles one-way. During the summer, the path often attracts ATVs and 4x4 enthusiasts; the fall brings breath-taking aspen colors and their fans. This post documents a winter trek, on which a single snowmobile passed by. Within this blessed solitude, the river basin, Crystal Mill, and the ghost town of Crystal stood frozen in time and silence. On that note, wise hikers will double-check the Colorado Avalanche Information Center prior to stepping out in adventure. While this route typically poses minimal risk, be alert to the slopes above the road and learn the signs of compromised snow fields. At the 1-1/4 mile mark, the trail wraps around the right side of Lizard Lake, often a destination in itself.
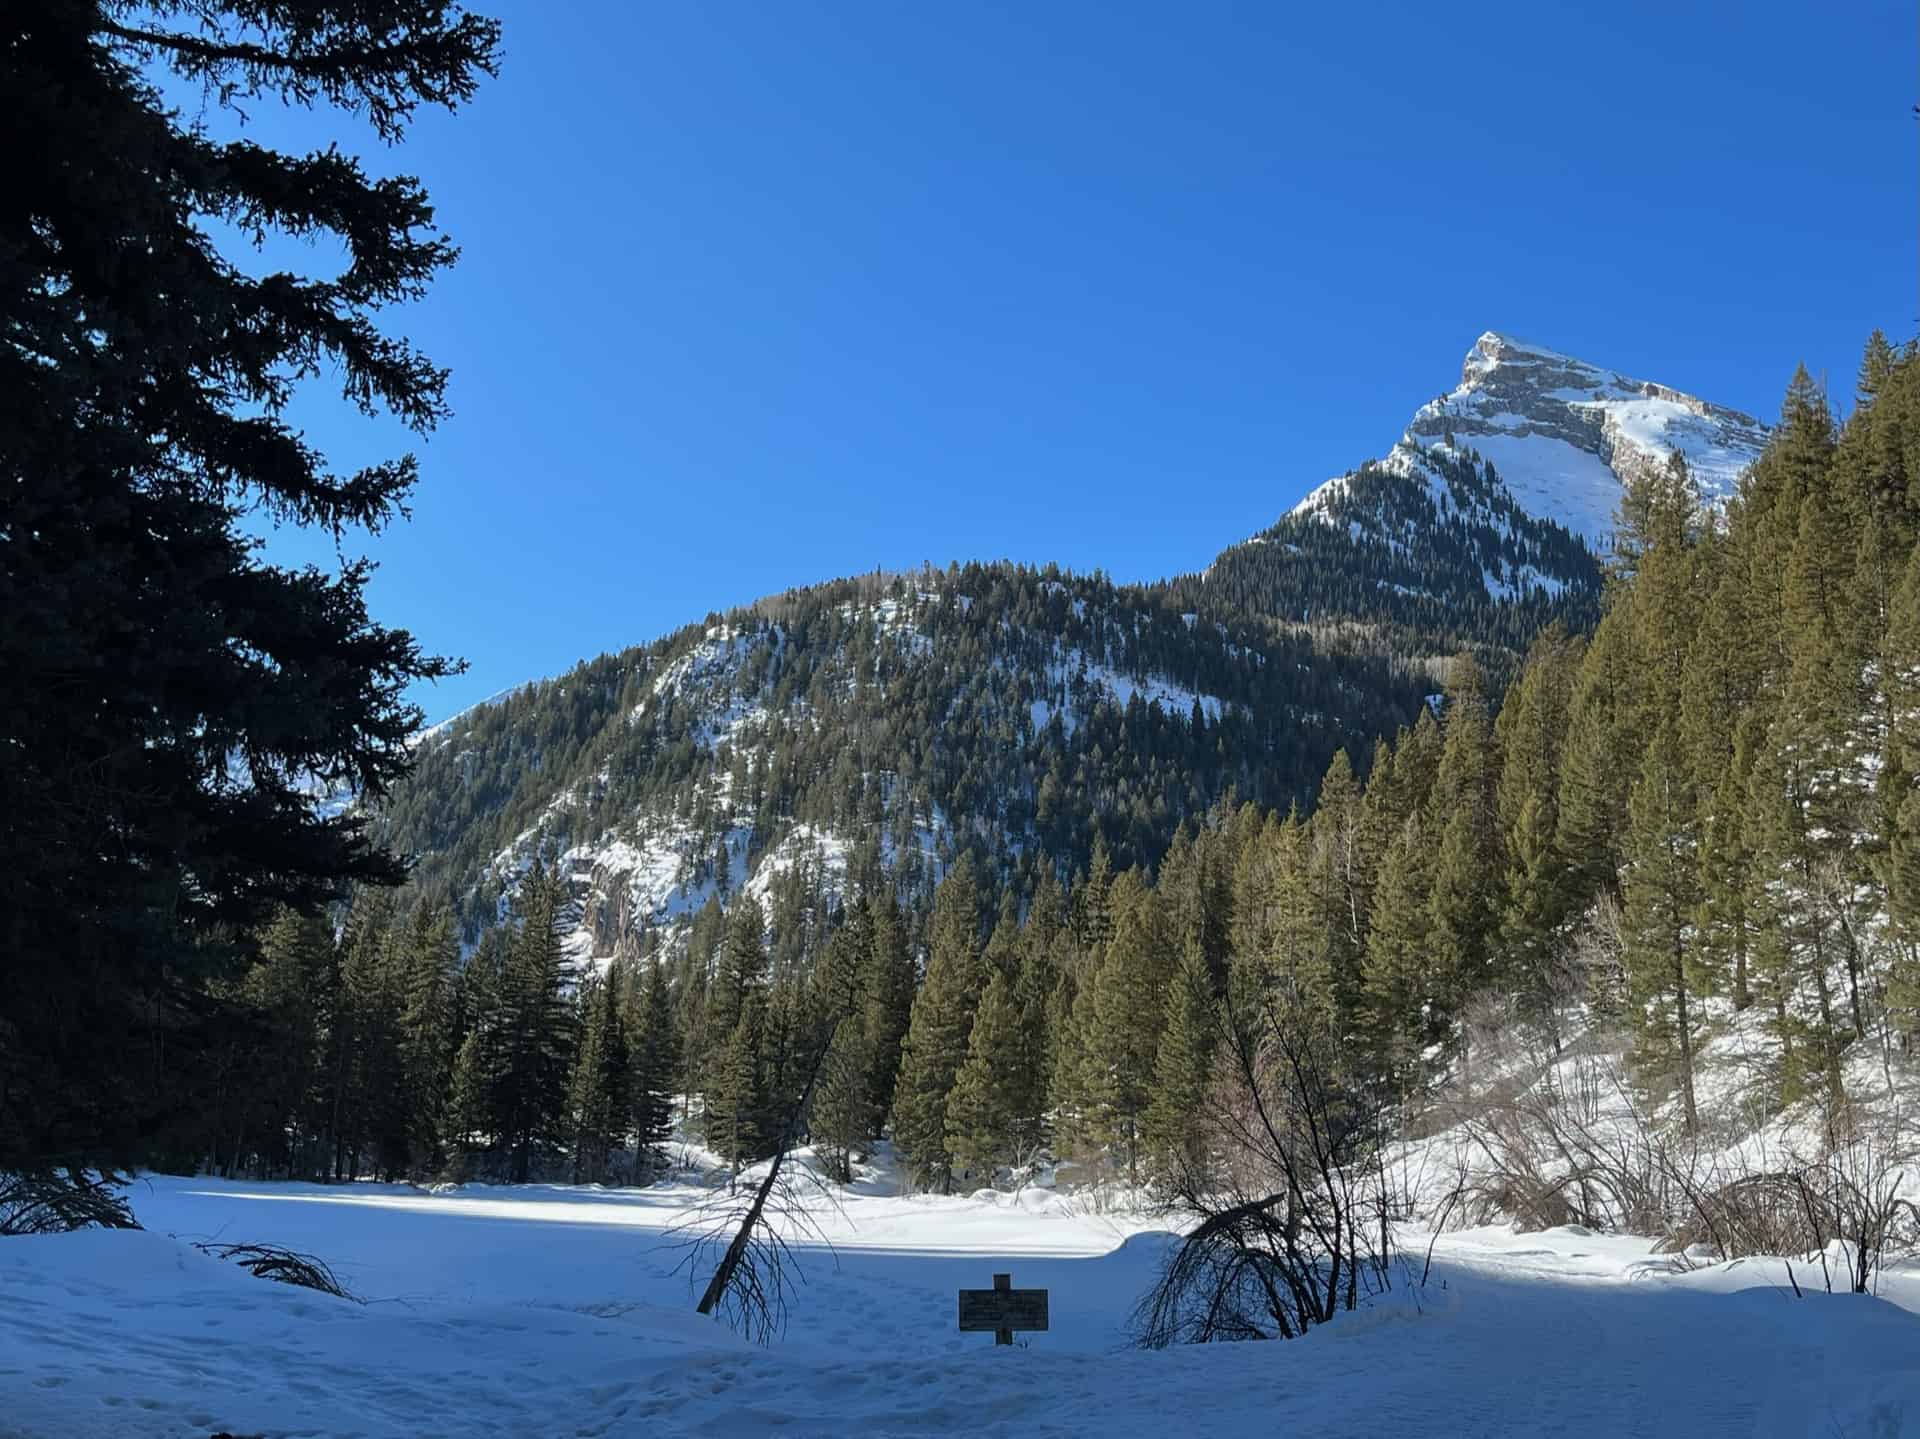
From the southeast end of the lake, the trail drifts leisurely on a ridge above Crystal River. No matter the season, the river valley floor sparkles. With gentle elevation changes and no risk of taking a wrong turn, hiking the remaining 3-1/4 miles is pure delight. Upon reaching the mill, the awe-inspiring nature of this historic landmark is impossible to miss. And if time and weather permit, those with energy and curiosity can continue up the road another a few paces to the actual town of Crystal. During the summer months, this often serves as an outpost for impromptu picnics. To return to the trailhead, reverse the route.
Crystal Mill resides on my Mom's all-time "Must see!" list in Colorado. Whether by foot or 4x4, I hope she gets to see it and take 1,000 pictures.
Tips & Resources for Hiking to the Crystal Mill
- TIP: While the remote location deters some, the sheer popularity of the site beckons people from all over. The small parking lot fills fast in summer and autumn, and even in the winter it can be full. Consider a mid-week visit or plan to go early.
- Trail Map: Crystal Mill Hike
- Packing List: Always pack the 10 Essentials. Download our Hiking Guide to get the list and dayhiking packing checklist. Additionally, take some time to review our 10 Winter Hiking Tips.
- Colorado Road Conditions: Colorado Road Conditions
- After the Hike: Get some back country BBQ at Slow Groovin'! Just note carefully that they operate from May 1st - October 31st.
Weather
Map & Driving Directions
Click for Driving Directions
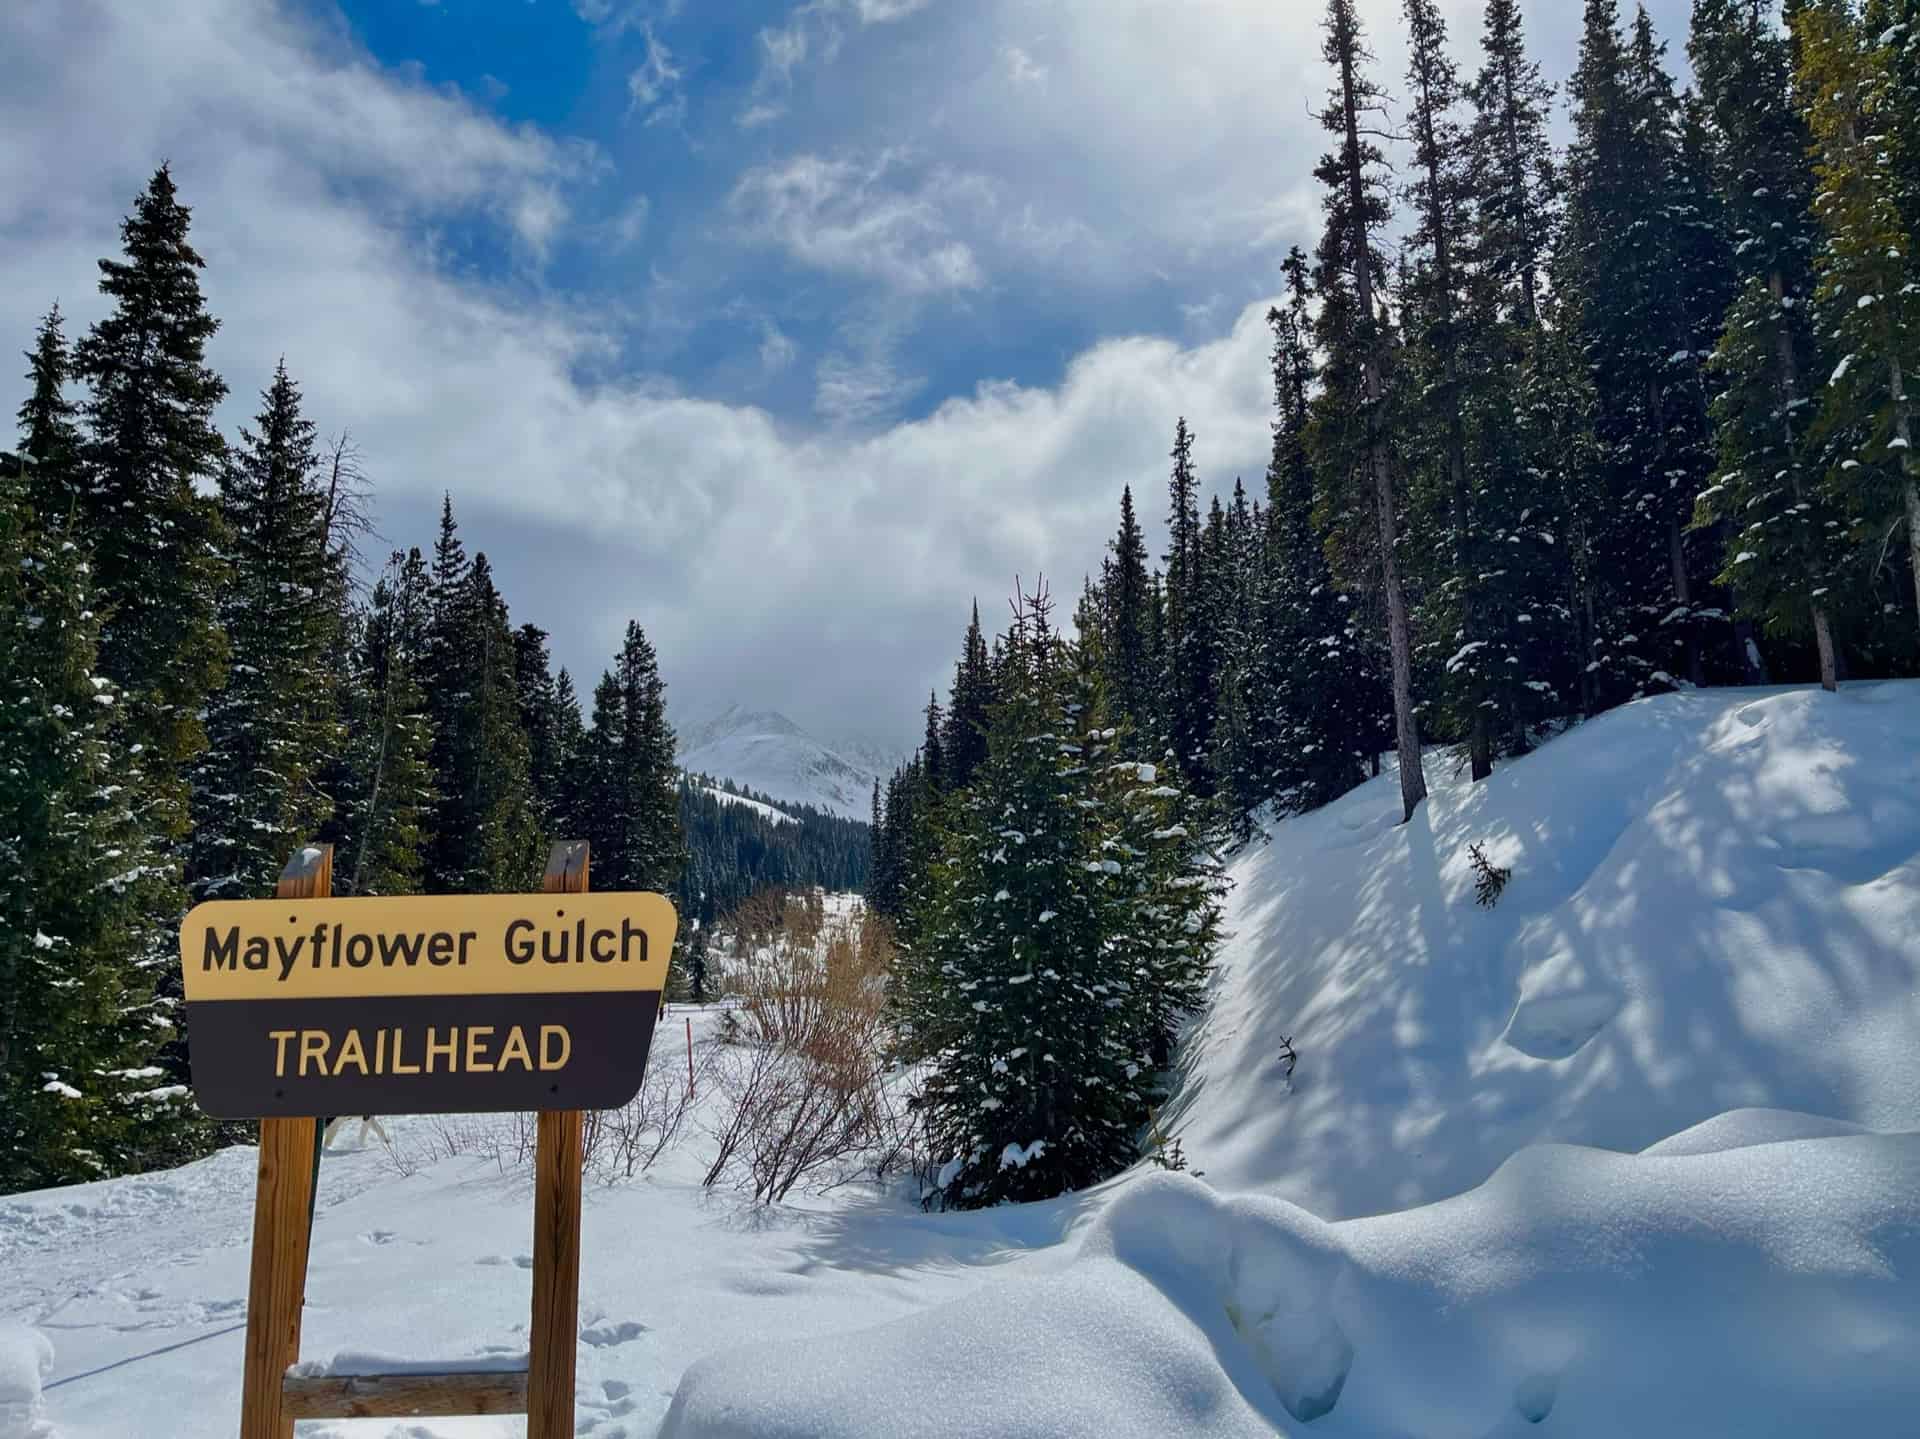
Mayflower Gulch Trail near Copper Mountain
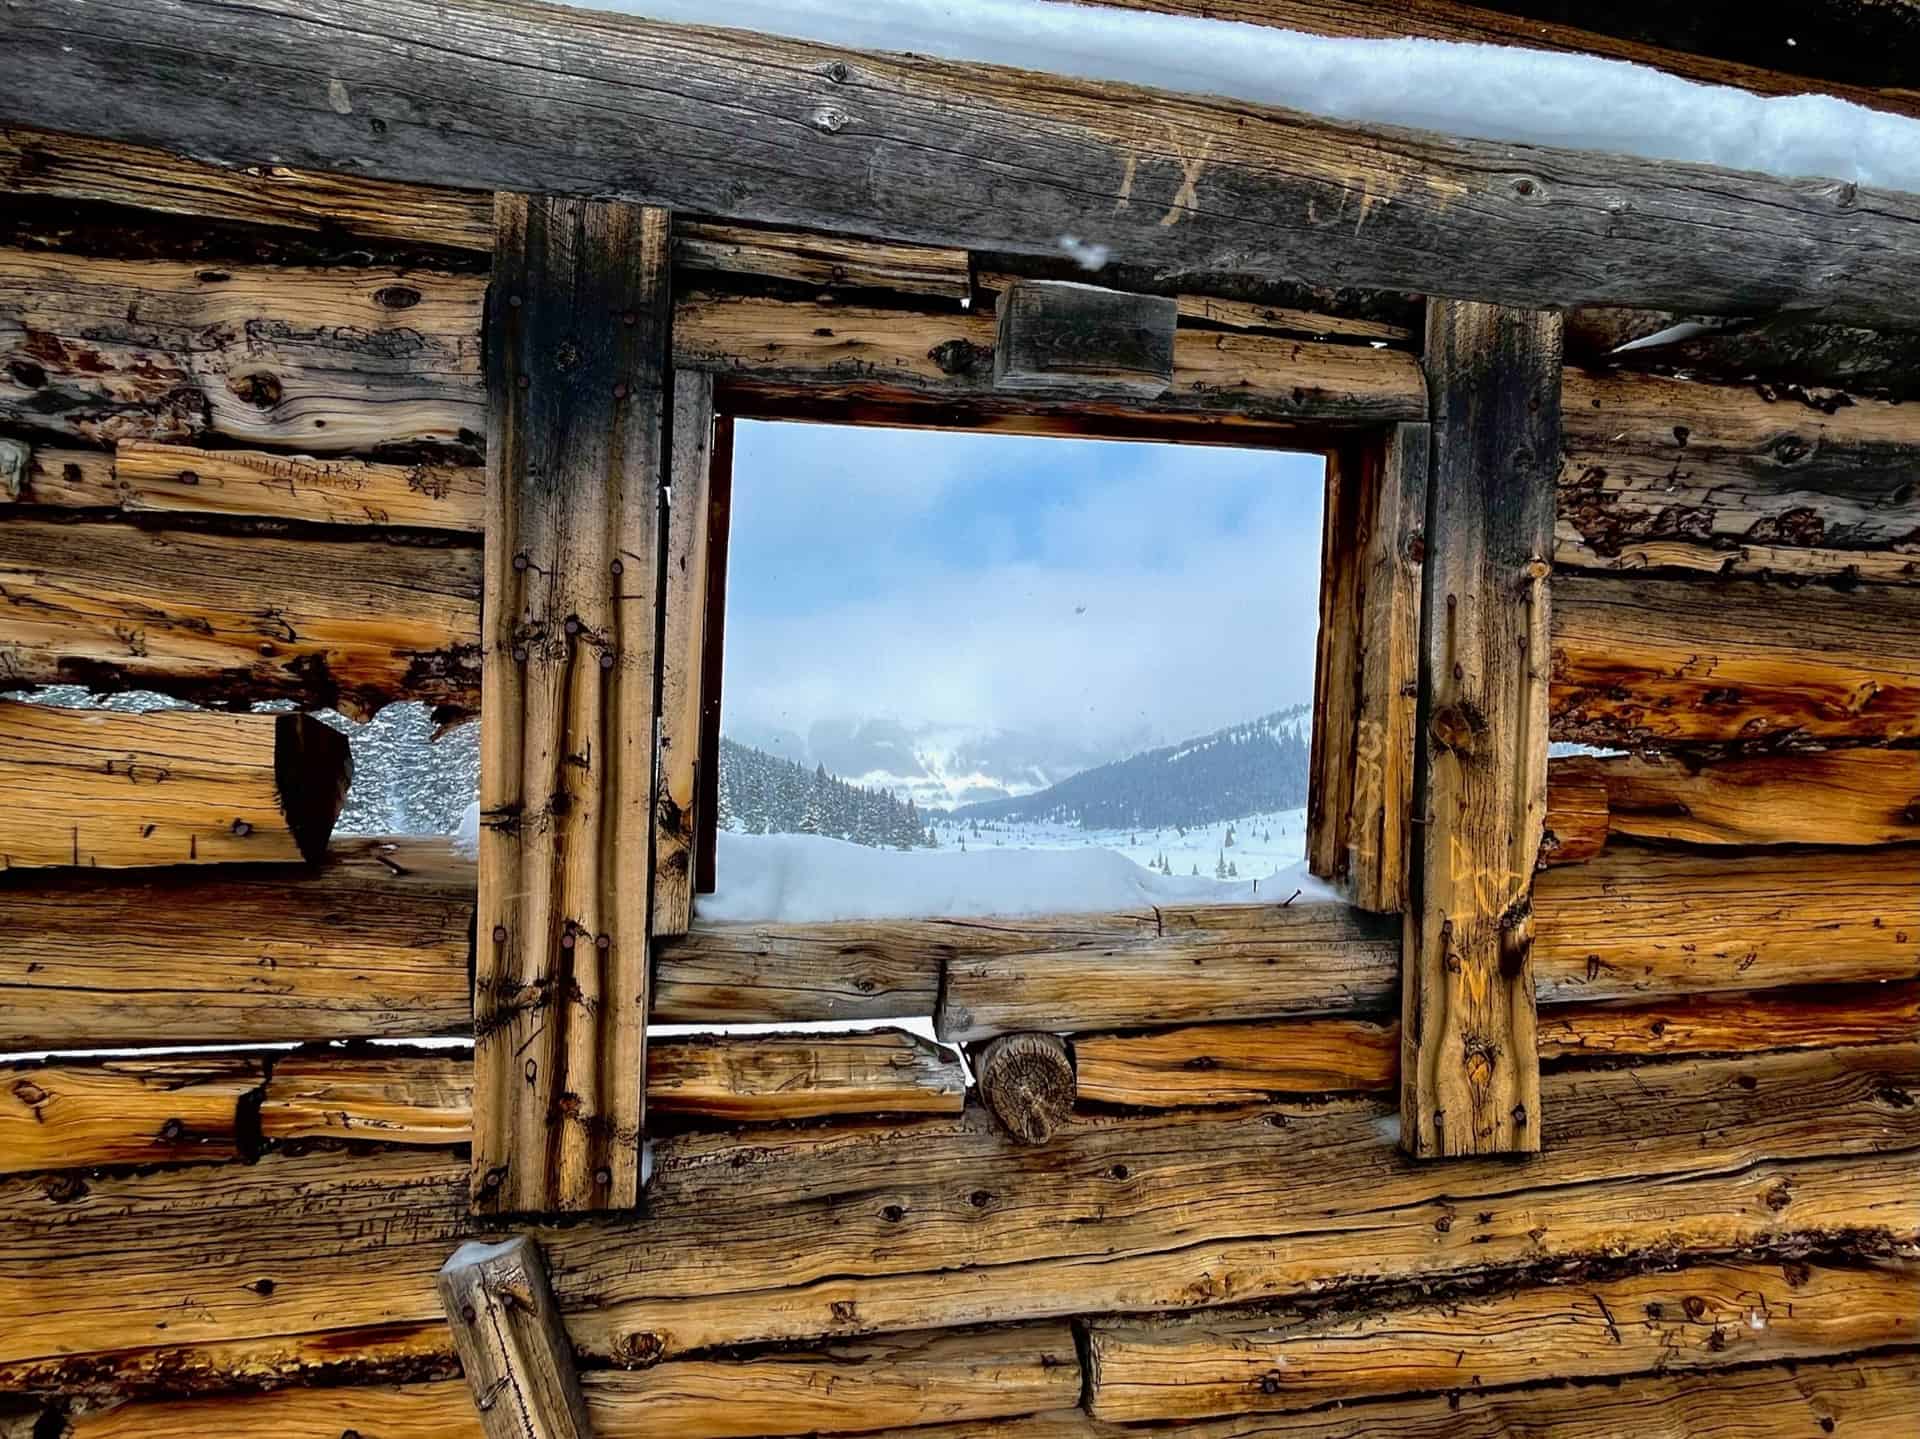
Easy parking. Gentle elevation. Three miles round trip. And a ghost town? The Mayflower Gulch Trail gives you all this and a shockingly gorgeous basin to behold. On top of all this, the hike works well for families, especially if there exists any curiosity about the old west. The spacious gulch invites visitors to wander around and discover the fringes...a running stream, abandoned mines, and ridge line views. Caution: DO NOT inspect abandoned mines or even walk too closely; enjoy them from a distance! They can have unstable internal structures and entrances.
Explore the full Mayflower Gulch Hike profile below for trail map, driving directions, and more tips and details to help you enjoy this old west adventure near Denver.
Trail Snapshot: Mayflower Gulch Trail
| Hike Distance | 3 miles Round Trip (longer if exploring) |
|---|---|
| Difficulty | Easy to Moderate |
| Duration | Approx 2-3hr |
| Trail Type | Out-and-Back |
| Starting Elevation | 11,000′ |
| Elevation Gain | Approx +600′ |
| Seasons | All Seasons |
| Dogs | Allowed On Leash |
| Hike Trail Map | Click for Trail Map of Mayflower Gulch Hike |
| Denver Drive Time | 1.5 hours |
| Driving Directions to Mayflower Gulch | Click for Google Map |
| Town Nearest Hike | Copper Mountain, Colorado |
| Beauty | Valley basin, 13ers, Ghost Town |
| Activities | Hiking, Snowshoeing, Cross-country skiing |
Parking & Trailhead Information for Mayflower Gulch
From Denver, heading west on I-70, exit 195 for Copper Mountain. The road curves to the left, heading south into the resort area. Only six miles later along Highway 91, the free parking appears on the left (east), immediately after a short bridge over Mayflower Creek.
The Hike: Mayflower Gulch Trail
From the trailhead marker, the trail proceeds straight for approximately 1.5 miles. It's that simple! Meandering through pines, bordering the actual Mayflower Creek, hikers can devote almost all of their attention toward experiencing the trail and its surroundings. A mining remnant about 1/2-way up foreshadows the ghost town and abandoned mines in the peak-ringed basin. 4x4 vehicles are permitted along this route during the summer, so keep an ear open. Immediately before the valley floor, a gate and small parking lot indicate the destination reached.
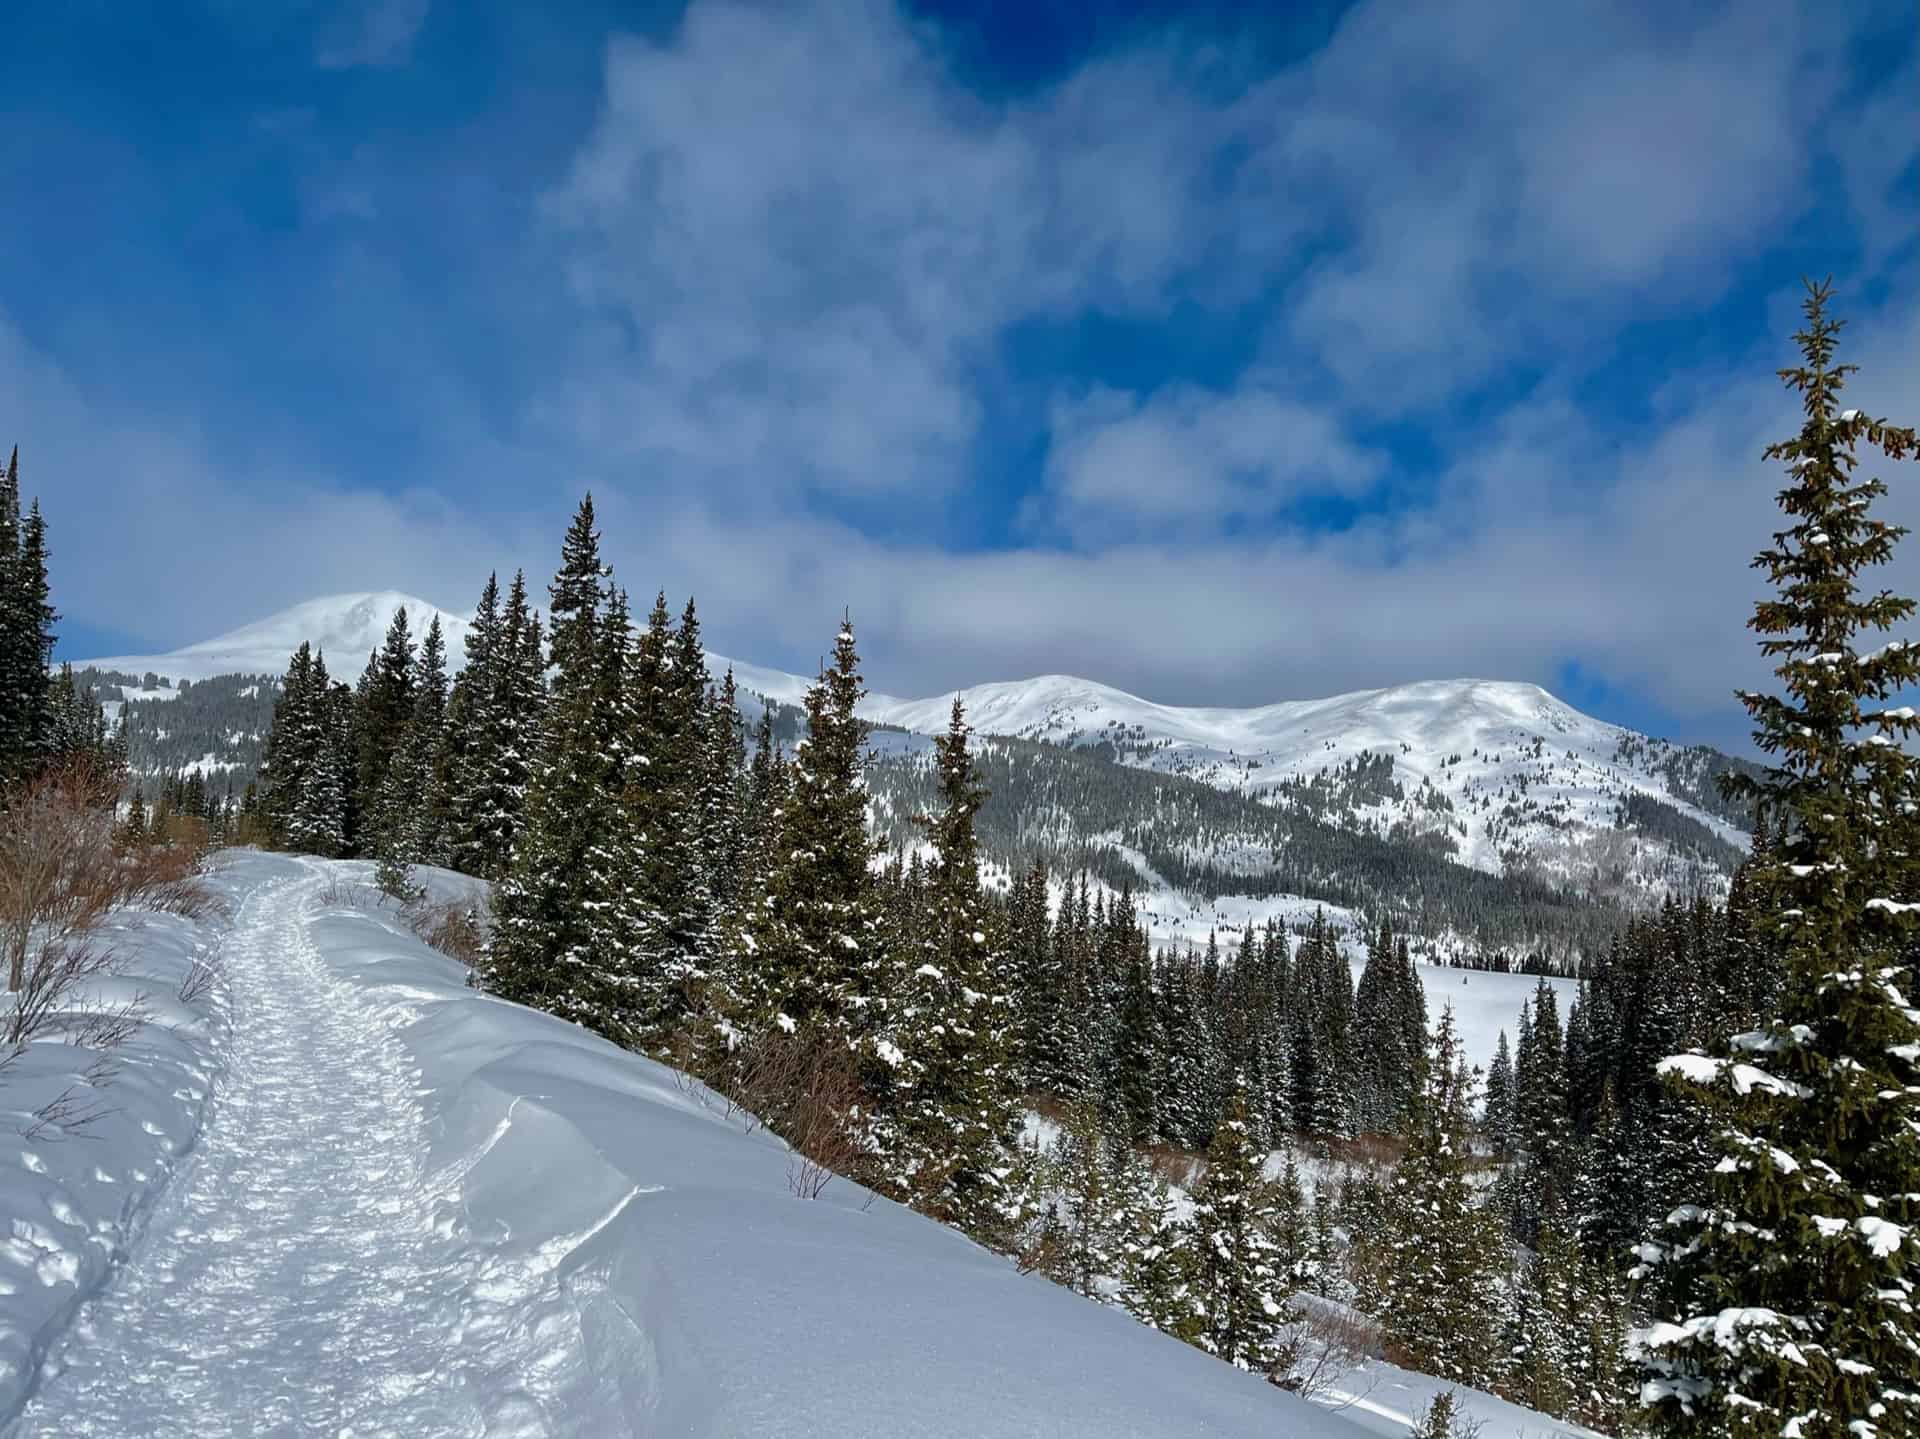
Some advanced hikers double-back and gain the ridge to the north. (Note: do not attempt without GPS, a reliable map, and alerting others to the plan.) This leads up to Atlantic Peak, a 13er sitting between two others -- Pacific Peak to the north and Fletcher Mountain to the south. Both Atlantic Peak and Fletcher Mountain tower over the gulch, so whether one views them from above or below, they greet visitors with majesty. After strolling the valley floor and taking in the gorgeous views, the return hike simply reverses the route, following the trail back down and out of the valley.
Tips & Resources for Hiking Mayflower Gulch
- TIP: Due to the ease of access, parking can fill fast, even in the winter. Also in the winter or early spring, "ski traffic" along I-70 can be unusually heavy on weekends during the morning and evenings. Therefore, this makes an excellent mid-week rest day to take a break from the slopes!
- Trail Map: Mayflower Gulch Trail
- Packing List: Always pack the 10 Essentials. Download our Hiking Guide to get the list and dayhiking packing checklist. Additionally, take some time to review our 10 Winter Hiking Tips.
- Colorado Road Conditions: Colorado Road Conditions
- After the Hike: Summer or winter, grab a slice at Mamma's Italiano! If there were a rebel's daughter who camped in the ghost town up in the gulch, she'd likely eat here and blend in with the menagerie of visitors.
Weather
Map & Driving Directions
Click for Driving Directions
Silver Dollar and Murray Lakes Trail
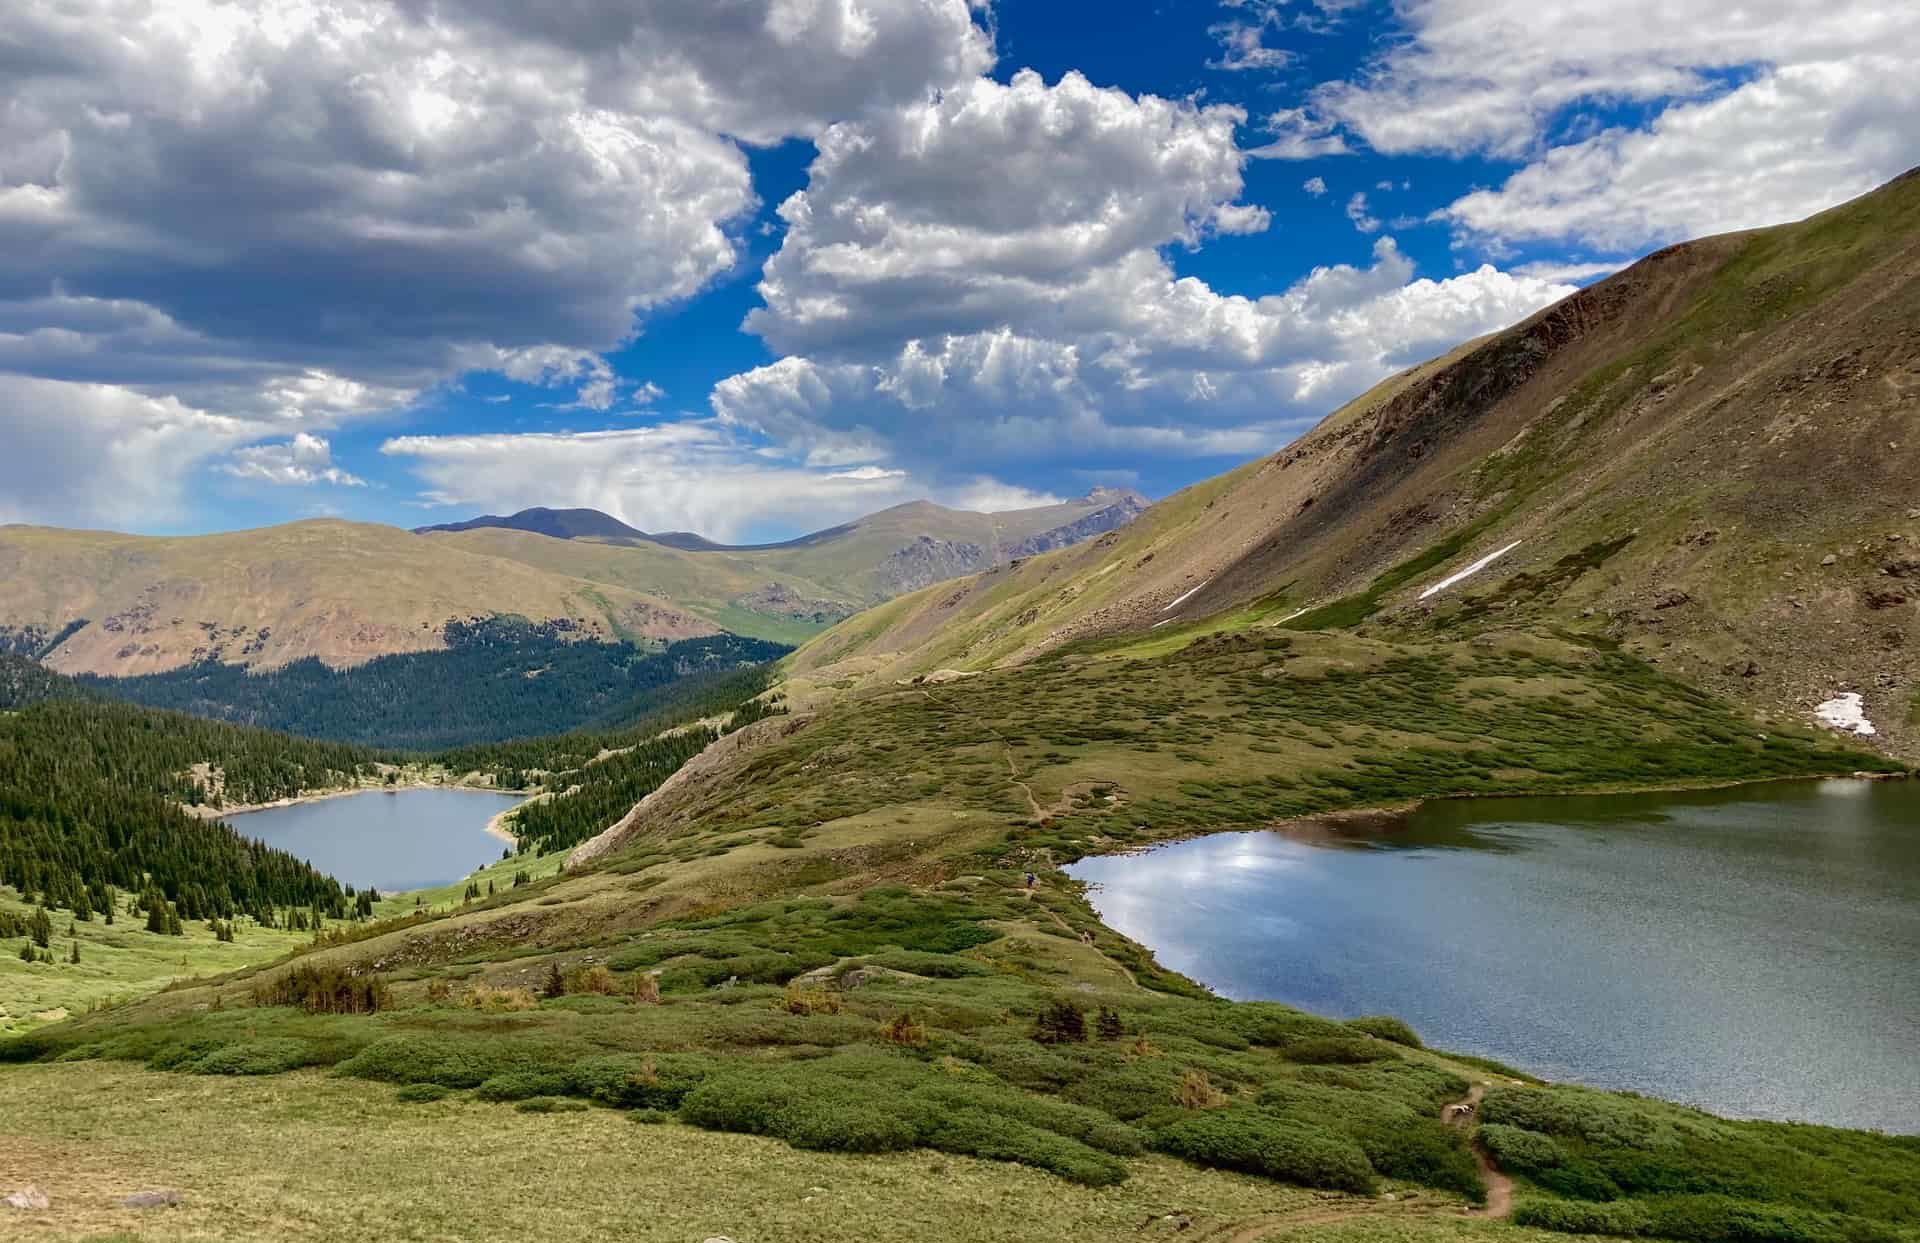
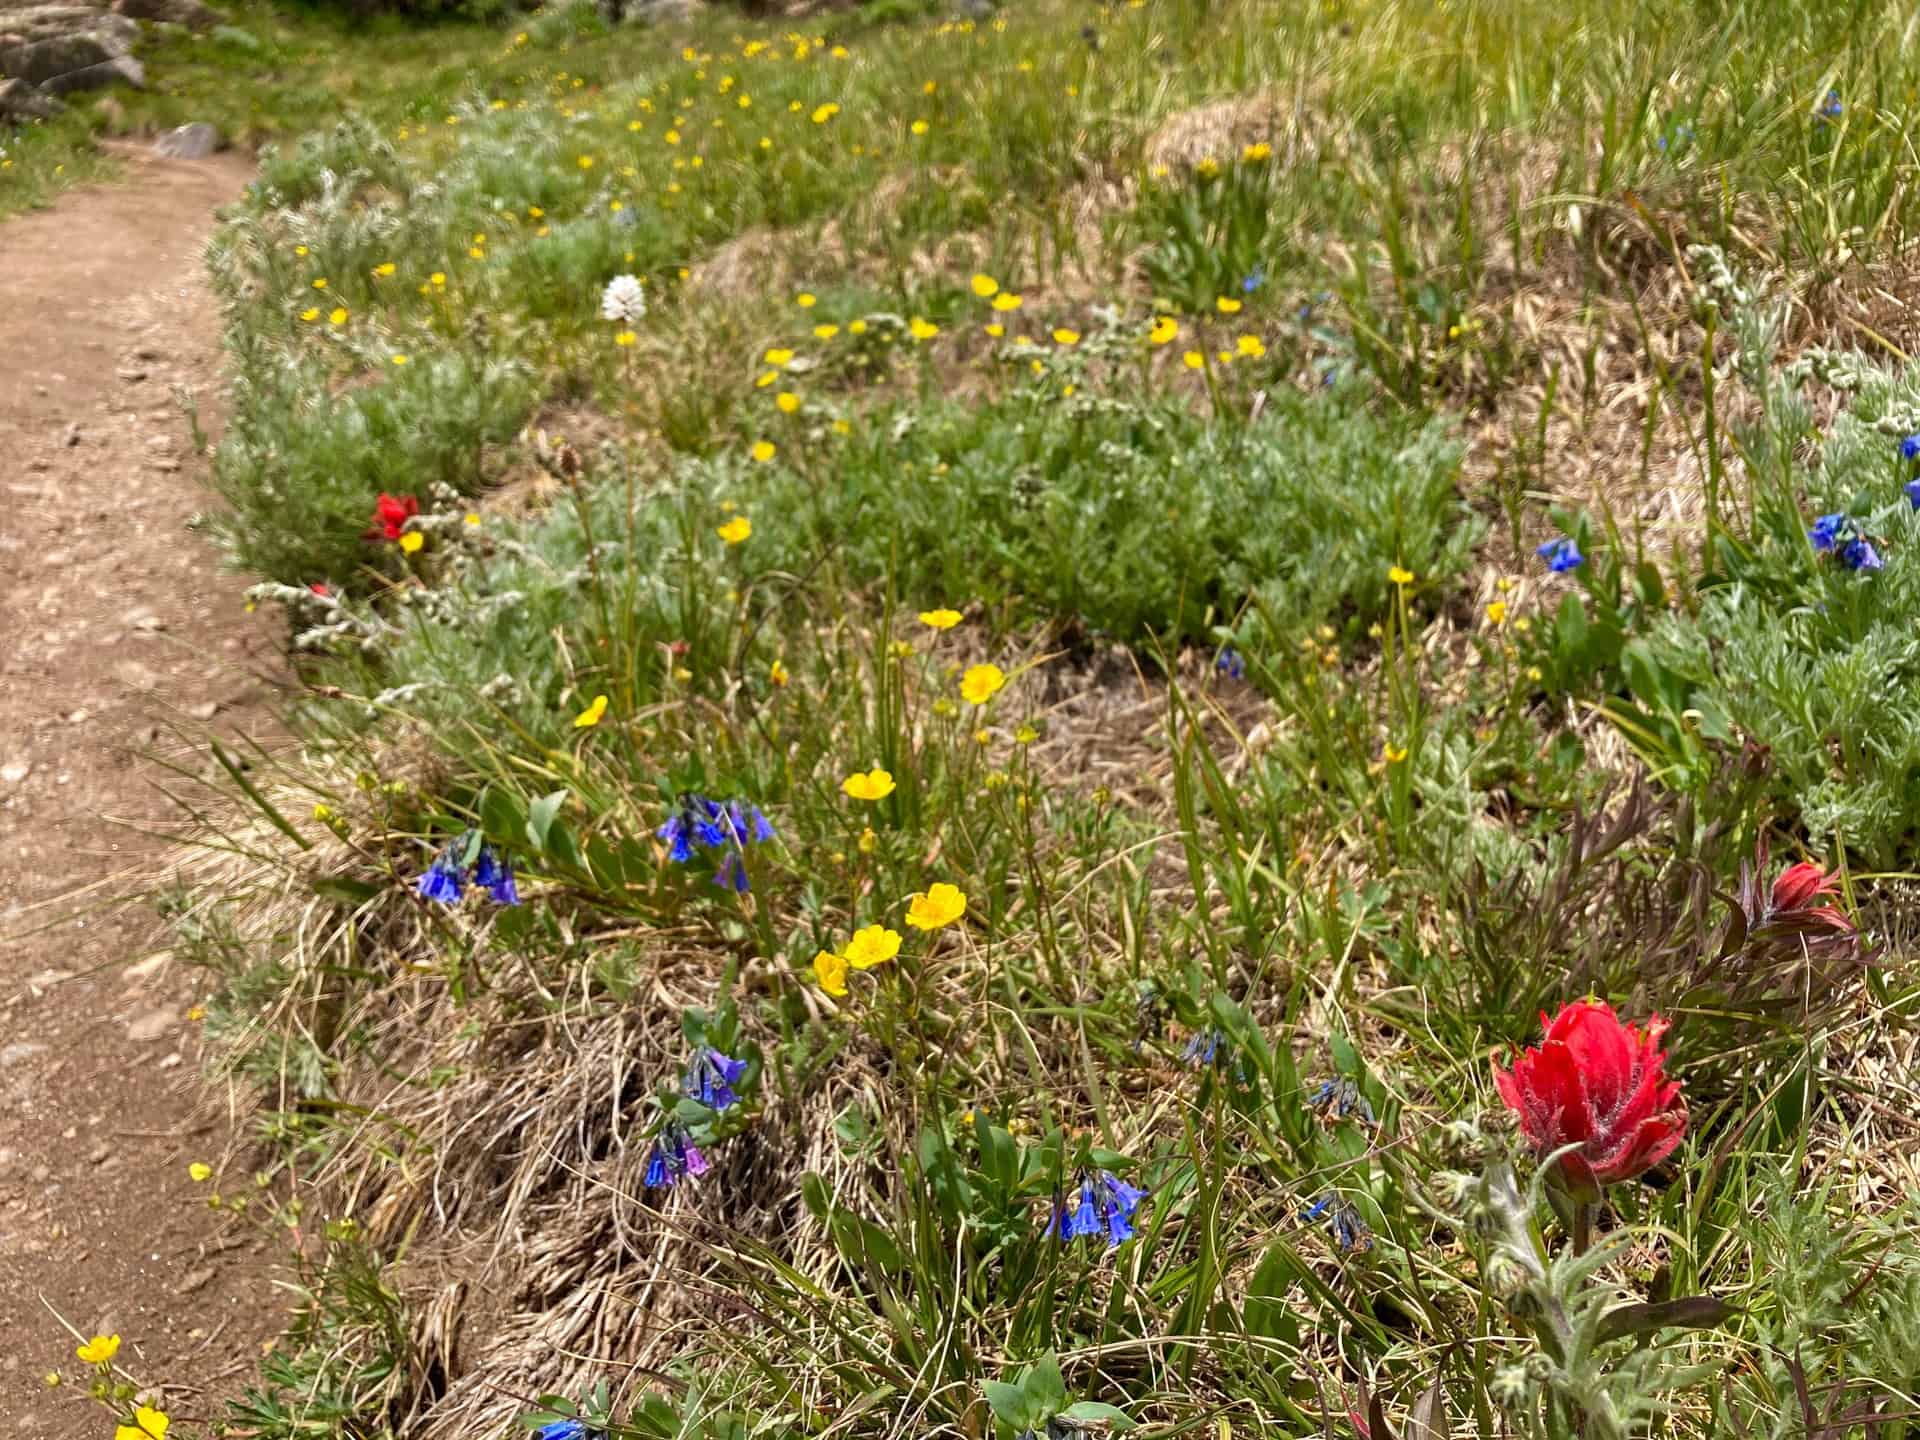
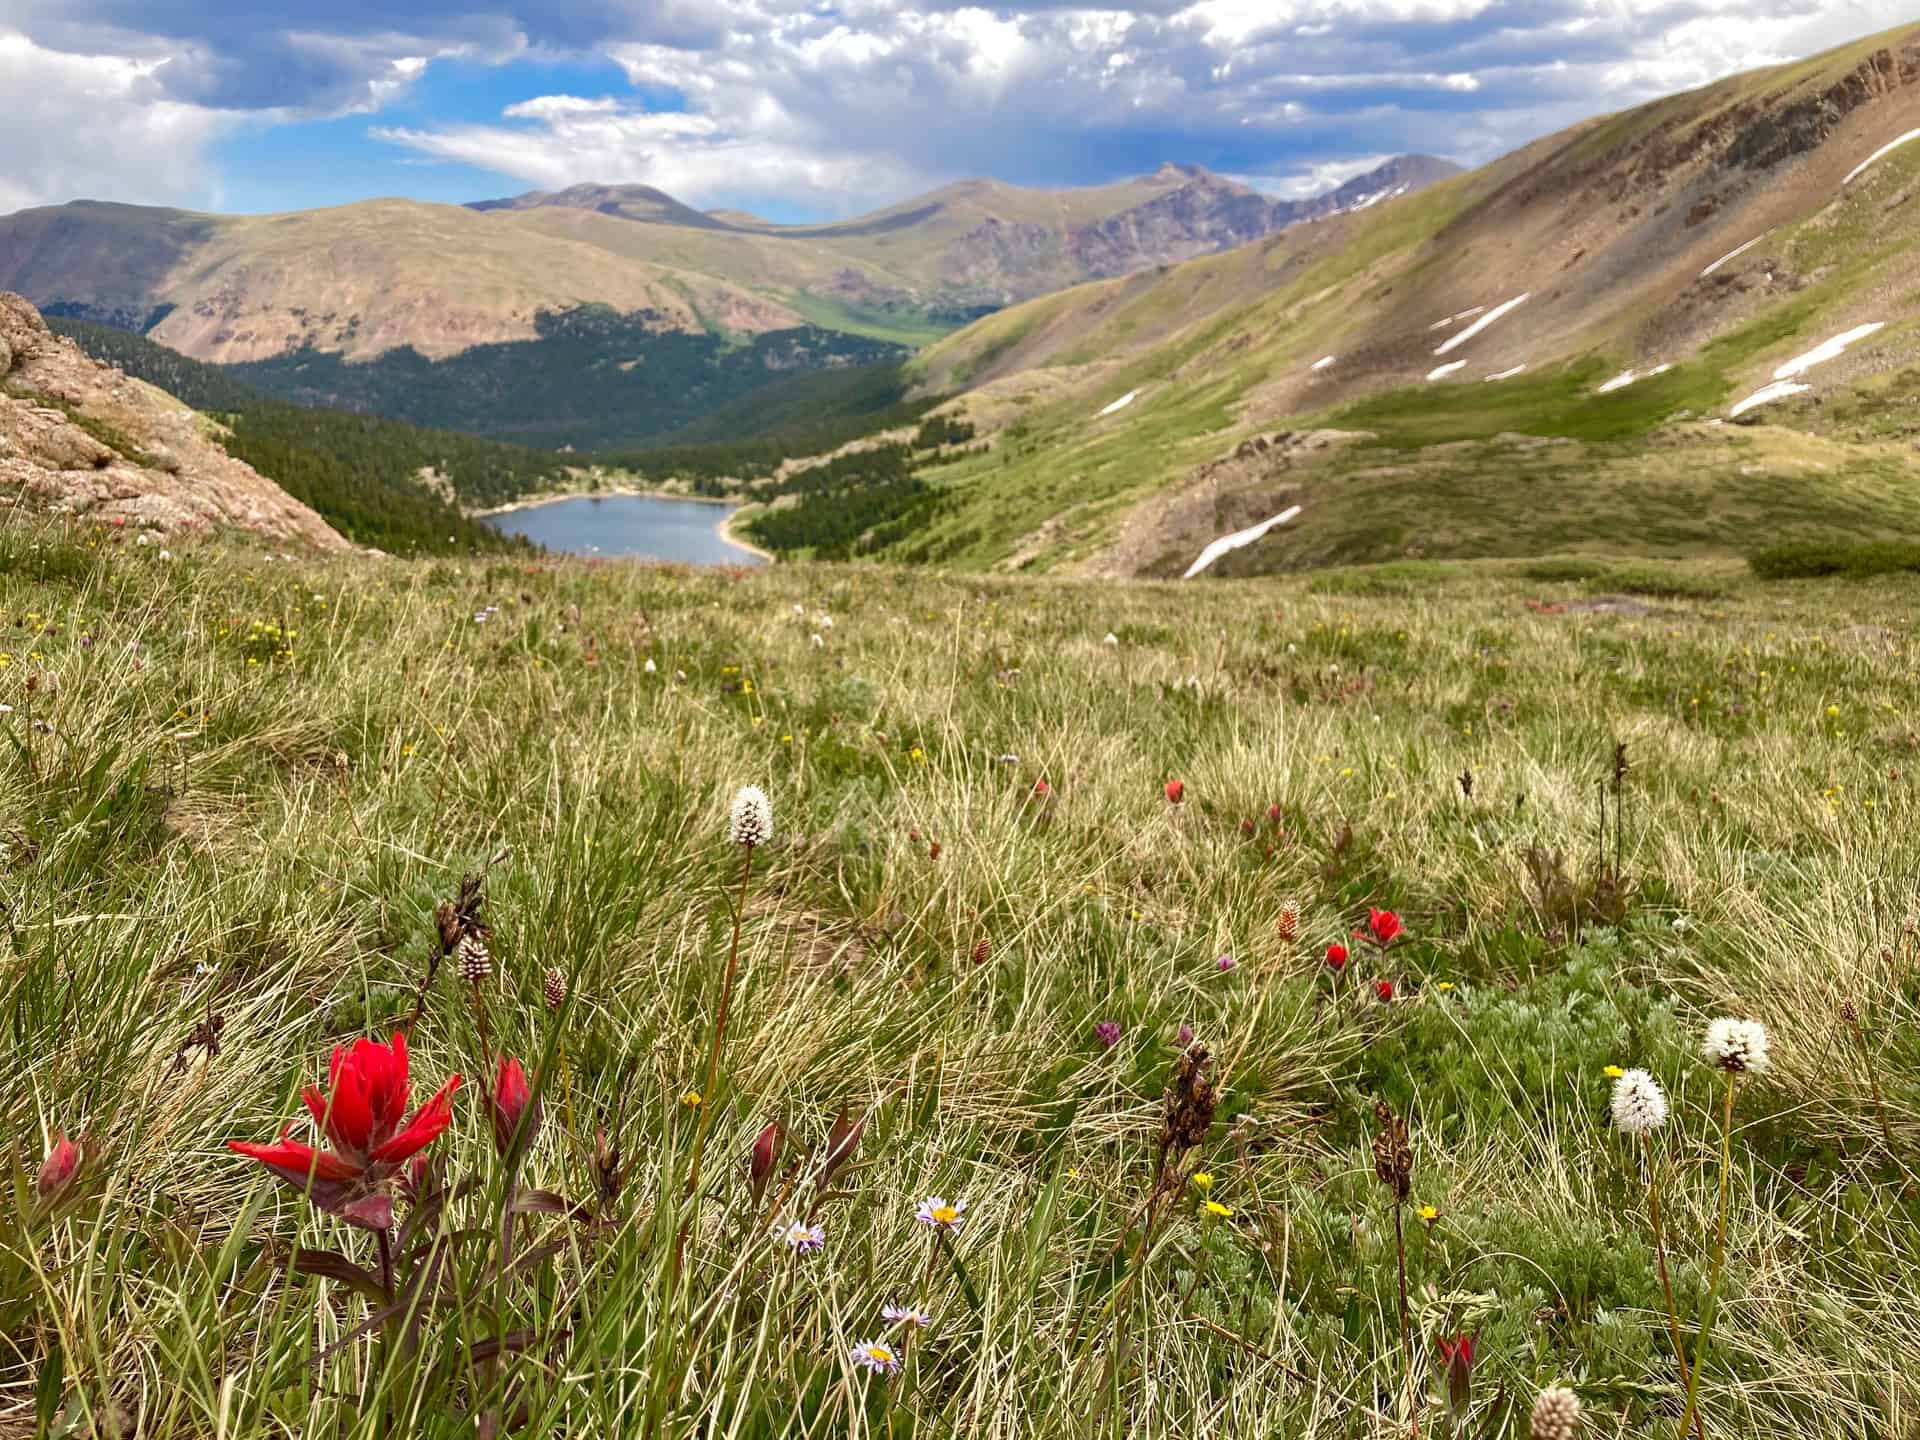
Silver Dollar Lake Trail graces hikers with not just one, but three lakes! This easy to moderate hike, approximately 3-4 miles, treks up lake by lake. Each successive one along the Silver Dollar Lake Trail perches above the previous, creating multiple platforms from which to view the valley, breathe in the beauty, and take pictures. Situated along the stunning Guanella Pass, the hike first skirts the edge of Naylor Lake, then proceeds onto the shore of Silver Dollar Lake, and finally to uppermost Murray Lake. Wildflowers punctuate the landscape all along the way as the trail exits the forest and walks the slope of the ridge through the basin.
Explore the full Silver Dollar and Murray Lakes Hike profile below for trail map, driving directions, and more tips and details to help you enjoy this adventure on Guanella Pass near Denver.
Trail Snapshot: Silver Dollar and Murray Lakes Trail
| Hike Distance | 3-4 miles Round Trip |
|---|---|
| Difficulty | Moderate |
| Duration | Approx 2-3hr |
| Trail Type | Out-and-Back |
| Starting Elevation | 11,200′ |
| Elevation Gain | Approx +1,000′ |
| Seasons | All Year |
| Dogs | Allowed On Leash |
| Hike Trail Map | Click for Trail Map of Silver Dollar and Murray Lakes Hike |
| Denver Drive Time | 1.5 hours |
| Driving Directions to Silver Dollar and Murray Lakes | Click for Google Map |
| Town Nearest Hike | Georgetown, Colorado |
| Beauty | Wildflowers, Guanella Pass, Evergreens, Lakes |
| Activities | Hiking, Fishing, Photography |
Parking & Trailhead Information for Silver Dollar and Murray Lakes Hike
From Denver, heading west on I-70, exit 228 for Georgetown, CO. Going left under the bridge, Georgetown's Visitor's Center appears immediately on the right. This is an excellent place to rest before or after a hike. Going straight through the traffic circle and turning right onto Rose Street, Guanella Pass begins at the end of the street, curving up and up! Approximately 8.5 miles up the route sits the Guanella Pass Campground on the west. Just past this the parking for Silver Dollar Lake Trail appears on the right-hand side. Parking lots on both sides of the pass accommodate the crowds; passengers vehicles should park here. Skilled drivers in high-clearance and 4WD vehicles may carefully navigate an additional 0.7 mile stretch up Naylor Lake Road to the official trailhead.
Available parking fills fast. If no spots remain, eager hikers can consider driving three miles further up the pass to the Square Top Lakes Trail, where a larger parking area may still have openings. Square Top Lakes Trail also has a restroom, whereas Silver Dollar Lake Trail does not.
Silver Dollar Lake Trail is quite popular in the summer, but remains open all year for an accessible but challenging (when the snowshoeing adventure) in the winter.
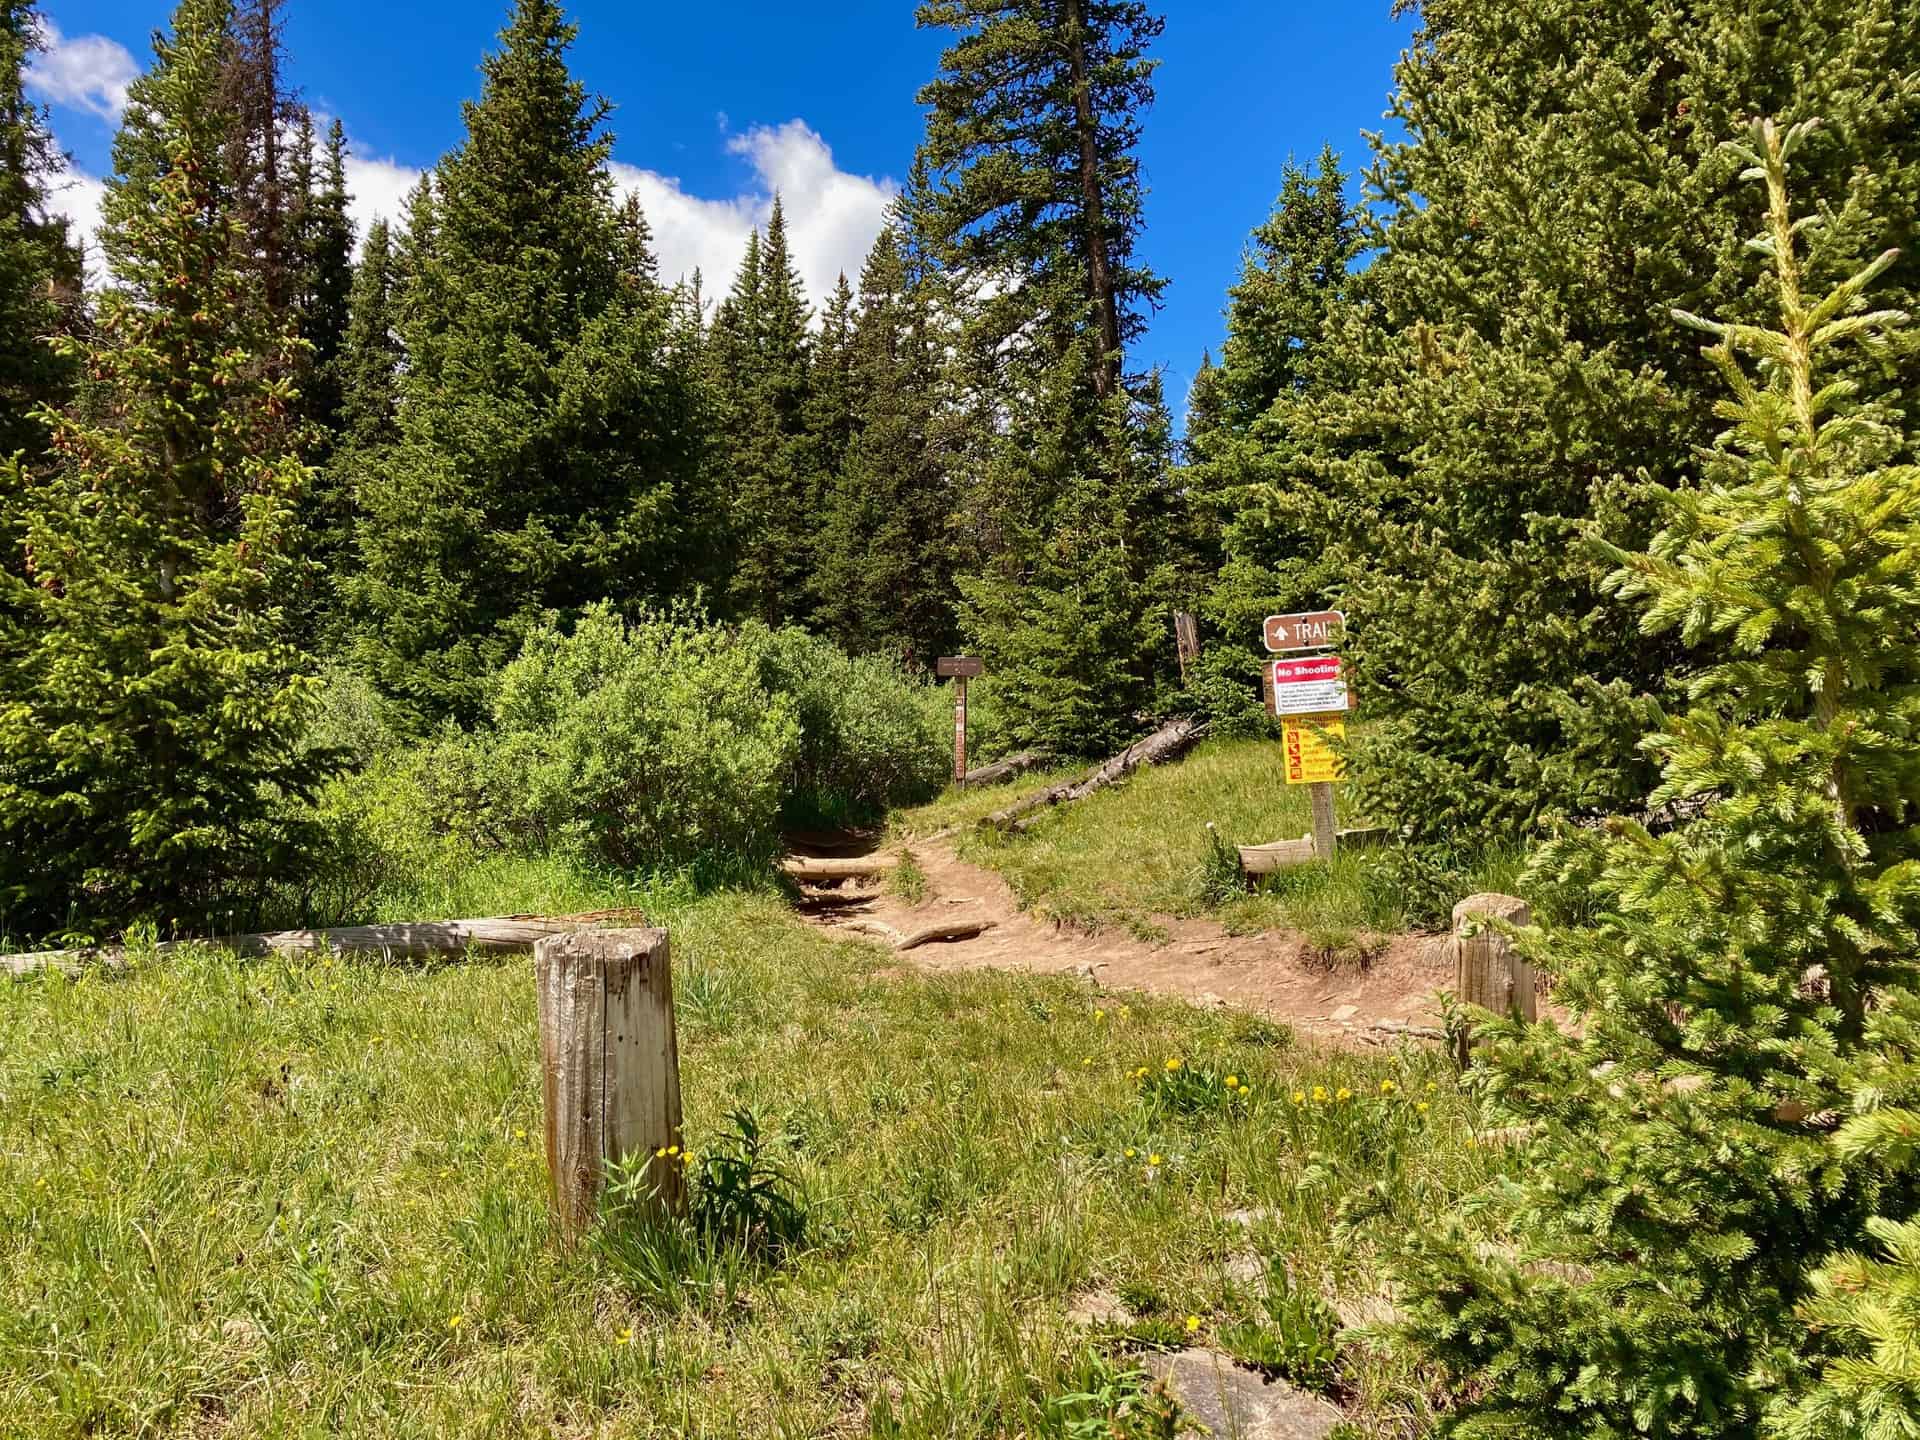
The Hike: Silver Dollar and Murray Lakes Trail
Beginning at the official trailhead, the hike moves in and out of the shade of thick forest. After a steady, strolling ascent, at the 1/2-mile mark, the trail swings left. A "TRAIL" sign directs hikers toward the ridge used to climb up the valley to Silver Dollar Lake. Near this spot, tracked on the GPS map, a short diversion provides a glimpse of Naylor Lake. Please note that private property surrounds the eastern rim of the lake at the end of Naylor Lake Road.
The trail climbs the basin ridge up and out of the forest, offering the first clear view of Naylor Lake down and to the right. Silver Dollar Lake is seated approximately one mile further up the trail, which rides the slope of the basin. Approaching the lake and then curving right, the trail crosses over the mouth of Silver Dollar Lake. Depending on water levels, this crossing can be up 10-15 feet wide. While the water is not deep, wise hikers look for dry, flat, small boulders to navigate across and avoid soggy socks! The trail ascends with moderate steepness up to Murray Lake, less than 1/2-mile away. After meandering about the top of the basin around Murray Lake, the return trail simply follows the route in reverse. As it descends, you will notice even more novel views on each lake, and benefit from the shade of the forest as it brings you back to the trailhead.
Tips & Resources for Hiking Silver Dollar and Murray Lakes Trail
- TIP: The parking situation at Silver Dollar Lake Trail often ebbs and flows since the trail does not require as much time as many others. If you get skunked on parking, consider returning in a couple hours when a wave of hikers has come and gone. Georgetown, CO, has a wonderful trail circumnavigating the local lake, as well as a Wildlife Viewing Station for sighting big horns sheep.
- Trail Map: Silver Dollar and Murray Lakes Hike
- Packing List: Always pack the 10 Essentials. Download our Hiking Guide to get the list and dayhiking packing checklist.
- Colorado Road Conditions: Colorado Road Conditions
- After the Hike: Grab some post-hike nourishment at Cabin Creek Brewing.
Weather
Map & Driving Directions
Click for Driving Directions
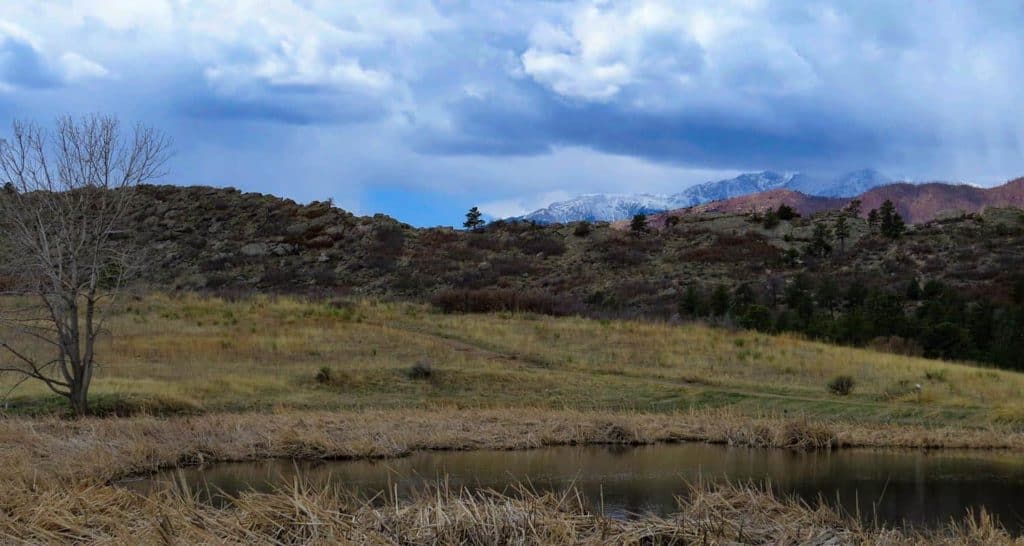
Ute Valley Park Loop in Colorado Springs
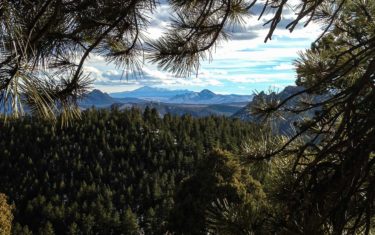
Ute Valley Park offers an easy 3-mile loop hike in the heart of northern Colorado Springs with views to snow-capped Pikes Peak. The trails make for a quick break from the city to trail run or walk the dog. Get the trail details, map, and driving directions in our full trail profile.
Trail Snapshot: Ute Valley Park
| Hike Distance | 2.5 to 3 miles Round Trip |
|---|---|
| Difficulty | Easy |
| Duration | Approx. 1.5 |
| Trail Type | Loop |
| Starting Elevation | 6550′ |
| Elevation Gain | Approx +200′ |
| Seasons | Year Round |
| Dogs | Allowed On Leash |
| Hike Trail Map | Click for a Map of Ute Valley Park Trails |
| Denver Drive Time | 1 hr 15 min |
| Driving Directions to Ute Valley Park | Click for Google Map |
| Town Nearest Hike | Colorado Springs, Colorado |
| Beauty | Views of Pikes Peak, Pope Bluffs formation, Juniper and Ponderosa Pine, Desert Wildflowers |
| Activities | Hiking and Mountain Biking |
Parking & Trailhead Information for Ute Valley Park
From Denver, take Interstate 25 South to Colorado Springs, exiting on exit 149 and taking a right onto East Woodman Road. East Woodman will turn into Rockrimmon Road. Next, take a right onto Vindicator Drive. The entrance to Ute Valley Park will be up on your left, just after you pass the Middle School. There is a portable toilet at the trailhead and parking for about 20 vehicles.
The Hike: Ute Valley Park
Ute Valley Park is nestled in the subdivisions of Colorado Springs, North of the city center providing residents with a quick escape from town for an after work trail run, mountain bike, and place to walk the dog. There are about 20 different unnamed trail segments, but for our purposes, we will look at a 3 mile loop and a shorter 2.5 mile option.
From the trailhead, take the trail that heads south out of the lot and hike west towards the bluffs. This approach will take us on a counterclockwise loop hike of the trails. Alternatively, you can hike it counterclockwise by reversing this description. Ignore the other trails at the juncture and keep and heading south, the trail will gradually rise to gain the low ridge of Popes Bluff. Along this stretch you'll soak in the sunshine and views out to Pikes Peak.
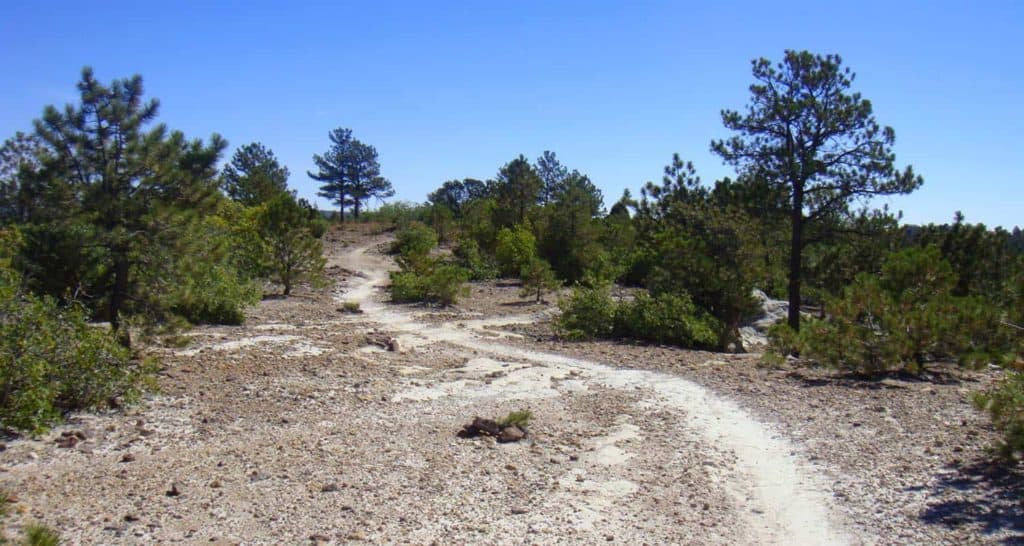
This stretch of trail is the longest and goes for about a mile to an overlook at the southwest end of Ute Valley Park. You'll pass through one trail intersection before you come to that overlook point. However, if you want to cut off 1/2 a mile and make this a 2.5 mile loop, take a left at that juncture for a more rugged trail that cuts over to the east side of the park and reconnects with this loop. Though in the city, you'll be taking in the aromatics of ponderosa pine and the same juniper trees that are found along the trails in Garden of the Gods.
Continuing with our 3-mile loop description, at the overlook, you have a couple options, but we'll go straight through on the trail that wraps around the most southern end of Ute Valley. See the Ute Valley Park Trail Map for detail.
After about 0.4 of a mile, the trail will begin turning North, traveling along the eastern edge of the park. You'll encounter about 5-6 trail junctures along this stretch. At each juncture, continue on the easternmost trail (keep bearing to the right, or hike straight through). You'll cross over a footbridge and after approximately another another 1/2 mile will be back at the parking lot.

Tips & Resources for Hiking Ute Valley Park
- TIP: Sunscreen is a must as most of the trail is exposed to the sun.
- Trail Map: Ute Valley Park Map
- Packing List: Always pack the 10 Essentials. Download our Hiking Guide to get the list and dayhiking packing checklist.
- Colorado Road Conditions: Colorado Road Conditions
- Photo: We would like to express our gratitude to Patricia Henschen , Tim Marshall , and Rob Lucas for sharing such an amazing photographs of this hike to at Ute Valley Park.
- After the Hike: Kairons Coffeehouse for Coffee and Lunch
Weather
Map & Driving Directions
Click for Driving Directions

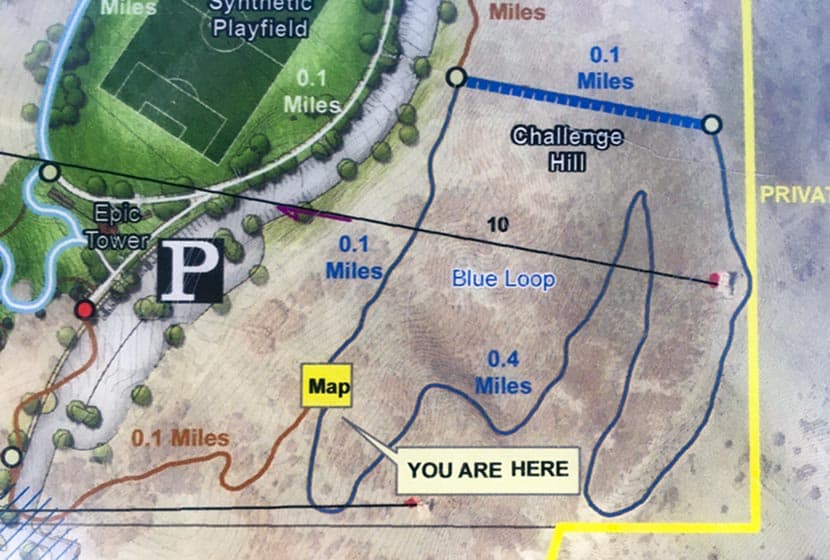
Incline at Castle Rock
The Incline at Castle Rock is a 0.6 mile loop that begins with a 200 step climb up the Challenge Hill to the top of a promontory. From the top, a trail winds down the side of the mesa for 1/2 a mile back to the bottom. It makes for a great workout in the outdoors, and is about 30 minutes south of the center of Denver. Explore the full Castle Rock Incline hike profile below for trail map, driving directions, and more tips and details to help you get active and enjoy the beauty of Colorado
Trail Snapshot: Incline at Castle Rock
| Hike Distance | 0.6 Mile |
|---|---|
| Difficulty | Moderate |
| Duration | Approx 30 min |
| Trail Type | Loop |
| Starting Elevation | Approx 6400′ |
| Elevation Gain | Approx +178′ |
| Seasons | Year Round |
| Dogs | Dogs Prohibited on Challenge Hill |
| Hike Trail Map | Click for a Map of Trails at Phillip S Miller Park |
| Denver Drive Time | 35 min |
| Driving Directions to Challenge Hill Parking Area | Click for Google Map |
| Town Nearest Hike | Castle Rock, Colorado |
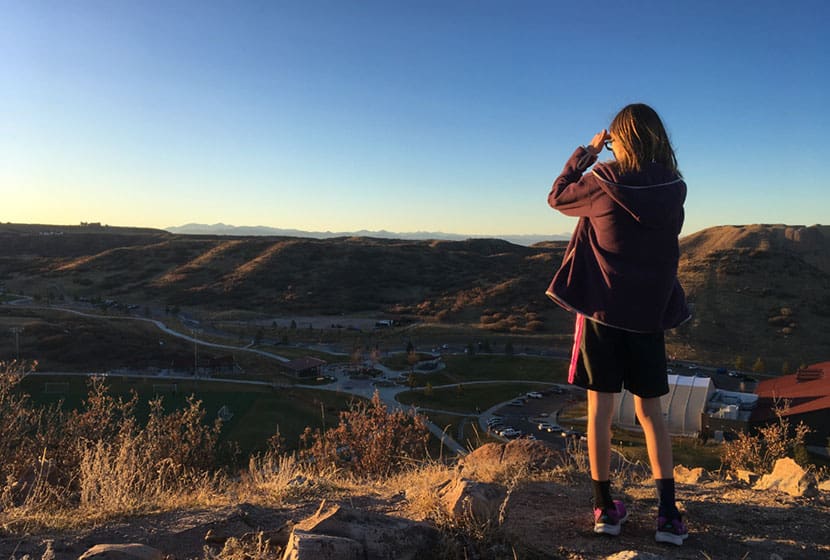
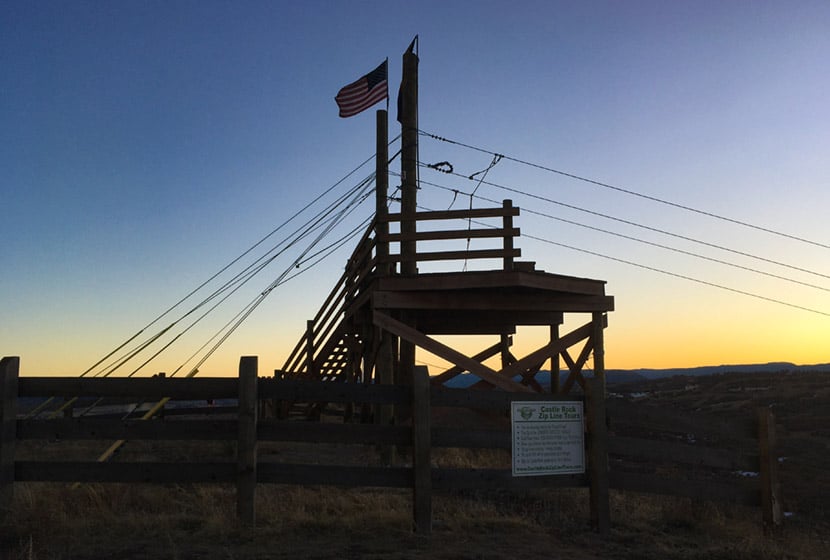
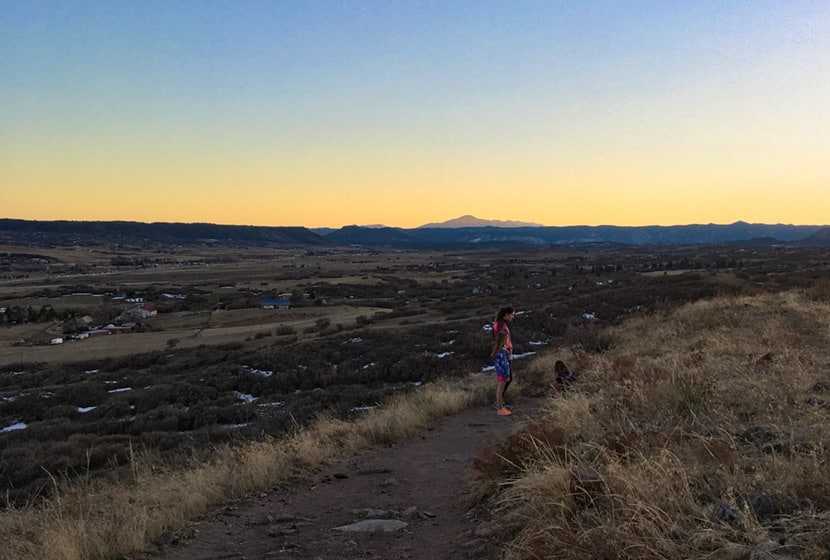
| Beauty | Views of Pikes Peak to the South and Longs Peak and the Front Range to the North, Great Sunsets, Deer in Valley below. |
| Activities | Hiking and Trail Running, nearby playground and Zipline Tours. |
Parking & Trailhead Information for Incline at Castle Rock
Take interstate 25 south from Denver to the town of Castle Rock, exiting at Wilcox/Wolfensberger exit, taking a right onto Wolfensberger. At the roundabout, go around and take the left-hand exit (3rd option on the roundabout) onto West Plum Creek Parkway. Go 0.7 mile on West Plum Creek Parkway and the Phillip S. Miller Park entrance will be on the right. After entering the park, go left to the area behind the MAC facility and the parking area for the incline will be at the base of the incline.
The Hike: Incline at Castle Rock
Officially, these 200 steps are called The Challenge Hill, but the locals call it "the incline," and rightly so, because it's inspired by the Manitou Incline near Colorado Springs. Because it's just 5 minutes down the road, we've turned this into a regular family workout. It's a perfect place to get in some exercise and take in amazing sunsets over the Colorado Front Range.

The first segment of the Castle Rock Incline is a 1/10th of a mile climb up 200 steps with close to 200' of elevation gain. This will kick your butt, especially if you take the steps back down. We prefer to run down the 1/2 mile loop trail, usually doing the loop a couple times. We've categorized this as a moderate trail because it has under 500' of total elevation gain and is only 0.6 miles, but many will find it difficult because of the grade of the ascent.
At the top of the Challenge Hill, you can take in views to the north and west of Longs Peak and Devil's Head. There's a wood bench if you want to rest or use it for stretching your legs after the climb. If you decide to descend via the steps be aware that the late afternoon sun can make it very difficult to see the steps.
A Zipline platform stands at the peak of this promontory. It's fun to watch zipliners fly through the air across the park. The Zipline tours are operated by Castle Rock Zipline Tours. But don't keep your eyes on the sky because the trail down has a lot of loose gravel and the trail demands your attention.
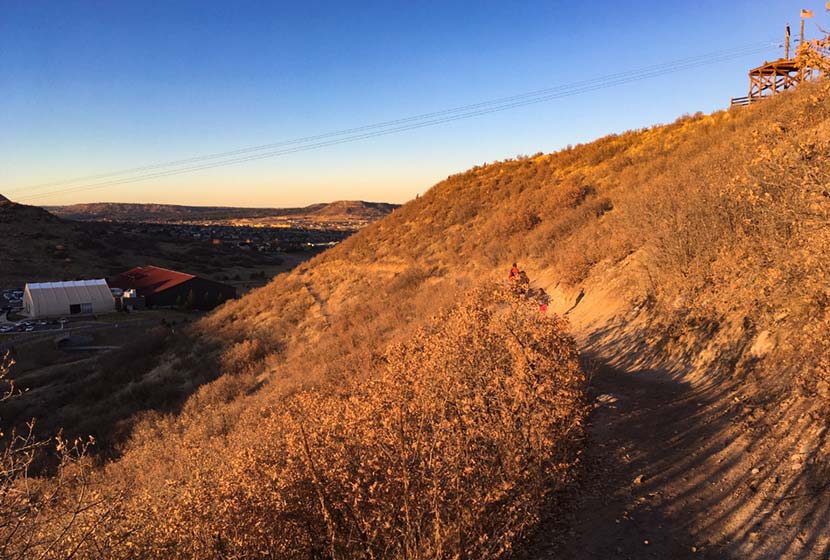
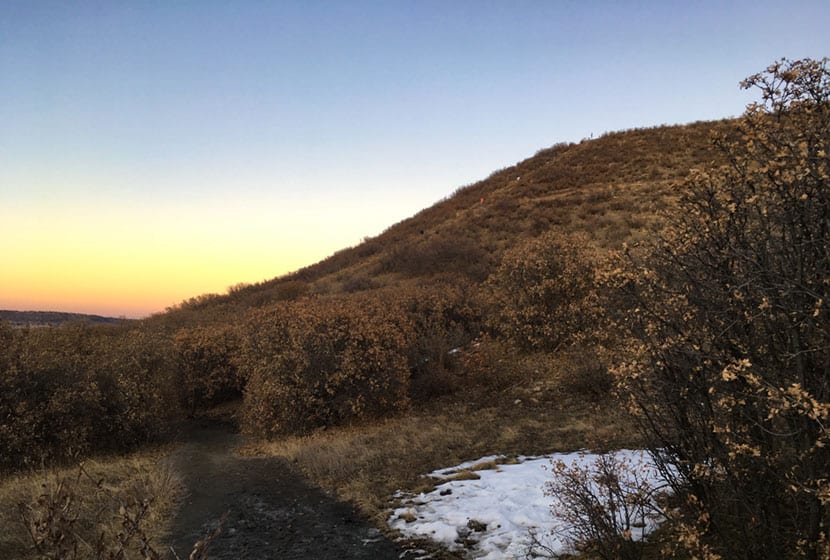
The trail wraps around the mesa back to the West facing side. Snow and ice can take a while to melt free from the trail, especially in shaded spots. You can check on the trail conditions using the Castle Rock Trail Conditions Map online.
On the back side of the hill, you'll find panoramic views of Pikes Peak and the broad rolling country to the South of Castle Rock. This segment starts out rock then gives way to a gravel trail.
Trail Etiquette at the Castle Rock Incline
- The trail is popular with trail runners, so be aware of approaching runners and keep right to allow them to pass.
- Dogs are prohibited on the challenge hill, because--well, you can imagine why.
- Keep to the right on steps and in single file, especially when others are trying to pass or are coming the opposite direction.
- Let others know when you intend to pass them.
- Descent via the steps is not discourage by the park signage because it's easier to get injured.
- Hours are Dawn to Dusk
From the photo above, you can get a feel for the scale of the Challenge Hill. Much of the lower trail is in scrub oaks, and this next part may seem a bit overly cautious, but after reading a ton mountain lions, I always keep my kids close. As a local ranger told me, "On the Front Range, where there are deer, there are mountain lions." And a kid running fast through an area like this can incite the instincts of a lion. That I know of, we've not had any attacks in this area, but this is just a protocol our family follows on any hike or run--kids and adults always stay together.

Speaking of the kids, the Phillip Miller park complex recently added (2019) a workout playground that looks like something out of Ninja Warrior competitions. After running the loop a couple times, we spend some time with the kids catching our breath and stretching at the playground.

Tips & Resources for Hiking the Incline at Castle Rock
- Check out Trail Conditions: Before going, check the trail conditions at the Challenge Hill at the Castle Rock Trail Conditions page.
- Pace Yourself: On the ascent, start with a sustainable pace. It gets way more steep and challenging at step 140.
- Trail Map: Incline at Castle Rock
- Packing List: Always pack the 10 Essentials. Download our Hiking Guide to get the list and dayhiking packing checklist.
- Colorado Road Conditions: Colorado Road Conditions
- After the Hike: Since I'm a local, I've got two absolute favorite spots for after the hike. The first is CRAVE Burgers. We love the Love Stinks Burger and the Not Yo Mamma's Burger (on the hidden menu) Crave Burgers in Castle Rock. The second is Manna, a a restaurant in the local hospital. But this is by no means hospital food! It's locally sourced food at great prices. Manna in Castle Rock
Weather
Map & Driving Directions
Click for Driving Directions
Agnes Vaille Falls Hike
Agnes Vaille falls is viewed on this 1 mile, easy, loop hike just south of Buena Vista, Colorado. Take in snow-capped Mt. Princeton and the white Chalk Cliffs of the canyon on what makes for a great family hike in the Arkansas River valley of Colorado.
Trail Snapshot: Agnes Vaille Falls
| Hike Distance | Approx. 1 mile |
|---|---|
| Difficulty | Easy to Moderate |
| Duration | Approx 1 hour |
| Trail Type | Loop |
| Starting Elevation | 9000′ |
| Elevation Gain | Approx +500′ |
| Seasons | Year Round |
| Dogs | Allowed On Leash |
| Hike Trail Map | Click for a USFS Map of Cascade Creek Loop |
| Denver Drive Time | 2hr 40min |
| Driving Directions to Agnes Vaille Falls | Click for Google Map |
| Town Nearest Hike | Buena Vista, Colorado |
| Beauty | Waterfall, Creek, Chalk Cliffs, Mountain Goats |
| Activities | Hiking, photography, USFS interpretive signs |
Parking & Trailhead Information for Agnes Vaille Falls
From Denver, take HWY 285 South for 124 Miles to Nathrop, Colorado. Take Chalk Creek Drive/CO-162 West for 8.7 miles into Chalk Creek Canyon. On this 8.7 mile segment, you'll Pass the Mt. Princeton Hot Springs Resort, then the Mt. Princeton USFS Campground. Just after the campground, the Cascade Creek Trailhead will be on the right, directly across from the Chalk Lake Campground. This whole segment of road, going up to St. Elmo has several camping options. Parking is limited at the Cascade Creek trailhead to about 12 vehicles. It's easy to miss the trailhead, so be sure to slow down and keep an eye out after you pass the Mt. Princeton Campground. The trail starts at the "Agnes Vaille" sign.
The Hike: Agnes Vaille Falls
The trail to Agnes Vaille Falls used to be a 1.2 mile out-and-back trip. Now, the upper segment is closed, so hikers are directed to take the approximately 1-mile loop hike on the Cascade Creek trail that still offers a view of the waterfall. Why did the upper trail to Agnes Vaille close? Sadly, in 2013, while on a family hike, a rockslide broke loose, tumbled down the canyon below the falls and killed 5 members of the hiking party. Plans are underway to rebuild the out-and-back trail, but no dates are posted for when it will be reopened. Follow the USFS regulations in this area as posted on the signage. The closed area of the trail may still be unstable and should not be hiked.
The Cascade Creek Loop creek still makes for a great family hike and offers views to the waterfall, and Mt. Princeton. The Chalk Cliffs surround the loop and look like something out of a storybook. In the fall, the aspen trees and cottonwoods glow with golden hues along the top bend of the loop. Mountain goats and bighorn sheep can be spotted along the rock above the trail.
Be sure to stop and read the USFS interpretive signs describing the history of the area, and the historical figures of of Agnes Vaille and Chief Antero for whom the waterfall and nearby 14er mountain, Mt. Antero, are named.
Tips & Resources for Hiking Agnes Vaille Falls
- Waterfall Peak: The best time of year to see Agnes Vaille falls will be in the early summer months of May and June, when the snowmelt is at it's highest volume. Some years, if we have a heavy snowpack or late snows, flows can still be high into July.
- Unstable Rock: While the areas is repaired and trail rerouted, this entire area is known for its unstable rock. Just a good look at the chalk cliffs gives you an idea of the geologic variety and instability of the area. Large boulders can shift and rocks accidentally knocked loose can injure hikers below. So, stay the trail, be alert, and follow the USFS regulations.
- Hike, Camp, and Soak: Because there is camping nearby, more hiking, and amazing hot springs, make a weekend visit fo the area to take in the sights and relax. Drive up further on Cascade Creek road to take in Alpine Lake and the Colorado ghost town of St. Elmo.
- Trail Map: Agnes Vaille Falls
- Packing List: Always pack the 10 Essentials. Download our Hiking Guide to get the list and dayhiking packing checklist.
- Colorado Road Conditions: Colorado Road Conditions
- Photo: We would like to express our gratitude to Brad Patterson for sharing such an amazing photograph of this hike at Agnes Vaille Falls.
- After the Hike: Soak at Mt. Princeton Hot Springs Resort

Weather
Map & Driving Directions
Click for Driving Directions
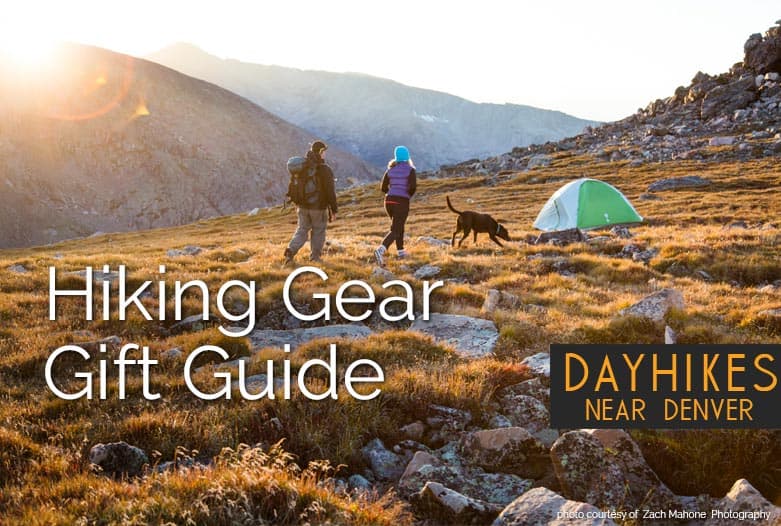
Hiking Gear Gift Guide
If you are looking for Christmas gifts for the the hiker, backpacker, and camper in your life, here’s a great place to start. We’ve read through reviews, checked some sales, and found 45 of our favorite gifts in several different price ranges, starting at $15.
Gifts under $15
Smartwool PhD Lightweight Hiking Socks & Heathered Hiker Socks
PhD Regular Price: $20.95
PhD Sale Price: $13.73 until 11.20.17 or when they run outstool


Heathered Hiker Regular Price: $22.95
Heathered Hiker Price: $15.73 until 11.20.17 or when they run out
Two classic hiking socks made by smartwool and both on sale until 11.20.17
[unordered_list style="tick"]
- Both great for dayhiking
- They are Smartwool! Need we say more?
What Reviewers Think:
- “These are my go-to socks for trail running” (PhD)
- Great cushioning! (both socks)
- “The most comfortable socks I’ve ever owned (PhD)
Snow Peak Titanium Spork
[unordered_list style="tick"]
- Combo lightweight titanium spoon and fork, so no need to carry two utensils
- No metallic taste and will not rust
What Reviewer’s Think:
- Durable, lightweight, and extremely easy to clean
- Some find it to be a little short
REI Co-op Nalgene Bottle - 32 fl. Oz.

[unordered_list style="tick"]
- The classic water bottle everyone needs
- Doesn’t Leak
- Dishwasher safe and BPA-free
- Great for both warm and cold beverages
What Reviewers Think:
- Easy to clean
- Holds up to all kinds of wear and tear
- Doesn't taste like you are drinking from plastic
- Lasts forever!
CamelBak Insulated Water Bottle - 21 fl. Oz.
Regular Price: $13
Sale Price: $5.73 until 11.20.17
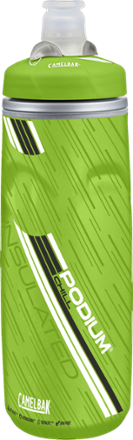
[unordered_list style="tick"]
- The classic waterbottle everyone needs
- Doesn’t Leak
- Dishwasher safe and BPA-free
- Greate for both warm and cold beverages
- Double-wall insulation = keeps cold stuff cold and hot stuff hot
- No plasticy taste; free of BPA, BPS and BPF
- Not leaky, easy to squeeze for best flow.
- Easy to fill and clean
What Reviewers Think:
- No leaks, no drips and easy to clean
Ruffwear Quencher Collapsible Dog Bowl
Regular Price: $14.95
[unordered_list style="tick"]

- Folds up so you can jam it into your pack
- You can throw it in the washing machine to get it clean
What Reviewers Think:
- Lightweight, compact, portable, durable
- Collapses well and doesn't leak
- If you have a high-energy dog, they can bump the bowl easily and cause it to collapse
Schrade First Responder Clip Knife
Regular Price: $14.95
[unordered_list style="tick"]

- Blade Length 3.25 inches
- Material: Aluminum
- Closed Length 4.94 inches
What Reviewers Think:
- Lightweight, compact, portable, durable
- Collapses well and doesn't leak
- If you have a high-energy dog, they can bump the bowl easily and cause it to collapse
- Great knife to keep in the car or a backpack
- Has seatbelt cutter and glass breaker
- Rubberized handle has a great look and feel
Gifts $16 to $50
LifeStraw Water Filter
Regular Price: $19.95
[unordered_list style="tick"]

- No more pumping your water out of the creek. Use the LifeStraw to sip water straight from a stream or lake.
- 2 oz. so this thing adds almost nothing to your pack
- Good for up to 264 gallons of filtering
- Includes a removable lanyard, because you want to hike around with this cool plastic necklace
What Reviewers Think:
- Isn't hard to drink out of once the flow gets going
- Very compact and lightweight
- You can drink directly from the water source
- There were some complaints that didn’t work the first or second time
Petzl Tikkina Headlamp
Regular Price: $19.95
[unordered_list style="tick"]

- This is one of your 10 essentials and from a reliable company that has been making headlamps for years!
- I’ve had the previous version of this for years and love it!
- Great for having around the house when the lights go out or you’re working on the car
- 3 brightness levels
- 5 year Petzl guarantee
What Reviewers Think:
- Bright light with 3 level settings
- Lightweight, small and comfortable to wear
- Easy to control the light strength with a touch
YETI Rambler Lowball Vacuum Tumbler - 10 fl. Oz.
Regular Price: $20
[unordered_list style="tick"]

- I’ve had the larger version of this for a few years and it’s amazing how long it keeps my coffee piping hot.
- Double-wall vacuum insulation
- No Sweat™ design won't leave a ring on your coffee table
- No metallic taste
What Reviewers Think:
- Retains the heat and the lid is great for 'spill-proof' protection
REI Co-op Trail Stool
Regular Price: $22.50
[unordered_list style="tick"]

- Light enough you can pack it in for short hikes
- Capacity: 200 lbs
- Weight: 1lb 2oz
- Size: 15 x 13 x 13 inches
What Reviewers Think:
- Sturdy and stable
- Small and light, can be attached easily to the outside of a pack
- Few complained of its “limited life” (but maybe they were throwing it around--those legs are aluminum you know!)
Smartwool The Lid Hat
Regular Price: $30
Sale Price: $20.99 until 11.20.17

I picked up this hat at REI back in March of 2017 for hiking a stretch of the Appalachian Trail in southern Tennessee. Since the, it’s become by go-to winter hat. It’s kept its tight fit despite me sleeping in it and it taking a lot of wear from being in the top of my pack. It was difficult droppign $30 on a hat, but I can say wholeheartedly that it was worth it.
[unordered_list style="tick"]
- 50% Merino Wool = Warm
- 50% Acrylic = Snug fit
- Great Colors: Charcoal Grey and Steel Blue
What Reviewers Think:
- Can wear it all day indoors and outdoors
- A bit itchy on forehead area
- Great in low temps with high winds
Adventure Medical Kits Mountain Series Hiker Medical Kit
Regular Price: $25
[unordered_list style="tick"]

- Great for dayhikes and up to a 2-day adventure
- Injury-specific organization
- See-through pockets
- 14 precut, shaped moleskin pieces for blister
- Wilderness medicine guide
- One of the 10 Essentials for every dayhiker
What Reviewers Think:
YETI Rambler Mug - 14 fl. Oz.

YETI does it again, adding another level of cool (and hot) to this mug-style rambler. This might just become your go-to camp cup.
[unordered_list style="tick"]
- Double-wall vacuum-insulation maintains even temperature to your beverage.
- Stainless steel + DuraCoat® finish means this thing can take a beating
- It’s got a handle; what more can we say?
- Dishwasher safe
What Reviewers Think:
- The mug's rugged construction and sheer usefulness make it perfect for camping, fishing, or just chillin' at home
- Welded handle is a good size and features rounded-off edges
- Built pretty tough, but not immune to scratches
Therm-a-Rest Compressible Pillow
Regular Price: $19.95 - $34.95

I wish I had this pillow on my last multi-day backpacking trip.
[unordered_list style="tick"]
- Great on the plane, in the car, and in the tent.
- Smushes down to a 1/5th of its full size
- 4 Sizes available
- Machine washable
What Reviewers Think:
- Very soft, squishy, and comfortable
- Outer material is also soft and comfortable against your face
- Lightweight and compresses well
- Can take a very long time to air dry if it gets wet while camping
YETI Rambler Vacuum Bottle - 18 fl oz

The YETI Rambler is probably in my Top 5 of favorite gear that I’ve acquired in the last couple years. I use it every morning to prepare and shake up my bulletproof coffee. It keeps my coffee piping hot on the mornings that I leave it in my cold truck while I work out at the gym. It takes a beating, and you can put a bunch of cool stickers on it.
[unordered_list style="tick"]
- Comes in a bunch of colors
- 18 fl oz, 3 x 9.25 inches
- Stainless Steel
What Reviewers Think:
- “My full time car water/coffee bottle.”
- Ice lasted for 4 days!
Coal Yukon Brim Beanie

I’ll admit that I don’t yet own any Coal products. Everyone who does seems to have a much higher cool-factor though. They make some of the best trucker hats out there. This thing combines the coal cool-factor with cable-knit and a brim. What more could you want?!
[unordered_list style="tick"]
- Interior fleece headband
- Wool knit keeps you warm without being itchy or uncomfortable
What Reviewers Think:
- Holds up well and stays warm even through significant freezing rain
- The inner lining can cause the beanie to shift on your head
Petzl Actik Headlamp

Ready to upgrade your headlamp? The Petzl Actik is our recommendation.
[unordered_list style="tick"]
- 300 lumens!!!
- Several light modes with wide and mixed beam.
- Great for reading at night
- That cool red light function for hiking at night
- Comes with batteries (it’s always nice when they do that)
- 5 year Petzl guarantee
What Reviewers Think:
- Very bright and you can really see when it is dark
- Button can be a bit hard to press when you are wearing gloves, but it prevents it from accidentally getting turned on when in your pack
SOG PowerAccess Multitool
Regular Price: $49.95
[unordered_list style="tick"]

- Closed Length: 4.1 inches
- Stainless Steel
- Patented Gear-drive pliers
- Weight 5.9 oz.
- 18 different components
What Reviewers Think:
- The pliers are strong!
- They love the magnetic hex bit holder feature
- The smaller size makes this really useful and portable
Gifts $51 to $100
Osprey Jet 18 Pack - Kids'
Regular Price: $60
[unordered_list style="tick"]

- Made for kids to be comfortable
- Mesh waistbelt and external pocket
- Side compression straps
What Reviewers Think:
- Built-in whistle, comfortable, easy to load, good suspension, highly adjustable, large capacity, lightweight, Osprey Pack Guarantee
Patagonia Belgrano Pants
Regular Price: $99
Sale Price: $68.73 until 11.20.17
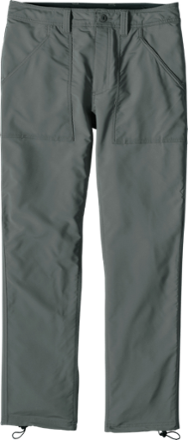
My 10yr old hiking pants are getting pretty worn and these look like a great option. Plus, they are Patagonia!
[unordered_list style="tick"]
- Water repellent and dries quickly
- Gusseted crotch allows full range of motion for scrambling
- Solid stitching
- Rear pocket has a secure zip closure and key loop
- Looks like a 2017 closeout, so check several sites for best price
What Reviewers Think:
- One reviewer noted that pine sap washed right off his pair of Belgranos
BearVault BV500 Food Container

I’ve owned this product from BearVault since 2004 and love it. It’s a must-have if you plan to do any overnights in Rocky Mountain National Park, as bear canisters are now required in the RMNP backcountry. There are two things I love about this thing: 1) no more trying to hang bear bags, and 2) it doubles as a great camp stool.
[unordered_list style="tick"]
- The obvious: Bears aint eatin’ your food
- Translucent: You can see your food and get to it easily
- It’s Legit: BearVault model has approval from both the Sierra Interagency Black Bear Group and Interagency Grizzly Bear Committee
What Reviewers Think:
- Clear, you can see what is inside
- Can be hard to twist open if you don’t have strong arms and a strong grip (I put a bit of coconut oil on the threads to help this).
Nikon Aculon W10 10 x 21 Waterproof Binoculars
Regular Price: $88
[unordered_list style="tick"]

- 7.6 oz
- 3.4 x 4.3 inches
- Of course, you don’t want to drop these, but they are rubber coated and waterproof down to 3.5 ft.
- I want these for Christmas :)
What Reviewers Think:
- Fits nicely in a pants cargo pocket
REI Co-op Traverse Trekking Poles
Regular Price: $99.95
Sale Price: $74.89 until 11.20.17

I’m always on a personal mission to find a solid pair of trekking poles under $90. Look no further! Well, they are under $90 when REI has them on sale like this, and they are a tested product.
[unordered_list style="tick"]
- Aluminum with cork grips
- 1lb 4oz (pretty light even compared with top-of-the-line poles
- External lever lock: this is my preferred mechanism for trekking poles. I’ve had 3 pairs of different poles and it’s way more reliable.
What Reviewers Think:
- The lever lock can have a slipping issue. The solution is easy, just tighten it up with a screwdriver.
Patagonia Better Sweater Quarter-Zip Pullover - Men's
Regular Price: $99
Sale Price: $68.99
[unordered_list style="tick"]

- Sweater-knit exterior and warm fleece interior
- The cuffs are awesome
- It’s got that cool vertical zipping pocket
What Reviewers Think:
- Warm and comfortable
- Stylish, can be worn anywhere
- Sizing maybe a little smaller
- Tight around the neck when fully zipped
Patagonia Better Sweater Quarter-Zip Pullover - Women’s
Regular Price: $99
Sale Price: $68.99
[unordered_list style="tick"]

- Sweater-knit exterior and warm fleece interior
- The cuffs are awesome
- It’s got that cool vertical zipping pocket
What Reviewers Think:
- These run small so you might want to read through reviews to get a feel for sizing, or go into an REI store to try them on
REI Co-op Down Vest - Men’s

[unordered_list style="tick"]
- 650 Down Fill
- Water-Repellent
- My wife got me last year’s version of this and I love it. It keeps my core warm whether I’m on a hike or just driving in to work on a cold day
What Reviewers Think:
- With a flannel or sweatshirt, it’s comfortable down to 35-40 degrees
- Great on the bike ride to work in 40 degree weather
REI Co-op Down Vest - Women’s
Regular Price: $79.50
[unordered_list style="tick"]

- 650 Down Fill
- Water-Repellant
- Perfectly packable
What Reviewers Think:
- “It's fitted and doesn't make me feel like the Michelin man.”
- Lightweight and not too puffy
North Face Tech Glacier Pullover - Women’s
Regular Price: $55
[unordered_list style="tick"]

- Quick-dry Fleece
- 200 Weight for active pursuits
What Reviewers Think:
- Keeps you warm without overheating
- “Air-dry and it will last forever”
- Extremely versatile
Gifts over $100
MSR Talus TR-3 Trekking Poles
Regular Price: $159.95
Sale Price: $119.73 until 11.20.17
[unordered_list style="tick"]

- Aluminum
- 1lb 6oz
What Reviewers Think:
- Locking mechanism can be a bit clumsy but is great once you get used to it
- Worked well for tent supports
Jetboil MiniMo Cooking System
Regular Price: $134.95 - $139.95
[unordered_list style="tick"]

- Simmers great with a newly designed valve control
- A must-have for any backpacker
- Features revolutionary new valve technology and a new cooking-cup size
- Rubber handle makes it easy to go from cooking to eating
- Push-button piezo igniter
- Average boil time is 4min 30sec
- Weight 14 oz
- Capacity 1 liter (it’s the compact version)
What Reviewers Think:
- Safest stove for beginners and younger users
- Boils water faster than advertised
- Compact and light
- Super quick, super easy, extremely efficient
- Very secure feeling of handles
MSR WhisperLite Universal Backpacking Stove
Regular Price: $139.95
Sale Price: $103.99 until 11.20.17
[unordered_list style="tick"]

- This comes recommended by our friend Kristen over at Bearfoottheory.com
- You can use white gas with the MSR pump bottle or an isobutane canister
- I’ve personally used the older whisperlite for about 20 years and it’s been a reliable stove. Now that it’s universal, makes it that much better.
- If you are planning to hike out of the country, this is the one you want because it runs on a variety of approved fuels.
- Boils 1 liter of water in only 3 min. 30 sec.
- Great simmering when using isobutane
- Also includes a fuel pump, windscreen, heat reflector, small-parts kit, instructions and storage sack
What Reviewers Think:
- Great pot support for large pots
- Grooved stamped stainless steel legs
- Ability to use Isobutane
- Really fast boil times
- Ability to adjust the flame and control the fuel consumption, plus the ability to use mixed fuel canisters or white fuel
- Be aware that the burner blades have sharp enough edges though that can cut into a tent or through something else inside the pack or the pack itself. Duct Tape can fix that :)
REI Co-op Ruckpack 40 Pack - Men's
Regular Price: $139
[unordered_list style="tick"]

- Great daypack for hiking or traveling
- Carry-on Sized (but check with airline first)
- Laptop compartment (just in case you can get wireless out in the backcountry)
- Great ventilation along back
- 2 exterior pockets (a priority for any daypack)
- 2 waterbottle pockets
- Trekking-pole attachments tuck out of the way when not in use
What Reviewers Think:
- Built-in rain cover that is stored in the bottom of the pack
- Comfortable and transports heavy loads well
- Plenty of pockets and compartments for electronics, clothes, etc.
REI Co-op Ruckpack 40 Pack - Women's
Regular Price: $139
[unordered_list style="tick"]

- This comes recommended by our friend Kristen over at Bearfoottheory.com and that girl knows her gear!
- It’s basically the same pack as the men’s version above, except it’s customized to be a better fit for women
Patagonia Nano Puff Jacket - Men’s
Regular Price: $199.00
Sale Price: $138.99 until 11.20.17

[unordered_list style="tick"]
- 60g Primaloft
- Water-repellent; 98% of its insulating ability even when wet
What Reviewers Think:
- “Perfect for 25-50 degree weather”
- Because it’s fitted, it can be a bit snug around the waist, depending on your build
- Great alternative to a “puffy”
REI Co-op Magma 850 Down Jacket - Women’s
Regular Price: $189.00
Sale Price: $129.99 until 11.20.17

[unordered_list style="tick"]
- 850 Fill Goose Down
- Rip-stop shell material
- Elastic cuffs
- Form-fitted
What Reviewers Think:
- Perfect for mild winter days
- Silky soft
- “I also like the subtle drawstrings on the inside which can be tensioned to seal out errant drafts”
The North Face Shellista II Mid Winter Boots - Women's

[unordered_list style="tick"]
- Another solid recommendation from our friend Kristen over at Bearfoottheory.com (I’m a guy, so I’m going to let the ladies make the women’s book recommendations).
- Warm and waterproof nubuck leather
- Stylish mid-calf lace-ups
- Durable Winter Grip rubber outsoles with IcePick temperature-sensitive lugs
What Reviewers Think:
- Comfortable, Durable, stylish, Well made
- Toes can get cold in the rubber front
- Difficult Entry/Exit
- Not recommended for snowshoeing
Keen Targhee II - Our Go-To Hiking Boot
Regular Price: $134.95 Men’s
Regular Price: $134.95 - Women’s

The Keen Targhee has been around for years and from talking with boot sales at REI and reading reviews, this may be the best boot out there for day hikes and shorter overnight trips.
[unordered_list style="tick"]
- Incredible Keen grip soles
- Waterproof and Breathable
- They tend to run ½ size small, so order up ½ size
- Short break-in time when compared with other boots
What Reviewers Think:
- Great for beginner hikers
- “If I could marry these hiking boots, I would!”
Patagonia Storm Racer Rain Jacket - Men's

Now we are getting into performance gear! This is Patagonia’s go-to waterproof jacket for hiking, running, and biking.
[unordered_list style="tick"]
- Super lightweight nylon ripstop shell has a comfortable inside
- Chest pocket turns into stuff sack
- Hood store away in back and is easily adjusted
- Reflective logos on left chest and center back at neck
What Reviewers Think:
- Light, soft to the touch
- Waterproof and breathable
- Can also be worn against bare skin without feeling like wrapped in cellophane (that’s rare for a rain jacket!)
Outdoor Research Alpine Bivy
Regular Price: $245.00
[unordered_list style="tick"]

- I’ve owned an older version of this Bivy for years and it’s been worth every penny. Spring through Fall, I usually take this instead of a tent.
- Sleeping pad attachment system keeps you from rolling onto the cold ground
- I get claustrophobic in small spaces, so the zipper system is really helpful in this regard
- This thing now has ethically sourced down in it!
What Reviewers Think:
- Keep the flap open a bit to let moisture escape
- There is enough room to read a book in here!
REI Co-op Alpen Pod 17 Sleeping Bag - Mens
Regular Price: $159 to $169
[unordered_list style="tick"]

- Rated to 17 degrees lower limit and 28 degrees comfort limit
- 550 Down/Synthetic Blend
- Short, Regular, and Long sizes
- 3lb 1oz to 3lb 7oz
What Reviewers Think:
- “It isn't as claustrophobic as my other sleeping bags”
- Was comfortable at 20 degrees overnight
- Worked great on cold nights during a 2-week backpacking trip

REI Co-op Joule 21 Sleeping Bag - Women's
Regular Price: $299 to $319
[unordered_list style="tick"]
- REI Staff Pick
- Rated to 9 degrees lower limit and 21 degrees comfort limit
- 700-fill down
- Regular, Long, and Wide sizes available
- 2lb 5oz to 2lb 10oz
What Reviewers Think:
- Zipper pull is amazing, making it easy to get in and out
- Didn’t feel claustrophobic
- Not waterproof but insanely water-repellent!
Osprey Aether 70 Pack - Men’s
Regular Price: $290
Sale Price: $216.73 until 11.20.17
[unordered_list style="tick"]
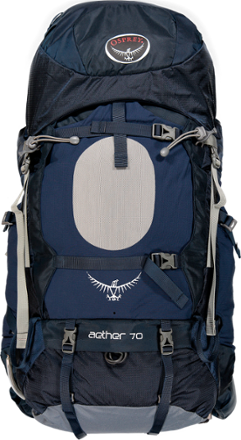
- Great for multi-day, extended backpacking trips
- Custom hip-belt molding is available at most REI stores
- Great stability and weight transfer features
- Top lid can be removed and converted into a lumbar pack; great for summits and short side-trail adventures
- Trekking pole attachment, side gear straps, ice axe tool loops, cord loop attachment slots and removable sleeping pad straps accommodate a variety of alpine gear
- Hydration-compatible with reservoir sleeve and dual drink tube exit ports)
What Reviewers Think:
- Good padding and lots of ways to adjust the straps
- Historically, Osprey packs are better for those with normal or small torsos
- Comfortable all day long and can carry a decent load
Osprey Ariel 75 Pack - Women’s
Regular Price: $310
Sale Price: $231.73 until 11.20.17
[unordered_list style="tick"]
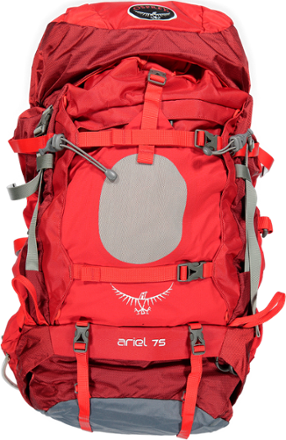
- Women’s version of the Aether (above)
What Reviewers Think:
- Sizing runs a bit large
- Great mold and body fit
- Stretchy side pockets are a bit too deep for water bottles
- Great for first-time backpacker
Kelty TrailLogic TN2 Tent
[unordered_list style="tick"]
- REI’s Highest Reviewed Backpacking Tent
- 2 person
- 3 Season
- 4lbs 13oz
What Reviewers Think:

- Easy to set up
- The aluminum poles are way more durable than fiberglass ones
- “I feel the extra weight is justified with the comfort, durability, ease of pitch, and design features this tent packs.”
REI Co-op Quarter Dome 2 Tent
Regular Price: $349.00
[unordered_list style="tick"]

- REI Staff Pick
- 21.5 sqft vestibule area
- 2 person
- 3 Season
- 3lbs 5oz
What Reviewers Think:
- View the online setup video on REI.com before setting it up for the first time
- Performed well in a torrential downpour
- Roomy, even for a 6’ 2” guy
* All product links in this guide are affiliate links. That means that I get a % commission for every sale (at no additional cost to you). It’s a great way to support our family business. All links are to REI, a company that we are glad to support. I’ve been a REI co-op member for close to 20 years! Prices are subject to change. All product photos courtesy of REI.com
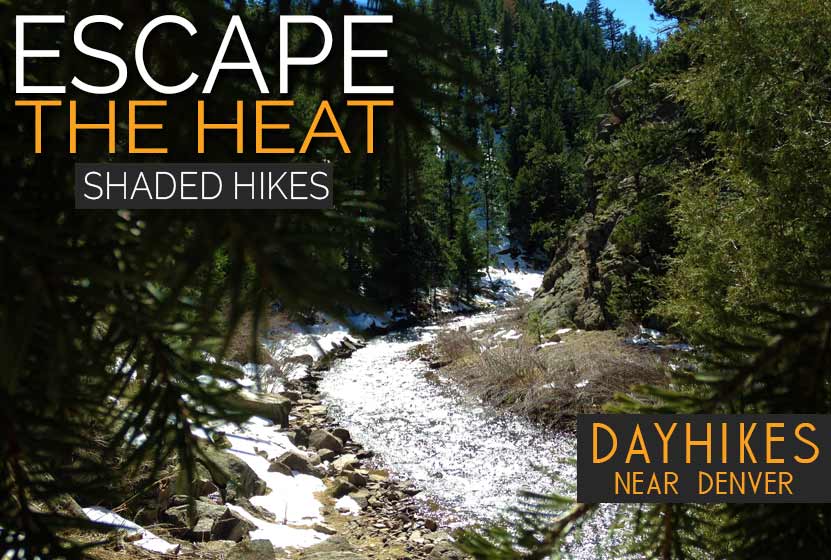
Hikes With Shade Near Denver
Most hikes near Denver are very exposed to the sun. In fact, less than 10% of the hikes on our site offer any real significant escape from the sun. This leaves you with just a couple options: 1) Hike early in the morning to escape the heat, or 2) Try out out some of the hikes from this list below.
All of these hikes offer a considerable amount of shade, but none of them keep you entirely out of the sun. So be sure to still wear your sunscreen! All of these shady hikes are within 90 minutes of Denver. Explore the individual trail profiles to get a sense of difficulty level and distance. We'll keep adding to this set as we find more hikes near Denver that offer a significant amount of shade.

Bear Creek Trail at Lair o’ the Bear Park
Brainard Lake CMC Cabin Hike
Buffalo Creek Falls at Wellington Lake
Calypso Cascades in Rocky Mountain National Park
Clear Creek Trail in Downtown Golden

Copeland Falls in Rocky Mountain National Park

Devils Thumb Lake
Eagles View Hike in Reynolds Park
Eldorado Cascades at Walker Ranch
Fallen Timbers Loop Hike at Fox Run Park

Fern Falls in Rocky Mountain National Park