Bear Peak Near Boulder
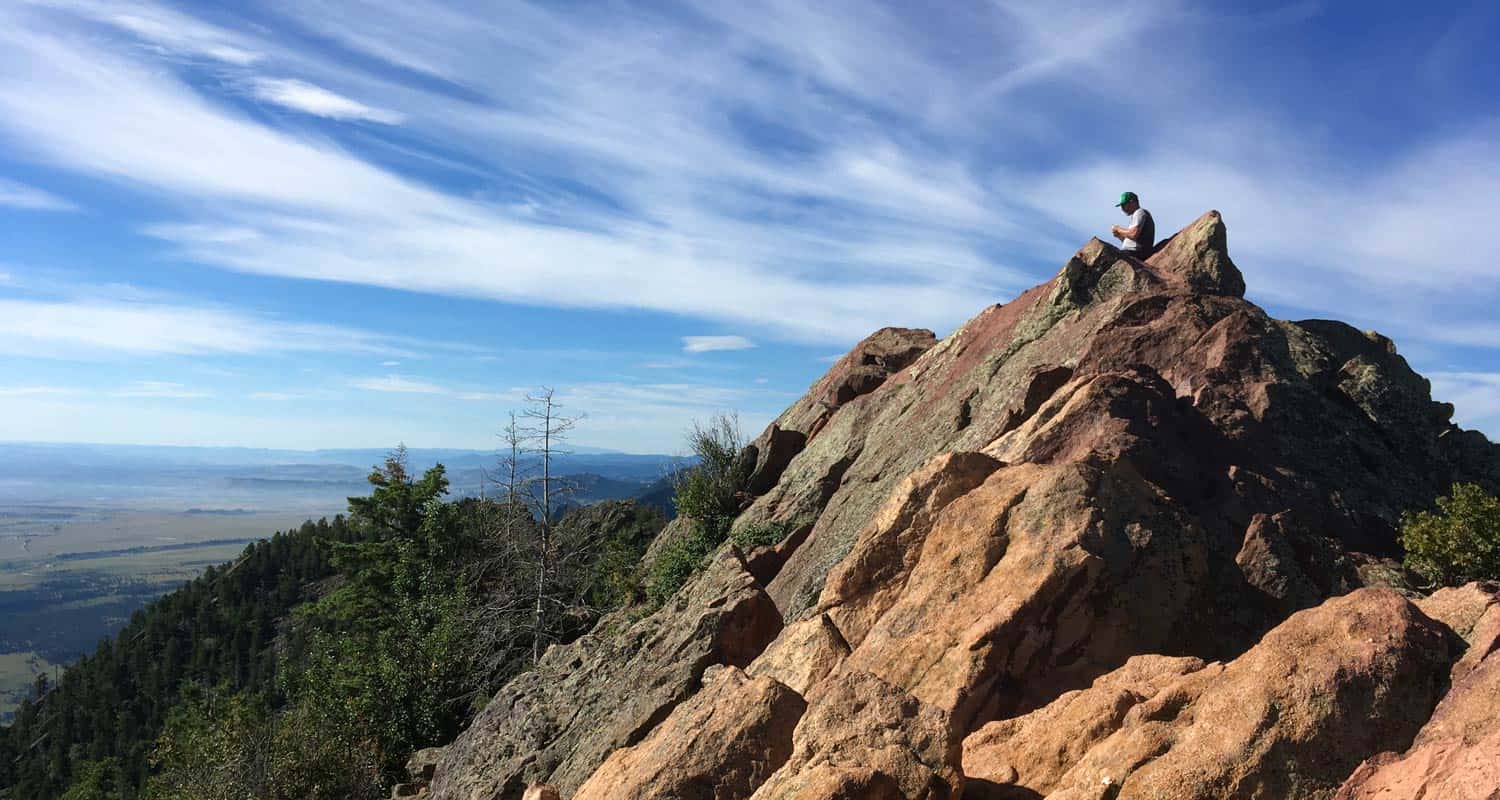
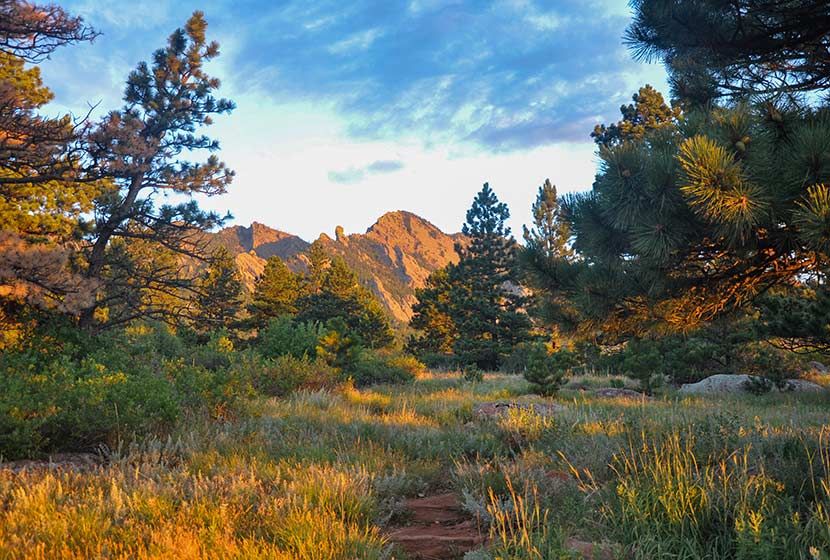
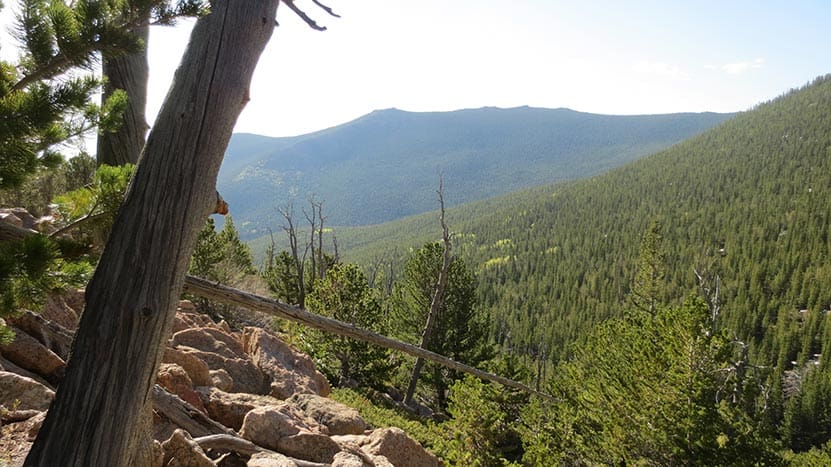
Bear Peak is a demanding 7.4-mile hike (round trip) through the broad meadows of South Mesa, up through the rocky trail of shadow canyon, to the granite summit with sweeping 360 degree views of the Colorado Front Range. Hikers can summit South Boulder Peak on your way and make a loop hike out of your adventure by returning via Fern Canyon. Explore the full Bear Peak hike profile below for the trail map, driving directions, and more tips and details to help you enjoy this adventure near Boulder, Colorado.
Bear Peak Trail Snapshot
| Hike Distance | 7.4 Miles Round Trip or 8.4 Mile Loop |
|---|---|
| Difficulty | Difficult |
| Duration | Approx 3-5 hrs |
| Trail Type | Out and Back and Loop Option |
| Starting Elevation | 5650′ |
| Elevation Gain | Approx +2800′ Bear Peak 8461' |
| Seasons | Year Round |
| Dogs | Allowed On Leash |
| Hike Trail Map | Click for a Map Bear Peak and South Mesa Trailhead |
| Denver Drive Time | 45 Minutes |
| Driving Directions to Bear Peak from South Mesa Trailhead | Click for Google Map |
| Town Nearest Hike | Boulder, Colorado |
| Beauty | Peak Top Views, Canyon, Wildflowers, Sunrise, Meadows, Wildlife: Deer, Bear, Birding. |
| Activities | Hiking, Trail Running, Photography |
Parking & Trailhead Information for Bear Peak
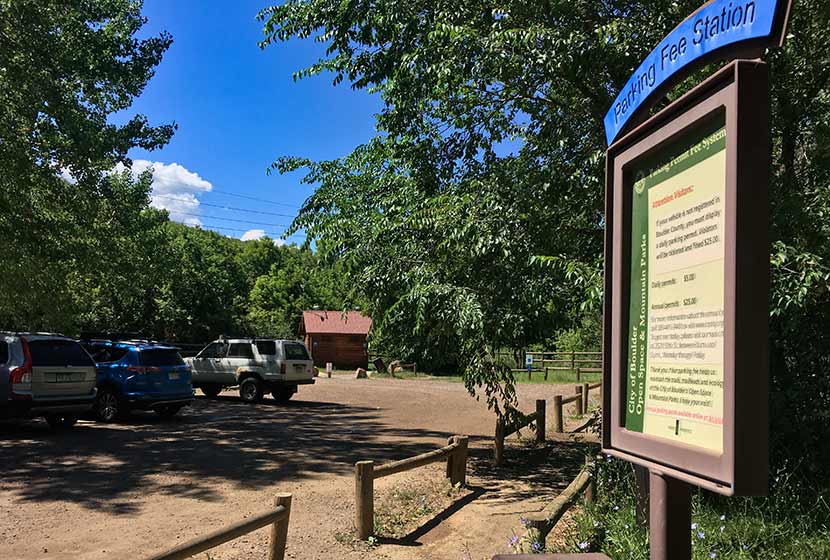
Access to Bear Peak is from the South Mesa Trailhead off of Eldorado Springs Drive just South of Boulder. From Denver, drive North on interstate 25 to 36 toward Boulder. Take the McCaslin Blvd exit and then go South/West onto McCaslin. At the intersection of McCaslin and Marshall, take a right onto Marshall Road. Marshall will intersect with Eldorado Springs Drive. Here, take a left onto Eldorado Springs Drive. About two miles down the road, you'll find the South Mesa Trailhead on your right. The South Mesa Trailhead is a part of the Boulder County Open Space and requires a daily parking fee, or an annual pass. I went online and bought an annual parking pass through the Open Space website. This gives you access to all the southern fee parking areas as well as the parking areas on Flagstaff Mountain. There are restrooms at the trailhead.
The Hike: Bear Peak
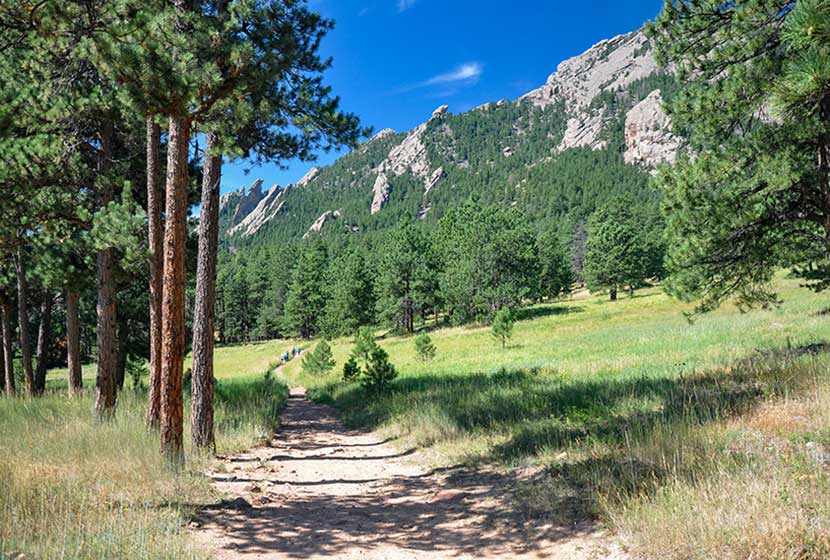
From the South Mesa Trailhead, the trail leads across a small bridge spanning over Boulder Creek. Willow trees arch over the stream making it worth a short pause to take in the sounds of water before you set off across the meadows of South Mesa. There are many trail options, but the most direct is to take the Homestead Trail, which heads West across a gentle grade toward Shadow Canyon.
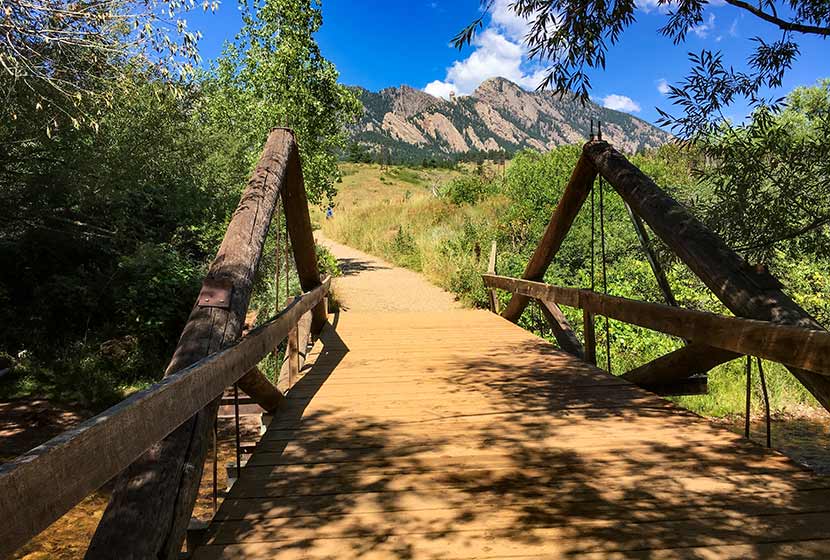
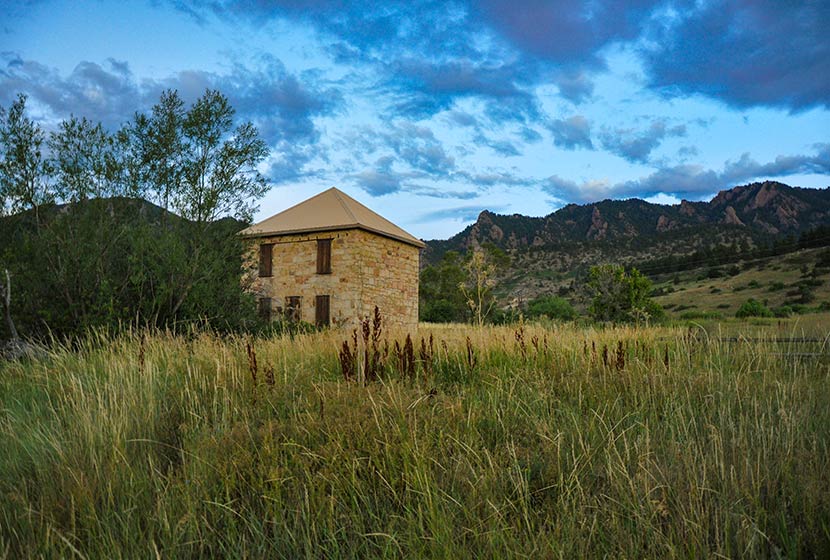
This first mile or so of the hike is easy and offers stunning views of the Flatirons and views of the entrance of Eldorado Canyon. An old stone building, part of an early homestead is the first marker you'll pass early in the hike.
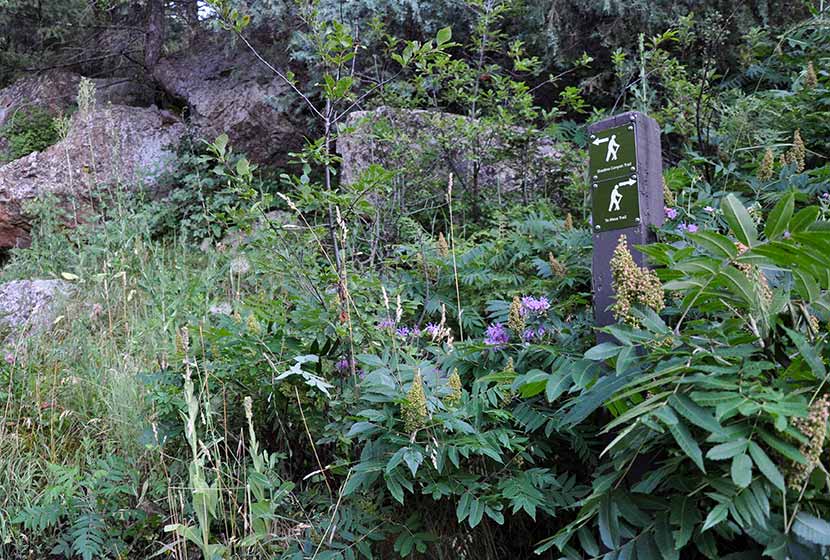
After about 1.3 miles, the trail will split. Take the left (West) trail, which leads to the South Shadow Canyon Trail. After about a 1/2 mile, you'll encounter a 2nd trail split. The Shadow Canyon Trail will again bear to the left and begin heading up steeper terrain.
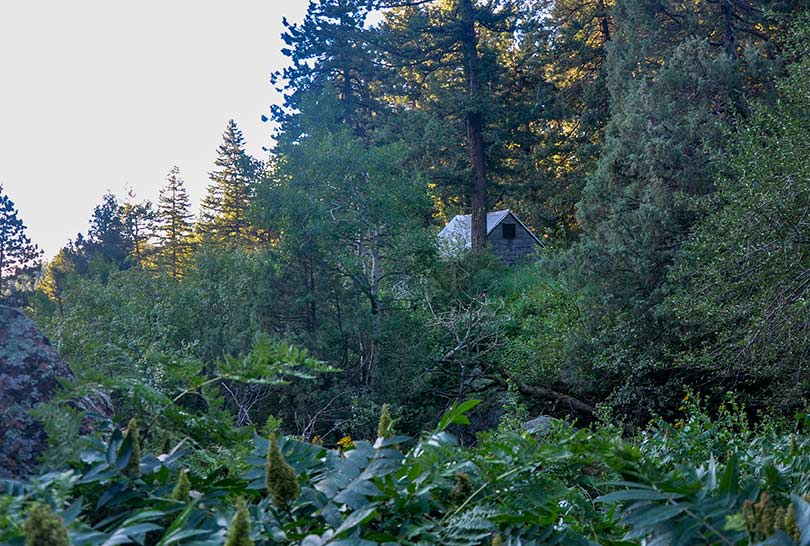
As the trail ascends, you soon leave the meadow and enter into more dense ponderosa pine forest. The vegetation in the understory grows tall and green at the entrance to the canyon. You'll see another cabin with a metal roof (pictured below). Soon past the cabin will be another important trail juncture. Again, the trail up Shadow Canyon will bear left (West).

Once in Shadow Canyon, the trail now becomes much more steep and requires navigating over rock and tree roots. This segment of the trail traveling up through the canyon is over a mile, so be ready for a steady and demanding climb.
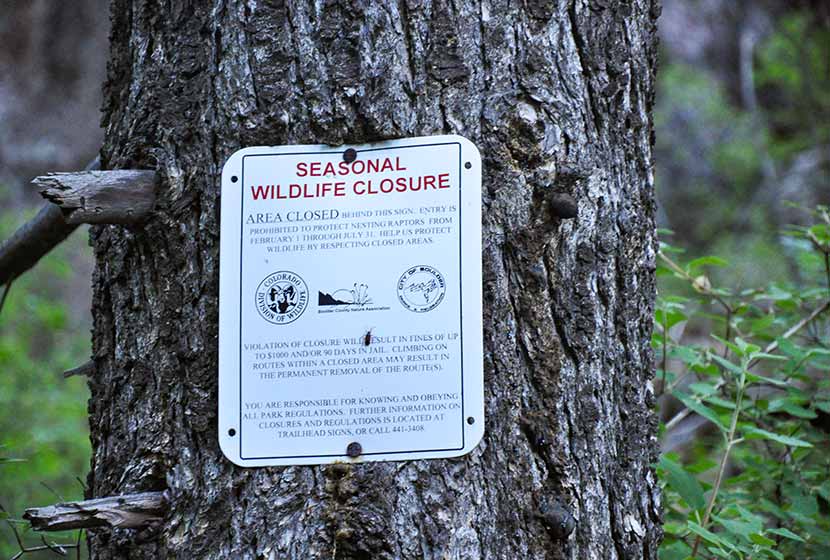
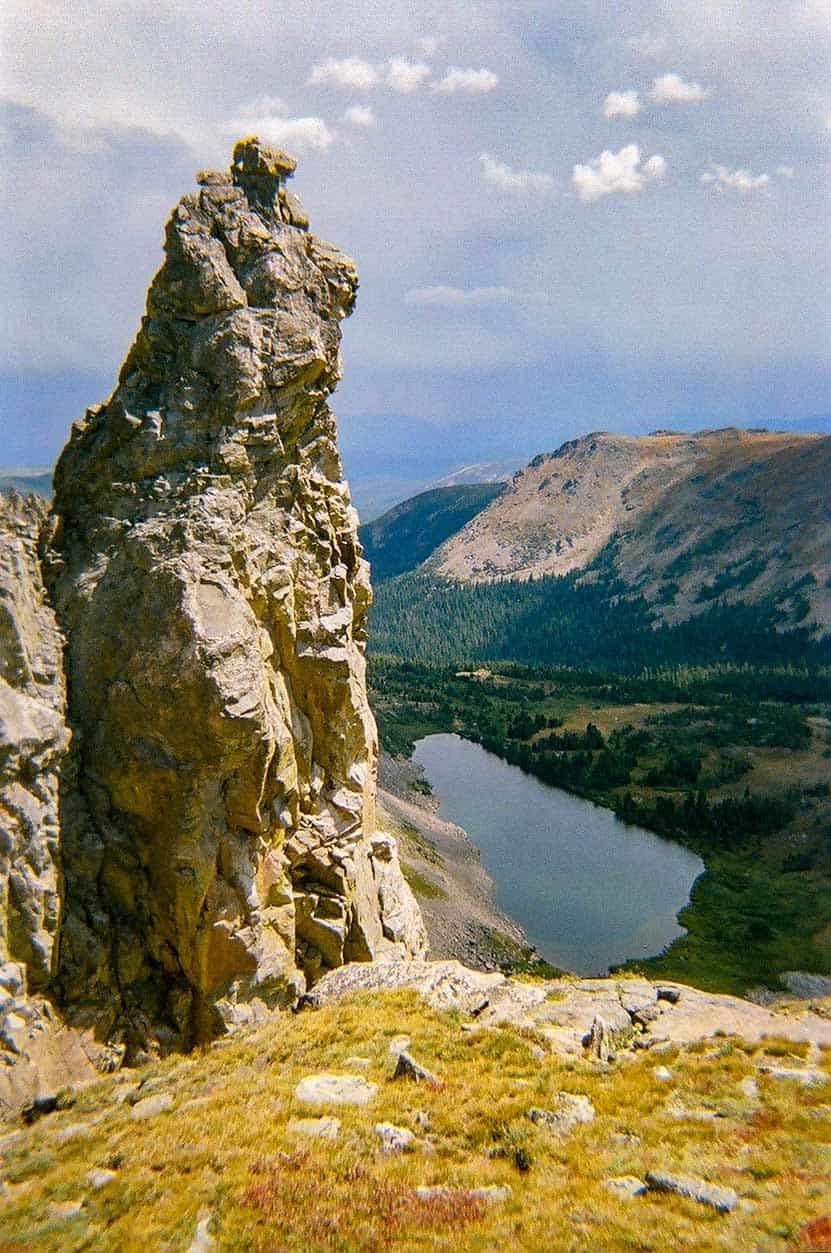
The canyon is an access route for Devils Thumb, a prominent rock formation along this ridge. There are seasonal closures (see photo below) because of nesting raptors. Be sure to stay out of this area from Feb. 1st to July 31st. You are welcome to stay on the Shadow Canyon trail--it's not closed during this time--but refrain from going off-trail or taking social trails during this time up to Devils Thumb.
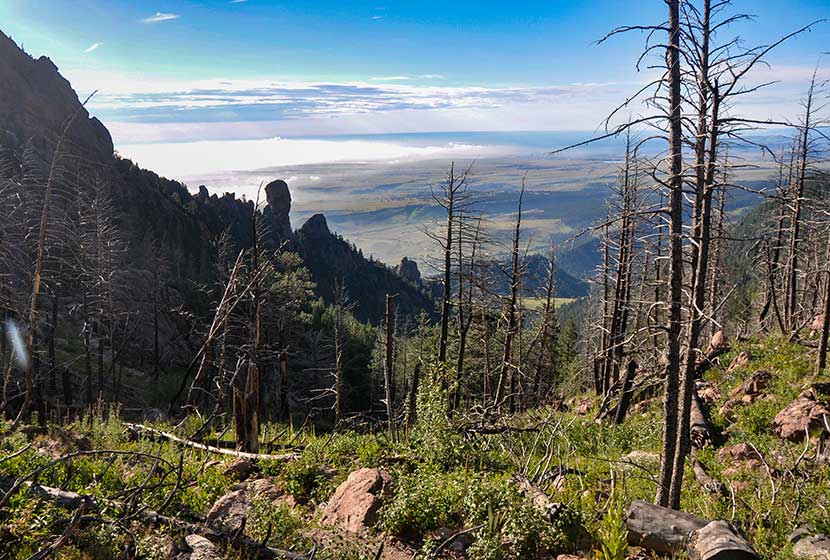
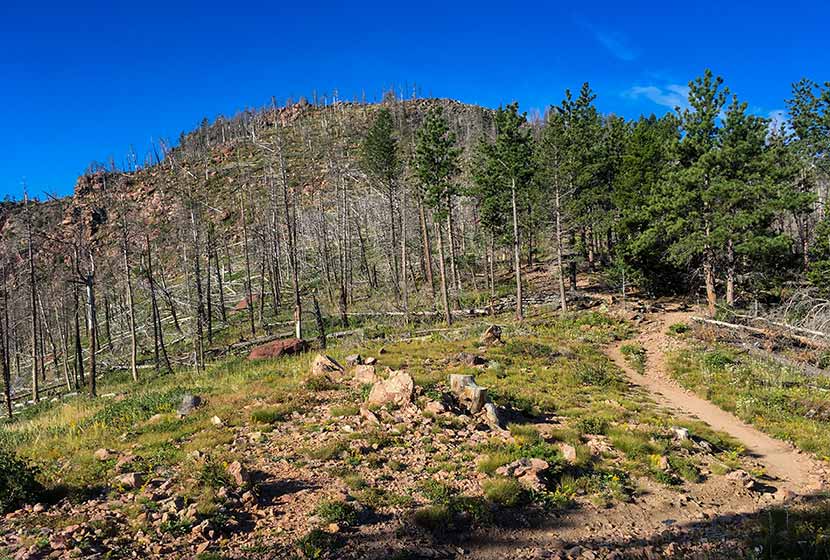
Eventually, the trail emerges from the canyon onto the saddle between South Boulder Peak and Bear Peak. This area is marked by a burn area, and in the late summer, raspberry plants grow trailside full of ripe berries. The burn was ignited by lightning in June of 2012. Named the Flagstaff Fire, it consumed about 300 acres before being contained by firefighters.
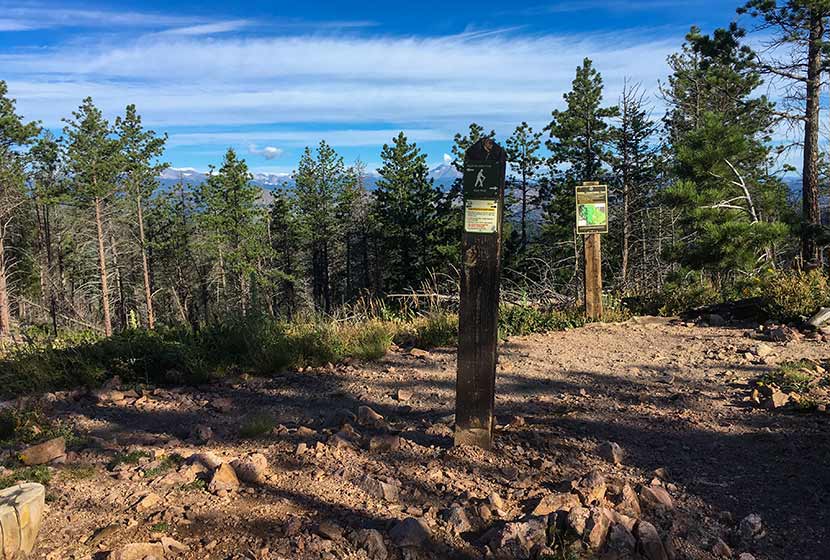
Another trail sign notes the way to Bear Peak, a 0.3 mile trail segment curving North up the back of the summit.
You'll notice more burn area on the left (West) side of the trail. The rock on the trail becomes increasingly brittle as you go, so be aware of those hiking below you and be sure to hike on the most secure and durable surfaces.
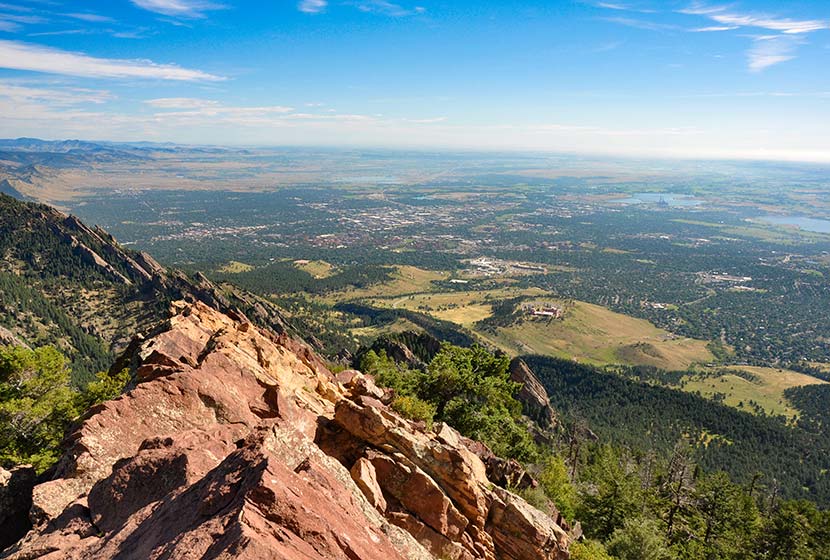
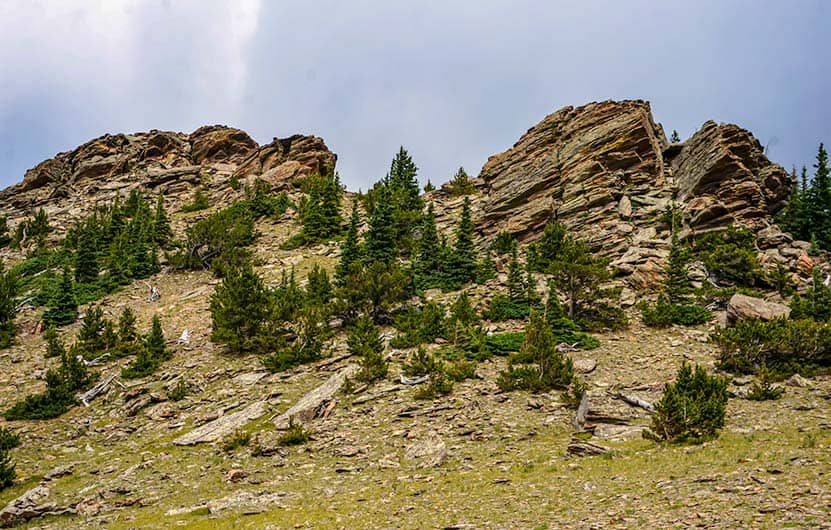
The final segment requires a scramble along about 25 yards of angled rock. Take your time and scope out the safest route to the summit. Most peaks along the Front Range have broad tops, but Bear Peak is tapered to a point with exposure on all sides. Several USGS markers are set into the rock (I think I counted 3--which is unusual). The views are great, both to the East and to the mountains in the West.
There are two options for the return hike: 1) to hike the 3.7 miles back through Shadow Canyon, retracing the same trails, or 2) to make a loop out of the hike by descending via Fern Canyon (about 4.7-mile return). The rest of this profile will follow the Fern Canyon to Mesa Trail return.
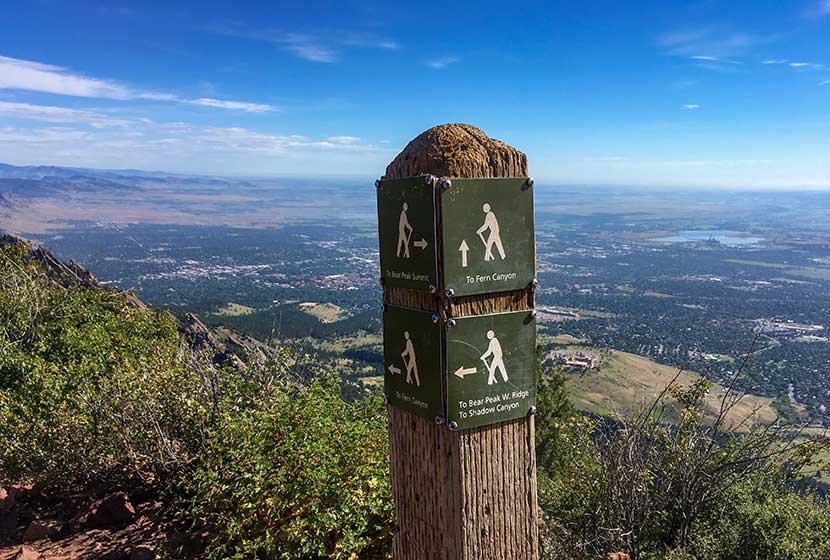
A sign marking the trail down Fern Canyon is located right at the base of Bear Peak (where the trail turns into a scramble up the summit). The descent into Fern Canyon is very steep and the rock is very loose. Hikers will also encounter people making their way up the trail, so be sure to move off to the side and grant right-of-way to hikers who are doing the harder work of ascending the trail. I would not recommend hiking up to Bear Peak from this route because the trail is way more demanding than the Shadow Canyon approach.

After about 1/2 of a mile descending this steep saddle, the trail will bear right (East) into Fern Canyon via a series of switchbacks. Eventually, the trail will emerge from Fern Canyon back onto the more gentle slopes of South Mesa. Look for signs for the Mesa Trail, and follow them South back to the South Mesa Trailhead.
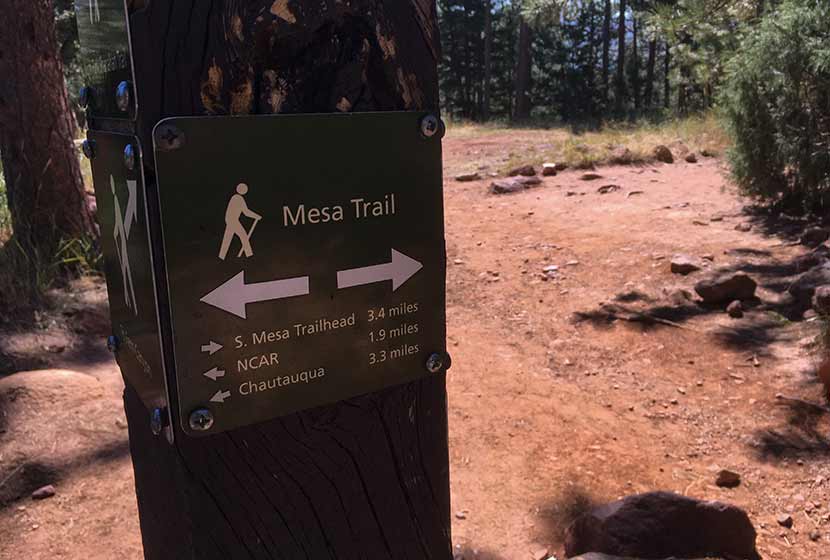
The hike back on the Mesa Trail travels in and out of the shade of Ponderosa pines and along the pink and orange Flatiron mountains that make this area so spectacular. We took the Upper Bluestem trail to some small connector trails leading back to the trailhead. Another approach is stay on the Mesa Trail (see map) until it connects back to the Homestead Trail.
Tips & Resources for Hiking to Bear Peak
- Weather: As with all hikes on the Front Range, especially peak hikes, be weather aware. Thunderstorms can emerge suddenly, especially in the early afternoon in the Summer months.
- Hiking with Your Dog: Though dogs are allowed on leash, and I've encountered people hiking with their dogs on the trails up to Bear Peak, I wouldn't put Bear Peak on the dog-friendly list because of the steep rock at the summit summit and the difficulty of the terrain leading up through the canyons.
- TIP: Be ready for a hike that is really demanding on your legs, especially the descent through Fern or Shadow Canyon. Trekking poles would be helpful on the descent.
- TIP: Hike to South Boulder Peak. It adds just 0.6 mile to your trip.
- Trail Map: Bear Peak Map from South Mesa Trailhead
- Packing List: Always pack the 10 Essentials. Download our Hiking Guide to get the list and dayhiking packing checklist.
- Colorado Road Conditions: Colorado Road Conditions
- After the Hike Cafe: Walnut Cafe in Boulder
- After the Hike Brewery: Sanitas Brewing Company
Weather
Map & Driving Directions
Click for Driving Directions
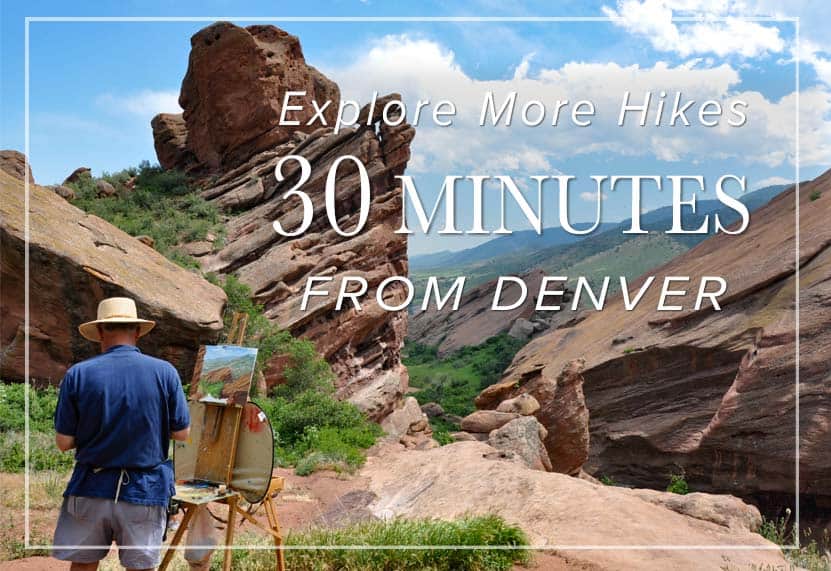

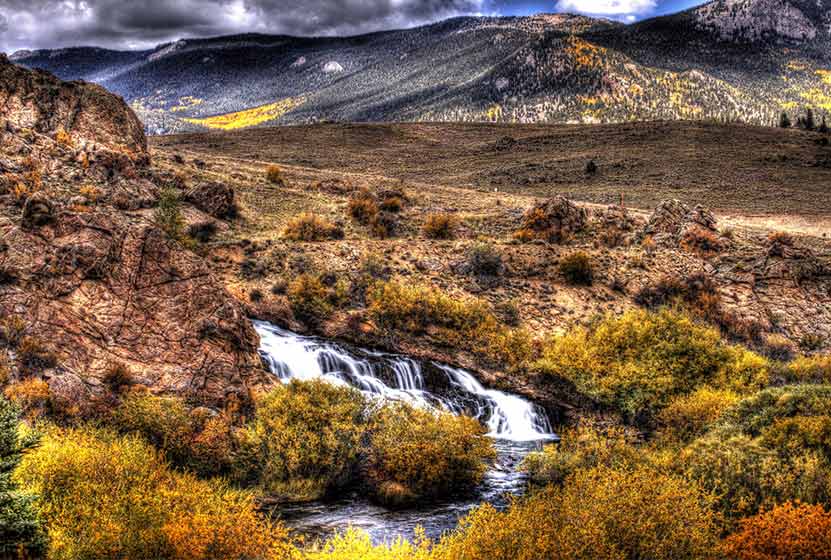
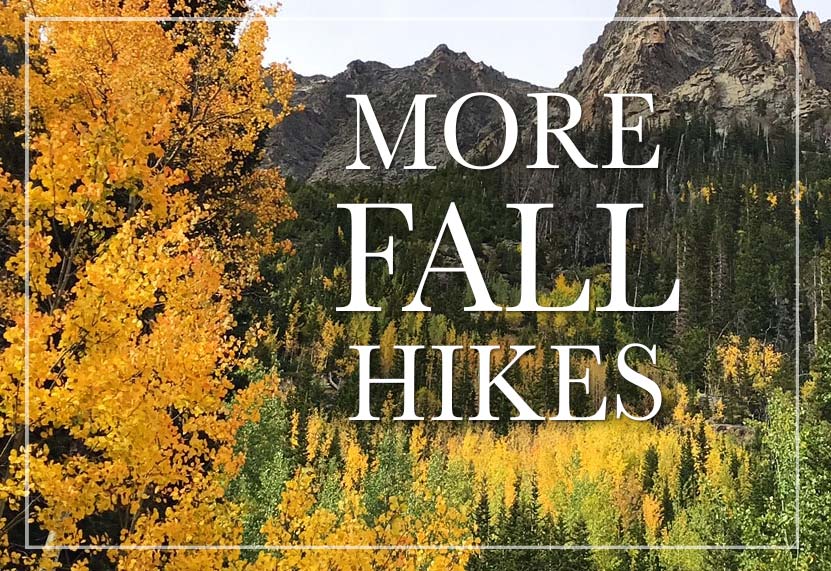
Fall Hikes and Scenic Drive Ideas
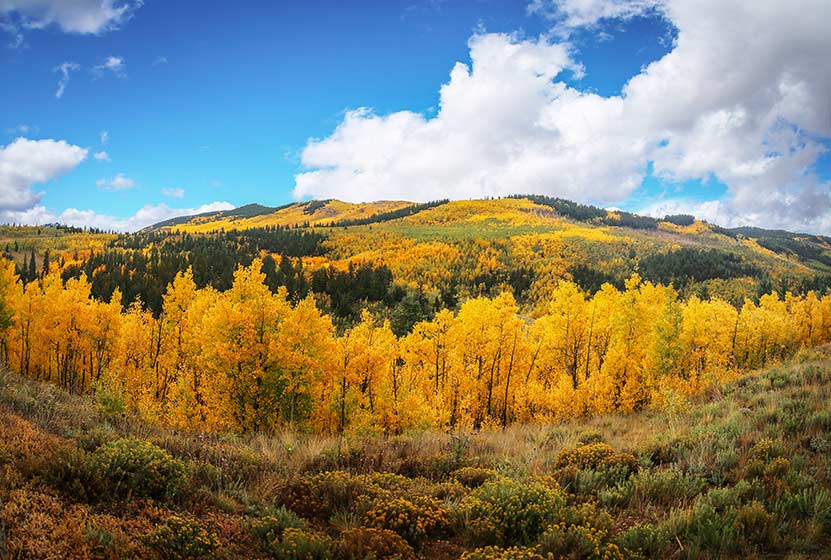
"Where should I hike this Fall?" Friends text asking for Fall hike recommendations and coworkers stop me in the hallway to ask what trails are best for enjoying the colors of Colorado. During September and early October, we have a short window to see the golden yellows, bright oranges, and the fire reds of the changing aspens. In this post, I'm sharing my top Fall hike and scenic drive recommendations--the ones I share with my friends, family, and coworkers. Don't Miss the Mountains!
-
#1 Scenic Drive and Hike: Old Fall Creek Road
-
#2 Scenic Drive and Hike: Kenosha Pass and Highway 77
-
#3 Hike the Wild Basin in RMNP
-
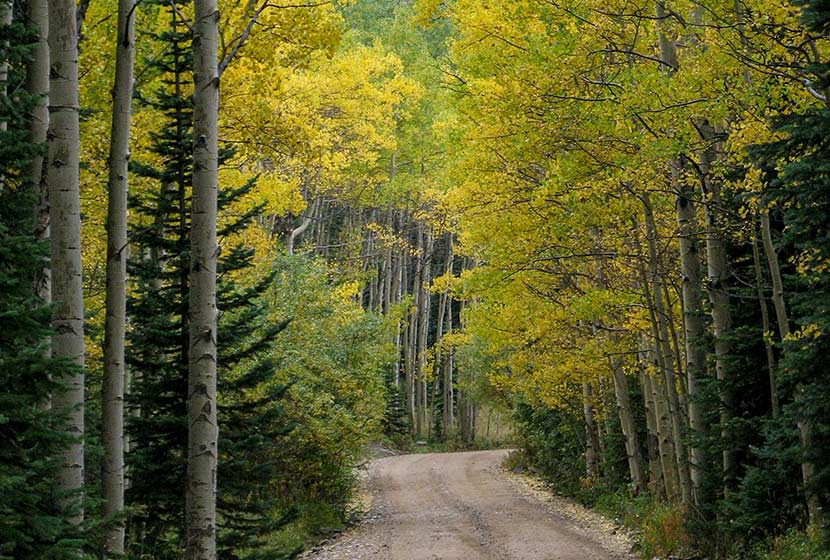
#4 Kebler Pass Scenic Drive and Camping Trip
-
#5: Fall Hikes in Indian Peaks Wilderness
Fee: National Park Access Fee Required
Dogs: Dogs prohibited outside of your vehicle in these segments of RMNP
Miles of Driving: About 210 Miles or 5-6 hours in the Car
Access: Old Fall River Road is seasonal, so check for conditions and closures.
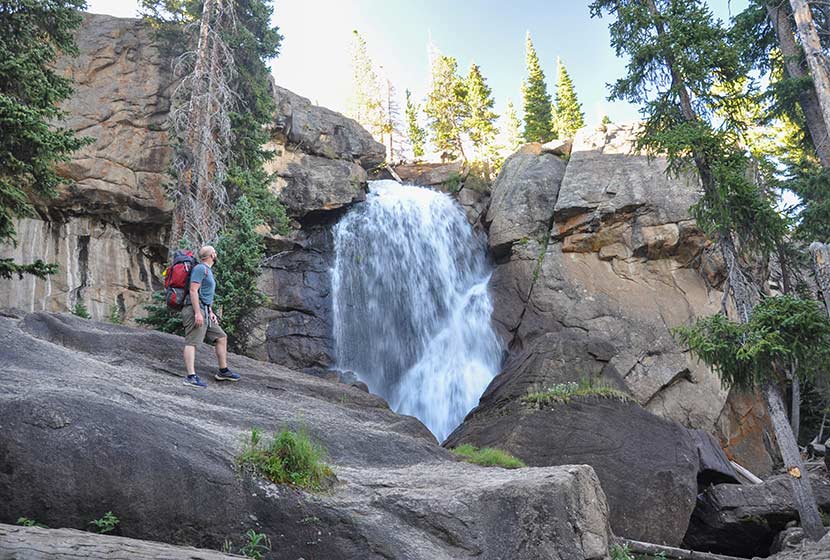
Last year, our family drove up one of the most scenic dirt roads in Colorado, Old Fall River Road in Rocky Mountain National Park. We stopped to visit two waterfalls, hiked through the wildflowers in an alpine meadow, saw moose and elk, then finished our day off with a great dinner on the other side of the Continental Divide.
The 9.5 mile dirt road is usually kept in good condition and was driveable with our low clearance, 2WD minivan. However, conditions can change quickly with weather, so be sure to check the RMNP road conditions page before setting off on your trip.
The trip starts at the Fall River Entrance on the Northeast side of Rocky Mountain National Park. There is an entrance fee, and each year we purchase the annual America the Beautiful pass, which gives you access to all the National Parks, Wildlife Refuges, and other BLM, National Forest, and Army Corp of Engineers sites. We visit RMNP several times each year, so it pays for itself after a few visits. If you have a 4th grader, your family can get a free annual pass through the Every Kid Outdoors program. You can purchase the pass online, or you can buy it at any of the entrance stations.
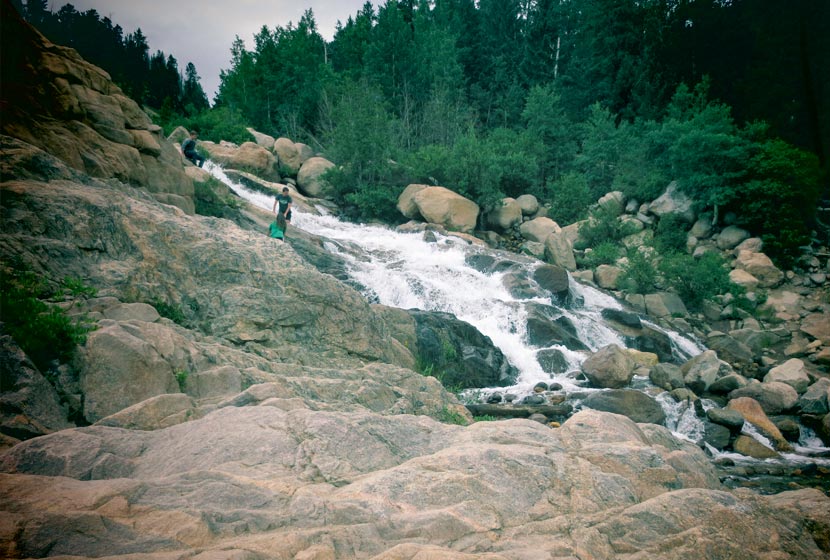
Our first stop was Horseshoe Falls, a beautiful set of cascades in the alluvial fan of the Roaring River. Next, we kept driving up Endovalley Road to the beginning of Old Fall River Road. Once on Old Fall River Road, you've committed to the drive because it's a one-way, dirt road all the way to the top (about 10 miles). The Endovalley Picnic area is located just before Endovalley Road becomes Old Fall River Road and you'll see signs pointing you to this shaded spot.
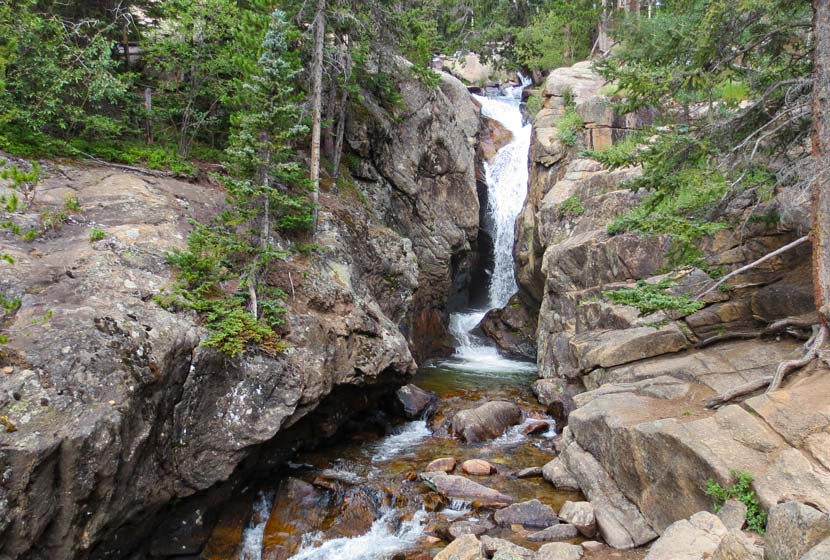
The next stop is Chasm Falls. Be mindful of others and park with care. It's a beautiful waterfall--one of our favorites in the park because it is so accessible. Chasm Falls drops through a dark and narrow gorge in Fall River. You can get more details on its location from our trail profile of Chasm Falls. If you are interested in exploring the many waterfalls in RMNP, check out our Waterfall Hikes in RMNP page.
Higher up, you can park at the Chapin Creek Trailhead to hike in the high country. It's a fragile tundra environment up here, so stay to the trail and do your part to care for this high traffic and easily damaged area. Parking is really limited. So, if you plan to hike here, be sure to start early so you can get a space. If you park roadside, be sure to use the pull-off areas. The trail here is high in elevation and very exposed, so be sure to keep an eye on the weather when hiking.
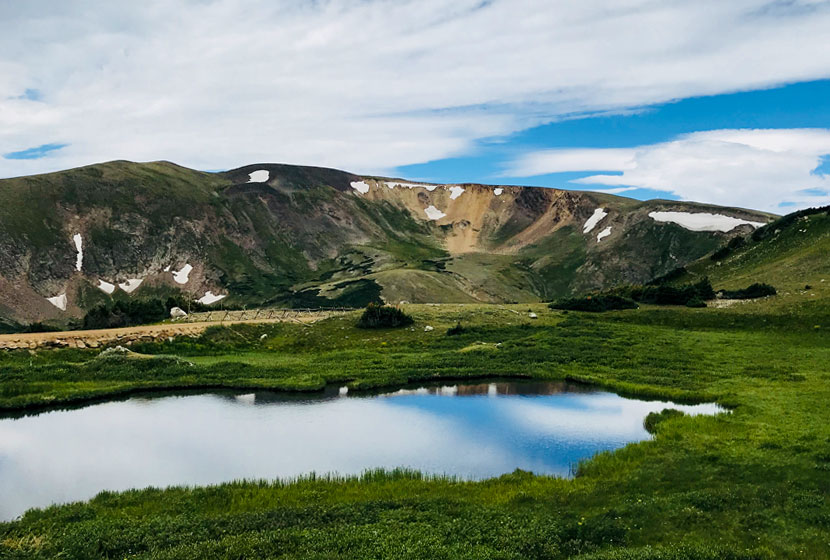
Towards the top, we found some trails along the south (left) side of the road leading to a beautiful creek, lined with wildflowers and surrounded by meadows where elk were grazing. Taking photos here was one of our favorite parts of the trip. Then, at the top, we stopped at the Alpine Visitor's Center to use the restrooms and grab some coffee before our trip down. There is a cafe and gift shop.

From the top, you've got a couple choices: 1) Descend back into Estes Park on Trail Ridge Road, or 2) Travel down the West Side into Grand Lake. We chose to drive down to Grand Lake and stop at the Bowen-Baker Trailhead where we had a late picnic lunch on the banks of the Colorado River where we saw moose and elk in the meadows. Keep aware in this area as moose, though they are gigantic, can hide themselves well in the trees, and are very territorial--especially cows with their calves.
You can end your trip driving back to Denver via Highway 40 to interstate 70. We stopped and had pizza at Beaujo's in Idaho Springs for Dinner. We also like stopping at The Peak in Winter Park, or grabbing a bite to eat (or great ice cream) in Grand Lake.
Map of Old Fall River Road to Grand Lake Scenic Loop
Hike Distance: Less than Mile to 14.4 Miles
Difficulty: Easy to Demanding
Miles of Driving: About 220 Miles or 4.5 hours in the Car
Kenosha Pass is arguably the most stunning fall landscape close to Denver. Check out our full trail profile page for Kenosha Pass. But with the population growth of the Front Range, and it being just 90 minutes from Denver, this place is getting a lot of traffic. Go on a weekday, or leave before 6am on the weekend to avoid traffic. Hiking etiquette becomes all that much more important when there are more people, so be sure to brush up on your trail courtesy before heading out. Expect a slow drive home if you are taking highway 85 back to Denver. However, I'd recommend taking a more leisurely way home and visit some other sites.
After hiking at Kenosha Pass, drive down into the South Park region to take in views of these stretch-to-forever countryside. In Jefferson, turn onto Highway 77. This highway is one of my favorite drives in all of Colorado (keep it a secret). Just about 30 minutes from Kenosha Pass, you'll arrive at Tarryall Reservoir where you can park and take a short walk to a quaint waterfall, Tarryall Falls.
From Tarryall Reservoir, it's another 30 minute drive on 77 south to Lake George, Colorado. Along the stretch of road you'll see the China Wall (see photo below) and the mountains of Lost Creek Wilderness. If you got started early and want to hike in this area, start at the Twin Eagles Trailhead or Spruce Campground where you can begin hiking up into some beautiful stands of aspens along the boundary of Lost Creek. If you are hungry and looking for a place to stop, check out The Iron Tree Restaurant just outside Lake George.
From Lake George, it's about a 1-hour drive back into Colorado Springs, or about a 2-hour drive back to Denver via 24 to interstate 25. If you want one more stop on this big loop drive, stop in at Garden of the God's for a sunset stroll. See our Ultimate Guide to Hiking Garden of the Gods to plan on which of the six hiking trails you might decide to take.
Map of Kenosha Pass to Lake George Scenic Loop
Hike Distance: 5.4 to 14 miles
Difficulty: Easy to Moderate
Drive Time: About 90 minutes from Denver
Fee: National Park Access Fee Required
Dogs: Dogs prohibited in RMNP
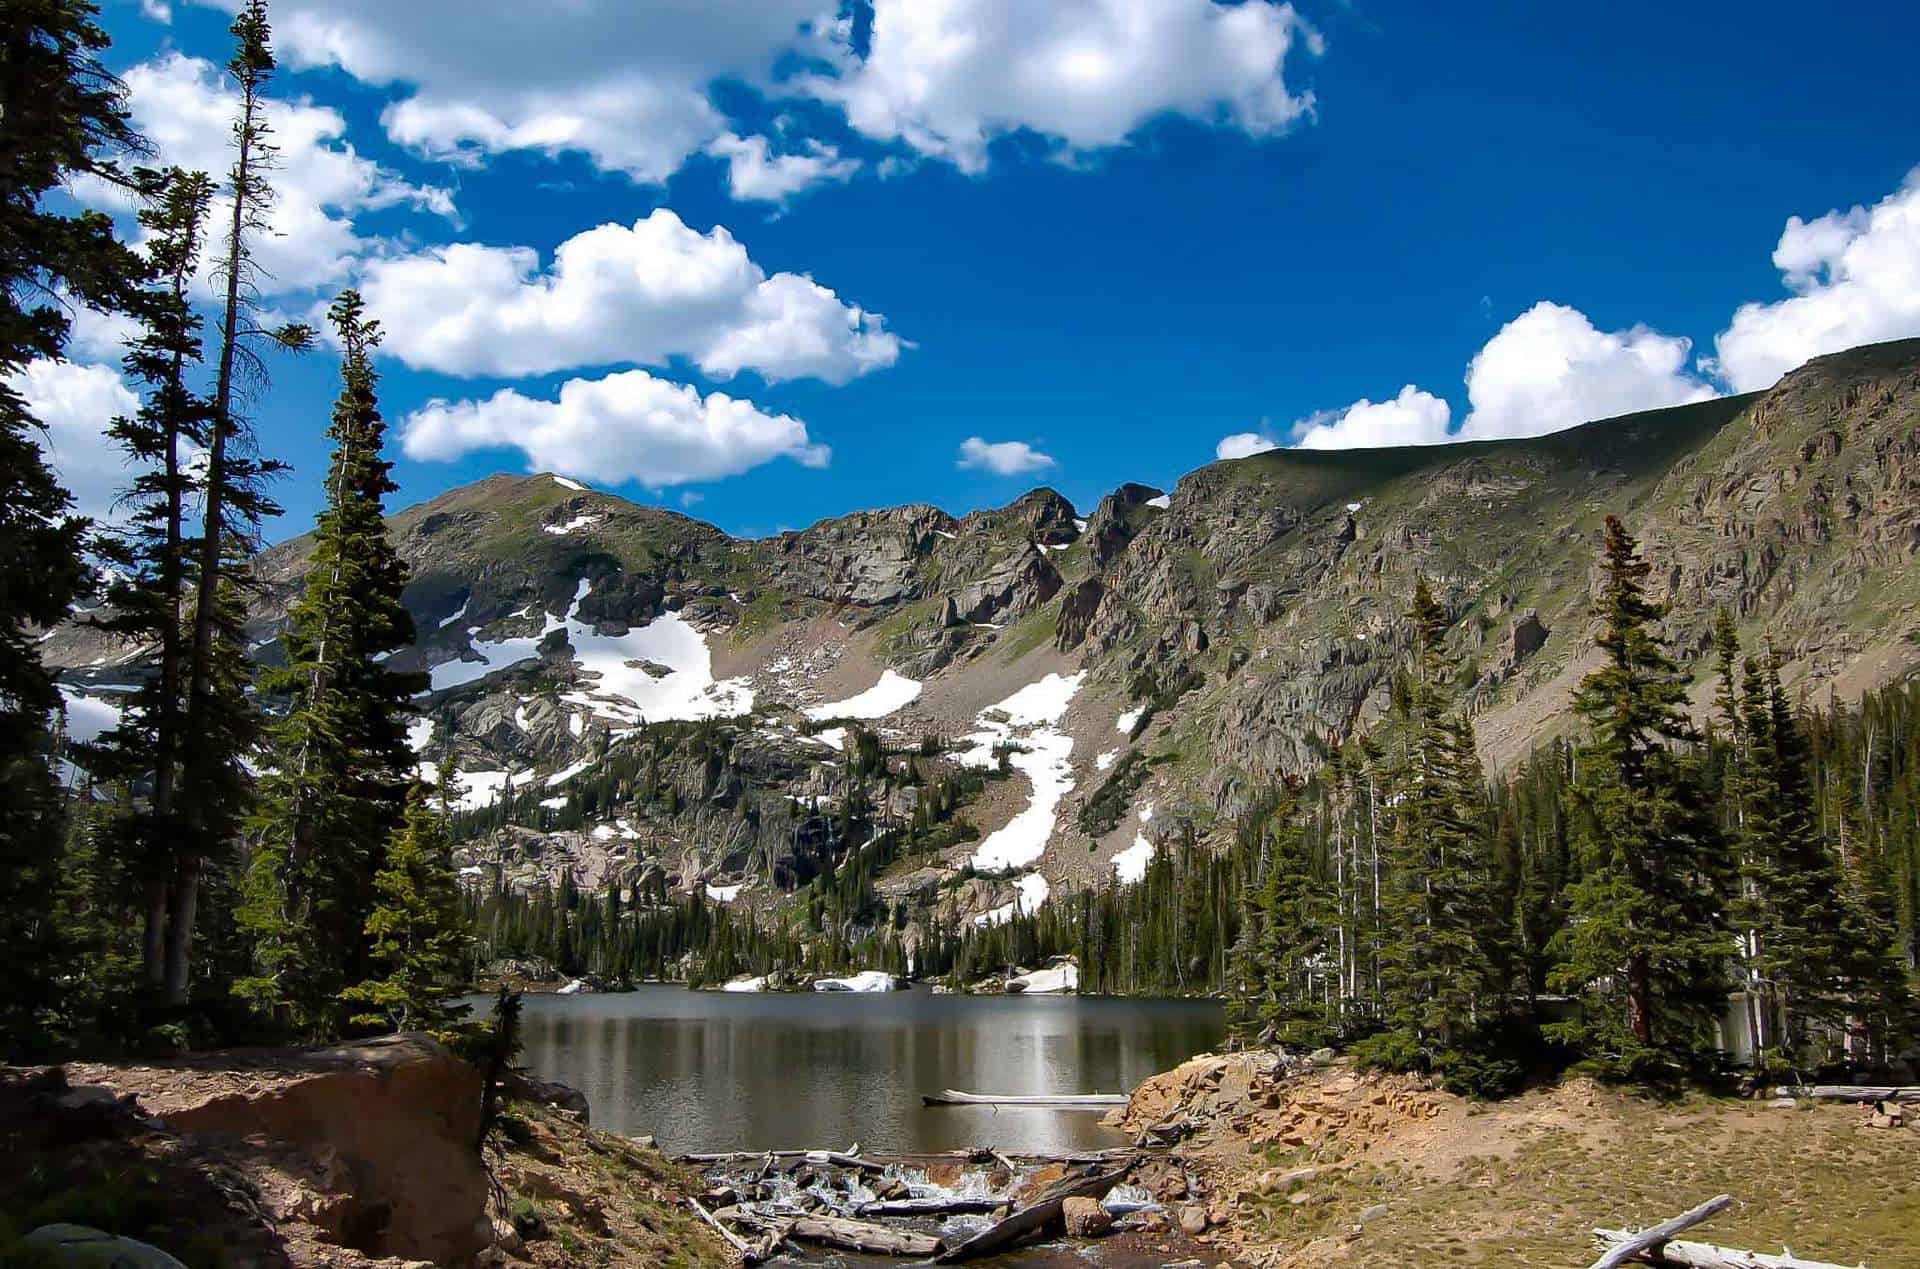
Where is the Wild Basin? It's a region of Rocky Mountain National Park, located South of Estes Park on the East side of the Continental Divide. And it's gorgeous! A friend and I recently hiked in to one of the campsites, stayed the night, then hiked the entire next day. On the trip, I was in search of the trail to a massive, hidden waterfall. We got directions to the social trail from a local guide and an off-duty park ranger, but didn't have time to hike it yet. I'll send out a trail profile in one of our future Trail Dispatches (sign up here to get the email).
Like so many places near Denver, the Wild Basin trailhead can get busy; so, go early or on a weekday. And when I say "go early," I mean, "leave before 6 AM." I'd recommend two different options. The first is the shorter hike up to Ouzel Falls. It's a 5.4-mile round trip hike, and you can make it into a loop hike by taking the campsite trail back. This also cuts off a bit of distance and time. The trail to Ouzel Falls takes you past upper and lower Copeland Falls, stunning Calypso Cascades, and the gushing spray of Ouzel Falls.
The other option is to hike a more demanding, 14-mile round trip trail up to Lion Lake. Your legs will feel like jelly on the way down, but it's worth the sites. We opted to camp at St. Vrain campsite (any in that area will do) and to hike up to Lion Lake in the morning. Backcountry camping permits are required and can be acquired from the RMNP Backcountry Office (these must be picked up in person).
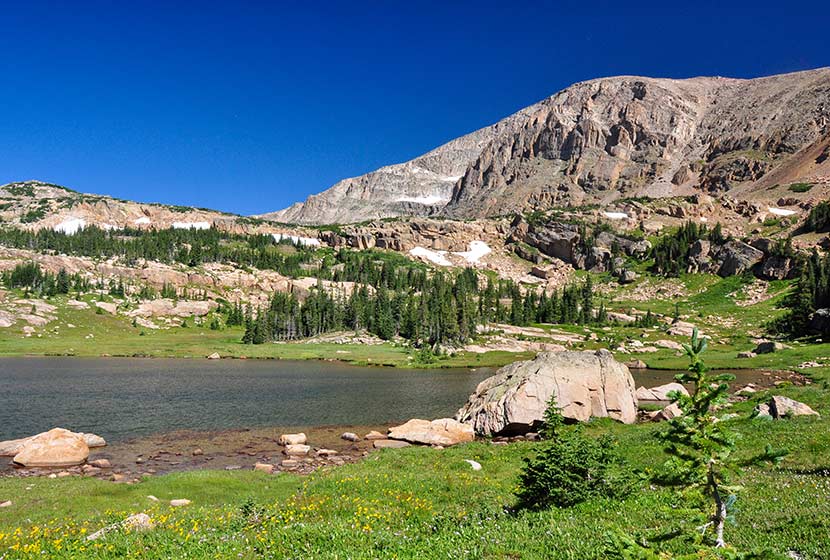
Just past Lion Lakes is an unusual waterfall, Trio Falls, spilling over the cubic face of granite outcropping. And higher up are two more alpine lakes worth visiting. Be sure to have a Trails Illustrated Rocky Mountain National Park map for these trips.
3-Day Camping Trip with Scenic Drive
Miles of Driving: About 470 Miles or 12 hours in the Car
This is one of our 2019 family fall adventures--and it's a lot more ambitious than any of the above recommendations. I'll be reporting back soon, so look for this description to be updated with better details. Here's our plan for taking in the Fall colors of Colorado!
Day 1
The plan is to drive up Cottonwood Pass, a scenic highway outside of Buena Vista. It's a seasonal road and usually closes sometime in October when the snow starts to pile up. There are about a dozen campsites along this approximately 50-mile stretch of road between Buena Vista and Altmont, Colorado. So, we plan to camp close to Altmont for our first night. Most all of the sites are first come, first served after mid-September.
Day 2
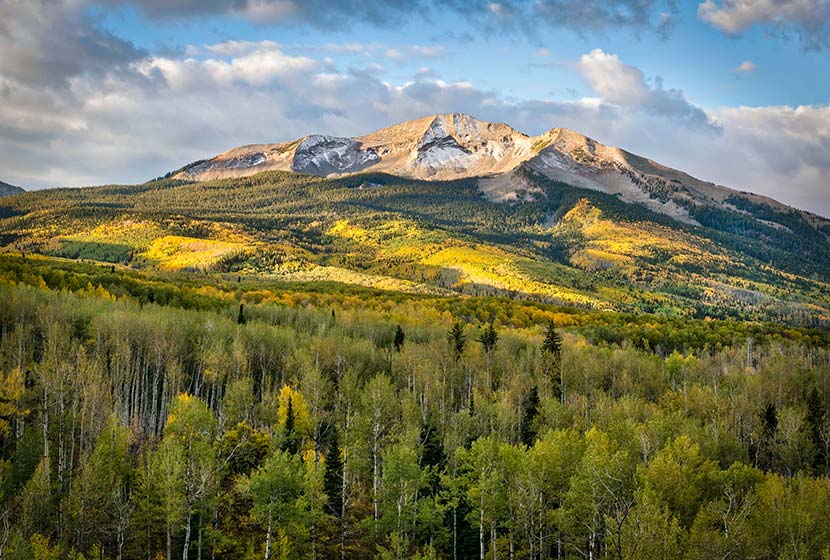
We'll spend the day hiking around Crested Butte, take the scenic drive over Kebler Pass and camp somewhere outside of town or perhaps at Paonia State Park.
Day 3
I'm hoping we'll still have some adventure left in us and can make an early morning drive to Aspen to the Maroon Bells trailhead. You can drive the road to the trailhead before 8am. There is a $10 access fee. From 8am-5pm, you have to take the shuttle. See our Ultimate Guide to Hiking the Maroon Bells for more details.
Here's a map below of the proposed adventure.
Hike Distance: 1.5 to 13 miles
Difficulty: Easy to Difficult
Drive Time: About 90 minutes from Denver
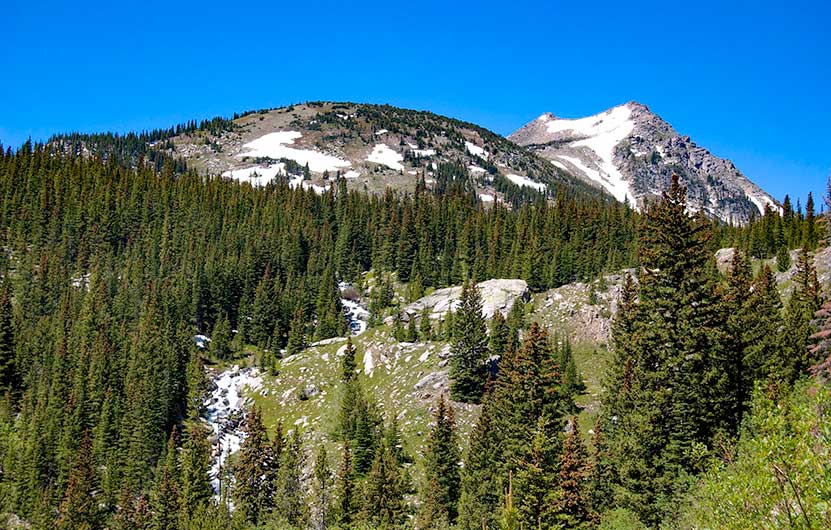
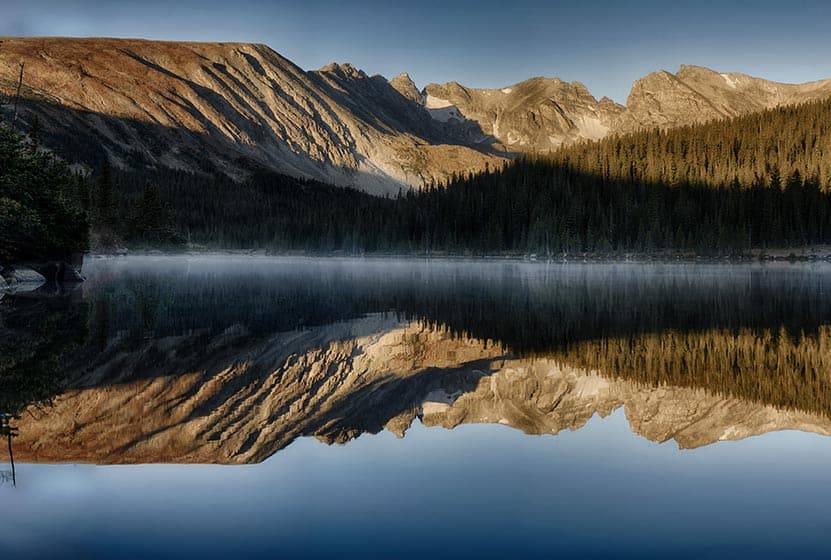
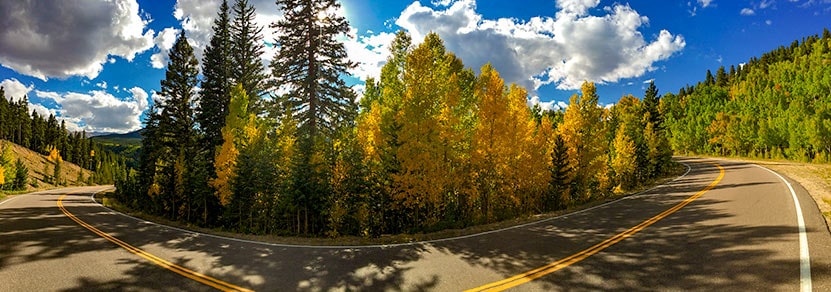
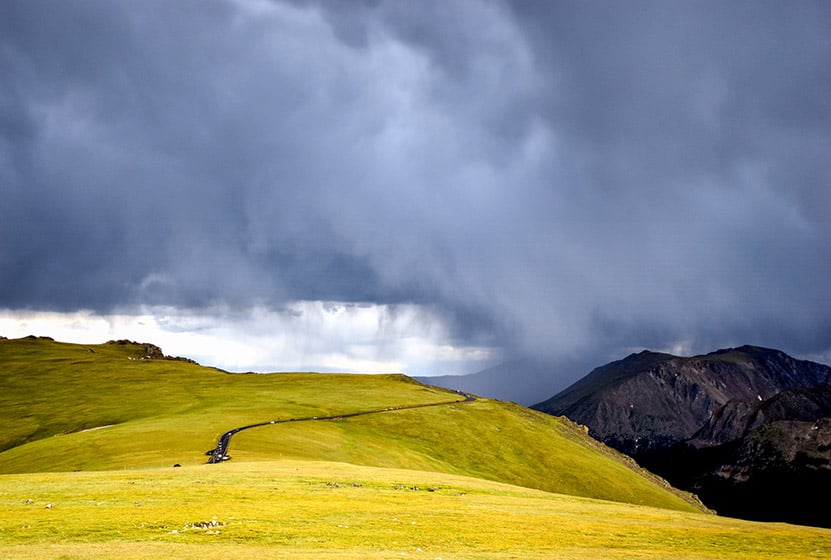
If you are looking for some alpine scenery and a shorter scenic drive, the hikes coming out of the 4th of July, Hessie, and Brainard Lake Trailheads are top notch. You'll have to leave super early to beat the crowds, but it's worth it. The photo above is from the drive in on 4th of July Road during the early morning hours of September. Come prepared by packing the 10 essentials, and add to that a down coat because it gets cold the higher you hike and snow falls early at these reaches. A few hikes worth exploring are below.
Explore these 5 Trail Profiles in Indian Peaks
- Long Lake Loop Trail: An easy 1.5 mile loop hike with mountain and lake views. Accessed from the Brainard Lake Recreation area and entrance fee is required. Seasonal closures of trailhead.
- Lost Lake: A moderate hike of 4 miles round trip to a sub-alpine lake.
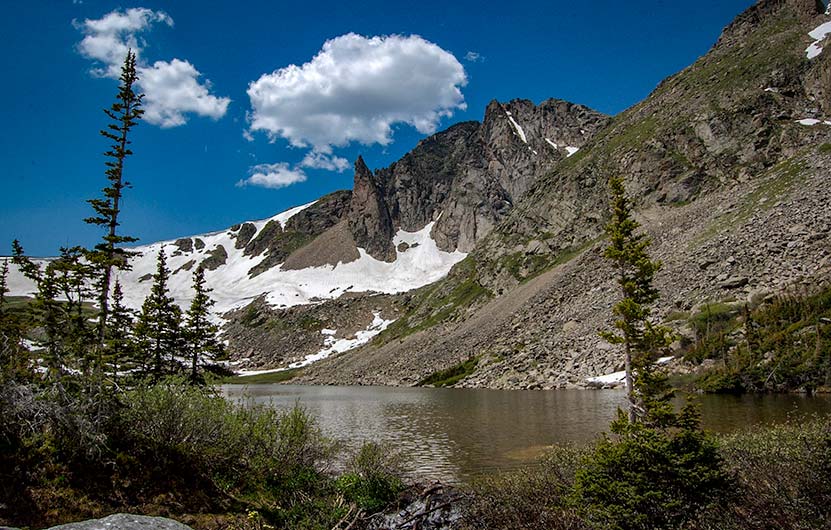
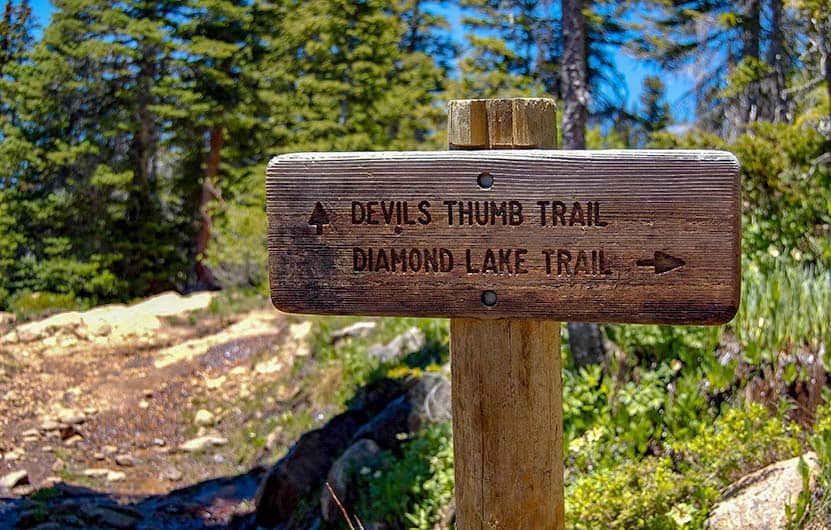
- Diamond Lake: 5.4 miles round trip, moderate, and passes a waterfall on the way.
- Jasper Lake: A demanding 11-mile round trip hike up to a stunning sub-alpine lake.
- Devils Thumb Lake: 13 miles round trip, demanding hike with approx. 2500' of elevation gain with views of Devils Thumb lake and Devils Thumb
Jasper Lake Hike in Indian Peaks
Jasper Lake requires a 5.5-mile (one-way) hike into the mountainous, wildflower-laden Indian Peaks Wilderness. Just 40 minutes outside of Boulder Colorado and about 1hr 15 minutes from Denver, the trail to Jasper Lake gets its start at the Hessie Trailhead. Travel an additional mile beyond Jasper to see Devils Thumb, a striking rock formation that looms above Devil's Thumb Lake. Explore the full Jasper Lake hike profile below for trail map, driving directions, and more tips and details to help you enjoy this adventure in the Indian Peaks Wilderness.
JASPER LAKE TRAIL SNAPSHOT
| Hike Distance | 11 Miles Round Trip |
|---|---|
| Difficulty | Difficult |
| Duration | Approx 6-7 hrs |
| Trail Type | Out and Back |
| Starting Elevation | 8642′ |
| Elevation Gain | Approx +2175′ |
| Seasons | May through Sept. |
| Dogs | Allowed On Leash |
| Hike Trail Map | Click for a Map of Jasper Lake in Indian Peaks Wilderness |
| Denver Drive Time | 1 hr 15min |
| Driving Directions to Hessie Trailhead | Click for Google Map |
| Driving Directions to Shuttle Parking in Nederland | Click for Google Map |
| Hessie Shuttle Details | @ Boulder County Hessie Page |
| Town Nearest Hike | Nederland, Colorado |
| Beauty | alpine lakes, waterfalls, meadows, creek, wildflowers, aspen groves, fall colors, wildlife: moose |
| Activities | Hiking, snowshoeing, cross-country skiing, camping (by permit only), fishing |
Parking & Trailhead for Jasper Lake Hike
The parking at Hessie Trailhead is limited, so be sure to take some time to review these details before departing for your hike to Jasper Lake. There is a free shuttle that runs from Nederland every 15-20 minutes on weekends during the Summer months and on some holidays. For full details on the Hessie Trailhead Shuttle, please visit the Boulder County page for the Hessie Trailhead shuttle service. This shuttle departs from the RTD Park-n-Ride in Nederland, CO.
Directions to Hessie Trailhead
At the roundabout in Nederland, Colorado, drive south onto CO-119/South Bridge St. Take a right onto Eldora Road which will take you to Elodora Colorado. The road continues through Eldora, and changes to Eldorado Road. It proceeds out of town and changes its name to Hessie Road. About 3/4 of a mile outside of Eldora, the road will split, 4th of July Road goes to the right, and Hessie will turn to the left. The 2WD Hessie Trailhead Parking area is at this split. Do not park alongside the road, as you will likely be fined. If the parking area is full, then go back to Nederland for the shuttle (weekends and holidays). There is parking for 4WD vehicles further up the dirt road and closer to the beginning of the official trail. It's important to know that rains can quickly flood this segment of Hessie Road between the 2WD and 4WD trailheads.
The Hike: Jasper Lake Trail
Most hikers will begin the hike up to Jasper lake at the Hessie 2WD parking area. This adds about 1 mile to the total hike distance, making this an 11-mile hike (round-trip). It's also where the shuttle drops off hikers. At the 2WD parking area, pick up the trail that runs along the north side of the 4WD dirt road. The trail will take you within view of a small pond. Moose frequent the wetlands on this segment of the trail, so be alert--you may get a chance to snap some photos of them.

At approximately 1/2 mile from the shuttle drop, a sign marks the site of the old mining town of Hessie, Colorado. The trail then crosses a footbridge over Middle Boulder Creek. Soon after the bridge, you'll find the official trailhead signage. Because this is a longer hike into demanding terrain, we recommend Trails Illustrated: Indian Peaks Wilderness map for this hike.
After crossing the bridge near the trailhead, the trail climbs the mountainside via an old mining road. After 1/4 mile, the forest gives way to a meadow and opens up to panoramic views of the peaks of Indian Peaks. At the first trail intersection, both trail options will take hikers to Jasper Lake, and both options are approximately the same length. The right-hand trail is called the "Devils Thumb Bypass trail" and was created for Spring and Early Summer hikers to help avoid the mud and pools of water created by early season snowmelt. However, the trail leading to the left, the Devils Thumb Trail, will be a more scenic choice.
Small waterfalls and cascades are spotted along the trail as it follows the course of Middle Boulder creek. Indian Peaks Wilderness is known for its brilliant wildflowers that bloom from early to mid-summer. If traveling on the the Devils Thumb (main trail) then you'll encounter a second intersection marked by signage pointing left to Lost Lake and King Lake, and right for Devils Thumb Lake, Jasper Lake, and Woodland Lake. Taking the right-hand trail continues alongside Middle Boulder Creek and leads up to Jasper Lake.
The next intersection will have a left-hand trail that leads to Woodland Lake and a right-bearing trail that leads to Devils Thumb and Jasper Lakes. This is where the bypass trail joins up to the main trail from the southeast. Now, the terrain becomes more demanding.
About 1/2 mile before arriving at Jasper Lake, a trail sign will point the way northeast to Diamond Lake. However, Diamond Lake is best accessed via the 4th of July Trailhead. Be mindful of the sky when emerging from the forest into the open sections of high-country meadows and tundra. Thunderstorms, during in the Summer months, can come up quickly due to orographic lift, a phenomenon caused by the heated rock faces of our mountains thrusting moisture into the skies along the Front Range.
If the weather is looking good and you're up to adding two more miles and approximately 1hr to your hike, then continue up the trail to Devils Thumb Lake to gain views and get photos another alpine lake and the rock formation of Devils Thumb that protrudes from the ridgeline.
Tips & Resources for Hiking to Jasper Lake
- Camping: Camping is allowed by permit only and in designated spots. See the Indian Peaks Alliance page for details.
- USFS Indian Peaks: Camping is allowed by permit only and in designated spots. See the Indian Peaks USFS Page page for details.
- Trekking Poles: Because it's an 11-mile trek over rocky terrain, we recommend Trekking Poles.
- Parking: Parking is very limited at the Hessie trailhead, so try to arrive before 7am to find a space. Review trailhead information above for seasonal weekend and holiday shuttle service from Nederland.
- Trail Map: Jasper Lake near Nederland
- Packing List: Always pack the 10 Essentials. Download our Hiking Guide to get the list and dayhiking packing checklist.
- Colorado Road Conditions: Colorado Road Conditions
- Photo: We would like to express our gratitude to The John and Belinda Bosleyfor sharing photographs of this hike to Jasper Lake
- After the Hike: Train Cars Coffee
Weather
Map & Driving Directions
Long Lake Loop in Indian Peaks
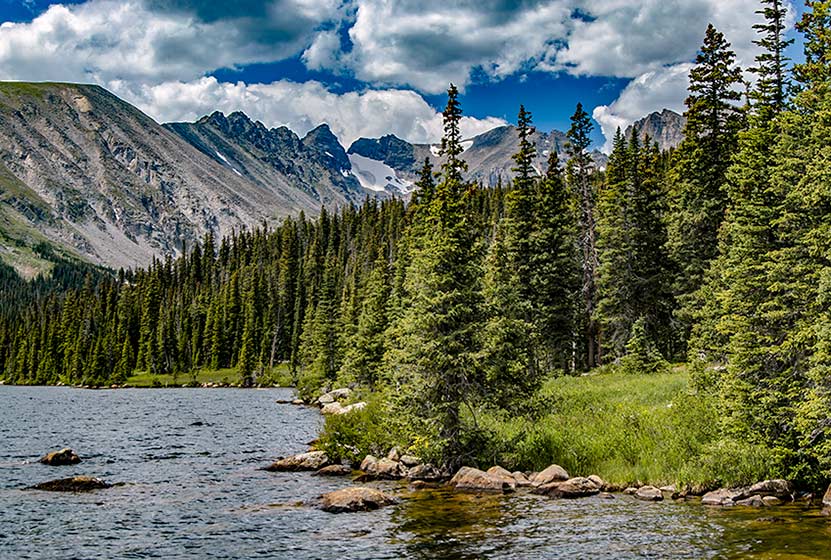
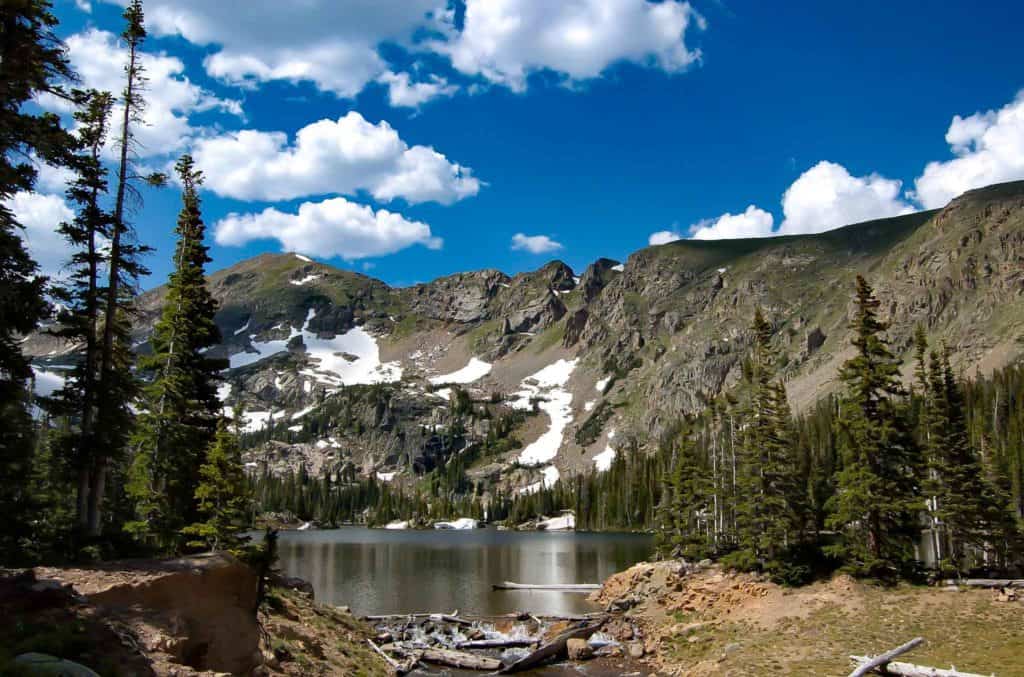
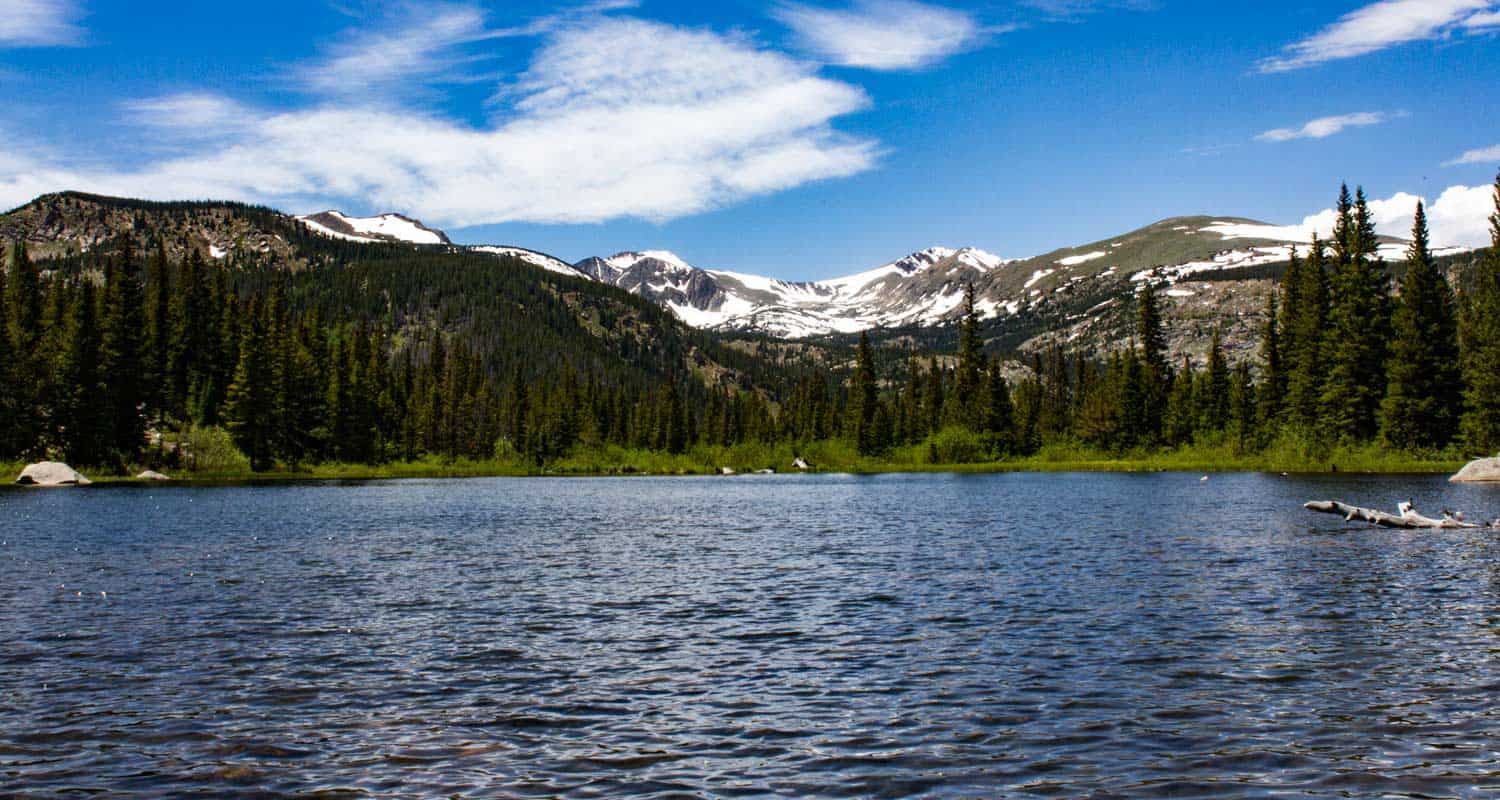
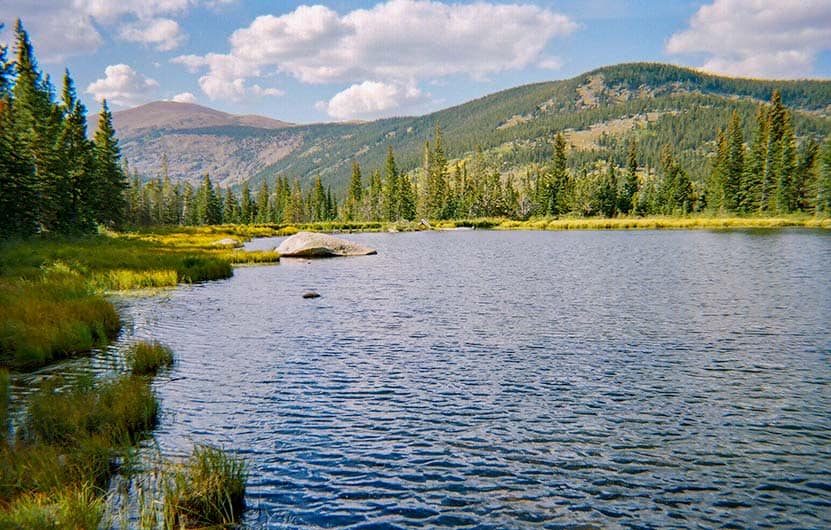
Long Lake offers an easy 1.5 mile loop hike in Indian Peaks Wilderness. Located about 1 hour West of Boulder, Colorado, Long Lake is an easy-to-access alpine lake with stunning scenery. It's a popular spot, especially in the Summer months, so be sure to read the details on access fees and the notes below on the Long Lake Trailhead. Explore the full trail profile for trail maps, driving directions to Long Lake and more.
Long Lake in Indian Peaks - Trail Snapshot
| Hike Distance | 0.6 mile or 1.5 miles |
|---|---|
| Difficulty | Easy |
| Duration | Approx 1 hr |
| Trail Type | Out and Back & Loop |
| Starting Elevation | 10,500′ |
| Elevation Gain | Approx +100′ |
| Seasons | Mid-June to Mid-Oct. Depending on Weather |
| Dogs | Dog Prohibited in specific Brainard Rec. areas and on Jean Lunning and Pawnee Pass Trails. See USFS page for details. |
| Hike Trail Map | Click for a Map of Long Lake Area in Indian Peaks |
| Denver Drive Time | 1hr 30min |
| Driving Directions to Meyer Homestead Trailhead | Click for Google Map |
| Town Nearest Hike | Ward, Colorado |
| Fee: | Entrance Fee to Brainard Rec. Area Required |
| Beauty | Lake, mountain peak views, wildflowers, moose/td> |
| Activities | Hiking, cross-country skiing, snowshoeing, photography |
Parking & Trailhead Information for Long Lake Loop
Note: This trailhead can only be reached by using Brainard Lake Road, which has seasonal closures. Because the Brainard Lake Recreation area is extremely popular, this entrance road experiences high amounts of traffic during weekends on the Summer. See the USFS page for details. For Brainard Lake Road closure status, see the Boulder Ranger District roads page.
From Boulder, Colorado, head North on US36/28th Street. Take a left onto Lee Hill Road. Lee Hill Road will dead-end at an intersection with Left-Hand Canyon Road. Take a left onto Left-Hand Canyon Road heading West. Eventually, Left-Hand Canyon Road will turn into Indiana Gulch Road and will turn into Utica Road upon entering the town of Ward, Colorado. Utica turns into Nelson Road (lots of name changes on this trip) then ends at an intersection with 72/Peak to Peak Highway. Take a right onto 72, then the almost immediate next turn will be on your left for the Brainard Lake Road. Travel on Brainard Lake Road 2.2 miles to the entry station where you will need to pay the fee for the recreation area. As you approach the lake, bear right to continue on the Brainard Lake Road for another 1/2 mile, then turn right onto Mitchell lake Road. Go less than 1/10th of a mile, then turn left onto Long Lake Road. After about 1/3 of a mile, you will have arrived at the Long Lake Trailhead and parking area.
In the winter, the Brainard Lake Recreation area is a popular snowshoeing and cross-country skiing destination. However, all parking is at the Brainard Lake Gateway Trailhead (near the access gate). It is approx. 4-miles one-way from the Brainard Lake Gateway Trailhead to the Long-Lake Trailhead.
The Hike: Long Lake Loop Hike
From the Long Lake Trailhead, it's an easy and short 0.3-mile hike to Long Lake. Returning via this trail makes this a 0.6-mile out-and-back trip. However, to really take in the best of the Rocky Mountain Scenery, we recommend doing the full 1.5-mile loop.
Having reached the northeastern edge of Long Lake, head south over a footbridge and pick up the Jean Lunning Trail. The Jean Lunning trail travels alongside the southern perimeter of Long Lake and offers stunning views of the jagged mountain peaks surrounding the lake. Eventually, the Jean Lunning trail will intersect with the Pawnee Pass Trail. Take a right on the Pawnee Pass trail to head east and back to the short connector trail that leads back to the trailhead.
Tips & Resources for Hiking Long Lake
- TIP: During the Summer, avoid the traffic by visiting Long Lake during the weekdays. Arrive at the trailhead in the early morning to secure a parking place.
- Trail Map: Brainard Lake Area, Long Lake Trail Map
- Packing List: Always pack the 10 Essentials. Download our Hiking Guide to get the list and dayhiking packing checklist.
- Colorado Road Conditions: Colorado Road Conditions
- Photo: We would like to express our gratitude to Matt Lewis and Max and Dee Berntfor sharing photographs of this hike on Long Lake
- After the Hike: Marrocco’s
Weather
Map & Driving Directions
Click for Driving Directions
Devils Thumb Lake
Devils Thumb Lake is located in Indian Peaks Wilderness north of Boulder Colorado and can be accessed via a 6.5-mile (one-way) steep and challenging hike. Wildflowers, alpine meadows, small waterfalls, and cascades all beckon those who have the stamina to explore these heights in the Front Range near Denver. Explore the full Devils Thumb Lake hike profile below for trail map, driving directions, and more tips and details to help you enjoy this adventure in the Indian Peaks Wilderness.
Trail Snapshot: Devils Thumb Lake Trail
| Hike Distance | 13 Miles Round Trip |
|---|---|
| Difficulty | Difficult |
| Duration | Approx 7-8 hrs |
| Trail Type | Out and Back |
| Starting Elevation | 8642′ |
| Elevation Gain | Approx +2500′ |
| Seasons | May through Sept. |
| Dogs | Allowed On Leash |
| Hike Trail Map | Click for a Map of Devils Thumb in Indian Peaks Wilderness |
| Denver Drive Time | 1 hr 15min |
| Driving Directions to Hessie Trailhead | Click for Google Map |
| Driving Directions to Shuttle Parking in Nederland | Click for Google Map |
| Hessie Shuttle Details | @ Boulder County Hessie Page |
| Town Nearest Hike | Nederland, Colorado |
| Beauty | alpine lakes, waterfalls, meadows, creek, wildflowers, aspen groves, fall colors, wildlife: moose |
| Activities | Hiking, snowshoeing, cross-country skiing, camping (by permit only), fishing |
Parking & Trailhead Information for Devil's Thumb Lake Hike
The parking at Hessie Trailhead is limited, so be sure to take some time to review these details before departing for your hike. Boulder County offers a shuttle that runs from Nederland every 15-20 minutes on weekends during the Summer months and on some holidays. For full details on the Hessie Trailhead Shuttle, please see the Boulder County page for the shuttle service. This shuttle departs from the RTD Park-n-Ride in Nederland.
Directions to Hessie Trailhead
At the roundabout in Nederland, Colorado, drive south onto CO-119/South Bridge St. Take a right onto Eldora Road which will take you to Elodora Colorado. The road continues through Eldora, and changes to Eldorado Road. It proceeds out of town and changes its name to Hessie Road. About 3/4 of a mile outside of Eldora, the road will split, 4th of July Road goes to the right, and Hessie will turn to the left. The 2WD Hessie Trailhead Parking area is at this split. Do not park alongside the road, as you will likely be fined. If the parking area is full, then go back to Nederland for the shuttle (weekends and holidays). There is parking for 4WD vehicles further up the dirt road and closer to the beginning of the official trail. It's important to know that rains can quickly flood this segment of Hessie Road.
The Hike: Devils Thumb Lake Trail
Most hikers will begin the hike up to Devils Thumb lake at the Hessie 2WD parking area. From here, pick up the trail that runs along the north side of the 4WD dirt road. The trail will run alongside a small pond, keeping to the right-side of the 4WD segment of Hessie Trailhead road until it arrives at the official trailhead. Moose frequent the wetlands on this segment of the trail, so be alert--you may get a chance to snap some photos of them. At approximately 1/2 mile from the shuttle drop, a sign marks the site of the old mining town of Hessie, Colorado. A bit further up, the trail will cross a footbridge over Middle Boulder Creek. Soon after the bridge, you'll find the official trailhead signage that provides a quick-reference map. Because this is a longer hike into demanding terrain, we recommend Trails Illustrated: Indian Peaks Wilderness map for this hike.
The Hike: Devil’s Thumb Lake Lake Trail
After crossing the bridge near the trailhead, the trail climbs the mountainside via an old mining road. After 1/4 mile, the forest gives way to a meadow and opens up to views breathtaking views of Rocky Mountain scenery. At the first intersection, both trails will lead to Devil's Thumb, and both options are approximately the same length. So, which one is best? The right-hand Devils Thumb Bypass trail was created for Spring and Early Summer hikers because the main Devil's Thumb segment can get thick with mud and drenched with water during the early snowmelt. Otherwise, the left-hand Devils Thumb Trail will be the most scenic.

Small waterfalls and cascades are spotted along the trail as it makes its way along Middle Boulder creek. Indian Peaks is also famous for its wildflowers in the early and mid-summer. If you've taken the Devils Thumb (main trail) then you'll encounter a second intersection with signage that points left to Lost Lake and King Lake, and right for Devils Thumb Lake, Jasper Lake, and Woodland Lake. Taking the right-hand trail will lead up to Devils with more small waterfalls, cascades, and wildflowers. The next intersection will have a left-hand trail that leads to Woodland Lake and a right-bearing trail that leads to Devils Thumb and Jasper Lakes. This is where the bypass trail joins up to the main trail from the southeast. And here is where the terrain becomes much more steep and challenging.
About 1/2 mile before the side-trail for Jasper Lake, a trail sign will point the way northeast to Diamond Lake. However, Diamond Lake is best accessed via the 4th of July Trailhead. Jasper Lake is every bit as beautiful as Devils Thumb Lake and is worth stopping to take in the views. However, be mindful of the weather, especially during the Summer months when afternoon thunderstorms can explode onto the scene without much warning.
It's just 1 mile from Jasper Lake up to Devils Thumb Lake. The lake is named after the tower of rock prominent upon the ridge above its waters. The Thumb can be seen from many miles away when driving Hwy 40 near Winter Park, Colorado.
Tips & Resources for Hiking the Devils Thumb Lake Trail
- TIP: Parking is very limited at the trailhead, so try to arrive before 7am. Review trailhead information above for seasonal weekend and holiday shuttle from Nederland.
- CAMPING: Camping is allowed by permit only and in designated spots. See the Indian Peaks Alliance page for details.
- USFS Indian Peaks: Camping is allowed by permit only and in designated spots. See the Indian Peaks USFS Page page for details.
- TIP: The trail is rocky and steep so it would be a good idea to bring trekking poles.
- Trail Map: Devil’s Thumb Lake-Jasper Lake Trail near Nederland
- Packing List: Always pack the 10 Essentials. Download our Hiking Guide to get the list and dayhiking packing checklist.
- Colorado Road Conditions: Colorado Road Conditions
- Photo: We would like to express our gratitude to Brendan Brombaci, The Bosleys, and Eric Frazier for sharing photographs of this hike on Devil’s Thumb Lake.
- After the Hike: Salto Coffee Works in Nederland
Weather
Map & Driving Directions
Click for Driving Directions
Lost Lake Hike Near Nederland
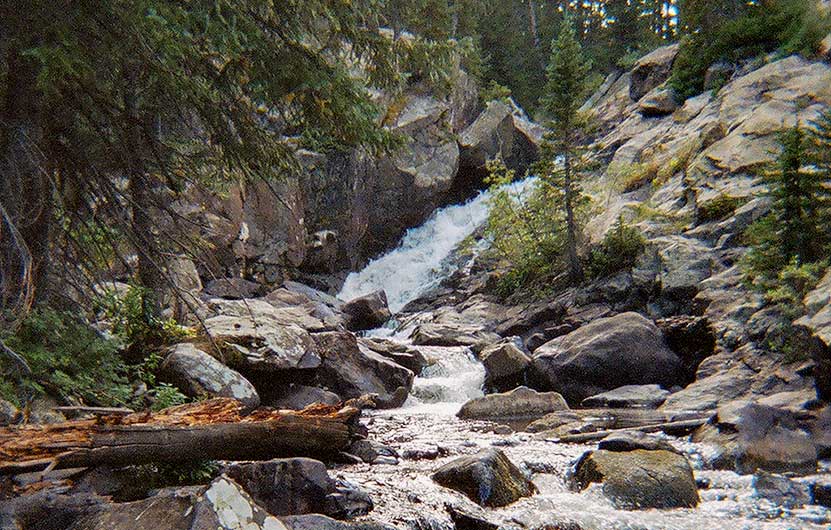
Lost Lake is an accessible 4-mile round-trip hike to a beautiful alpine lake surrounded by the mountains of Indian Peaks. Just over one hour northwest of Denver, the trail up to lost lake takes you along the course of Middle Boulder Creek, a slide waterfall, a set of tumbling cascades, and a variety of wildflowers that decorate the borders of the trail, the creeksides, and the small meadows that open up along the trail. In the winter months, the trail up to Lost Lake makes for a good snowshoeing route and cross-country trail. trail (though it's a bit steep on the way up
While we categorize Lost Lake as a family-friendly hike and a great trail to take in the changing colors of Fall, it's important to know that the hike is uphill and demanding up to its destination. Explore the full Lost Lake hike profile below for trail map, driving directions, and more tips and details to help you enjoy this adventure in Indian Peaks Wilderness.
Trail Snapshot: Lost Lake Trail near Nederland, Colorado
| Hike Distance | Approx. 4 miles Round Trip |
|---|---|
| Difficulty | Moderate |
| Duration | Approx 2-3 hrs |
| Trail Type | Out and Back |
| Starting Elevation | 8642′ |
| Elevation Gain | Approx +1144′ |
| Seasons | Year Round |
| Dogs | Allowed On Leash |
| Hike Trail Map | Click for a Map of Lost Lake in Indian Peaks Wilderness |
| Denver Drive Time | 1 hr 15min |
| Driving Directions to Hessie Trailhead | Click for Google Map |
| Driving Directions to Shuttle Parking in Nederland | Click for Google Map |
| Hessie Shuttle Details | @ Boulder County Hessie Page |
| Town Nearest Hike | Nederland, Colorado |
| Beauty | alpine lake, creek, waterfalls, wildflowers, columbine, Indian paintbrush, aspen groves, fall colors |
| Activities | Hiking, snowshoeing, cross-country skiing, camping, fishing, lunch |
Parking & Trailhead Information for Lost Lake Hike
Parking is very limited at the Hessie Trailhead, so be sure to take some time to review these details before departing for your hike. Because the Hessie trailhead is one of the most popular in the state, Boulder County offers a shuttle that runs from Nederland every 15-20 minutes on weekends during the Summer months and on some holidays. For full details on the Hessie Trailhead Shuttle, please see the Boulder County page for the shuttle service. This shuttle departs from the RTD Park-n-Ride in Nederland.
Directions to Hessie Trailhead
At the roundabout in Nederland, Colorado, drive south onto CO-119/South Bridge St. Take a right onto Eldora Road which will take you to Elodora Colorado. The road continues through Eldora, and changes to Eldorado Road. It proceeds out of town and changes its name to Hessie Road. About 3/4 of a mile outside of Eldora, the road will split, 4th of July Road goes to the right, and Hessie will turn to the left. The 2WD Hessie Trailhead Parking area is at this split. Do not park alongside the road, as you will likely be fined. If the parking area is full, then go back to Nederland for the shuttle (weekends and holidays). There is parking for 4WD vehicles further up the dirt road and closer to the beginning of the official trail. It's important to know that rains can quickly flood this segment of Hessie Road.
Trail Map for Lost Lake Hike

The Hike: Lost Lake Trail
If taking the shuttle, it will drop you off at the 2WD parking area. From here, hikers will follow a trail for that runs along the north side of the 4WD dirt road. The trail runs past a small pond and will keep to the right-side of the 4WD Hessie Trailhead road until it arrives at the official trailhead. Keep your eyes peeled for Moose who frequent these waterlogged meadows along this lowland segment of the trail. At approximately 1/2 mile from the shuttle drop, a sign marks the site of the old mining town of Hessie, Colorado.
Soon, the trail will cross the North Fork of Middle Boulder Creek via a footbridge and a large sign will map and describe the several trails and destinations that can be accessed from this point. Hikers will continue on this old mining road as it leads uphill towards both Lost Lake and the intersection for the trails that lead to Devil's Thumb Lake, Jasper Lake, Woodland Lake, King Lake, and Bob and Betty Lakes. This trail profile will describe the route to Lost Lake only.
The next 1.2 miles climbs by way of switchbacks over rocky and steep terrain. Wildflowers pepper the trailsides and the riparian zone along Middle Boulder Creek. At the first trail intersection (Devils Thumb and Devils Thumb Bypass Trails), a sign will mark the way to Lost Lake and give distances and point the direction to the other destinations. Here the trail to Lost Lake will go left and cross another footbridge. Soon, a waterfall and set of cascades will come into view. The trail will make its way to a second intersection and sign. Here, the trail for Lost Lake departs, once again, to the left.
From this point, Lost Lake is just 1/2 mile away. It's a steep segment but worth the views when you arrive. At Lost Lake, hikers can explore the outside circuit of its shores (this will add both time and distance to the hike). Return via the same trails for a total of 4 miles.
Related Hikes
- Diamond Lake Hike in Indian Peaks
- Changing Aspens Hikes Near Denver
- Mt. St. Vrain Hike Near Allenspark, Colorado
Tips & Resources for Hiking the Lost Lake Trail
- TIP: Parking is very limited at the trailhead, so try to arrive before 7am. Review trailhead information above for seasonal weekend and holiday shuttle from Nederland.
- CAMPING: Camping is allowed by permit only and in designated spots. See the Indian Peaks Alliance page for details.
- USFS Indian Peaks: Camping is allowed by permit only and in designated spots. See the Indian Peaks USFS Page page for details.
- TIP: The trail is rocky so it would be a good idea to bring trekking poles.
- Trail Map for Lost Lake Trail: Trail Map Link
- Packing List: Always pack the 10 Essentials. Download our Hiking Guide to get the list and dayhiking packing checklist.
- Colorado Road Conditions: Colorado Road Conditions
- Photo: We would like to express our gratitude to Tim and Brad Fagan and Eric Frazier for sharing photographs of this hike on Lost Lake.
- After the Hike: Sundance Cafe, Nederland
Weather
Map & Driving Directions
Click for Driving Directions
Chief Mountain Hike
Chief Mountain is a 1.5-mile hike in the mountains just one hour outside of Denver, Colorado. The Chief Mountain trail travels through alpine forest, then breaks out into high-country tundra, eventually gaining panoramic views of surrounding mountains. Chief Mountain gives hikers an incredible vantage point to survey the changing colors of Fall spread out in 360 degrees below. Explore the full Chief Mountain hike profile below for trail map, driving directions, and more tips and details to help you enjoy this adventure near Denver.
Trail Snapshot: Chief Mountain Hike
| Hike Distance | 3 miles Round Trip |
|---|---|
| Difficulty | Moderate |
| Duration | Approx 3 hrs |
| Trail Type | Out and Back |
| Starting Elevation | 10800′ |
| Elevation Gain | Approx +1000′ |
| Seasons | Year Round (weather permitting) |
| Dogs | Allowed On Leash |
| Hike Trail Map - Winter | Click for a Map of Chief Mountain Trail |
| Hike Trail Map - Summer | Click for a Map of Chief Mountain Trail |
| Denver Drive Time | 1 hr |
| Driving Directions to Chief Mountain Trailhead | Click for Google Map |
| Town Nearest Hike | Idaho Springs, Colorado |
| Beauty | Panoramic views, Rock Formations, Summer Wildflowers, Fall Colors |
| Activities | Hiking, snowshoeing, skiing, camping, photography, |
Parking & Trailhead Information for Chief Mountain Hike
From Denver, take Interstate 70 west to exit 252. This exit will funnel you onto CO-74/Evergreen Parkway headed West/Southwest for about 2 miles, where you'll take a right onto Squaw Pass Road. Squaw Pass road is paved and climbs the mountain in a series of switchback for 10.4 miles. The trailhead is easy to miss. It's a pull-out on the right-hand/North side of the road. It's worth taking a look at the parking area using satellite view on Google maps before going. You'll notice that the trail begins just a bit East of the parking area on the South side of the road. We've dropped the pin in the driving directions above at the location of the trailhead. As with all roads at this altitude, be sure to check conditions and closures before setting out.
The Hike: Chief Mountain Trail
The Chief Mountain trail begins on the south side of Squaw Pass road. The trail starts out as a steep 1/4 mile segment that takes hikers through dense alpine forest to Old Squaw Pass Road. The trail is picked up again on the other side of the dirt road and marked by signage. The trail bends now along the base of Papoose Mountain and the dense forest gives way to scattered trees and eventually into high-country tundra. Colorado's tundra ecosystems are incredibly fragile. Here the alpine flowers and lichens grow close to the ground in order to survive in the harsh winds and cold. Stay on maintained trails as it can literally take centuries for this alpine environment to recover from the damage inflicted upon it by foot traffic.
The trail should be evident, but you'll also find that it is marked by blaze marks on some of the trees. The trail becomes more demanding and steep. With each switchback new panoramas reveal distant snow-capped landscapes. Jagged rock formations grow in size as the trail gains elevation and makes its way closer to the summit.
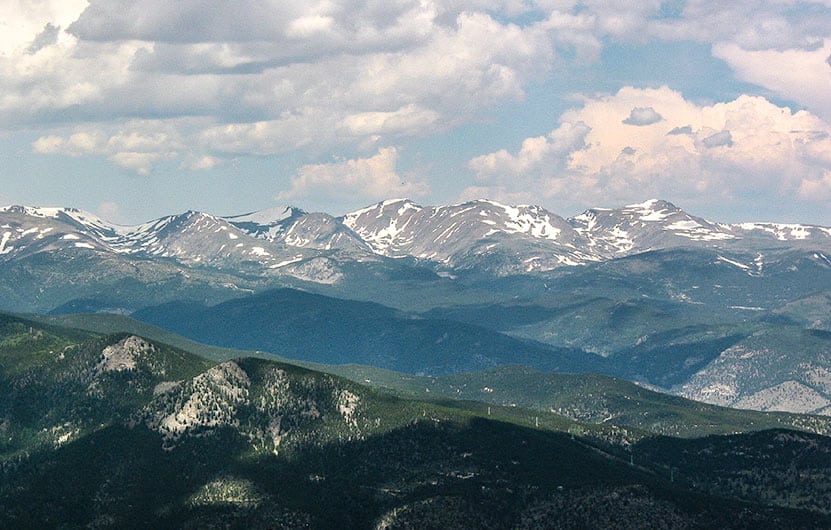
The views are incredible at the top (see photo below). Mount Evans can be seen to the West and Squaw Mountain to the East. This is a great vantage point for taking in the changing aspens along the Front Range of Colorado. For more Fall Hikes, see our 25+ Hikes for Viewing the Changing Aspens in Colorado.
Tips & Resources for Hiking the Chief Mountain Trail
- TIP: Because this hike is popular especially on summer weekends, get there early or do it during weekdays.
- Trail Map for Chief Mountain Trail - Winter: Trail Map Link
- Trail Map for Chief Mountain Trail - Summer: Trail Map Link
- Packing List: Always pack the 10 Essentials. Download our Hiking Guide to get the list and dayhiking packing checklist.
- Colorado Road Conditions: Colorado Road Conditions
- Photo: We would like to express our gratitude to Rick Pawela and CL Baker for sharing photo of this hike on Chief Mountain.
- After the Hike: Beau Jo's Pizza in Idaho Springs
Weather
Map & Driving Directions
Click for Driving Directions

Booth Creek Falls Hike Near Vail
Booth Creek Falls is a 60-foot waterfall located in the Eagles Nest Wilderness near Vail, Colorado. The journey to the waterfall requires a strenuous, 2-mile hike along the banks of Booth Creek. Explore the full Booth Creek Falls hike profile below for trail map, driving directions, and tips and details to help you enjoy this adventure near Vail.
Trail Snapshot: Booth Creek Falls Near Vail
| Hike Distance | 4 miles Round Trip |
|---|---|
| Difficulty | Moderate |
| Duration | Approx 2-3 hrs |
| Trail Type | Out and Back |
| Starting Elevation | 8460′ |
| Elevation Gain | Approx +1290′ |
| Seasons | March to October |
| Dogs | Allowed On Leash |
| Hike Trail Map | Click for a Map of Booth Creek Falls |
| Denver Drive Time | 2 hr |
| Driving Directions to Booth Creek Falls Trailhead | Click for Google Map |
| Town Nearest Hike | Vail, Colorado |
| Beauty | Waterfall, Lake, Cascades, Creek, Aspen Trees, Wildflowers |
| Activities | Hiking, Photography, Birding |
Parking & Trailhead Information for Booth Creek Falls Hike
To get to the Booth Creek Falls Trailhead from Denver, follow interstate 70 West until you reach East Vail. Take exit 180. At the first intersection, make a right, then an almost immediate left onto the I-70 Frontage Road. After about 1 mile on Frontage road, turn right onto Booth Falls Road. Follow Booth Falls road for about 1/4 mile until it terminates at the trailhead parking area. Space is limited and the trailhead parking likely fills early in the day. The trailhead is near a residential area so please be courteous of those living in the vicinity.
The Hike: Booth Creek Falls Hike
From the trailhead, the trail starts at a steep incline as it follows the course of Booth Creek and passes through the aspen forests and glades of wildflowers that make this part of Colorado famous. In the fall, the changing leaves of the aspens make this hike a favorite. The trail continues on this steady ascent for the first mile, then becomes more gradual.
At around 1.8 miles be on the lookout for a trail sign indicating a side-trail for Booth Creek Falls. You may opt to view the falls from the overlook or proceed down the social trails for a closer experience of the falls. Exercise caution, however, because the area around the falls is steep and social trails are not maintained. As with all trails, conditions can change quickly after rains and weather.
Tips & Resources for Hiking Booth Falls Hike
- TIP: The trailhead may not be directly visible from the parking lot, so walk up the road and find it. It will be located just past the gate.
- TIP: Hike further up the trail to Booth Lake. This adds 2.4 miles (round trip).
- Trail Map: Booth Creek Falls Map
- Packing List: Always pack the 10 Essentials. Download our Hiking Guide to get the list and dayhiking packing checklist.
- Colorado Road Conditions: Colorado Road Conditions
- Photo: We would like to express our gratitude to Shannon Dizmang and Brandon Bombaci for sharing such an amazing photograph of this hike to Booth Falls.
- After the Hike: Loaded Joe’s
Weather
Map & Driving Directions
Click for Driving Directions
St. Vrain Mountain Hike
The St. Vrain Mountain trail is just a 3-mile hike into Indian Peaks Wilderness to stunning views of the rocky peaks of Wild Basin. Hike up and additional 1.5 miles from the RMNP boundary to the summit of St. Vrain mountain for 360-degree panoramic views of a wildflower-laden wilderness. Explore the full St. Vrain Mountain hike profile below for trail map, driving directions, and more.
Trail Snapshot: St. Vrain Mountain Hike
| Hike Distance | 9 miles Round Trip |
|---|---|
| Difficulty | Difficult |
| Duration | Approx 5-6 hrs |
| Trail Type | Out and Back |
| Starting Elevation | 8,800′ |
| Elevation Gain | Approx +3,200′to Summit of St. Vrain Mountain |
| Seasons | June-Sept. |
| Dogs | Allowed On Leash |
| Hike Trail Map | Click for a Map of St. Vrain Mountain Trail |
| Denver Drive Time | 1 hr 30 min |
| Driving Directions to St. Vrain Mountain Trailhead | Click for Google Map |
| Town Nearest Hike | Allenspark, Colorado |
| Beauty | Cascades, Panoramic Views, Wildflowers, Summit |
| Activities | Hiking, snowshoeing, photography |
Parking & Trailhead Information for St. Vrain Mountain
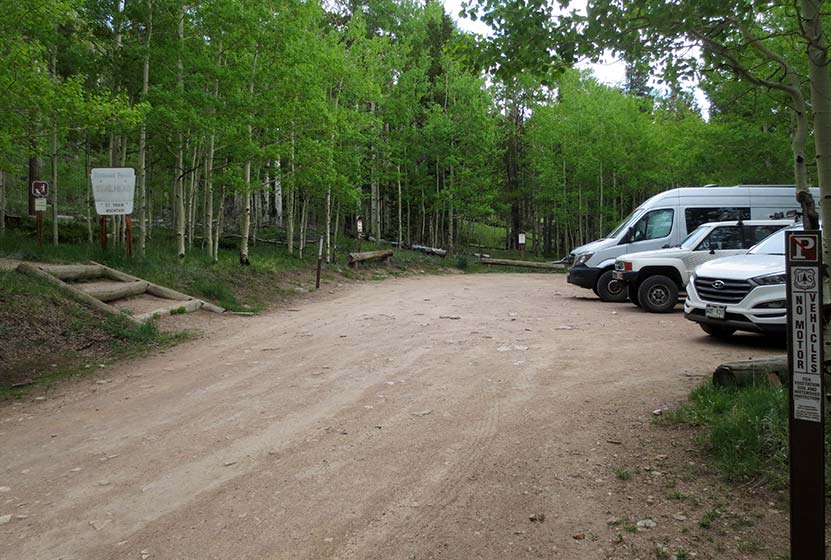
From Denver, take Interstate 25 to either 36 or 66 to Lyons. In Lyons, follow 7 to Allenspark. In Allenspark, turn left onto Ski Road - FR-107. This will be marked with a street sign and a home-crafted sign made out of an old pair of skis. Follow this dirt road as is weaves through Allenspark then a series of dispersed cabins for about 2 miles until the road terminates at the trailhead. There is parking for only about 8 vehicles at the trailhead. There is additional parking along the road, but make sure that you're not blocking cabin drives or tearing up the roadside. You may have to park a ways back down the road if crowded. I hiked this on the weekend and the lot was full around 8 AM. There are not restrooms or potable water at the trailhead.
The Hike: St. Vrain Mountain Trail
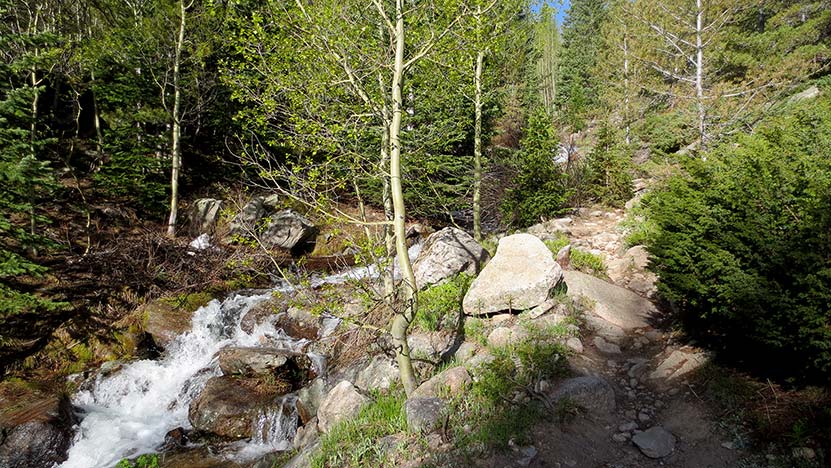
The hike begins in the shade of aspen, spruce, and lodgepole pine forest. This first segment is easy and gradual, getting steeper as the sounds of distant St. Vrain Creek grow louder and closer. Wildflowers become more prevalent and soon the trail begins to follow right alongside the course of the creek.
Then the switchbacks begin. I hiked this in late-May after a Winter when our snowpack was below normal. So it was snow-free until around mile 2. From about mile 2 to mile 3, intermittent snow covered about 3/4 of the trail. I didn't bring snowshoes but had it been early May, I definitely would have needed a pair. Trekking poles were essential for negotiating the trail and to keep from post-holing up to my waist. It could be done without poles, but I'd definitely recommend having them.
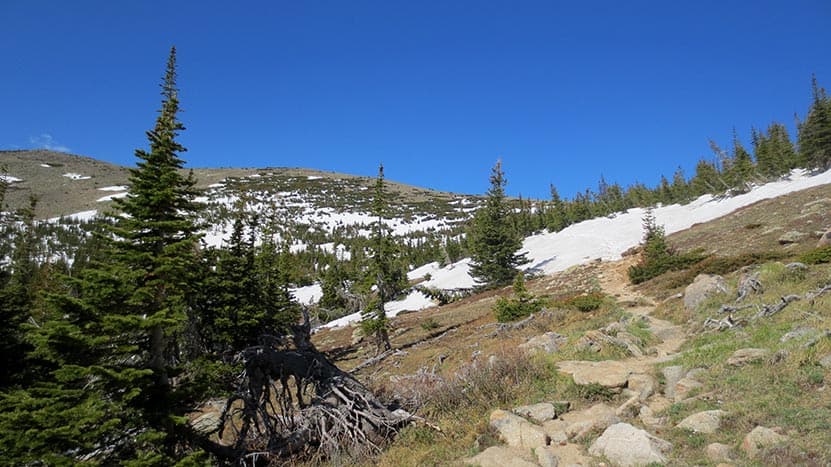
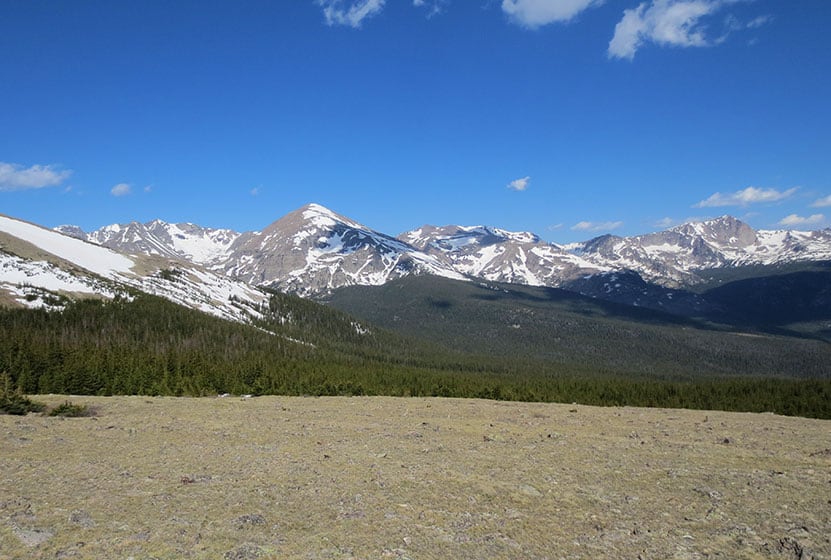
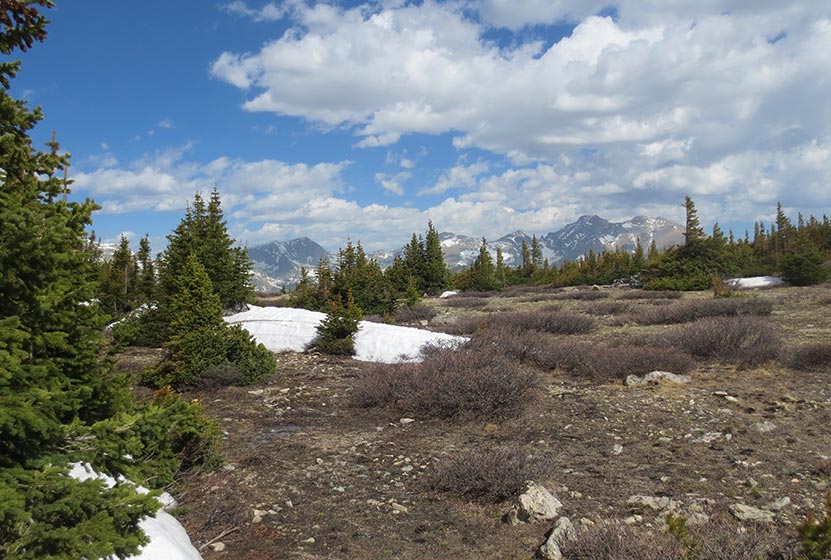
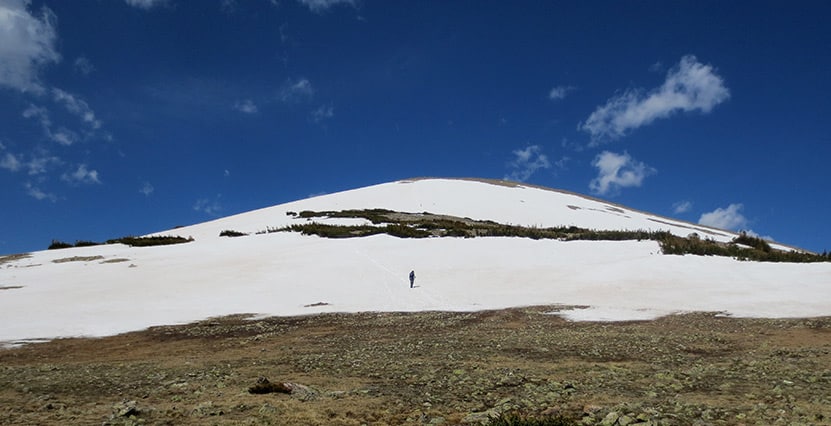
At treeline, things open up to blue skies and high-country tundra brightened by the many colors of summer wildflowers. In early-May, these were just beginning to bloom. However, come mid-June, the creek alongside the trail and these upper reaches of high-country should be replete with wildflowers.
Once you crest the saddle, the views are outstanding. To the Northwest, the entire Wild Basin of Rocky Mountain National Park opens up before you. To the North, you'll find Meadow Mountain, elevation 11,632'. I met a local from Allenspark along the trail and he said the views from the summit of Meadow Mountain rival those of St. Vrain because of the perspective looking down into the Wild Basin area.
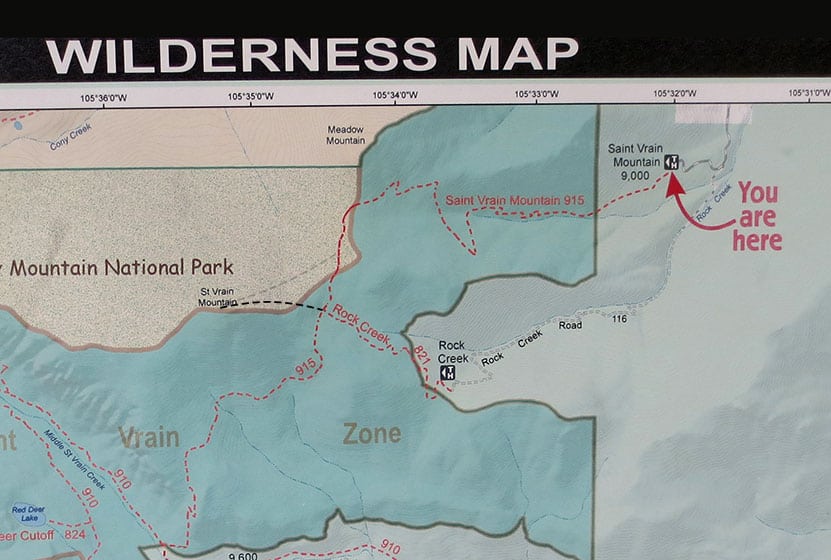
At mile 3, the trail enters Rocky Mountain National Park. From this point, I could see a faint trail in the snow leading up the rounded ridgeline of St. Vrain Mountain. It's about a 1/2 mile hike from the main trail to the summit with about 700 feet of elevation gain.
Below is a photo of the map found at the trailhead. I've added a dark-black dashed line to indicate the trail that goes from the junction with the Rock Creek Trail to the summit. The lighter-grey dashed line indicates the path hikers were taking across the snow to the slopes of St. Vrain Mountain. Be sure to hike on durable surfaces (snow, rock, trails) on the summit approach to protect the fragile tundra environment.
Tips & Resources for Hiking St. Vrain Mountain Trail
- TIP: Trekking Poles are a must on this trail. They will be especially helpful to negotiate the snow that covers the upper reaches of the trail in late-Spring through early Summer.
- TIP: Apply sunscreen as the trail is mostly exposed to the sun.
- Similar Hikes: Flattop Mountain, Windy Peak, Carpenter Peak.
- Trail Map: St. Vrain Mountain Trail
- Packing List: Always pack the 10 Essentials. Download our Hiking Guide to get the list and dayhiking packing checklist.
- Colorado Road Conditions: Colorado Road Conditions
- After the Hike: Meadow Mountain Cafe in Allenspark, CO
Weather
Map & Driving Directions
Click for Driving Directions
Best Time to See Changing Aspens in Colorado
When Do the Aspens Change in Colorado?
The peak color of changing aspens only lasts for about a week in Colorado. However, the shoulder weeks bring to the state about a month of golds, greens, oranges, and reds from mid-September to mid-October. So, the best answer to the question, "When is the best time to see the fall colors of Colorado?" is best answered as, between September 15th and October 15th, but there will be an optimal 7-10 day period sometime within that date range. That optimal time when the aspen colors are most intense and brilliant, depends on four factors: temperature, moisture, sunlight, and altitude. For instance, a dry season will dull the fall colors. An early frost can cut short the season, too. The best kind of mountain weather requires a bit of moisture, gradually decreasing temperatures, and a good amount of sunlight.
If you are interested in why certain aspens turn red, orange, or yellow, or wonder why they change color in the first place, then read on. I also give a set of recommendations for places to hike where you can take in the Fall colors of Colorado near Denver. If you are looking for hikes to take this fall, then check out our Top 10 Best Fall Hikes Near Denver.
Why Do the Aspens Change Color in Colorado?
Let's start off with the familiar. We know that the compound, chlorophyll, is what provides food to trees through the process of photosynthesis--and that chlorophyll is what makes leaves green. It helps to think of the power of Chlorophyll as similar to the intensity of the sun that blocks out the stars during the day. During the Spring and Summer, the other chemicals in a leaf that produce the yellows, oranges, and reds get overpowered by the green of chlorophyll. When the chlorophyll flow gets shut off in the Autumn, these other colors get to shine. This is triggered when trees respond to longer and colder nights by essentially blocking off the flow of chlorophyll into and out of the leaves. At this point, three other compounds get trapped in the leaf and begin to show their hues. Let's take a look into each of the colors.
Why Do Aspens Turn Red?
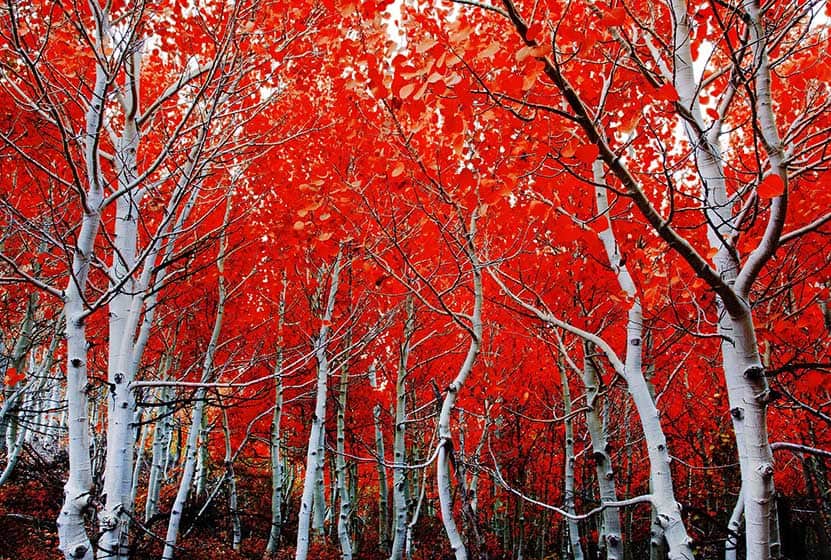
Red is the most rare, and it is created by anthocyanins. These are generated by sugars that get locked into the leaves in the fall. You may notice that certain groves of aspens will turn red year after year, and that others will never turn red. Researchers as Colorado State University found that this is due in part to genetics: some apsens will produce anthocyanins and others just don't. They also found that weather plays an important role. The reds will become more intense if the fall season starts out warm and sunny then gradually cools, without getting down to freezing at night.
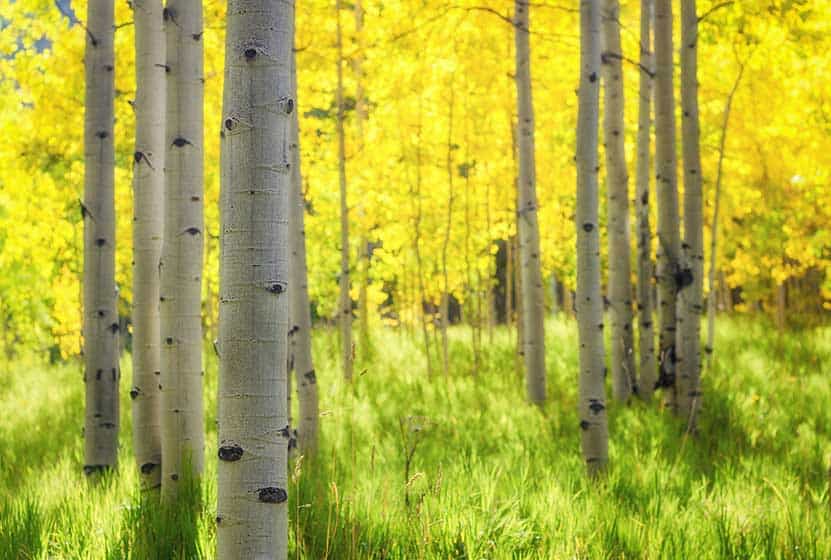
Why Do Aspens Turn Yellow?
Another compound, Xanthophyll, creates the yellow tones in fall leaves. Going back to our sun and stars metaphor, Xanthophylls might be similar to the moon. Its yellow pigment can stand up to the intensity of the green in chlorophyll and can be seen year-round--similar to how you can often see the moon during the intensity of the day. However, once the chlorophyll is blocked, its golden hue radiates!
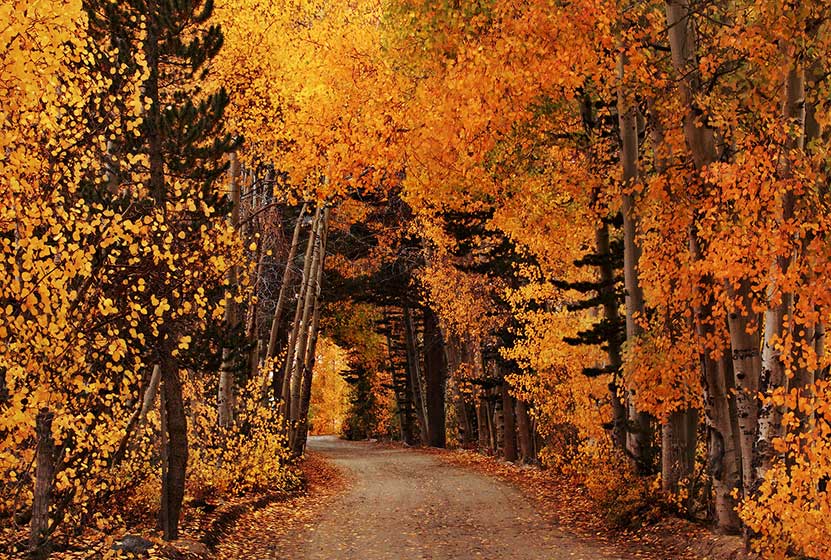
Why Do Aspens Turn Orange?
You probably guessed it, the orange is caused by another trapped compound with a funny name! Carotenoids (think carrots) produce and orange pigment--Go Broncos!
Carotenoids are not as strong as xanthophylls, but they are more prevalent than their red cousins, the anthocyanins. That's why you'll see more oranges in the mountains than reds when the fall colors carpet the landscape.
Once all the yellows, oranges, and reds are spent, the only thing left are the tannins, which turn the leaves brown. Then comes the white of winter.
The Best Places to View Changing Aspens Near Denver
I've written an entire post with the Top 10 Best Fall Hikes Near Denver--check it out. But if you are looking for a quick guide, here are a few of my recommendations.
-
Drive: Guanella Pass Road to 285 to Kenosha Pass
-
Trail Ridge Road in Rocky Mountain National Park
-
Maroon Bells - Worth the Drive
Easy access from Denver; pick up Guanella Pass Road by taking interstate 70 to Georgetown, Colorado. The road winds up to the top of Guanella Pass, where hikers can get out and go for a light stroll, or make the demanding climb up the 14er, Mt. Bierstadt (prepare accordingly). The road continues over the pass and terminates at highway 285 in Grant, Colorado. Taking a right (going West) onto 285 leads to Kenosha Pass about 7.5 miles down the road. Kenosha Pass is arguably the best place to view the changing aspens within 90 minutes of Denver. Check out our Kenosha Pass and Guanella Pass Trail profiles for more details.
Trail Ridge Road is further from Denver, but worth the drive. It will also require drivers to purchase a Rocky Mountain National Park pass. I find it most affordable to buy a yearly pass because I make multiple trips into the park each year. September is a great time to visit the park because the Elk are in rut and bugling. However, that does mean that the traffic in RMNP is high, so I recommend going on a weekday. We have profiled over 50 hikes in Rocky Mountain National Park, so for more info, explore our Rocky Mountain National Park Hiking Trails page.
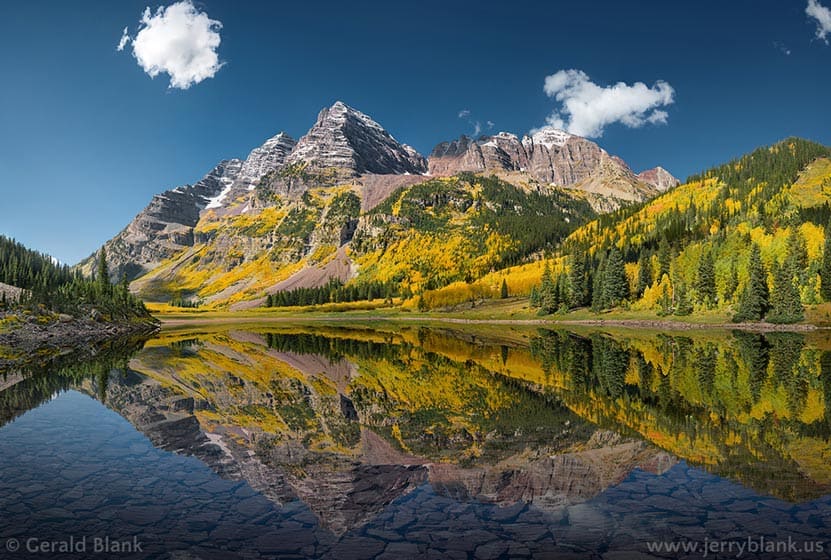
Maroon Bells is about 4 hours from Denver, and if you have the time, it's worth taking a long day-trip to witness the breathtaking landscape. There are several hikes around the Maroon Bells area and we've profiled them, as well as several campsite options, in our Ultimate Guide to Hiking Maroon Bells. Be sure to take time to read it because there is limited parking, an access fee, and you may need to take the shuttle to access the trailhead.
Photo Credits
Thanks goes out to Pacheco for the photos of the orange and red aspens; to Matt Santomarco for his photo of the changing aspens at Mt. Sneffels; Gwendolyn Stansbury for her photo of Trail Ridge Road;and to Alistair Nicol's photo of the golden stand of aspens.