Eagles View Hike in Reynolds Park
The Eagles View Loop hike in Reynolds Park is a 4-mile, moderate, loop trail to a scenic outlook. The trail ascends through meadows and ponderosa pine forest to views of Pikes Peak and the sawtooth spires and peaks of the Rampart Range. Explore the full Reynolds Park Eagle View Loop hike profile below for trail map, driving directions, and more tips and details to help you enjoy this adventure near Conifer, Colorado.
Trail Snapshot: Reynolds Park Eagle View Loop
| Hike Distance | 4 or 4.4 miles Round Trip |
|---|---|
| Difficulty | Moderate |
| Duration | Approx. 2 hours |
| Trail Type | Loop |
| Starting Elevation | 7,250'′ |
| Elevation Gain | Approx +900′ |
| Seasons | Year Round |
| Dogs | Allowed On Leash |
| Hike Trail Map | Click for a Map of Eagles View Loop at Reynolds Park |
| Denver Drive Time | Approx. 50 min |
| Driving Directions to Reynolds Park | Click for Google Map |
| Town Nearest Hike | Conifer, Colorado |
| Beauty | Scenic Overlook, Aspen woodlands, Views of Pikes Peak and Cathedral Spires |
| Activities | Hiking, Trail Running, Equestrian Trails, Photography |
Parking & Trailhead Information for Reynolds Park
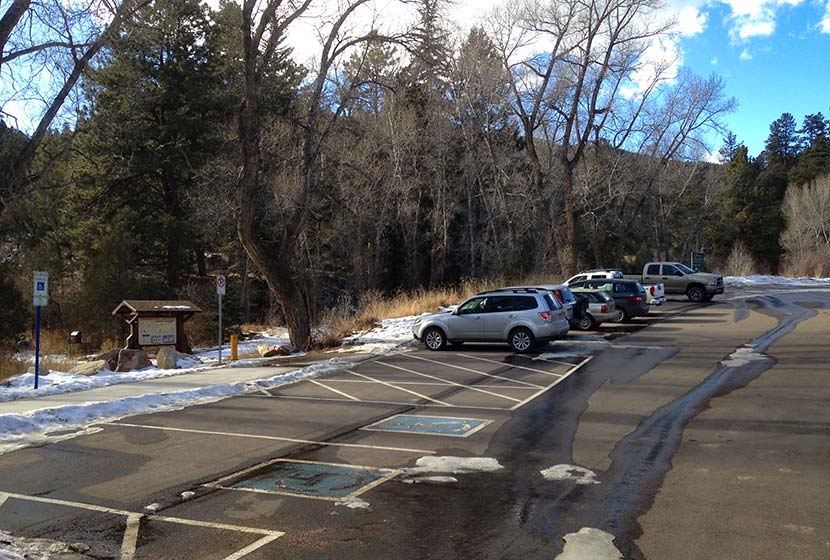
I really enjoy the drive into Reynolds Park, particularly for the last stretch descending to the trailhead. The trailhead is about 50 minutes from downtown Denver. From Denver, take 285 South to Conifer, Colorado taking the Kennedy Gulch exit. At the exit, you'll take a left onto Kennedy Gulch Road, which will go under the 285 overpass. At the next stop sign, you'll see a red barn in front of you and an entrance to 285 on your right. Here, you'll take a left onto Foxton Road. This is where that beautiful stretch of road begins. Drive for about 5 miles and the Reynolds Park parking area will be on your right. The parking area can hold about 45 vehicles. There are restrooms, picnic tables, and grills at the trailhead.
The Hike: Eagles View Loop at Reynolds Park
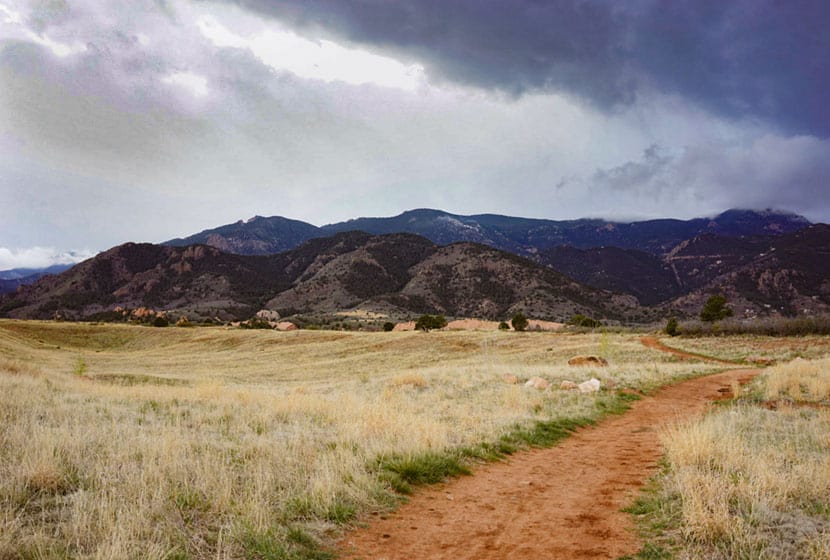
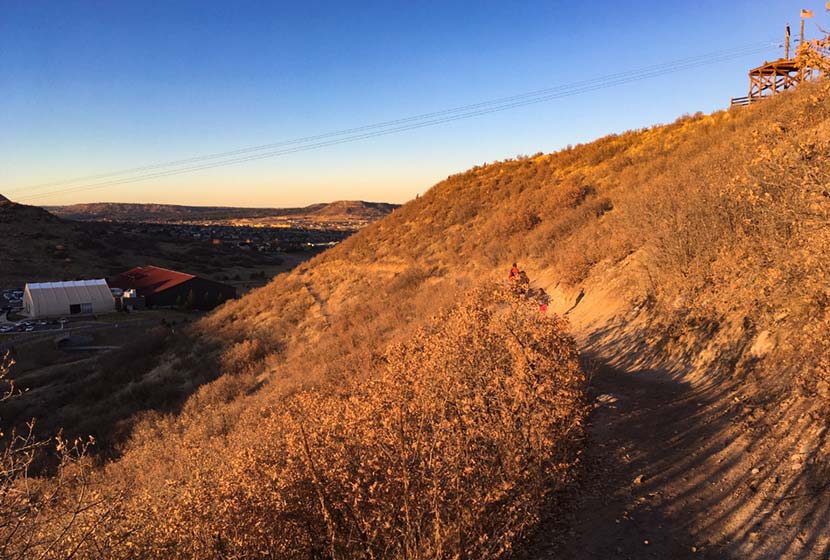
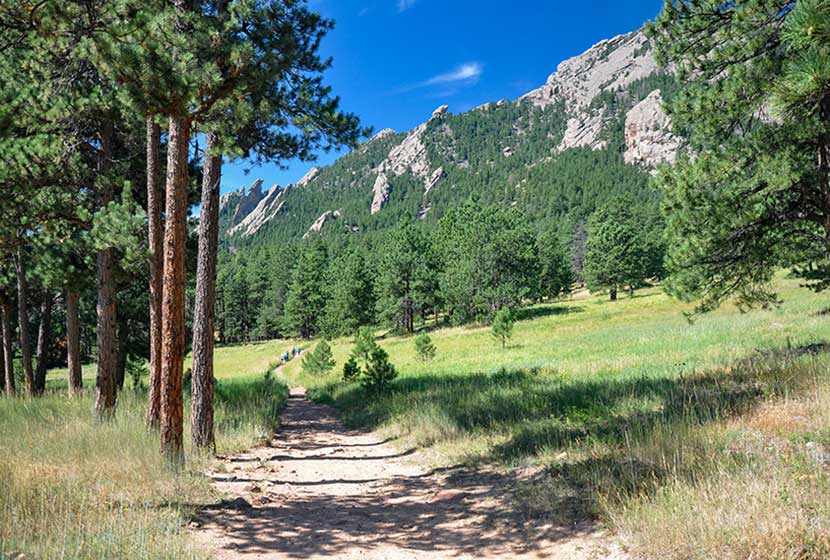
This loop hike gives hikers the most extensive exploration of the larger West side of Reynolds park. Begin by taking the main trail found on the south end of the parking lot (near the restrooms). It's wider than the other trails. At the first junction, take a right onto the Elkhorn Trail. This will lead through a mix of wooded areas and meadow.

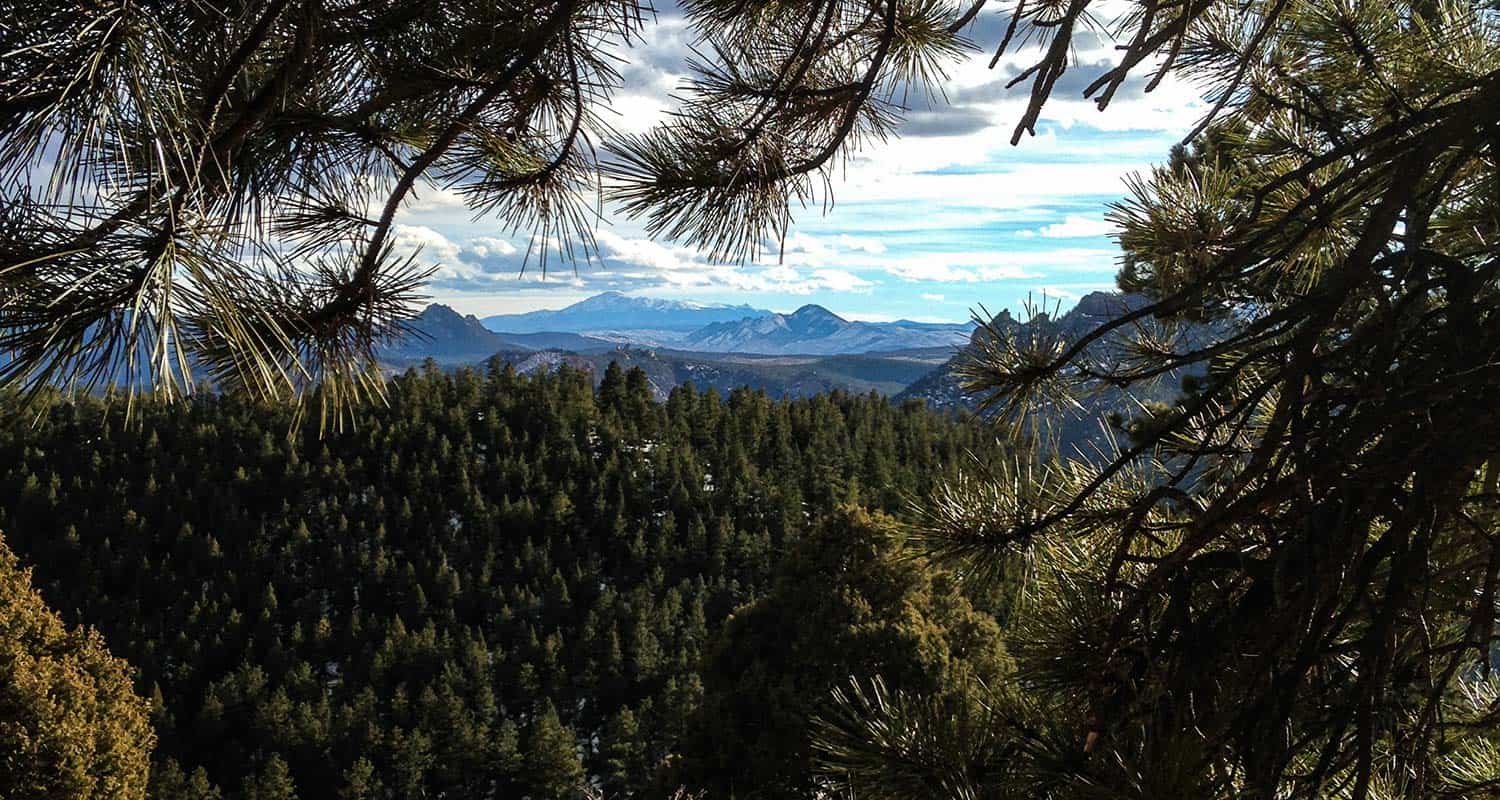
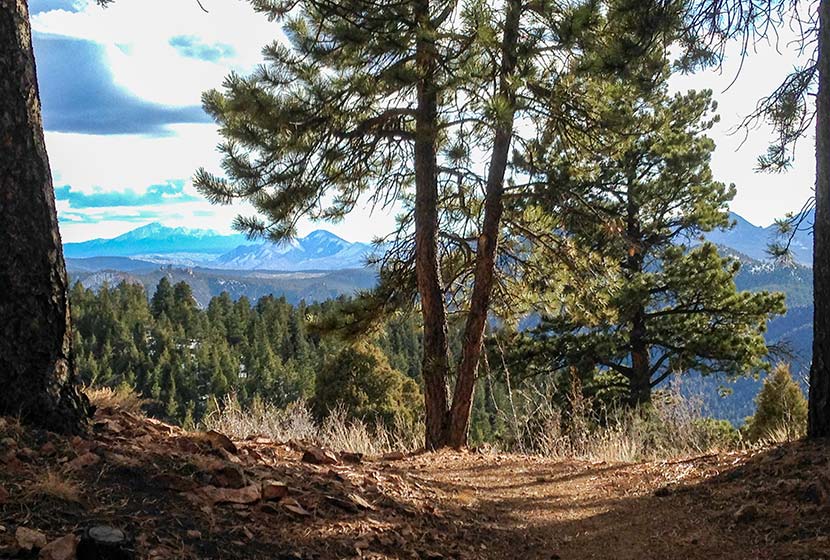
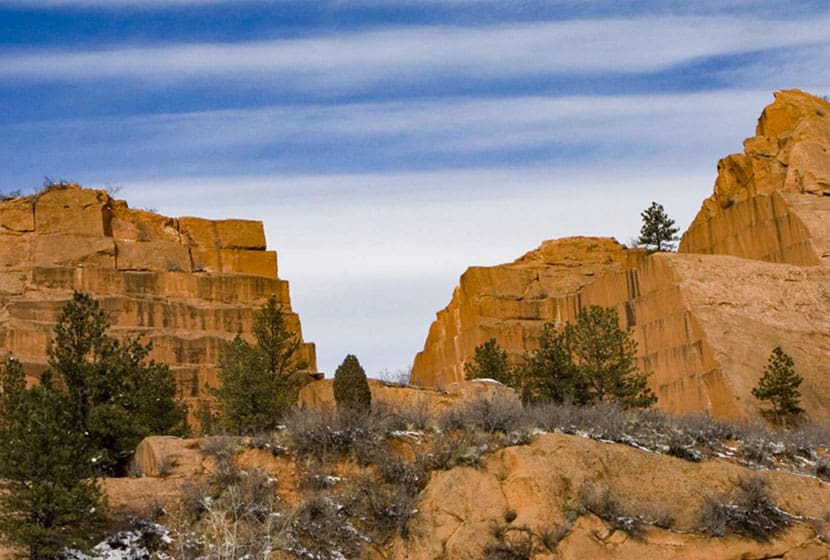
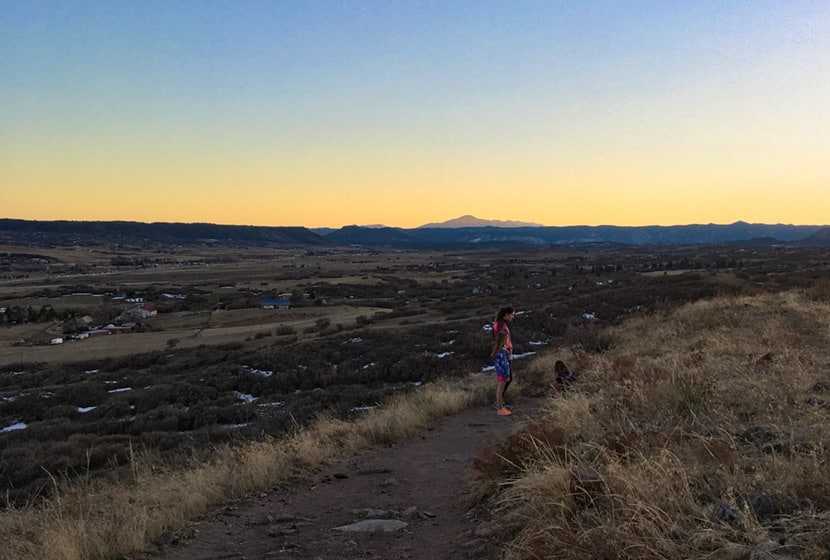
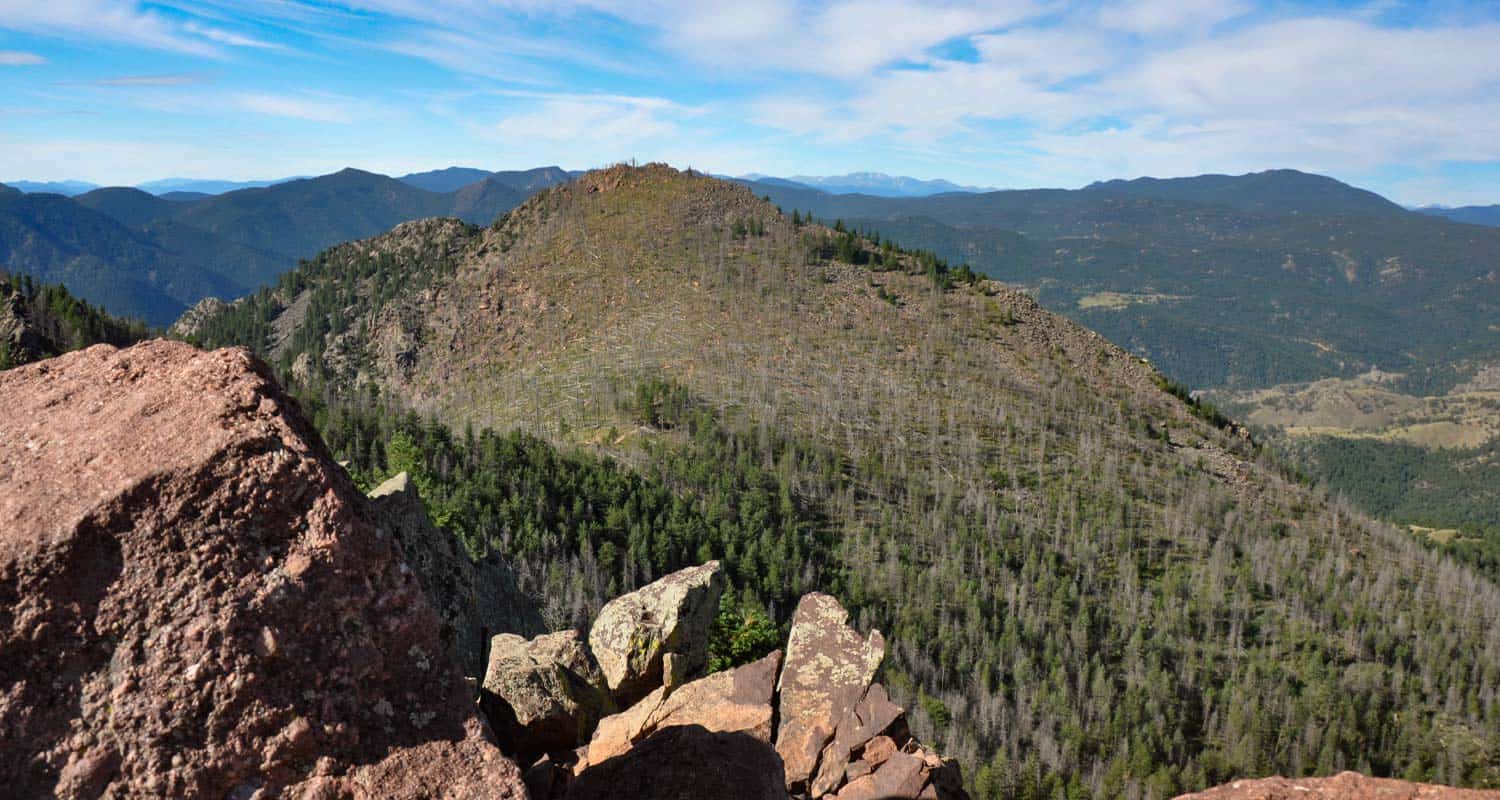
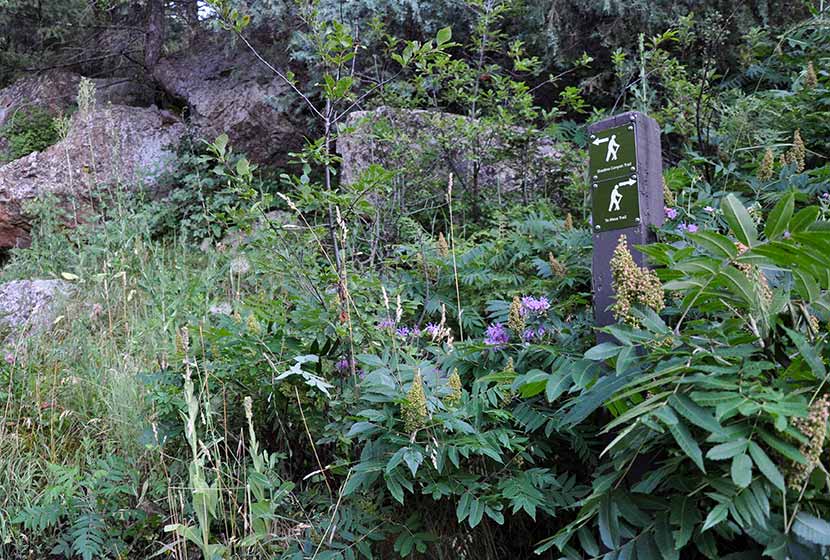
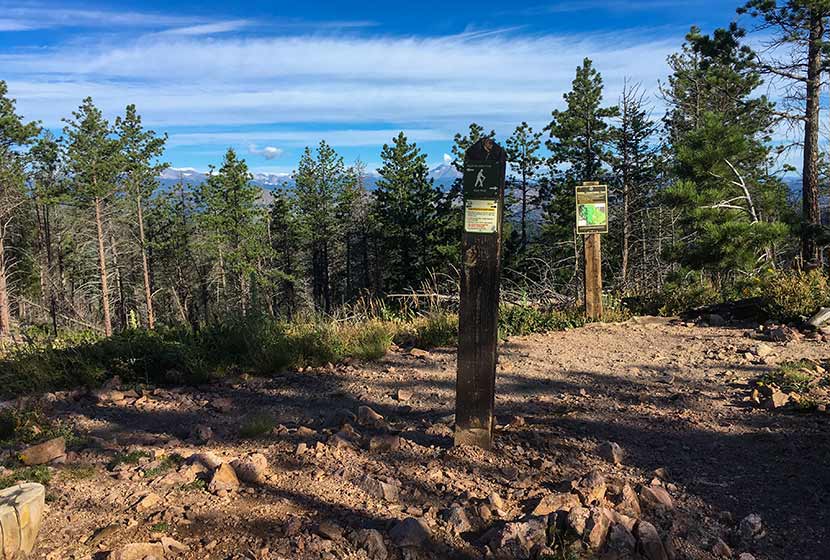
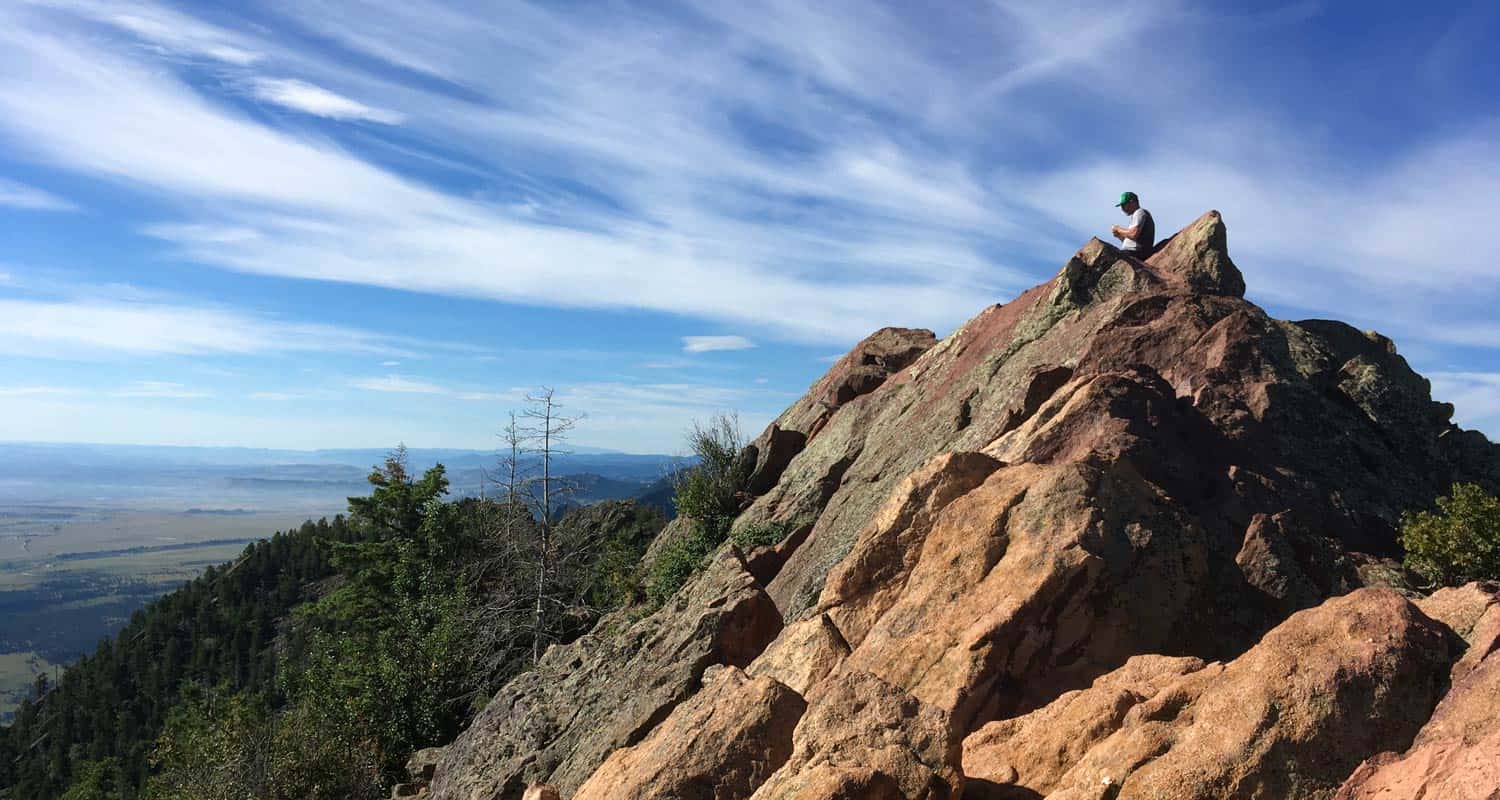
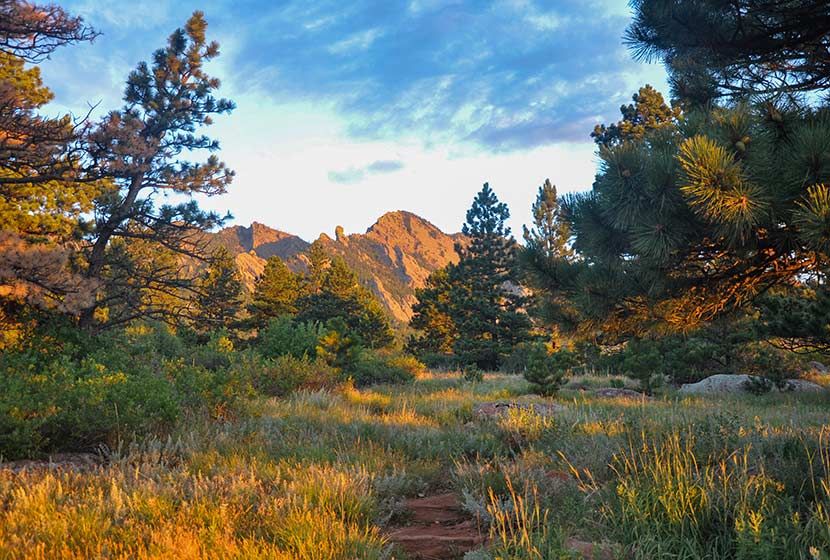
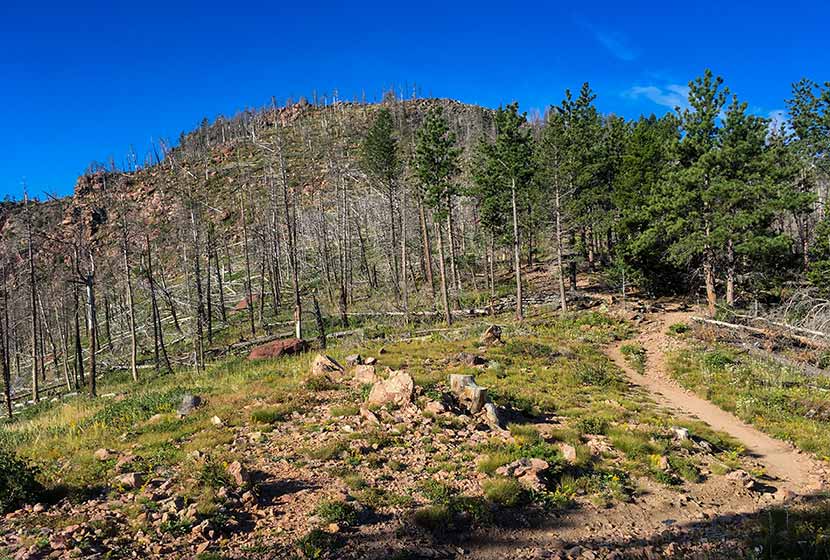
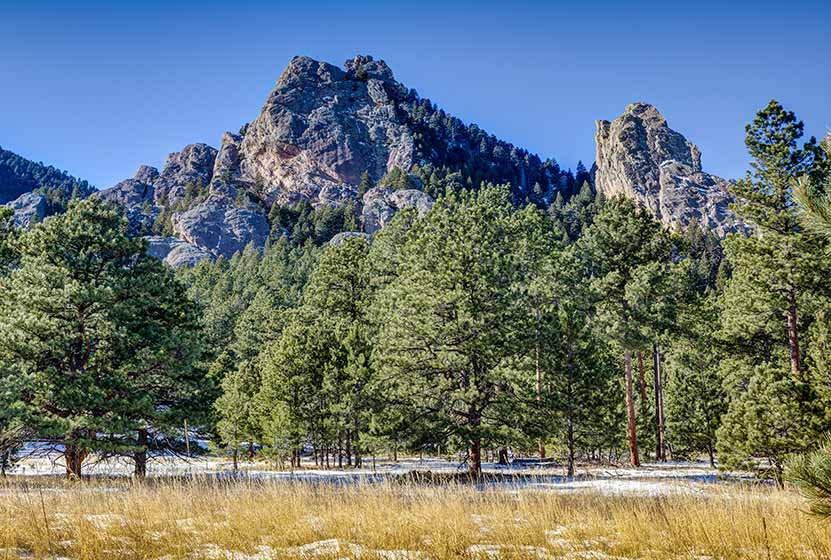
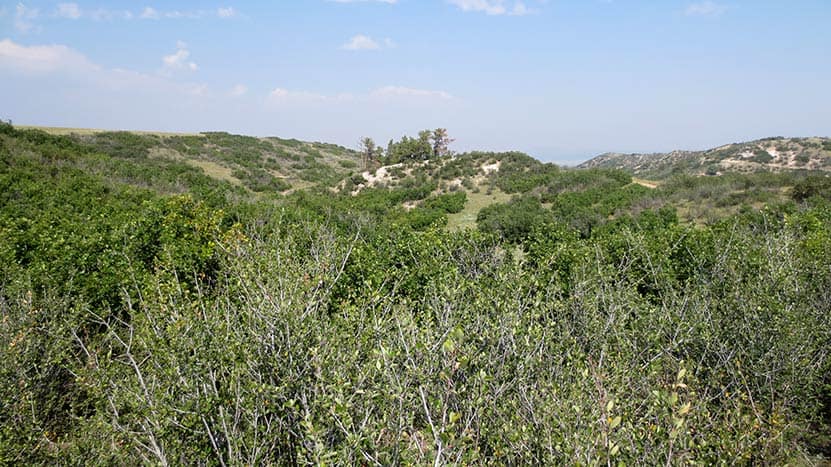
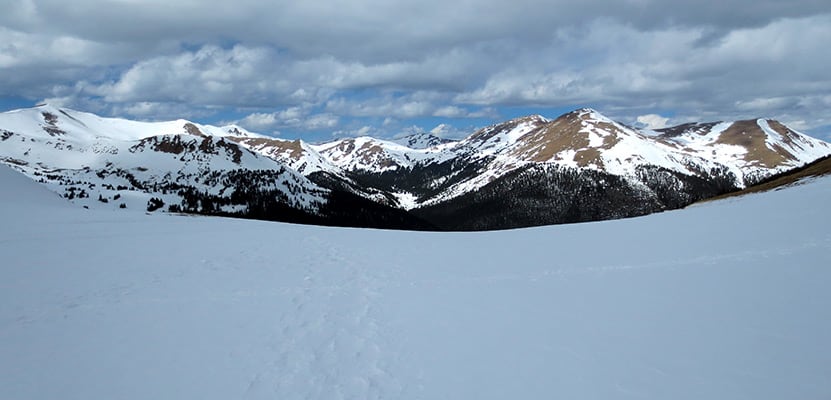
Hikers will travel about 0.3 mile on this segment of the Elkhorn Trail until it intersects with the Ravens Roost Trail. Here, take the Ravens Roost trail which is more steep, ascending for 0.6 of a mile up to the next junction with the Eagles View Trail. Both the Ravens Roost and Eagles View trails are Hiker and Equestrian Only (no bikes, but dogs are allowed). You'll travel through stands of ponderosa pine. Look for Clarks Nutcracker and Stellar Jays as you hike. At the junction, the Eagles View Trail will bear to the right (pictured below).

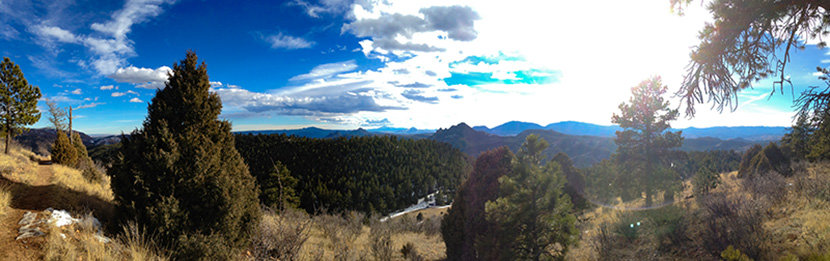
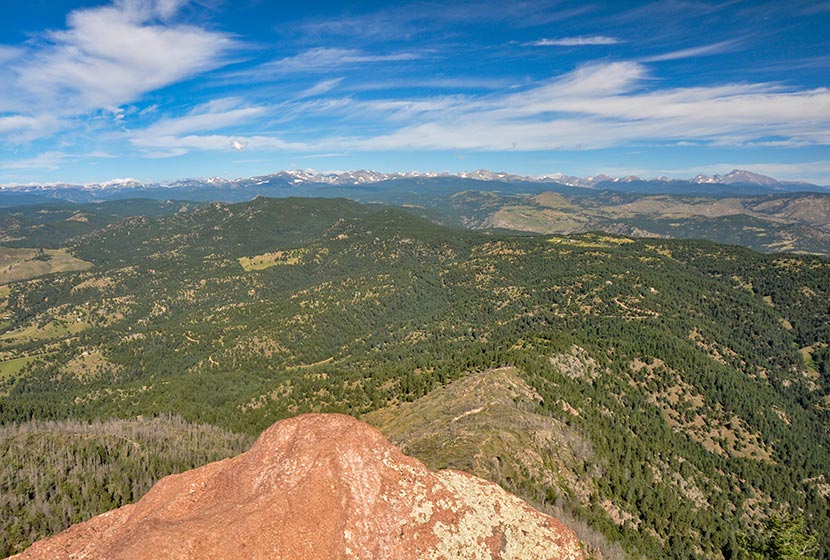
The trail will eventually open up to panoramic views, with the Eagles View scenic viewpoint being the best.
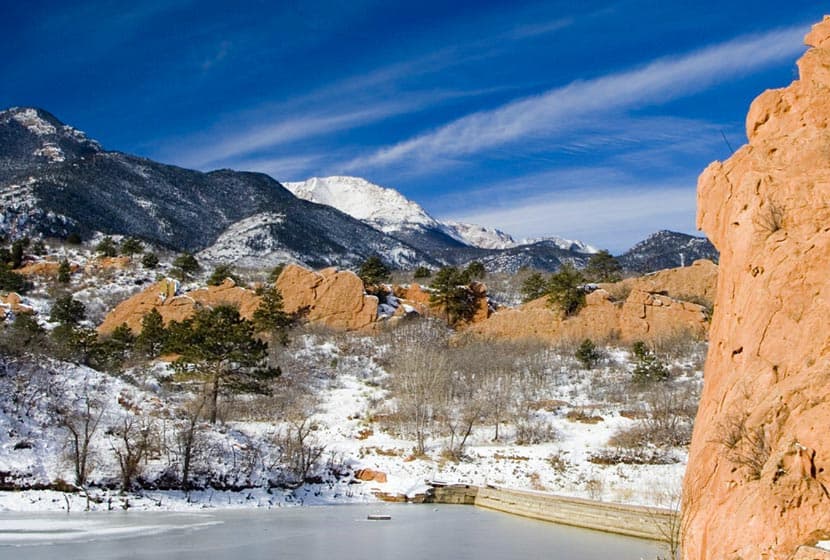
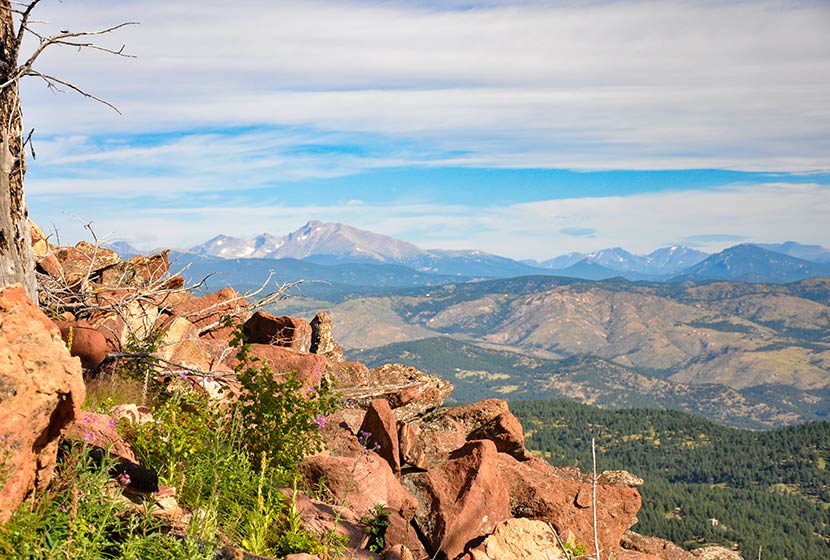
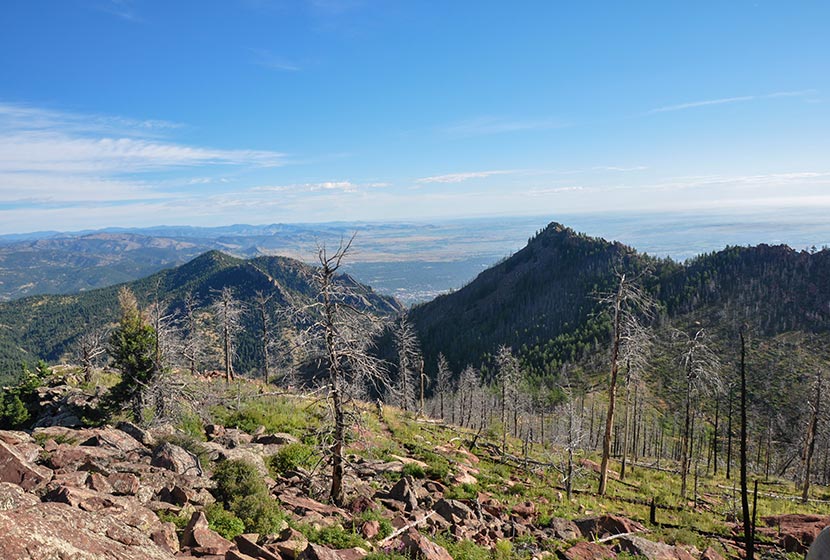
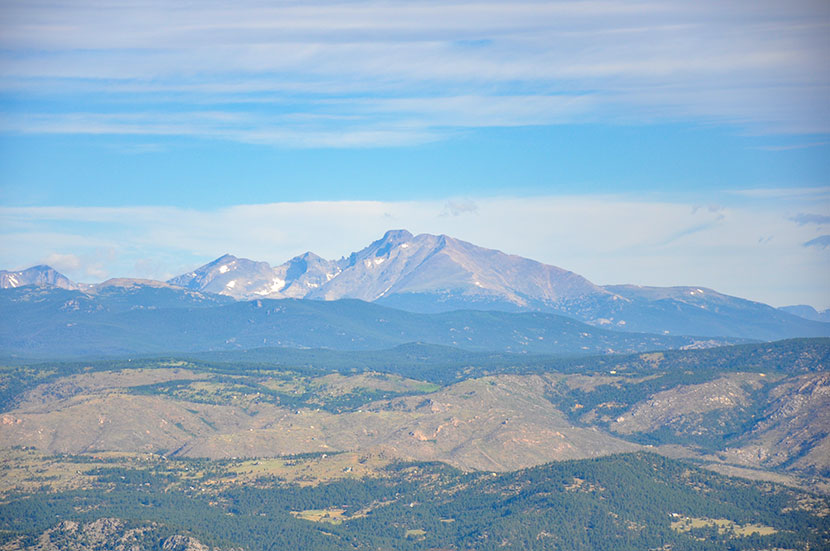
At the viewpoint, there are expansive views of the Rampart Range, and pikes Peak to the South. The Rampart Range is a low mountain range that stretches from south of Denver to Colorado Springs. The range is characterized by scraggy granite peaks jutting out of green forested foothills. At sunrise the granite rock formations light up orange and pink, and look like a series of castles or the rampart wall of a giant ancient fortress. My favorite view of the Rampart Range is from the Devils Head trail and from the Fire Lookout Tower up on Devils Head. It's the tallest peak in the range with an elevation of 9632 feet.
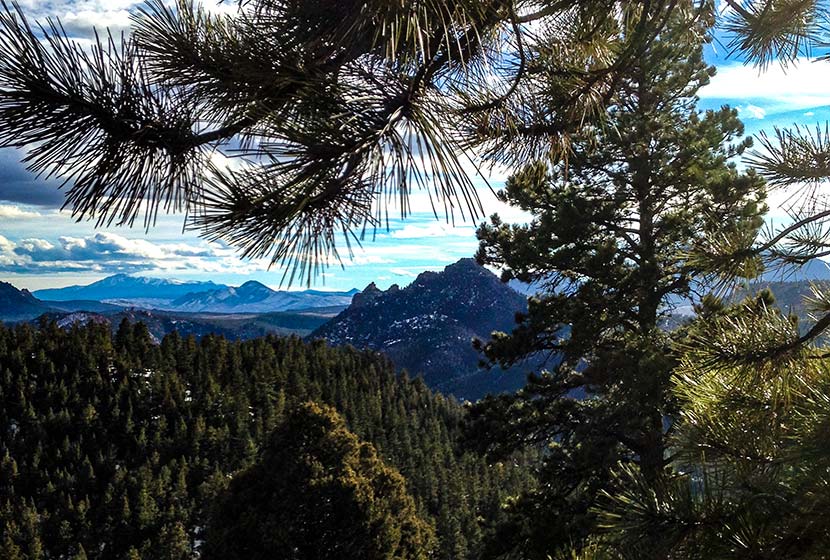
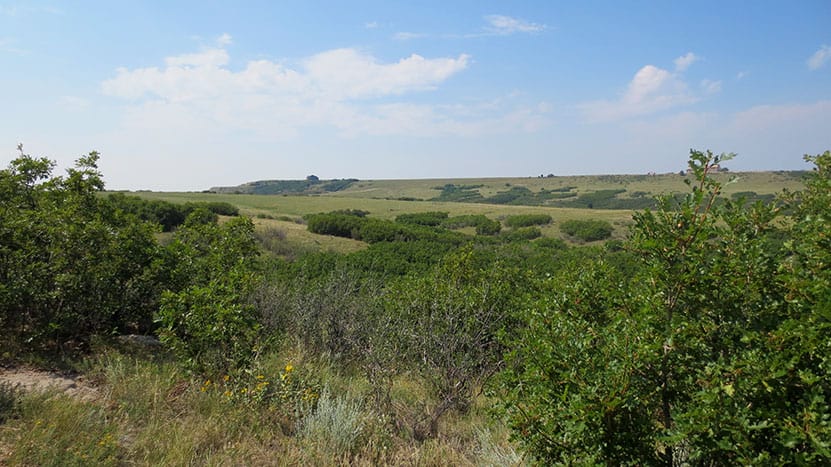
From the scenic point at Eagles View, the trail begins to descend and wind its way north. Pause on this segment to take in the views into the valley below and out to the distant plains in the East.
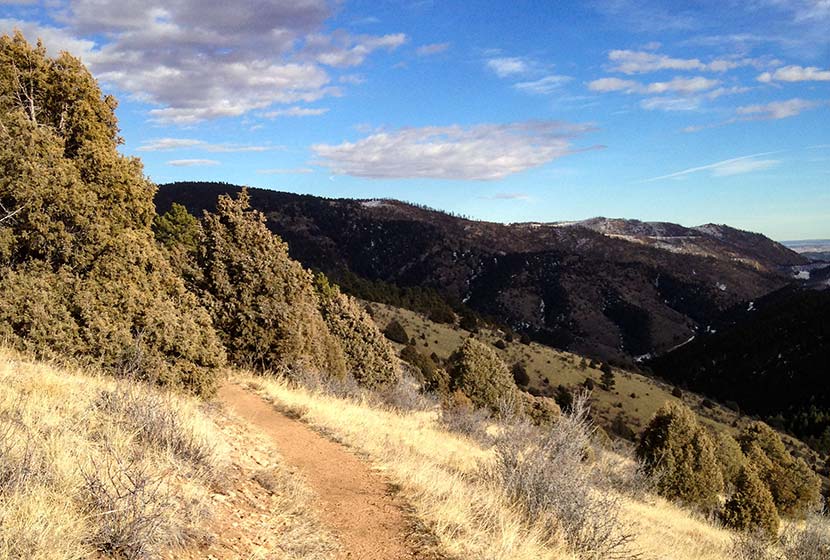
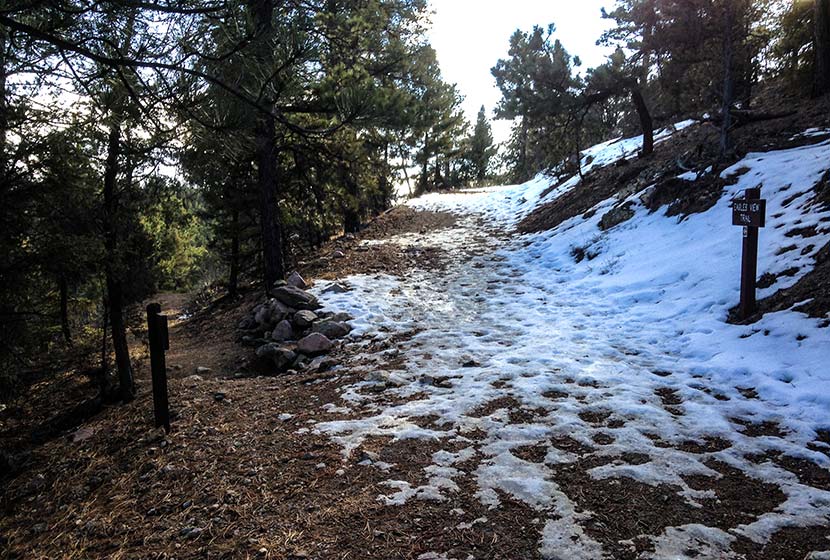
Eventually, the trail will come to another juncture with the Ravens Roost (south segment) and the Oxen Draw Trail. Both are options back to the Trailhead. Taking the Ravens Roost trail makes for a longer 4.4 miles total. Taking the Oxen Draw trail will make your total trip around 4 miles.
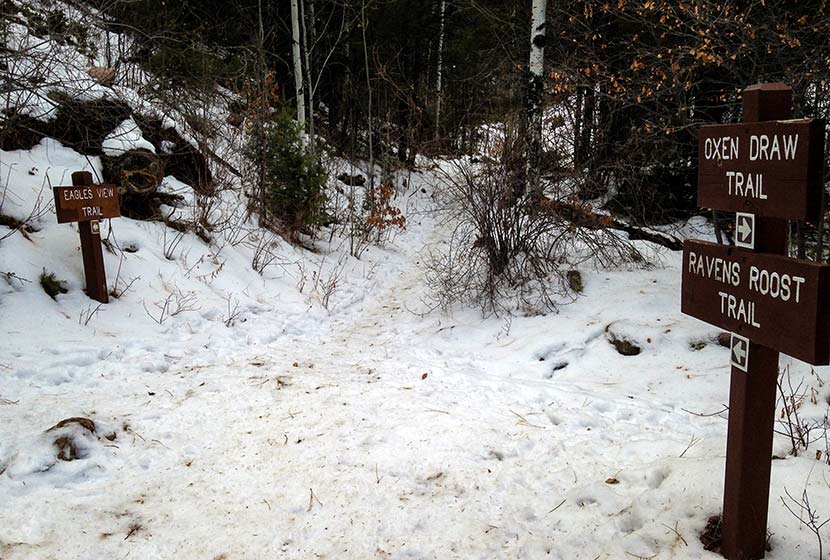
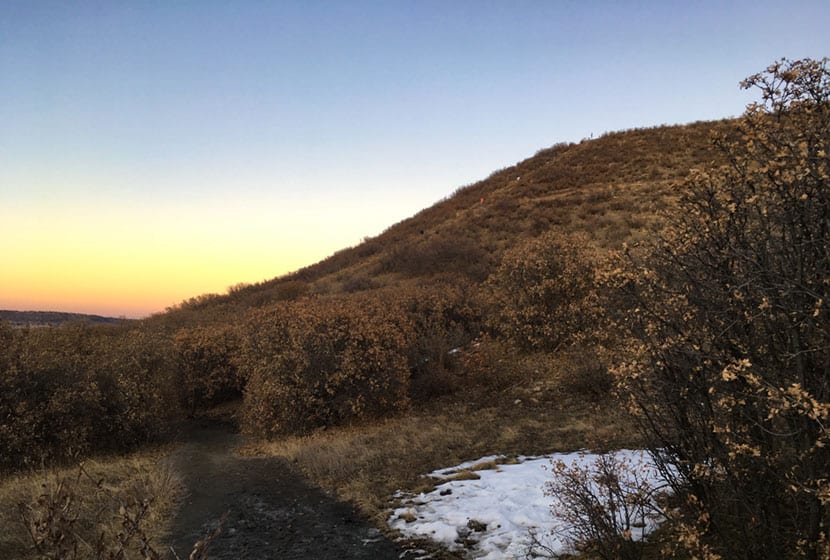
When I hikes this in the Winter, the Oxen Draw Trail got quite icy from a recent thaw and freeze. I'm assuming this is pretty normal for this shaded area of the park during the cold months. I wish I had brought my traction devices because the trail had some steep and sketchy, ice-coated segments. I had my trekking poles, and they helped, but it was difficult to navigate.
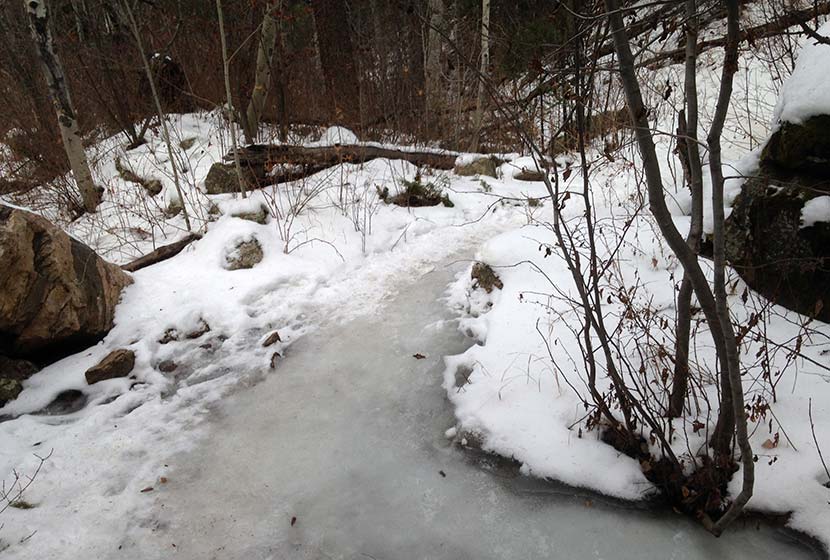
You may notice that I've marked this as a dog-friendly hike. Most of the year that's true, but these icy segments of the Oxen Draw Trail in the Winter may not be the best for your best friend. Overall, though this hike has proven to be one of the lesser traveled trails near Denver--especially on a weekday. Be sure to watch the video below to get a feel for the hike.
Tips & Resources for Hiking at Reynolds Park in Jefferson County
- Trekking Poles and Traction: If you are hiking in the Winter or Spring, the this trail (as you can see from the photos above) can get icy and muddy. Trekking Poles and Traction Devices are recommended for these seasons. I'm a huge fan of trekking poles because they take so much impact off the knees when hiking and backpacking, and they allow us to navigate more demanding terrain. Check out Trekking Pole options at REI.
- Camping: There are 5 tent camping areas on the East end of Reynolds Park that require only a short hike in and make for a good way to introduce your kids or family to a weekend camping trip without having to travel far from Denver. You can reserve a campsite at the Idylease Campground at the Jefferson County Parks Reservations Page. The campground is just a 1/2 mile hike in and has restrooms--but no drinking water--available at the site.
- Trail Map: Reynolds Park in Jefferson County Park Map
- Packing List: Always pack the 10 Essentials. Download our Hiking Guide to get the list and dayhiking packing checklist.
- Colorado Road Conditions: Colorado Road Conditions
- After the Hike: Scooters Smokehouse BBQ
Weather
Map & Driving Directions to Reynolds Park
Click for Driving Directions
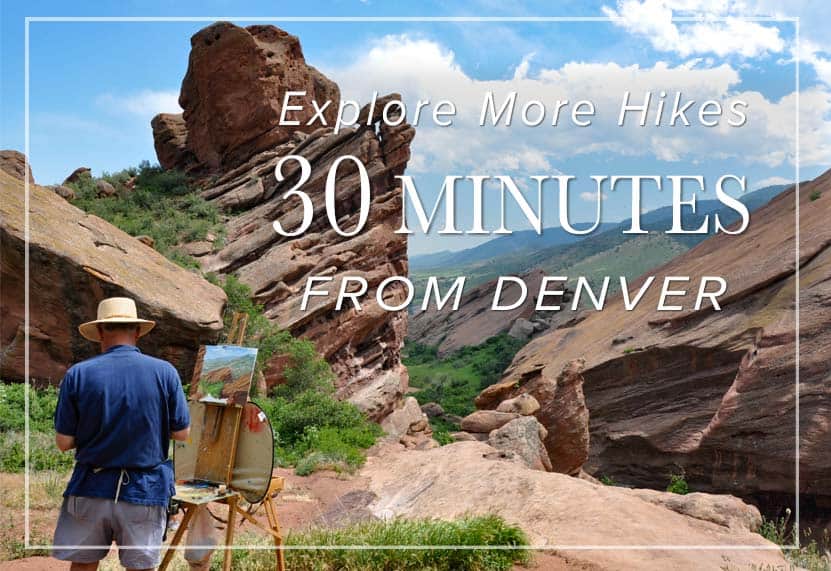
Red Rock Canyon Hikes
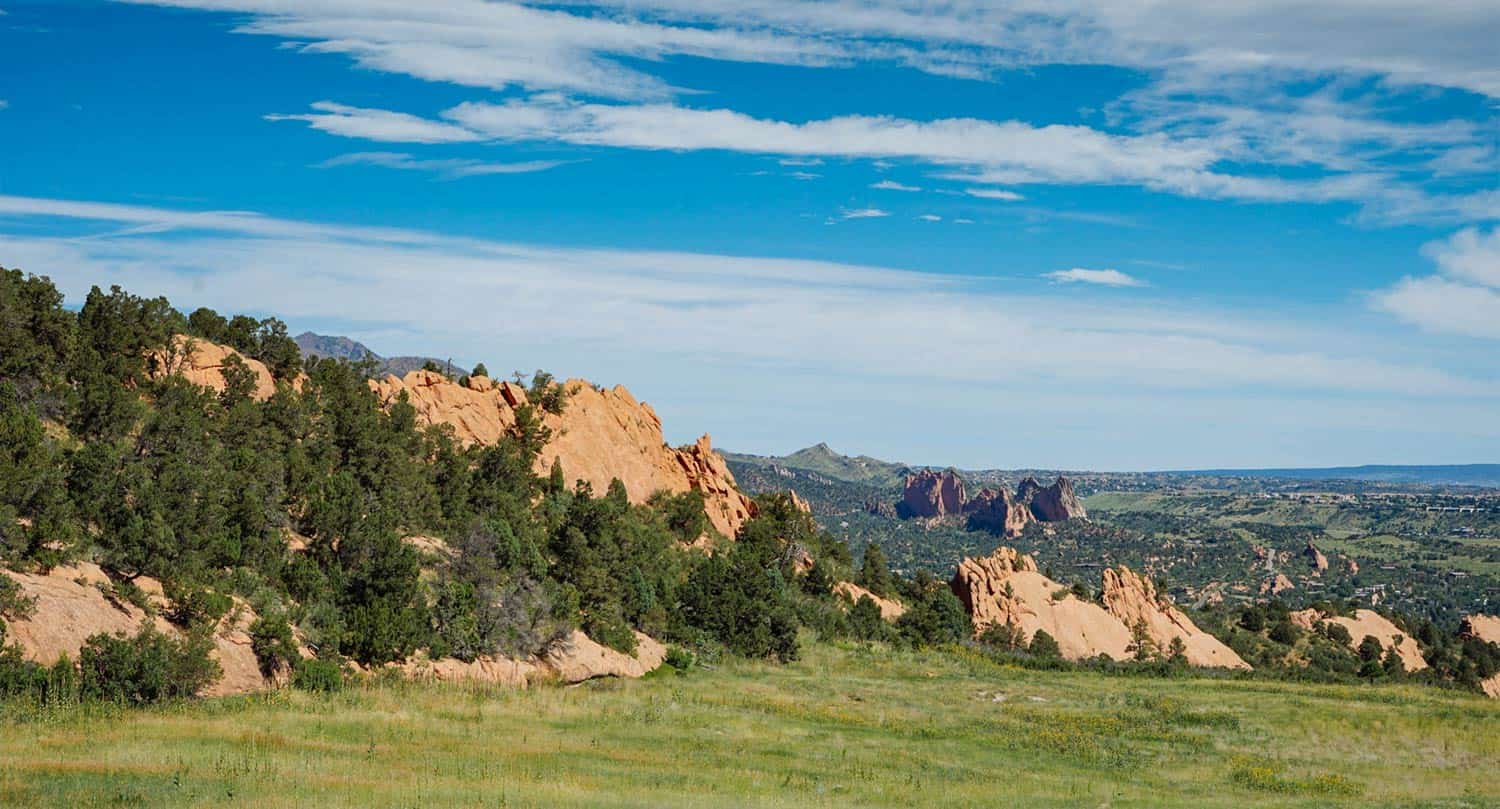
Red Rock Canyon Open Space features miles of easy hiking trails just a few miles west of Colorado Springs with views of Pikes Peak to the West and Garden of the Gods to the North. The park has two off-leash dog trails and most other trails are accessible to and shared by hikers, trail runners, and mountain bikers. Check out the full Red Rock Canyon Open Space hike profile below for trail map, driving directions, and more five different hike options to explore at this park near Colorado Springs.
Trail Snapshot: Red Rock Canyon Open Space
| Hike Distance | 1 to 3.3 miles Round Trip |
|---|---|
| Difficulty | Easy |
| Duration | Approx 1-2 hours |
| Trail Type | Loops and Out and Back Options |
| Starting Elevation | 6100′ |
| Elevation Gain | Approx +100′to +900' |
| Seasons | Year Round |
| Dogs | Allowed On Leash, Off Leash in Designated Areas |
| Hike Trail Map | Click for a Map of Red Rock Canyon Open Space |
| Denver Drive Time | 1hr 15min |
| Driving Directions to Red Rock Canyon Open Space | Click for Google Map |
| Town Nearest Hike | Colorado Springs, Colorado |
| Beauty | Red rock formations, migratory birds, ruins of red rock quarry, pond area, and deer. |
| Activities | hiking, mountain biking, trail running, snowshoeing, photography |
Parking & Trailhead Information for Red Rock Canyon Open Space
From Denver, take Interstate 25 south to Colorado Springs, taking the Cimarron St/24 West. Proceed about 3 miles West on Cimarron/24 and take a left onto Ridge Road. At the roundabout, take a left (by going around 3/4 of the roundabout). The parking lot and trailhead for Red Rock Canyon will be on your right.
From the trailhead hikers can pick up two of the main trail arteries, the Mesa Trail that works its way through the middle of the park, and the Red Rock Canyon Trail, which runs along the east side. Both lead toward the most popular destination, the quarry.
5 Hike Options in Red Rock Canyon Open Space
-
-
The Dog Loops: 1/2 and 1 mile
-
The upper dog loop is an approximately one-mile curcuit, while the lower is about 1/2mile. Both are great options for a quick walk with the dog after work in a space set aside for off-leash exercise and play. You'll find these two off-leash dog trails immediately South of the parking lot.
-
-
Contemplative-Sand Canyon Loop: 1.75 miles
-
This short loop hike offers more peace and quite because it's tucked away along some of the red rock formations, and the Contemplative Trail segment is designated a hiker-only trail. Pick up the Contemplative trail by starting at the Sand Canyon Trail (West end of the parking lot). This will lead to the Contemplative Trail. You can hike the Contemplative Trail out-and-back, but hikers also have a loop option by joining back up with the Sand Canyon Trail and taking it back to the parking lot.
-
-
The Quarry Loop: 2 Miles
-
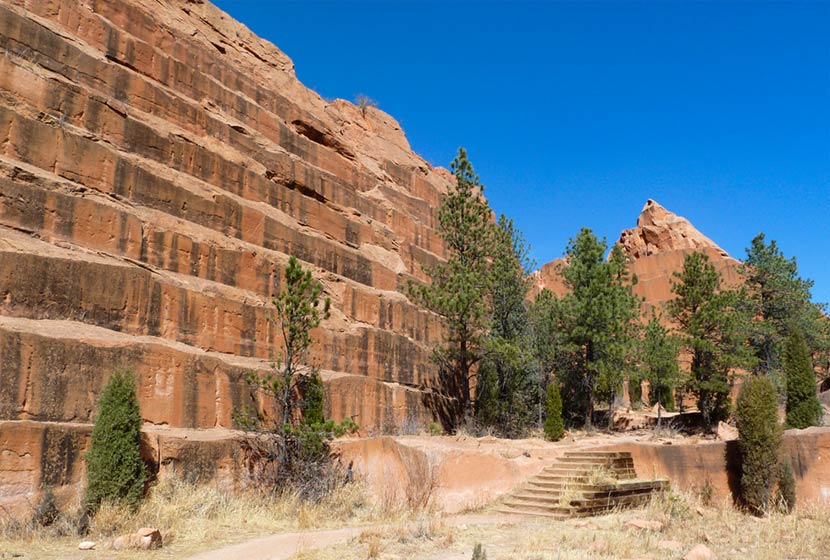
The most interesting destination in Red Rock Canyon is the old Quarry. If you've been in downtown Denver or Colorado Springs, you've probably seen old houses and buildings built with Red Rock cut from quarries like this one. One 2-mile loop option starts by taking the Red Rock Canyon trail to the east side of the Quarry (pick this trail up from the East end of the parking lot). This will run along to the back side of the quarry where you can take the old miner's steps up the side of the red rock. Once up and over, take the Quarry Pass Trail to the Mesa Trail, and hike the Mesa Trail North back to the parking area.
-
-
Hogback Valley-Lion Loop: 3.3 Miles
-
Starting at the east parking lot, pick up the Lower Hogback Tail. The trail will lead up to the Red Rock Rim Trail, then the Hogback Valley Trail taking you into a mesa of meadows with views into Colorado Springs and of Pikes Peak. Take a trail map with you as several trails will tie in together. Connect with the Lion Trail (the upper Codell Trail is more demanding, so be aware of this if choosing that option). Taking the Lion Trail North (right), it will lead back towards the parking area.
-
-
Mesa-Greenlee Loop: 3 Miles
-
This is probably the best hike in the park because it takes hikers through the heart of Red Rock Canyon along the gentle ridge of mesa where you can take in expansive views up to Pikes Peak and out to Garden of the Gods. Start at the Mesa Trail, taking it to the Southern end of the park where it connects with the Greenlee Trail. Return North via the Greenlee Trail to make this a 3 mile loop hike.
Tips & Resources for Hiking Red Rock Canyon Open Space
- TIP: The Southern end trails at Red Rock Canyon connect up with the following area trails: Intemann Trail, and Palmer Red Rock Trail, and others that lead south into Bear Creek Park.
- Nearby Hikes: The Crags Hike, Garden of the Gods Trails, and Helen Hunt Falls.
- Trail Map: Red Rock Canyon Open Space
- Packing List: Always pack the 10 Essentials. Download our Hiking Guide to get the list and dayhiking packing checklist.
- Colorado Road Conditions: Colorado Road Conditions
- Photo: We would like to express our gratitude to Brian Schultze, Sfgamchick, and Cody Wellons for sharing such an amazing photographs of this hike in Colorado Springs.
- After the Hike: Bristol Brewing Company
Weather
Map & Driving Directions
Click for Driving Directions

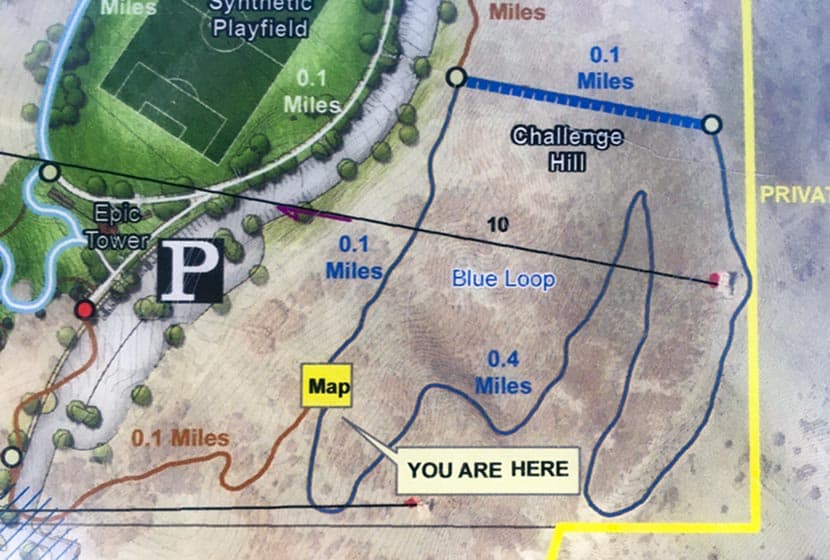
Incline at Castle Rock
The Incline at Castle Rock is a 0.6 mile loop that begins with a 200 step climb up the Challenge Hill to the top of a promontory. From the top, a trail winds down the side of the mesa for 1/2 a mile back to the bottom. It makes for a great workout in the outdoors, and is about 30 minutes south of the center of Denver. Explore the full Castle Rock Incline hike profile below for trail map, driving directions, and more tips and details to help you get active and enjoy the beauty of Colorado
Trail Snapshot: Incline at Castle Rock
| Hike Distance | 0.6 Mile |
|---|---|
| Difficulty | Moderate |
| Duration | Approx 30 min |
| Trail Type | Loop |
| Starting Elevation | Approx 6400′ |
| Elevation Gain | Approx +178′ |
| Seasons | Year Round |
| Dogs | Dogs Prohibited on Challenge Hill |
| Hike Trail Map | Click for a Map of Trails at Phillip S Miller Park |
| Denver Drive Time | 35 min |
| Driving Directions to Challenge Hill Parking Area | Click for Google Map |
| Town Nearest Hike | Castle Rock, Colorado |
| Beauty | Views of Pikes Peak to the South and Longs Peak and the Front Range to the North, Great Sunsets, Deer in Valley below. |
| Activities | Hiking and Trail Running, nearby playground and Zipline Tours. |
Parking & Trailhead Information for Incline at Castle Rock
Take interstate 25 south from Denver to the town of Castle Rock, exiting at Wilcox/Wolfensberger exit, taking a right onto Wolfensberger. At the roundabout, go around and take the left-hand exit (3rd option on the roundabout) onto West Plum Creek Parkway. Go 0.7 mile on West Plum Creek Parkway and the Phillip S. Miller Park entrance will be on the right. After entering the park, go left to the area behind the MAC facility and the parking area for the incline will be at the base of the incline.
The Hike: Incline at Castle Rock
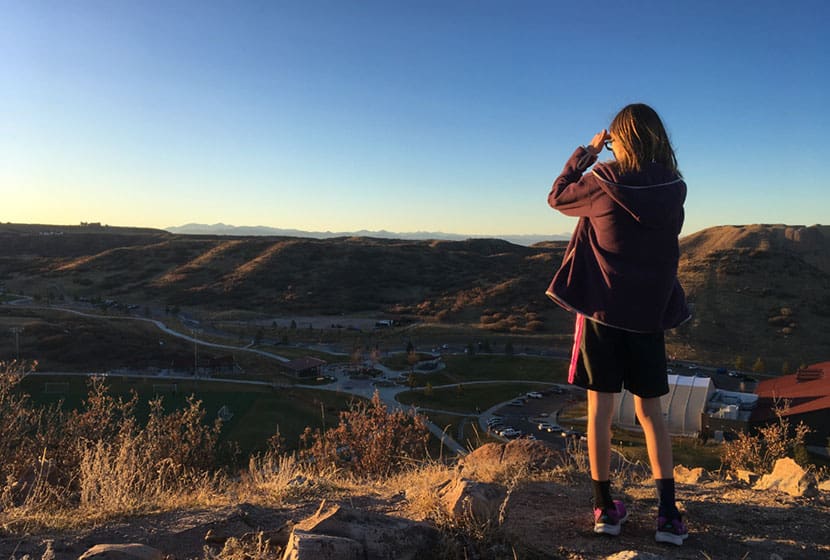
Officially, these 200 steps are called The Challenge Hill, but the locals call it "the incline," and rightly so, because it's inspired by the Manitou Incline near Colorado Springs. Because it's just 5 minutes down the road, we've turned this into a regular family workout. It's a perfect place to get in some exercise and take in amazing sunsets over the Colorado Front Range.

The first segment of the Castle Rock Incline is a 1/10th of a mile climb up 200 steps with close to 200' of elevation gain. This will kick your butt, especially if you take the steps back down. We prefer to run down the 1/2 mile loop trail, usually doing the loop a couple times. We've categorized this as a moderate trail because it has under 500' of total elevation gain and is only 0.6 miles, but many will find it difficult because of the grade of the ascent.
At the top of the Challenge Hill, you can take in views to the north and west of Longs Peak and Devil's Head. There's a wood bench if you want to rest or use it for stretching your legs after the climb. If you decide to descend via the steps be aware that the late afternoon sun can make it very difficult to see the steps.
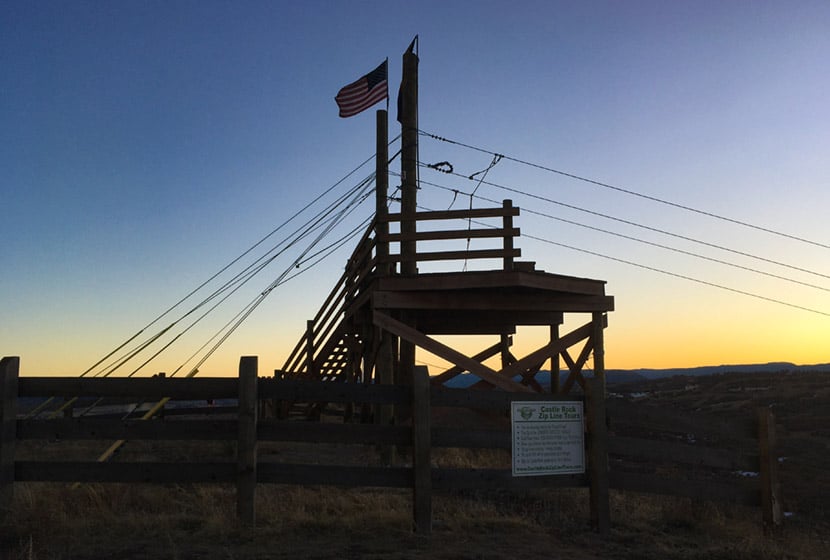
A Zipline platform stands at the peak of this promontory. It's fun to watch zipliners fly through the air across the park. The Zipline tours are operated by Castle Rock Zipline Tours. But don't keep your eyes on the sky because the trail down has a lot of loose gravel and the trail demands your attention.
The trail wraps around the mesa back to the West facing side. Snow and ice can take a while to melt free from the trail, especially in shaded spots. You can check on the trail conditions using the Castle Rock Trail Conditions Map online.
On the back side of the hill, you'll find panoramic views of Pikes Peak and the broad rolling country to the South of Castle Rock. This segment starts out rock then gives way to a gravel trail.
Trail Etiquette at the Castle Rock Incline
- The trail is popular with trail runners, so be aware of approaching runners and keep right to allow them to pass.
- Dogs are prohibited on the challenge hill, because--well, you can imagine why.
- Keep to the right on steps and in single file, especially when others are trying to pass or are coming the opposite direction.
- Let others know when you intend to pass them.
- Descent via the steps is not discourage by the park signage because it's easier to get injured.
- Hours are Dawn to Dusk
From the photo above, you can get a feel for the scale of the Challenge Hill. Much of the lower trail is in scrub oaks, and this next part may seem a bit overly cautious, but after reading a ton mountain lions, I always keep my kids close. As a local ranger told me, "On the Front Range, where there are deer, there are mountain lions." And a kid running fast through an area like this can incite the instincts of a lion. That I know of, we've not had any attacks in this area, but this is just a protocol our family follows on any hike or run--kids and adults always stay together.
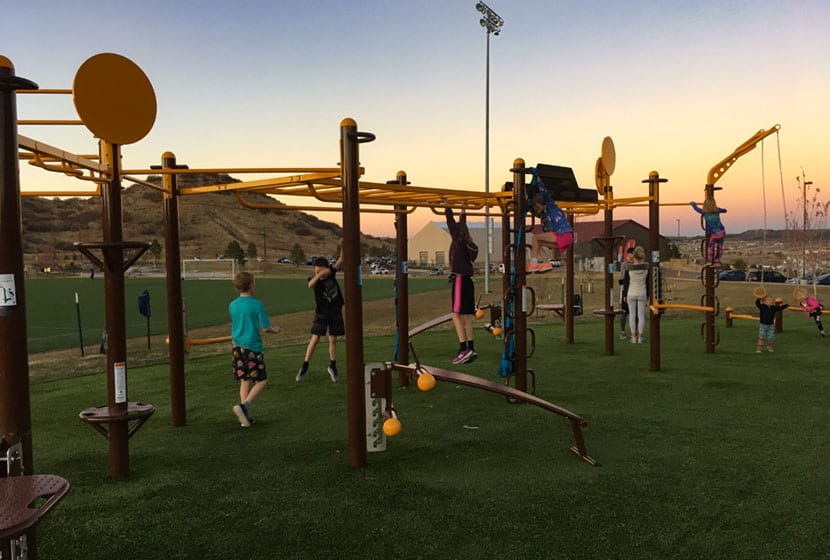
Speaking of the kids, the Phillip Miller park complex recently added (2019) a workout playground that looks like something out of Ninja Warrior competitions. After running the loop a couple times, we spend some time with the kids catching our breath and stretching at the playground.

Tips & Resources for Hiking the Incline at Castle Rock
- Check out Trail Conditions: Before going, check the trail conditions at the Challenge Hill at the Castle Rock Trail Conditions page.
- Pace Yourself: On the ascent, start with a sustainable pace. It gets way more steep and challenging at step 140.
- Trail Map: Incline at Castle Rock
- Packing List: Always pack the 10 Essentials. Download our Hiking Guide to get the list and dayhiking packing checklist.
- Colorado Road Conditions: Colorado Road Conditions
- After the Hike: Since I'm a local, I've got two absolute favorite spots for after the hike. The first is CRAVE Burgers. We love the Love Stinks Burger and the Not Yo Mamma's Burger (on the hidden menu) Crave Burgers in Castle Rock. The second is Manna, a a restaurant in the local hospital. But this is by no means hospital food! It's locally sourced food at great prices. Manna in Castle Rock
Weather
Map & Driving Directions
Click for Driving Directions
South Boulder Peak
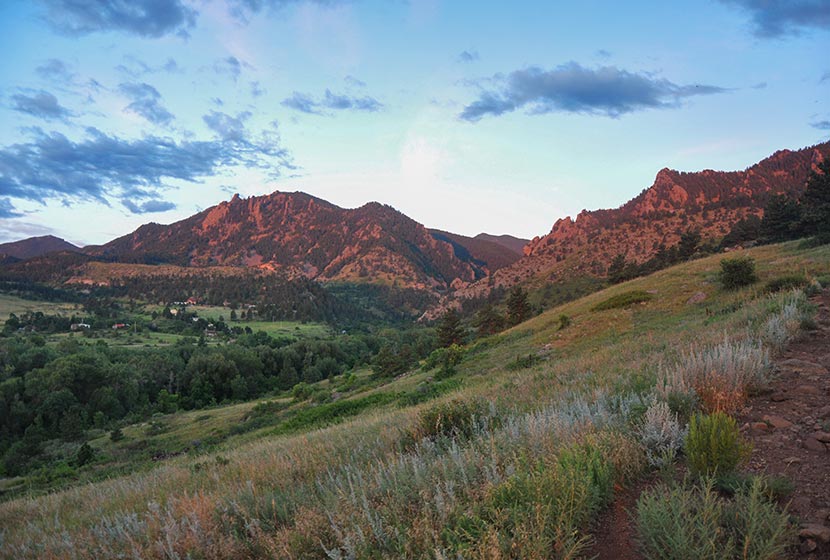
South Boulder Peak is a demanding 3.7-mile hike (one-way) situated above the South Mesa in the famous Flatirons region near Boulder Colorado. Hikers can bag nearby Bear Peak on the same trip and return via Fern Canyon to make an 8.7 mile loop. Explore the full South Bolder Peak hike profile below for the trail map, driving directions, and more tips and details to help you enjoy this adventure near Boulder, Colorado.
South Boulder Peak Trail Snapshot
| Hike Distance | 7.4 Miles Round Trip or approx. 8.7 Mile Loop |
|---|---|
| Difficulty | Difficult |
| Duration | Approx 3-5 hrs |
| Trail Type | Out and Back or Loop Option |
| Starting Elevation | 5650′ |
| Elevation Gain | Approx +2900′ South Boulder Peak 8550' |
| Seasons | Year Round |
| Dogs | Allowed On Leash |
| Hike Trail Map | Click for a Map South Boulder Peak and South Mesa Trailhead |
| Denver Drive Time | 45 Minutes |
| Driving Directions to South Boulder Peak via South Mesa Trailhead | Click for Google Map |
| Town Nearest Hike | Boulder, Colorado |
| Beauty | Peak Top Views, Canyon, Wildflowers, Sunrise, Meadows, Wildlife: Deer, Bear, Birding. |
| Activities | Hiking, Trail Running, Photography |
Parking & Trailhead Information for South Boulder Peak
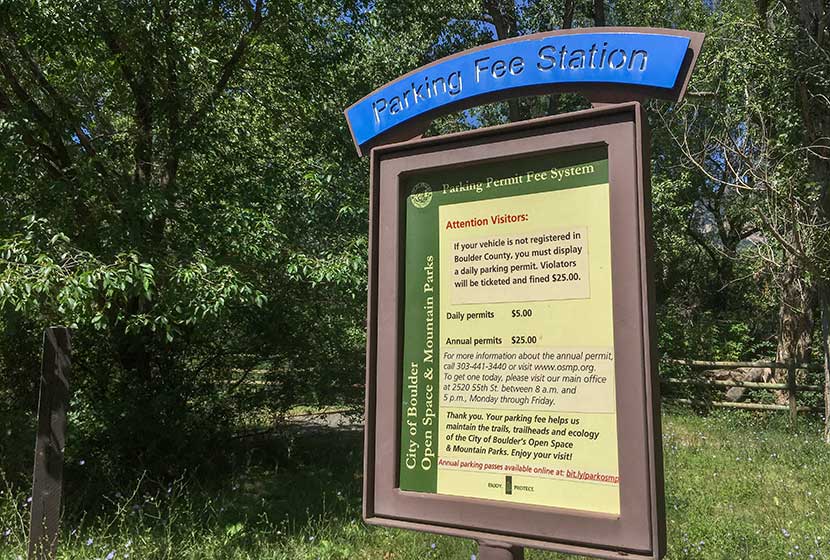
The trail to South Boulder Peak begins at the South Mesa Trailhead off of Eldorado Springs Drive just South of Boulder, Colorado. From Denver, drive North on interstate 25 to 36 toward Boulder. Take the McCaslin Blvd exit and then go South/West onto McCaslin. At the intersection of McCaslin and Marshall, take a right onto Marshall Road. Marshall will eventually intersect with Eldorado Springs Drive. Take a left onto Eldorado Springs Drive. About two miles down the road, you'll find the South Mesa Trailhead on the right. The South Mesa Trailhead is a part of the Boulder County Open Space and requires a daily parking fee, or an annual pass. I went online and bought an annual parking pass through the Open Space website. This gives you access to all the southern fee parking areas as well as the parking areas on Flagstaff Mountain. There are restrooms at the trailhead but not potable water.
The Hike: South Boulder Peak
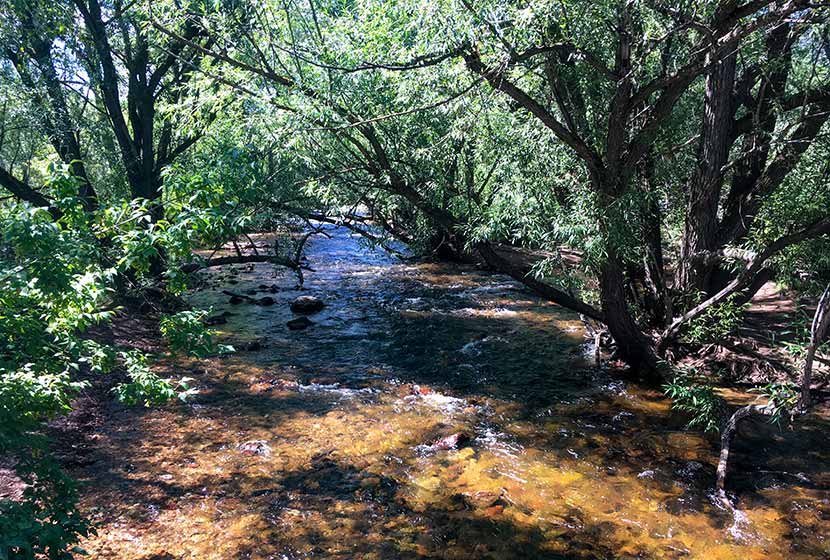
If you study a map of the South Mesa area, you'll notice that it's a complex network of trails. Tis is great for exploring the mesa, but when summiting a peak, you'll want to preserve as much energy as possible by taking the most direct route. The first trail choice presents itself after crossing the bridge over small bridge that spans Boulder Creek.
We took the Homestead Trail, a 1.3 mile segment to a connector segment of the Mesa Trail. It will be marked "Mesa Trail" and have an arrow pointing left to the Shadow Canyon Trail and Right to the Towhee Trail. The way to South Boulder Peak will be to head left toward Shadow Canyon. During this first segment, you'll gain great views down into the entrance of Eldorado Canyon .
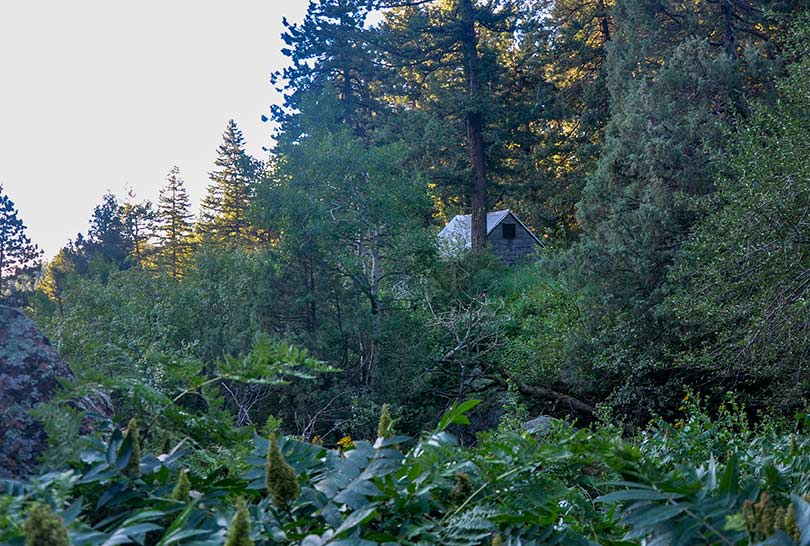
The first 0.4-mile segment of the Shadow Canyon South Trail is gradual. At any of the other trail intersections keep taking those marked "Shadow Canyon." Eventually, the trail leads into a densely wooded ravine where an old cabin is tucked away in the undergrowth
You'll know when you've entered Shadow Canyon because the trail becomes steep and demanding. It's more humid, too, so the rock can get slippery. Be mindful of your steps and prepared to ascend over a mile of fairly rugged terrain.
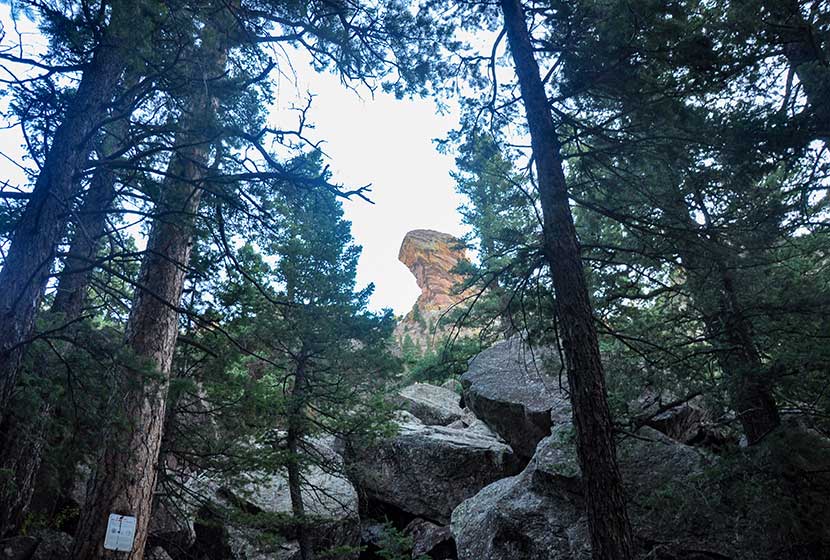
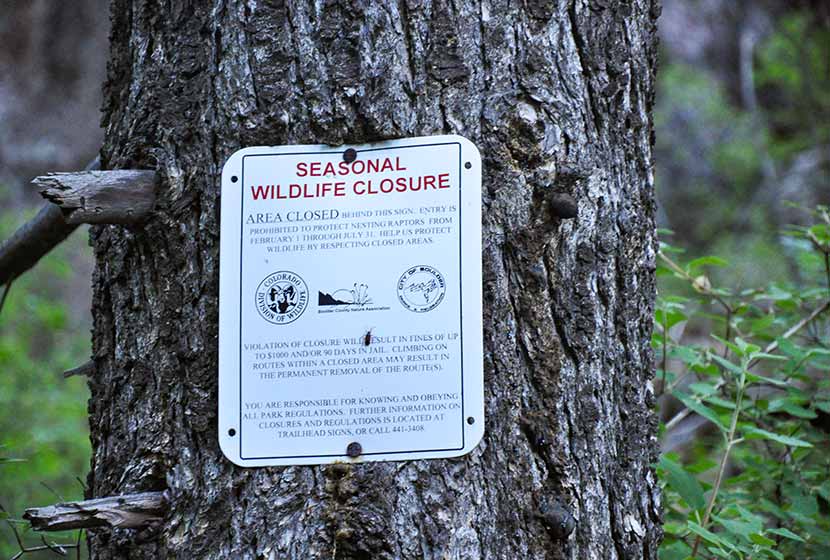
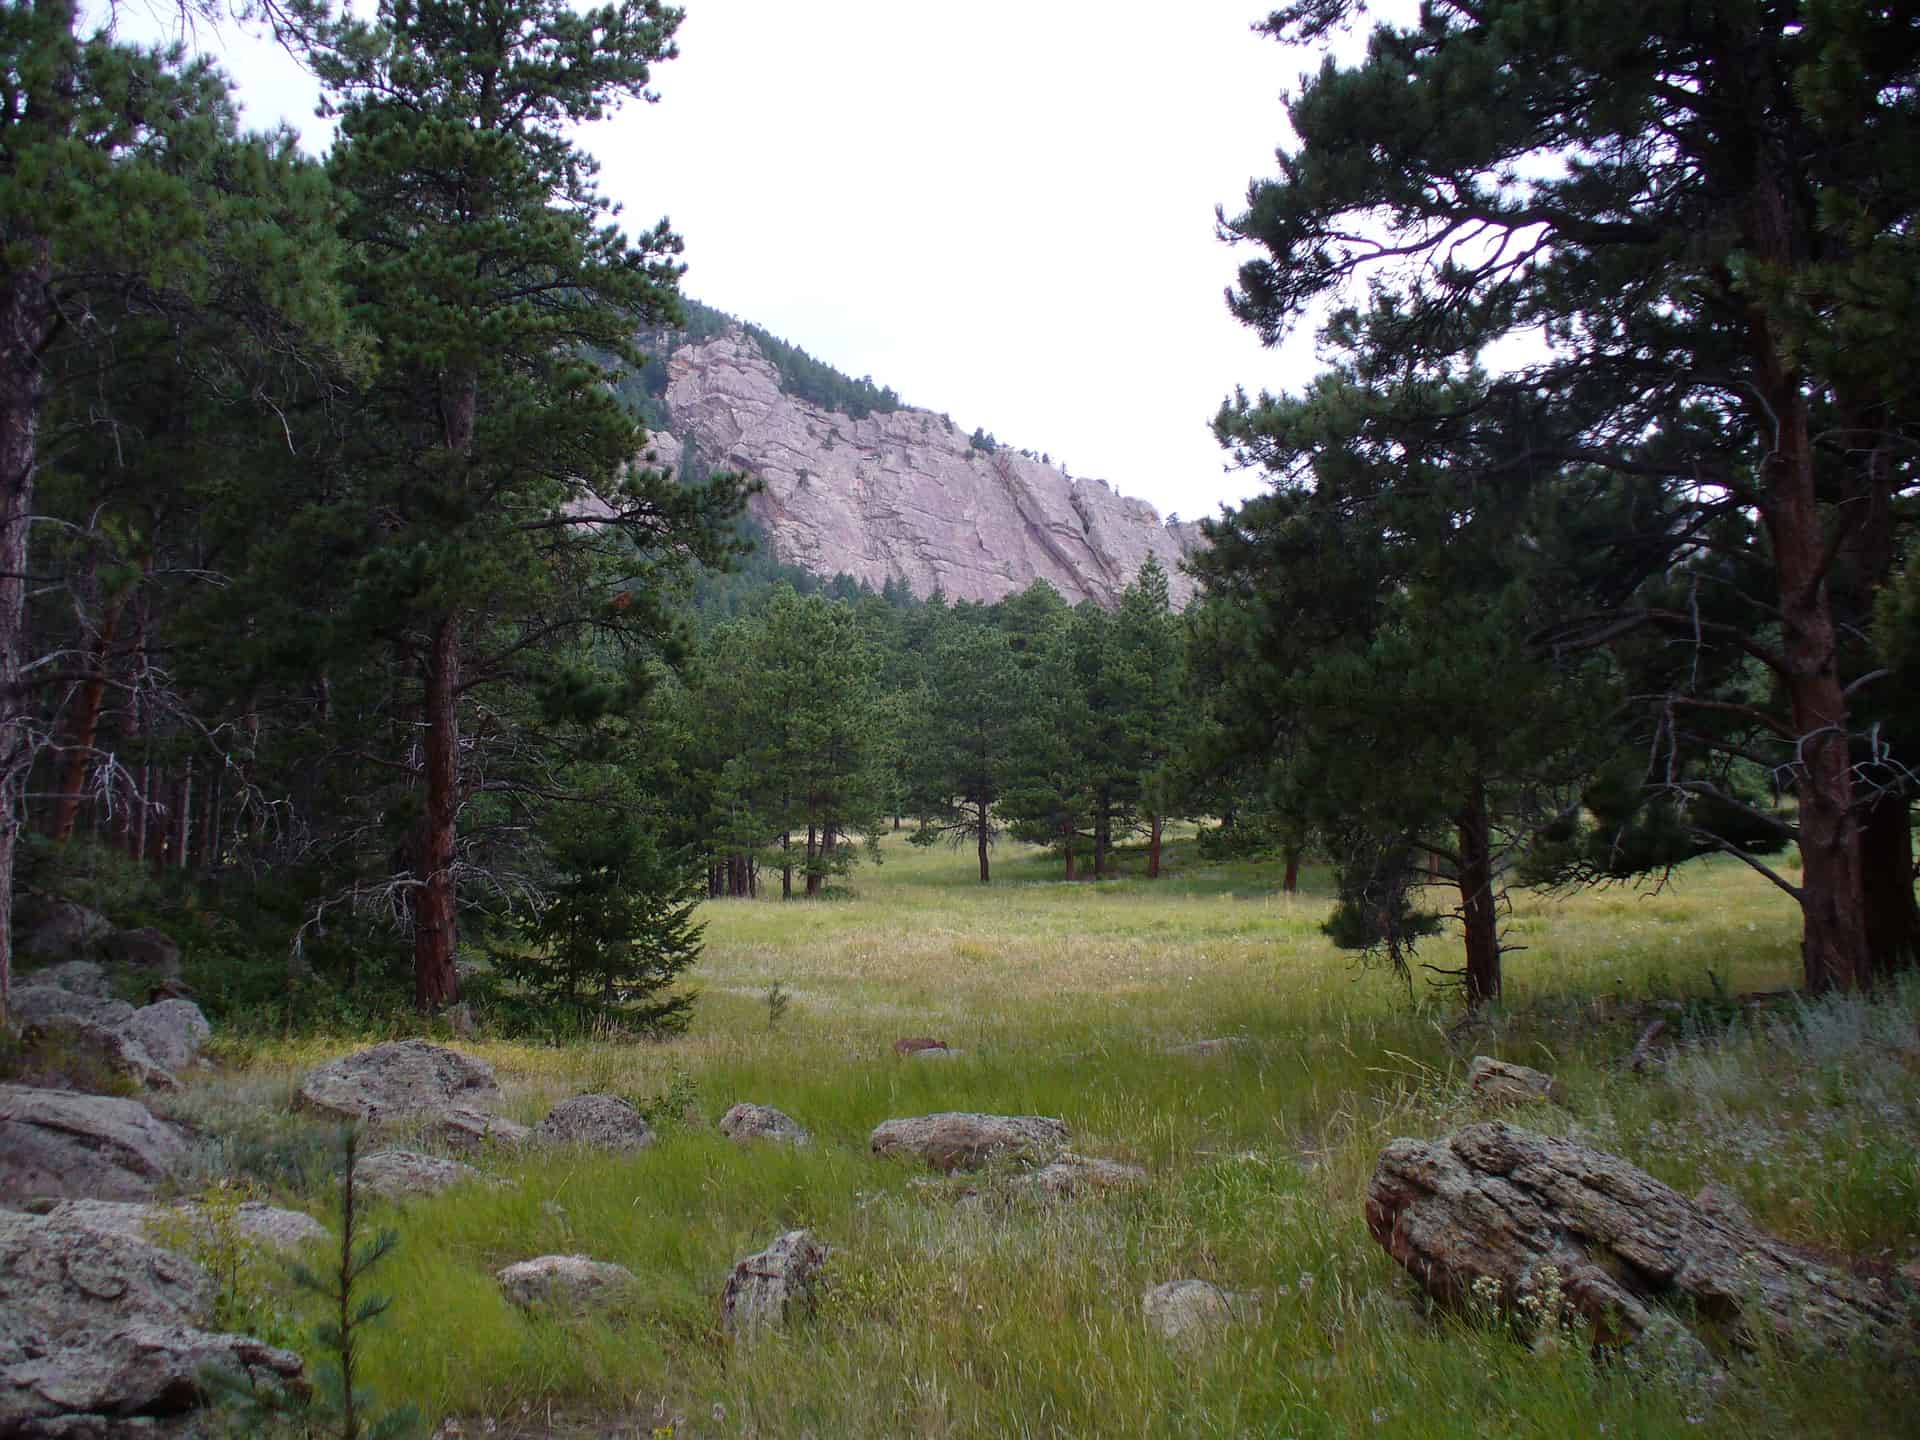
Shadow canyon is an access point for a prominent rock formation, Devils Thumb. Seasonal closures (see photo below) protect nesting raptors. Be sure to stay out of this area from Feb. 1st to July 31st. The Shadow Canyon Trail is not closed during this time, but refrain from going off-trail or taking social trails in the closure area during these periods.
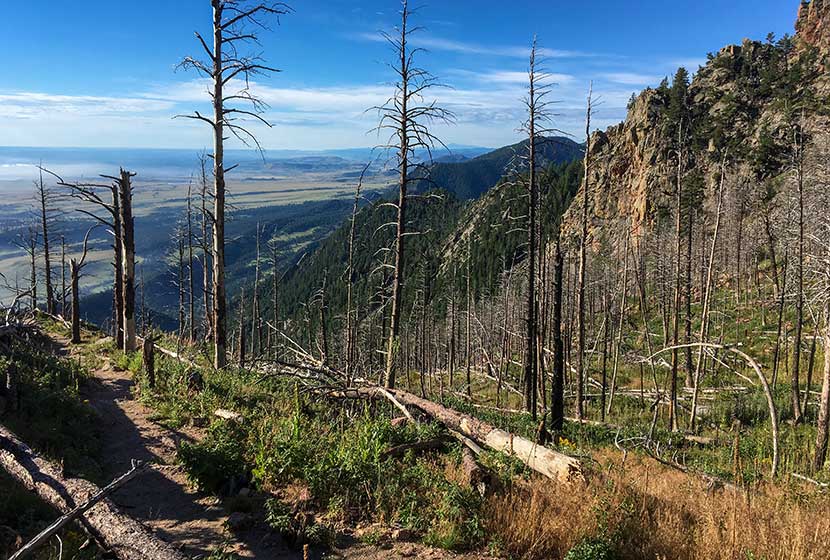
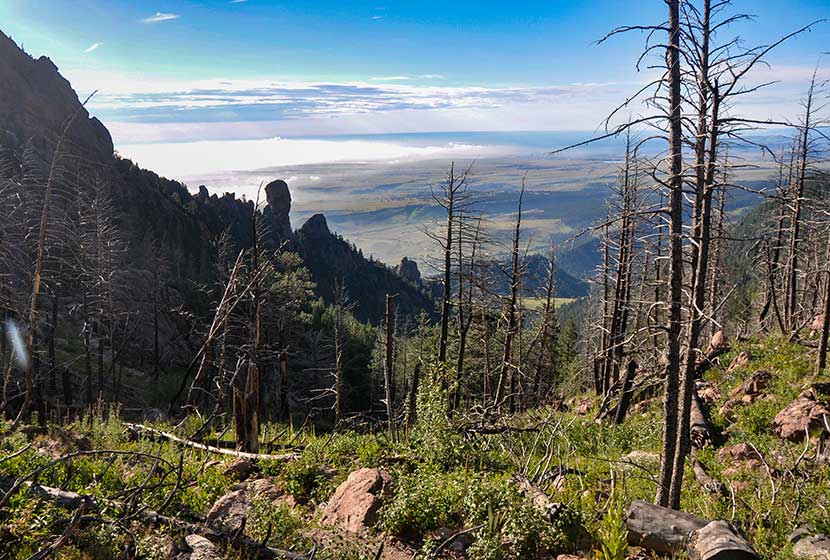
The trail pops out of the canyon onto saddle between South Boulder Peak and Bear Peak. The first thing you'll notice is a burn area that stretches all the way to the top of South Boulder Peak. It's the result of the 2012 Flagstaff fire.
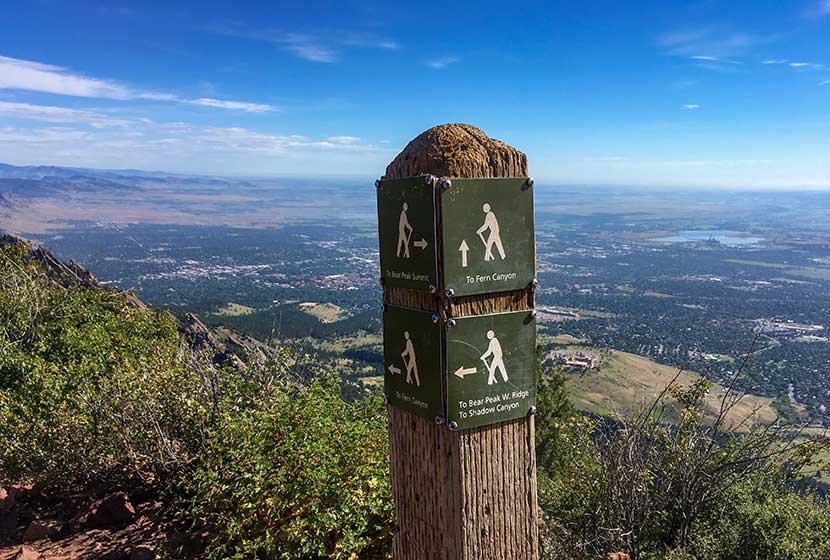
At the saddle ridge, another trail sign notes the way to South Boulder Peak, a 0.3 mile trail climbs to the summit. You'll notice that the trail to the right leads the same distance to Bear Peak.
At points, the trail becomes difficult to discern and requires a little bit of bouldering to make it to the top. Whenever I'm in these rocky segments, I try to be mindful of those behind me. It's easy to inadvertently cause a rock to shift and tumble toward the hikers below. Most of the rock is stable, but it's smart to be aware as you navigate these kinds of areas. The back side of the summit is exposed, so do not approach or descend the peak via this route. And be mindful of the exposure while on the peak.
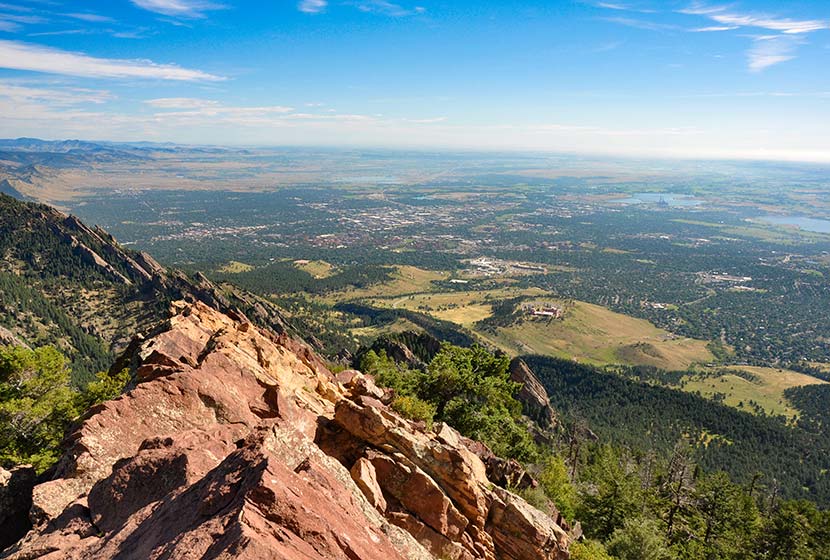
The pink granite summit offers 360 degree panoramic views (see the video below).
You can also see the summit of Bear Peak just 0.6-mile to the Northeast. If you want to summit Bear Peak, be sure to review our Bear Peak Hike Profile.
From the summit of South Boulder Peak your options are to 1) Descend via the approach route (7.4 miles round trip), 2) Summit Bear Peak and return via the approach route (8 miles total), or 3) Summit Bear Peak and return via Fern Canyon (approx. 8.7 miles). It's important to know that the descent into Fern Canyon is more demanding than the return via Shadow Canyon. For the loop route via Fern Canyon, explore our Bear Peak Trail Profile.
Tips & Resources for Hiking to South Boulder Peak
- Hiking with Your Dog: Though dogs are allowed on leash, I wouldn't put South Boulder Peak on the dog-friendly list because of the rocky area at the summit and the ascent up fern canyon.
- TIP: Be ready for the hike down to be demanding on your knees and ankles, especially if you choose to descend via Fern Canyon. Trekking poles would be helpful.
- Weather: As with all hikes on the Front Range, especially peak hikes, be weather aware. Thunderstorms can emerge suddenly, especially in the early afternoon in the Summer months.
- Trail Map: South Boulder Peak Map from South Mesa Trailhead
- Packing List: Always pack the 10 Essentials. Download our Hiking Guide to get the list and dayhiking packing checklist.
- Colorado Road Conditions: Colorado Road Conditions
- After the Hike Cafe: Walnut Cafe in Boulder
- After the Hike Brewery: Sanitas Brewing Company
Weather
Map & Driving Directions
Click for Driving Directions

Bear Peak Near Boulder
Bear Peak is a demanding 7.4-mile hike (round trip) through the broad meadows of South Mesa, up through the rocky trail of shadow canyon, to the granite summit with sweeping 360 degree views of the Colorado Front Range. Hikers can summit South Boulder Peak on your way and make a loop hike out of your adventure by returning via Fern Canyon. Explore the full Bear Peak hike profile below for the trail map, driving directions, and more tips and details to help you enjoy this adventure near Boulder, Colorado.
Bear Peak Trail Snapshot
| Hike Distance | 7.4 Miles Round Trip or 8.4 Mile Loop |
|---|---|
| Difficulty | Difficult |
| Duration | Approx 3-5 hrs |
| Trail Type | Out and Back and Loop Option |
| Starting Elevation | 5650′ |
| Elevation Gain | Approx +2800′ Bear Peak 8461' |
| Seasons | Year Round |
| Dogs | Allowed On Leash |
| Hike Trail Map | Click for a Map Bear Peak and South Mesa Trailhead |
| Denver Drive Time | 45 Minutes |
| Driving Directions to Bear Peak from South Mesa Trailhead | Click for Google Map |
| Town Nearest Hike | Boulder, Colorado |
| Beauty | Peak Top Views, Canyon, Wildflowers, Sunrise, Meadows, Wildlife: Deer, Bear, Birding. |
| Activities | Hiking, Trail Running, Photography |
Parking & Trailhead Information for Bear Peak
Access to Bear Peak is from the South Mesa Trailhead off of Eldorado Springs Drive just South of Boulder. From Denver, drive North on interstate 25 to 36 toward Boulder. Take the McCaslin Blvd exit and then go South/West onto McCaslin. At the intersection of McCaslin and Marshall, take a right onto Marshall Road. Marshall will intersect with Eldorado Springs Drive. Here, take a left onto Eldorado Springs Drive. About two miles down the road, you'll find the South Mesa Trailhead on your right. The South Mesa Trailhead is a part of the Boulder County Open Space and requires a daily parking fee, or an annual pass. I went online and bought an annual parking pass through the Open Space website. This gives you access to all the southern fee parking areas as well as the parking areas on Flagstaff Mountain. There are restrooms at the trailhead.
The Hike: Bear Peak
From the South Mesa Trailhead, the trail leads across a small bridge spanning over Boulder Creek. Willow trees arch over the stream making it worth a short pause to take in the sounds of water before you set off across the meadows of South Mesa. There are many trail options, but the most direct is to take the Homestead Trail, which heads West across a gentle grade toward Shadow Canyon.
This first mile or so of the hike is easy and offers stunning views of the Flatirons and views of the entrance of Eldorado Canyon. An old stone building, part of an early homestead is the first marker you'll pass early in the hike.
After about 1.3 miles, the trail will split. Take the left (West) trail, which leads to the South Shadow Canyon Trail. After about a 1/2 mile, you'll encounter a 2nd trail split. The Shadow Canyon Trail will again bear to the left and begin heading up steeper terrain.
As the trail ascends, you soon leave the meadow and enter into more dense ponderosa pine forest. The vegetation in the understory grows tall and green at the entrance to the canyon. You'll see another cabin with a metal roof (pictured below). Soon past the cabin will be another important trail juncture. Again, the trail up Shadow Canyon will bear left (West).
Once in Shadow Canyon, the trail now becomes much more steep and requires navigating over rock and tree roots. This segment of the trail traveling up through the canyon is over a mile, so be ready for a steady and demanding climb.
The canyon is an access route for Devils Thumb, a prominent rock formation along this ridge. There are seasonal closures (see photo below) because of nesting raptors. Be sure to stay out of this area from Feb. 1st to July 31st. You are welcome to stay on the Shadow Canyon trail--it's not closed during this time--but refrain from going off-trail or taking social trails during this time up to Devils Thumb.
Eventually, the trail emerges from the canyon onto the saddle between South Boulder Peak and Bear Peak. This area is marked by a burn area, and in the late summer, raspberry plants grow trailside full of ripe berries. The burn was ignited by lightning in June of 2012. Named the Flagstaff Fire, it consumed about 300 acres before being contained by firefighters.
Another trail sign notes the way to Bear Peak, a 0.3 mile trail segment curving North up the back of the summit.
You'll notice more burn area on the left (West) side of the trail. The rock on the trail becomes increasingly brittle as you go, so be aware of those hiking below you and be sure to hike on the most secure and durable surfaces.
The final segment requires a scramble along about 25 yards of angled rock. Take your time and scope out the safest route to the summit. Most peaks along the Front Range have broad tops, but Bear Peak is tapered to a point with exposure on all sides. Several USGS markers are set into the rock (I think I counted 3--which is unusual). The views are great, both to the East and to the mountains in the West.
There are two options for the return hike: 1) to hike the 3.7 miles back through Shadow Canyon, retracing the same trails, or 2) to make a loop out of the hike by descending via Fern Canyon (about 4.7-mile return). The rest of this profile will follow the Fern Canyon to Mesa Trail return.
A sign marking the trail down Fern Canyon is located right at the base of Bear Peak (where the trail turns into a scramble up the summit). The descent into Fern Canyon is very steep and the rock is very loose. Hikers will also encounter people making their way up the trail, so be sure to move off to the side and grant right-of-way to hikers who are doing the harder work of ascending the trail. I would not recommend hiking up to Bear Peak from this route because the trail is way more demanding than the Shadow Canyon approach.

After about 1/2 of a mile descending this steep saddle, the trail will bear right (East) into Fern Canyon via a series of switchbacks. Eventually, the trail will emerge from Fern Canyon back onto the more gentle slopes of South Mesa. Look for signs for the Mesa Trail, and follow them South back to the South Mesa Trailhead.
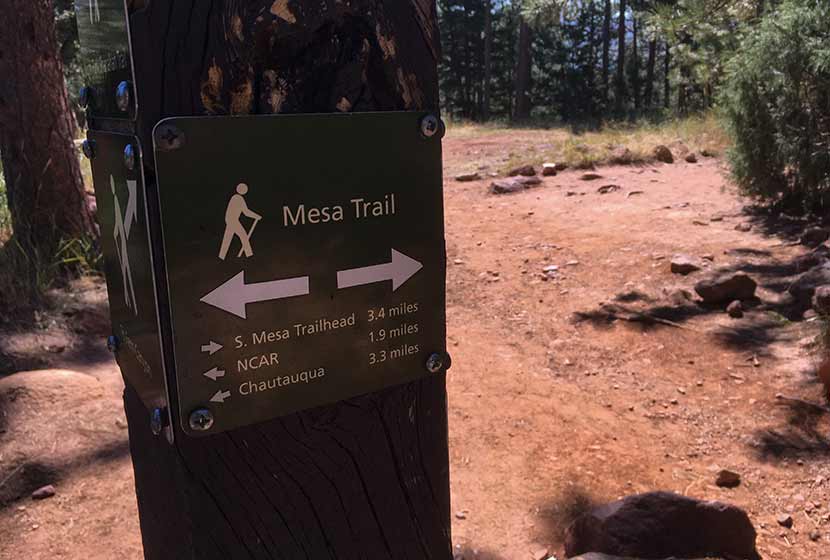
The hike back on the Mesa Trail travels in and out of the shade of Ponderosa pines and along the pink and orange Flatiron mountains that make this area so spectacular. We took the Upper Bluestem trail to some small connector trails leading back to the trailhead. Another approach is stay on the Mesa Trail (see map) until it connects back to the Homestead Trail.
Tips & Resources for Hiking to Bear Peak
- Weather: As with all hikes on the Front Range, especially peak hikes, be weather aware. Thunderstorms can emerge suddenly, especially in the early afternoon in the Summer months.
- Hiking with Your Dog: Though dogs are allowed on leash, and I've encountered people hiking with their dogs on the trails up to Bear Peak, I wouldn't put Bear Peak on the dog-friendly list because of the steep rock at the summit summit and the difficulty of the terrain leading up through the canyons.
- TIP: Be ready for a hike that is really demanding on your legs, especially the descent through Fern or Shadow Canyon. Trekking poles would be helpful on the descent.
- TIP: Hike to South Boulder Peak. It adds just 0.6 mile to your trip.
- Trail Map: Bear Peak Map from South Mesa Trailhead
- Packing List: Always pack the 10 Essentials. Download our Hiking Guide to get the list and dayhiking packing checklist.
- Colorado Road Conditions: Colorado Road Conditions
- After the Hike Cafe: Walnut Cafe in Boulder
- After the Hike Brewery: Sanitas Brewing Company
Weather
Map & Driving Directions
Click for Driving Directions
Long Lake Loop in Indian Peaks
Long Lake offers an easy 1.5 mile loop hike in Indian Peaks Wilderness. Located about 1 hour West of Boulder, Colorado, Long Lake is an easy-to-access alpine lake with stunning scenery. It's a popular spot, especially in the Summer months, so be sure to read the details on access fees and the notes below on the Long Lake Trailhead. Explore the full trail profile for trail maps, driving directions to Long Lake and more.
Long Lake in Indian Peaks - Trail Snapshot
| Hike Distance | 0.6 mile or 1.5 miles |
|---|---|
| Difficulty | Easy |
| Duration | Approx 1 hr |
| Trail Type | Out and Back & Loop |
| Starting Elevation | 10,500′ |
| Elevation Gain | Approx +100′ |
| Seasons | Mid-June to Mid-Oct. Depending on Weather |
| Dogs | Dog Prohibited in specific Brainard Rec. areas and on Jean Lunning and Pawnee Pass Trails. See USFS page for details. |
| Hike Trail Map | Click for a Map of Long Lake Area in Indian Peaks |
| Denver Drive Time | 1hr 30min |
| Driving Directions to Meyer Homestead Trailhead | Click for Google Map |
| Town Nearest Hike | Ward, Colorado |
| Fee: | Entrance Fee to Brainard Rec. Area Required |
| Beauty | Lake, mountain peak views, wildflowers, moose/td> |
| Activities | Hiking, cross-country skiing, snowshoeing, photography |
Parking & Trailhead Information for Long Lake Loop
Note: This trailhead can only be reached by using Brainard Lake Road, which has seasonal closures. Because the Brainard Lake Recreation area is extremely popular, this entrance road experiences high amounts of traffic during weekends on the Summer. See the USFS page for details. For Brainard Lake Road closure status, see the Boulder Ranger District roads page.
From Boulder, Colorado, head North on US36/28th Street. Take a left onto Lee Hill Road. Lee Hill Road will dead-end at an intersection with Left-Hand Canyon Road. Take a left onto Left-Hand Canyon Road heading West. Eventually, Left-Hand Canyon Road will turn into Indiana Gulch Road and will turn into Utica Road upon entering the town of Ward, Colorado. Utica turns into Nelson Road (lots of name changes on this trip) then ends at an intersection with 72/Peak to Peak Highway. Take a right onto 72, then the almost immediate next turn will be on your left for the Brainard Lake Road. Travel on Brainard Lake Road 2.2 miles to the entry station where you will need to pay the fee for the recreation area. As you approach the lake, bear right to continue on the Brainard Lake Road for another 1/2 mile, then turn right onto Mitchell lake Road. Go less than 1/10th of a mile, then turn left onto Long Lake Road. After about 1/3 of a mile, you will have arrived at the Long Lake Trailhead and parking area.
In the winter, the Brainard Lake Recreation area is a popular snowshoeing and cross-country skiing destination. However, all parking is at the Brainard Lake Gateway Trailhead (near the access gate). It is approx. 4-miles one-way from the Brainard Lake Gateway Trailhead to the Long-Lake Trailhead.
The Hike: Long Lake Loop Hike
From the Long Lake Trailhead, it's an easy and short 0.3-mile hike to Long Lake. Returning via this trail makes this a 0.6-mile out-and-back trip. However, to really take in the best of the Rocky Mountain Scenery, we recommend doing the full 1.5-mile loop.
Having reached the northeastern edge of Long Lake, head south over a footbridge and pick up the Jean Lunning Trail. The Jean Lunning trail travels alongside the southern perimeter of Long Lake and offers stunning views of the jagged mountain peaks surrounding the lake. Eventually, the Jean Lunning trail will intersect with the Pawnee Pass Trail. Take a right on the Pawnee Pass trail to head east and back to the short connector trail that leads back to the trailhead.
Tips & Resources for Hiking Long Lake
- TIP: During the Summer, avoid the traffic by visiting Long Lake during the weekdays. Arrive at the trailhead in the early morning to secure a parking place.
- Trail Map: Brainard Lake Area, Long Lake Trail Map
- Packing List: Always pack the 10 Essentials. Download our Hiking Guide to get the list and dayhiking packing checklist.
- Colorado Road Conditions: Colorado Road Conditions
- Photo: We would like to express our gratitude to Matt Lewis and Max and Dee Berntfor sharing photographs of this hike on Long Lake
- After the Hike: Marrocco’s
Weather
Map & Driving Directions
Click for Driving Directions
Shanahan Ridge Hike Near Boulder
The Shanahan Ridge Loop Hike is an easy, 4-mile lollipop-loop trail with stunning views of the Shanahan Ridge of the Flatirons in Boulder, Colorado. Explore the full Shanahan Ridge Loop hike profile below for trail map, driving directions, and more tips and details to help you enjoy this hike in Boulder.
Trail Snapshot: Shanahan Ridge Loop Trail in Boulder, Colorado
| Hike Distance | 4 Miles |
|---|---|
| Difficulty | Easy |
| Duration | Approx 2 hrs |
| Trail Type | Lollipop-Loop |
| Starting Elevation | Approx. 5500′ |
| Elevation Gain | Approx +900′ |
| Seasons | Year Round |
| Dogs | Allowed On Leash |
| Hike Trail Map | Click for a Map of Shanahan Ridge Trail |
| Denver Drive Time | 40 Min |
| Driving Directions to Shanahan Ridge Trailhead | Click for Google Map |
| Town Nearest Hike | Boulder, Colorado |
| Beauty | meadows, wildflowers, peak views, pine forest |
| Activities | Hiking, Photography, Trail Running |
Parking & Trailhead Information for Shanahan Ridge Loop Trail
The Shanahan Ridge Trailhead is located just along Lehigh Street south of Boulder. From US 36, follow Table Mesa Drive West to its intersection with CO 93. Turn left onto 93 and follow it for less than a mile. Turn right onto Greenbriar Boulevard which eventually becomes Lehigh Street. The trailhead is on the left/southwest side of the road and marked by a trail post and trash receptacle. There is actually no parking lot because the trailhead is located in a residential area. Because of this please exercise extra care and respect for the residents as you park along Lehigh or adjacent streets. Be aware of city parking signage.
The Hike: Shanahan Ridge Loop Trail
The Shanahan Ridge loop is best hiked clockwise in order to gain the best views of the Flatirons and surrounding countryside. Going left on the first junction will take you onto a connector trail that will next intersect with the South Fork Shanahan Trail. This trail begins with a gradual ascent which becomes more demanding. If you are acclimatized to the altitude and hike a fair amount, you'll find this segment easy; but beginner hikers and those of us who are not in the best of shape will find this a moderately demanding trail.
Continue on the South Fork Shanahan Trail for about 1.8 miles as it weaves through ponderosa forest and opens out to captivating vistas of the Flatirons. The trail will terminate at a junction with the Mesa Trail. Follow this trail North (right) as it winds along the base of the Shanahan Ridge of the Flatirons.
After approximately a 1/2 mile on the Mesa trail, it will intersect with the North Fork Shanahan Trail. Taking a right onto the North Fork Shanahan leads backdownhill for about 1.3 miles to the trailhead.
Tips & Resources for Hiking the Shanahan Ridge Loop
- TIP: Check ahead for trail closures.
- More Hikes in the Flatirons: Royal Arch Trail, First and Second Flatirons Hike, and Enchanted Mesa Hike.
- Trail Map: Shanahan Ridge Loop Trail
- Packing List: Always pack the 10 Essentials. Download our Hiking Guide to get the list and dayhiking packing checklist.
- Colorado Road Conditions: Colorado Road Conditions
- Photo: We would like to express our gratitude to Dave Dugdale and John Giez for sharing their photographs of this hike.
- After the Hike: The Parkway Cafe
Weather
Map & Driving Directions
Click for Driving Directions
Ridgeline Open Space Hike
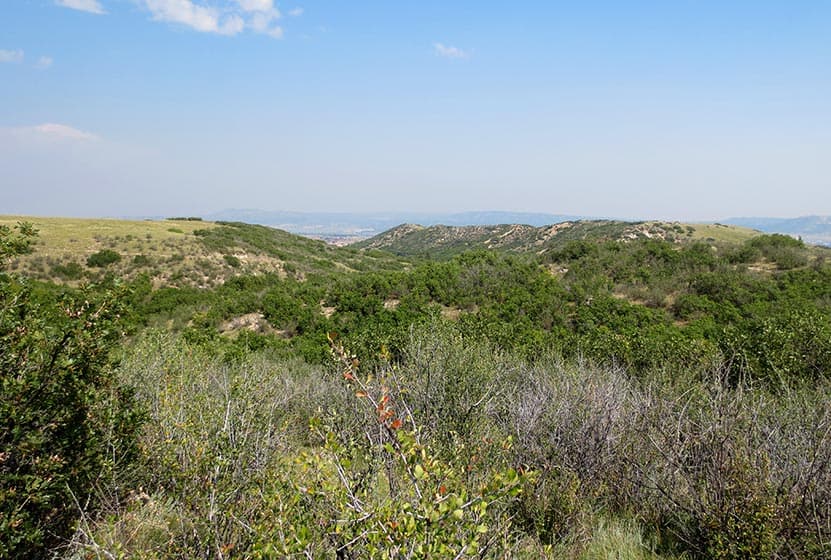
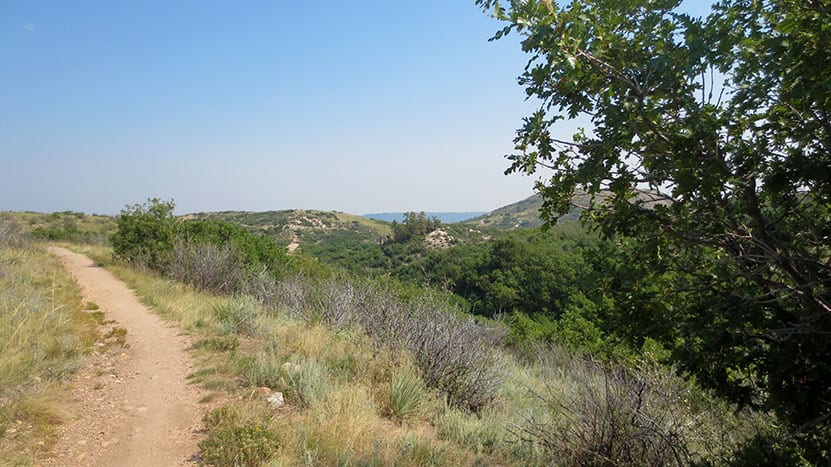
Ridgeline Open Space is nestled in the Meadows residential area of Castle Rock. This network of over 13 miles of trails winds through elevated grasslands and gamble oak with a backdrop of distant snow-capped peaks of the Front Range. Hike it or bike it for a quick escape from the work week. Explore the full Ridgeline Open Space hike profile below for trail map, driving directions, and more tips and details to help you enjoy this adventure in Castle Rock.
Trail Snapshot: Ridgeline Open Space Trail near Castle Rock, Colorado
| Hike Distance | 1 to 13.4 miles |
|---|---|
| Difficulty | Easy |
| Duration | Approx 1hr+ |
| Trail Type | Multiple Loops and Out and Back Options |
| Starting Elevation | 6600′ |
| Elevation Gain | Approx +200′ |
| Seasons | Year Round |
| Dogs | Allowed On Leash |
| Hike Trail Map | Click for a Map of Ridgeling Open Space Trails |
| Denver Drive Time | 40 min |
| Driving Directions to Meyer Homestead Trailhead | Click for Google Map |
| Town Nearest Hike | Castle Rock, Colorado |
| Beauty | grasslands, small stands of pine trees, mountain views, wildflowers, wildlife: rattlesnake, western bluebirds |
| Activities | Hiking, mountain biking, trail running |
Parking & Trailhead Information for Ridgeline Open Space
From Denver, follow Interstate 25 south to Castle Rock and take Exit 182 and go west on Wolfensberger Road. Turn right onto Coachline and follow this until to Ridgeline Open Space Trailhead (on the left-side of the road). There is a restroom and map at the trailhead. Alternatively, hikers can park at Bison Park in Castle Rock and access one of the several neighborhood access trails that lead into Ridgeline Open Space.
The Hike: Ridgeline Open Space
Ridgeline Open Space is one of our family's favorite places to hike because it's right in our backyard here in Castle Rock. The residents of Castle Rock also use the 13.4 miles of trail for trail running and mountain biking. It's quite a labyrinth of trails, but because it's located right in the heart of a residential area, it's hard to get lost (if you stay on the trail). There are maps posted at several junctions and trailheads along the network in the case you need to reorient yourself. Or print the map from the link above and bring it with you.
Our approach is usually to go up to Ridgeline for an afternoon and see where the trails take us. You'll likely encounter mountain bikers along the trail. Most are locals and are very considerate of hikers. Less considerate are the rattlesnakes. I've yet to run into one, but my neighbor was stopped short by a rattler recently while trail running. Rattlesnakes are only aggressive when threatened, but they are easy to stumble upon because they are so well camouflaged. So, keep your eyes peeled as you hike. Mountain Lions also frequent the area--like most trails along the Front Range--because of the plentiful deer population. It's wise to always keep your kids near when hiking and not running up the trail ahead on their own. This is just good practice on any trail, but I mention it because we have seen Mountain Lion prints in the mud on one of the western trail segments.
Ridgeline is aptly named because it is situated above the town and offers great views out to Longs Peak, Indian Peaks, Mt. Evans, Devil's Head to the west, and Pikes Peak to the south. Deer bed down in the grass between the gamble oak and birds flit from tree to tree along the trails.
Tips & Resources for Hiking the Ridgeline Open Space Trail
- Rattlesnakes: Keep an eye out for rattlesnakes that sun themselves on rock and the packed, warm surface of the trail.
- Hiking with Kids: As always, hike as a group, keeping small children near you. Mountain lions live in the area (as with most front-range hikes), and the sight of a small creature running alone on the trail can signal a lion's prey response.
- Sunscreen: This hike is 100% exposed to the sun's rays, so be sure to wear a hat and apply that sunscreen.
- More Hikes in Castle Rock Colorado: Castle Rock Trail, Waterfall at Castlewood Canyon, East Plum Creek Trail.
- Trail Map for Ridgeline Open Space Trail near Castle Rock: Trail Map Link
- Packing List: Always pack the 10 Essentials. Download our Hiking Guide to get the list and dayhiking packing checklist.
- Colorado Road Conditions: Colorado Road Conditions
- After the Hike: Crave Burgers
Weather
Map & Driving Directions
Click for Driving Directions
Butler Gulch Hike
The Butler Gulch Trail near Berthoud Falls is a moderately difficult out-and-back trail with a balance of shade on the first half and then above treeline with spectacular views of peaks and wildflowers all around. Activities here include stream crossings and steep climbs, and one can visit an old mine above the treeline. This is also a great snowshoeing hike during winter and is a well-known skiing destination. Explore the full Butler Gulch hike profile below for trail map, driving directions, and more tips and details to help you enjoy this adventure near Berthoud Falls.
Trail Snapshot: Butler Gulch Hike
| Hike Distance | Approx 5 Miles Round Trip |
|---|---|
| Difficulty | Moderate (difficult in Winter) |
| Duration | Approx 3.5 hrs |
| Trail Type | Out and Back |
| Starting Elevation | 10,400′ |
| Elevation Gain | Approx +1200+′ |
| Seasons | June to September; October to May for Winter Trail Conditions |
| Dogs | Allowed On Leash |
| Hike Trail Map | Click for a Map of Bulter Gulch Trail |
| Denver Drive Time | 1 hr |
| Driving Directions to Butler Gulch Trailhead | Click for Google Map |
| Town Nearest Hike | Empire, Colorado |
| Beauty | Summer Wildflowers, Lake, Cascades, Meadows, Stream, Aspen trees, Wildlife: Mountain Goats |
| Activities | Hiking, Photography, Snowshoeing, Cross-country Skiing |
| Nearby Hikes | Herman Gulch and Cascades Near Berthoud |
Parking & Trailhead: Butler Gulch Hike
The Trailhead for Butler Gulch is about 1 hour West of Denver via Interstate 70. Take the exit for Hwy 40/Winter Park (easy to miss) through Empire (be alert for reduced speed limit) up to where US 40 makes a sharp bend to begin climbing up the mountain toward Berthoud Pass. Just before this turn, there is a left-hand turn to take for the Henderson Mine Road. Follow Henderson Mine road for about a mile. It will pass the mining operation and the parking area is just past the mine on the left. The main parking area is the first one you will encounter and it's large. A smaller one is about .25 mile up the road (the road is 4WD after the first lot) is small and fills fast. We recommend parking in the first lot as it is maintained and this will prevent damage to the trailhead.
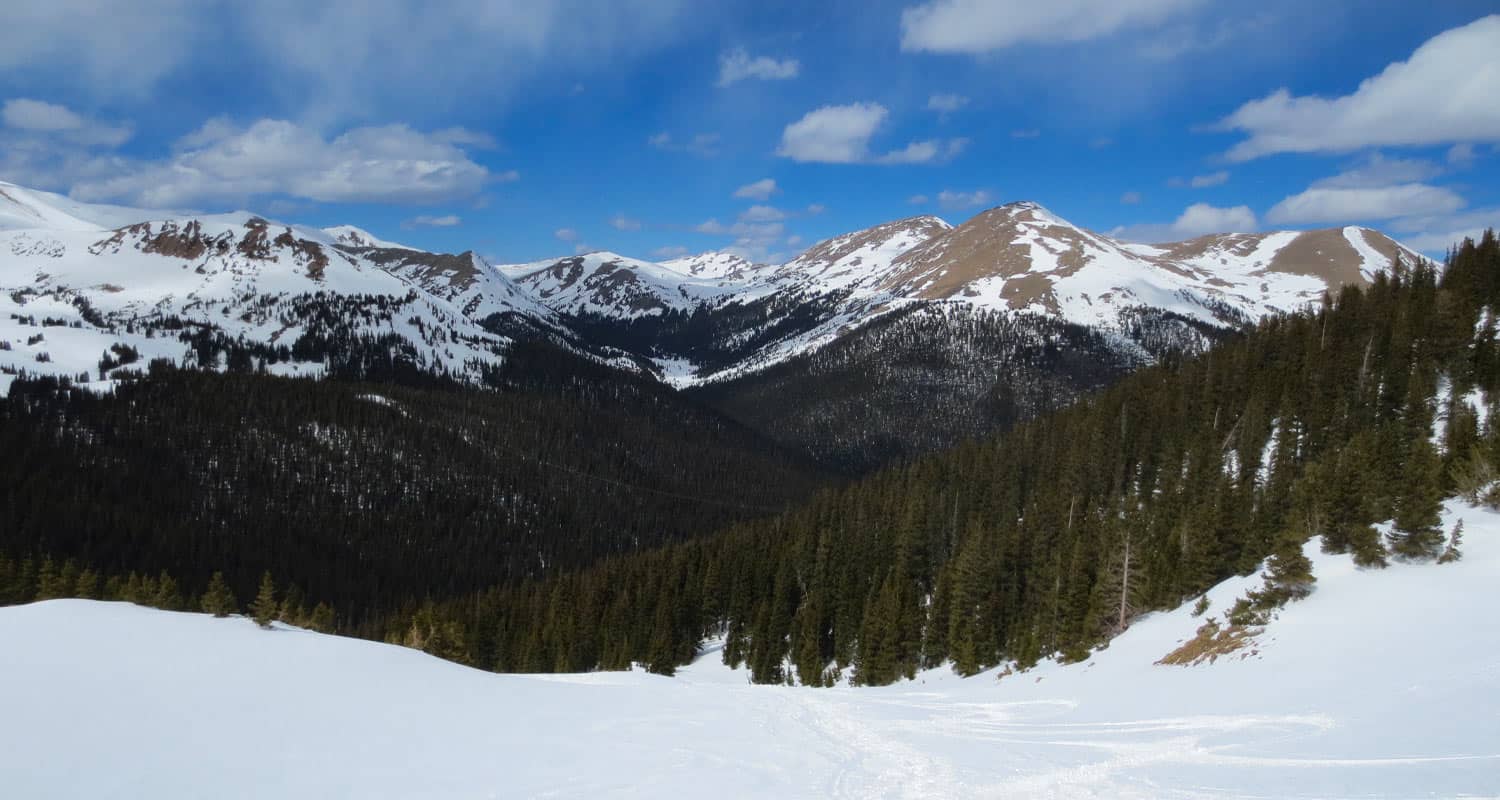
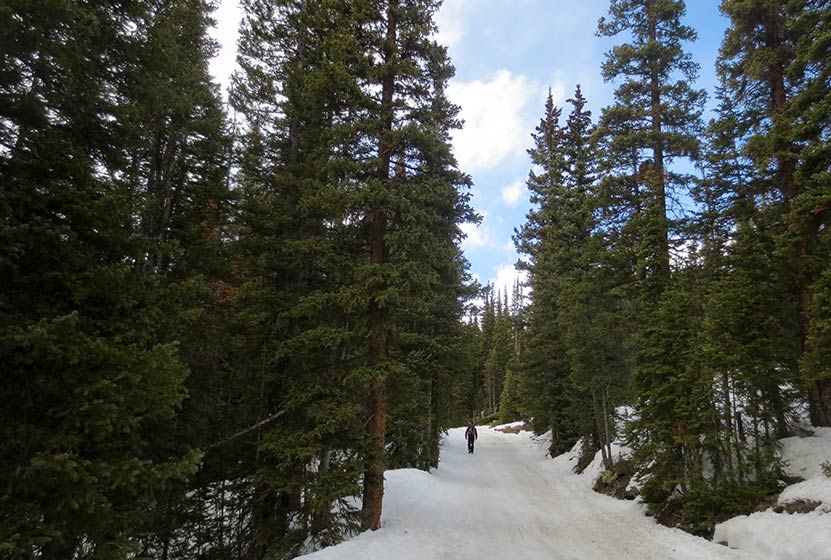
From the parking area, hike the 4WD road for about 1/4 mile to where the trail splits. There should be signage here at the fork indicating the Jones Pass Trail goes to the right, and the Butler Gulch Trail goes to the left. Soon, the trail begins to climb through mixed forest of spruce, fir, and aspens. After approximately one mile, a mountain stream nears the trail, forming a quaint meltwater waterfall (right side of trail). Soon, the trail emerges from the trees into a landscape of snow-capped mountains. This bowl will be replete with wildflowers in the early weeks of Summer. At this point, hikers are exposed to the elements, and during the Summer months, lightning storms can come up without warning in the afternoon. So, keep an eye on the sky. Winter travelers should be alert to avalanche conditions. Here in the bowl, the trail has come to about 2.5 miles and a hike back will make this a 5-mile round-trip adventure. Hikers can add a strenous hike up the nearby ridgeline to gain panoramic views on the Continental Divide. When I hiked this in April of 2016, tracks were evident that led past the remains of old mining equipment along the ridge. At the top, the views are absolutely beautiful. It's a great place to take in hundreds of miles of changing aspen trees in the Autumn. The trail map link for Butler Gulch in this post is not the best. Because of this we recommend The Latitude 40 Summit County Trails Map.
Tips & Resources for Hiking Butler Gulch Hike
Weather
Map & Driving Directions
Click for Driving Directions
Garden of the Gods Ultimate Hiking Guide
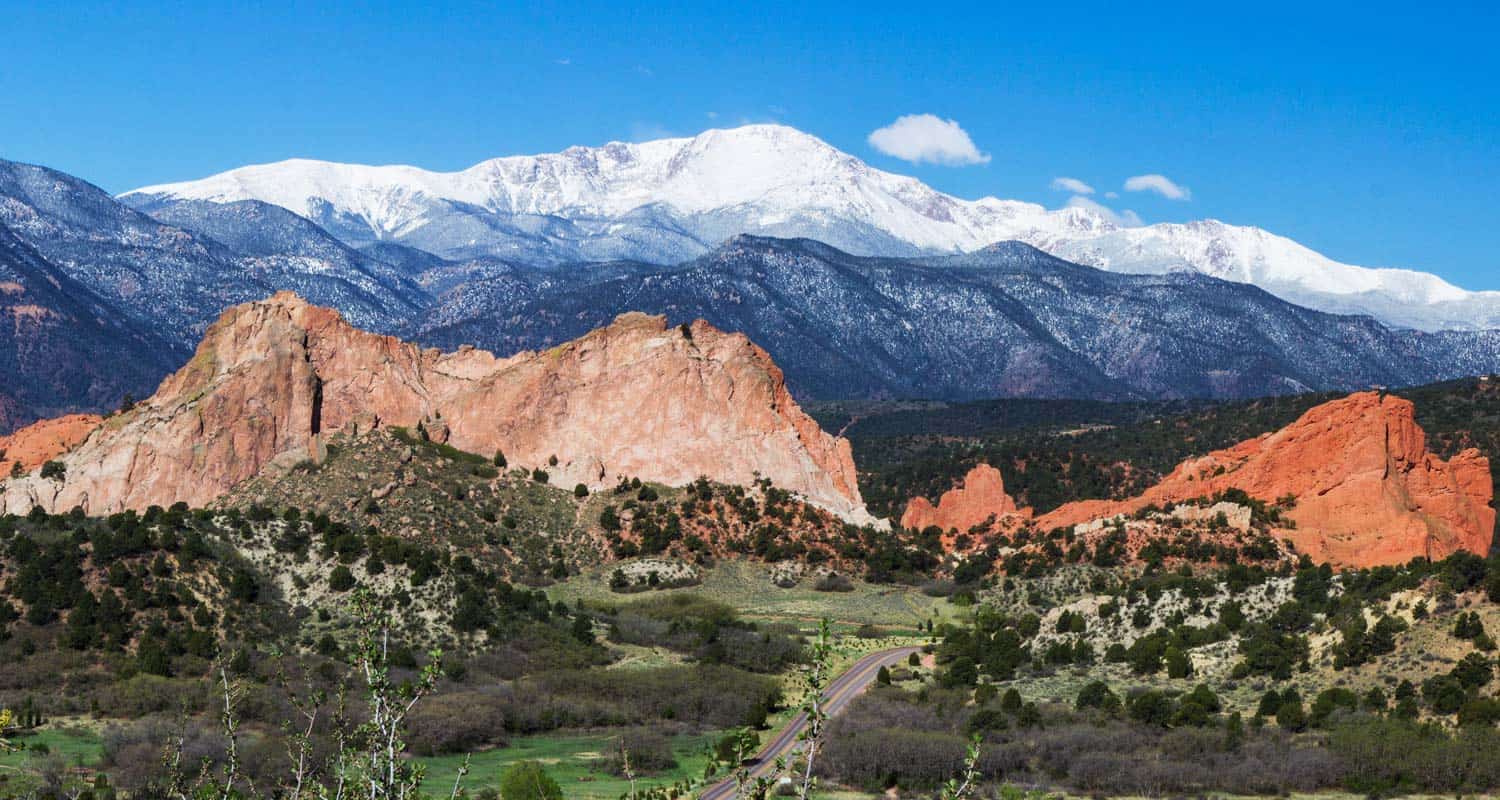
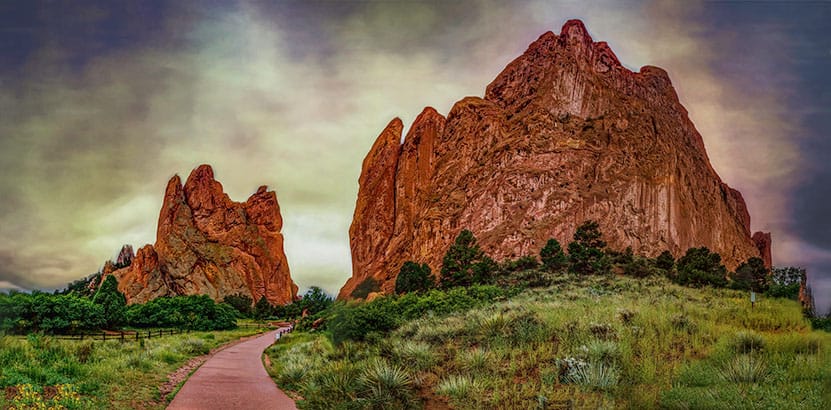
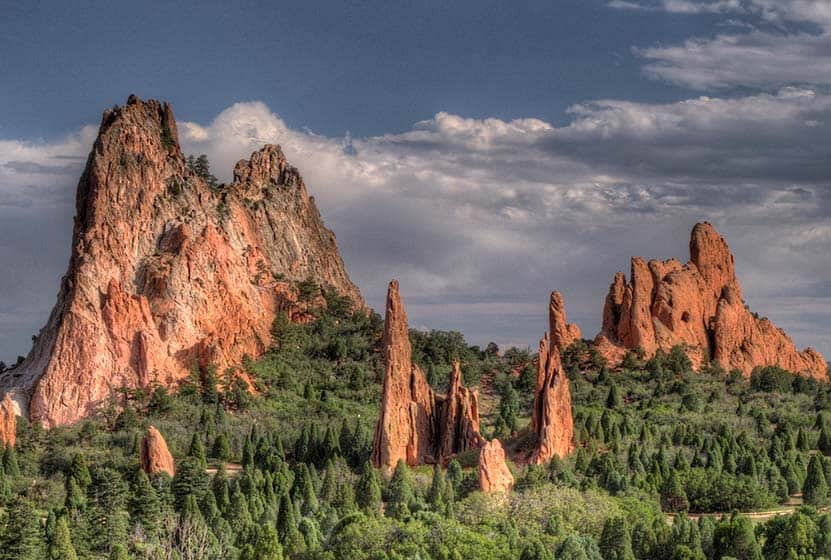
Garden of the Gods is argueabley the best place to hike in Colorado Springs. Designated a National Natural Landmark, the park is known for its towering red sandstone formations and panoramic views of Pikes Peak. Hiking, Horseback riding, mountain biking, birding, and climbing are among the activities that can be enjoyed here. This guide to the Garden of the Gods features 6 different hiking trail options, spanning from easy to moderate and 1/2 mile to 2.5 mile hikes.
We've attempted to create the definitive guide to hiking in Garden of the Gods. In this guide, you'll find: Driving directions to Garden of the Gods, Trail Maps, Photography tips, Camping information for the Garden of the Gods area, and other Resources for planning your Colorado Vacation. This guide to Garden of the Gods is extensive, so we have created a table of contents to help you navigate. Have fun exploring!
Garden of the Gods Hiking Guide Contents
- Trail Snapshot
- Driving Directions
- Hiking Trails
- Central Garden Trail
- Ridge Trail
- Siamese Twins Trail
- Palmer Trail
- Scotsman & Buckskin Charlie Loops
- Balanced Rock Trail
- Photography
- Hiking with Kids
- For Out-of-State Hikers
- Things to Do Nearby
- History and Geology
- Protect Garden of the Gods
Trail Snapshot: Garden of the Gods
| Hike Distance | Six Trails: 1/2 to 3 miles Round Trip - Depending on Trail |
|---|---|
| Difficulty | Easy to Moderate |
| Trail Type | Both Loop and Out-and-Back Hikes |
| Starting Elevation | 6200′ |
| Elevation Gain | Up to +300' |
| Seasons | Year Round |
| Hours | 5AM to 9PM |
| Cost | Free to the Public |
| Dogs | Allowed On 6' Leash |
| Hike Trail Map | Click for a Map of Garden of the Gods Area Hikes |
| Denver Drive Time | 1 hr 10min |
| Driving Directions | Click for Driving Directions to Garden of the Gods |
| Town Nearest Hike | Colorado Springs, Colorado |
| Beauty | Red Rocks, Views of Pikes Peak, Wildflowers, Meadows, Aspens, Wildlife: Mule Deer, Whitetail Deer, and Bighorn Sheep. |
| Activities | Hiking, Biking, Running, Horseback Riding, Rock Climbing (in approved areas with permit), Camping, Visitor & Nature Center, Free Guided Nature Walk, Geo-Trekker Movie, Outdoor Scavenger Hunt. |
Driving Directions to Garden of the Gods
Take interstate I-25 to Colorado Springs. Exit onto West Fillmore Road and head West. Fillmore will change names to Fontmore Road. Take a right onto North 30th Street, and you'll find the Garden of the Gods Visitor Center just 1.2 miles up on the right/east side of the road. We recommend you stop at the Visitor Center to pick up a free color trail map. The main parking area for hiking is located on the North end of the park. You'll find Gateway Road (the access road into Garden of the Gods) directly across from the Visitor Center. Head west on Gateway road, then right at the intersection with Juniper Way Loop Road. The main parking area is located on the left-hand/South side of the first bend of the Juniper Way Loop. There are restroom facilities available at both the main parking area and at the visitor center.
- Driving Directions to the Main Parking Area at Garden of the Gods
- Driving Directions to Garden of the Gods Visitor and Nature Center
- Driving Directions to the Trading Post at Garden of the Gods
Before you park, consider driving around the entire Juniper Way loop to take in the sites and get your bearings. It's one of the most beautiful drives in Colorado, especially during sunrise and sunset. The loop is one way, has a low speed limit, and is frequented by cyclists. So, it also makes for a great bike ride-- the northbound loop is a gradual but demanding climb. Be attentive to hikers and cyclists as you drive in the park.
6 Hiking Trails at Garden of the Gods
Trail Option #1 - The Central Garden Trails
| Hike Distance | 1 Mile Round Trip |
|---|---|
| Difficulty | Easy |
| Trail Type | Lollipop Loop |
| Elevation Gain | Approx. +30' |
We've put this loop hike first on our list because it takes you right into the heart of the park. It's also paved and wheelchair and stroller accessible. From the parking lot, hikers will head south on the main trail (pictured above). On your right will be the largest of the sandstone Monoliths, North Gateway Rock. The tower on its north end is called the Tower of Babel, and its south end marks the gateway into the famous central valley. But before you enter the valley, be sure to look up at the Kissing Camels formation located at the middle-top of North Gateway Rock.
The loop begins right after you enter through the gateway at the twin spires of Sentinel Rock. Going left will take you on a clockwise circuit around the valley. You'll first pass between the Three Graces and Pulpit Rock before the trail bends to the North. Finally, the trail will bend South and meet back up with the trail that leads back to the main parking lot. There are many other trails that come off of the main loop trail, so bring a map with you if you plan to explore some of the nooks and crannies of the park.

Looking for more places to hike with your dog? Explore more Dog-Friendly hikes near Denver by visiting our 25+ Dog Friendly Hikes and our Top 10 Dog Hikes Near Denver.
Trail Option #2 - The Ridge Trail at Garden of the Gods
| Hike Distance | 0.5 Mile Round Trip |
|---|---|
| Difficulty | Easy |
| Trail Type | Loop |
| Elevation Gain | Approx. +100' | Ridge Trailhead Driving Directions | Click for Directions to South Garden Parking Area |
The Ridge Trail is a short, half-mile loop on the southeastern end of the park. From the parking area indicated in the table above, the trail is located across the street to the left by takign a crosswalk. Before you cross, be aware of cars and cyclists (often the cyclists come around the curves of the park much faster and can take you by surprise). The Ridge trail makes it way to the foot of The Sleeping Giant formation before bending back toward the parking area.

Siamese Twins Rock Formation - Courtesy of Matt Santamarco
Trail Option #3 - The Siamese Twins Trail
| Hike Distance | Approx 1/2 Mile |
|---|---|
| Difficulty | Easy |
| Trail Type | Loop |
| Elevation Gain | Approx. +150' |
| Trailhead Driving Directions | Click for Directions to Siamese Twins Trailhead |
To hike to the Siamese Twins formation, take the trail on the north end of the parking lot that leads North. As you hike, you'll observe a very different landscape to the West, desert terrain that stretches out and up to Rampart Range Road. At the Siamese Twins, be sure to grab a photo of Pikes Peak framed by the window in the rock. Be sure to adjust your camera to take it's light reading from the distant mountain rather than the foreground (on your phone, simply press your screen to readjust the reference point for the lighting and focus). The trail heads South and will pass the parking area as it bends around and back up to it.
Trail Option #4 - The Palmer Trail (Chambers/Bretag Loop)
| Hike Distance | 2.5 as Described Miles |
|---|---|
| Difficulty | Moderate |
| Trail Type | Loop |
| Elevation Gain | Approx. +250' |
| Trailhead Driving Directions | Click for Directions to Main Parking Lot Trailhead |
This 2.5 mile loop hike is a great way to take in the full spectrum of terrain and rock formations in the park. The route, as describe below is about 2.5 miles, and mileage may vary depending on the side trails you decide to take. From the main parking area/trailhead, the Palmer Trail can be picked up by crossing Juniper Way directly North of the lot. Heading left/West on the Palmer trail, it will wind around South, roughly following the main road through Garden of the Gods.
To make the loop, at about 1.3 miles on the Palmer Trail hikers will cross Juniper Way at the Scotsman Picnic Area and join up with the Scotsman Trail. It will dips South initally, then heads Northeast to meet up with the trails of the Central Valley. This area can be quite a labyrinth and the best way to pick up the Eastern side of the loop will be to keep an eye out for the gateway, the space between North Gateway and South Gateway Rocks. Once through the gateway, hikers will pick up the Garden Trail, head East, and join up with the Susan G. Bretag Trail, by crossing Juniper Way where it intersects with Gateway Road. Heading North on the Bretage Trail, it will eventually come to a fork. Taking the left-hand/West trail (Palmer Trail) will lead back to the parking lot.
Trail Option #5 - The Scotsman and Buckskin Charlie Loops
| Hike Distance | Scottsman Loop Approx. 1 Mile; Scotsman+Buckskin Charlie Approx. 2 Miles |
|---|---|
| Difficulty | Moderate |
| Trail Type | Loop |
| Trailhead Driving Directions | Driving Directions to the Scotsman/Buckskin Charlie Trailhead |
These are two loops found just South of the Central Valley area. The parking area is small and will likely be full during most days during the Summer months. One alternative is to begin your hike at the main lot, then pick up the Scotsman trail on the South end of the Valley.
The Scotsman Loop is 1.1 mile in its entirety. Picking up the trail from the Scotsman Picnic ground by following social trails East, the Scotsman dips South then winds Northeast before making a sharp turn South and back to the parking area. Bring your trail map, or have it up on your phone to keep oriented.
The Buckskin Charlie Trail can be added to double your hike. Hikers will pick up the Buckskin Charlie Trail on the southern bends of the Scotsman. The trail winds around until it begins again to head North, following the line of the main road, Juniper way, until it joins back up with the Scotsman and returns home to the Scotsman Picnic area.
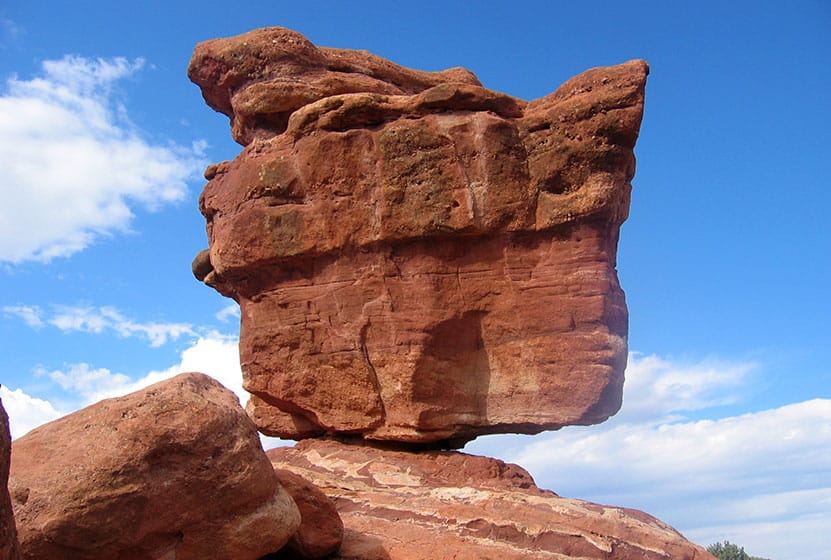
Trail Option #6 - The Balanced Rock Loop Hike
| Hike Distance | 0.7 Mile |
|---|---|
| Difficulty | Easy |
| Trail Type | Loop |
| Trailhead Driving Directions | Best Trailhead for Balanced Rock Loop Best Parking for Viewing Balanced Rock |
You don't have to hike to Balanced Rock (see driving directions in the table above). In fact, this loop hike is named "the Balanced Rock Trail" only because it is near Balanced Rock, not because it takes you there. For visitors entering through the South end of the park, Balanced Rock will be the first stop, then on to the Trading Post. In fact, the best way to pick up the Balanced Rock Trail is from the Northern end of the Trading Post lot. Hikers will find a connector trail that goes directly from the lot North, crosses the road, and immediately picks up the Balanced Rock Loop trail. Hiking counter-clockwise, the trail follows alongside Garden road, then leads North until it terminates at another section of the road. Hikers can cross the road (watch for cars and cyclists) and pick up the Cabin Canyon Trail across the street. Taking the Cabin Canyon Trail South, it will come to a crosswalk where you can pick the Balanced Rock Trail up again and back to the parking area.
Photography: Great Photos in Garden of the Gods
- All year round and any time of the day, Garden of the Gods is already photogenic. However, the best times to take photos are during the golden hours of sunrise and sunset when the rock faces are lit up and cast their shadows across the landscape. Going early in the morning will also help you avoid having people in your photos.
- Snow adds its white contrast during the Winter months and early Spring. If you want a snowcapped Pikes Peak in the background, you'll likely need to get that shot before mid-June.
- Wildflowers appear most noticeably in April through July.
- After heavy rains, standing water can form what look like small ponds (but are really giant puddles). These offer the rare opportunity to capture the reflection of the rock formations on water.
- One classic vantage point is to take your photo from the North End of the Palmer Trail at Sunset. This will give you one of the best photographs of the Central Valley area.
- For sunrise, a great place to capture Garden of the Gods with Pikes Peak in the background is from the parking area up on Mesa Road that overlooks the park.
Hiking with Kids at Garden of the Gods
- Hydrate: This goes for adults as well, but is even more important with kiddos. Almost all the trails in Garden of the Gods are exposed to the sun. You're also in a High-Plains Desert environment, so you simply need more water. Then add onto that physical exertion. So, bring water and hydrate.
- Pack Snacks or Bring a Lunch: Even though the hikes are not long in Garden of the Gods, it always helps to have fuel. Plus, nothing beats finding a great view of Pikes Peak and kicking back to rest and enjoy a picnic.
- Climbing can result in injury: Having hiked often in Garden of the Gods, I've witnessed people--usually young people--who have climbed up into areas and gotten themselves in a tough spot. Children should know that climbing up into an area is a lot easier than getting down.
Visiting Garden of the Gods From Out-of-State
- Download our Hiking Guide for a list of hiking tips, 10 essentials that everyone should pack for their dayhike, and recommended hiking snacks.
- Free Full-Color Map: Don't get lost. Pick up this freebie at the Garden of the Gods Visitor & Nature Center information kiosk.
- Bring Lots of Water: It can be very hot and dry, and there may not be a chance to refill, so bring a full water bottle.
- Altitude: If you are visiting Colorado from out-of-state, chances ar that it will take you a few days to adjust to teh altitude. The good news about hikes in Garden of the Gods is that they are relatively easy. However, a little exertion at altitude can result in feeling naseauted, winded, and just plain tired. So, don't overdo it if you are not feeling well. Hydrate, Hydrate, Hydrate (because it oxygenates your blood), and get good rest.
- Garden of the Gods Visitor CenterThe Visitor Center is a must-do, especially if you are visiting from out-of-state. They now have a cafe with a family-friendly and healthy menu.
- Free Guided Nature Walks led by a naturalist, from the north parking lot
- Geo-Trekker Movie Experience at the Geo-Trekker Theater in the Visitor Center.
- Outdoor Scavenger Hunt with a guide that will be provided
- Park Tours on Bus, Jeep, or Segway
- Garden of the Gods Trading Post: This gift shop and art gallery is located at the southwest edge of the park.
- Breakfast and Lunch: A favorite local go-to is the Mountain Shadows Cafe--a great place to refuel after your hike.
- Mediterranean Food: A great mediterranean option is the nearby Heart of Jerusalem Cafe.
- Amazing Sandwiches: You've got to be patient for this one, because, at the Mate Factor, they take their time crafting your sandwich--but it's worth it. Step inside and you'll agree that you've never been to a place like this before. Mate Factor, Manitou Springs.
- Stay the Trail: The sandstone in the parks is easily eroded, and because this area sees a lot of visitors the impacts of individuals quickly adds up. So keep on established trails during your hikes.
- Keep Dogs on a 6' Leash: And be sure to bring bags for picking up after your pet.
- Pack Out All Trash: It should go without saying but be sure to pick up after yourself. In the last few years it seems that litter along trails in Colorado has grown to be a real problem. Do your part to keep the park and our State beautiful. One of our family hiking habits is to pick up trash as we hike.
- Climbing and Bouldering: Climbing and Bouldering in Garden of the Gods require both the proper equipment and permits. You can pick up permits at the Visitor Center or online at the City of Colorado Springs climbing permit page.
- Thanks goes out to Joel Tonyan for his great photo of Garden of the Gods and snow-dusted foothills.
- Care for the Rock: This should also go without saying, but don't carve or deface the rock in any way.
- Let them sit and grow: Removing rocks, plants, or animals is prohibited.
- Mountain Biking: Mountain biking is limited to designated trails.
Camping Near Garden of the Gods
Camping is prohibited in Garden of the Gods, and it's important to understand that the Park is located in the town of Colorado Springs--it's not a backcountry experience. Those looking to camp will need to explore campgrounds and tent camping options outside the immediate area. However, there is a nearby campground in Manitou Springs that offers cabins, bunkhouses, and RV spots. It's pet-friendly and even offers bike rentals. You can find current rates and more at Garden of the Gods RV Resort. Most of the tent camping is going to be out near Rampart Range Reservoir or further West past Woodland Park, CO.
Things to Do and Places to Eat Near Garden of the Gods
History and Geology of Colorado’s Garden of the Gods
Imagine a prehistoric landscape of sand dunes plunged and crushed into the earth by some violent upheaval involving tectonic and hydraulic forces. That's how the red rock fins of Garden of the Gods were formed in the womb of the earth. Then another cataclysm. The Pikes Peak massif gets thrust to the sky along with the surrounding red sedimentary rock. Some at angles and some perpendicular to the land. Then the forces of wind and water began to wear down the loose rock creating the unusual holes and across the surfaces of the rocks. You'll find these types of rock formations stretching from North of Ft. Collins down into Southern Colorado. Some of the most notable are Roxborough State Park and South Valley Park near Littleton and Red Rocks Park in Denver.
After his death in 1907, the children of railroad tycoon, Charles Elliott Perkins, fulfilled their father's wishes by donating 480 acres of Garden of the Gods to become a permanent park and free to the public. The park has expanded over the years to over 1,300 acres. The park got its name from a German surveyor mapping out the land in 1859.
How You Can Protect the Garden of the Gods Area
Weather
Map & Driving Directions