Dream Lake in Rocky Mountain National Park
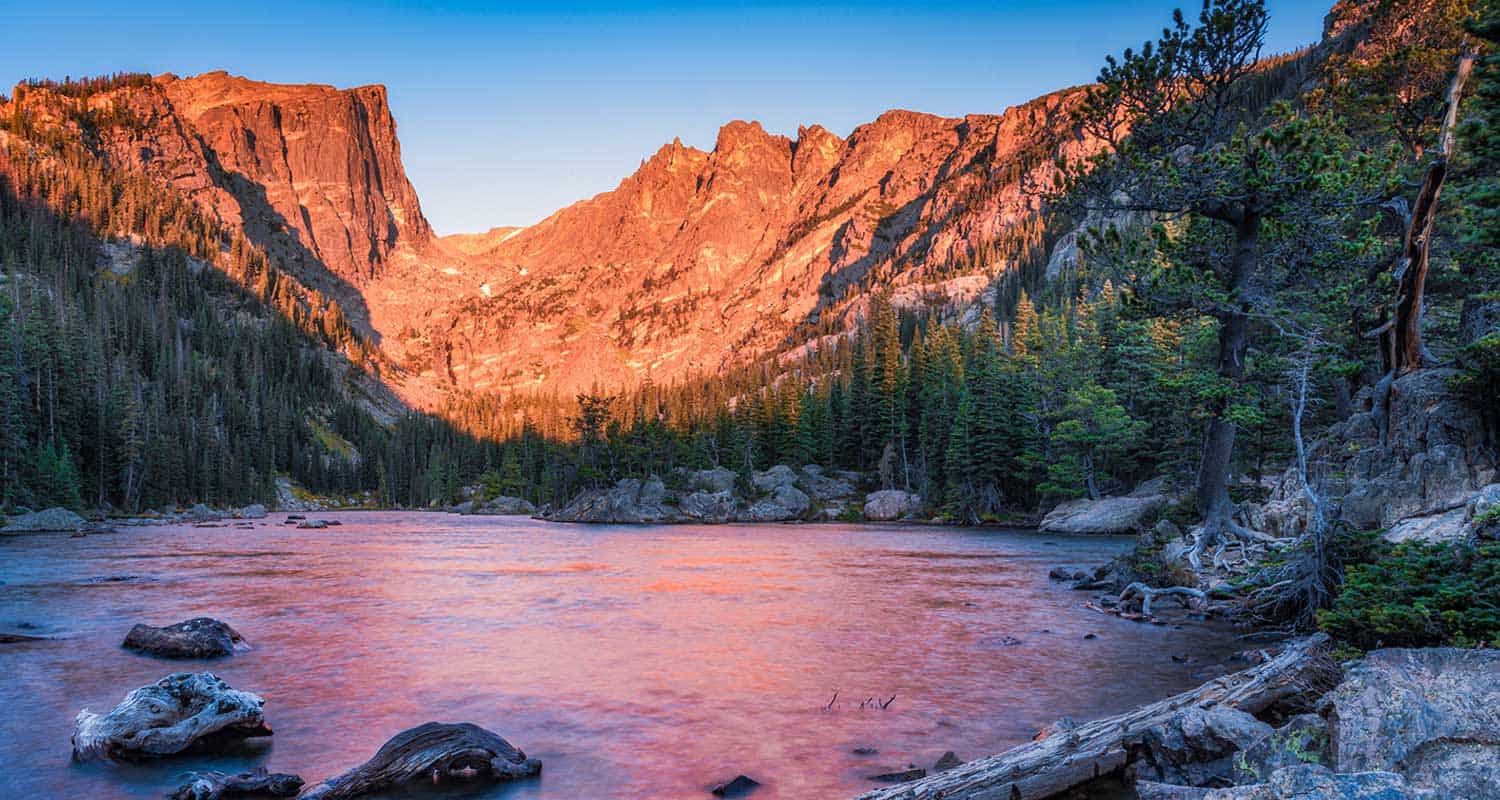
The hike to Dream Lake is one of the popular destination hikes in Rocky Mountain National Park--and for good reason. In the early morning hours, Dream Lake is a vision straight out of a fairy tale. This 2.2-mile, out-and-back hike begins at the Bear Lake trailhead and passes Nymph Lake along the way. Explore the full Dream Lake hike profile below for trail map, driving directions, and all the details you need to enjoy this Colorado adventure.
Note: Rocky Mountain National Park now requires timed entry permits from May 27th through October 10th. See the RMNP permits page for more information.
Trail Snapshot: Dream Lake in Rocky Mountain National Park
| Hike Distance | 2.2 mile Round Trip |
|---|---|
| Difficulty | Easy |
| Duration | Approx 1.5hr Round Trip |
| Trail Type | Out and Back |
| Starting Elevation | 9475' at Trailhead |
| Elevation Gain | Approx. +425' |
| Seasons | Spring through Fall, Winter Snowshoeing |
| Dogs | Prohibited in RMNP |
| Hike Trail Map | Click for a Map of Dream Lake in RMNP |
| Denver Drive Time | 2 hr |
| Driving Directions to Bear Lake Trailhead | Click for Google Map |
| Town Nearest Hike | Estes Park, Colorado |
| Beauty | Sub-alpine lakes, mountain views, wildlife: Abert's squirrel, elk, bear |
| Activities | Picnicking, hiking trails, photography, snowshoeing |
| Conditions at Bear Lake Trailhead | Click Here |
| Fee | Park Pass Required |
Parking & Trailhead Information for Dream Lake:
The trail up to Dream Lake begins at the Bear Lake Trailhead (driving directions).In the event that parking lot at Bear Lake is full, you'll then need to park at the Park & Ride near the Bierstadt Trailhead and take the bus into the trailhead. This service runs 7am to 7PM and more information on the RMNP shuttle bus routes can be found at this link. The trail to Dream Lake is located on your way to Bear Lake, off to the left, just before reaching the shore viewing area of Bear Lake.
The trail to Dream Lake is paved for the first half mile. The path was surfaced to deal with the erosion caused by the heavy foot traffic, and is not considered handicap accessible. After visiting the lily pad-laden Nymph Lake, the trail becomes a dirt path and begins a gentle climb towards Dream Lake. For a short stint the trail becomes more steep and demanding. On the way up, hikers will gain views of a vast landscape featuring the Keyboard of the Winds in Glacier Gorge and Longs Peak looming over everything but the distant sky.
Just before reaching Dream Lake, the trail splits. The trail to the left takes hikers to Lake Haiyaha and the trail to the right leads to Dream Lake. Dream Lake, with the beautiful backdrop of Hallet Peak, is one of the most photographed scenes in Rocky Mountain National Park. At daybreak, light from the east illuminates the stone face and crags of Hallet, and Dream Lake returns the favor by mirroring its image in her waters.
List and Links of Destinations From Bear Lake to Emerald Lake
Tips & Resources for Hiking to Dream Lake:
- Explore More: Adventure beyond Dream Lake is Emerald Lake (+.6 mile from Dream Lake).
- Trail Map for Bear Lake Corridor: Trail Map Link
- Colorado Road Conditions: Colorado Road Conditions
- After the Hike: Poppy's Pizza
- Photo: We would like to express our gratitude to Brendan Bombaci for sharing such an amazing photograph of this hike to Dream Lake.
Weather
Map & Driving Directions
Click for Driving Directions
Nymph Lake Hike in Rocky Mountain National Park
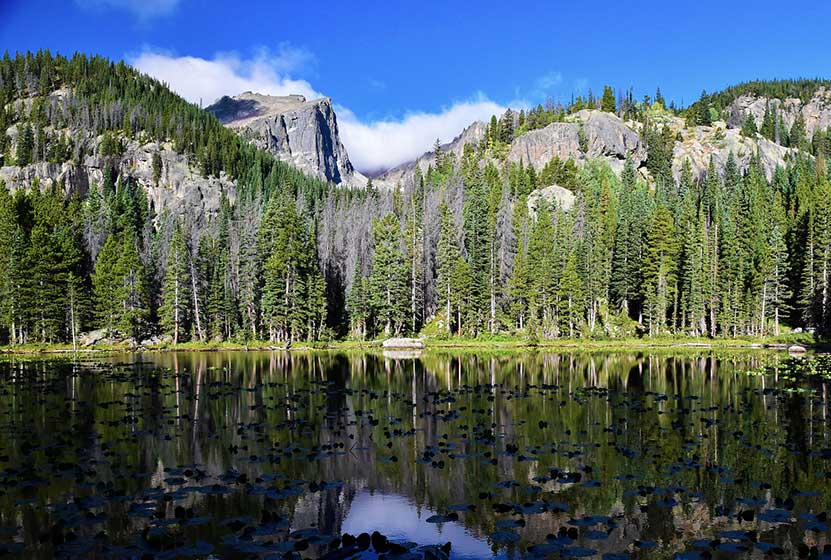
In Summer, Nymph Lake in Rocky Mountain National Park blooms with the yellow blossoms of the lily pads that cover its surface. It's a short easy hike from the Bear Lake Trailhead to Nymph lake. Most hikers will want to make the journey beyond Nymph to Dream and Emerald Lakes. Explore the full trail profile below for all the destinations and details: trail map, tips, and driving directions to the trailhead.
Note: Rocky Mountain National Park now requires timed entry permits from May 27th through October 10th. See the RMNP permits page for more information.
Trail Snapshot: Nymph Lake in Rocky Mountain National Park
| Hike Distance | 1 mile Round Trip |
|---|---|
| Difficulty | Easy |
| Duration | Approx 40 min Round Trip |
| Trail Type | Out and Back |
| Starting Elevation | 9475' at Trailhead |
| Elevation Gain | Approx. +225' |
| Seasons | Spring through Fall, Winter Snowshoeing |
| Dogs | Prohibited in RMNP |
| Hike Trail Map | Click for a Map of Nymph Lake RMNP |
| Denver Drive Time | 2 hr |
| Driving Directions to Bear Lake Trailhead | Click for Google Map |
| Town Nearest Hike | Estes Park, Colorado |
| Beauty | Sub-alpine lakes, mountain views, wildlife: Abert's squirrel, ducks, bear |
| Activities | Picnicking, hiking trails, snowshoeing |
| Conditions at Bear Lake Trailhead | Click Here |
| Fee | Park Pass Required |
Parking & Trailhead Information
The trail up to Nymph Lake begins at the Bear Lake Trailhead (driving directions).In the event that parking lot at Bear Lake is full, you'll then need to park at the Park & Ride near the Bierstadt Trailhead and take the bus into the trailhead. This service runs 7am to 7PM and more information on the RMNP shuttle bus routes can be found at this link. The trail to Nymph Lake is located on your way to Bear Lake, off to the left, just before reaching the shore viewing area of Bear Lake.

The hike up to Nymph Lake is one of the least demanding--but still rewarding--destinations in Rocky Mountain National Park. Most hikers make the Lake a stopping point on their journey on the longer, 3.6 mile round-trip hike to Emerald Lake. However, Nymph Lake is not without its attractions. In the summer, after the snow and ice have melted, the yellow pond lily fills the lake and bursts with yellow blooms. In the Winter, the Lake, being a smaller body of water (less than 1/5th the size of Dream Lake), freezes over, and Park Rangers will lead snowshoers across it's frozen waters.
The half-mile trail from Bear Lake to Nymph has been improved with asphalt. However it's not exactly wheelchair accessible. The trail was paved in order to absorb the impact of the numerous visitors who hike from Bear Lake to Nymph lake every day. The asphalt ends at Nymph and returns to a dirt trail, meandering through the woods to Dream and Emerald Lakes. At the Lake, hikers can take in some of the iconic scenery of Rocky Mountain National Park. Hallet Peak and Flattop Mountain loom in the distance. Go early in the morning for the most best photography opportunities, and be sure to explore the trail profiles below for the beautiful destinations beyond Nymph Lake.
List and Links of Destinations From Bear Lake to Emerald Lake
1. Bear Lake
2. Nymph Lake - @ .5 miles
3. Dream Lake - @ 1.1 miles
4. Emerald Lake -@ 1.8 miles
Tips & Resources for Hiking to Nymph Lake :
- Explore More: Beyond Nymph lake, you'll find Dream lake (+.6 mile) and Emerald Lake (+.6 mile from Dream Lake).
- Trail Map for Bear Lake Corridor: Trail Map Link
- Conditions at Bear Lake: Click to View Current Conditions
- Colorado Road Conditions: Colorado Road Conditions
- Photo: We would like to express our gratitude to Pete Sheffield for sharing such an amazing photograph of this hike.
- After the Hike: Poppy's Pizza
Weather
Map & Driving Directions
Click for Driving Directions

Hiking Davis Ponds Hike at Staunton State Park
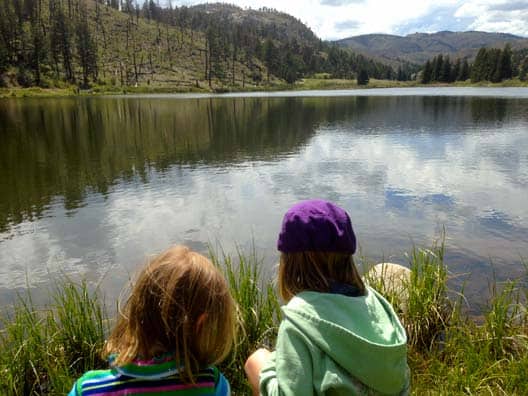
The Davis Ponds loop is a short and easy hike, perfect for young families. Davis Ponds is a great place to take your kids fishing near Denver. Explore the full trail profile below for all the details: hiking trails, trail map, and detailed directions to the trailhead.
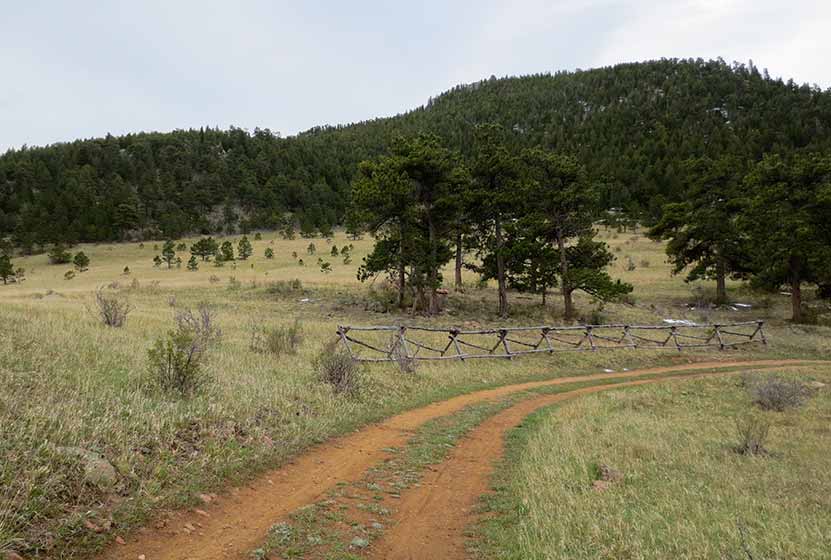
Staunton State Park is one of Colorado's newest gems and located just 45 minutes from downtown Denver. It's a great park for outdoor activities, including hiking, mountain biking, and rock climbing. Staunton has some longer and more demanding trails, but this hike, the Davis Ponds Loop Trail, is a lighter option with some beautiful views to the mountains and the prominent Lions Head outcropping.
Trail Snapshot: Davis Ponds Loop at Staunton State Park
| Hike Distance | 2.15 Miles |
|---|---|
| Difficulty | Easy |
| Duration | Approx 1 hr |
| Trail Type | Loop |
| Starting Elevation | 8200′ |
| Elevation Gain | +80′ |
| Seasons | All Year |
| Dogs | Allowed On Leash |
| Hike Trail Map | Click for a Trail Map |
| Denver Drive Time | 45 min |
| Driving Directions to Staunton State Park | Click for Google Map |
| Town Nearest Hike | Conifer, Colorado |
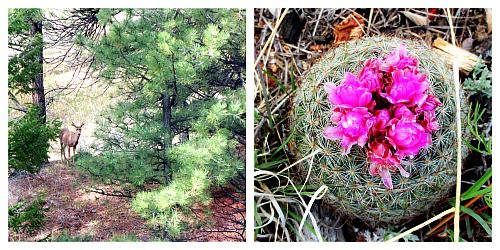
| Beauty | Meadows, Pine Forest, Ponds, Hummingbirds, and Deer |
| Activities | Hiking, Fishing |
| Fee | Entrance Fee or State Parks Pass Required |
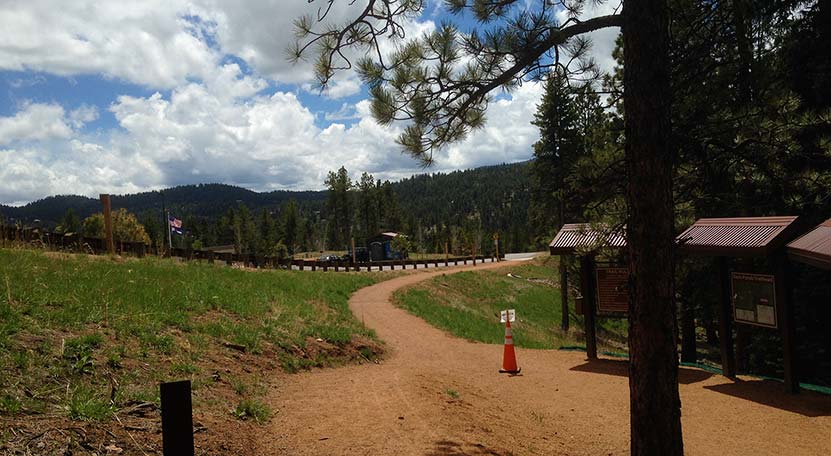
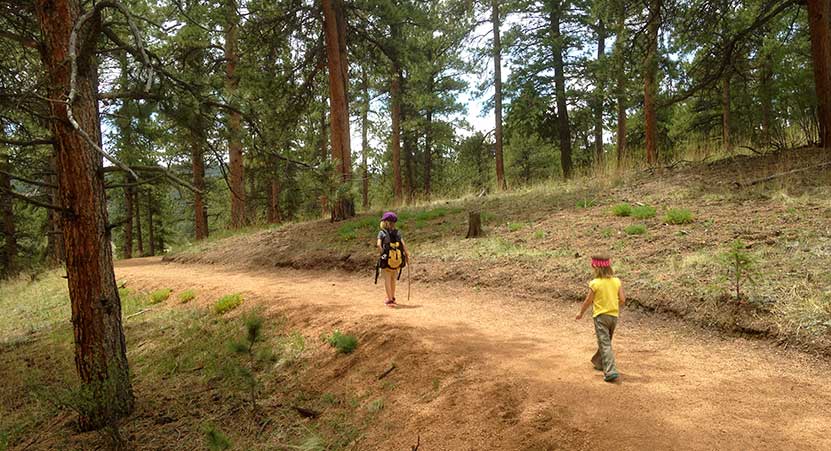
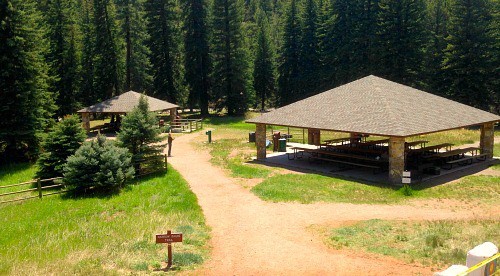
The trail begins just to the north of the initial parking lot (pictured above). We hiked the trail clockwise, taking the trail to the left, but it can be hiked in either direction. The Davis Ponds trail is hiker-only, so you will not encounter any mountain bike or horse traffic, making this perfect for young kids. There is scattered shade as the trail winds in and out of meadows and pine forest. Deer make their way grazing near the trail and hummingbirds buzz by, finding nectar in the wildflowers growing out of the rocky soil.
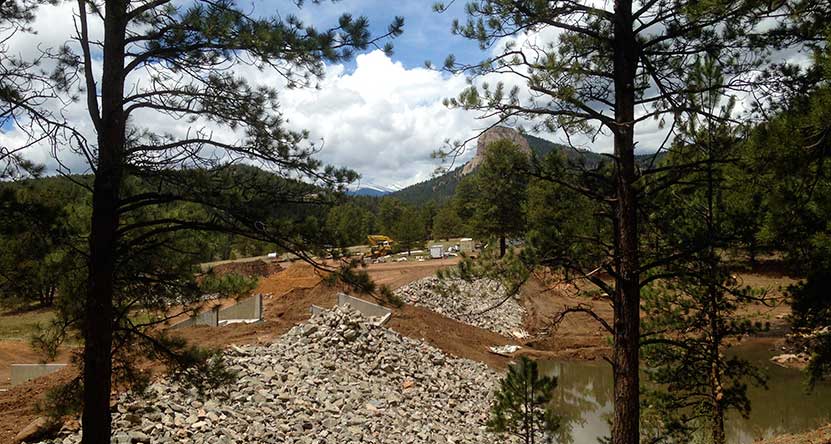
Before the ponds, there is a cut-through trail that can be used to shorten the hike by approximately 1/2 mile, but it's worth going all the way to Davis Ponds and to gain views to the west. The Davis Ponds were under construction and improvements while we were there, but they have now been finished and stocked with rainbow and cutthroat trout. If you are looking for a weekend destination near Denver to fish with your children, this may be one of the best.
On the way back, the trail will merge again with the cut-through trail. The trail back to the trailhead bears left and slightly uphill.
Tips & Resources for Hiking the Davis Ponds Loop :
- TIP: Getting into the park can be slow at times, so be prepared to wait at the entrance on busy weekends.
- Wildlife: You'll find that deer are out grazing in the early morning and closer to twilight.
- Winter: During the Winter, park hours are 8am - 7pm.
- Trail Map for Staunton State Park: Trail Map Link
- Packing List: Always pack the 10 Essentials. Download our Hiking Guide to get list and dayhiking packing checklist.
- Colorado Road Conditions: Colorado Road Conditions
- After the Hike: Crow Hill Cafe in Bailey
Weather
Map & Driving Directions
Click for Driving Directions
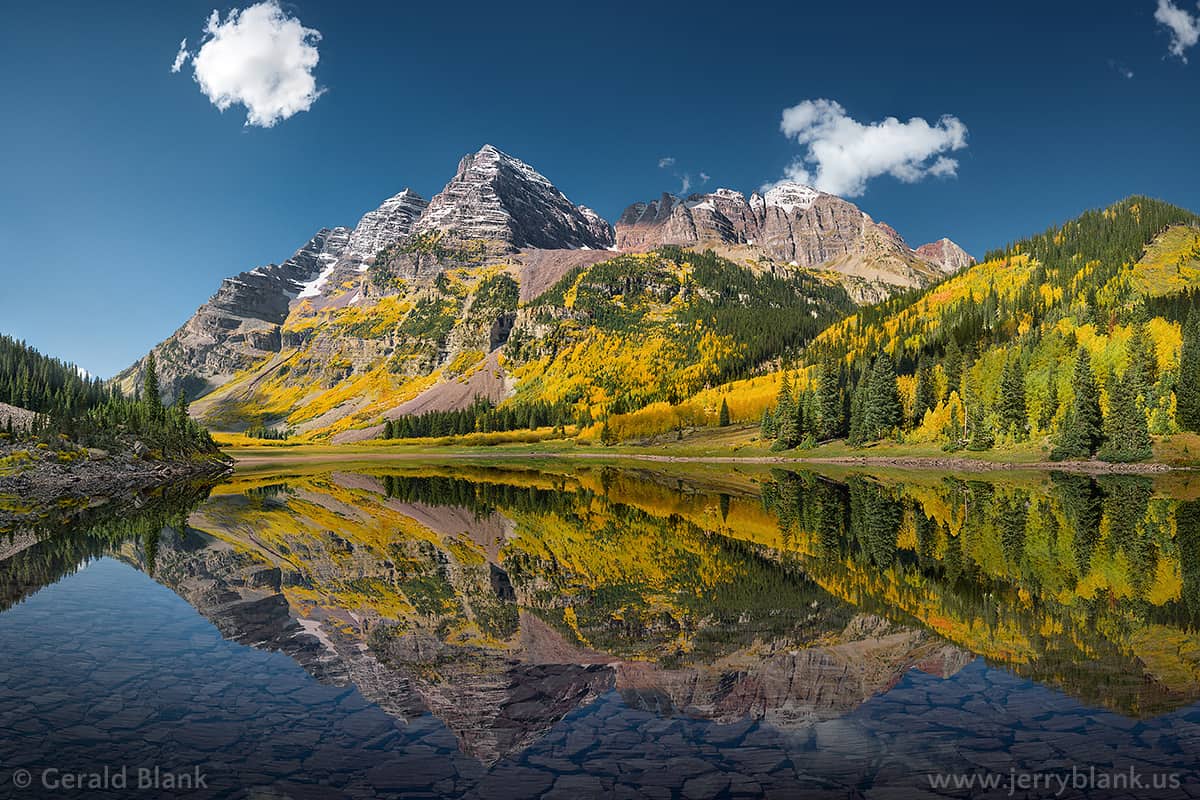
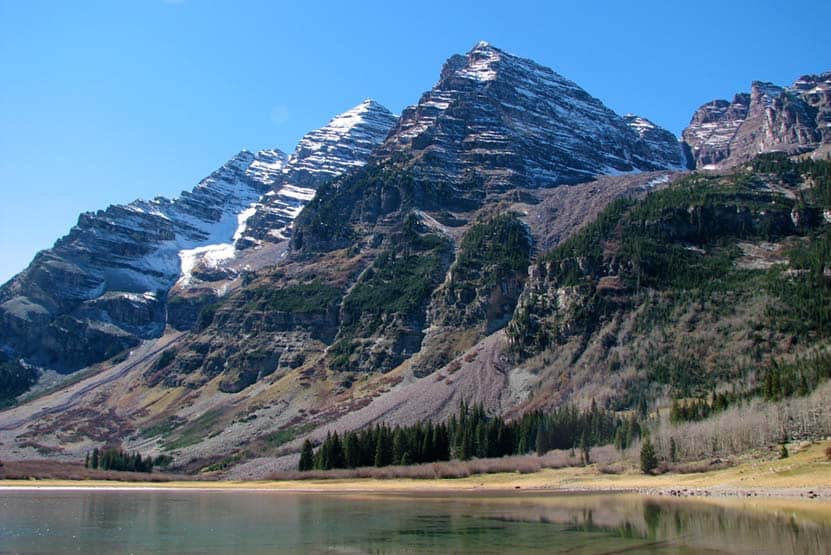
Ultimate Guide to Maroon Bells in Colorado
The Maroon Bells offer several hikes and some of the most beautiful scenery in Colorado. It's a Rocky Mountain landscape painted with cascades, lakes, golden aspens, and all against the backdrop of the peaks of the Maroon Bells. This guide to the Maroon Bells features 5 different hiking trail options, spanning from easy hikes to moderately demanding. Because traffic in this area has skyrocketed in recent years, a fee is required to access whether you are driving in or taking the shuttle.
We've attempted to create the definitive guide to hiking from the Maroon Bells Trailhead. In this guide, you'll find: Driving directions to Maroon Bells, Trail Maps, Important Shuttle Bus information, Photography tips, Camping information for the Maroon Bells area, and Tips & Resources for planning your Colorado Vacation. This guide to Maroon Bells is extensive, so we have created a table of contents to help you navigate. Have fun exploring!
Maroon Bells Hiking Guide Contents
1. Trail Snapshot
2. Driving Directions: Parking, Fees, and Permits
3. Parking & Trailhead
4. Hiking the Trail
5. Maroon Lake Trail
6. The Scenic Loop Trail
7. Maroon Creek Trail
8. The Crater Lake Trail
9. The Willow Lake Trail
10. Photography
11. Hiking with Kids
12. For Out-of-State Hikers
13. Things to Do Nearby
14. History and Geology
15. Protect Maroon Bells
Maroon Bells Hike Snapshot
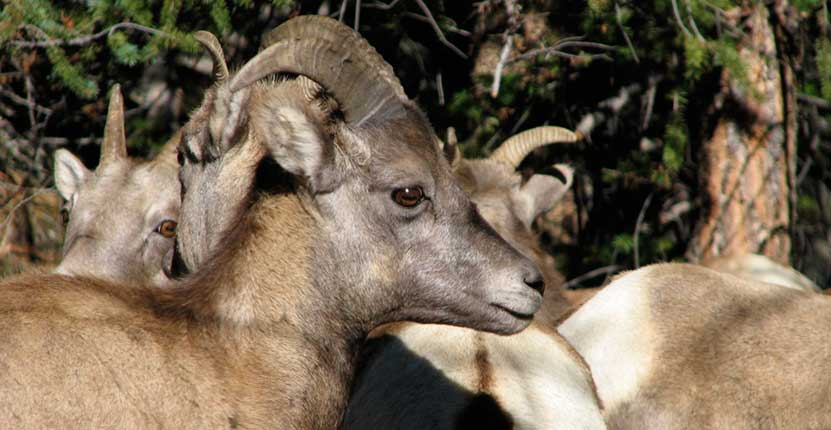
Hike DistanceFive Trails: 1 to 13 miles Round Trip - Depending on TrailDifficultyEasy to ModerateDurationDepends on Hike (see trails below)Trail TypeBoth Loop and Out-and-Back HikesStarting Elevation9500′Elevation GainNominal up to +3030'SeasonsMid-May to Mid-November (weather dependent)DogsAllowed On 6' leash - but Prohibited on the Scenic Loop TrailHike Trail MapClick for a Map of Maroon Bells Area HikesDenver Drive Time4 hoursDirections Click for Driving Directions to Maroon Bells Town Nearest HikeAspen, ColoradoBeautyIconic Mountain Views, Lakes, Meadows, Tundra, Fall Aspens, Moose, Beaver, and ElkActivitiesHiking, Backpacking, CampingFeeAccess Fee of $10 per vehicle or individual shuttle bus fee
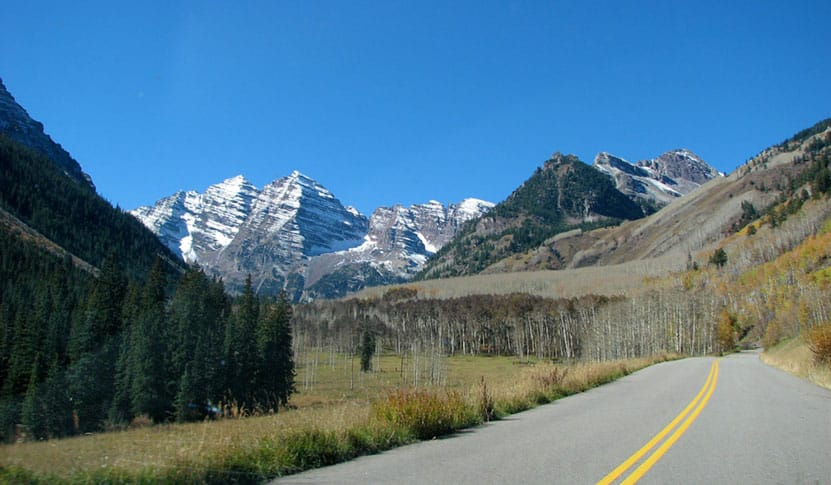
Driving Directions to Maroon Bells: Parking, Fees, and Permits
Because the Maroon Bells trailhead is one of the heaviest used recreation areas in the state of Colorado, there are some driving and access restrictions during the busy summer months. That's why it's important to carefully read these details before you plan your trip.
The Basics
- The Maroon Bells Trailhead is seasonal, and closed from about mid-November though mid-May. Because snow is unpredictable, the exact dates may change. Check the AspenChamber.org page for the most up-to-date and accurate information.
- Parking is very limited at the Trailhead and requires both a permit/reservation and fee. Read all the details at the AspenChamber.org Maroon Bells Reservations page.
- During the busy season, you have to arrive and park at the trailhead by 8AM or After 5PM.
- Most visitors will need to take the shuttle in during the day. Tickets are available online at the RFTA website https://www.rfta.com/routes/maroon-bells/
- Be prepared to shell out some cash for the trip. Parking in Aspen is both limited and expensive. Parking + shuttle costs can really add up for a group. The least expensive way to visit, is to book a parking permit for the trailhead (often many weeks ahead of time) at https://aspenchamber.org/plan-trip/trip-highlights/maroon-bells/reservations
- Plan, Plan, Plan: There are still a ton of places in Colorado where you can jump in the car, drive to a trailhead, and hike. Maroon Bells is not one of them. So, take your time, make your reservations, and plan out your trip.
Driving Directions
There are three different sets of driving directions that you may find helpful.
- Driving Directions to the Maroon Bells Trailhead
- Driving Directions to the Maroon Bells Shuttle Bus service at Aspen Highlands
- Driving Directions to the Rubey Park in Aspen for the free shuttle to Aspen Highlands where you can catch the Shuttle
Access Tips for Maroon Bells in the Summer
- If the Aspen Highlands lot is full--which is often the case--, you can take the free Castle/Maroon bus from Rubey Park in Aspen to Aspen Highlands, where can pick up the Maroon Bells shuttle (link and map for directions to Rubey Park).
- It's also important to note that if your plans are to backpack and camp in the Maroon-Snowmass Wilderness, you will not be given a parking exception, but will need to take the bus in from the Aspen Highlands lot during the 8am-5pm timeframe.
- Another option is to cycle the 8 miles, one-way from Aspen Highlands up to the Maroon-Snowmass trailhead. There is no fee for cyclists, only vehicles. However, it's important to remember that the road is still very busy, even during the 8am-5pm hours when the driving restrictions apply. As with hiking the area, plan to bring proper gear for the frequent afternoon thunderstorms--yet another reason to go early.
- Driving Out: It's important to note that if you drive in to the trailhead, you may drive out at any time.
Access Tips for Maroon Bells During the Rest of the Year
- In Late-Spring: From when Maroon Creek road opens, which is historically mid-May, and until mid-June--when the shuttle bus service starts--you are allowed to drive the road from 8am-5pm. Of course, permits are still required.
- In Late-Fall: There is a small window, during the last week of October, when you can drive Maroon Creek road to the trailhead any day and any time of the week. Again, the access fee applies. See details at https://aspenchamber.org/plan-trip/trip-highlights/maroon-bells/reservations
- Maroon Bells During the Winter Months: Winter comes in early at this elevation and it holds on well through April. Maroon Creek road is closed during the winter months, beginning in mid-November. Until the road reopens around mid-May of each year, the trailhead is only accessible by hiking in, cross-country skis, or via snowmobile tours. Snowmobile tours can be booked through T-Lazy-7 Ranch. From the gate, the hike/ski in is about 6 miles one-way, and from Aspen Highlands, it's about 8 miles one-way.
Parking and Facilities at the Maroon Bells Trailhead
The Maroon Bells Trailhead--officially titled the Maroon-Snowmass Trailhead--has limited parking and no facilities, except for restrooms. There is plenty of space to lock up your bike on the provided bike racks. There are 35 parking spaces designated for backpackers who are overnighting in the wilderness and you may park for up to 5 consecutive nights in those designated spots. These fill up during the busy season, so be sure to have the shuttle as your plan-b. If you get to Aspen Highlands after the last bus, then you will need to have a plan-c: take a taxi (expensive) in or ask a friend to drive you into the trailhead. Overnight backpackers are not allowed to park in the day-use area. Again, get all the details and permits at https://aspenchamber.org/plan-trip/trip-highlights/maroon-bells/reservations
Guide for Hiking at Maroon Bells
Trail Option #1 - The Maroon Lake Trail at Maroon Bells
- Distance: Less than One Mile
- Difficulty: Easy
- Trail Type: Out & Back
- Elevation Gain: Nominal
The Maroon Lake Trail heads out from the trailhead to the northeast side of Maroon Lake (elevation 9580’) where hikers can take in iconic views of the peaks of the Maroon Bells reflected in its mirrored waters. Fishing is allowed at Maroon Lake, but a Colorado fishing license is required. Be sure to follow limits and regulations. Bring a picnic lunch and soak in the scenery, which includes aspen groves, Maroon Creek, and surrounding meadows. Do be mindful to stay to the trail as the high amount of foot traffic has a profound impact on the environment. For tips on taking a great photo of the Maroon Bells, check out the Photography at Maroon Bells section below.
Trail Option #2 - The Scenic Loop Trail at Maroon Bells
- Distance: 3 Miles
- Difficulty: Easy
- Trail Type: Lollipop Loop
- Elevation Gain: Approx. +120'
- Dogs are prohibited because of Moose inhabiting this area.
The Scenic Loop Trail is probably the most popular trail at Maroon Bells, and for good reason: the views are incredible, the loop takes you along the cascades of Maroon creek for much of the hike, and wildflowers spring up at your feet along the trail. A lollipop loop is a hike that begins with a straightaway (part of the out & back hike above), which takes you to a loop on the end. The Scenic Trail Loop begins at a footbridge on the far/west end of the lake. A way up the trail, hikers will notice another footbridge on the right. This can be taken to shorten the trip by crossing the creek then turning right to head back to Maroon Lake and the trailhead. However, the loop trail actually goes further and past some exceptionally beautiful cascades before turning back toward Maroon lake.
Trail Option #3 - The Maroon Creek Trail
- Distance: 2.5 or 3.5 Miles - One-Way
- Difficulty: Easy
- Trail Type: One-Way
- Elevation Gain: -870'
- Maroon Creek Lake Trail Map: Map Link
If you are looking for a less crowded option, the Maroon Creek Trail may be the best choice. The Maroon Creek Trail winds downhill alongside Maroon Creek for 3.5 miles. Being near water, the chances of seeing wildlife are pretty good. Maroon Creek Trail begins at Maroon Lake and the trail can be picked up by hiking across the footbridge, turning left, then following the trail down into the valley (away from the Maroon Bells). The trail offers two options.
#1 - 2.5 Mile Hike:
Hikers will encounter and cross a bridge at about 2.5 miles into their hike. At this point, a trail off to the left can be taken across the meadow and up to the road where they can catch the bus back to Aspen Highlands or back to the trailhead. Of course, be mindful of the traffic.
#1 - 3.5 Mile Hike:
The second option is to continue on the trail, cross another bridge, then to stay left onto the East Maroon Trail. This will wind downhill a bit further to another area where you can catch the bus along Maroon Creek Road. As you hike, don't forget to stop occasionally to take in the views behind you of the Maroon Bells.
Trail Option #4 - The Crater Lake Trail at Maroon Bells
- Distance: 3.6 Miles Round Trip
- Difficulty: Moderate
- Trail Type: Out & Back
- Elevation Gain: +500'
- Crater Lake Trail Map: Map Link
The Maroon/Snowmass trail (right of lake) will lead hikers through a meadow and to a forest service bulletin board at the far end of the lake. From this point the correct trail is the West Maroon/Crater Lake trail which leads up through meadows, aspens forests, and scree fields. The trail can be extremely rock, so be sure that you have excellent footwear. The trail will split at about 1.7 miles where the correct trail to follow is the West Maroon/Crater Lake Trail. At this point, Crater Lake is not far away. The trail will eventually dip down into a beautiful basin that holds Crater lake and incredible views of the Maroon Bells. Crater Lake is not stocked or fishable as it is a dead lake. It is also an area that has been negatively impacted by heavy use and poor camping practices. Because of this, camping is now prohibited and great care should be exercised to keep human and canine impact to a minimum.
Trail Option #5 - The Willow Lake Trail at Maroon Bells
- Distance: approx. 13 Miles Round Trip
- Difficulty: Difficult
- Trail Type: Out & Back
- Elevation Gain: +3020' to Willow Pass
- Willow Lake Trail Map: Map Link
The Willow Lake trail is demanding and may require an overnight. The trail begins at Maroon Lake and follows the same trails that lead to Crater Lake. At the Crater Lake bulletin board, the trail forks to right and makes its way up through Minnehaha gulch, through alpine meadows and eventually to a trail sign for Maroon-Snowmass/Willow Lake Junction. Here the trail goes to right. Switchbacks lead to top of Willow Pass. After making it over Willow Pass, Willow Lake is a more gradual 1.5 miles further down the trail. This hike is difficult, steep, and more exposed to the regular thunderstorms that form in the afternoons. Camping is prohibited in the meadow near Buckskin Pass, and camping is discouraged at Willow lake. The best option is to camp in the established sites in Minnehaha Gulch.
Get our Dayhikes Near Denver Hiking Guide. It includes our favorite hikes near Denver, packing lists, hiking food and snack ideas, and tips for hiking the Front Range of Colorado.
Photography: How to Get Great Photos of the Maroon Bells
We would like to thank photographer Jerry Blank for the stunning photo of the Maroon Bells at the top of this post. We asked him for a few photography tips and he emphasized the importance of arriving early in order to 1) get a parking spot, and 2) to get a shot of the water before the wind kicks up ripples on the early morning mirror surface of the lakes. More of his photos can be viewed and prints can be ordered from his galleries at this link.
- Fall is the Best Time for Photos: The changing aspens peak in their golden hues during the latter half of September. However, this is just a rule of thumb because much depends on the changing temperature, so it varies from year to year.
- Sunrise Shots are Primo: We all have our best side, and the Maroon Bells' best side faces east. This means that the morning sunrise provides the best opportunity for photos.
- What Time Should I Get There? Earlier than you think. The shoreline of Maroon Lake fills up fast with tripods, so you'll want to get there well before sunrise.
- Dress for the Occasion: Wear your down coat and bring a thermos of hot coffee. The morning breeze and cold temps will conspire to make the wait for sunrise a cold one.
Hiking with Kids at Maroon Bells
- Hydrate: We hike a lot with our kids and it's easy for them to get dehydrated, especially in the dry climate and at high altitude in Colorado. Bring water bottles full of water for everyone.
- Pack Snacks or Bring a Lunch: The drive back to Maroon Bells takes you pretty far out of town and you'll want to stay a while. Bring snacks or a picnic lunch to refuel while you are exploring.
- Choose a Hike with Options: If your children are younger then you may want to begin with the Maroon Lake Trail. If you are still feeling adventurous after that, you could add on all or part of the Scenic Loop. Be aware of Moose and keep your distance from them.
Visiting Maroon Bells From Out-of-State
- Download our Hiking Guide for a list of hiking tips, 10 essentials that everyone should pack for their dayhike, and recommended hiking snacks.
- Take it Easy: Hiking at altitude (almost 2 miles above sea level at the Maroon Bells trailhead) can be really demanding. Choose a trail that matches your physical shape and be prepared to go at a slower pace.
- Don't Drink from Streams or Lakes: There is a misconception that drinking from a mountain stream or lake is the purest water in the world--it's not! Mountain streams and lakes are watering holes for wildlife, especially rodents that carry parasites like giardia and other waterborne infectious diseases that can completely ruin your vacation. All water from these areas should be properly filtered and/or purified.
Camping Near Maroon Bells
There are three established USFS camping areas along Maroon Creek Road on your way in to the Maroon Bells Trailhead. These three are some of the more popular campsites in the state during the summer and fall, so you will want to reserve them well ahead of time. You'll find profiles for the three camping areas below. Reservations can be made at all three campgrounds by calling 1-877-444-6777 or by reserving online at www.recreation.gov
Crater Lake Campground has been closed because of bear activity in the past, so be sure to check to see if it is currently open. However, there are about 20 USFS campgrounds in the White River National Forest area near Aspen. The USFS has a handy camping brochure that can be downloaded at this link.
Silver Bar Campsite
- Driving Directions to Silver Bar Campground: Click for Directions
- Four primitive walk-in campsites only
- Elevation: 8500'
- Drinkable water and toilets, as well as picnic tables and fire-grates are available.
- Five-day camping limit with 2pm checkout.
- Eight-person, two car limit per campsite.
- Pets allowed but must be leashed at all times.
- Reservable Dates: 5/26 - 9/13
- Fees: Camping Fee + Vehicle Fee
Silver Bell Campsite
- Driving Directions to Silver Bell Campground: Click for Directions
- Fourteen campsites
- Elevation: 8350'
- Drinkable water and toilets, as well as picnic tables and firegrates are available.
- Five-day camping limit with 2pm checkout
- Eight-person, two-car limit per campsite.
- Pets allowed but must be leashed at all times
- 30' RV limit
- Reservable Dates: 5/26 - 9/13
- Fees: Camping Fee + Vehicle Fee
Silver Queen Campsite
- Driving Directions to Silver Queen Campground: Click for Directions
- Six campsites
- Elevation: 9100'
- Drinkable water and toilets, as well as picnic tables and firegrates are available.
- Five-day camping limit with 2pm checkout
- Eight-person, two-car limit per campsite.
- Pets allowed but must be leashed at all times
- 30' RV limit
- Reservable Dates: 5/26 - 9/13
- Fees: Camping Fee + Vehicle Fee

Backcountry Camping in the Maroon Bells/Snowmass Wilderness
- Camping is allowed within the Maroon Bells/Snowmass Wilderness area. Be sure to follow all the Wilderness Use Regulations and Practice Leave No Trace principles.
- Camping at the designated spots at Crater Lake is currently allowed, but has been closed in 2014-2015 because of increased bear activity in the area, which is due to poor camping practices. The USFS will close the area again if bear activity becomes problematic.
- Bear canisters are required
- Self-registration required at the trailhead
- Pets allowed but must be on a 6' leash at all times in the wilderness.
Things to Do Near Maroon Bells
- White Water Rafting with Aspen Whitewater Rafting
- Guided Climbing, Hiking, and Mountaineering Trips with Aspen Alpine Guides
- Winter Snowmobile Access to Maroon Bells with T-Lazy-7 Snowmobile Tours
History and Geology of Colorado’s Maroon Bells
The brick red color of the Maroon Bells is created by the oxidation of iron in the ancient sedimentary rock that makes up the mountains. They were formed when ancient granite mountains eroded, then were thrust toward the sky in a later mountain building event. Glaciers then cut valleys and cirque lakes, like Maroon Lake and Crater Lake. The Maroon Bells are considered Colorado Fourteeners with North Maroon at 14,014' and the summit of South Maroon Peak at 14,156'. They are called "the bells" because the shape of the mountains resemble church bells. The surrounding Maroon Bells-Snowmass Wilderness area was one of the first US Wilderness areas established in 1964. The ruins of mine riddle the landscape from the silver mining activity of the late 1800's.
The sedimentary siltstone that makes up the Maroon Bells and nearby mountains, like Pyramid Peak, makes them very dangerous to climb. It's described by climbers as "rotten" rock and very unstable. In fact, in 1965 there were five different climbing accidents on the Maroon Bells, taking the lives of eight climbers. This gave the Maroon Bells the new monicker, the "Deadly Bells". There are yearly accidents and usually deaths on the Bells. Because of this, we recommend that those contemplating an ascent of the Maroon Bells should contact a professional guiding service.
How You Can Protect the Maroon Bells Area
- Camp in Designated Spots: Camping has been prohibited at many of the high-mountain lakes in the Maroon Bells-Snowmass area in order to protect these overused and highly impacted environs. The USFS has inventoried over 700 campsites, that have impacted the equivalent of 35 football fields of land. So, be sure to use established camping areas in both the wilderness and along Maroon Creek road.
- Keep Out of the Water: People and Dogs can greatly disturb fragile ecosystems in streams and lakes because of detergents and oils on our clothing and skin. The water sources around Maroon Bells are at a much higher risk because of the sheer volume of hiker and backpacker traffic.
- Keep Dogs on a 6' Leash: I have regularly hiked with my dog for years, and have often let her off the leash. But in the last few years, I've become much more aware that man's best friend has a significant impact on the wildlife that make our wilderness areas their home. Even in areas that don't require leashes, I now leash our dog. As much as you would love for your dog to run free, it's important to remember that both we and our dogs are guests in this place and we want to leave the least amount of impact possible. Of course, this is a 6' leash required area. The Ranger District is now giving special attention to unleashed dogs and writing tickets.
- Pack Out All Trash: It should probably go without saying, but be sure to pack out your trash, including both human and dog waste. In 2015 alone, forest rangers packed out over 500 pounds of trash left by visitors to the Maroon Bells-Snowmass area.
Weather
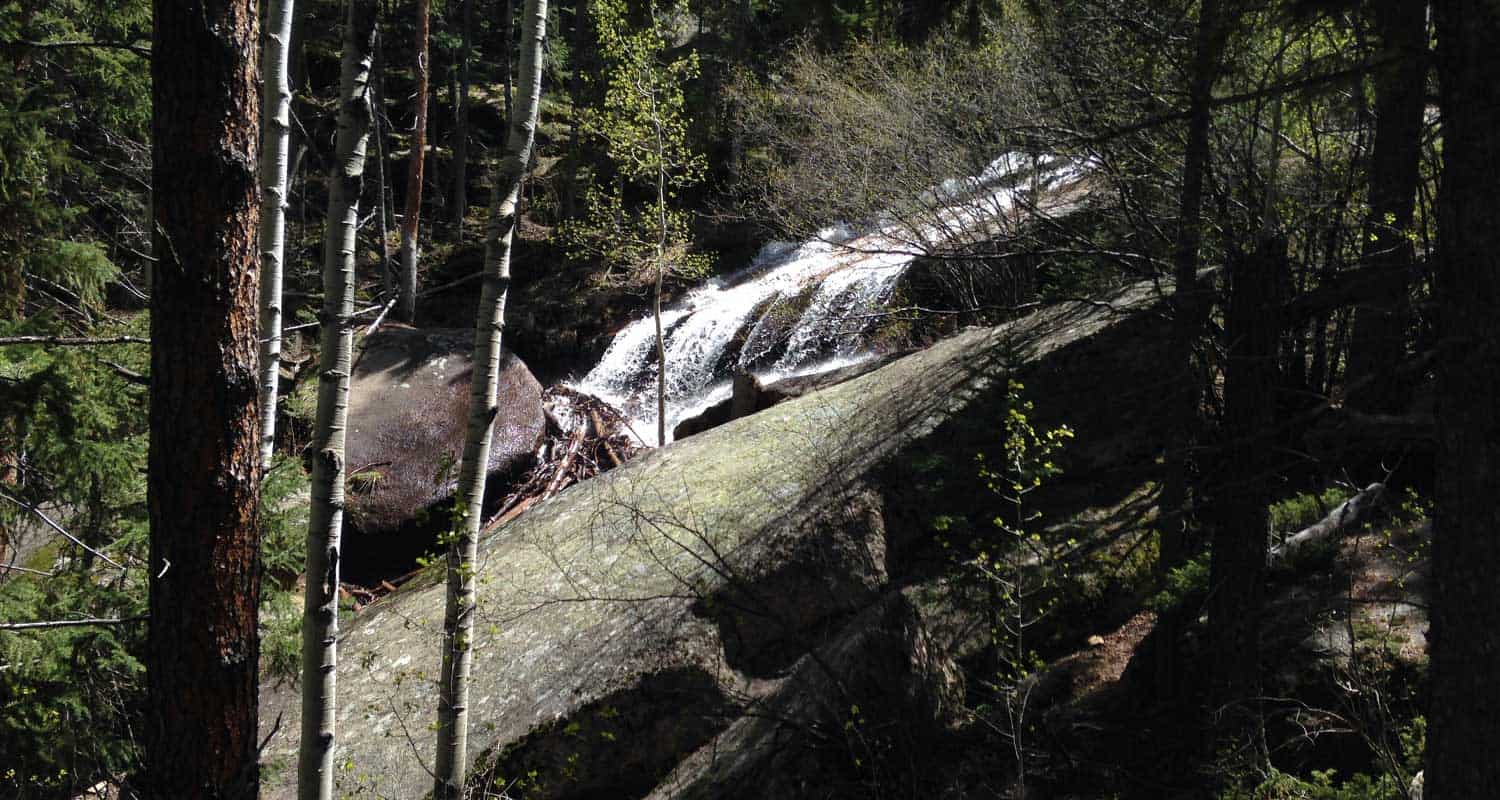
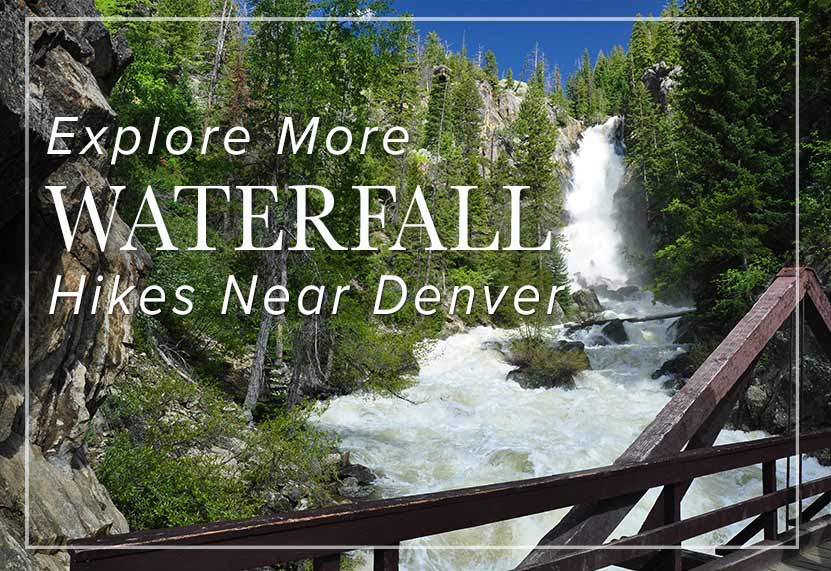
Buffalo Creek Falls at Wellington Lake
This waterfall isn't even on the map, and it's become my favorite waterfall hike near Denver. In fact, this is the only post that I'm tempted to keep to myself, because not only is there great hiking, but Wellington Lake may be the best camping spot within 90 minutes of Denver.
There is a hitch though: it's a privately held recreation area and requires a day-use fee of $14 per adult (age 13+) and a fee of $6 fee per child. Fees have gone up so, (depending on the size of your party) it probably makes more sense to pay the camping fee, stay for at least one night, and make the waterfall hike a part of your adventure. Explore the full trail profile below for this beautiful waterfall hike near Denver.
Trail Snapshot: Buffalo Creek Falls at Wellington Lake
| Hike Distance | 0.5 mile RT |
|---|---|
| Difficulty | Easy |
| Duration | approx. 30 minutes |
| Trail Type | Out and Back |
| Elevation Gain | Approx. +500' |
| Seasons | Year Round |
| Dogs | Allowed On Leash |
| Hike Trail Map | Click for a Map of Buffalo Creek Falls |
| Denver Drive Time | 1 hr 45 min |
| Directions | Click for Google Map |
| Town Nearest Hike | Bailey, Colorado |
| Beauty | Waterfall, Lake, Castle Mountain, Osprey, Waterfowl |
| Activities | Hiking, camping, boating (non-motorized), fishing |
| Fee | 14$ per adult, 6$ per child ages 6-12. See Castle Mountain Rec site for up-to-date fees |
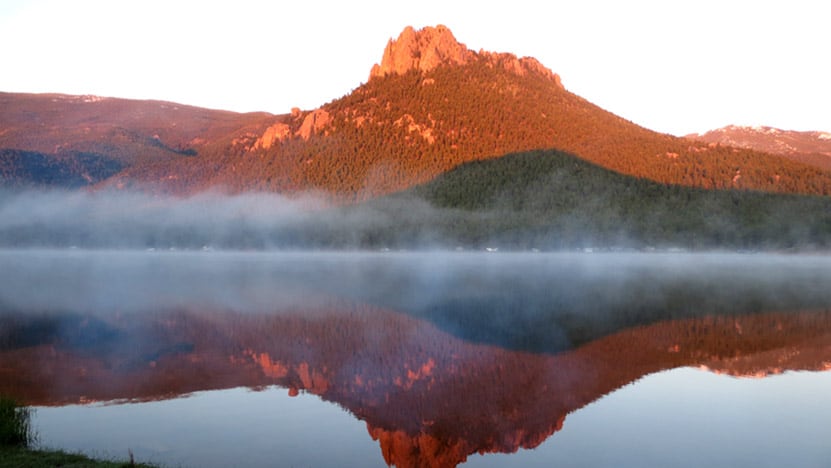
You'll find Buffalo Creek Falls at the backside of Lake Wellington and just under the shadow of The Castle, a granite mountain that rises off the lake and is named--you guessed it--because it looks like a fortress. Read on to get a detailed set of driving directions, a description of Buffalo Creek Falls, places to explore beyond the falls, and some details on camping at Wellington Lake.
Driving Directions to the Trailhead:
You'll drive 285 to Bailey, then hang a left onto 68/Wellington Lake Road. 68 is a dirt road and relatively smooth. Still, rain can change things in an instant, so we advise being alert for potholes and washboard. When you arrive at the lake, pull up to the office building, and pay your day-use fee. We have been incredibly impressed by the folks who work here, they are hospitable and kind. If you decide to camp, this is where you pay your campsite fees and get firewood. Put the day-use tag in your car where it's visible, then take the road around the lake. Be aware of kids running and playing because the road runs right through the campground. The Google maps provided in this post only go about halfway around the lake. You'll want to continue further, all the way to the scout camp, and that's where you'll find the large dirt parking area and the trailhead.
The Hike to Buffalo Creek Falls
My friend Matt and I took our two 4 1/2-year-old daughters with us on this hike and they did great. Look for the trailhead that begins just to the left of the Scout Camp sign. It's been raining almost every day this year (2015) so there was a lot of mud and puddles at the start. This gives way to a trail that climbs about 400 yards or less up to the base of the falls.
Here, at the bottom of the waterfall, the creek spills itself into a fan of cascades. Look for the trail that runs to your right and goes to a falls overlook bridge. The trail and steps are in need of some repair, but it's a short jaunt to the top. The waterfall is really unique. It's a shelf waterfall, but the water, over time, has scalloped out the rock to create ripples. So, when the water is really flowing, such as in early Summer or after a good rain, the waterfall creates a spray of waves. It's not enormous or breathtaking, but it's got a really unusual character about it. Watch the video to see what I'm trying to describe with words that an image can better tell. In my opinion, it's much better than Maxwell Falls, which is probably the most popular waterfall hiking destination near Denver.
But the waterfall isn't even the best part. The creek above the falls is nothing but cascade after cascade. I scrambled around and explored about 100 yards further up South Buffalo Creek and found some shallow caves and hidden spots with pools and miniatures falls. I'm looking forward to going back to hike the creek as far as I can manage, possibly all the way to the ridgeline. I should make a few of recommendations at this point: 1) hike on durable areas to prevent erosion, 2) it's an easy place to slip and twist an ankle, so wear good shoes or boots and be mindful, and 3) pick up any trash you see and pack it out with you.
Finally, it's important to note that this waterfall will likely be a trickle by midsummer. The best time to go will we mid-May through July 1. However, it should also be a great midsummer after a good rain.
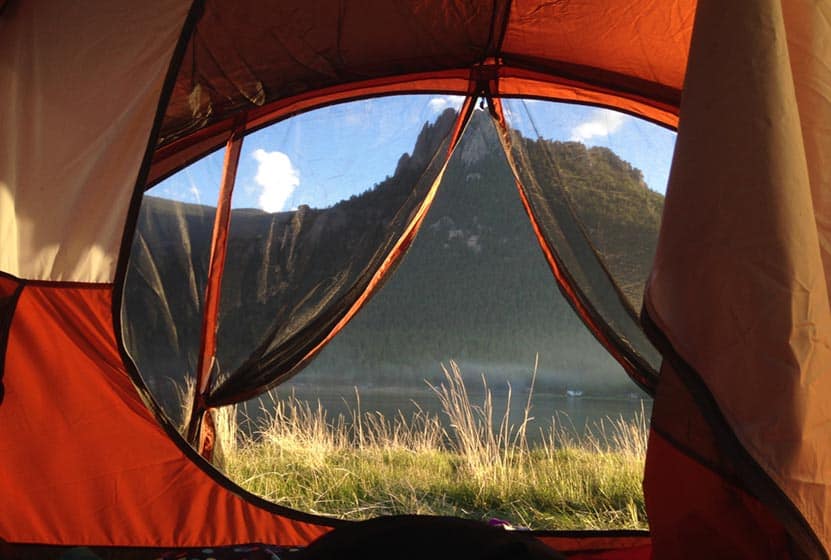
Camping at Wellington Lake
There are 75 camping sites at Wellington Lake, including group sites, and many of them right on the shore. You can camp with everything from tents to larger RVs, though it depends on the site you pick. To make sure you will have enough room at a particular site, be sure to give Castle Mountain Rec a call at 303.838.5496 before you book online. We love this place because we can paddleboard, fish, the kids catch minnows and crawdads, and there more hikes beyond the waterfall hike. We even watched an osprey dive into the water and snag a fish from the lake. There are restrooms, water sources, but no showers and no cell service (but that's why you're camping).
Tips & Resources for Hiking Buffalo Creek Falls:
- You've Got to Camp Here: You can book your campsite online at the Castle Mountain Recreation Reservation Page. This place packs out in the Summer, so make your reservations early. There are also First Come, First Served sites.
- Dogs: If you bring your dog on this hike, be sure to keep them on a leash. If they get out on the rock, it's slick, and they can tumble into the cascades. We heard a story of a dog getting swept away down the falls. Of course, the same thing can be said for children. Well, you don't need them on a leash, but keep a close eye on them around the steep and slick terrain around the waterfall.
- Trail Map for Buffalo Creek Falls Trailhead: Trail Map Link
- Colorado Road Conditions: Colorado Road Conditions
- After the Hike: Crow Hill Cafe, Bailey, Colorado
Weather
Map & Driving Directions
Click for Driving Directions
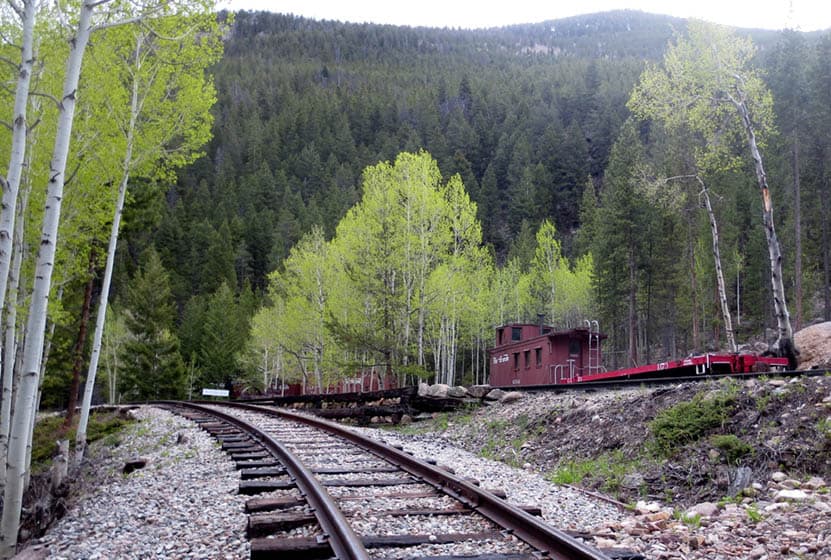
Georgetown Railroad Hike & Train Ride
After the hike, I asked our 7 year-old daughter what she thought of it. Her reply said it all, “Dad, it was awesome!” Here favorite parts were the fairy pond, a small, moss-rimmed pool probably created by miners long ago to hold drinking water, and the gleaming minerals in the rocks she picked up along the trail. I enjoyed the history and stories told by our guide, Kelsey, who had a particular love for the town and people of Georgetown and Silver Plume. This not your typical Dayhike Near Denver because it's actually a guided historic tour meets hike, plus a train ride on a vintage train back to the trailhead. Read below for all the details for this reservation-required hiking tour.
Trail Snapshot: Georgetown Railroad Hike & Train Ride
| Hike Distance | 2.3 Miles |
|---|---|
| Difficulty | Easy |
| Duration | Approx. 3 hr Guided Tour |
| Trail Type | One Way with Return on Train |
| Elevation Gain | -750′ |
| Seasons | May-September |
| Dogs | Not Allowed |
| Railroad History | Click for Georgetown Railroad Site |
| Denver Drive Time | 1 hr |
| Directions | Click for Google Map |
| Town Nearest Hike | Silver Plume, Colorado |
| Beauty | Steam Engine Trains, Old Mining Ruines, Clear Creek, History, and Geology |
| Activities | Hiking, Train Ride, and Lunch Provided |
| Fee | This is a guided tour hike and reservations are required. See the Schedule & Fares Page for the most up to date information.Lunch is included. |
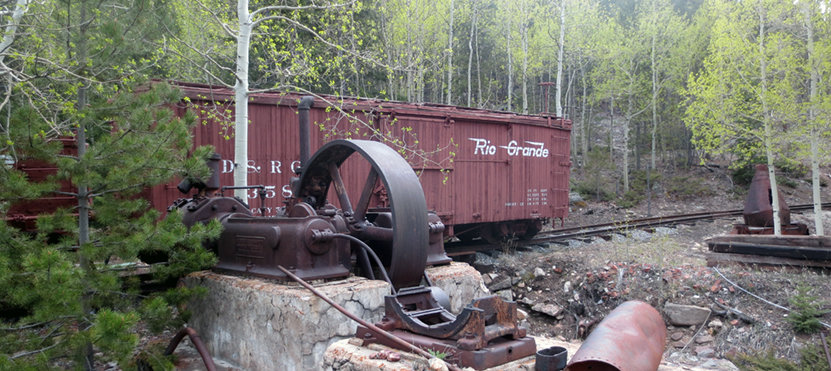
The Georgetown Railroad hike is a one-of-a-kind guided hike through the clear creek valley, a landscape decorated by the rich history of the Colorado Gold Rush of 1859. If you take just a moment to scan the mountainsides along interstate 70, you'll notice the yellow-stained tailings of abandoned gold mines. This hike takes you right through the very heart of that forgotten territory. We got to take a sneak-peek of the trail before it opened, so I brought our 7 year old daughter with me for our date-night, and she loved it.
The hike begins in Silver Plume, Colorado at the historical railroad station and museum. On the hike you'll have one to two guides who accompany your party. Groups are typically about 10 hikers. The hike begins on a nondescript gravel road, but soon enters an old, overgrown cemetery. From the graveyard, the trail descends into a healthy stand of lodgepole pines. We could see mist in the valley below, and the sound of the train in the distance. Though the sounds of interstate 70 are not far away, it's like stepping back in time. The hummingbirds zooming past us, and the rapids of Clear Creek below us brought the valley alive.
The best sounds, however, came from the steam train in the valley below. Kids will love this. It's a unique experience to be on a hike, then to watch a train pass in front of you, below you, and even above you on the tracks. And it creates anticipation of the train ride back.
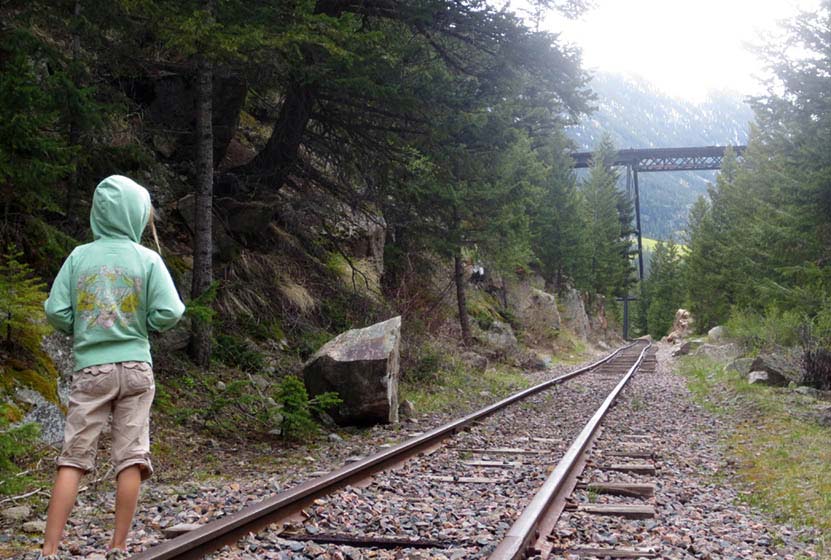
The hike itself is quite easy and could be done in about 45 minutes--if it was all about speed. But the destination for the Georgetown Railroad hike is the entire journey. Our tour guide pointed out old claim markers from the 1800's, the remains of mining equipment, barrels, and tin buckets tucked away in the woods. She told stories, and showed us things we would have missed just hiking through. At roughly halfway through the hike, you'll stop for lunch (lunch is provided) in a grove of aspens that has a great story of its own. Keep your eyes peeled for the foxes and deer that frequent this part of the valley floor.
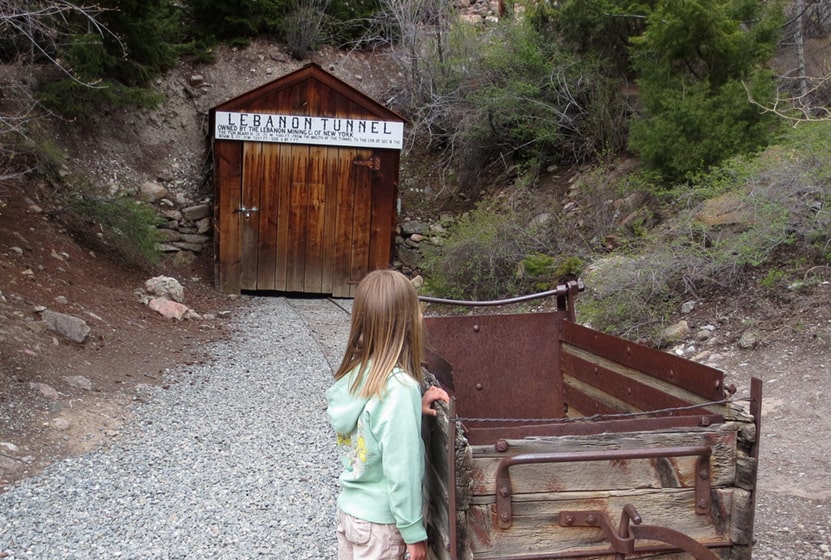
My daughter was captivated by the gleaming biotite and muscovite in the rocks alongside the trail. Our guide picked some special ones out for her to take home. After lunch, you'll hike by the Hall Tunnel, and the old Lebanon mine. Crossing the tracks, then following inactive segments, you'll make your way down into Georgetown. The trail leads under the the Devil's Gate High Bridge and ends at the Devil's Gate Station--named such because of the way the wind howls through this part of the valley.
Just when you think the fun is over, you get a 30-45 minute train ride back to your car in Silver Plume.
Tips & Resources for the Georgetown Railroad Hike & Train Ride:
- Call Ahead to book Your Hiking Tour: 1-888-456-6777
- Great for Kids: I would guess that the youngest age to take on this hike would be 6 years old, but it really depends on the child. Our daughter is pretty rough-and-tumble. The pace is right, and their are a lot of things to keep their attention.
- Supervise Kids on the Tracks: Kids will want to run fast down the railroad tracks, but the ties prove to be pretty uneven ground. Our 7 year old daughter tripped and got a little scrape on her knee, but was fine. Your guide will give you safety tips, but they will also be very engaged in giving you the tour.
- Restrooms: There are restrooms about 1/2 way through the hike at the Lebanon mine site.
- It's a Hike: I'd classify this as an easy hike, but there are some segments where the trail is steep and runs through soft gravel, where it's easy to slip. While it's a guided tour, it's not a bike path--it's still a hike.
- Footwear: Wear close-toed shoes. Boots are not necessary, but I'd recommend something that laces up.
- Colorado Road Conditions: Colorado Road Conditions
- After the Hike: The Alpine Restaurant & Bar in Georgetown
Weather
Map & Driving Directions
Click for Driving Directions
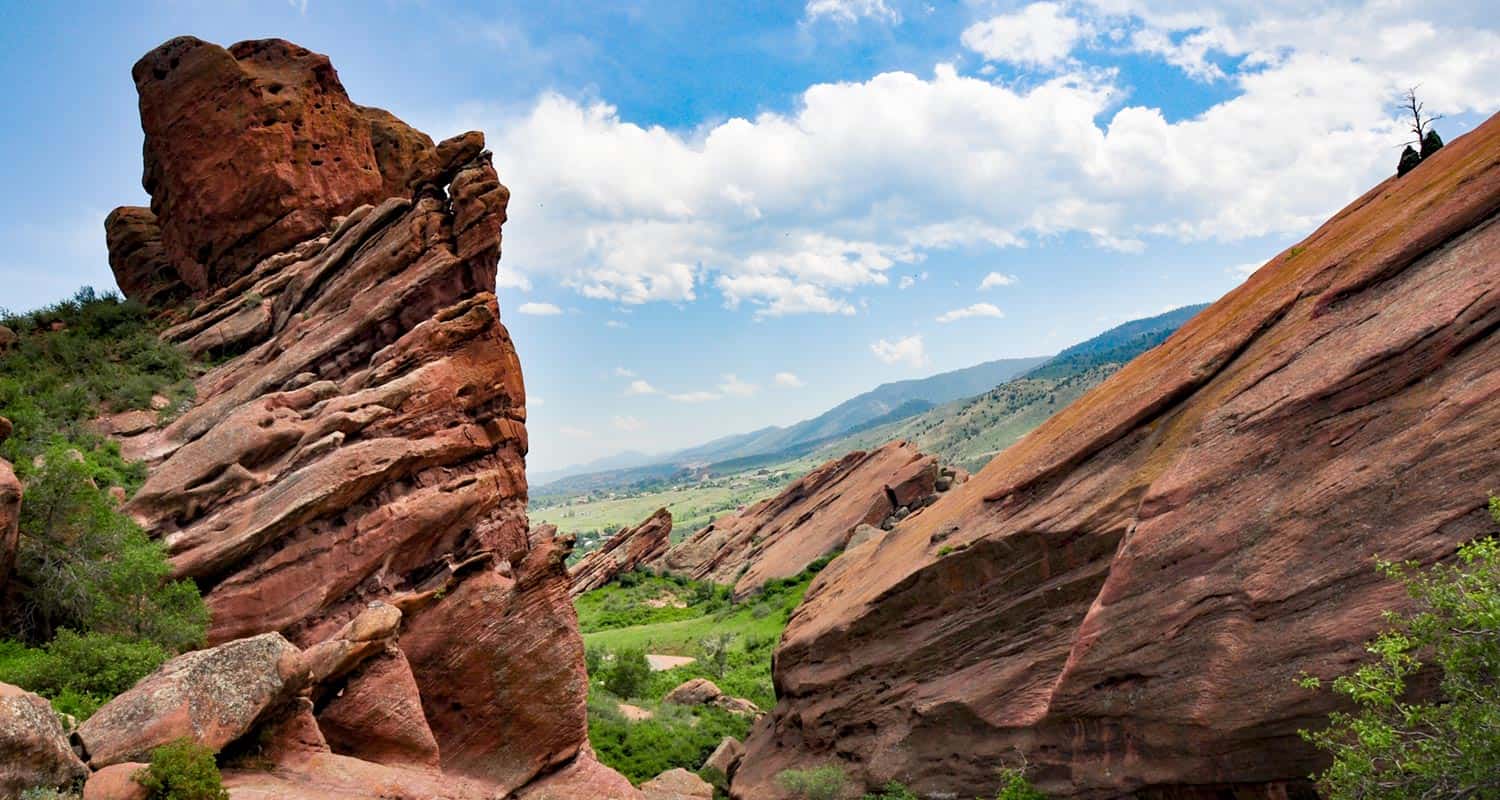
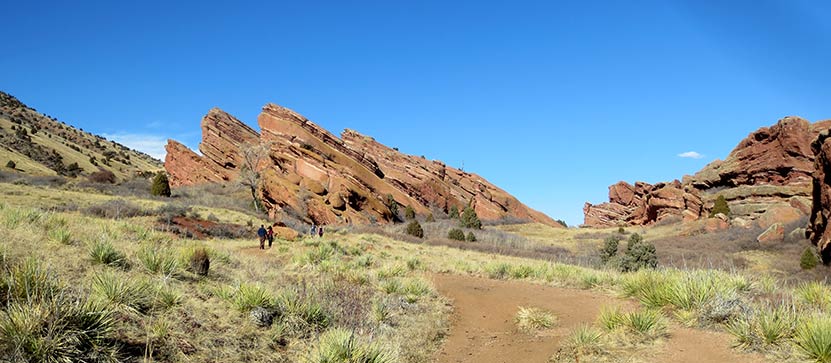
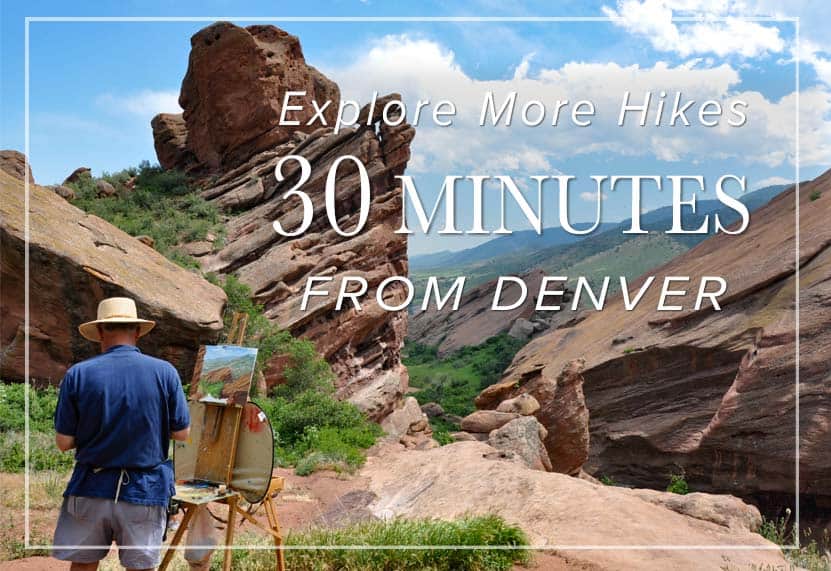
Trading Post Trail at Red Rocks Park
Ready for a hike around Colorado's Red Rocks Park and famous amphitheater? The Trading Post trail at Red Rocks takes you around 10 of the park's giant red rock formations. It's a short, 1.4-mile loop hike just 25 minutes from downtown Denver. Check out our full hiking trail profile below for all the details.
Trail Snapshot: Trading Post Loop Trail
| Hike Distance | 1.4 Mile |
|---|---|
| Difficulty | Easy |
| Duration | 1 hr |
| Trail Type | Loop |
| Elevation Gain | +500′ |
| Seasons | Year Round |
| Dogs | Allowed on Leash |
| Hike Trail Map | Click for a Trail Map |
| Denver Drive Time | 30 min |
| Directions | Click for Google Map |
| Town Nearest Hike | Morrison, Colorado |
| Beauty | Red rocks, meadows, Front Range views, Bluff Overlooks, wildlife: red fox, and mule deer |
| Activities | Picnic areas, hiking trails |
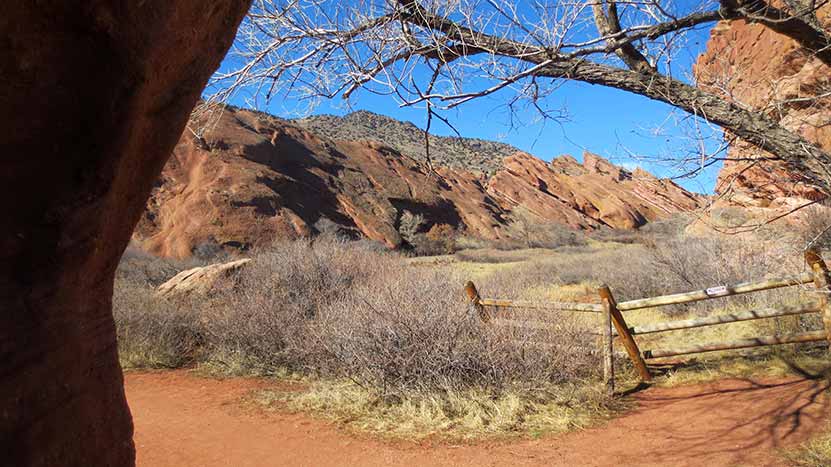
If you are looking for a family adventure that's quick to get to, this hiking trail at Red Rocks is a great option. The Trading Post trail weaves through some of Colorado's most majestic red rock formations, into meadows, and great views of Red Rocks park. Because the trail is narrow and has some steep areas, keep a good eye on the kiddos.
We hiked the Trading Post Trail on a sunny Saturday in February with our children, ages 7 and 4. They loved it, but were definitely tired at the end. However, after we finished the 1.4 mile loop, it was their idea to hike up to the amphitheater, then all the way to the top.
Trail Map for Trading Post Trail
The Hike: The Trading Post Trail at Red Rocks
We started at the trading post, and hiked the loop counter-clockwise. I'd recommend hiking it this way because it gives you the move favorable views, and offers a bit of shade about 3/4 of the way through the hike--right when you need it the most. The sand and grave on the rock surface of the trail can cause your feet to slip, but as long as you are aware and take your time, it makes for a perfect leisurely hike.
You can bring your dog on this hike, however, we haven't added this trail to our list of best trails for hiking with your dog near Denver because the trail can be narrow and can be high traffic. So, if you are bringing Fido, we recommend going early in the morning, or taking the Red Rocks trail, which is more open and has fewer people on it.
I get a lot of emails from people who are only in Denver for a few days, limited when it comes to their transportation, and want to experience the outdoors. This is the hike I send them to. Why?
- The Trading Post is gorgeous year-round.
- Red Rocks is super close to Denver, and while it's still expensive, you could take a Lyft or Uber there from downtown. Get a group of friends to share the cost and you're golden.
- The elevation is less of an issue for out-of-towners, and it's a relatively easy hike. It's short, but long still long enough to get a workout.
Tips & Resources for Hiking the Trading Post Trail at Red Rocks :
- Sunscreen: There's not much shade on this hike, so bring the sunscreen
- Rattlesnakes: There are rattlesnakes in Red Rocks, as there are in many parks along the front range. Like us, they love to sunbathe, but on rocks and other warm areas. Don't let their presence deter you from enjoying this hike, but keep an eye out for the varmints.
- Climbing: Rock Climbing is Prohibited at Red Rocks
- View of Denver: After your hike around the Trading Post loop, walk up into the Red Rocks Amphitheater. It's worth climbing all the stairs to the top for a great view of Denver.
- Hours: The hiking trails at Red Rocks open one hour before sunrise and close one hour after sunset
- After the Hike: Ice Cream @ The Blue Cow
- Trail Map for Red Rocks Park: Trail Map Link
- Colorado Road Conditions: Colorado Road Conditions
Weather
Map & Driving Directions to the Trading Post Trail at Red Rocks
Click for Driving Directions
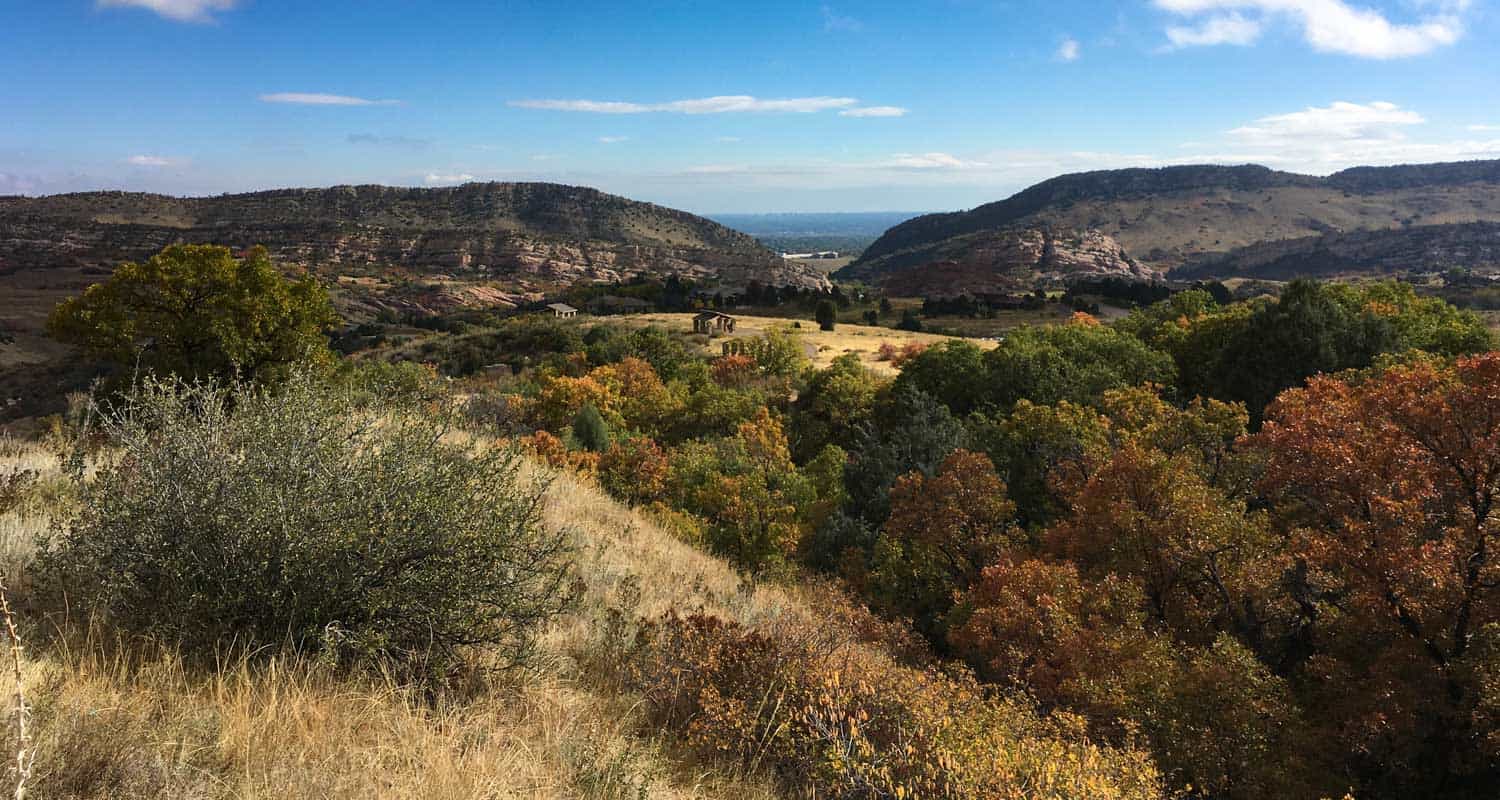
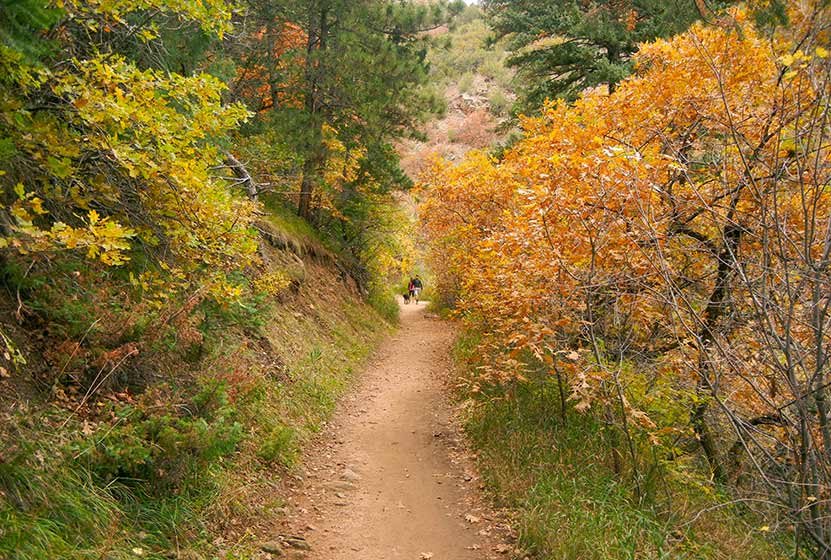
Deer Creek Canyon Loop Hike
This loop hike in Deer Creek Canyon offers a quick getaway from the city of Denver and its surrounding suburbs. Because Deer Creek Canyon Park is tucked away in the entrance of the canyon, you can completely immerse yourself in the foothills and the valley that lies between Littleton and the park.
Trail Snapshot: Deer Creek Canyon Loop Trail
| Hike Distance | 2.7 miles RT |
|---|---|
| Difficulty | Easy |
| Duration | Approx 2 hr |
| Trail Type | Loop |
| Elevation Gain | +500′ |
| Seasons | All Year |
| Dogs | Allowed on Leash |
| Hike Trail Map | Click for a Map of Deer Creek Canyon Park |
| Denver Drive Time | 35 min |
| Directions | Click for Google Map |
| Town Nearest Hike | Littleton, Colorado |
| Beauty | Fall colors, quick escape from Denver, beautiful valley, rock formations |
| Activities | Hiking, great picnic facilities, mountain biking, horseback riding |
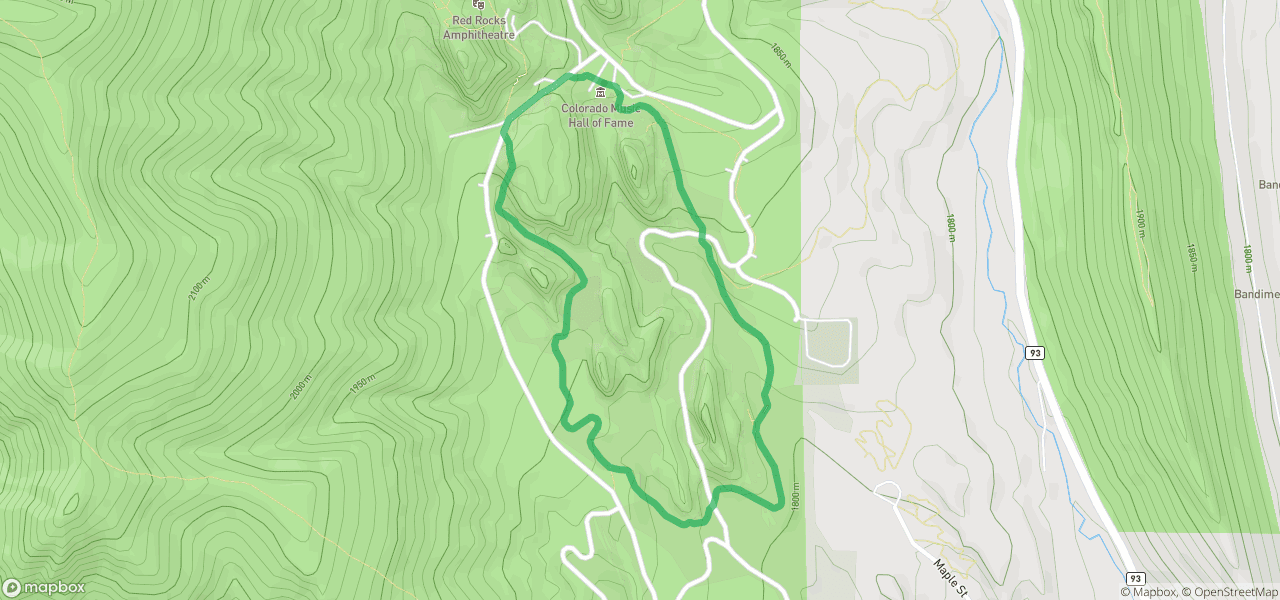
Deer Creek Canyon Loop Trail Profile
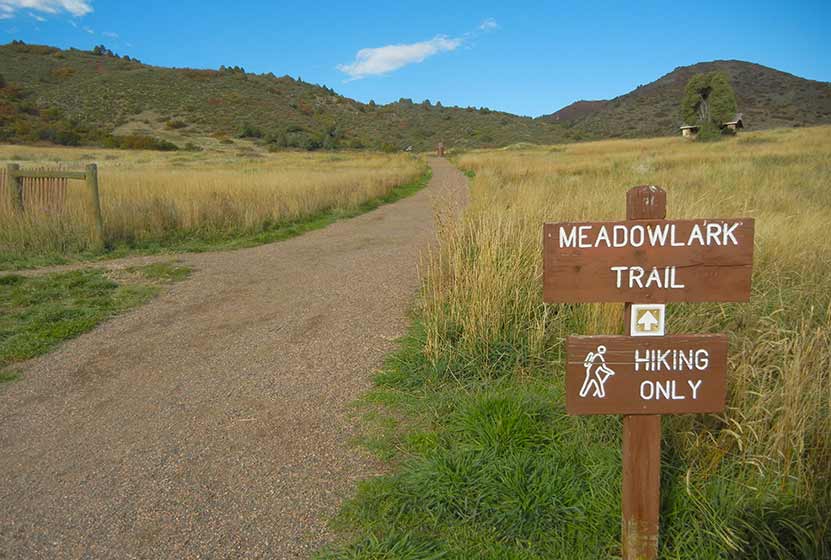
This 2.7 mile loop hike in Deer Creek Canyon is made by combining two trails. The Route: Start on the Meadowlark Trail (1.6 mile trail) until you come to the Plymouth Creek Trail junction. Go left onto the Plymouth Creek Trail for 1.1 miles back to the trailhead.
This hike is relatively easy, characterized by mostly gentle slopes and a very few rock scrambles. It's perfect for kids, and older outdoor enthusiasts. Pathfinder, Joe Q., scouted this hike for Dayhikes Near Denver and went about a week too late to catch the peak of the fall colors; however, as he reported, "Even when I went the array of reds, oranges, and yellows were a great exemplification of Colorado’s fall beauty."
The Meadowlark Trail is a hiker only trail, however, the Plymouth Creek trail does allow mountain bikes. As you hike, you'll encounter some faint side-trails where people choose to depart from the true trail to see a new vista view or viewpoint. These are pretty clearly not trails and will end within 100 feet. If you are ever questioning whether or not you’re on the true trail, you probably aren’t. The true trail is very well worn, well maintained, and is pretty obvious.
The Plymouth Creek Trail follows the creek for a while, and gives lots of views to small cliff walls on either side. In the lower portions of Plymouth Creek the trail runs adjacent to private residences, but the trail remains clearly marked.
Tips & Resources for Hiking Deer Creek Canyon Loop:
- Parking at Deer Creek Canyon: There is ample parking, but it's possible that the lot could fill up on holidays and weekends.
- Getting There: GPS may give you incorrect directions to the trailhead. If you are traveling westbound on Deer Creek Canyon road, turn left on Grizzly; you'll find the Deer Creek Canyon Park Trailhead on your right.
- Rattlesnakes: There is a higher than usual presence of rattlesnakes in the lower regions of Deer Creek Canyon Park. Rattlesnakes are a normal inhabitant of the foothills and plains along the front range, but some areas--like this on--may have higher concentrations. They tend to sun themselves on rock and the warm gravel of trails--so keep your eyes peeled as you hike.
- After the Hike: Spur Coffee in Littleton
- Road Conditions: Colorado Road Conditions
- Thanks goes out to Joe Q. who hiked this loop, and took the trail notes and photos to produce this trail profile.
Weather
Map & Driving Directions
Click for Driving Directions
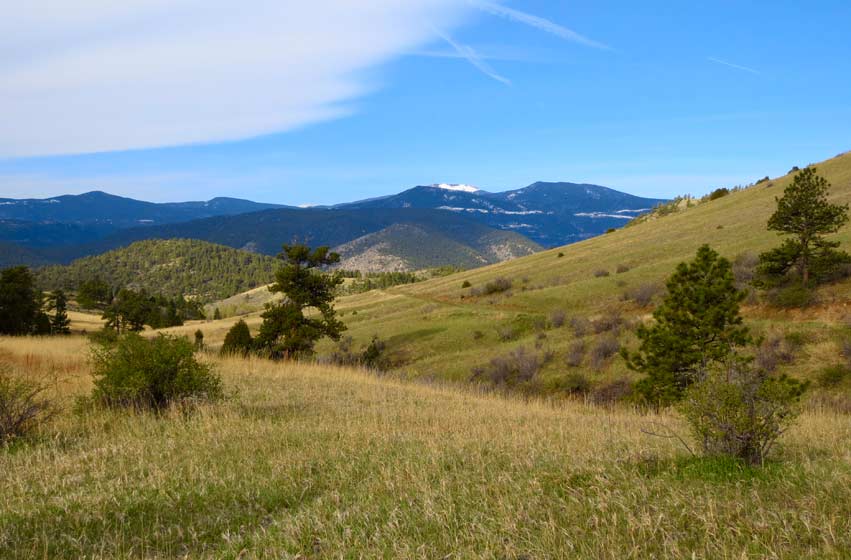
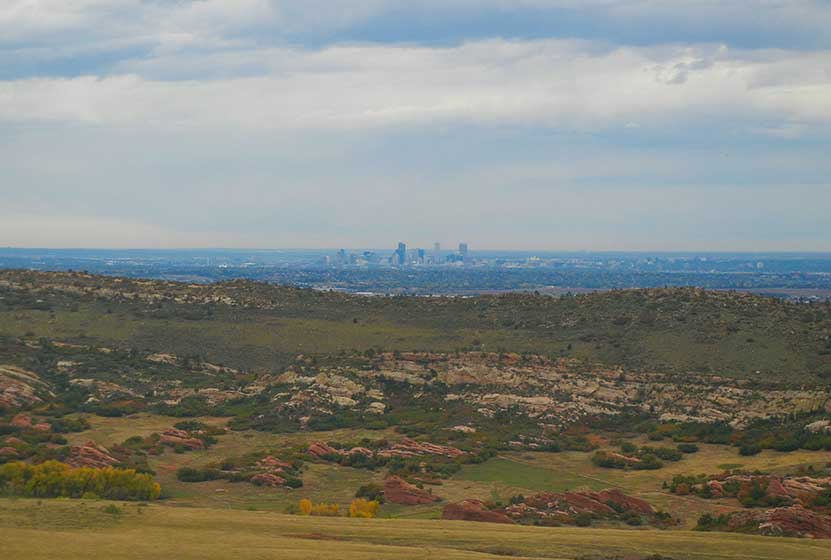
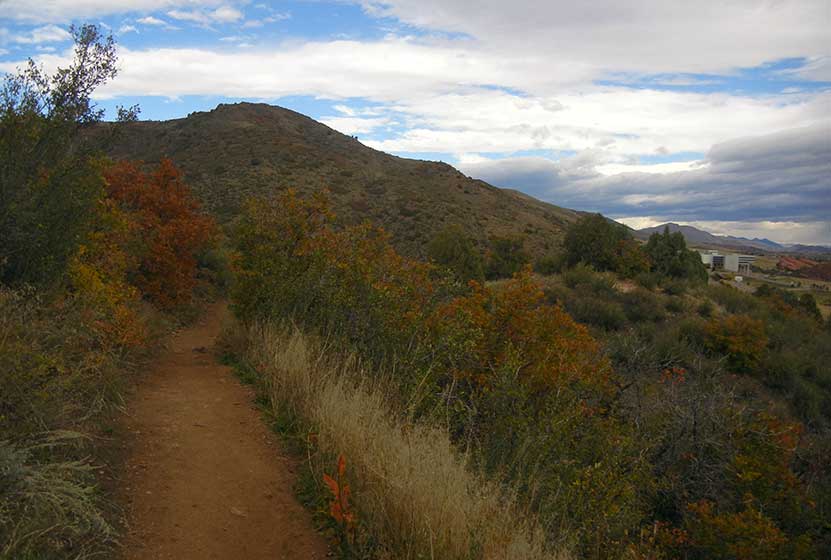
Elk Range Trail at Centennial Cone Park
For those who are looking for a nice hike that incorporates the highland meadows of Colorado and views to snowcapped mountains, then the Elk Range Trail at Centennial Cone Park is the perfect hike. The Elk Range Trail can be hiked as an out-and-back 6.6 mile adventure, starting from one of two different trailheads. We saw a lot of wildlife and few people. Explore the full trail profile below for trail details, Centennial Cone park map, driving directions, and more.
Trail Snapshot: Elk Range Trail at Centennial Cone
| Hike Distance | 6.6 miles Round Trip |
|---|---|
| Difficulty | Easy to Moderate |
| Duration | Approx 2.5 hr |
| Trail Type | Out and Back |
| Elevation | +446'/-314' |
| Seasons | All Year (closes during hunting season) |
| Dogs | Allowed on Leash |
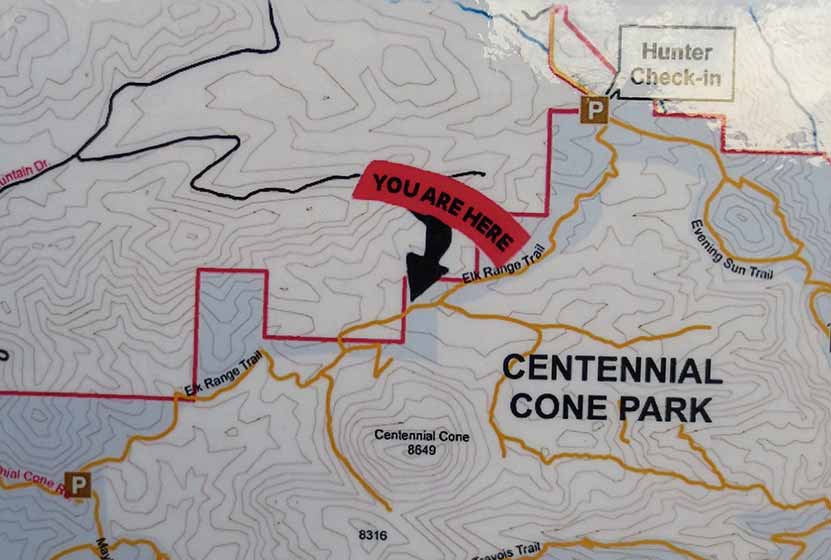
| Hike Trail Map | Click for a Map of Centennial Cone Park |
| Denver Drive Time | 42 min |
| Directions | Click for Google Map |
| Town Nearest Hike | Golden, Colorado |
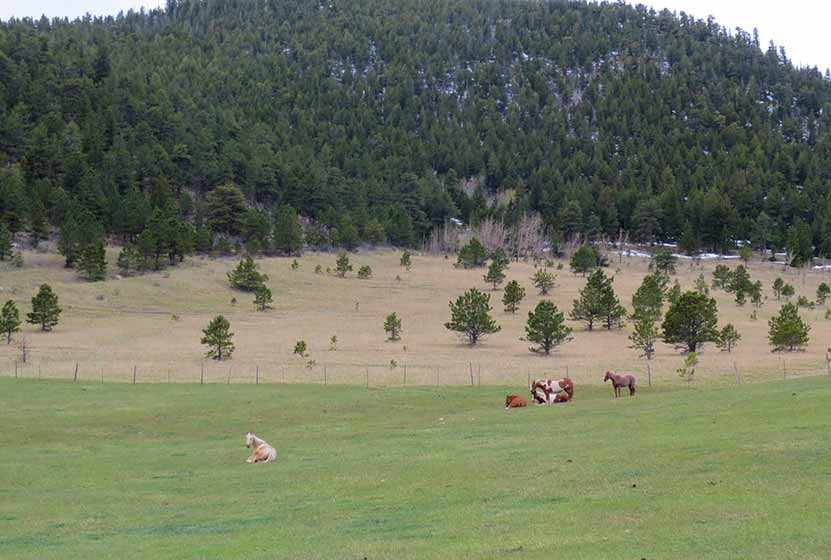
| Beauty | Upper foothills and the peaks of the Rockies beyond, high country meadows, grazing cattle and horses, elk and whitetail deer |
| Activities | Horseback riding, hiking, mountain biking and wildlife viewing |
| Video | Click For Video |
| Weekend Use | Odd days hiker-only, Even days bike-only |
 Looking East towards Centennial Cone
Elk Range Trail at Centennial Cone Profile
You have two trailhead options when taking the 6.6 mile Elk Range Trail.The driving directions link above are for the Centennial Cone Road trailhead. A North Centennial Cone Park Trailhead has equestrian trailer parking and can be located at this link. Our trail profile here describes the trail hiking from West to East.
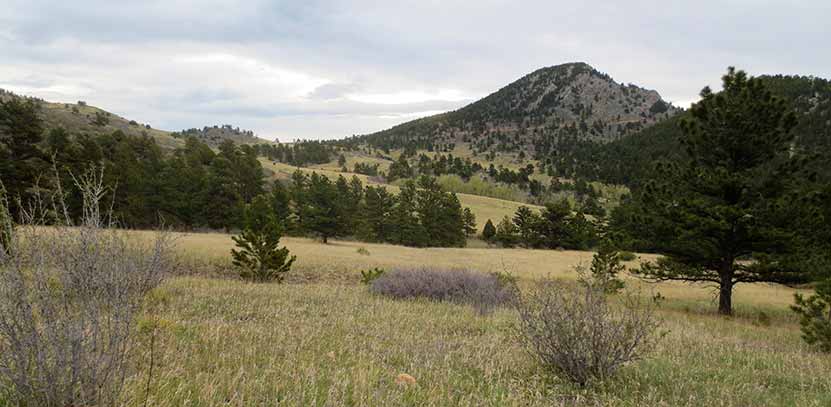
From the Centennial Cone trailhead, you immediately find yourself surrounded by green open fields. At about half a mile in you'll encounter a fence with a gate. When you walk through the gate, you'll be on private property for a few hundred yards. Jefferson County parks has some sort of easement, so continue your hike but stay on the trail, until you get to the other gate. There are horses and cows that wander about the area without fences, so they may be on the trail when you arrive. Another reason to be sure that the gates close behind you.
Hiking along the Elk Range Trail, I couldn't help wondering, "Can you hike up to the top of Centennial Cone?" There is no trail on the map but there appears to be the vestiges of an old road or trail leading up the North end of Centennial Cone. Because I haven't hiked it yet, I can't recommend it, but the old trail can be found just before the trail enters private property. Where the trail bends just before the gate, you can follow a set of what look to be markers for an underground gas line. These lead up to the trail at the base of Centennial Cone. This is as far as I explored, and hope to get back to attempt a hike to the top of the cone.
It's important to know that on the weekends the trail alternates from hiker-only to biker-only. Here's how to keep track of it: Odd days are hiker only and even days are bikes only.The weekdays are open to both hikers and mountain bikers.The park is closed during certain days for hunting season. You can get the exact closure dates from the Centennial Cone page of Jefferson County's opens space site.
If you've started from the Centennial Cone Road trailhead and would like a pleasant and beautiful drive home, take Highway 6 through Clear Creek canyon, and into Golden.
Tips & Resources for Hiking the Elk Range Trail:
- Mud: The Elk Range Trail can be a bit muddy after a good rain. You'll want to bring appropriate gear if you're planning a hike after a storm for a good day or two, including sturdy shoes.
- Storms: The Elk Range Trail is at a high enough altitude that you'll want to keep an eye out for thunderstorms. There is very little cover on this trail, so check the weather report before heading out as well.
- After the Hike: Cafe13 in Golden
- Road Conditions: Colorado Road Conditions
- Trail Map for Centennial Cone Park: Trail Map Link
Weather
Map & Driving Directions
Click for Driving Directions
Pine Valley Ranch Park Hike
Pine Valley Ranch Park has become one of our family's favorite parks near Denver. Pine Valley Ranch Park boasts several hikes, a beautiful lake, a lot of history, a small island with a gazebo, and the best picnic area on the Front Range of Colorado. If that's not enough, the North Fork of the Platte River runs through the park, lined with enormous spruce trees and granite cliffs. Explore the trail profile below for hiking options, trail map, driving directions and more.
Trail Snapshot: Pine Valley Ranch Park Trail
| Hike Distance | 1.2 to 3.2 miles Round Trip |
|---|---|
| Difficulty | Easy to Moderate |
| Duration | Approx 45 min to 2 hr |
| Trail Type | Loops and Out-and-Back |
| Elevation Gain | +500′ |
| Seasons | Best April to November |
| Dogs | Allowed on Leash in the Park |
| Hike Trail Map | Click for a Map of Pine Valley Park |
| Denver Drive Time | 1 hr |
| Directions | Click for Google Map |
| Town Nearest Hike | Pine, Colorado |
| Beauty | Pine Lake, Platte River, bridges, island with gazebo, waterfowl and other birds |
| Activities | Mountain bike trails, fishing, ice skating in winter, pavilions, picnic tables and grills |
| Video | Click For a Video of Pine Valley Ranch Park |
Hiking Options at Pine Valley Ranch Park
#1 - Park View Out-and-Back Hike - Approx. 2 Miles Round Trip
The Park View trail can be located on the other side of Pine Lake (not the far side). Take the narrow gauge trail across the bridge and you'll locate the trailhead just on the other side of a shelter that sits along Pine lake. The trail is moderate to strenuous and will take you up to some great views of the surrounding Pike National forest and the Platte River. You'll get views of the extensive Hayman Burn, the burn scars left from the 2000 fire.
#2 - Full Park View Loop - Approx. 2.5 Miles
If you would like to take a longer loop hike, take the Park view trail (.8 mile) up to the strawberry jack trail (.5), which will connect you to the Buck Gulch trail (.4) which will take you back down to Pine Lake. The Strawberry Jack trail will take you out into Pike National Forest. Be sure to have a map you--which you can pick up at the park--because a wrong turn onto the Buck Gulch Trail can take you far out of the way.
#3 - Pine Lake Loop Hike - Approx. .7 mile
You can take a leisurely hike around Pine Lake at Pine Valley Ranch. Go early (before 7:30AM) to catch site of the birds and wildlife around the lake.
#4 - Narrow Gauge Trail Hike - .5 to 3.8 miles
This is the hike that our kids most enjoy. We like to hike the southeast segment that takes you along the North Fork of the South Platte River. There are willows to pass through, and probably some good trout fishing along the banks. The Narrow Gauge trail stretches about half a mile in this direction and is surrounded by granite cliffs, pine, and spruce.
If you hike the Narrow Gauge trail to the West, you'll follow the river past Pine lake for about 1.5 miles, then can hike it back.
Pine Lake at Pine Valley Ranch Park
Pine Lake packs out with fisherman on the weekend but can be a great quiet escape on the weekdays, especially in the mornings and evenings. The lake has a fishing pier and a great shelter. In the winter months, there is ice fishing and skating. The shoreside shelter at Pine Lake has several picnic tables and a fireplace.
The Best Picnic Area Near Denver
As our family explores hikes and parks near Denver, we get to see a lot of picnic areas. See our Seven Great Picnic Areas Near Denver post. The picnic area at Pine Valley Ranch Park is hands down our favorite. A few reasons why: 1) It's along a river, 2) it's surrounded and shaded by enormous spruce trees, 3) has great facilities: two large covered shelters, and 4) there are a lot of activity options for families.
Tips & Resources for Hiking the Pine Valley Ranch Park:
- Gazebo: There are some hidden treasures at Pine Valley Ranch. One you can't miss is the gazebo. Behind the large picnic shelters you'll find a small trail that leads to a bridge. The bridge leads to an small island in the Platte River and a beautiful old gazebo. The island is man-made and was created to contain the domesticated goats that used to roam the ranch.
- River's edge: The Platte river can swell and be quite dangerous, especially in the Spring and after heavy rains, so keep a close eye on children along the river's edge.
- Eagles: Keep your eyes peeled for bald eagles and osprey
- Use sunscreen: Though there are a lot of trees, like most Colorado hikes, most areas are exposed to the sun, so hike early and use sunscreen.
- Handicap accessibility: This would be a great place for family with physical limitations or who are wheelchair bound. I should point out that the park is not built around handicap accessibility, but we saw several people fishing from wheelchairs along the lake, and there is a lot of beauty to take in without having to go far or negotiate obstacles.
- Historical significance: Pine Valley Ranch is replete with historical significance. The best place to start is to take a tour of Baehrden Lodge, a 27 room estate perched over the top of Pine Valley Ranch Park that is now in the care of Jefferson County Parks.
- Carved initials: Look for initials carved into trees a long the paths of Pine Valley Ranch. These go back many decades to when Pine Valley Ranch was a resort and folks would take the train from Denver to escape into the mountains.
- Dr. Robert Dudley: We want to express our gratitude to Dr. Robert Dudley, who in the 1970's kept the park from being parceled out to the highest bidder, and to the Jefferson County Parks staff for the care they give to keep Pine Valley Ranch Park available to the public.
- After the Hike: Aspen Perk Cafe
- Colorado Road Conditions: Colorado Road Conditions
- Trail Map for Pine Valley Ranch Park: Trail Map Link
Weather
Map & Driving Directions
Click for Driving Directions