
Raccoon Loop Hike in Golden Gate Canyon State Park
Our kids loved this 2.5 mile loop hike in Golden Gate Canyon State Park. The trail sports lots of shade, panoramic views of snowcapped peaks, wildflowers, and trickling brooks. Be sure to see the details below regarding an annual raptor closure that detours one segment of this hike. Explore the full Raccoon Loop Hike profile for trail map, driving directions, and many of the details you need to enjoy this adventure in Golden Gate Canyon State Park.
Trail Snapshot: Raccoon Trail Loop at Golden Gate Canyon
| Hike Distance | 2.5 miles |
|---|---|
| Difficulty | Easy |
| Duration | Approx 1.5 hr |
| Trail Type | Loop |
| Starting Elevation | 9120′ |
| Elevation Gain | Approx +500′ |
| Seasons | Year Round |
| Dogs | Allowed On 6' Leash |
| Hike Trail Map | Click for a Map of Golden Gate Canyon State Park |
| Denver Drive Time | 1 hr |
| Driving Directions to Panorama Point Trailhead | Click for Google Map |
| Driving Directions to Reverends Ridge Campground Trailhead | Click for Google Map |
| Town Nearest Hike | Golden, Colorado |
| Beauty | Mountain range views of snowcapped peaks, wildflowers, aspens |
| Activities | Hiking, mountain biking, photography, snowshoeing in winter |
| Fee | Colorado State Parks Pass Required |
Parking & Trailhead Information for the Raccoon Loop Hike
You can begin your hike at either the Panorama Point Trailhead or at the Reverend Ridge Campground Trailhead. Our family hiked this from the Panorama Point Trailhead. Though parking is limited, there is additional parking located directly across the street in a dirt lot. Reverend Ridge Trailhead, while a larger parking area, can fill up fast because it is located at the campground. Either one, however, is a good option. Driving directions for both trailheads are located in the trail snapshot above.
The Hike: The Raccoon Loop Hike in Golden Gate Canyon
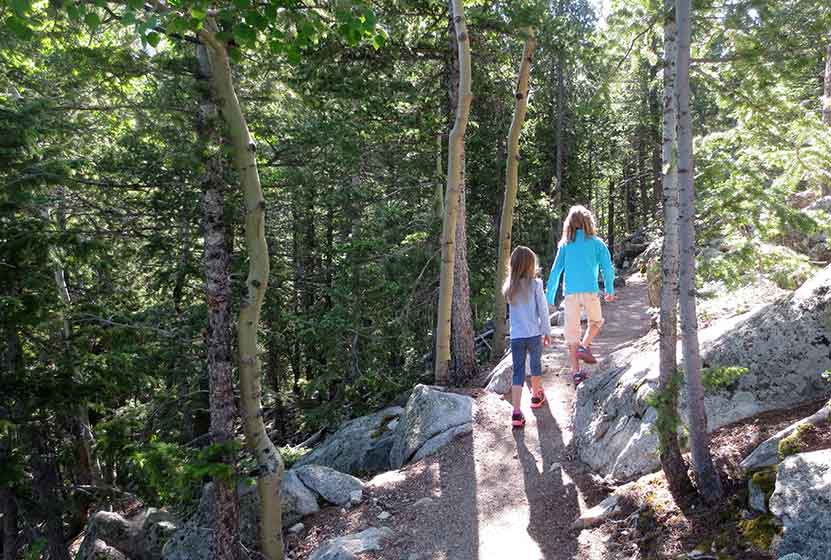
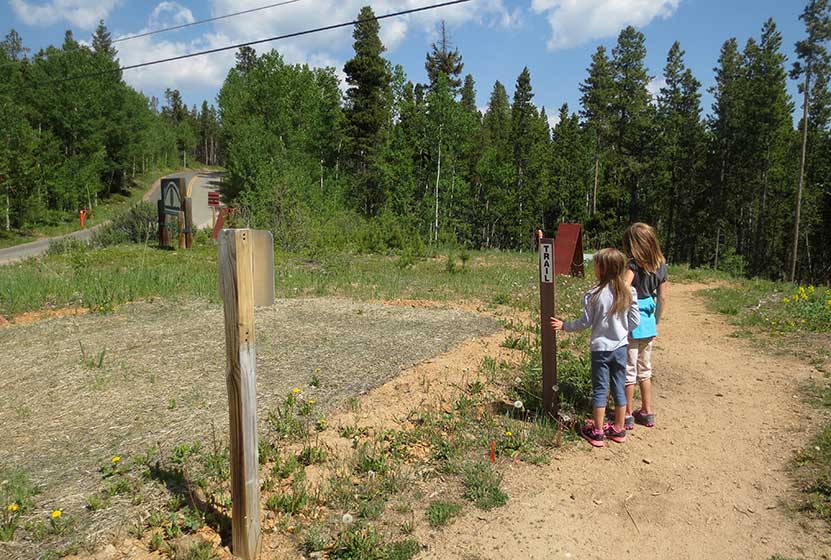
We hiked the Raccoon Loop counter-clockwise from the Panorama Point Trailhead and found it to be easy to moderate in difficulty. Our kids (at the time of this post) are 5 and 8. Both were wearing tennis shoes and did well on the trail. There was a steep segment with loose rock, where our youngest needed me to hold her hand as she navigated here way down the trail.
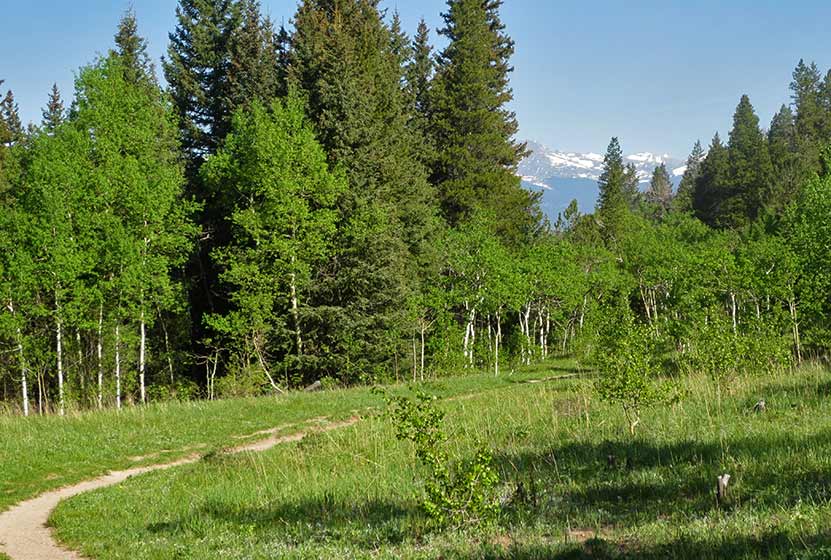
The trail begins with incredible views of the snowcapped Indian Peaks stretched out against the western sky. Soon, views of Thorodin Mountain and Starr peak dominate the landscape as the trail winds to the east and crosses a seasonal brook. Raccoon Trail then gently drops into aspen groves and green meadows full of wildflowers.
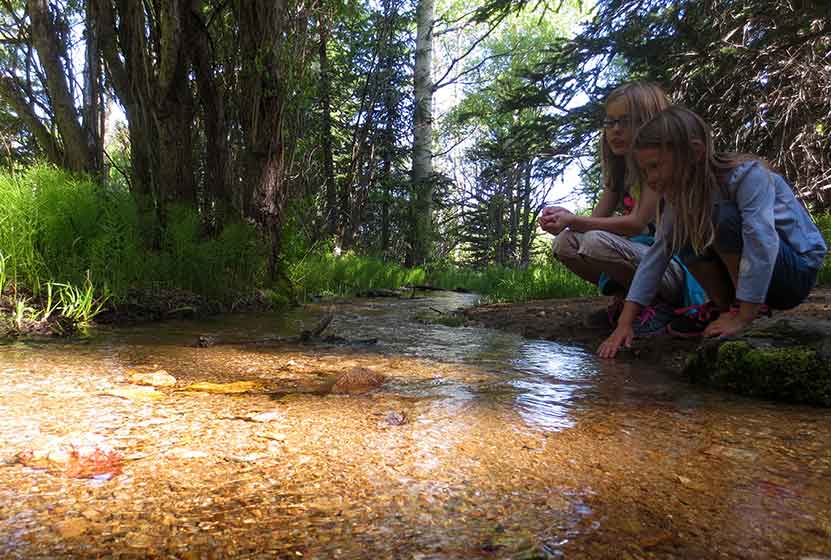
Entering a more mature stand of aspens, the trail begins a more steep descent. This is where hikers will want to watch their footing on the loose rock and gravel surface of the trail. After this short descent, the trail crosses another brook over a small footbridge, then begins to climb a bit further west before turning sharply to the south.
Shortly after the brook is where we encountered the closure of approximately 0.5 mile of the Raccoon trail. These closures are announced on the front page of the Golden Gate Canyon State Park website, and we knew about it before making our trip.
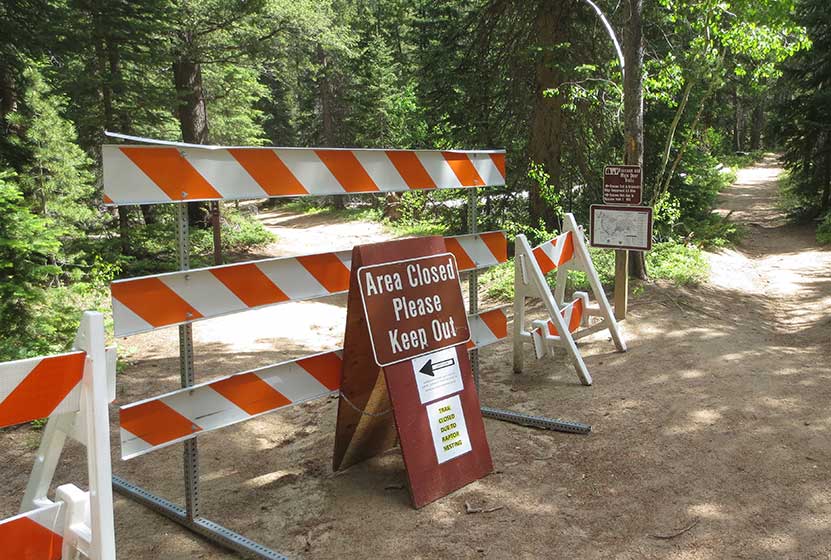
This rerouted us up to the Reverend Ridge Campground, then required that we hike down State Park Road for about 0.5 mile until we were able to pick up the Raccoon Trail again. Because the detour wasn't clearly marked, we've provided an image of the normal route vs. the detour route we took below.
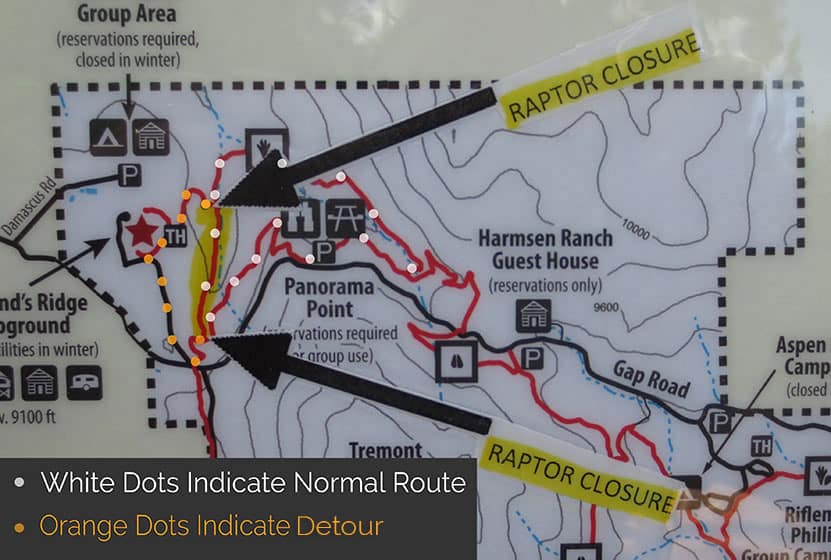
It probably goes without saying, but do exercise caution when walking the road, and assume that cars will not see you. There are several sharp turns/switchbacks. We were able to pick up the trail down where the road comes to a stop sign, then hike back to Panorama Point. The detour adds approximately 1 mile to the original hike, making this into a 3.5 mile loop hike.
This last section had some elevation gain, but still was moderate in difficulty. This is a great hike for visiting friends and family, but those who have not acclimatized to the altitude, or who are not in the best shape, may find this last part challenging. There is a bench strategically placed on the ascent, and rocks where you can rest your legs.
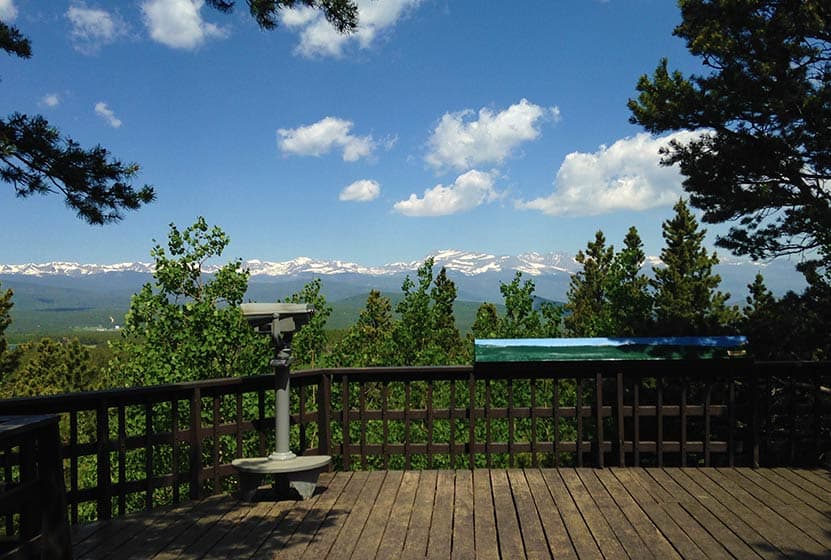
At Panorama Point, hikers will find a large deck and viewing area. It's one of the best accessible views you'll get of the Front Range near Denver.
Tips & Resources for Hiking the Raccoon Loop Hike
- Be Aware of Closures: The Raccoon Loop has seasonal closures when raptors are nesting. However, it's just one segment of the trail that is closed, and a (not-so-well-marked) detour is available.
- Look out for Mtn Bikers: We always find mountain bikers to be considerate on the trails near Denver. There is an established etiquette and they will call their pass. Still, it's good to know that this trail is popular with both mountain bikers and hikers, so keep your eyes and ears peeled and give them plenty of room to pass.
- Trail Map for Golden Gate Canyon State Park: Trail Map Link
- Packing List: Always pack the 10 Essentials. Download our Hiking Guide to get the list and dayhiking packing checklist.
- Colorado Road Conditions: Colorado Road Conditions
- After the Hike: Windy Saddle Cafe in Golden, Colorado
Weather
Map & Driving Directions
Click for Driving Directions to Panorama Point Trailhead
Calypso Cascades in Rocky Mountain National Park
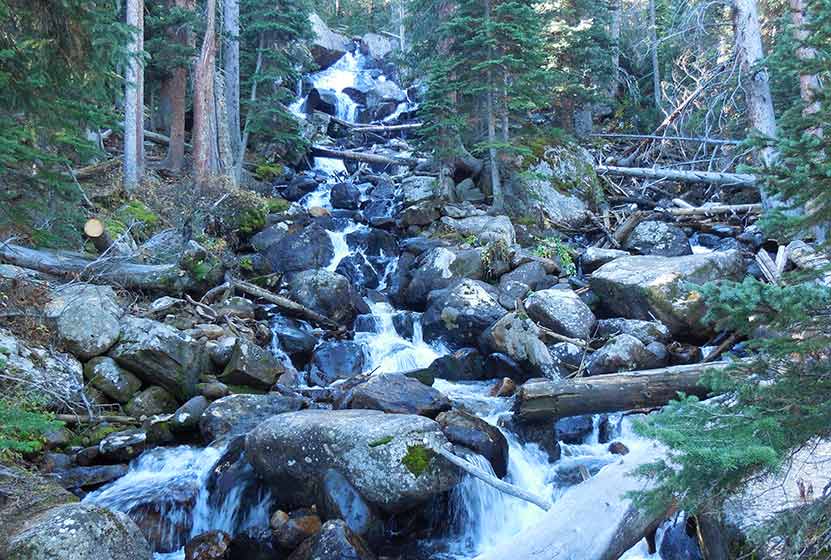
Calypso Cascades is an easy 3.6 mile hike to one of several waterfall destinations along this section of trail. This waterfall in the Wild Basin of Rocky Mountain National Park is gets its name from the purple Calypso Orchids that bloom along the banks of Cony Creek. Explore the full Calypso Cascades hike profile below for trail map, driving directions, and more tips and details to help you enjoy this adventure in Rocky Mountain National Park.
Note: Rocky Mountain National Park now requires timed entry permits from May 27th through October 10th. See the RMNP permits page for more information.
Trail Snapshot: Calypso Cascades in Rocky Mountain National Park
| Hike Distance | 3.6 miles Round Trip |
|---|---|
| Difficulty | Easy |
| Duration | 2-3 hr Round Trip |
| Trail Type | Out and Back |
| Starting Elevation | 8566' |
| Elevation Gain | Approx. +700' |
| Seasons | Spring through Fall, Winter Snowshoeing |
| Dogs | Prohibited in RMNP |
| Hike Trail Map | Click for a Map of Calypso Cascades RMNP |
| Denver Drive Time | 1 hr 30 min |
| Driving Directions to Wild Basin Trailhead | Click for Google Map |
| Driving Directions to Winter Recreation Parking for Wild Basin Hikes | Click for Google Map |
| Town Nearest Hike | Allenspark, Colorado |
| Beauty | Waterfall, mountain views, meadows, river, wildlife: Abert's squirrel, elk, deer, moose, bear; wildflowers |
| Activities | Picnicking, hiking trails, snowshoeing, horseback riding, backcountry camping (with a permit), photography |
| Fee | Park Pass Required |
Parking & Trailhead Information for Calypso Cascades
The southeast corner of Rocky Mountain National Park boasts one of the loveliest portions in the park known as the Wild Basin. The Wild Basin Trailhead is located just 15 minutes outside of Allenspark, Colorado along Highway 115. There is a ranger station at at the Wild Basin Trailhead with toilets and drinking water available.
In the winter (October-May), Hwy 115 may not be plowed to the trailhead, and hikers will need to park their vehicles at a winter parking lot for Wild Basin hikes. Be aware that hikes from the winter parking lot add on another 3 miles of hiking (one-way). There are other small parking areas, like the Finch Lake Trailhead, that may be accessible and allow hikers to park closer to the Wild Basin Trailhead. It's important to know that Hwy 115, though titled a "highway", is a maintained dirt road, which means that it can be used by 2WD vehicles. However, after heavy rains and other severe weather, its quality may degrade until it is repaired. 4WD may be needed when snow is on the ground.
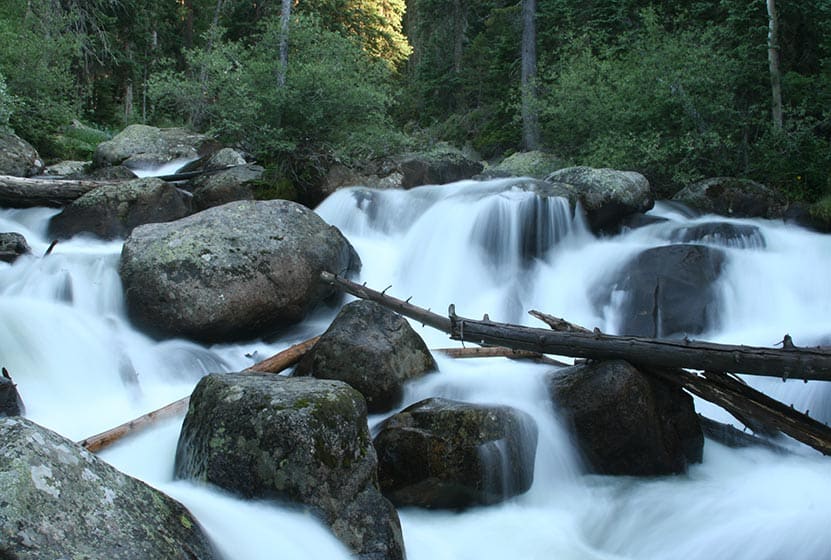
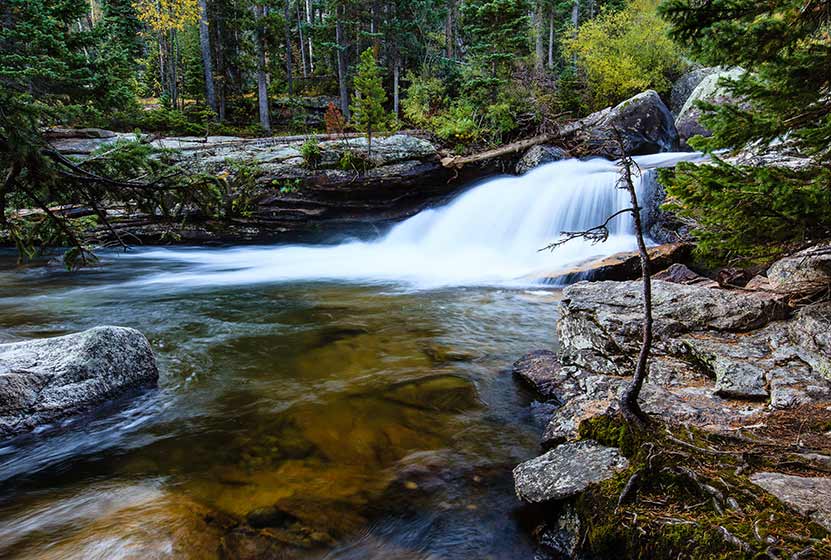
Calypso Cascades From Below
The Hike: Calypso Cascades Trail in RMNP
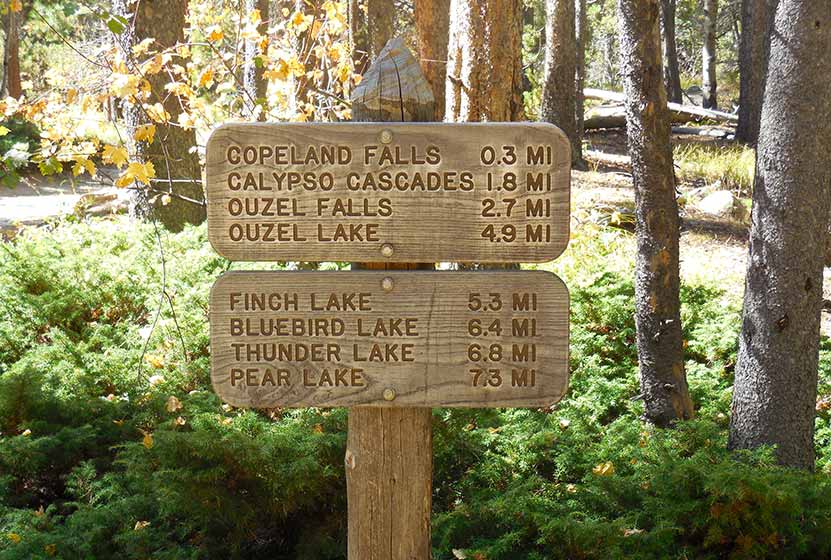
The hike to Calypso Cascades begins at the Wild Basin Trailhead, and at just .3 mile into the trail, passes by both the lower and upper leaps of Copeland Falls. Read our full trail profile on Copeland Falls for details on how to access both sets of cascades.
After taking in the views at Copeland Falls, the trail follows the course of North St. Vrain Creek as it flows out of the rugged high country and snowfields in this wild corner of Rocky Mountain National Park. Soon the trail will split. The right-hand trail leads through a segment of trail with 5 different backcountry camping sites and on towards Thunder and Lion lakes. These backcountry camping sites can be reserved through the RMNP Backcountry Offices. The left-hand trail leads south towards Calypso Cascades and Finch Lake Trail system.
Taking the Finch Lake Trail, hikers will cross a large log bridge spanning North St. Vrain Creek. Near the bridge, you'll discover an unnamed set of cascades. After crossing the bridge, the trail follows Cony Creek for about 0.4 mile to the site of Calypso Cascades. Calypso Cascades are reminiscent of Fern Falls: the waters of Cony Creek tumble over boulders and fallen trees in a moss-covered landscape. What makes Calypso Cascades unique are the Calypso Orchids (also known as Pink Lady Slippers) that bloom in the late-spring and early-summer along the creek.
Hikers can return to the trailhead to make this a 3.6 mile hike, or can continue on the Finch Lake trail for approximately 1 mile to the site of Ouzel Falls.
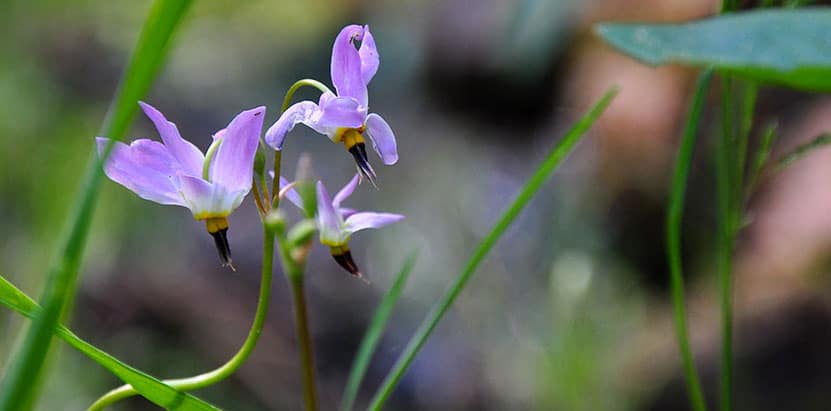
Pink Fairy Slipper Flower
Tips & Resources for Hiking to Calypso Cascades in RMNP
- TIP: The area near the bridge over North St. Vrain Creek can be a great spot for a picnic.
- Packing List: Always pack the 10 Essentials. Download our Hiking Guide to get list and dayhiking packing checklist.
- TIP: There are food storage lockers available at the Wild Basin, Finch Lake, and Sandbeach Lake Trailheads. These are required for visitors staying overnight.
- Get there early: Parking lot might get full even early in the morning.
- You're in Bear Country: Black Bears live in the Wild Basin area and are active on the months of April through November. Be aware, dispose of your food responsibly, and don't food or anything else with a strong scent in your vehicle.
- Trail Map for Wild Basin Area: Trail Map Link
- Colorado Road Conditions: Colorado Road Conditions
- Photo: We would like to express our gratitude to Jeff Kramer for sharing such an amazing photograph of this hike to Calypso Cascades in RMNP.
- After the Hike: Meadow Mountain Cafe
Weather
Map & Driving Directions
Click for Driving Directions
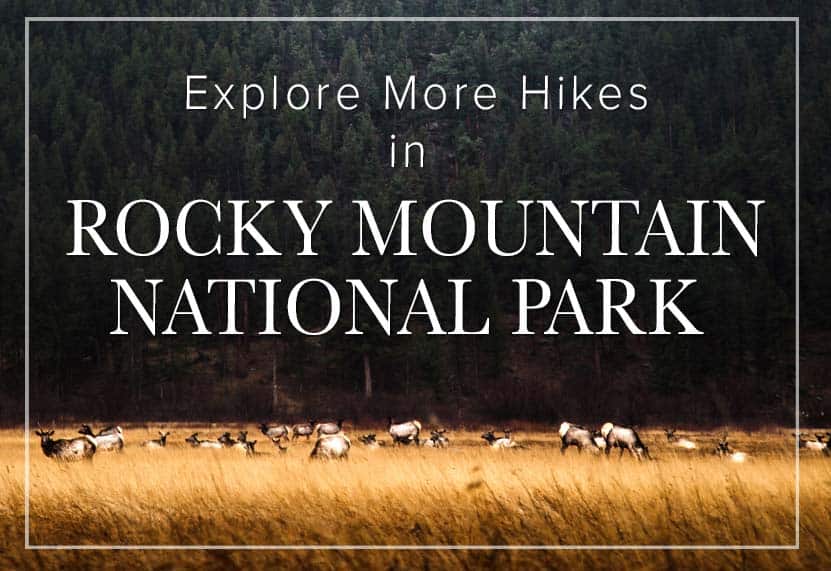
Moraine Park Loop Hike in Rocky Mountain National Park
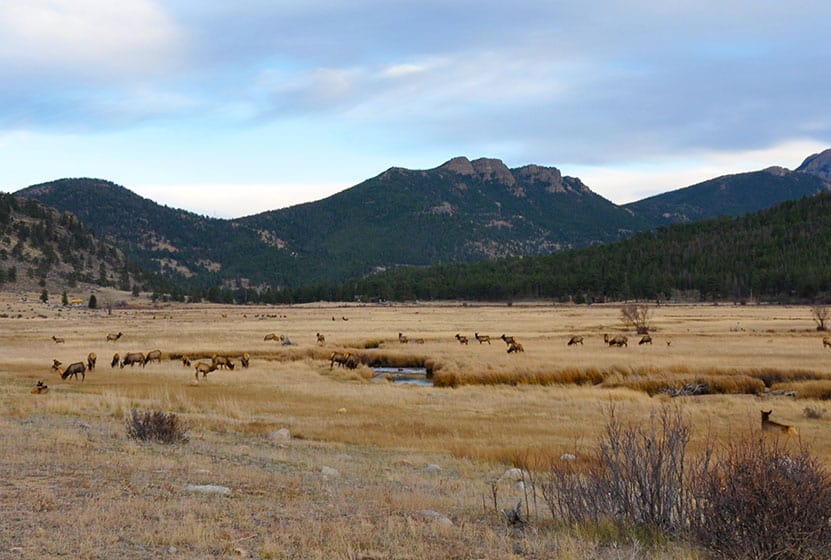
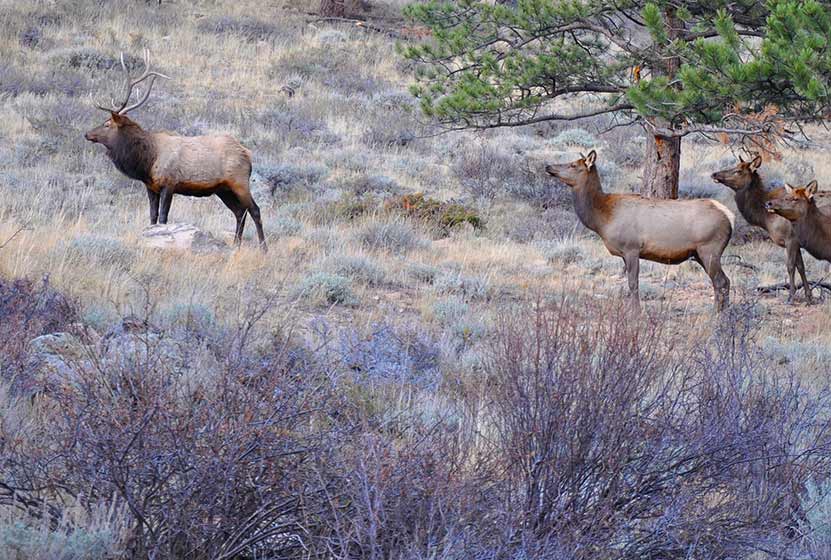
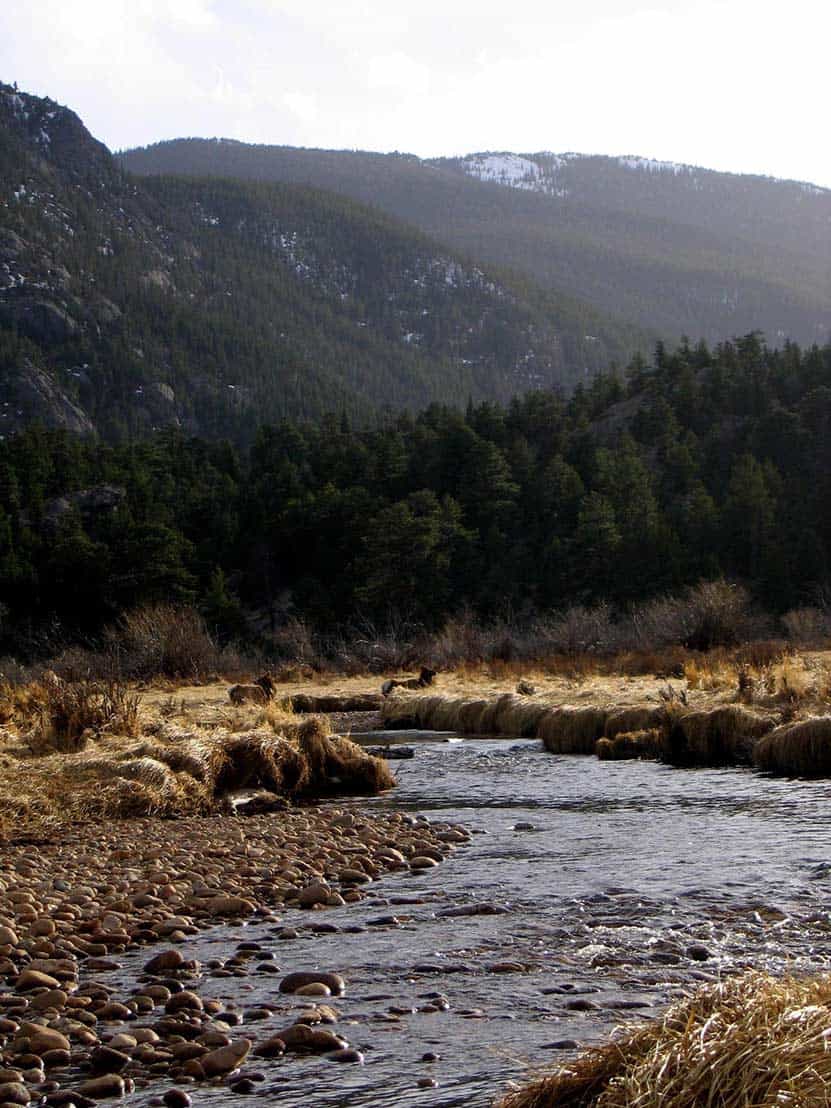
The Moraine Park Loop encircles the golden meadows of Moraine Park in Rocky Mountain National Park. The morning mists rising from the Big Thompson River, and herds of grazing elk make for an enchanted landscape. In the evening, the setting sun brings shadows and light play to the valley floor. All of this is against the backdrop of the distant snowcapped peaks of the Rocky Mountains. Explore the full Moraine Park Loop hike profile below for trail map, driving directions, and all the details you need to enjoy this adventure in Rocky Mountain National Park.
Note: Rocky Mountain National Park now requires timed entry permits from May 27th through October 10th. See the RMNP permits page for more information.
Trail Snapshot: Moraine Park Loop in Rocky Mountain National Park
| Hike Distance | 5.5 miles |
|---|---|
| Difficulty | Easy |
| Duration | Approx 3 hrs |
| Trail Type | Loop |
| Starting Elevation | 8128' |
| Elevation Gain | Approx +90' |
| Seasons | Spring through Fall, Winter Snowshoeing |
| Dogs | Prohibited in RMNP |
| Hike Trail Map | Click for a Map of Moraine Park Loop RMNP |
| Denver Drive Time | 1 hr 30 min |
| Driving Directions to Moraine Park Discovery Center | Click for Google Map |
| Town Nearest Hike | Estes Park, Colorado |
| Beauty | Mountain views, meadows, river, wildlife: Abert's squirrel, elk, deer, moose, duck, bear, mountain goat; wildflower |
| Activities | Picnicking, hiking trails, snowshoeing, horseback riding, backcountry camping (with a permit) |
| Fee | Park Pass Required |
Waypoints Along the Moraine Park Loop
A. 0.0 miles : Moraine Park Discovery Center
B. 0.6 miles : Moraine Park Trailhead
C. 0.8 miles : Trail through the Lateral Moraine Trail
D. 1.7 miles : Lateral Moraine Trail and Moraine Service Road intersection
E. 2.1 miles : Head west through the Lateral Moraine Trail
F. 2.9 miles : Lateral Moraine Trail - Cub Lake intersection
G. 3.4 miles : Cub Lake Trailhead
H. 4.1 miles : Continue east through Fern Lake Road
I. 4.5 miles : To Moraine Park Road
J. 5.3 miles : Back at Moraine Park Discovery Center
Parking & Trailhead Information for Moraine Park Loop
The Moraine Park Loop can be accessed from several different small parking areas such as the Cub Lake Trailhead and the Fern Lake Bus Stop, but the largest parking lot in the area is found at the Moraine Park Discovery Center. It's a great place to learn about the history and habitat of the area before or after your hike. Those staying at the Moraine Park Campground in RMNP can access this loop of trails by walking down the campground road, or via some short connector trails that come off the south end of the campground. Please only use well-worn trails, and don't cut across the fields from the campground, as this causes a lot of disruption and damage to the landscape.
The Hike: Moraine Park Loop Trail in RMNP
This 5.3 mile loop begins at the Moraine Park Discovery Center and follows a clockwise route around the outer rim of Moraine Park. Though this valley is the centerpiece of Rocky Mountain National Park, drawing thousands every year to watch the bull elk bugle and battle over rights to their harem of cows, the loop hike is not very well marked. However, much of this loop hike is an oft-used route for horseback rides guided by the local YMCA camp. Segments of this loop run along the dirt and asphalt roads at the rim of the meadows. Because of this, it's recommended to 1) Be very aware of cars. While the speed limit is low, drivers are often distracted by the views and wildlife, and 2) Look for paths in the meadow alongside the road. These will be safer routes than walking the roads. 3) When walking along the roads, please walk against traffic and walk in single file along the roads.
The hike begins at a high point, looking down upon the Park from the discovery center, and the trail can be picked up just to the east of Bear Lake road. By zooming in on the google map provided above, hikers should be able to discern a trail that runs roughly alongside the road. This is the safest option. The next segment, the South Moraine Trail, can be picked up by crossing Bear Lake Road and heading west on South Moraine Road.
The South Moraine Trail travels across the foot of the moraine for which this area is named. A moraine is a deposit left by either the side or foot of a glacier (imagine the piles of dirt left by an excavator as it cuts a path through the earth). This segment of the loop is a favorite for its views and partial shade.
After approximately 2 miles on the South Lateral Moraine Trail, hikers will encounter a junction with the Cub Lake Trail. To continue on the Moraine Park Loop, the correct direction is right/north on the Cub Lake Trail. After crossing the Big Thompson River, the stream that snakes its way through the meadows, the trail will come out at the Cub Lake Trailhead. Here, the loop continues right/east along Fern Lake road. Again, it's best to travel on any well-worn paths alongside the road when possible.
Fern Lake Road will terminate at Moraine Park Road. Here, the loop continues right/east back to the Moraine Park Discovery Center. An alternative route that avoids walking along Moraine Park Road is to cut through the Park on an established trail back down to the southeast corner of Moraine Park. Here, hikers can cross Bear Lake Road and take the same trail they used at the beginning and return to the Moraine Park Discovery Center.
Tips & Resources for Hiking to Moraine Park Loop in Rocky Mountain National Park
- Arrive Early for Parking: It is advisable to arrive early to avoid entry lines and to find suitable parking.
- Wildlife: Keep your distance from the Elk. While they are very used to humans, cows may be protecting calves, and bull elk can be aggressive during certain seasons. It's always best to view wildlife at a distance in our National Parks.
- The Fences: You'll notice fences along the route, and some gates you may pass through. These have been established because of the very high populations of elk in the park, which has in turn had a negative impact on the vegetation. These are here to help reestablish overbrowsed habitat.
- Trail Map for Bear Lake Corridor: Trail Map Link
- Packing List: Always pack the 10 Essentials. Download our Hiking Guide to get list and dayhiking packing checklist.
- Colorado Road Conditions: Colorado Road Conditions
- After the Hike: Mountain Home Café
Weather
Map & Driving Directions
Click for Driving Directions
Copeland Falls in Rocky Mountain National Park
Copeland Falls is just one of the many waterfalls hikers will encounter in the Wild Basin area of Rocky Mountain National Park. In fact, you can't miss Copeland Falls as it is the first waterfall along the main trail--just a short hike from the trailhead. Explore the full Copeland Falls hike profile below for trail map, driving directions, and more tips and details to help you enjoy this adventure in Rocky Mountain National Park.
Note: Rocky Mountain National Park now requires timed entry permits from May 27th through October 10th. See the RMNP permits page for more information.
Trail Snapshot: Copeland Falls in Rocky Mountain National Park
| Hike Distance | 0.6 miles Round Trip |
|---|---|
| Difficulty | Easy |
| Duration | Less than 1 hr Round Trip |
| Trail Type | Out and Back |
| Starting Elevation | 8566' |
| Elevation Gain | Approx. +15' |
| Seasons | Spring through Fall, Winter Snowshoeing |
| Dogs | Prohibited in RMNP |
| Hike Trail Map | Click for a Trail Map |
| Denver Drive Time | 1 hr 30 min |
| Driving Directions to Wild Basin Trailhead | Click for Google Map |
| Driving Directions to Winter Recreation Parking for Wild Basin Hikes | Click for Google Map |
| Town Nearest Hike | Allenspark, Colorado |
| Beauty | Waterfall, mountain views, meadows, river, wildlife: Abert's squirrel, elk, deer, moose, bear; wildflowers |
| Activities | Picnicking, hiking trails, snowshoeing, horseback riding, backcountry camping (with a permit), photography |
| Fee | Park Pass Required |
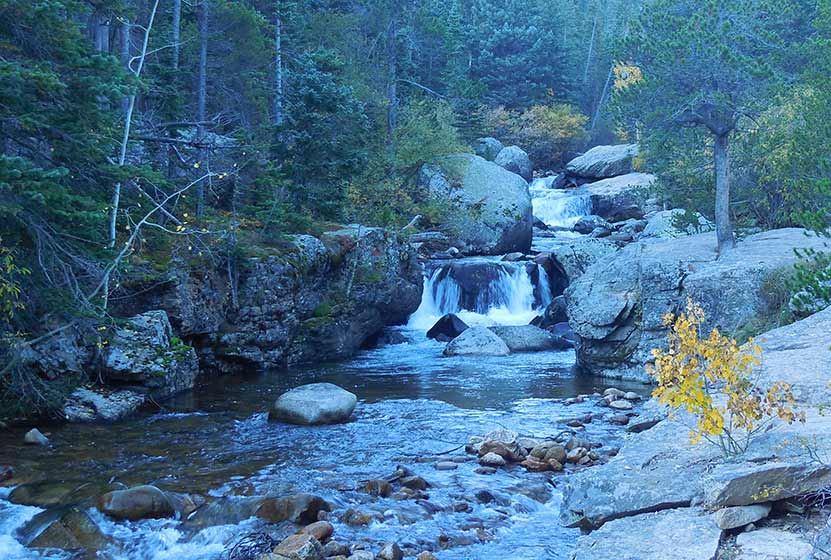
Another View of Copeland Falls
Parking & Trailhead Information for Copeland Falls
The southeast corner of Rocky Mountain National Park boasts one of the loveliest portions in the park known as the Wild Basin. The Wild Basin Trailhead is located just 15 minutes outside of Allenspark, Colorado along Highway 115. There is a ranger station at at the Wild Basin Trailhead with toilets and drinking water available.
In the winter (October-May), Hwy 115 may not be plowed to the trailhead, and hikers will need to park their vehicles at a winter parking lot for Wild Basin hikes. Be aware that hikes from the winter parking lot add on another 3 miles of hiking (one-way). There are other small parking areas, like the Finch Lake Trailhead, that may be accessible and allow hikers to park closer to the Wild Basin Trailhead. It's important to know that Hwy 115, though titled a "highway", is a maintained dirt road, which means that it can be used by 2WD vehicles. However, after heavy rains and other severe weather, its quality may degrade until it is repaired. 4WD may be needed when snow is on the ground.
Wild Basin Trailhead
The Hike: Copeland Falls Trail in RMNP
Copeland Falls is just a short and easy hike from the Wild Basin Trailhead. There are lower and upper leaps at Copeland Falls, and they are reached by following a couple of spur trails that branch off from the main trail. Signs will indicate the location of the trail to the Lower Copeland Falls. After viewing the lower falls, another spur trail leads along St. Vrain Creek to Upper Copeland Falls. A sign will indicate where this second spur trail is located. After viewing the falls, hikers can connect back to the main Wild Basin Trail which leads on to many other beautiful destinations, including several more waterfalls.
Tips & Resources for Hiking to Copeland Falls in RMNP
- TIP: Bring lots of water and high-energy food.
- TIP: There are food storage lockers available at the Wild Basin, Finch Lake, and Sandbeach Lake Trailheads. These are required for visitors staying overnight.
- Get there early: Parking lot might get full even early in the morning.
- You're in Bear Country: Black Bears live in the Wild Basin area and are active on the months of April through November. Be aware, and dispose of your food responsibly.
- Trail Map for Wild Basin Area: Trail Map Link
- Packing List: Always pack the 10 Essentials. Download our Hiking Guide to get list and dayhiking packing checklist.
- Colorado Road Conditions: Colorado Road Conditions
- Photo: We would like to express our gratitude to Ben Graham for sharing such an amazing photograph of this hike to Copeland Falls in RMNP. His photos can also be seen at Redbubble.
- After the Hike: Meadow Mountain Cafe
Weather
Map & Driving Directions
Click for Driving Directions
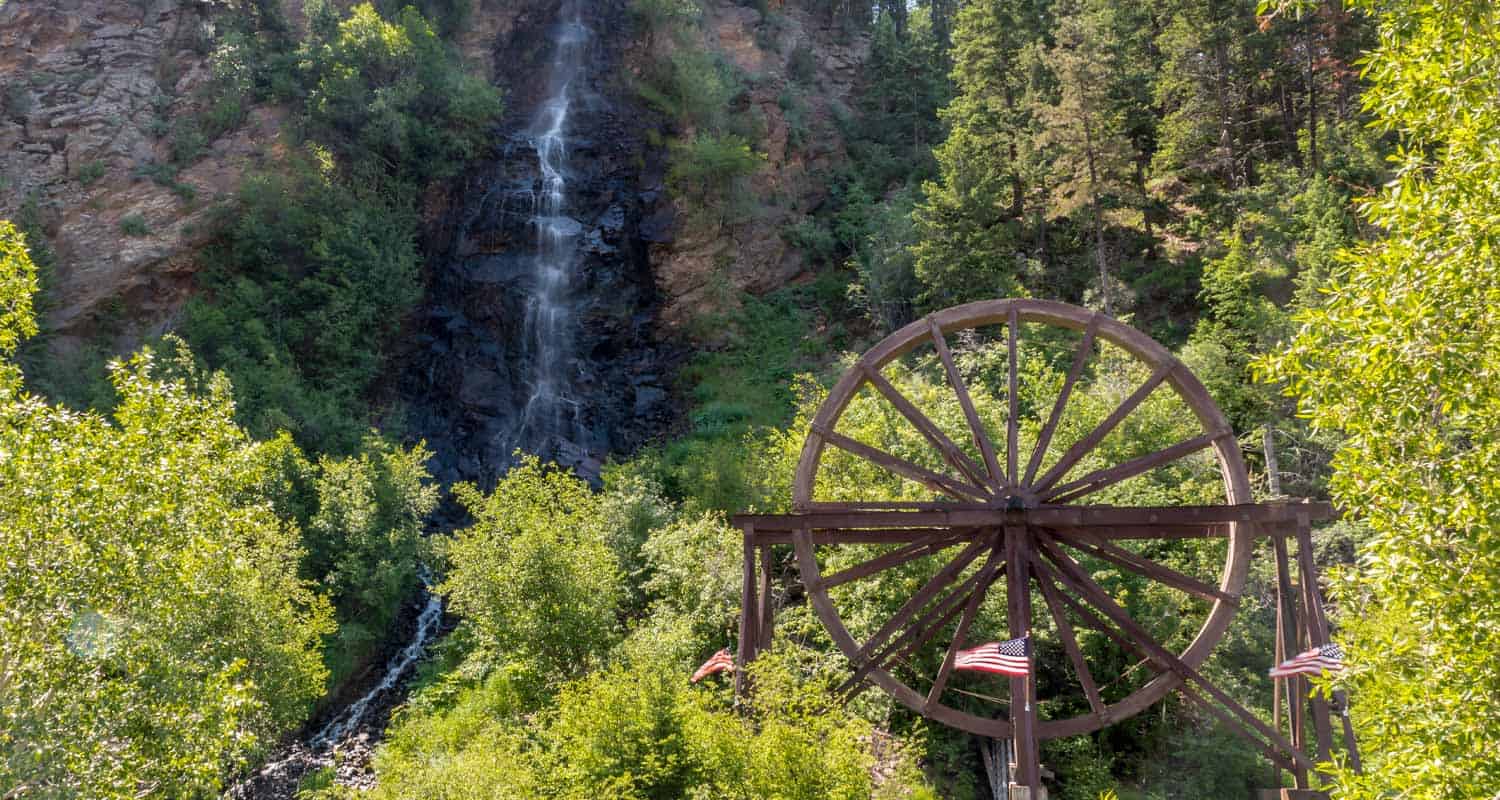
Bridal Veil Falls in Idaho Springs
Bridal Veil Falls is best viewed from Water Wheel Park, a short and easy walk from the downtown of Idaho Springs, Colorado. The legacy of steam locomotives and gold mining make this a historic hike in an historic Colorado town. Explore the full Bridal Veil Falls hike profile below for trail map, driving directions, and many of the details you need to enjoy this waterfall in Idaho Springs, Colorado.
Trail Snapshot: Bridal Veil Falls in Idaho Springs
| Hike Distance | Less than 1/4 mile Round Trip |
|---|---|
| Difficulty | Easy |
| Duration | Approx 15 min Round Trip |
| Trail Type | Out and Back |
| Starting Elevation | 7550' |
| Elevation Gain | Negligible |
| Seasons | Year Round |
| Dogs | Allowed On Leash |
| Hike Trail Map | Click for a Map of Bridal Veil Falls and Waterwheel Park |
| Denver Drive Time | 45 min |
| Driving Directions to Bridal Veil Falls, Idaho Springs | Click for Google Map |
| Town Nearest Hike | Idaho Springs, Colorado |
| Beauty | Waterfall, Creek |
| Activities | Hiking, historic steam locomotive, and waterwheel |
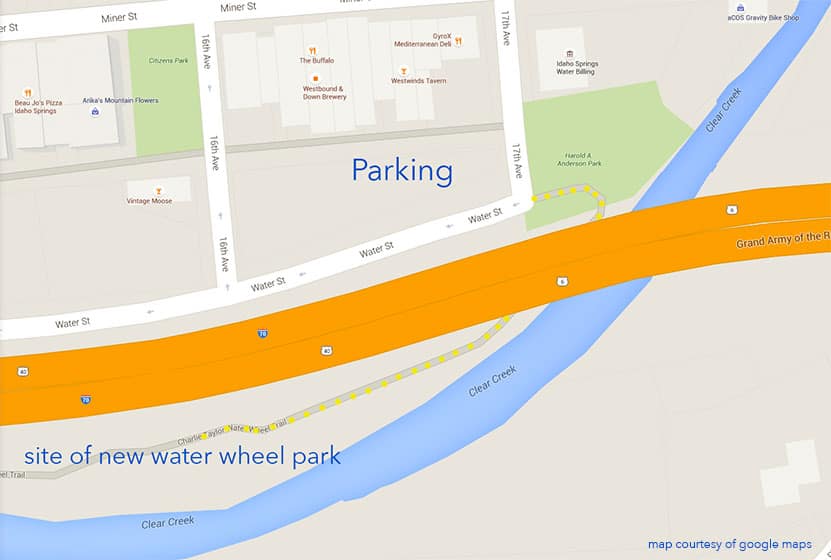
Parking & Trailhead Information for Bridal Veil Falls, Idaho Springs
The parking area for this short hike/walk is in downtown Idaho Springs, at the corner of 17th and Water Street, which is situated behind the downtown restaurants and shops. Use the driving directions above, which lead to Harold Anderson Park. At this small park, just across from the parking lot, you'll pick up a concrete path that leads under interstate 70 to Water Wheel park (scheduled to open early June of 2016). See the marked map below for a visual of the parking area, trail (yellow dots), and the location of Water Wheel Park.
The Hike: Bridal Veil Falls, Idaho Springs
It's a little hike (more of a stroll) with a lot of history. Starting at Harold Anderson Park, you'll want to take a gander at Locomotive #60, one of five remaining steam engines that ran on the narrow gauge rails of the Colorado and Southern Railway. Kids will love the train and the other sites along this short jaunt.
The Charlie Taylor Waterwheel Trail leads under Interstate 70 then goes west for about 1/10th of a mile before it arrives at the best viewing area for Bridal Veil Falls. The waterfall spills out of Soda Creek high above, making its way then into Clear Creek, a stream famous for its gold, river rafting, and Coors Beer. The water wheel that's just north of Bridal Veil Falls was built in the late 1800's by a local miner, Charlie Taylor. Taylor used the water wheel to drive a machine called a stamp mill--imagine a big hammer that grinds and crushes rock to get silver and gold ore out of it. It was relocated from Ute Creek to its present location by a group of volunteers in the 1980's and now belongs to the Idaho Springs Historical Society. The Colorado Department of Transportation is renovating Water Wheel Park during the Spring of 2016 with a goal to have the project completed and reopen the park in early June.
There are several Bridal Veil falls in Colorado. For Bridal Veil Falls at Hanging Lake, view our Guide to Hiking Hanging Lake page. Or Explore our trail profile for Bridal Veil Falls in Rocky Mountain National Park.
If you are vacationing in the area and looking for more places to explore with your family, we recommend checking out Echo Lake, the Mt. Evans Summit Hike, or the Mt. Bierstadt Trail on Guanella Pass. See our day trip recommendation in the tips section below.
Tips & Resources for Hiking Bridal Veil Falls, Idaho Springs
- Plan a Day Trip: Make this a family day trip by arriving early at Echo Lake to see the reflection of Mt. Evans in its mirror waters, then drive up to the Summit of Mount Evans. After your drive back down, take in the sites of Bridal Veil Falls at Water Wheel Park, then grab lunch at Beaujo's Pizza in downtown Idaho Springs.
- Add a Railroad Hike Tour: The Georgetown Loop Railroad still operates on what remains of track of the old C&S Railroad. Located just a few minutes drive from Idaho Springs, they offer a hike + railroad tour, a great family adventure near Denver. Explore more at our Georgetown Railroad Hike page.
- Packing List: Always pack the 10 Essentials. Download our Hiking Guide to get list and dayhiking packing checklist.
- Colorado Road Conditions: Colorado Road Conditions
- Photo: We would like to express our gratitude to John Weitzel for sharing such an amazing photograph of Bridal Veil Falls in Idaho Springs, Colorado.
- After the Hike: Beaujo's Pizza
Weather
Map & Driving Directions
Click for Driving Directions
Whitmore Falls Near Lake City Colorado
Whitmore Falls is a lesser-known waterfall deep in the mountains of Colorado. But, it is just a 1/10th of a mile hike from the pull-off along Engineer Pass Road. It's a great destination hike for those vacationing in the Lake City area and are looking to combine a scenic drive with a short waterfall hike. Explore the full Whitmore Falls hike profile below for a trail map, driving directions, and all the details you need to enjoy this adventure near Lake City, Colorado.
Trail Snapshot: Whitmore Falls Near Lake City, Colorado
| Hike Distance | 0.2 mile Round Trip |
|---|---|
| Difficulty | Easy |
| Duration | Approx 15 min Round Trip |
| Trail Type | Out and Back |
| Starting Elevation | 9970′ |
| Elevation Gain | Approx -50′ |
| Seasons | May-September |
| Dogs | Allowed On Leash |
| Hike Trail Map | Click for a Map of Whitmore Falls |
| Denver Drive Time | 6 hr |
| Driving Directions to Whitmore Falls, Colorado | Click for Google Map |
| Town Nearest Hike | Lake City, Colorado |
| Beauty | Scenic Drive, Waterfall, Historic Capitol City Landmark |
| Activities | Short hike, Scenic Drive |
Directions, Parking, & Trailhead Information
Whitmore Falls is off the beaten path, located about 1hr west of Lake City, Colorado along the Alpine Loop Scenic Byway. From Lake City, take 1st Street northwest, then a left onto the Alpine Loop Scenic Byway/20/Engineer Pass Road. This dirt road which follows Henson Creek is closed December through May. It may be closed or difficult to navigate depending on weather and how recently its been graded. Typically, it is navigable for 2WD passenger cars up to Whitmore Falls, but SUVs will fare best on this stretch of road.
Beyond Whitmore Falls, the road requires higher clearance vehicles more suitable to the difficult terrain, and drivers who possess off-road driving experience. See the Colorado BLM site for more information on the Loop. Whitmore Falls is located approximately 11 miles West of Lake City, and about 2 miles after passing the Capitol City Landmark, a set of restored historic buildings. Take your time, the drive and the scenery is half the adventure.
The parking area for Whitmore Falls is a small pulloff on the right/west side of the road. The falls trail should be marked with a sign on the opposite side of the pulloff. Because of the limited cell service in this part of Colorado, we advise that drivers not rely on phone-based map services that require a cellular connection. Take care in crossing the road to the other side where you can make your way down to the waterfall.
The Hike to Whitmore Falls
Tips & Resources for Hiking to Whitmore Falls
The drive to Whitmore Falls is more harrowing than the hike. It's just a short 1/10th of a mile from the roadside down to the falls. However, it is steep and the terrain is mostly gravel, much of it talus and loose scree. So, take care making your way down to the falls. Trekking poles will be a great aid in making it down the switchback trail to the overlook and to the falls. The trail can be located near the Whitmore Falls BLM sign.
Whitmore Falls is a plunge waterfall that launches over 40' from the rock cliffs surrounding Henson Creek. Depending on the flows of Henson Creek, the base of the waterfall provides close access for viewing the falls.
- TIP: Bring trekking poles to assist the short hike down the steep, gravel path.
- Take Your Time: Pack a picnic lunch, and enjoy the scenic drive. Hikers can stop and explore the Capitol City historic site before or after their visit to Whitmore Falls.
- Packing List: Always pack the 10 Essentials. Download our Hiking Guide to get list and dayhiking packing checklist.
- Colorado Road Conditions: Colorado Road Conditions
- Photo: We would like to express our gratitude to Dan Parker for sharing such an amazing photograph of this hike.
- After the Hike: Lake City Cafe
Weather
Map & Driving Directions
Click for Driving Directions See More Detailed Driving Directions Above
Zapata Falls Hike Colorado
The hike to Zapata Falls is a perfect family adventure. The 30 foot waterfall is back an easy .4 mile trail, and requires wading through Zapata creek to gain the best views under the shower of the falls. Because it's quite a drive from Denver, we recommend camping at the nearby campground and adding a visit to the Great Sand Dunes National Park to your adventure. Explore the full Zapata Falls hike profile below for driving directions, and all the details you need to enjoy this unusual Colorado waterfall.
| Hike Distance | 0.8 mile Round Trip |
|---|---|
| Difficulty | Easy |
| Duration | 30-45 min Round Trip |
| Trail Type | Out and Back |
| Starting Elevation | 9035′ |
| Elevation Gain | Approx +215′ |
| Seasons | Year Round |
| Dogs | Allowed On Leash |
| Hike Trail Map | Click for a Map of Zapata Falls Trail |
| Denver Drive Time | 4 hr |
| Driving Directions to Zapata Falls | Click for Google Map |
| Town Nearest Hike | Alamosa, Colorado |
| Beauty | Waterfalls, panoramic views of San Luis Valley, views to the Great Sand Dunes |
| Activities | Hiking, birding, photography, picnicking, camping |
Parking & Trailhead Information for Zapata Falls Trail
Like most of the best hikes in Colorado, the trailhead for Zapata Falls is out in the middle of nowhere--well, almost. It's about 8 miles south of Great Sand Dunes National Park and 29 miles from Alamosa, Colorado. Parking is limited, so arrive early in the morning to guarantee a space--or visit on a weekday. Memorial Day weekend is the busiest time of the year for Zapata because so many families visit the neighboring Great Sand Dunes and stay at the campground during that weekend. If the parking lot is full, the road leading into the trailhead lot offers roadside parking; just park with care. The trailhead has toilet facilities.
The Hike to Zapata Falls
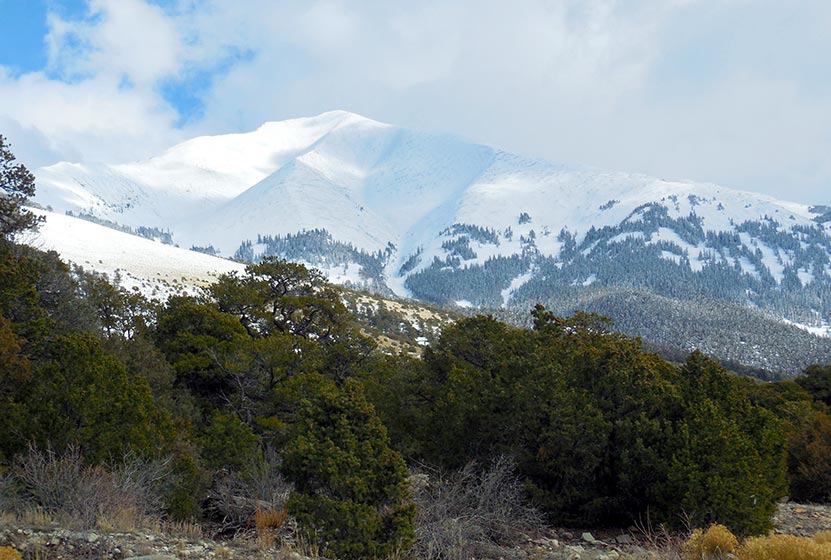
The hike to Zapata Falls is short and refreshing. The trail is well-constructed with benches along the way for hikers who need to take a breather. However, it's a very popular trail and you'll want to hit the trail early to avoid waiting in line to see the falls (and to avoid the midday heat). Along the way, you'll take in the scent of juniper trees and gain views of both the Great Sand Dunes National Park and the larger San Luis Valley of Colorado.
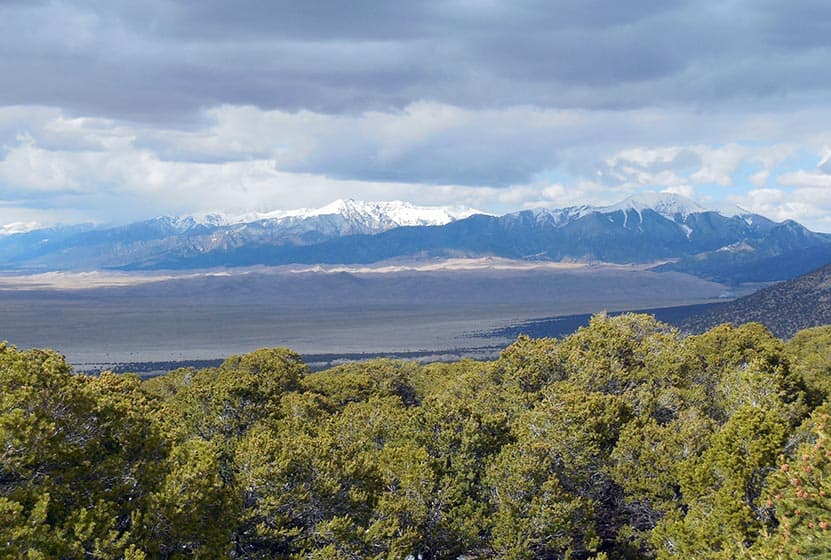
Views to the Great Sand Dunes courtesy of Patrick Mitchell
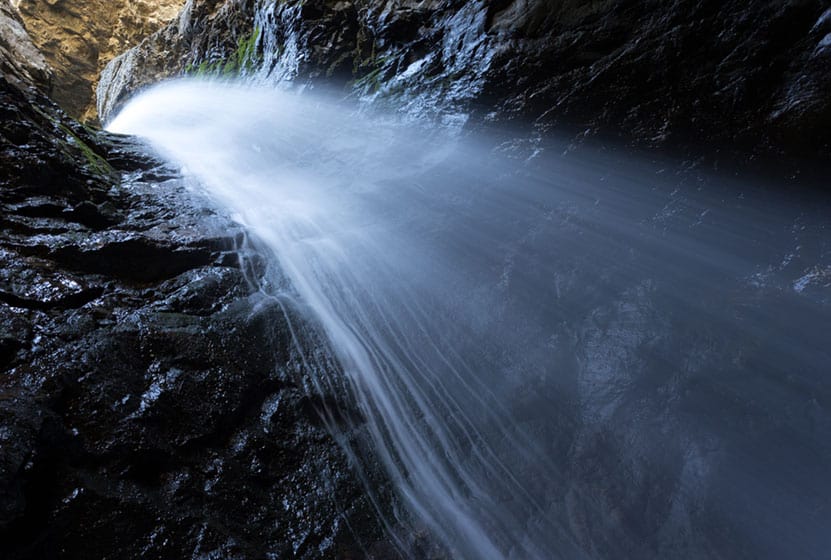
At the falls, many hikers opt to wade across Zapata creek to gain the best views and experience of the waterfall. Zapata Falls is unusual as it is tucked back in a short tunnel in the rock where the water funnels 30 feet down from the creek high above. Though a small creek, after heavy rains, the current can become very strong. Exercise great care on the slippery rock, and be sure to bring your water shoes if you opt to explore the base of the falls.
Zapata Falls is accessible in the winter when it turns into a frozen masterpiece of ice and snow.
Camping Near Zapata Falls
It's quite a drive to hike Zapata Falls, and you may want to do more than just hike. Camping is an option! There is a USFS campground next to the Zapata Falls Trailhead. It's a popular spot with 23 sites, all non-reservable. On weekends these campsites fill up by Friday at noon. On holiday weekends, they are at capacity before Friday. For fees and more details, see the official USFS campground page for Zapata Campground.
Tips & Resources for Hiking to Zapata Falls
- Pathfinder: We would like to thank, Dayhikes Pathfinder, Patrick Mitchell for hiking this trail, providing a report, and photos of his hike to Zapata Falls.
- Oasis General Store: This place is the only store for miles and just outside the National Park off of Highway 150 North.
- Packing List: Always pack the 10 Essentials. Download our Hiking Guide to get list and dayhiking packing checklist.
- Colorado Road Conditions: Colorado Road Conditions
- Photo: We would like to express our gratitude to Ben Flasher for sharing such an amazing photograph of Zapata Falls.
- After the Hike: The Roast Cafe in Alamosa, CO
Weather
Map & Driving Directions
Click for Driving Directions
Treasure Falls Near Pagosa Springs Colorado
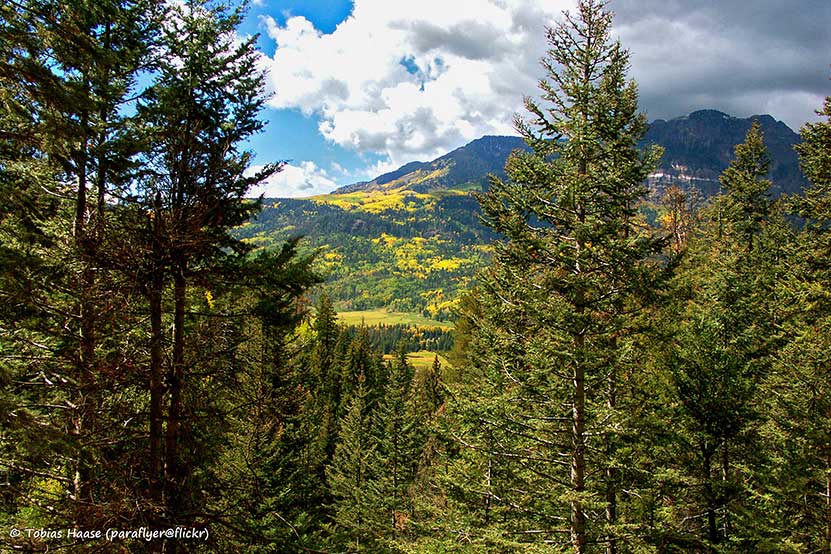
Treasure Falls is a 105 foot, plunge waterfall just 15 miles outside of Pagosa Springs, Colorado. It's just a 1/2 mile hike in to the falls where you can get close enough to feel the spray and mist from the falling water. It's a sight that kids and adults alike will remember. Explore the full Treasure Falls hike profile below for trail map, driving directions, and more of the details you need to enjoy this adventure near Wolf Creek Pass in Colorado.
Trail Snapshot: Treasure Falls Near Pagosa Springs, Colorado
| Hike Distance | 1 mile Round Trip |
|---|---|
| Difficulty | Easy |
| Duration | Approx 30 min Round Trip |
| Trail Type | Out and Back |
| Starting Elevation | 8275′ |
| Elevation Gain | +200′ |
| Seasons | Year Round (possible winter closings) |
| Dogs | Allowed On Leash |
| Denver Drive Time | 4 hr 45 min |
| Driving Directions to Treasure Falls near Pagosa Springs, CO | Click for Google Map |
| Town Nearest Hike | Pagosa Springs, Colorado |
| Beauty | Waterfall, Scenic Drive area, Fall Creek |
| Activities | Hiking, Photography |
Parking & Trailhead Information for Treasure Falls in Colorado
Treasure Falls is located about 15 miles northeast of the town of Pagosa Springs, along highway 160 near Wolf Creek Pass. Driving from Pagosa Springs, the parking area and trailhead for Treasure Falls are located on the right (east) side of the road. Parking can accommodate about 18 vehicle and 3 RV/trailers. There are restrooms at the site. Because parking is limited, it fills to capacity often during the summer months. Though the trailhead is open year round, sometimes the entrance gets blocked by plowed snow. Some have noted Treasure Falls as a handicap accessible hike, but it is not. However, the waterfall can be viewed--at a distance--from the parking area.
The Hike: Treasure Falls in Colorado
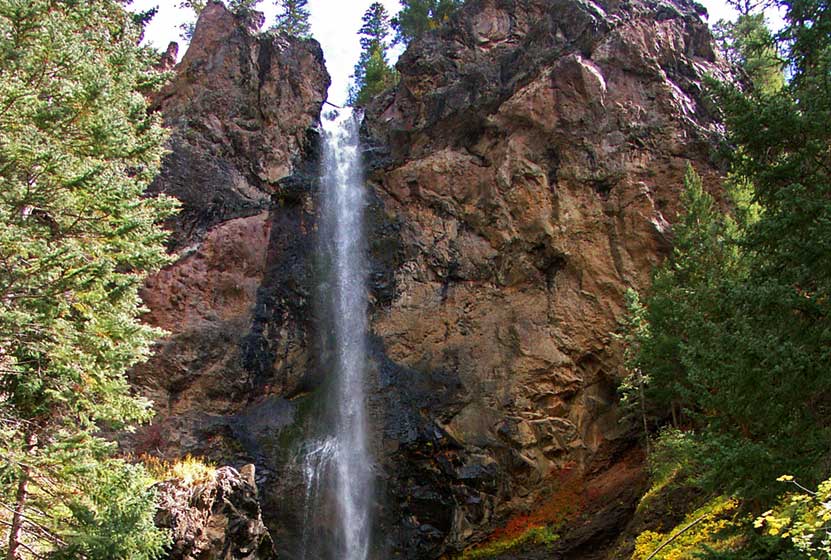
Treasure Falls is a 105 foot plunge waterfall with a horsetail spray. This hike is approximately 1/2 mile to the two different observations decks. The complete journey down to the falls and back (includes both observation decks) is a total of 1 mile. Along the way, hikers learn the history of the area and the story of how Treasure Falls got its name: a legend that a treasure was buried near the sight. Kids (adults, too) will love this short hiking trail, the history, and the captivating site of one of Colorado's highest waterfalls. While short, the hike is steep, and older folks and those who have difficulty walking, may find the journey beyond their ability.
The first observation deck, named Blowout, takes the trail to the right. The second observation deck, which is closer to the waterfall--so close that you can feel the spray from the falls--is called Misty Deck, and can be reached by going back to the main trail and following the signs.
The trail to Treasure Falls is steep and can become quite muddy with the spring snowmelt and rains. In the Winter, the waterfall freezes over into an aqua stream of ice. During these months, when the parking lot is not plowed or snowed in, Treasure Falls can be accessed by snowshoeing or hiking in with traction devices or microspikes--much depends on the amount of snowfall. Ice can compound with the snow to make the trail very difficult.
Tips & Resources for Hiking to Treasure Falls, CO
- Hot Cocoa: After the trip, drive up the the Wolf Creek ski area and get hot chocolate at the lodge.
- Wear Good Footwear: The hike up to treasure falls can be slick in places, and muddy in the spring. Be sure to have durable and gripping boots or shoes. Looking for good boots? Check out our hiking boot reviews.
- Packing List: Always pack the 10 Essentials. Download our Hiking Guide to get list and dayhiking packing checklist.
- Colorado Road Conditions: Colorado Road Conditions
- After the Hike: Alley House Grill in Pagosa Springs
- Photo: We would like to express our gratitude to Tobias Haase for sharing such an amazing photograph of this hike.
Weather
Map & Driving Directions
Click for Driving Directions
Monarch Lake Loop Hike
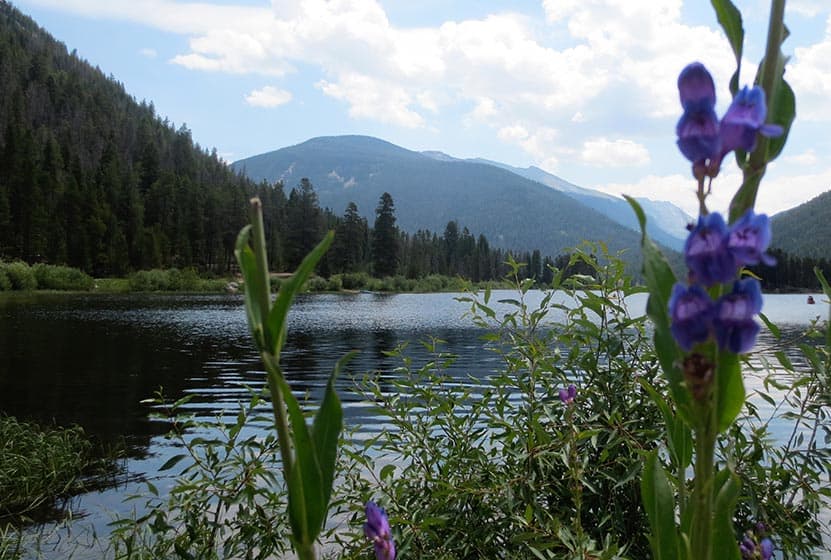
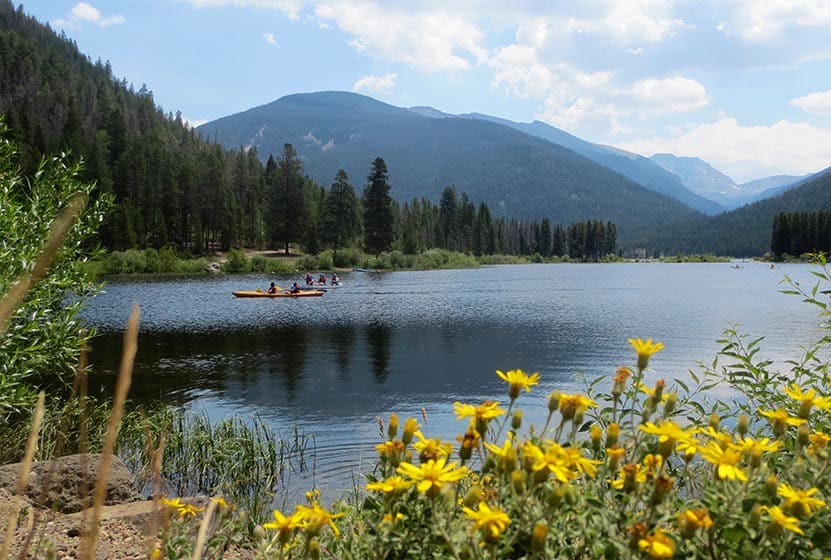
The Monarch Lake Loop is a perfect family hike that leads 4 miles through shaded forest, across creeks, and along the shore of the lake. It's one of the more diverse, but easy, hikes in the area. Monarch Lake is a popular destination for canoeing, kayaking, and access to the Indian Peaks Wilderness area. Explore the full Monarch Lake Loop hike profile below for trail map, driving directions, and many of the details you need to enjoy this adventure in Grand County, Colorado.
Trail Snapshot: Monarch Lake Loop, Colorado
| Hike Distance | 4 miles |
|---|---|
| Difficulty | Easy |
| Duration | Approx 2-3hr |
| Trail Type | Loop |
| Starting Elevation | 8400′ |
| Elevation Gain | Approx +300′ |
| Seasons | All Year, Road open from June 16 to Nov. 14 |
| Dogs | Allowed On Leash |
| Hike Trail Map | Click for a Map of Monarch Lake Loop |
| Denver Drive Time | 2 hr 50 min |
| Driving Directions to Monarch Lake, CO | Click for Google Map |
| Town Nearest Hike | Granby, Colorado |
| Beauty | Lake, shaded forest, wetlands, wildlife: moose, elk, deer, fox, waterfowl |
| Activities | Hiking, canoeing, horseback riding, photography, fishing |
| Fee Required | ANRA Day Use Fee |
Parking & Trailhead Information for Monarch Lake, Colorado
Following the driving directions in the above trail snapshot for Monarch Lake, the road will end at the Monarch Lake Trailhead. Here, you'll find parking spaces for about 40 vehicles. The parking area fills fast and cars and trucks often line both sides of the road to the trailhead. An Arapahoe National Recreation Area day use pass is required and can be purchased at the kiosk at the Arapahoe Bay Pay Station. This pay station is located shortly after you turn onto County Hwy 6 and before crossing over the dam. While Monarch lake is open in the winter, and Hwy 6 is plowed, the approximately 1 mile final segment of road that leads into the trailhead is closed from Nov. 15 to June 15. Because of this, hikers will have to park and snowshoe, cross-country ski, or hike in to the trailhead.
The Hike: Monarch Lake, CO
From the trailhead, a shaded tunnel of trees leads down a short gravel path to the Wilderness Information Cabin. Here you can pick up trail maps and information about hikes up into the Indian Peaks Wilderness area. The trail description here is of hiking the Monarch Lake Loop in a clockwise fashion. Begin on the Cascade Creek trail #N1. This will follow the shoreline of the lake and soon enter the forested area along the Northern end of the lake. After approximately 1 mile, the landscape changes and enters a wetland marsh. Keep your eyes peeled for moose and other wildlife here.
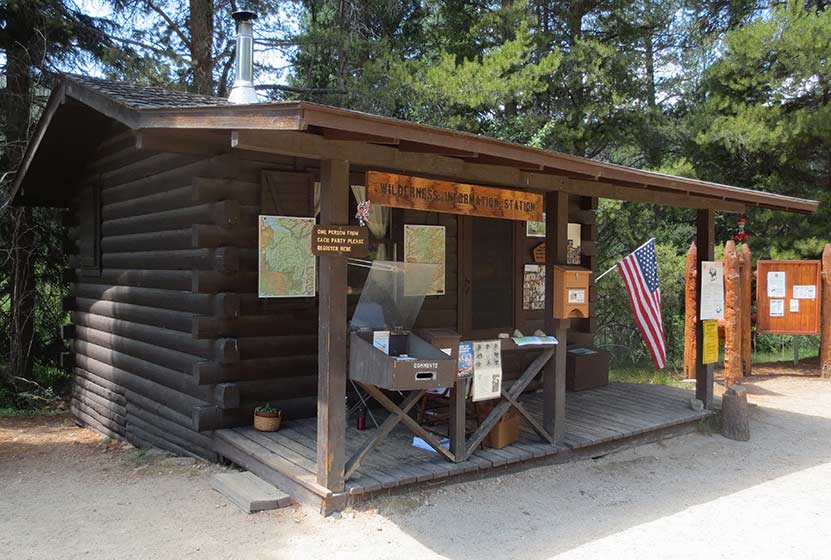
Wilderness Info Cabin at Monarch Lake
After 1.5 miles on the Cascade Creek Trail, the loop will be continued by taking a right onto the Arapaho Pass Spur Trail. This will head south, crossing Buchanan Creek, then Arapaho Creek. Here, after .8 mile, the spur trail ends and the Arapaho Pass trail begins. This last segment on the Arapaho Pass trail #N6 is 1.7 miles long.
Because of the pine beetle kill, there are many dead trees throughout the Monarch Lake Loop hike. Be alert for falling trees, especially when gusts of wind blow through. Hikers may also encounter deadfall across the trail. Be careful going under any fallen trees as they are often unstable and may only be supported by a few small, dead branches.
The hike continues on the south shore of the lake, passing an old, rusty steam engine. These "steam donkeys" were used to pull logs down out of the mountains back in the logging camps of the 1800's. After the steam engine, the trail will cross two more creeks, and finally make its way across the dam at the northwestern end of the Lake.
Because this hike is so perfect as a family outing, or for visiting family and friends, we recommend the following day trip:
1) Leave early (take breakfast with you) and arrive at the trailhead at or before 8AM (better chance of seeing wildlife and better parking)
2) Hike Monarch Lake
3) Drive over Trail Ridge Road (fee required--but worth every penny)
4) Eat a late Lunch in Estes Park (so bring snacks)
5) Head back home or drive in to Moraine Park in Rocky Mountain National Park.
Tips & Resources for Hiking the Monarch Lake Loop
- Fishing: Monarch Lake is a popular fishing spot for trout. Colorado State fishing regulations apply.
- Falling Trees: Because of the amount of dead trees in this area, hikers should be on alert for falling trees.
- Trail Map for Monarch Lake Area: Trail Map Link
- Packing List: Always pack the 10 Essentials. Download our Hiking Guide to get list and dayhiking packing checklist.
- Colorado Road Conditions: Colorado Road Conditions
- After the Hike: Mavericks Grill in Granby, CO
Weather
Map & Driving Directions
Click for Driving Directions
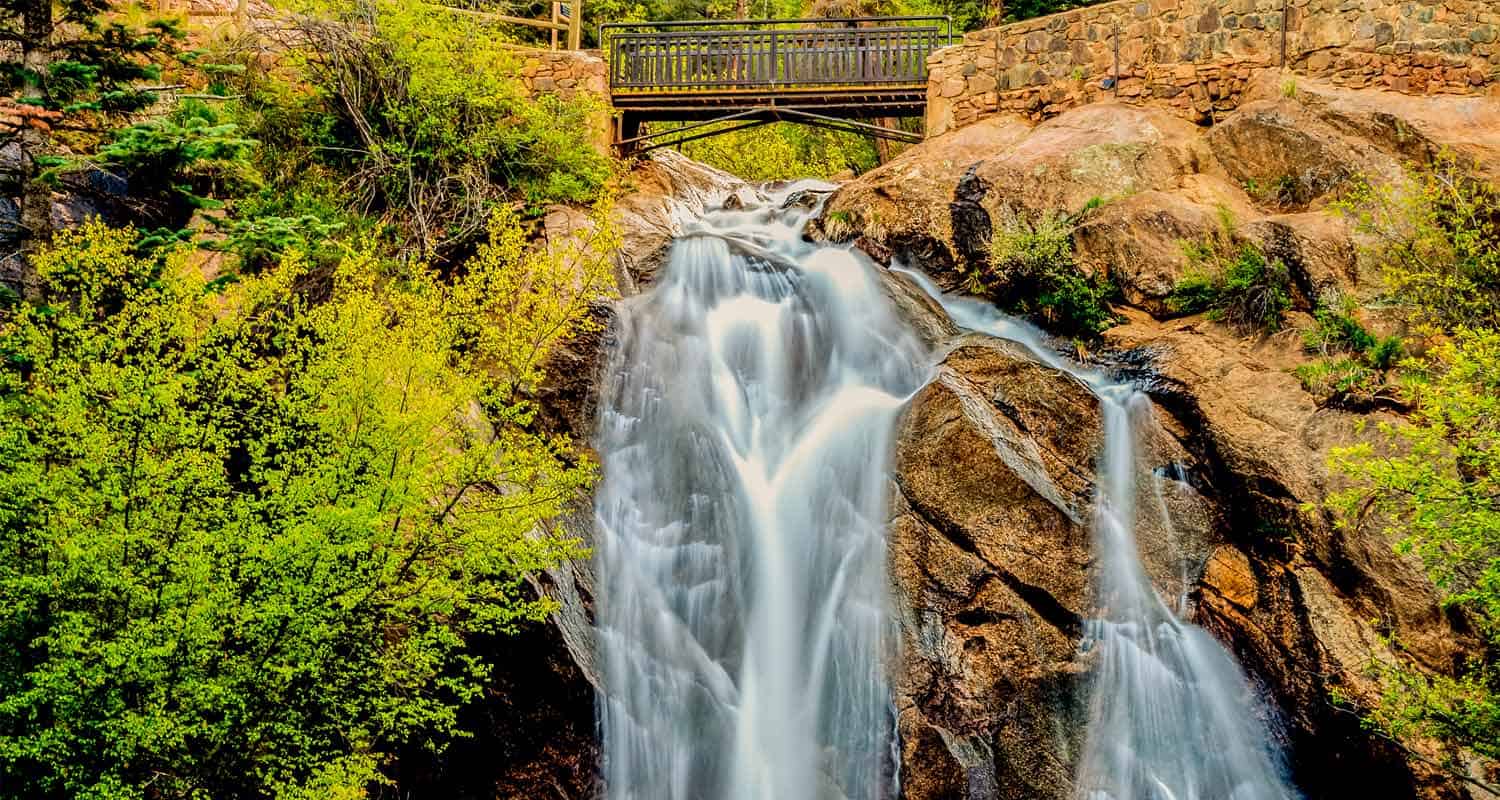
Helen Hunt Falls in Colorado Springs
Helen Hunt Falls in Colorado Springs is a 35 foot waterfall requiring only a short walk from the parking area. For a longer and more demanding hike, visitors can take the 4 mile Columbine Trail from the bottom of Cheyenne Canyon to Helen Hunt Falls. This strenuous option affords and experience of the rich ecosystem of this canyon at the base of Pikes Peak. Explore the full Helen Hunt Falls hike profile below for trail map, driving directions, and many of the details you need to enjoy this waterfall in Colorado Springs.
Trail Snapshot: Helen Hunt Falls
| Hike Distance | 1/10 mile or 8 Miles Round Trip |
|---|---|
| Difficulty | Easy to Moderate |
| Duration | Approx 10 min or 4 hrs |
| Trail Type | Out and Back |
| Starting Elevation | 7200′ |
| Elevation Gain | Negligible or Approx 1000'+ |
| Seasons | Year Round |
| Dogs | Allowed On Leash |
| Hike Trail Map | Click for a Map of North Cheyenne Canyon Area |
| Denver Drive Time | 1 hr 45 min |
| Driving Directions to Helen Hunt Falls, Colorado Springs | Click for Google Map |
| Town Nearest Hike | Colorado Springs, Colorado |
| Beauty | Waterfalls, Cheyenne Canyon, North Cheyenne Creek |
| Activities | Hiking, Picnicking, Mountain Biking, Photography |
Parking & Trailhead Information for Helen Hunt Falls
Helen Hunt Falls is located in the upper reaches of North Cheyenne Canyon in Colorado Springs. The driving directions and map in the trail snapshot (above) direct hikers to the small parking area nearest to the waterfall. However, this lot is often full, so visitors will need to drive further up into the canyon to additional parking. The Helen Hunt Falls area is a trailhead to several hikes in the canyon, so the parking areas do fill quickly on weekends and during the busy vacation season. Go early to park close. In case you or a friend are unable to make the short hike to the falls, they are visible along the road from your vehicle. Drive with care through the canyon as there are many cyclists on this stretch of road.
The longer hike begins near the Strasmore Visitor Center at the entrance to Cheyenne Canyon. Click for Driving Directions.
The Hike: Helen Hunt Falls
Helen Hunt Falls is a 35 foot waterfall that cascades over the rock in North Cheyenne Creek. The falls are most beautiful when Cheyenne Canyon's water volume is at it's peak in the late Spring to early Summer, or after a good rain. It's not much of a hike to Helen Hunt Falls because the base of the falls can be accessed just a few steps from the Helen Hunt Falls Visitor Center. The visitor center is open only in the Summer and has snacks and gifts for sale. The waterfall access is open year-round and there is no fee.
In the winter, the frozen falls have a beauty of their own, but be advised that the trails can be very slick and icy.
There is short, but more strenuous trail just after the bridge and to the left. The trail has a set of stairs built into the side of the canyon that lead to an overlook and another perspective on the waterfall.
If you prefer a longer, creekside hike to the Falls, then park at the Strasmore Visitor Center at the entrance to the Canyon. Near the visitor center, you can locate the Lower Columbine Trailhead. This creekside trail weaves through Cheyenne Canyon all the way up to Helen Hunt Falls. It's 4 miles one-way to the Upper Columbine Trailhead near the falls, and about 1000+ feet of elevation gain. Because the trail follows the creek and over a lot of rocky surface, be prepared for slick surfaces, and be sure to wear a solid pair of hiking boots. Trekking poles will be exceptionally helpful on this stretch of trail. About midway up the Columbine Trail, it abandons the creek, crosses the road, and begins a significant climb that includes a set of demanding switchbacks. Eventually, the trail nears Tunnel #2 along Gold Camp Road, then terminates at the Helen Hunt Falls area.
Helen Hunt Falls is named for reformer, activist, and writer, Helen Hunt Jackson, who fought for Native American Rights in the era of Reconstruction after the Civil War.
Tips & Resources for Hiking Helen Hunt Falls
- Explore More: Hike further to Silver Cascade Falls to take in a second waterfall. It's less than 1/2 mile from Helen Hunt Falls with an elevation gain of approximately 250 feet.
- Pack a Picnic Lunch: Helen Hunt Falls and Cheyenne Creek are great places to enjoy a picnic lunch.
- Bear and Mtn Lion Activity: Like many areas along the Front Range of Colorado, Bear and Mtn. Lions live in Cheyenne Canyon and the surrounding countryside. Dispose of food in the proper containers. Be alert. And keep together as a group. It's best that children don't run ahead, but stay with your group. Dogs should be leashed at all times.
- Trail Map for North Cheyenne Canyon: Trail Map Link
- Packing List: Always pack the 10 Essentials. Download our Hiking Guide to get list and dayhiking packing checklist.
- Colorado Road Conditions: Colorado Road Conditions
- After the Hike: Urban Steam Coffee
- Photo: We would like to express our gratitude to Mike Sinko for sharing such an amazing photograph of this hike.
Weather
Map & Driving Directions
Click for Driving Directions