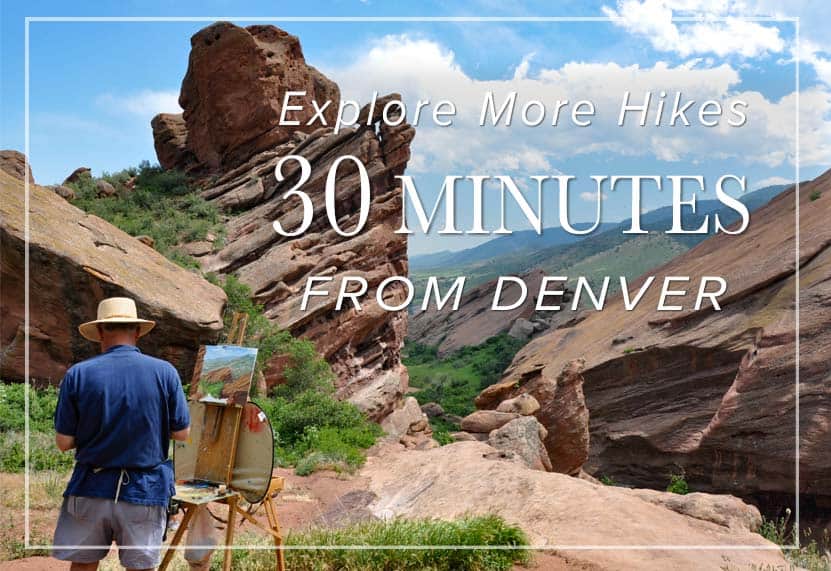
North Table Mountain Hike Near Golden, Colorado
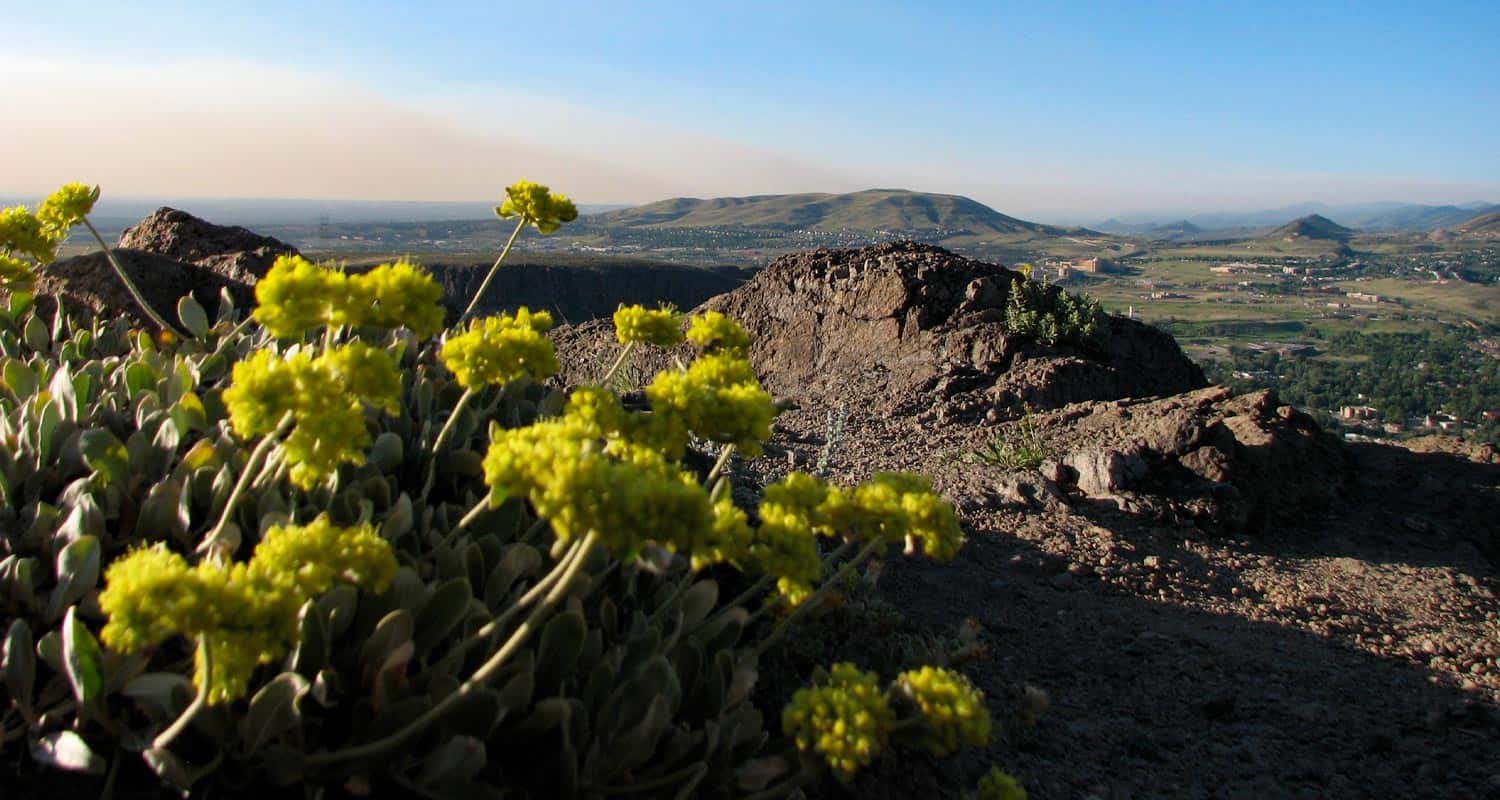
When the sun rises over the North Table Mountain, you'll see this mesa rising above the town of Golden, Colorado. A vast network of trails awaits hikers, mountain bikers, and nature photographers. This is a perfect hike near Denver for when you don’t have much time on your hands but need some fresh air. While the trails on Table Mountain are accessible all year round, the best time to hike it is in the Spring and early Summer when wild flowers start to bloom. Check out our detailed description of the hike, the Table Mountain trail map, driving directions so that you can explore this unique Colorado hike.
Trail Snapshot: North Table Mountain Near Golden
| Hike Distance | 2.7 to 7.7 miles |
|---|---|
| Difficulty | Moderate |
| Duration | Approx 1-4 hrs |
| Trail Type | Loop |
| Seasons | All Year |
| Dogs | Allowed on Leash |
| Hike Trail Map | Click for a Map of North Table Mountain Park |
| Denver Drive Time | 25 min |
| Directions | Click for Google Map |
| Town Nearest Hike | Golden, Colorado |
| Beauty | Views of Denver and Golden, wildflowers, deer, golden eagles |
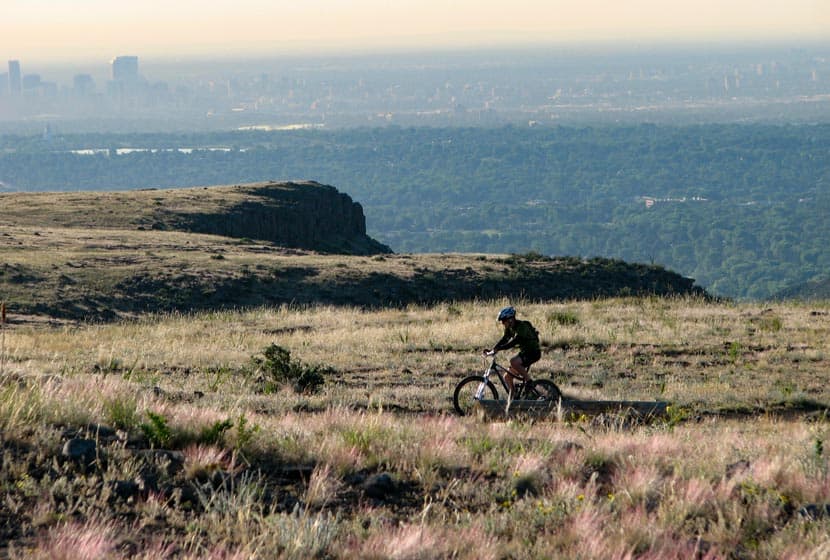
| Activities | Hiking, mountain biking, nature photography, climbing |
Start your tour of North Table Mountain (really it's a mesa) a few hours after the daybreak by entering the main parking lot off of Highway 93, just north of Golden, Colorado. At the trailhead, you'll find a kiosk with trail maps, and a public restroom. There are three ways you can explore the North Table Mountain, so scroll down to read the details on all three options.
Hiking North Table Mountain
#1 The (short) North Table Loop trail - 3.2 Miles
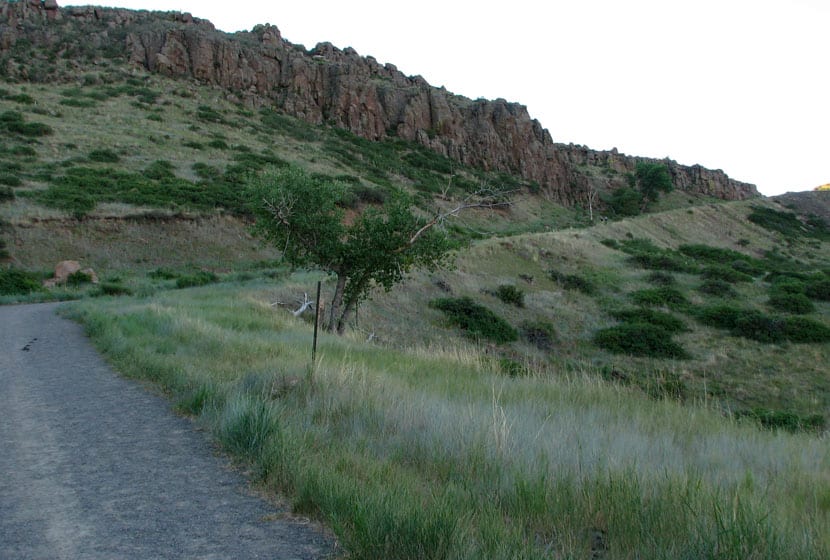
The first part of the trail starts with a wide path, a long ramp up to the top of the mesa. It's a bit of a challenge, but when you get to the top, the paths level off and are much easier. Leaving the parking lot, take the North Table Loop trail south for 0.7 miles until you reach a trail intersection. Take a left onto the Tilting Mesa trail. Follow Tilting Mesa trail for approximately 1 mile until the next trail junction. Take a left onto the Mesa Top Trail, hiking on it until it intersects with the North Table Loop trail again. Take a left onto the North Table loop trail which skirts the sides of North Table Mountain and takes you back to the trailhead.
#2 The Longer North Table Loop Routes - 6-8 Miles
Shake it up a bit: This is a longer route that combines a tour of the top of Table Mountain and a hike around the perimeter. Start the same way you would start the short table loop trail by taking the North Table Loop for 0.7 miles until you reach the Tilting Mesa trail. Follow the trail to the first unmarked intersection and then turn right. On your next intersection turn right again onto the Mesa Top trail. After about .6 mile, you'll encounter a trail intersection with the Rim Rock Trail which is closed seasonally (March 1 through July 31). Continue on the Mesa Top trail until it intersects with the North Table Loop trail which will take you all the way back to the west side of the mountain and to the parking area. This is approximately a 6 mile loop.
Adapt to a Closure Route: At the time of this post, April 2014, a segment of the Mesa Top trail is closed due to flood damage. An alternate route adds some mileage and difficulty to this loop, but that just may be what you are looking for. Here's the route: Same as above, but when on the Mesa Top Trail, take the Cottonwood Canyon Trail (right) until it links you back up with the North Table Loop trail. Then take a left back on to the North Table Loop trail which will then take you on a tour of roughly 3/4 of the perimeter of North Table Mountain. Here's a link to the North Table Mountain Trail Closure map that should help you plan this route. This Route is approximately a 7.5 mile loop.
The Straighforward Approach: The final route is pretty straightforward, just take the North Table Mountain Loop all the way around the perimeter of the mountain. This results in an approximate 7.7 mile loop.
#3 The Golden Cliffs Trail - 2.7 miles RT
If you are a climber or just looking for a shorter hike, you can take North Table Mountain trail to the Golden Cliffs trail. The Golden Cliffs are very popular Colorado rock climbing attraction. This area is actually a preserve managed by the Access fund. For more information on rock climbing the Golden Cliffs, see the Golden Cliffs page on the Mountain Project and Access Fund Sites. This is a 2.7 mile (Round Trip) out-and-back trip.
Tips for Hiking North Table Mountain:
- Wear sunscreen because there is no shade once you are atop Table Mountain.
- Camping and open fires are not permitted at North Table Mountain Park.
- Don’t forget to bring your camera. You can get some very interesting wildlife images.
- Rattlesnakes: Jefferson County Open Space notes that North Table Mountain is a known Rattlesnake habitat. They recommend downloading their Snakebite Prevention and First Aid Guide to better understand this native reptile of Colorado.
 Weather
Map and Directions to North Table Mountain West Trailheaad
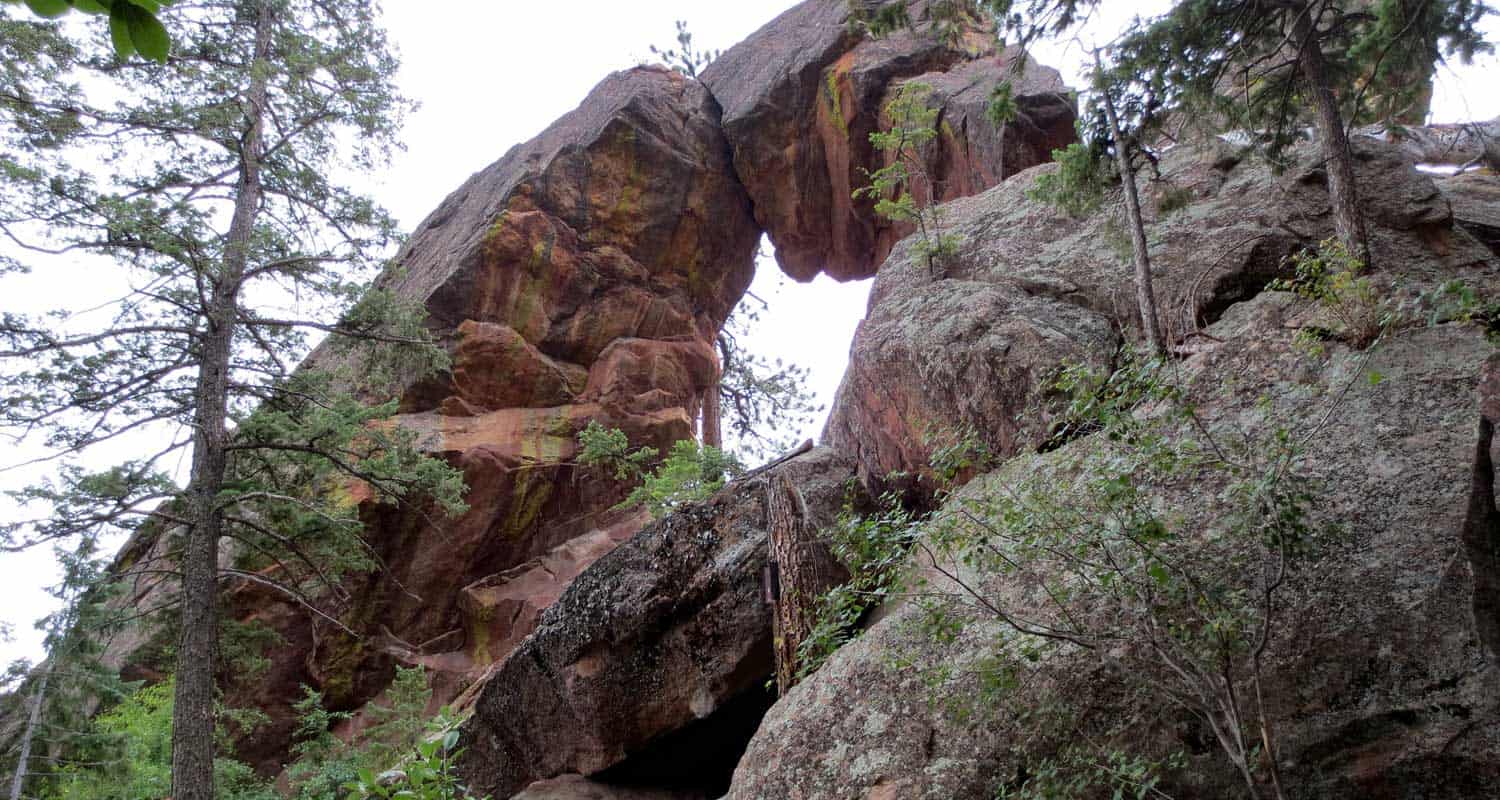
Royal Arch Trail
The hike up to Royal Arch in Boulder's Chautauqua Park is a serious workout, but the beauty of Bluebell canyon and the view of Royal Arch make it worth the journey. Our most important tip for making this an enjoyable hike is to go when it's not so crowded, during the early morning or on weekdays. Scroll down to get all the details you need for this hike in Boulder, Colorado: trail map link, driving directions, weather forecast, and more tips.
Trail Snapshot: Royal Arch Trail in Chautauqua Park
| Hike Distance | 3.5 miles Round Trip |
|---|---|
| Difficulty | Moderate to Difficult |
| Duration | 2-3hrs |
| Trail Type | Out and Back |
| Elevation Gain | Approx +1400′ |
| Seasons | All Year |
| Dogs | Allowed on Leash |
| Hike Trail Map | Click for a Trail Map of Royal Arch Area |
| Denver Drive Time | 40 min |
| Directions | Click for Google Map |
| Town Nearest Hike | Boulder, Colorado |
| Beauty | Rock formations, Bluebell Canyon, raptors, natural spring |
| Activities | Hiking, rock climbing |
If you talk with someone who has hiked the trail up to Boulder's Royal Arch, they will tell you two things: 1) The Royal Arch, though not as grand as some of the arches in Utah's backcountry, is really a beautiful sight, and 2) That the hike is a real challenge.
While the trail is relatively short - 3.5 miles round trip - the hike up through Bluebell Canyon to Royal Arch has a lot of uphill and downhill, making the elevation gain around 1400' over the course of the trip. Because the trail has a lot of rock steps and is heavily used, the latter half of the hike requires some negotiation. It's still a good trail, just don't expect a walk in the park.
The Hike to Royal Arch
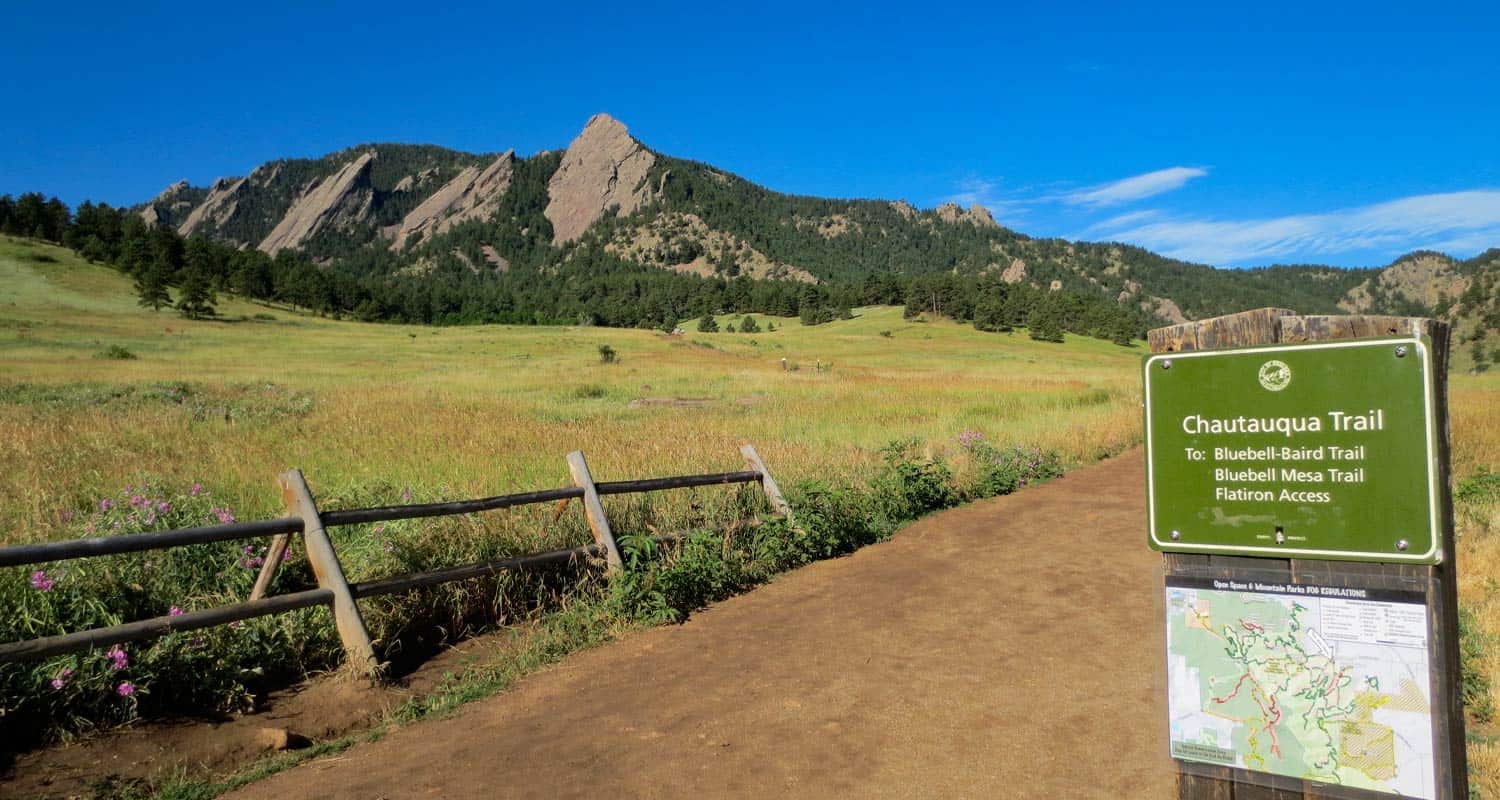
Beginning at the Chautauqua Park Trailhead, take the Bluebell Road Trail through the meadows and up to the Bluebell Shelter (see trail map here). You'll come to a junction near the Bluebell Shelter, and will see signs pointing you to the Royal Arch Trail.
Soon, you'll enter Bluebell Canyon. The Royal Arch trail will descend before beginning its climb to the top. This section of the hike is especially alive and enchanting during the early morning hours. Bluebell Canyon is home to raptors and is seasonally protected when the birds are hatching. The trail is still accessible during those times, but signs are posted to keep the canyon drainage clear of hikers.
The higher you hike, the more stairs you'll encounter. It's nothing like hiking the Incline in Colorado Springs, but it's still a real workout. If you hike to the Royal Arch on the weekend, this is where you'll begin to experience the trail congestion. In fact, I'd have to say that this was the most overcrowded trail I've hiked in Colorado. A lot of hikers had stopped to rest, huffing and puffing trailside. Others gathered right in the middle of the trail. I overheard several people deliberating whether or not to keep going, and watched others turn around without making it to the top. So, our first and most important tip would be to hike to Royal Arch early in the morning by getting on the trail before 8AM, or hiking the Royal Arch trail on a weekday.
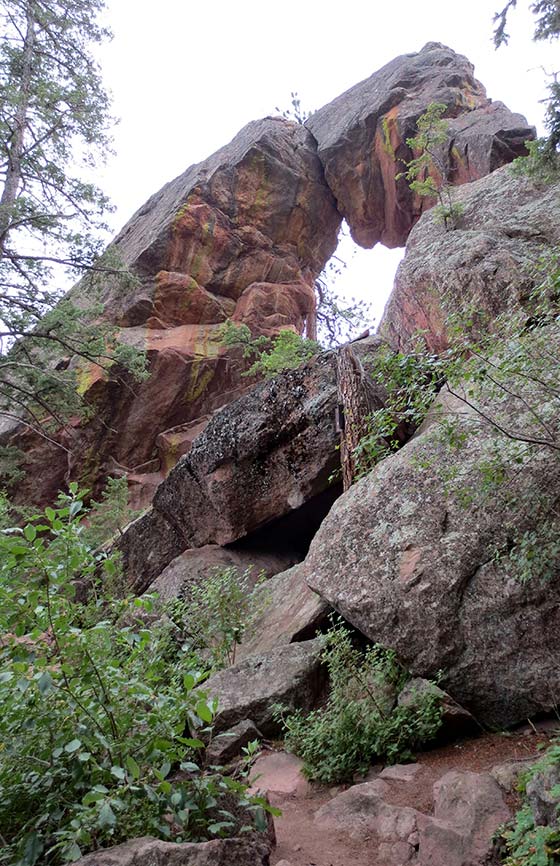
After pushing up to Royal Arch, be sure to walk around it and go through it. The views of Boulder are incredible. On a clear day, you can see all the way to Denver. I'd recommend taking a picnic or at least a snack, and kick back for a while. There is supposedly a way to make this hike more of a loop by taking a trail down the backside of the arch, but it's an unmarked trail and one hiker who took it warned against it. So, we recommend taking the marked Royal Arch trail back down to the shelter. From there, you have some trail options.
On my way back, I decided to take the Bluebell Mesa trail down to the Chautauqua trail, which led me home to the trailhead and ranger cottage. I'd highly recommend this route back. It takes you through a stand of pines on a mesa above the meadows of Chautauqua Park. You can pick up the Bluebell Mesa trail near the Bluebell Shelter soon after you exit the canyon.
Tips & Resources for Hiking to Royal Arch in Boulder:
- Leave Fido At Home: I love dogs; in fact, I took our Dog, Francine, on the hike up to Royal Arch. But it was so congested that it made it difficult for her and I to navigate the trail together. Other dog owners with long leashes nearly tripped several hikers along the trail. If you want to bring your dog on this hike, I'd recommend going early or going on a weekday.
- Bring Snacks and Water: It probably goes without saying, but be sure to bring food and water to refill your tank. This hike demands it.
- Bring Trekking Poles: The trail up to Royal Arch can be hard on the knees--especially the descent--so bring trekking poles if you have them. The trail is heavily shaded, so my guess is that it will ice up in the winter. Just another reason to bring something that will help you get traction.
- Take Time at the Top: Build time into your hike to rest and maybe have a picnic under the Royal Arch.
- Keep and Eye on the Weather: Talking to one of the rangers, he shared that storms can come up quickly along the Flatirons, which will catch hikers unawares. Because you are hiking through a densely wooded canyon and are so close to the mountain, it makes it difficult to really judge the skies. But the Flatirons area is like a lot of other mountain hikes, storms typically roll in during the early afternoon.
- Trail Map for Chautauqua Park: Trail Map Link
- Colorado Road Conditions: Colorado Road Conditions
- After the Hike: Ozo Coffee in Boulder, Colorado

Weather
Map & Driving Directions
Click for Driving Directions
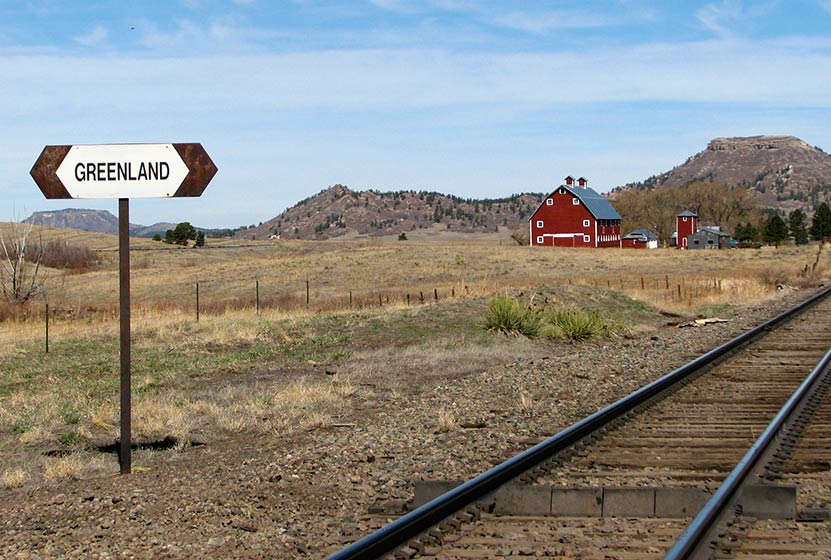
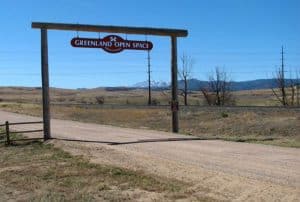
Greenland Open Space Trail Near Larkspur, Colorado
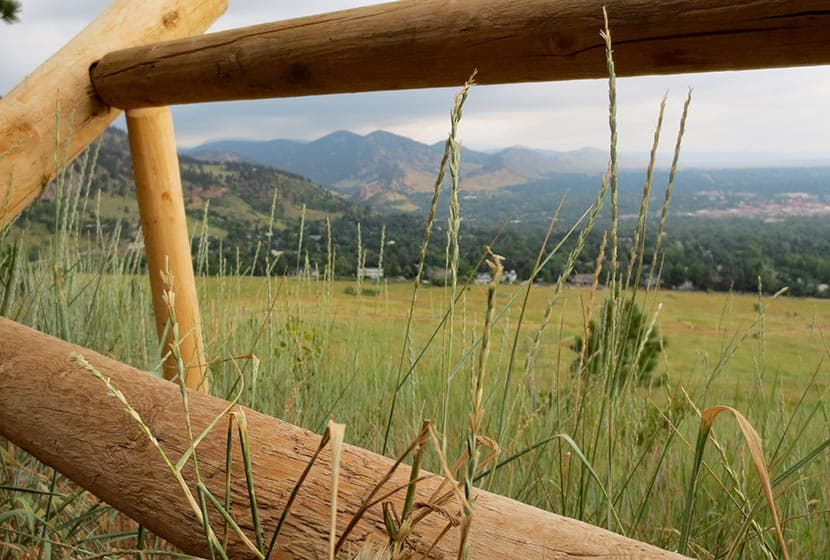
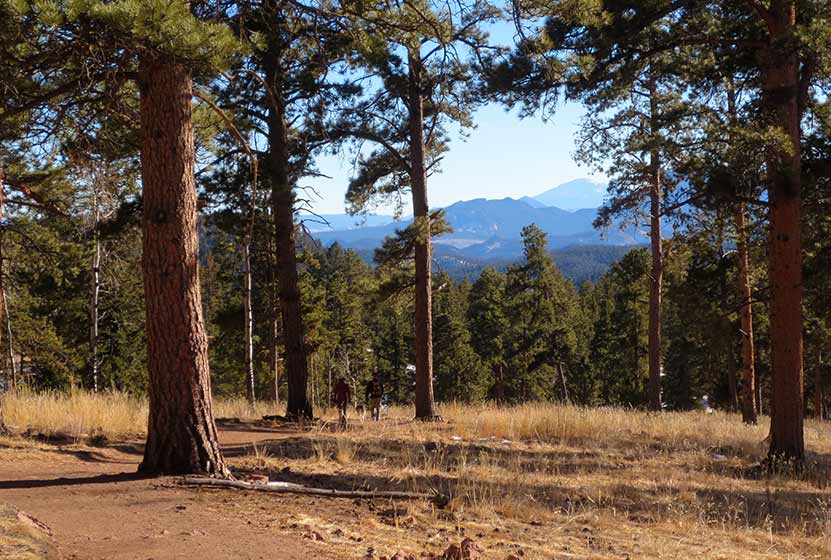
Rolling meadows stretch to spectacular views of Pikes Peak on this easy Colorado hike near Larkspur. The Greenland Trail takes you across the stunning grasslands near Larkspur, Colorado, a Douglas County Open Space that spreads across 3,600 acres of sun-drenched fields.The Greenland Open Space trailhead can be easily accessed from I-25. Check out the full trail profile below for detailed descriptions, trail map, and driving directions to this great hike along Colorado's Front Range.
Trail Snapshot: Greenland Open Space Trail Near Larkspur, Colorado
| Hike Distance | Up to 10 miles |
|---|---|
| Difficulty | Easy |
| Duration | Approx 1 to 3 hrs |
| Trail Type | Loop |
| Starting Elevation | 6908′ |
| Elevation Gain | +500′ |
| Seasons | All Year |
| Dogs | Allowed On Leash |
| Hike Trail Map | Click for a Map of Greenland Open Space Trail Near Larkspur, Colorado |
| Denver Drive Time | 46 min |
| Driving Directions to Greenland Open Space Trail Near Larkspur, Colorado | Click for Google Map |
| Town Nearest Hike | Larkspur, Colorado |
| Beauty | Grasslands, ponds and ponderosa pine forests |
| Activities | Bicycling, trail running, hiking |
| Video | Click For Video |
Greenland open space has one main trail, the Greenland Trail (appropriately named) that forms a 10 mile loop. However, your not stuck hiking the entire thing, you’ve got options. We’ll briefly profile three different ways you can hike the Greenland trail and customize it for you and your family (scroll past the video panorama for the three options).
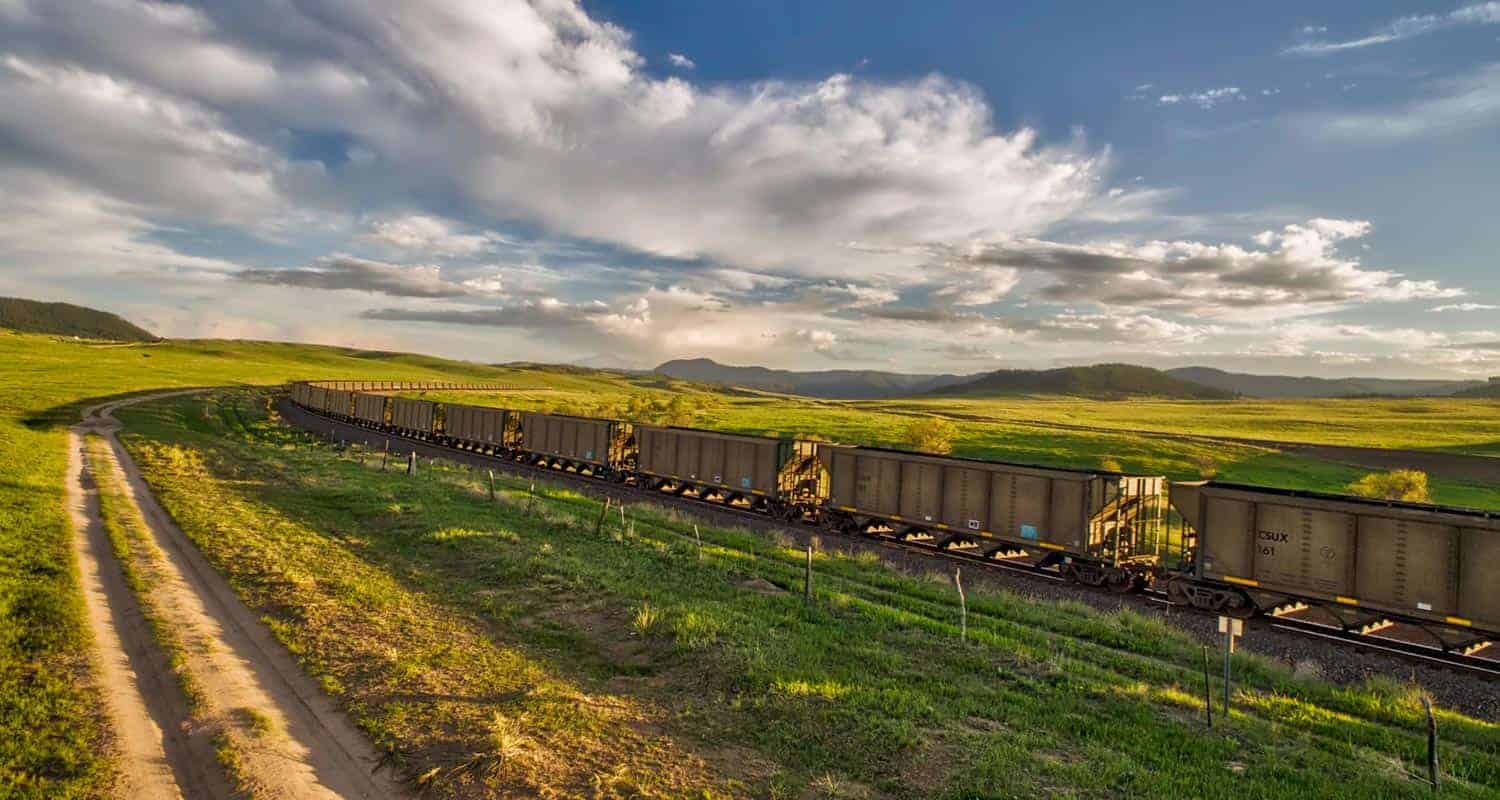
It’s a perfect place for horseback riding. In fact, when I-25 disappears from view, you may think you’ve time-traveled back to the early 1800‘s. You can leave your trailer on the parking area, but keep in mind that Greenland open space can get very crowded on the weekends. So, get there early to make sure you’ve got a place to park.
There is also a great 17 acre off-leash dog park just to the east of the trailhead. The open space area requires fido to be on a leash. Click here for more info on the Devon Theune off-leash dog park and for a list of the others in Douglas County.
Hike Options at Greenland Open Space
#1 - Greenland Trailhead to the Santa Fe Trailhead in Palmer Lake - 5.6 Miles One Way
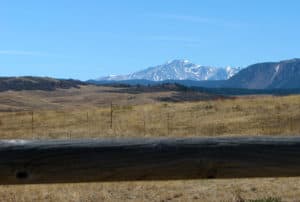
At the first fork in the trail, stay straight (right) on the Greenland Trail. You’ll pass a small pond and work your way through scrub oak and pines as the trail rises. At 3.5 miles you’ll see the option to turn left onto Kipps Loop. Instead of going left onto Kipps Loop, continue straight (South) on the trail. You’ll cross County Line road around 4.6 miles, then you’ll have one mile left until you arrive at the New Santa Fe Trailhead in Palmer Lake, Colorado. Out and back, this is an 11.2 mile trek across Greenland Open Space. The views of Pikes Peak and the neighboring Buttes of Spruce and Eagle Mountain mean a lot of beautiful scenery to soak in.
#2 - The Greenland Open Space Loop Trail - Approx. 10 Mile Loop
Our first tip on hiking Kipps loop is hike it counter-clockwise. This will give you a nice long and gradual two-mile descent as you are coming back into the trailhead. There’s only about 500’ of elevation gain on this hike, but your knees will be grateful at the end of the trip. Follow the same directions above, but when you get to the Kipps Loop option after 3.5 miles, take a left (East) onto the Kipps Loop of the Greenland Trail (your still officially on the Greenland Trail). The first 5 miles of the hike are uphill until you reach the high point which is at 7,400 feet. This is a great place to stop and enjoy the view. You’ll pass the gravesite of E. Kipp, and an unusual white rock formation along this eastern side of the loop. As we said before, the rest of your hike will be pretty much downhill from there back to the trailhead.
#3 - Just Explore - Approx. 1-3 Miles
Just because it’s a big loop doesn’t mean that you have to hike the entire thing. If you are hiking this as a sunset hike, you’ll likely want to keep it short. You can take either the eastern or western sides of the loop and hike until you are ready to turn around. Sunrises and sunsets are quite glorious in Greenland, and this is a great way to enjoy them.
Tips & Resources for Hiking Greenland Open Space Trail :
- TIP: There is no water on this trail so bring more than one bottle just in case. Don’t forget, dogs need plenty of water too!
- TIP: You are very exposed to lightning. Douglas County has some of the worst stats in the nation when it comes to lightning strikes, so really pay attention to the weather. Dark clouds moving over the edge of the foothills means that you should be headed back to the car.
- TIP: Bring the Sunscreen - you are also very exposed to the sun - no shade in Greenland. If you are hiking mid-day, then be sure to bring a hat and sunscreen.
- TIP: If you are snowshoeing or cross-country skiing, or even hiking in winter, be aware that drifts form along the Greenland Trail.
- TIP: There is a fantastic picnic area on the other side of the facade of the old Greenland general store.
- Trail Map for Greenland Open Space: Trail Map Link
- Photo: We would like to express our gratitude to Christopher Rosenberger for sharing such an amazing photograph of this hike to Greenland Open Space.
- Colorado Road Conditions: Colorado Road Conditions
- After the Hike: Charito’s House

Weather
Map & Driving Directions
Click for Driving Directions
First and Second Flatirons Hike in Boulder
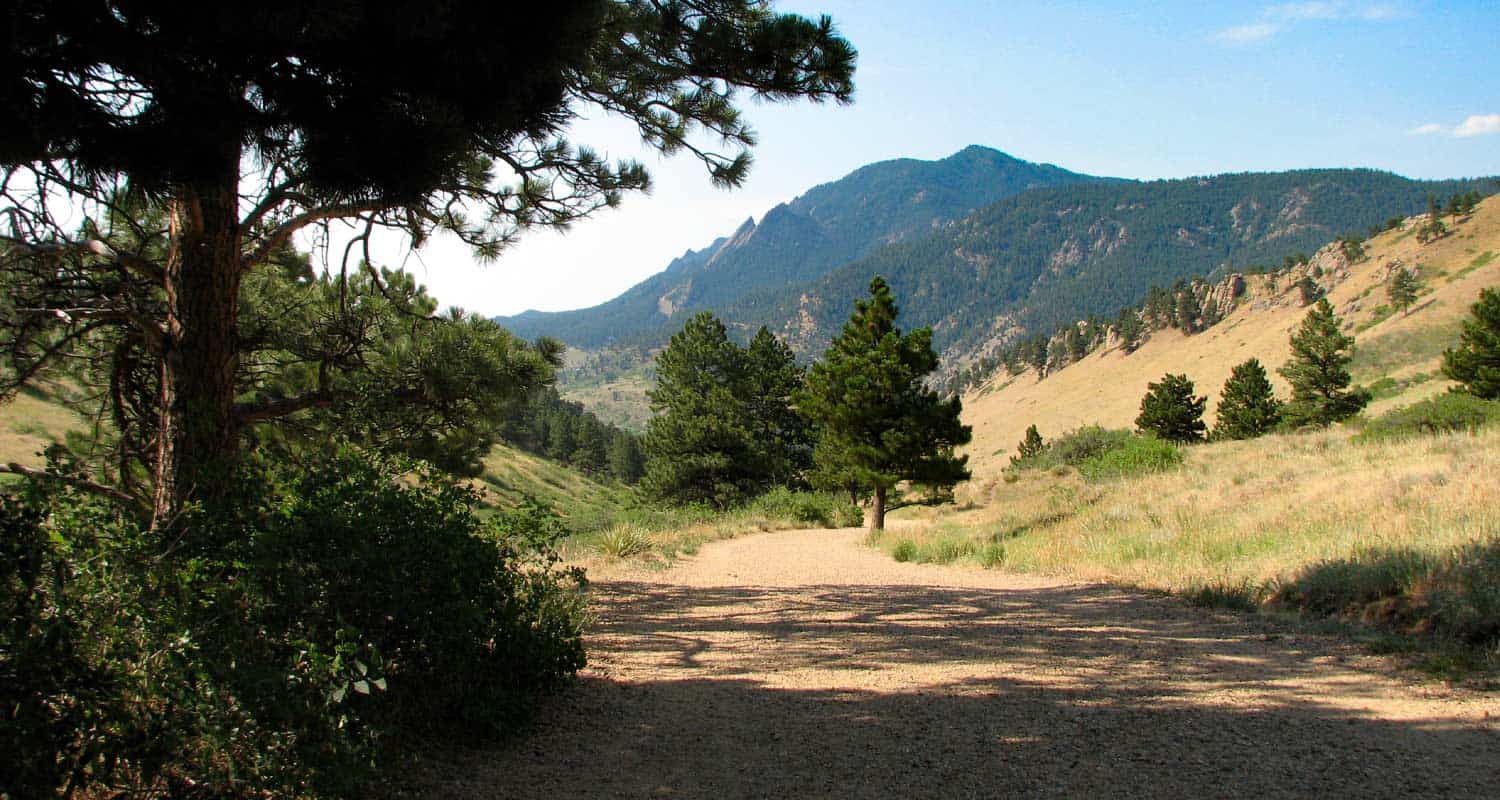
Hiking the Flatirons near Boulder, Colorado is a must. The trail draws you across an green meadow, then up through a notch between the First and Second Flatiron. You'll find the best part of this hike in the Flatirons at the end of the trail: some breathtaking and unmatched views of Colorado's Rocky Mountains. There's even more though. Explore the trail profile below to get links to the Flatirons map, hiking tips, trail details, and driving directions to the Chautauqua Park trailhead.
First and Second Flatiron Hike Trail Snapshot
| Hike Distance | 2.6 miles Round Trip |
|---|---|
| Difficulty | Moderate |
| Duration | Approx 2 hrs |
| Trail Type | Out and Back |
| Elevation Gain | +1400′ |
| Seasons | All Year |
| Dogs | Allowed on Leash |
| Hike Trail Map | Click for Map for Boulder Colorado's Flatirons Hike |
| Denver Drive Time | 45 min |
| Directions | Click for Google Map |
| Town Nearest Hike | Boulder, Colorado |
| Beauty | Views of Continental Divide, Expansive Meadows, Wildflowers, Flatirons Rock Formations, Cliffs |
| Activities | Hiking, Rock Climbing, Picnic Areas |
| Video | Click For Video |
The Flatirons are the most prominent feature of Boulder Colorado's landscape. They are beautiful to take in from a distance, but they are even better to explore. Here I'll give you a some options on how to make the most of the First and Second Flatiron trail, and some details on what to expect.
The Flatirons Trailheads at Chautauqua
#1 - Chautauqua Trailhead: You can start your hike from a couple different places. I chose Boulder's Chautauqua Park trailhead. The parking lot will fill up fast, by 8:30 on the weekend, but you can park along Baseline Road. The city of Boulder is doing some improvements on the parking area beginning September 3rd, 2013 and it looks like the lot will be closed. Here's a link for construction updates. But don't let that deter you, just park out on Baseline. The Chautauqua trailhead features an historic Ranger Cottage (link for hours of operation), and you'll find free trail maps for the flatirons in a box attached to the sign at the entrance to meadow.
#2 - Enchanted Mesa Trailhead: This is a lesser known trailhead (but probably well known by locals). Here's a google map to help you find it. From here, you can walk across to Chautauqua Park and pick up the Chatauqua Trail, or you can make a longer trip out of it by following the McClintock Upper Trail in. See the Chautauqua Area Hiking Map for details.
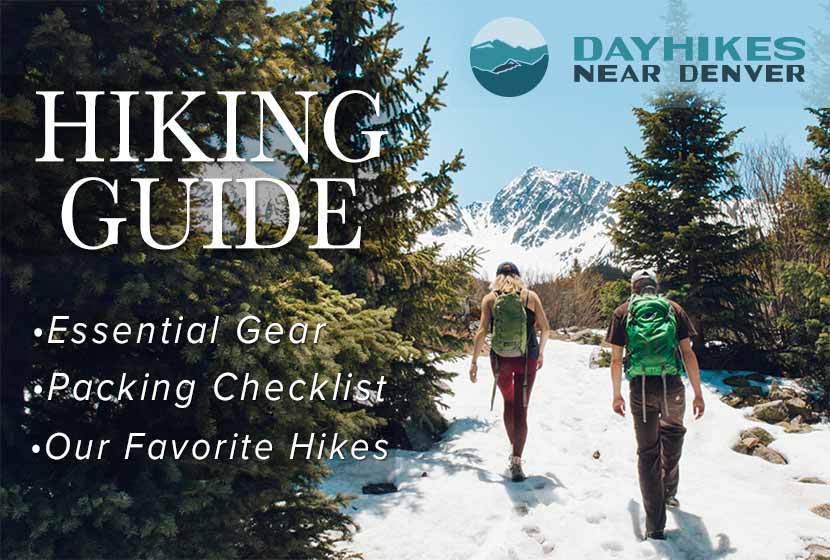
Get our Dayhikes Near Denver Hiking Guide. It includes our favorite hikes near Denver, packing lists, hiking food and snack ideas, and tips for hiking the Front Range of Colorado.
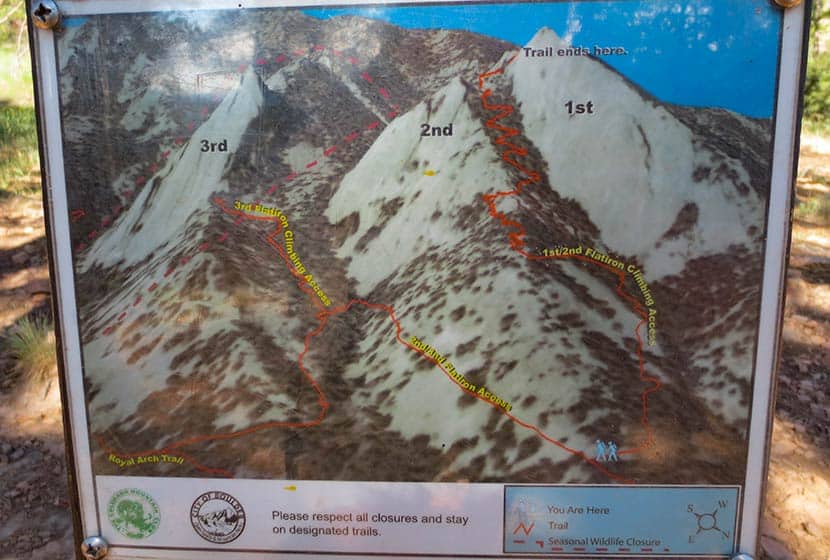
The Flatirons Panorama:
In the panorama video above, you'll see that the first flatiron is the most prominent. It's on the far right (North) and the second and third flatirons follow it to the south. There is an impressive canyon between the second and third flatirons that you'll get to peer down into towards the end of the trail. But let's start this hike profile at the trailhead.
The First Flatirons Trail Sequence
Here's the basic set of trails I'd recommend just because it's the most direct approach: Chautauqua Trail to First and Second Flatiron Trail. On the way back, I'd recommend the Bluebird Mesa trail; it takes you through a pine glade along the spine of a Bluebird Mesa, then gently drops back down to the Chautauqua trail near the trailhead. This makes for a roughly 2.5 mile hike.
Make it a loop. Deb Stanley details an interesting loop by taking a little known trail down the back side of the flatirons that hooks back into the Saddle Rock Trail. Looks like fun, but it also looks like it could be easy to get turned around in there if you're not careful. Check out the details on her loop trail profile if you're interested in taking this route.
First and Second Flatirons Hike Details
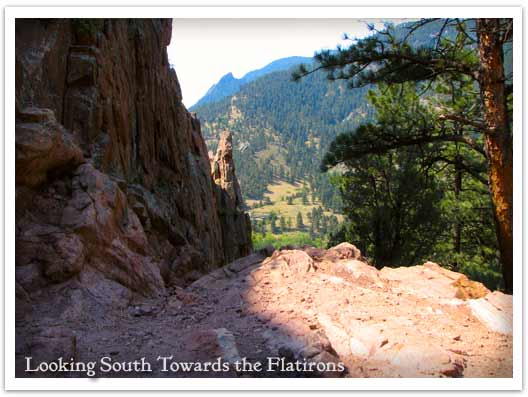
This photo gives you the best overview of the Flatirons one and two trail. Basically, once you break out of the meadow and start on the 1st and 2nd Flatirons trail, your going to ride the ridge of the 2nd flatiron up to a notch between the 1st and 2nd Flatirons. The trail continues behind the flatirons, then bends north and takes you up into a canopy formed by the back of the first flatiron.
 Starting at the Chautauqua Trail, you'll hike through the spectacular meadows at the base of the flatirons. If it's after a rain, be prepared for a lot of rain along what is essentially a fire road. The sides of the trail here have a good bit of poison ivy that tries to reach out and touch your calves, so keep an eye out for it. What I found most interesting about this section of the trail was the diversity of both plants and trees along the trail. There is a greater variety of deciduous trees and shrubs that I've seen anywhere on the front range.
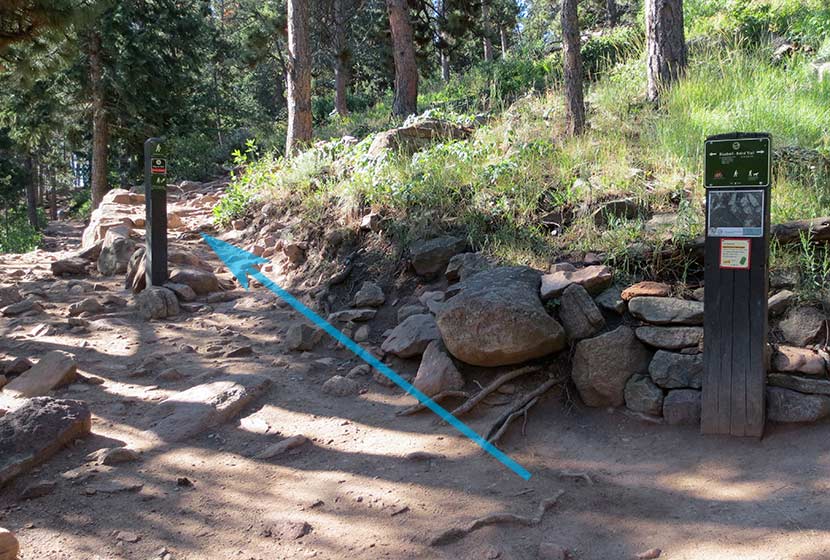
After taking the Bluebird-Baird Trail (left), you'll encounter a fork in the trail. Follow the signage towards the 1st and 2nd Flatirons trail (see photo below). Soon the trail will fork again and you'll want to take the 1st and 2nd Flatirons trail. The signage is really good in the Chautauqua/Flatirons area.
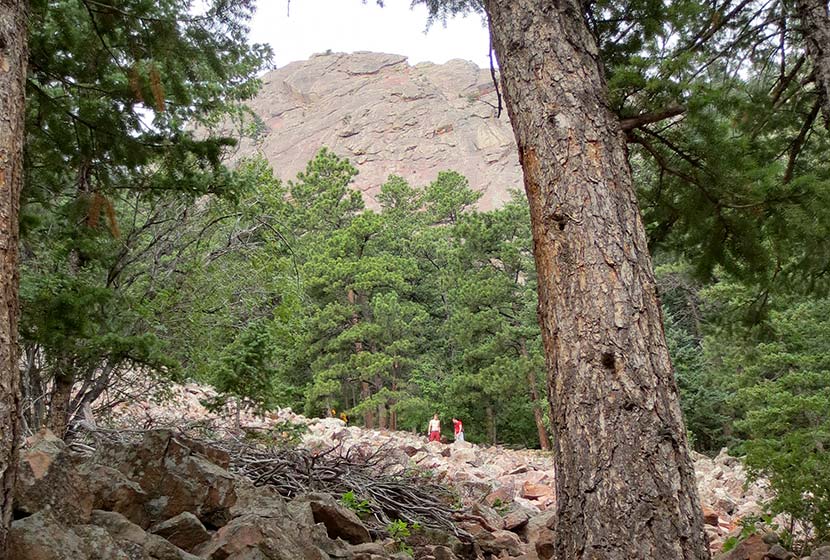
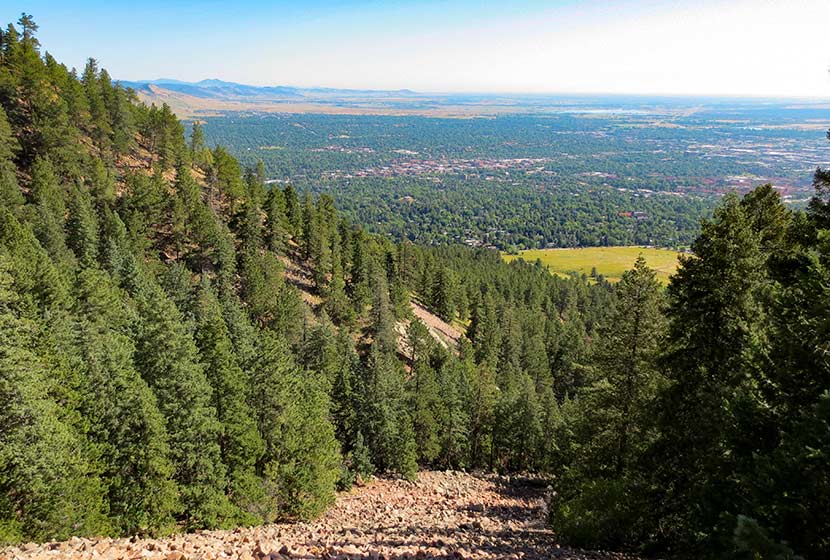
Emerging from the woods, you'll hike up through a long talus field, but the trail is well-constructed through this gigantic pile of rock. Be sure to look back at the views that open to Boulder.
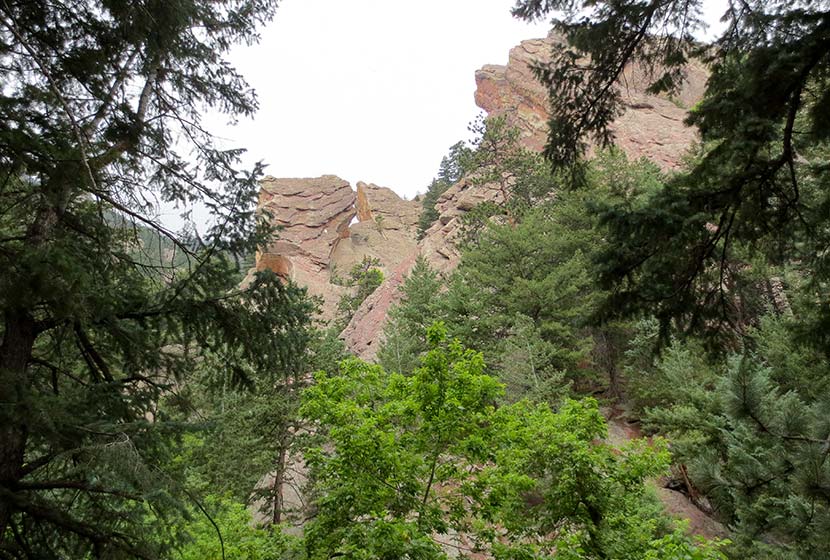
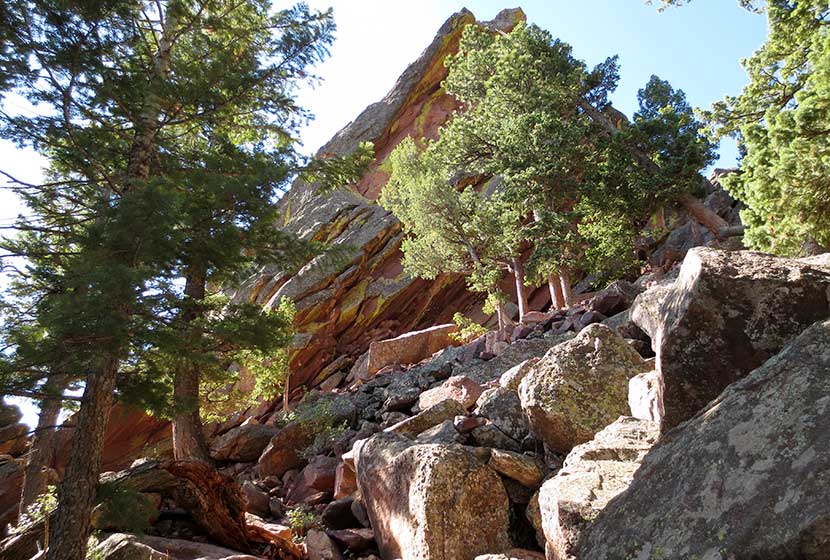
 The trail goes in and out of the shade, over a lot of rock, and eventually to a short scramble over some larger rock to regain the trail. The next landmark you'll reach is the notch between the first and second flatiron; you'll see the angled outcrop of the second flatiron just below the notch (photo below). This is a great place to stop and relax.
 The notch between the first and second flatiron offers more views of Boulder and a birds-eye view of the CU campus, it's terracotta roofs against the green of the city lawns.
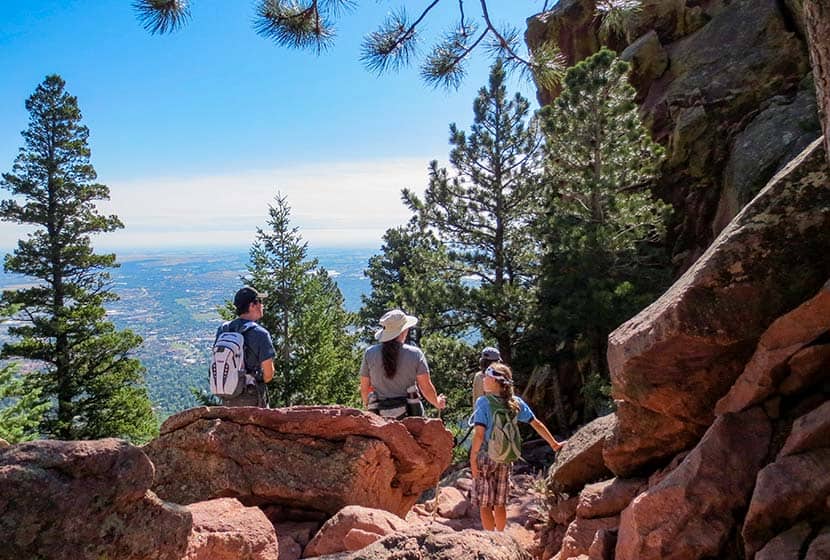
But the better place to take a break is just behind the notch. Here, you'll be able to look down into canyon that runs between flatiron two and three, and you get a great view of the imposing profile of flatiron three.
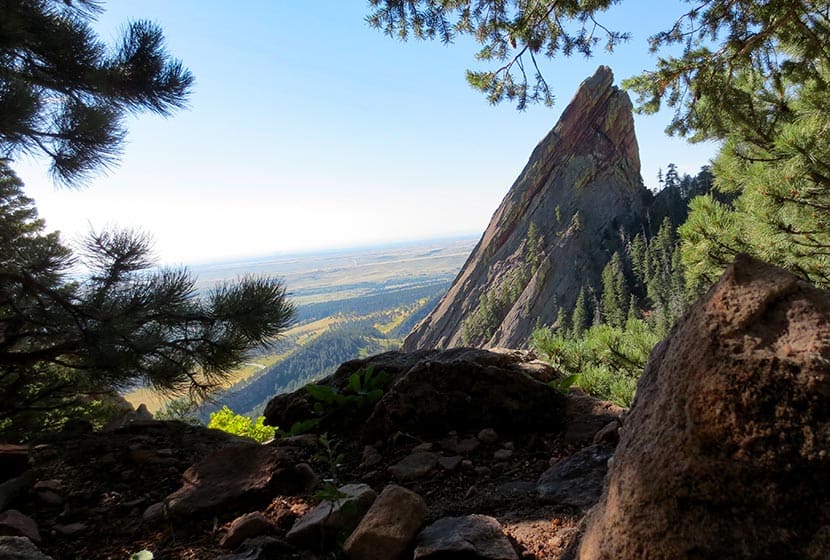 Then take the trail up a few switchbacks as it bends north. You'll hit a saddle but the trail will continue to bend to the right, until you find yourself in the shade of the massive top of the first flatiron. Back here you'll find all kinds of rock shelves and nooks to sit and take in some of fantastic views of Colorado's Rocky Mountains to the West.
 Tips & Resources for Hiking the First and Second Flatirons:
- TIP: This hike gets really crowded, so start early (before 8:30 AM).
- TIP: Take a lunch or breakfast and coffee with you. The first flatiron nooks are perfect for just sitting and enjoying a picnic.
- TIP: Weather can come up fast on the flatirons in the summer. Just be aware that it can change fast and bring a rain jacket.
- TIP: Dogs are allowed if they are leashed. Boulder does have a special tag you can get for your dog to allow it off leash in the park. It's called the Voice and Sight Control tag and you can get more information here.
- After the Hike: Ozo Coffee Roasters in Boulder
- Trail Map for Chautauqua Park: Trail Map Link
- Colorado Road Conditions: Colorado Road Conditions
Weather
Driving Directions to First Flatiron Trailhead
Click for Driving Directions
Mt. Bierstadt Trail on Guanella Pass
Summit a Fourteener, Mount Bierstadt, or go for an easy hike with your family high in Colorado's Rocky Mountains. In short, you've got options on this trail near the top of Guanella Pass. You can choose an easy stroll or a difficult hike. Explore the trail snapshot and profile below for hiking, camping, and trail map info.
Trail Snapshot: Mr. Bierstadt Hike at Guanella Pass
| Hike Distance | 1 to 7 miles Round Trip |
|---|---|
| Difficulty | Easy to Difficult |
| Duration | 1 to 6 hours |
| Trail Type | Out and Back |
| Elevation Gain | Up to 2400' |
| Seasons | Best Late Spring to Fall |
| Dogs | Allowed on Leash (avoid b/c of fragile ecosystem) |
| Hike Trail Map | Click for a Trail Map |
| Denver Drive Time | 1 hr 30 min |
| Directions | Click for Google Map |
| Town Nearest Hike | Georgetown, Colorado |
| Beauty | 14ers, high country tundra, peak top views, lakes |
| Activities | Hiking, camping, summit Mt. Bierstadt, picnic |
You've got options with the Mount Bierstadt trail. First, we'll profile the hike to the summit. Below that, you'll find some information on how to just explore the area with your family or friends, making this an easy hike high in the Colorado mountain.
Climb Your First Colorado Fourteener
Mt. Bierstadt is popular, not just because it's so close to Denver, but it's also one of the easier and more accessible of Colorado's 54 fourteen thousand foot peaks. The Mount Bierstadt trail can be accessed on the south side of Guanella Pass from the Mt Bierstadt trailhead (click here for map and directions from Denver). It's important to be aware that the weather can change in an instant in the mountains, and that snow can come in fast even in the late Spring and early Fall. As with any Day Hike, be sure to (at least) pack the 10 Essentials.
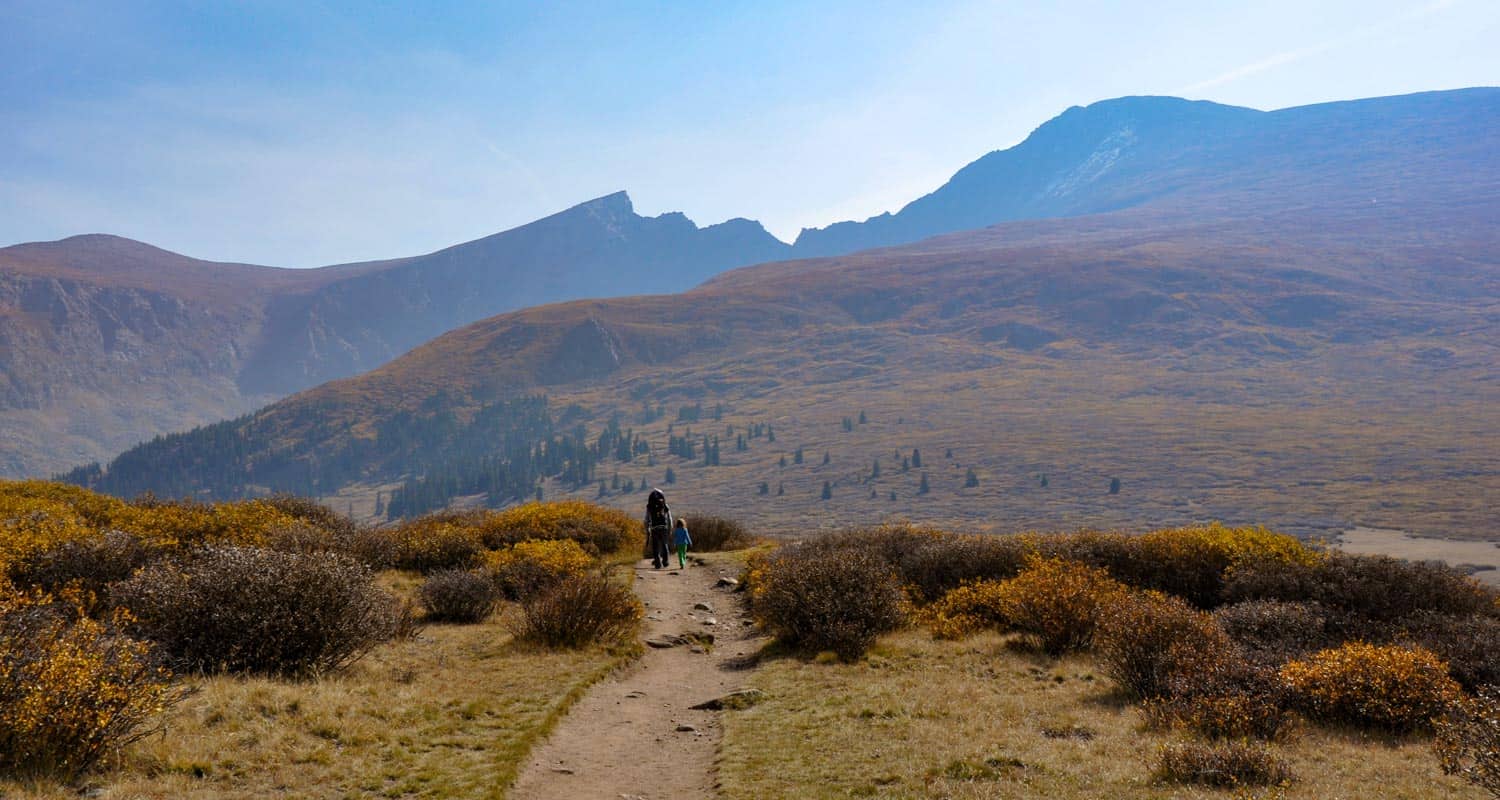
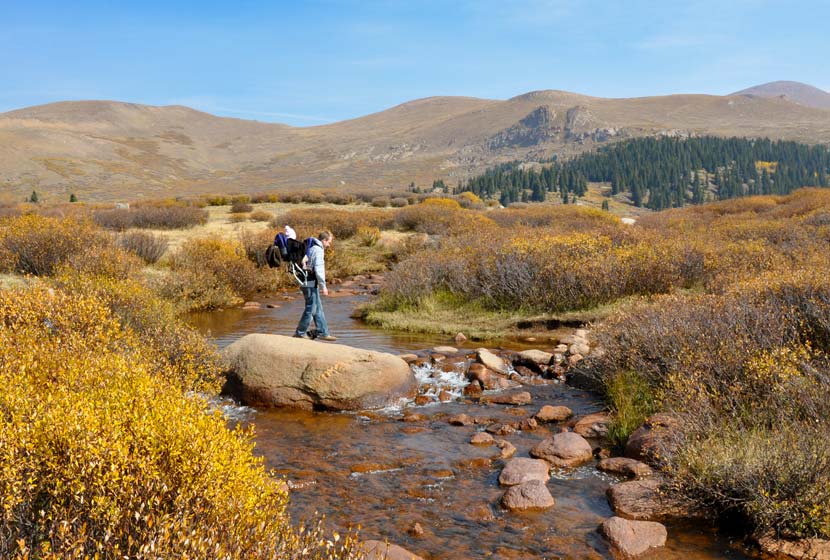
The Bierstadt trail is well marked; you'll follow signs down to a boardwalk, then to Scott Gomer Creek. After crossing the creek, the trail will become more steep, and the steepness will increase as you make your way to the summit. The trail winds gently through the tundra until you are about three miles in when the green and brown gives way to rock. Follow the west ridge up to the summit of Mount Bierstadt. For a detailed trace and profile of the Mt.Bierstadt route, see this Route #1 Bierstadt profile on 14ers.com.
Make it an Easy Family Hike
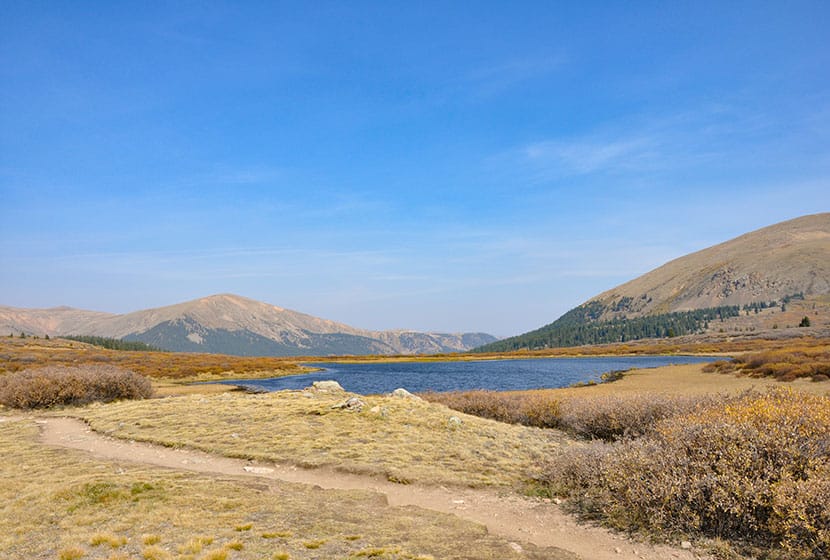
Hiking Colorado's Bierstadt trail doesn't mean that you have to summit. In fact, the first mile of trail is really tame. It takes you over a creek, through willows, and by two small high mountain lakes. If you want to gain additional views, you can add another half mile of moderate hiking that will take you above the valley floor.
We took our 4 1/2 year old, 2 year old with us in the Fall and they loved it. Dog's on the Mount Bierstadt trail must be kept on a leash and need to be kept 100' from water sources (in short, they aren't allowed to play in the lakes and streams). In fact, because we'd recommend that you leave Fido at home because of the fragile alpine tundra ecosystem. In August of 2012, Missy, a German Shepherd, was rescued after being stranded on the peak for eight days. You can read more about her ordeal and the rescue in this Denver Post article.
Camping Near the Mt. Bierstadt Trail
There are a lot of campground sites along both sides of Guanella pass that are managed by the forest service (fee required) and dispersed camping is allowed on US Forest and wilderness areas. Below you'll find a few important links to camping information for the Mt. Bierstadt and Guanella Pass Area.
- Mt. Evans Wilderness Hiking and Camping Regulations.
- Camping Information and Regulations for the US Forest Service
- Guanella Pass Campground
- Burning Bear Campground Near Mt. Bierstadt Trail: Jennifer Mason does a nice job profiling both the Burning Bear and Whiteside campgrounds on her site.(note: Whiteside has been permanently closed)
- For More Campgrounds along Guanella Pass, use the Recreation.gov site and do a search for Guanella Pass Road
Tips & Resources for Hiking the Mt. Bierstadt Trail:
- TIP: Go Early; the parking lot at the Mt. Bierstadt Trailhead fills fast.
- TIP: If you've never summited a 14er before, be sure to read this great article by Lindsey Koehler of 5280 Magazine.
- TIP: If you plan to summit Mount Bierstadt, start early so that you can be back at the trailhead before the almost daily summer thunderstorms role in. I'd recommend starting around 6am, so that you're back at your car around 11am.
- TIP: Hiking times vary. Those who frequently make the assault on Mt. Bierstadt (even trail run it), can make it up and back in 3 hours. The average is 5hrs, but adjust for experience and how good of shape you're in
- After the Hike: Tommy Knocker Brewery
- TIP: The weather will be cooler at the trailhead than the posted Georgetown, Colorado temperature below. It will be even cooler at the summit of Mt. Beirstadt.
- Trail Map for Guanella Pass: Trail Map Link
- Colorado Road Conditions: Colorado Road Conditions
Weather
Map & Driving Directions to Trailhead for Mt. Bierstadt
Click for Driving Directions
Cascades Near Berthoud Falls
Looking for a place to stop and stretch your legs on your way to Winter Park? These cascades along US 40 will refresh your spirit and are immediately accessible right off the road.There are some unmaintained trails to explore, so check out the full profile below to discover more.
Trail Snapshot: Cascades Near Berthoud Falls
| Hike Distance | 0.1 mile |
|---|---|
| Difficulty | Easy |
| Duration | 5 min |
| Trail Type | Out and Back |
| Seasons | Summer & Fall |
| Dogs | Allowed on Leash |
| Denver Drive Time | 1 hr |
| Directions | Click for Google Map |
| Town Nearest Hike | Berthoud Falls, Colorado |
| Beauty | Cascades and Mountain Views |
| Activities | Falls Viewing Area |
| Video | Click For Video |
Our family drives Highway 40 over Berthoud pass about once a month, and this little side stop is a great place to stretch your legs and listen to the water gushing down the mountainside. This beautiful cascade and stone bridge are located on the second switchback curve on highway 40 as you head towards Winter Park from Denver (south side of Berthoud pass). It's not a formal parking area (I think it's used for snow removal), but it can hold several cars after the snow has melted away in late May/early June. A small hiking trail can be discerned on the right side of the Hoop Creek, but it's not maintained. I've not hiked it, so I'm not sure how far it goes.
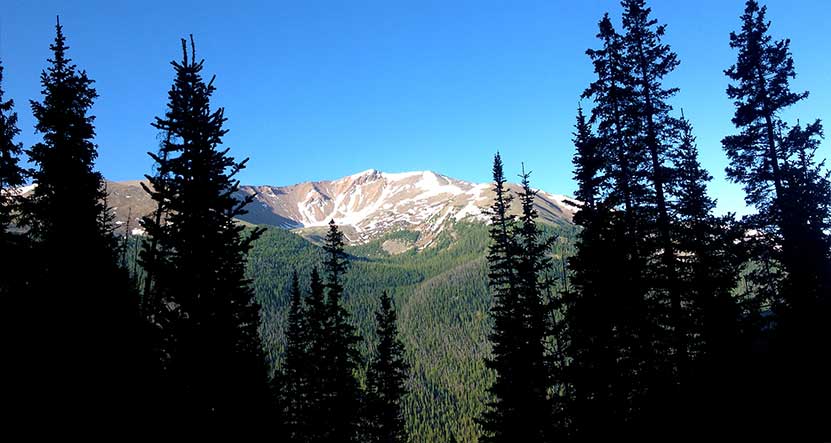
There are some great views looking South to Engelmann Peak and Red Mountain. There is no picnic area, and the ground is soaked in early Summer, but my guess is that you could bring a blanket in late summer and Fall and enjoy a picnic lunch by the falls.
It's unclear if this falls is where the small settlement of Berthoud Falls got its name. My guess is that this is not Berthoud Falls. Here are my two guesses on the correct location. Click here for the Google map pin locations.
1 - Where a creek runs about 1200' feet down into the settlement of Berthoud Falls. This is not a sheer drop, but it is quite steep terrain. The proximity to the settlement makes this the best choice.
2 - Where Hoop Creek and another creek meet then drop into a very steep ravine. This is a more sheer drop and is located about a mile east of the settlement of Berthoud Falls. Because it's so far from the town, it's not likely that this is the namesake However, because of the steep terrain, it may contain a legitimate waterfall, or some amazing cascades.
I'm hoping to explore these more sometime and will plan to update this post when we have more information.
If you know the history of the area or have additional information about the Berthoud Falls Waterfall, I'd appreciate it if you left a comment in the trail reports below.
Tips & Resources for Viewing the Cascades Near Berthoud Falls:
- Be Safe: The pull-off can sneak up with you and there can be a lot of traffic on the weekends. Be alert for cars.
- Picnic Areas: There are some great picnic areas at Jones Pass, bottom of US 40 near the settlement of Berthoud Falls, and along Clear Creek just east of Berthoud Falls.
- Colorado Road Conditions: Colorado Road Conditions
- After the Hike: Rocky Mountain Roastery in Winter Park
Weather
Map & Driving Directions
Click for Driving Directions
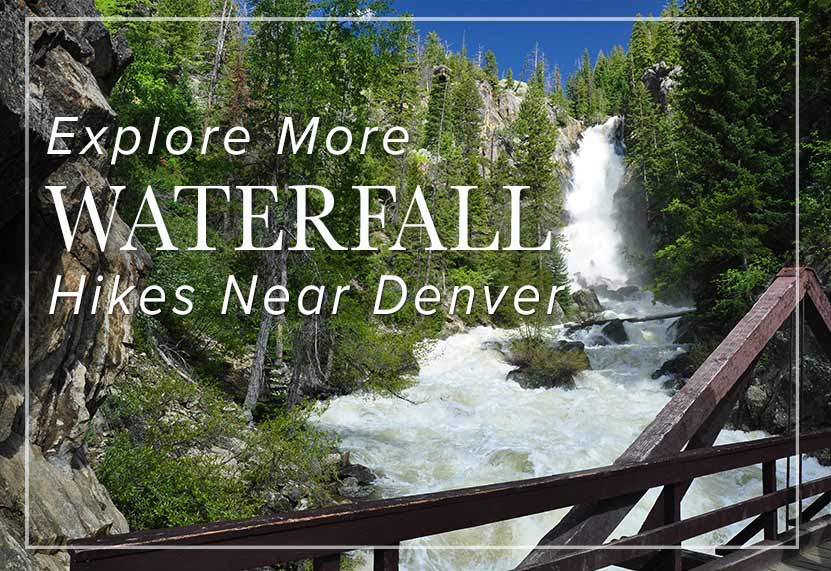
Looking for more waterfalls near Denver? Explore our more than 50 Colorado Waterfall Hikes, our favorite Waterfall Hikes in Rocky Mountain National Park, or 7 Waterfalls within One Hour of Denver.
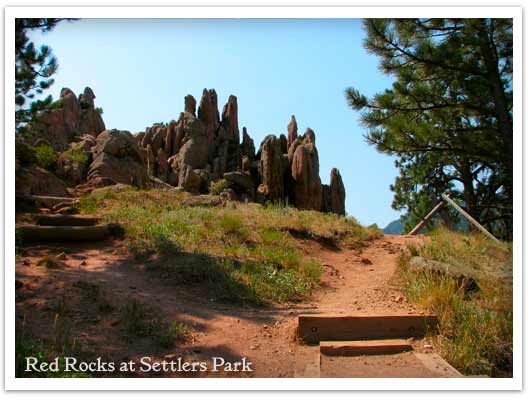
Red Rocks Trail at Settlers Park in Boulder
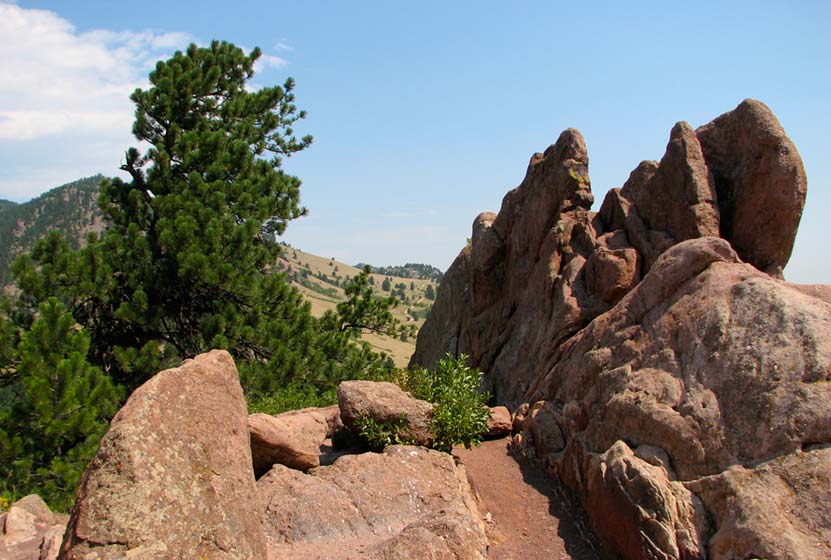
A giant underground sandstone formation runs from Ft. Collins all the way through Garden of the Gods in Colorado Springs. Here at Red Rocks Trail in Boulder, the rock juts out of the ground to transform the landscape. It makes for an inspiring short hike. Explore the hike snapshot and detailed trail profile below to get a feel for this great hike near Boulder.
Trail Snapshot: Red Rocks Trail at Settlers Park
| Hike Distance | 1 mile Loop + 0.4 mile spur |
|---|---|
| Difficulty | Easy |
| Duration | 45 min |
| Trail Type | Loop with Spur |
| Elevation Gain | +300′ |
| Seasons | All Year |
| Dogs | Allowed on Leash |
| Hike Trail Map | Click for a Map of Red Rocks & Anemone Trail |
| Denver Drive Time | 45 min |
| Directions | Click for Google Map |
| Town Nearest Hike | Boulder, Colorado |
| Beauty | Red Rock Formations |
| Activities | Picnic area, no bikes, hiking trails, rock climbing |
The trails of Red Rocks at Settlers Park in Boulder interconnect to form more of a labyrinth than a straightforward hike. But there is a way around all that---literally. Pull up the Boulder Open Space & Parks Map and follow the outer perimeter trail to form an approximately 1 mile loop around the sandstone red rock formations that jut out of the ground in the center of the park.
You can add an additional .8 mile to your hike by taking the Anemone trail to the west, rising another 400ft where it tops out on a hill to give you views of the City of Boulder, the Red Rocks Park, and the Colorado Front Range. Even with the Anemone trail spur, it's a short hike, so you might want to add one of the Mt. Sanitas hiking trail options to your adventure. The Mt. Sanitas trail is just North of the Centennial Trailhead.
Tips & Resources for Hiking the Red Rocks Trail at Settlers Park :
- This trail is not to be confused with Red Rocks in Denver. If you are interested in hiking at Red Rocks in Denver, you can access a trail profile for the Trading Post Trail here.
- Getting There: You can access Boulder's Red Rocks Trails from either the Centennial Trailhead or Settlers Park Trailhead parking areas.
- For information on rock climbing the rock formations in Settlers Park see the Mountain Project's page.
- Trail Map for Settlers Park Boulder: Trail Map Link
- Colorado Road Conditions: Colorado Road Conditions
- After the Hike: Ozo Coffee
Weather
Map & Driving Directions
Click for Driving Directions
Devils Head Fire Lookout Hike
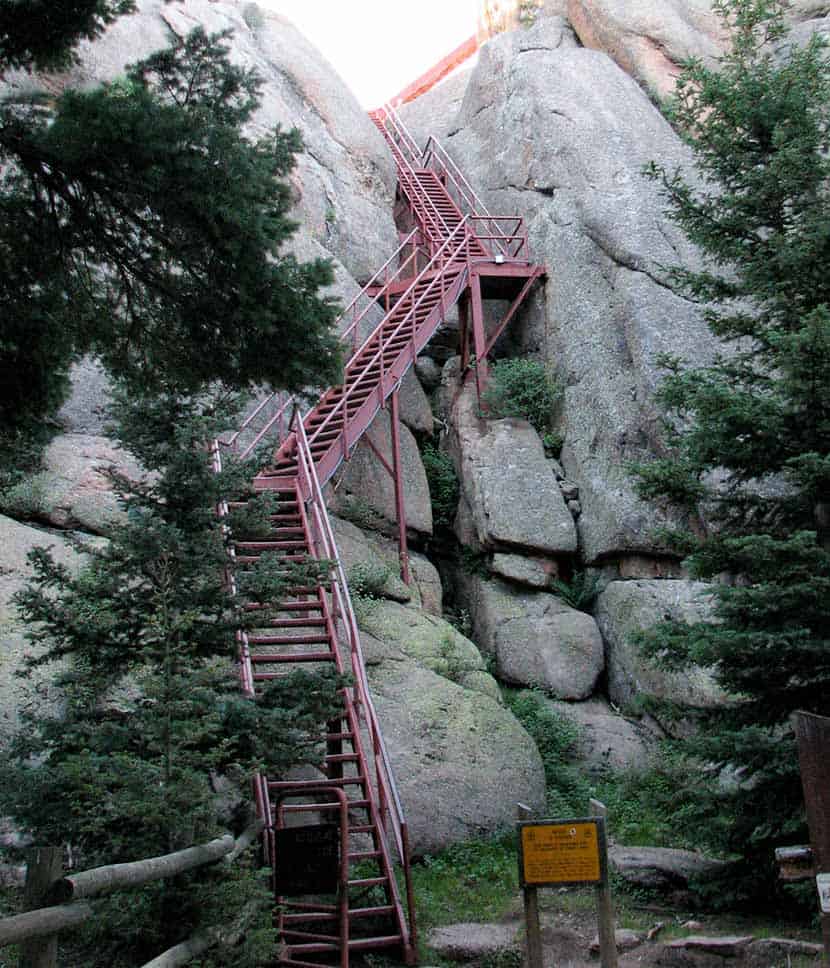
If you've not hiked to the top of the Devils head trail and climbed the 143 steps to the fire lookout, then I think you're not allowed to have one of those Colorado Native bumper stickers. The Devils Head trail is the classic Colorado Front Range hike and is just about an hour from the center of Denver. The views from the top offer a 360-degree panorama of mountains layered upon mountains. Scroll down to explore the trail profile and photos of one of the best hikes on the Colorado Front Range.
The Devil's Head Area is now open again. for the most current information, see the USFS Devils Head Page.
Devil's Head Lookout Trail Snapshot
| Hike Distance | 2.8 Miles Round Trip |
|---|---|
| Difficulty | Moderate |
| Duration | 2hr + |
| Trail Type | Out and Back |
| Elevation Gain | +940′ |
| Seasons | Mid-May to Mid-September |
| Dogs | Allowed on Leash |
| Hike Trail Map | Click Here For NG Map Store |
| Denver Drive Time | 1 hr 15 min |
| Directions | Click for Google Map |
| Town Nearest Hike | Sedalia, Colorado |
| Beauty | Front Range Views, Rock Formations, 360 views, sunrise |
| Activities | Fire Tower Lookout, Picnic Area, Camping Nearby, Hiking Trails |
| Video | Click For Video |
Parking & Trailhead for Devils Head Hike
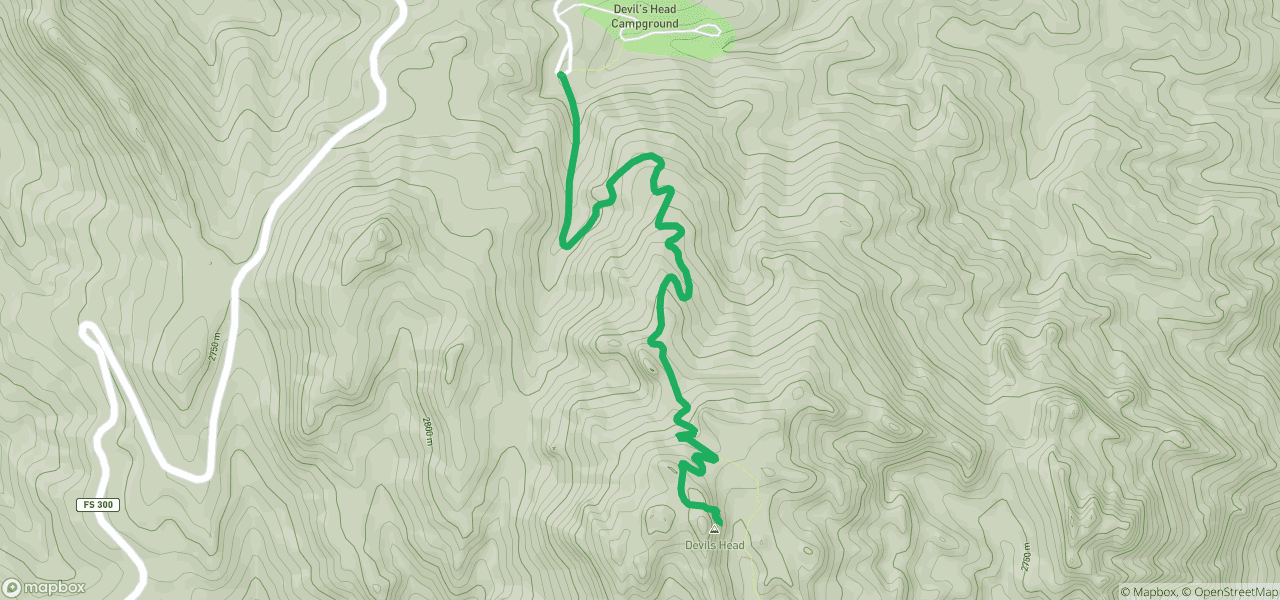
Devils Head Hike Map
The Hike: Devils Head
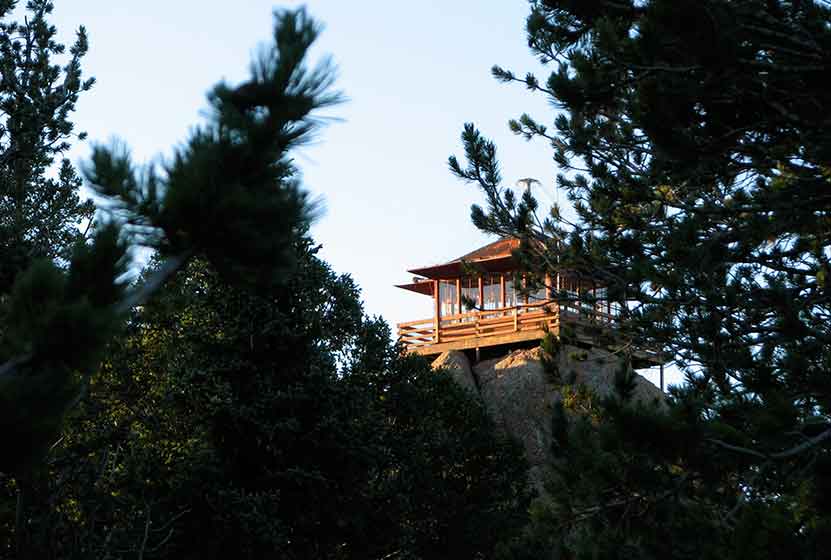
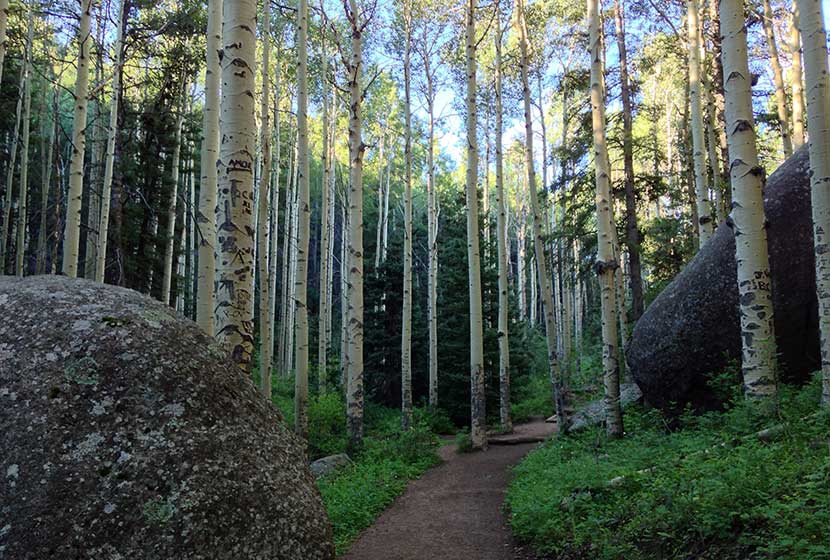
This Colorado hike begins in a glade of tall aspens, some of the biggest we've seen this close to Denver. Then the trail meanders through some unusual rock formations until the trail opens into a high meadow where a quaint ranger cabin sits nestled in the trees. Up ahead and to your left, you'll see the red steps that lead to the Devil's Head fire lookout.
The Devil's Head fire lookout is the only operational fire lookout in the state of Colorado and is over 100 years old, though the current structure was built in 1951. If you are a history buff and enjoy historical photos, check out these this site: Firelookout.org
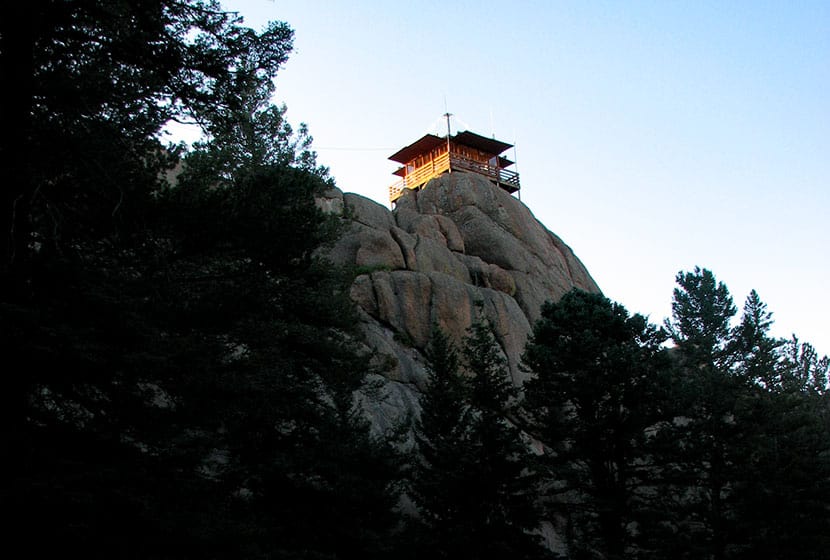
Bill Ellis and his wife have been operating the lookout for over 25 years, and many visitors remark that their discussions with Bill are the highlight of their trip. The Denver Post did a great piece on the Ellises and the fire lookout that is worth reading -
link to the Devils Head Article by the Denver Post.
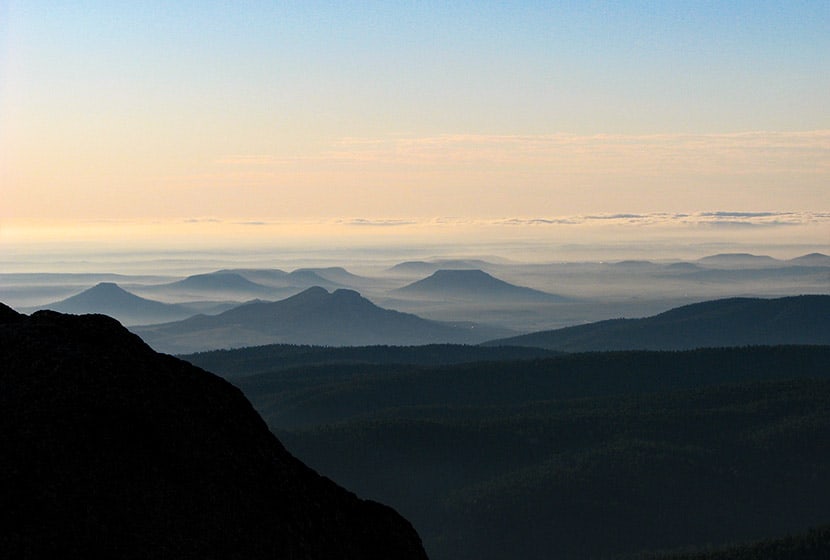
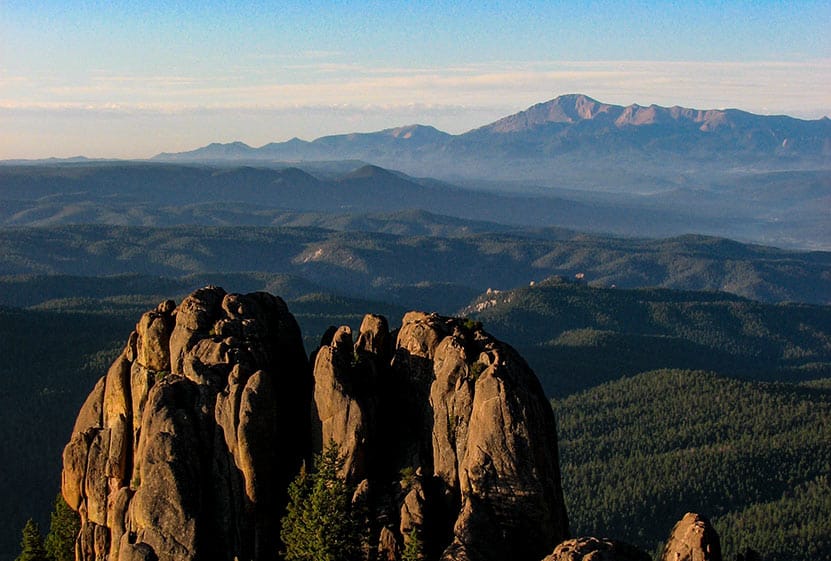
The views from Devil's head reveal features of Colorado's Front Range that are rarely discovered. My favorite is looking North down the spine of the foothills where red tinted rock formations push up from the peaks and resemble a chain of castles high above the forest.
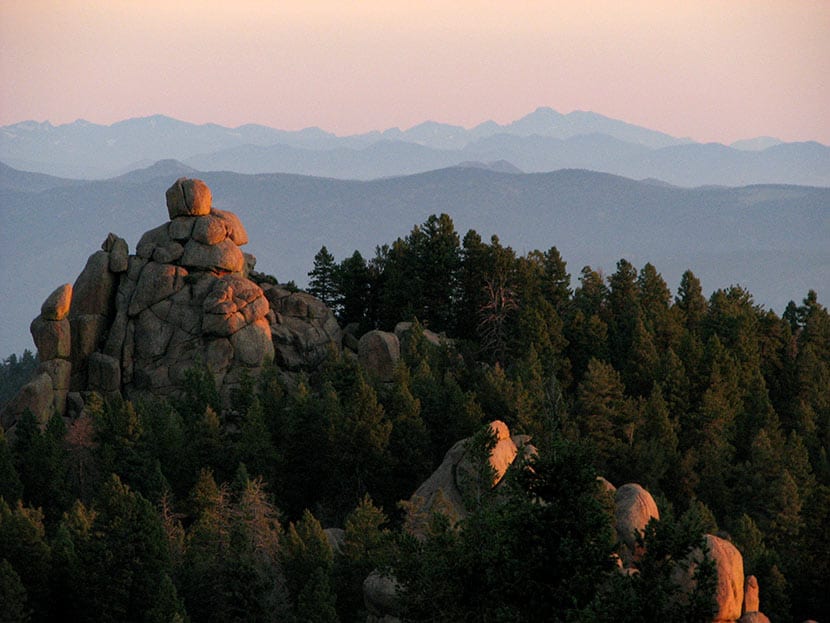
Pikes Peak dominates the landscape to the South. And the Western view from Devil's Head is riddled with the red mountains of the Tarryalls, Kenoshas, and Platte range. And there are few signs of civilization, at least not in the early morning hours when I took these photos.
Tips & Resources for Hiking Devils Head
- TIP: Go Early: Devil's Head is one of the most popular hikes on the front range. If you are hiking this on the weekend, try to get to the trailhead by 8am if you want a less crowded experience hiking Devils Head.
- TIP: Go Even Earlier for photography: The rising sun lights up the front range, and you can see hundreds of miles of mountains from the tower on Devil's Head.
- Camping: There is a USFS campground near the trailhead parking area. Some friends of ours have camped here and said it was a good experience. See the USFS Devils Head Campground site for details on camping and parking fees.
- TIP: Rough Drive: The 10 miles of Rampart Range Road can be dusty and a real washboard experience. 2WD is sufficient and this road is kept in pretty good condition, but be prepared for a less than comfortable drive on your way to Devils Head.
- TIP: Rampart Range Road is closed December 1st to about April 1st each year. You can call the South Platte Ranger District at 303.275.5610 to get the current status of the road.
- TIP: Be Lightning Aware: The front range is notorious for its lightning strikes and this is the highest point. If weather is looking bad, play it safe.
- Colorado Road Conditions: Colorado Road Conditions
- After the Hike: After the Hike: Obrien's Cafe in Sedalia
- Trail Map for Front Range USFS: Trail Map Link
Weather
Map & Driving Directions
Click for Driving Directions
Looking for more waterfalls near Denver? Explore our more than 50 Colorado Waterfall Hikes, our favorite Waterfall Hikes in Rocky Mountain National Park, or 7 Waterfalls within One Hour of Denver.
Elk Falls - New Waterfall Near Denver
Elk Falls in Colorado's new Staunton State Park opened to the public in 2013. This highest waterfall near Denver had been unknown to most, and inaccessible, except to a few. Now it's an adventure waiting for able hikers! If you are a fan of waterfall hikes and you live near Denver, you'll know that it's kind of slim pickings; most of the best waterfalls in Colorado require driving beyond the Front Range, or into Rocky Mountain National Park. Elk Falls, is just 50 minutes from Denver! The 3700 acre Staunton State Park offers incredible hiking, rock climbing, and beautiful rock formations - all making for some great Colorado day hikes. Explore the full Elk Falls hike profile below for trail map, driving directions, and many of the details you need to enjoy this adventure in Staunton State Park.
Trail Snapshot: Elk Falls Overlook Hike at Staunton State Park
| Hike Distance | 10.8 miles Round Trip |
|---|---|
| Difficulty | Moderate to Difficult |
| Duration | Approx 4-6 hr |
| Trail Type | Out and Back |
| Starting Elevation | 8200′ |
| Elevation Gain | +900′ |
| Seasons | All Year |
| Dogs | Allowed On Leash |
| Hike Trail Map | Click for a Map of Staunton State Park |
| Denver Drive Time | 45 min |
| Driving Directions to Staunton State Park | Click for Google Map |
| Town Nearest Hike | Conifer, Colorado |
| Beauty | Waterfall, Rock Formations, Meadows, Pine Forest, Ponds, Hummingbirds, and Deer |
| Activities | Hiking, Photography, Mountain Biking (on many trails) |
| Fee | Entrance Fee or State Parks Pass Required |
Parking & Trailhead Information for Elk Falls in Staunton State Park
The parking and trailhead area are immediately noticeable after the park entrance. On weekends, things can really back up at the entrance due to the number of visitors and those who need to purchase a parks pass. If you don't have your yearly parks pass, you can pick one up at a local Kings Soopers grocery store at the customer service area. Because your hike will begin with the Staunton Ranch Trail, the main artery of Staunton State Park, just look for the main trail which heads to the center of the park. If you've parked at the lower parking area, you'll have two Trailheads before you, the Staunton Ranch and the Mason Creek trailheads. Be sure to choose the Staunton Ranch Trail. The Elk Falls overlook can be reached by starting on the Mason Creek Trail, but its a significantly longer and more difficult 17 mile loop hike. Maps are available at the entrance and highly recommended for this hike.
The Hike: Elk Falls in Staunton State Park
The Staunton Ranch Trail leads hikers into the heart of Staunton State Park, through stands of ponderosa pine and past the Staunton Rocks climbing area. After 3.3 miles, the trail ends at a trail intersection with three new trails. The most direct route to the Elk Falls overlook is to choose the Bugling Elk trail which follows a small creek for 1.1 miles until it arrives at Elk Falls Pond, a good place to stop and Fish.
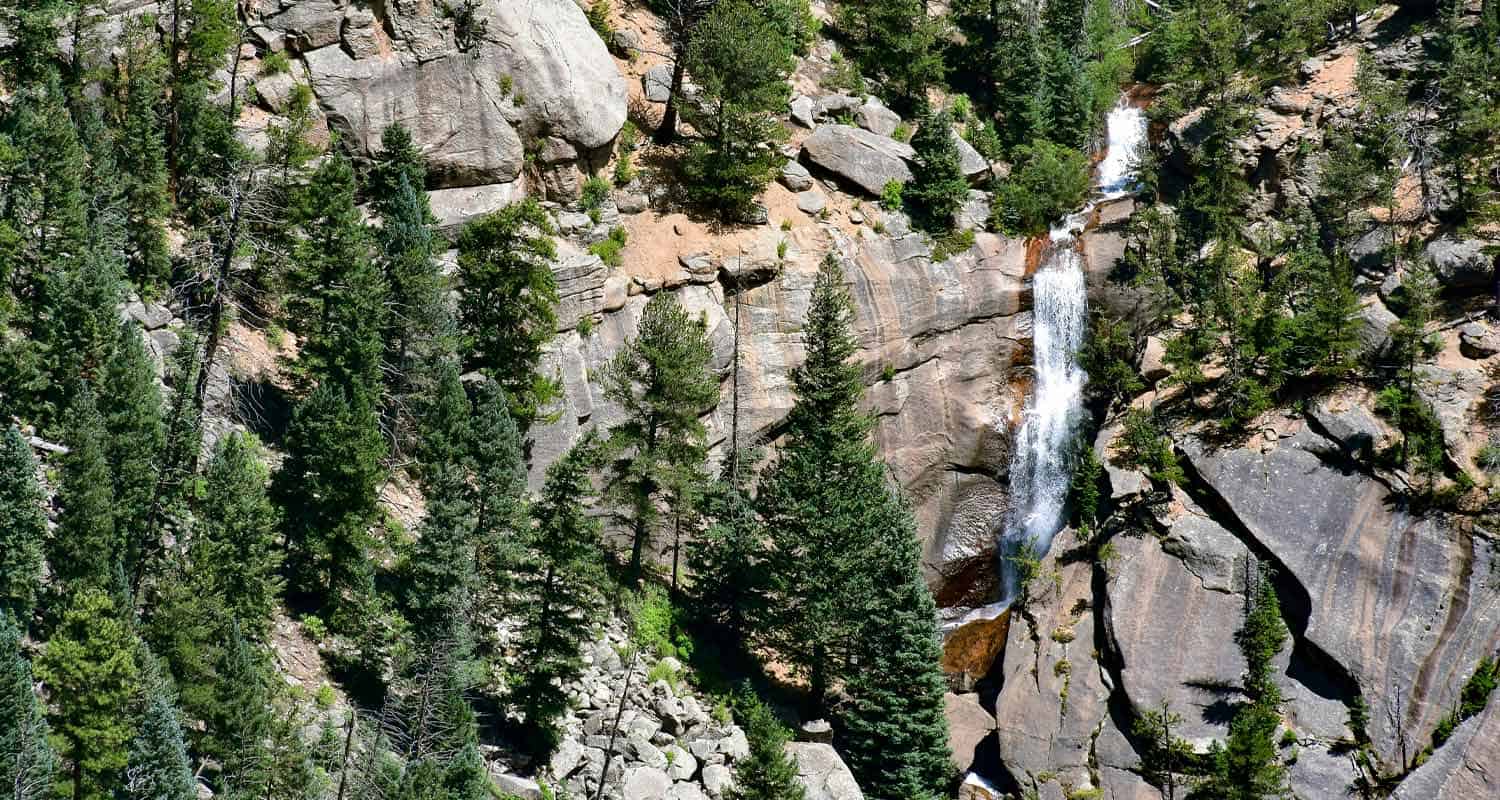
At Elk Falls Pond, a third trail, the Lion's Back Trail, leads another 1 mile up to the Elk Falls Overlook. Atop a highpoint, hikers will gain great views down to where Elk Falls drops from the cliff face into a beautiful mult-tiered waterfall. Out and Back, its a total of 10.8 miles.
Colorado State Parks is working on an Elk Falls Trail project that will eventually open access to the base of Elk Falls. This is projected to be completed and opened to the public in the Fall of 2016.
If you'd like to add a more challenging return segment to your hike and see new areas of the park, hikers can pick up the Marmot Passage trail until it meets with the hiker-only Scout Line trail, which eventually leads back to the main Staunton Ranch trail. This return route will add additional mileage, difficulty, and time to the hike back. Consult the trail map and topo lines to get a feel for the demanding nature of this option.
Tips & Resources for Hiking To Elk Falls Overlook:
- TIP: Getting into the park can be slow at times, so be prepared to wait at the entrance on busy weekends.
- Trekking Poles & Traction Devices are Recommended in Spring and Winter: During this time of year, there can be patches and even longer segments of snow and ice on the trail. Because of this, we recommend Trekking Poles and/or Traction Devices for this trail.
- Trail Map for Staunton State Park: Trail Map Link
- Packing List: Always pack the 10 Essentials. Download our Hiking Guide to get list and dayhiking packing checklist.
- Colorado Road Conditions: Colorado Road Conditions
- After the Hike: Crow Hill Cafe in Bailey
- We would like to express our gratitude to Bill Chopp for sharing such an amazing photograph of Elk Falls.
Weather
Map & Driving Directions
Click for Driving Directions
Looking for more waterfalls near Denver? Explore our more than 50 Colorado Waterfall Hikes, our favorite Waterfall Hikes in Rocky Mountain National Park, or 7 Waterfalls within One Hour of Denver.
Mt. Sanitas Hike Near Boulder
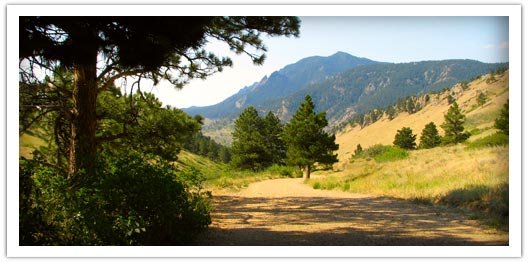
If you are visiting Boulder, this is a great Colorado hike. Mt. Sanitas gives you several trail options ranging from an easy stroll along a meandering brook to a demanding trail up the mountainside. Explore the trail profile below for all the info you need on this hike near Boulder.
Trail Snapshot: Mt. Sanitas Hike in Boulder
| Hike Distance | 3.1 miles or 2 miles |
|---|---|
| Difficulty | Medium+ with Easier Options |
| Duration | Approx 2 hr |
| Trail Type | Loop |
| Elevation Gain | Approx +1343′ |
| Seasons | Year Round |
| Dogs | Allowed on Leash |
| Hike Trail Map | Click for a Trail Map |
| Denver Drive Time | 45 min |
| Directions | Click for Google Map |
| Town Nearest Hike | Boulder, Colorado |
| Beauty | Front Range mountain views, views of Boulder, wildlife: mule deer, raptors, foxes, and coyotes |
| Activities | Picnic area, horseback riding, hiking trails, climbing, No Bikes Allowed |
Mt. Sanitas offers three different hike options, ranging from the more difficult climb up the mountain, to an easy walk through a peaceful valley. Sanitas is Latin for "health", and this hike may either get you in better shape (the 3.1 mile loop), or restore your sanity (the easier options). If you are visiting Boulder, this is a great Colorado hike.
3 Hike Options at Mt. Sanitas in Boulder, Colorado
1 - The Mt. Sanitas Loop - 3.1 Mile Loop - Medium+

This is the classic hike at Boulder's Mt. Sanitas, and it's the most difficult of the three hike options because it involves a series of log and rock steps that will leave your quads and knees either thanking your for the workout or aching for a couple days afterwards. Because of this, we would give it a Medium+ difficulty rating. The prize of this Front Range Hike are the views at the top. You'll be able to look down into Boulder and get some great views of Colorado's Front Range.
2 - Mt. Sanitas Valley Hike - 2 Mile Out-and-Back - Easy
Here's the easiest option; 1 mile straight up the valley and back. The two words that best describe the Sanitas Valley trail: idyllic and busy. Dogs run about and jump in the creek that runs along the beginning of the path, runners fly by, and families talk and stroll together. The trail rises gently at first, then goes into more of an incline. We took our stroller; it worked fine, but was tough pushing the kids up the last 1/4 mile uphill. We turned around just after the Dakota Ridge Trail junction, making it a 2 mile out-and-back hike.
3 - Dakota Ridge Trail at Mt. Sanitas - 2 Mile Loop - Easy to Medium
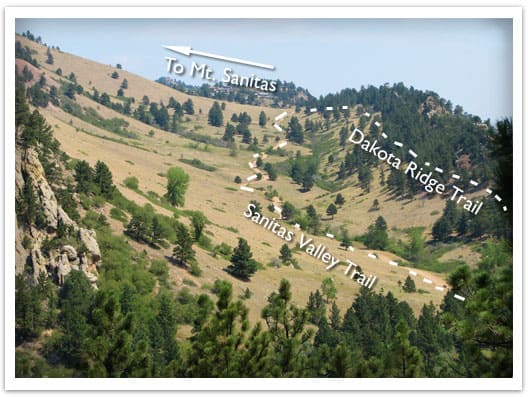
You'll find side trails running East/West off of the Sanitas Valley trail which will take you up onto the Dakota ridge, a hogback that boxes in the Sanitas Valley. You can make this an out-and-back hike, or turn it into a loop by hiking back through the valley (see photo above and the Mt. Sanitas Trail Map for the route).
Tips & Resources for Hiking Mt. Sanitas in Boulder:
- Parking: This is kind of a no-brainer, but get to the trailhead early. I think we arrived around 8am on a Saturday and grabbed the last parking spot. However, we noticed that many people were walking to the trailhead from town, so there are other parking options.
- No Shade: Bring your sunscreen; the trail is mostly exposed.
- Lots of People: If you are looking for solitude, I'd recommend trying another hike. The Mt. Sanitas trail is essentially in Boulder, and its great location means that it's quite busy.
- Trail Map for Mt. Sanitas Trail: Trail Map Link
- Colorado Road Conditions: Colorado Road Conditions
- After the Hike: Ozo Coffee
Weather
Map & Driving Directions
Click for Driving Directions