Pole Creek Falls Hike near Granby, Colorado
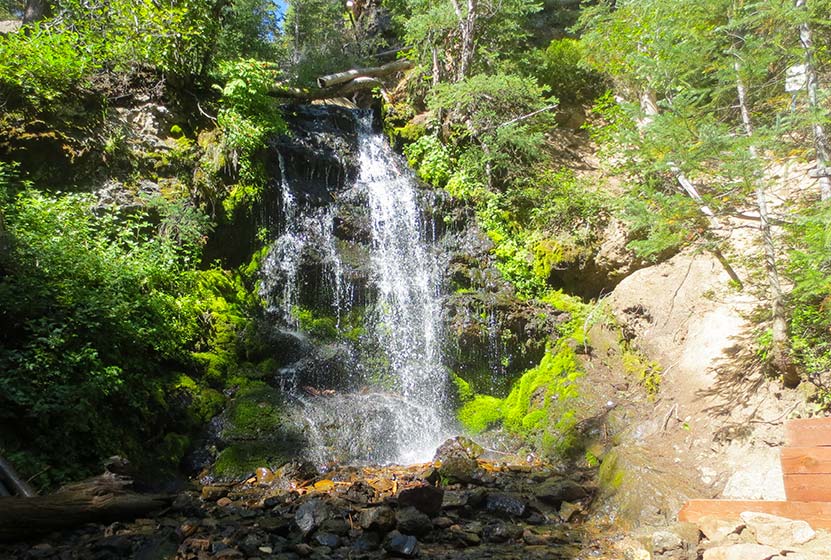
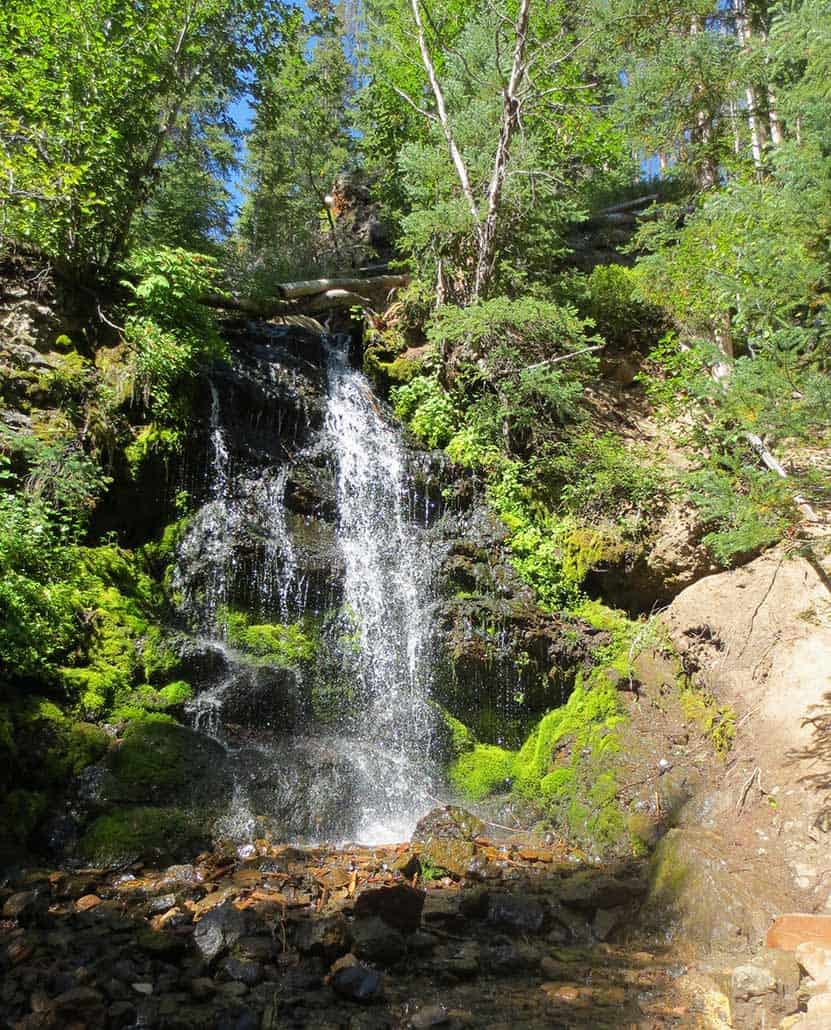
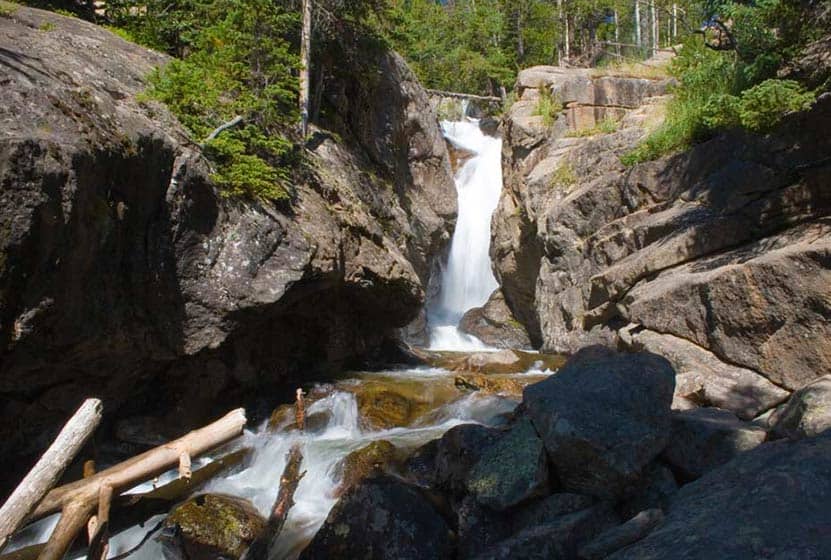
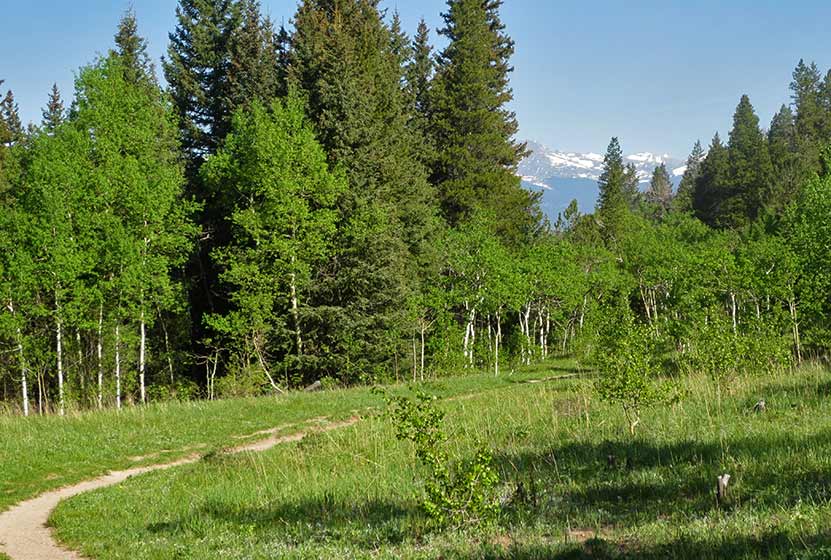
The Pole Creek Falls trail near Granby, Colorado is an easy out-and-back destination hike to a waterfall that courses down a huge dark slab of moss-covered rock. Purple mountain asters and active beaver dams can be observed along this family-friendly trail. Explore the full Pole Creek Falls hike profile below for trail map, driving directions, and more tips and details to help you enjoy this adventure near Granby.
Trail Snapshot: Pole Creek Falls Trail near Granby, Colorado
| Hike Distance | 2.2 miles Round Trip |
|---|---|
| Difficulty | Easy |
| Duration | Approx 1 Hour |
| Trail Type | Out and Back and Loop |
| Starting Elevation | 8925′ |
| Elevation Gain | Approx Total +400' on Loop |
| Seasons | Year Round |
| Dogs | Allowed On Leash |
| Hike Trail Map | Click for a Pole Creek Falls |
| Denver Drive Time | 1 Hour 50 Min |
| Driving Directions to Pole Creek Falls Trailhead | Click for Google Map |
| Town Nearest Hike | Frasier, Colorado |
| Beauty | creek, buckwheat, larkspur; wildlife: beaver, brook trout, moose, bear |
| Activities | Hiking, photography |
| Fee: | Free for YMCA of the Rockies Members and Paid Guests or Day-Pass purchase required (see details below) |
Parking, Trailhead, & Fee Information for Pole Creek Falls Hike
The trailhead for Pole Creek Falls is located on the YMCA Snow Mountain Ranch property just south of Granby, Colorado. To start out from Denver, take Interstate 70 to Highway 40. Highway 40 is a windy drive up and over Berthoud Pass, but the views make it worthwhile. You have the option of stopping at the top of Berthoud Pass to take in the alpine landscape. Then, stay on Hwy 40 through Winter Park, Fraser, and Tabernash. Turn left onto CR 53 (a sign for Snow Mountain Ranch will mark the road). As you drive into the property, look for the flagpole. This will mark your first stop, which is the Program office, the building immediately to the right of the flagpole/stone marquee entrance sign. This is where you'll need to purchase your day-pass (one for each person).
So, this is the real thing you have to consider for this hike: Is it worth the cost? The day-pass fees are $20 per adult and $10 per child 6-12. Kids 5 and under are free. The day-pass gets you access to all the hiking trails, biking trails, rec center, mini-golf, and swimming pool. However, if you're a guest at the ranch and paying for lodging, your day-use is included in the price.
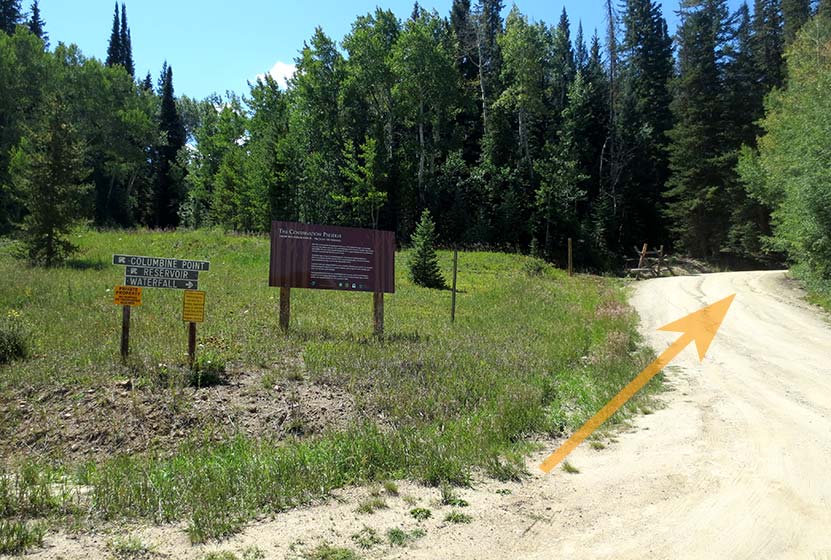
After getting your passes, drive back out and turn right onto CR 53. Stay on CR53 as it turns into a dirt road and passes the riding stables. Just after the stables it will bear left (you'll notice on the Google map that the road name at this point is CR53/Blue Ridge Rd). At the fork, there will be signage for the waterfall trailhead that points you to the right (see photo below).
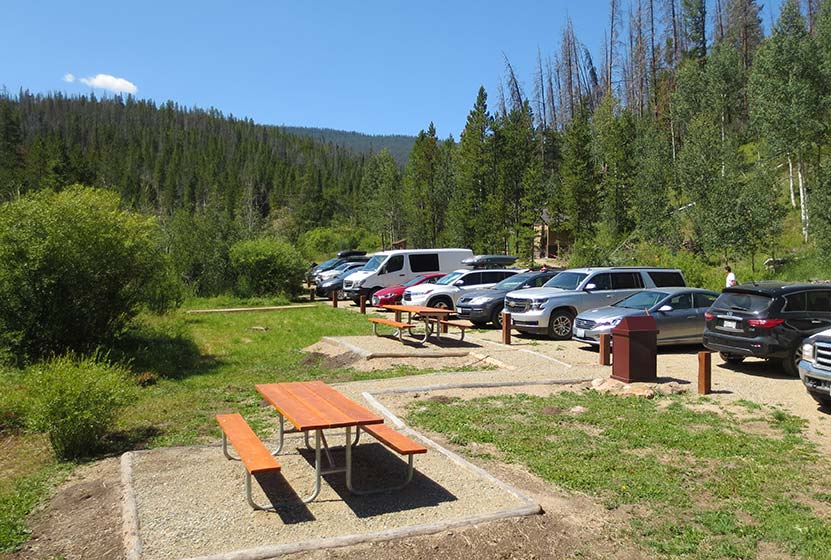
The trailhead parking is just a short distance further down the road from this fork. Here you'll find a toilet, picnic tables, and trash receptacles.
The trailhead is located at the end of the parking area on the right-hand side of the lot (pictured below).
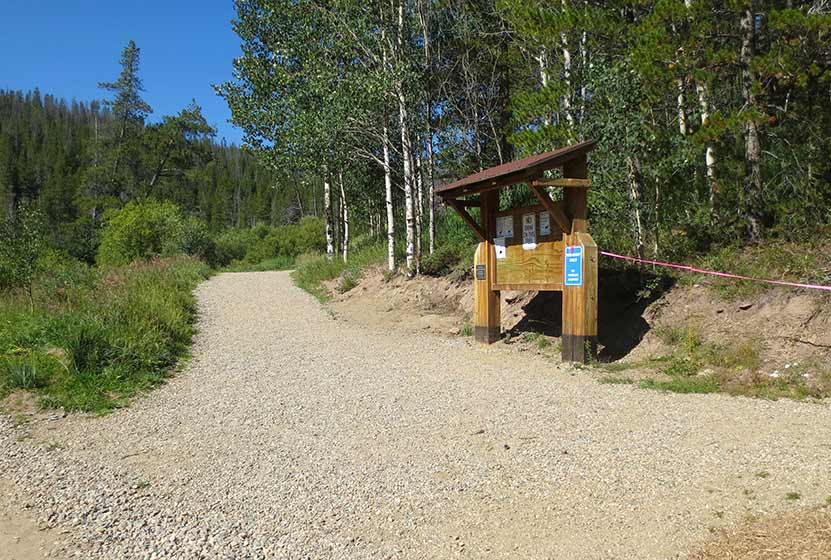
Pole Creek Falls Trailhead
The Hike: Pole Creek Falls Trail
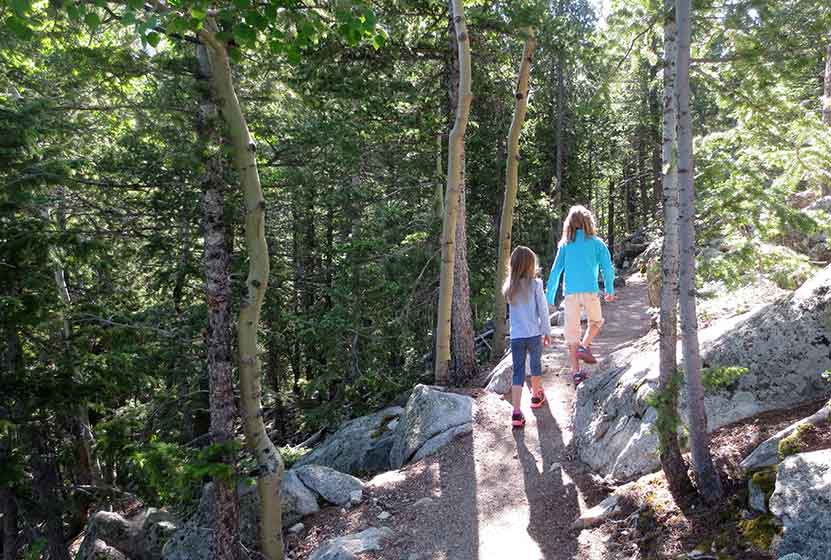
My oldest daughter and I hiked to Pole Creek Falls in the middle of August, and the falls were still at a nice flow. I would think that the waterfall really gushes in the late-Spring and early-Summer. The trail was gradual and enjoyable all the way up to the falls. Early on the trail, hikers will encounter a fork with a small footbridge to the left (picture below). Here you'll want to bear right to keep on the main trail.

Eventually, the trail will enter a wooded area and cross over a couple footbridges as it follows Pole Creek up to the base of the waterfall.
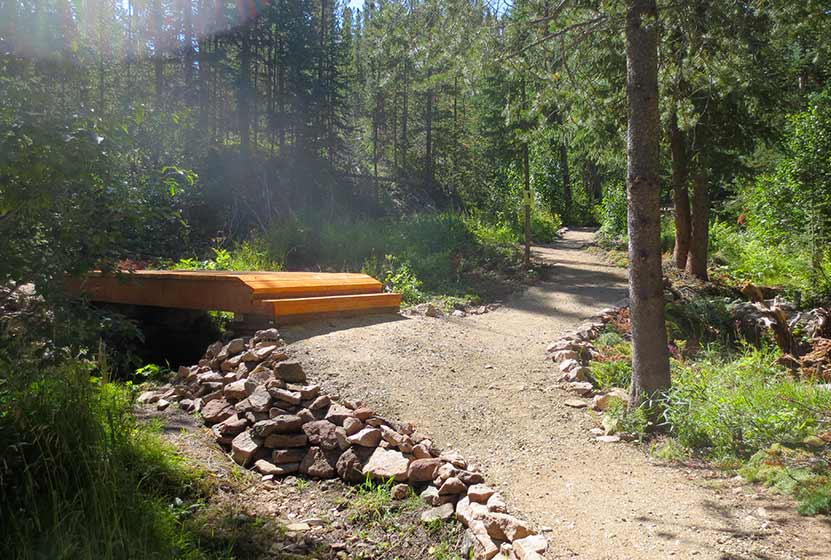
Finally, the bridge pictured above, hikers will stay on the right-hand trail segment to access the base of the falls. The trail to the left leads around to a higher viewing area, but the best views of the waterfall are at the bottom.
Tips & Resources for Hiking the Pole Creek Falls Trail
- TIP: After paying the daily access fee at the Program building in YMCA of the Rockies at Snow Mountain Ranch, obtain a map which leads to the trailhead along Blue Ridge Road, and marks the other trails on the property.
- TIP: Wear Sunscreen as much of this hike is without shade.
- Trail Map: Pole Creek Falls Trail near Granby
- Packing List: Always pack the 10 Essentials. Download our Hiking Guide to get the list and dayhiking packing checklist.
- Colorado Road Conditions: Colorado Road Conditions
- After the Hike: The Ditch in Winter Park
Weather
Map & Driving Directions
Click for Driving Directions
Beaver Loop Hike in Golden Gate Canyon
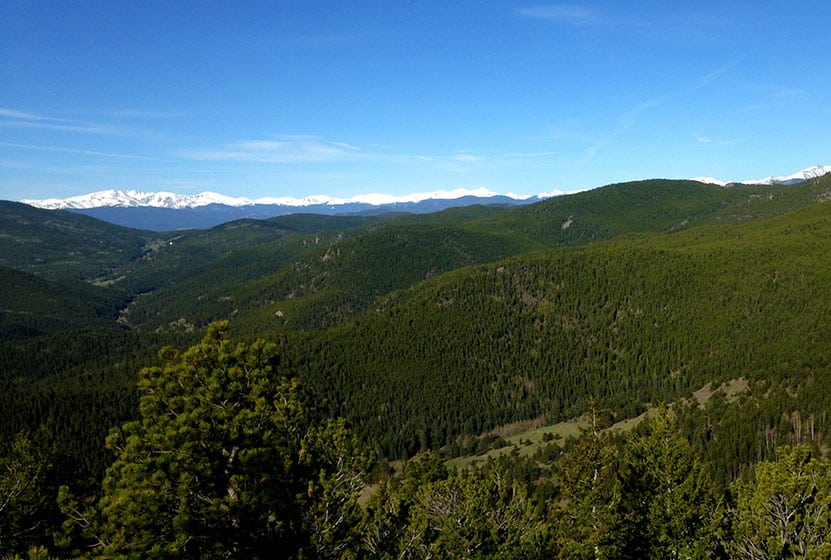
The Beaver Loop is a moderate 2.3-mile loop hike in Golden Gate Canyon State Park views of the snow-capped Rocky Mountains in the West. Add a short segment to Slough Pond to make this a 3-mile hike. Explore the trail profile for a trail map, driving directions, and tips for this hike near Golden, CO
Trail Snapshot: Beaver Loop in Golden Gate Canyon State Park
| Hike Distance | 2.3 miles |
|---|---|
| Difficulty | Moderate |
| Duration | Approx 1 hr |
| Trail Type | Loop |
| Starting Elevation | 8200′ |
| Elevation Gain | Approx +1050′ |
| Seasons | Best hiked May to October |
| Dogs | Allowed on 6' Leash |
| Hike Trail Map | Click for a Map of Golden Gate Canyon Trails |
| Denver Drive Time | 45 min |
| Driving Directions to Visitor Center | Click for Google Map |
| Town Nearest Hike | Golden, Colorado |
| Beauty | Views of Continental Divide, Treamont Mountain and Indian Peaks Wilderness Area, steep inclines, wildflowers, aspen trees< |
| Activities | Hiking, photography, snowshoeing in winter, picnic area, reservable camping shelter |
| Fee | Colorado State Parks Pass Required |
Parking & Trailhead Information for the Beaver Loop Hike
From Denver, take US-6 West to Golden. Just outside Golden, US-6 will turn left (West) into Clear Creek Canyon; it's at this intersection that you'll continue North on 93. After 1.3 miles on 93, turn left onto Golden Gate Canyon Road. Now, prepare for the rest of your drive being pretty windy. After 12.7 miles on Golden Gate Canyon Road, it will intersect with Crawford Gulch Road on a wide curve. Turn right onto Crawford Gulch road and the visitor center for Golden Gate Canyon State Park will be on your immediate right. This is the best parking area for the Beaver Loop. However, the parking here fills up fast, especially on the weekends. Another option is to park at the Ralston Roost Trailhead, located about 0.2 mile further down the road (see the State Park Map Link above). A third option is to begin your hike at Slough Pond. This will add about 3/4 of a mile to your hike, making it closer to a 3-mile trip.
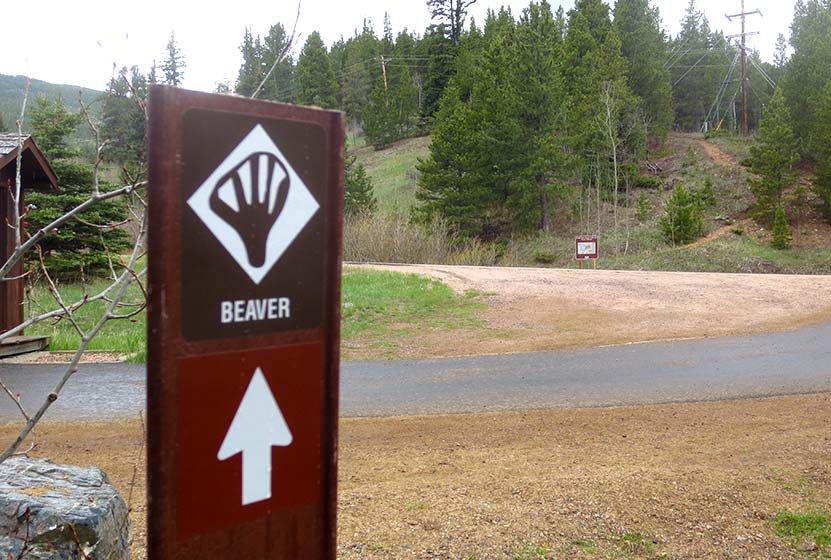
The Beaver Loop Trailhead Across Golden Gate Canyon Road from the Visitor Center
The Hike: The Beaver Loop Hike in Golden Gate Canyon
The Visitor Center at Golden Gate is worth exploring. Kids will be fascinated by the trout in the man-made creek and small pond surrounding the building. The Beaver Trail can be picked up just South of the Visitor Center by taking one of the paths around the perimeter of the building. The trail begins under the powerlines on the opposite side of Golden Gate Canyon road. Exercise caution crossing the road as vehicles may be descending the hill and not be looking out for pedestrians. Be alert for cyclists, as they frequent the road and come down the hill at high speeds.
First Trail Fork on the Beaver Loop
At the first trail fork, hikers have the option of taking the loop clockwise or counter-clockwise. I hiked this clockwise, taking the trail towards the shelter. The clockwise route offers a more gentle ascent, but steep descent on the back side of the loop. Taking it counter-clockwise will mean a steeper ascent and a more gentle descent on the way back, which is probably easier on the knees, but a more demanding climb.
You'll notice that the State Park trail map rates this trail as "most difficult." It's important to note that these ratings are relative to the other trails in the park. I 've classified the Beaver Loop as medium/moderate because, while it does have over 1000' of elevation gain, it is only a 2.3-mile hike. Add about 3/4 of a mile if you make the out-and-back trip out to Slough Pond. See our Hikes by Difficulty page for more hikes and the basic criteria we use to classify hikes. It should be noted that difficulty will differ by persons, so be sure to review the details of a hike before attempting it.
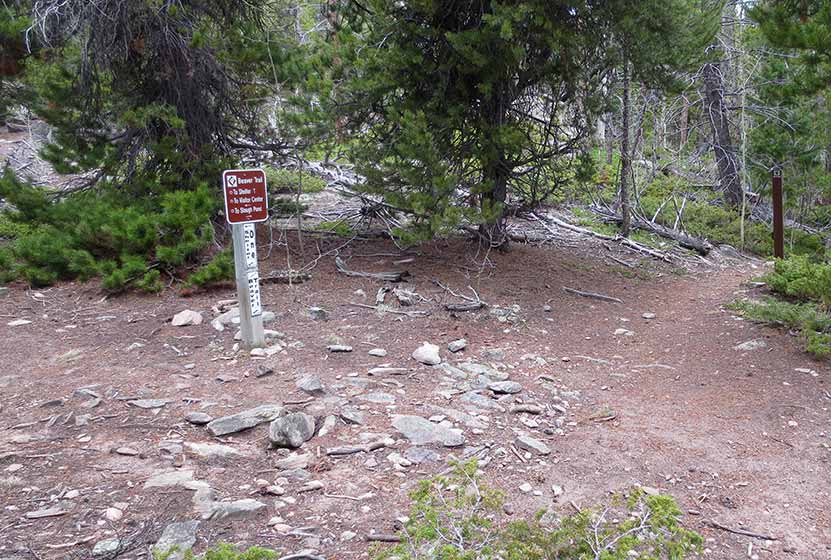
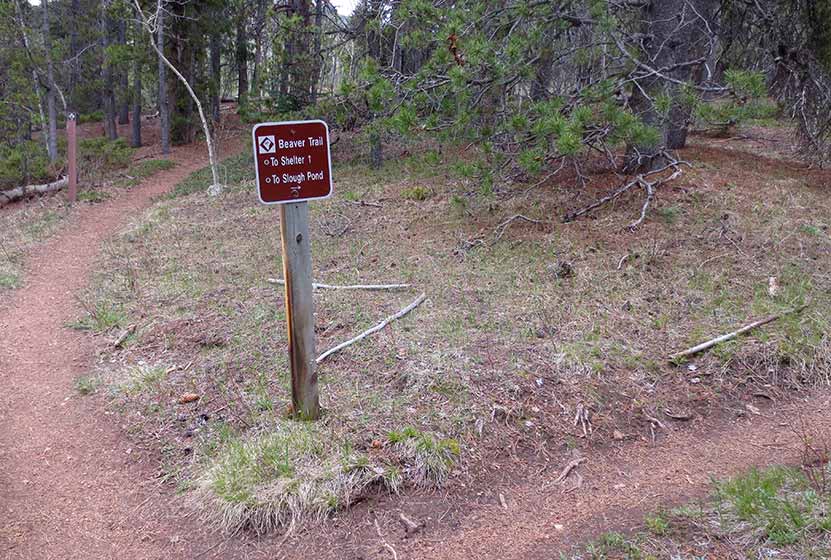
Sign Indicating Spur Trail to Shelter
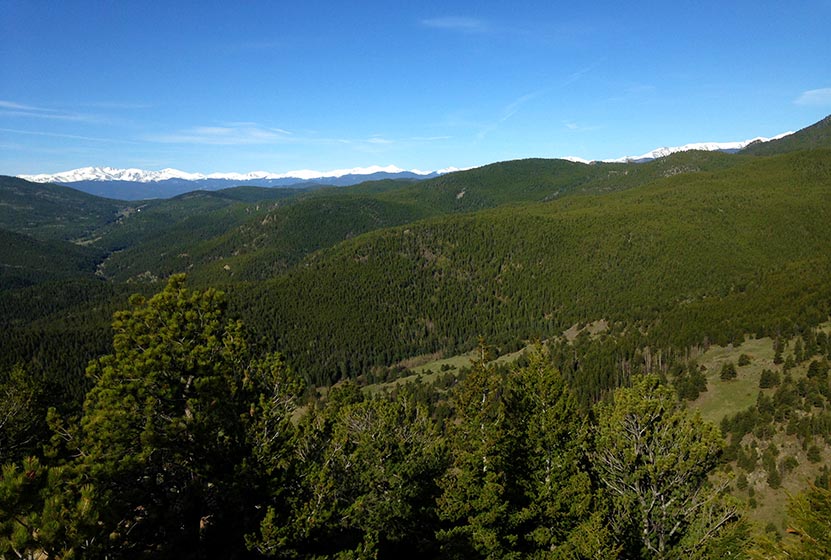
At approximately 1 mile into the loop, hikers will encounter a sign (pictured above) pointing to a 0.5-mile spur trail leading to a backcountry shelter. A permit is required to camp here and can be purchased online at the Golden Gate Canyon fees page. Continuing on the loop, the trail will soon lead to an overlook of views to the West. During most of the year, snow-capped peaks appear above a verdant green valley in these western foothills.
After the overlook, the trail begins a steep descent. I had brought my trekking poles (I always bring them), and was glad that I did. I would imagine that this trail gets slicked over with ice and hardened snow during the winter, making it really difficult to navigate. The trail then leads down to an intersection with the Slough Pond trail.
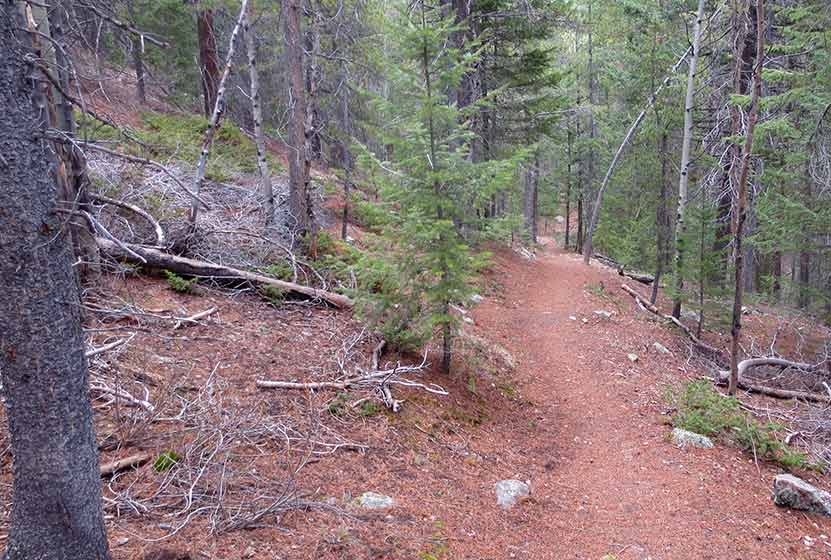
Downhill Trail Segment on the Beaver Loop
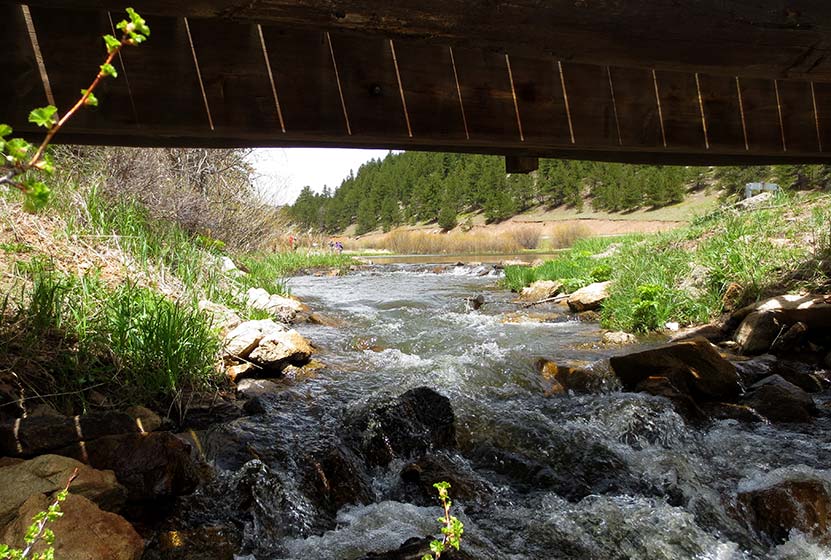
At this intersection at the bottom of the hill, you have the option of making the trip over to Slough Pond. The hike over to Slough Pond is pleasant and mostly flat. At the pond, a quaint creek flows out of the pond and under a footbridge. Slough Pond is a popular fishing spot and a great place for kids to learn to bait a hook. As mentioned above, adding this out-and-back segment to the hike, makes this closer to a 3 mile hike.
Tips & Resources for Hiking the Beaver Loop Hike
- TIP: Don't forget to bring food and water along this hike for refuelling.
- TIP: Pick up a paper map at the visitor center before hiking.
- TIP: Trekking poles will be a big help on the steeper portions of the trail. Traction devices are recommended for winter weather..
- Trail Map: Golden Gate Canyon Trail Map
- Packing List: Always pack the 10 Essentials. Download our Hiking Guide to get the list and dayhiking packing checklist.
- Colorado Road Conditions: Colorado Road Conditions
- After the Hike: Windy Saddle Cafe in Golden, Colorado
Weather
Map & Driving Directions
Click for Driving Directions to Visitor Center

Gregory Canyon Hike to Realization Point
The trail up Gregory Canyon is a moderately challenging hike to Realization Point Trailhead where hikers can pick up two different loop trails. Both loops offer expansive views of the Rocky Mountains in the West and wildflowers along the trail. Explore the full Gregory Canyon-Realization Point hike profile below for trail map, driving directions, and more tips and details to help you enjoy this adventure in Boulder, Colorado.
Trail Snapshot: Gregory Canyon to Realization Point
| Hike Distance | 2.4 to 5.7 miles Round Trip |
|---|---|
| Difficulty | Moderate |
| Duration | Approx 2-3 hrs |
| Trail Type | Out and Back |
| Starting Elevation | 5600′ |
| Elevation Gain | Approx +900′ Gregory Canyon Segment |
| Seasons | Year Round |
| Dogs | Allowed On Leash |
| Hike Trail Map | Click for a Map of Gregory Canyon Trail to Realization Point in Boulder |
| Denver Drive Time | 40 Minutes |
| Driving Directions to Gregory Canyon Trailhead | Click for Google Map |
| Town Nearest Hike | Boulder, Colorado |
| Beauty | Canyon, wildflowers, summit views, forest, rocky hillsides, wildlife: mule deer, coyote, mountain lion, bear, red-tailed hawk, fox |
| Activities | Hiking,Photography |
Parking & Trailhead Information for Gregory Canyon
Hikers have several parking options for the Gregory Canyon Trail: 1) the Gregory Canyon Trailhead, 2) Parking at Chautauqua Park, or 3) along permitted stretches of Baseline Road. The Gregory Canyon Trailhead can be reached by following Baseline Road in Boulder west past Chautauqua park. Gregory Canyon Road is located on the left/South about 1/2 mile West of the park. Parking is allowed along most of the south side of Gregory Canyon Road and there is room for 7-8 vehicles at the trailhead. Both the roadside parking and the small parking area at the Gregory Canyon Trailhead require an access fee. Because of the fee and because this parking area fills quickly most mornings, many hikers opt to park along Baseline or at Chautauqua Park. Another option is to park at the Realization Point Trailhead (another fee parking area) and to hike down through the Canyon.
The Hike: Gregory Canyon Trail to Realization Point
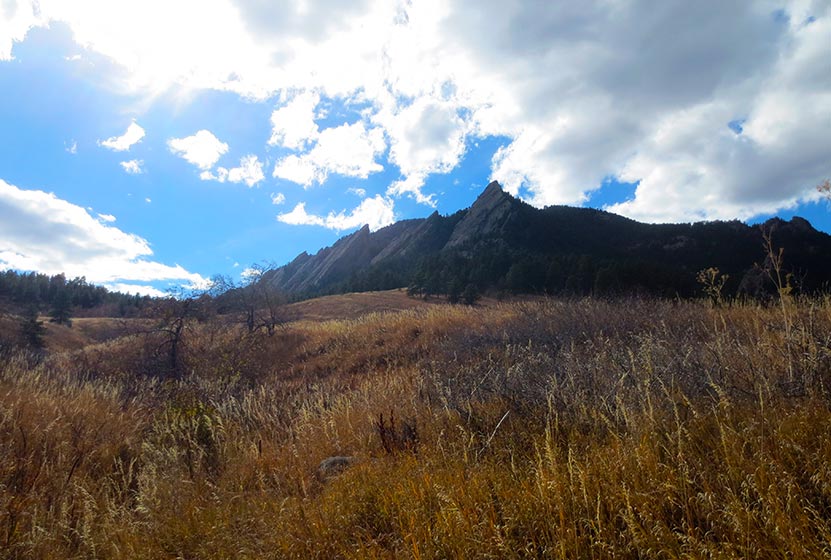
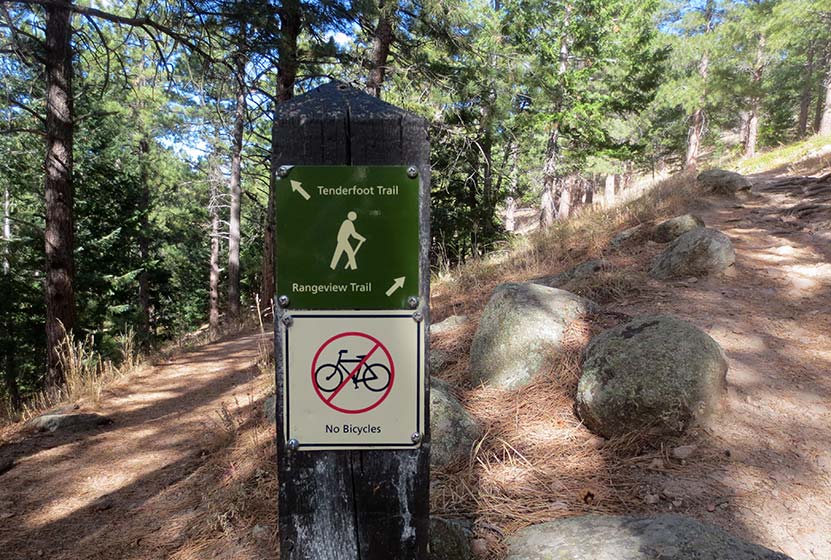
In addition to its proximity to Boulder, this hike sports a number of options and a variety of landscapes. The stretch between Gregory Canyon Trailhead and Realization Point Trailhead is the main artery of all the options in this profile. Because most hikers will begin their adventure at Chautauqua Park, there are a couple 1/2 mile (one-way) approaches: the Baseline Trail or the Meadow Trail. On the upper end of the hike, at Realization Point Trailhead, there are two different loop options that offer beautiful views to the West of seasonal snowcapped peaks. These are the Rangeview/Ute Loop and the Tenderfoot Loop. You can review each of the hike options below to decide which trail combination is best for you.
Gregory Canyon Trailhead to Realization Point Trailhead - 2.4 Miles Round Trip
This segment constitutes the main artery for all the hike options below. The Gregory Canyon Trail begins in the shade along Gregory Canyon Creek and climbs gradually to 0.5 mile where it crosses another small creek. Here the trail becomes more steep, making its way up a ridge via a set of switchbacks. Then the trail descends to a junction. At the junction, the Northern (right) segment leads a short distance up to Flagstaff Road and the Realization Point Trailhead (the destination for this hike as described here), or South (left) to the Long Canyon and Ranger Trails. After hiking the short segment to Flagstaff road, Realization Point Trailhead will be located across the street to the North. Be sure to watch for both cars and cyclists before crossing. If starting at Chautauqua Park and taking the Baseline or Meadow Trails to the Gregory Canyon Trailhead, add approximately 1 mile to this hike, making it 3.4 miles Round Trip.
Gregory Canyon Trailhead to Realization Point Trailhead + Rangeview/Ute Loop - 3.2 Miles Round Trip
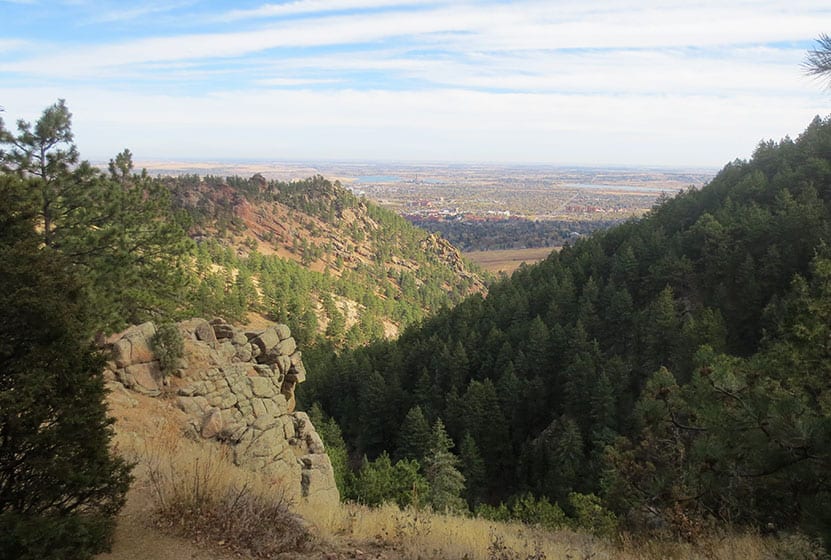
After traveling the 1.1 miles up through the canyon to Realization Point, hikers will find two loop options. The first is the shorter Rangeview/Ute Loop. This loop makes a 0.8-mile clockwise circuit around Flagstaff Mountain then joins back up to the trailhead. The loop offers views to the mountains in the West and great viewpoints to take in the changing aspens in the Fall. If starting at Chautauqua Park, add approximately 1 mile to this hike, making it 4.2 miles Round Trip.
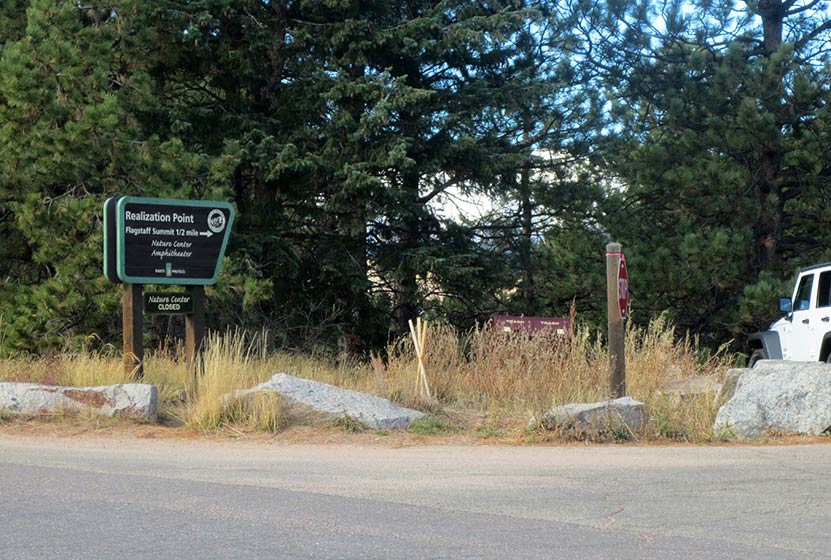
Realization Point Trailhead Across Flagstaff Road
Gregory Canyon Trailhead to Realization Point Trailhead + Tenderfoot Loop - 4.7 Miles Round Trip
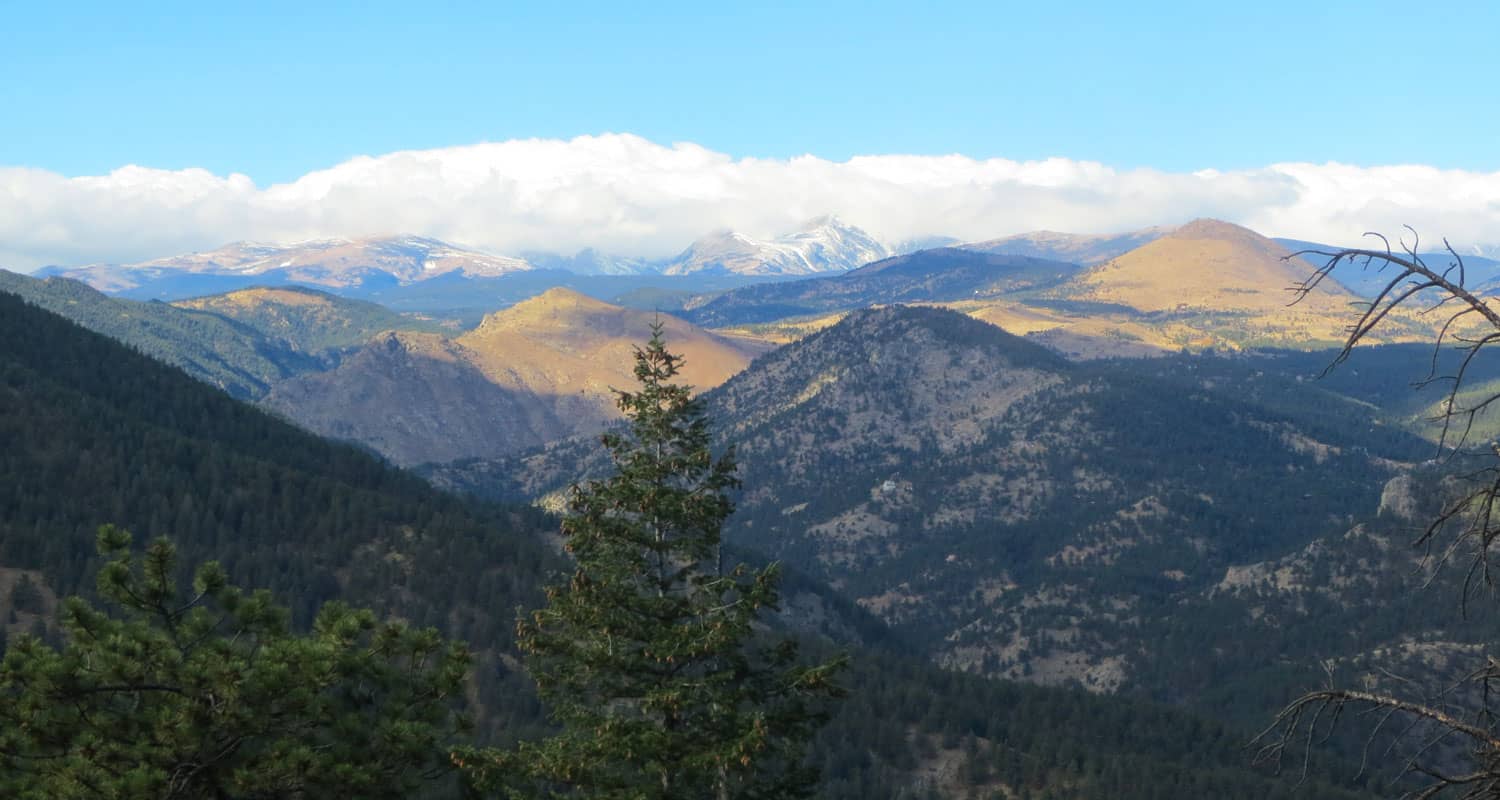
From Realization Point Trailhead, the Tenderfoot Trail bears to the left (Northwest) and makes for a more demanding loop when compared to the Rangeview/Ute Trail because of both the added distance and the additional elevation loss and gain. At its most northern point, hikers will find a short spur trail leading to a small peak that affords expansive views to the West. If starting at Chautauqua Park, add approximately 1 mile to this hike, making it 5.7 miles Round Trip. By adding the spur trail, it becomes closer to 6 miles total.
Both loop hikes afford multiple opportunities for taking in views out to the Rocky Mountains. The photo below was taken along the beginning segment of the Rangeview Trail.
Video of Gregory Canyon Hike
Tips & Resources for Hiking Gregory Canyon
- Poison Ivy: The canyon trail segment has a good deal of poison ivy trailside. Be aware and stay the traill
- Stay the Trail: Bear and Mountain Lion frequent this area of Boulder. It's wise to stay the trail and to hike with others.
- Trail Map: Trail Map for Gregory Canyon to Realization Point in Boulder
- Boulder Parks Area Dog Regulations Map
- Boulder Area Dog Regulations Map
- Packing List: Always pack the 10 Essentials. Download our Hiking Guide to get the list and dayhiking packing checklist.
- Colorado Road Conditions: Colorado Road Conditions
- After the Hike: Alpine Modern Cafe
Weather
Map & Driving Directions
Click for Driving Directions
Seven Falls Hike in Colorado Springs
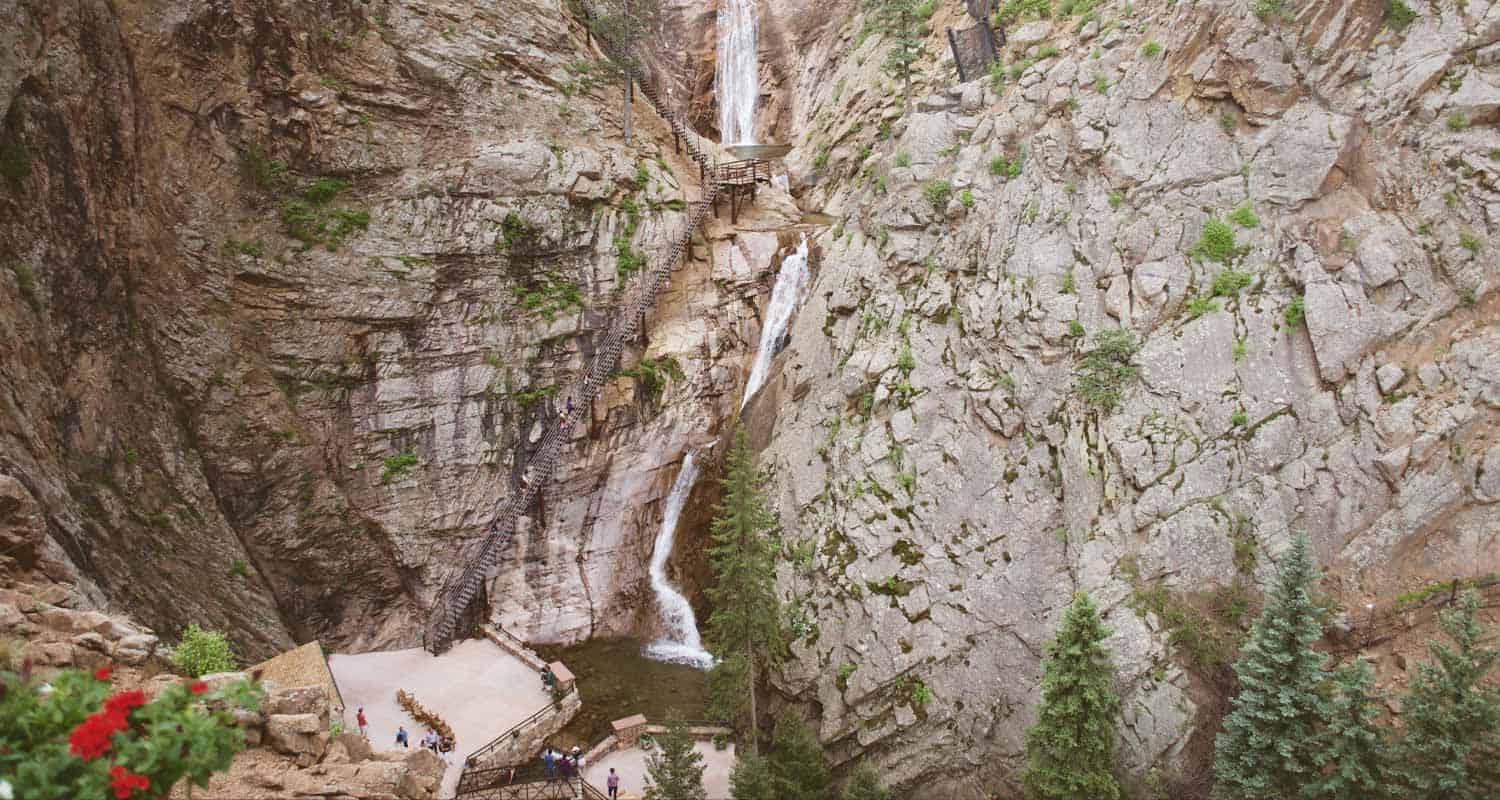
The hike to Seven Falls in Colorado Springs follows a paved canyon trail 0.8 mile to this famous tiered 181-foot waterfall. After severe damage by the floods in 2013, the Broadmoor Resort purchased the property and has made significant improvements, including trail and site repairs, as well as creating an on-site restaurant. As in the past, there is an access fee to this historic Colorado Springs attraction. Explore our full Seven Falls hike profile for 4 different hike options, driving directions, trail map, and tips for making the most of your trip to Seven Falls.
Trail Snapshot: Seven Falls in Colorado Springs
| Hike Distance | 0.4 to 3 miles |
|---|---|
| Difficulty | Easy |
| Duration | Less than 1 hr up to 4 hours |
| Trail Type | Out & Back and Loop Option |
| Seasons | See Site for Dates/Hours of Operation |
| Dogs | Allowed On Leash |
| Hike Trail Map | Click for a Map of Seven Falls Colorado Springs |
| Denver Drive Time | 1 hr 20 min |
| Driving Directions to Seven Falls Parking | Click for Google Map |
| Town Nearest Hike | Colorado Springs, Colorado |
| Beauty | Waterfall, canyon, creek |
| Activities | Hiking, photography, zipline tours |
| Fee | See the Seven Falls Website for current fees |
Parking & Trailhead Information for Seven Falls
The parking and shuttle service for Seven Falls is located at 1045 Lower Gold Camp Road in Colorado Springs. Visitors take the free shuttle from the parking area to the Seven Falls entrance. From here, it’s a 0.8 mile (one-way) hike through the canyon up to Seven Falls. Visitors have the option of taking a tram service to the base of the falls; however, the tram is prioritized for those who have physical limitations that may prevent them from making the journey up to the falls and back. So, on busy days, availability may be limited.
Driving Directions for Seven Falls Parking:
You must take a shuttle from the Norris Penrose building. To access the shuttle from Denver, take I-25 South to exit 141 onto North Cimarron St. Go right/west onto Cimarron St./24 West. At the first intersection, turn left onto 8th Street. After just 0.4 mile on 8th street, turn right onto Lower Gold Camp Road. After 0.4 mile on Lower Gold Camp Road, take a left into the Penrose Equestrian Center. Parking is in the dirt lot to the north of the Norris Penrose building (look for 7 Falls signs). There is no parking at Seven Falls.
Fee:
While parking itself is free of charge for patrons, there is a fee required to visit Seven Falls. For the most up-to-date prices and hours, access the Seven Falls site or contact the Seven Falls Office at 1-855-923-7272.
The Hike: Seven Falls Trail in Colorado Springs
There are three different hike options for visitors to Seven Falls in Colorado Springs.
#1 – Entrance to Base of Seven Falls
Visitors to Seven Falls can walk the 0.8-mile paved trail from the entrance to the base of the falls. The paved, private road winds through South Cheyenne Canyon and under the shadows cast by the Pillars of Hercules, a set of twin rock towers that soar nearly 1000 feet above the floor of the canyon.
At the base of the waterfall, you can choose to take the staircase of 224 steps that provide an opportunity to view the unique segments of this tiered waterfall and give visitors access to the additional three hikes above Seven Falls. At the falls, visitors can also take an elevator to an observation point, which is perhaps the best place to photograph the falls.
A Great Place to Rest and Relax
The path to the base of the falls is wheelchair accessible, and there is a sheltered viewing area (pictured here) and rocking chairs for visitors. If you’re hiking along Cheyenne Creek from the entrance, you’ll also find benches and picnic tables along the trail where you can take a break and soak in the sights and sounds of the canyon.
#2 – Midnight Falls Loop Hike
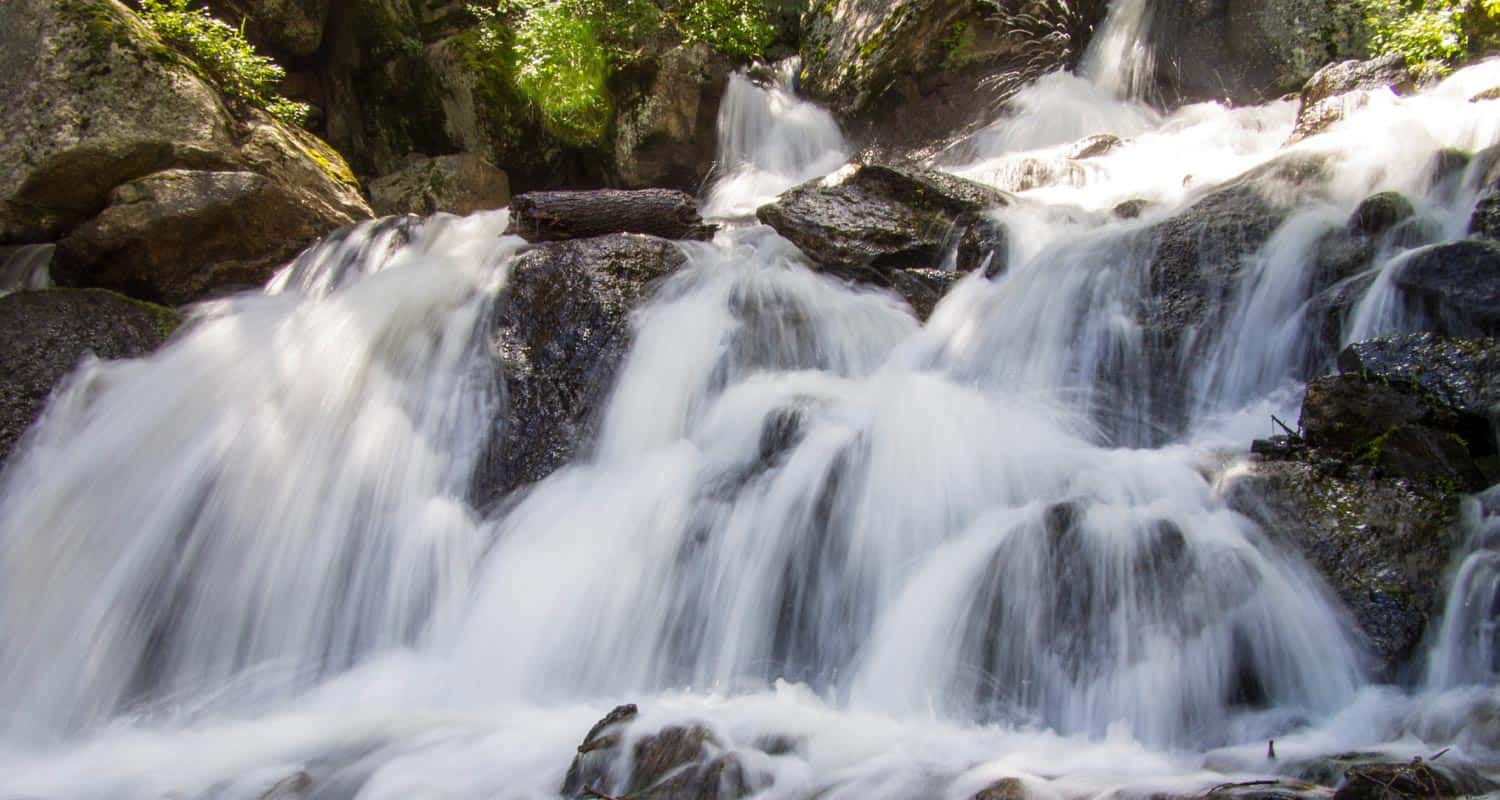
After climbing the steps to the area above Seven Falls, a short 0.35-mile trail leads south along Cripple Creek to another small waterfall, Midnight Falls. Round trip, this hike takes approximately 30 minutes and is a total distance out-and-back of 0.7 mile.
#3 – Inspiration Point Out-and-Back Hike
Once above the Falls, visitors will follow the Midnight Falls Trail until its first intersection with the Inspiration Point Trail. Taking a left onto the Inspiration Point Trail, it will lead east, then north to the Helen Hunt Jackson Memorial and to the Inspiration Point observation area. Here, hikers can take in views of the Great Plains as they stretch out to the East and of views of the city of Colorado Springs below. The hike to Inspiration Point is about 1.5-mile round-trip and takes approximately one hour to complete from the top of the falls.
Adventure Report – June 2023
In June of 2023, my teenage daughters and I hiked the winding canyon road up to Seven Falls, climbed the steep set of stairs to the top, and explored the trails above the falls. We enjoyed a wonderful lunch at 1858 restaurant, explored the gift shops, and made some memories.
A front had moved in, bringing rain to Colorado Springs, but it didn’t ruin our adventure. In fact, the clouds and mist added to the enchantment of Cheyenne Canyon. I was impressed by the established trees lining the creek: thick Ponderosa Pines and tall Douglas Fir. The White Fir trees were especially beautiful in the rain. When wet, their needles turn a glossy white and shimmer when they catch the light.
Along the road, toward the top, there’s a food truck and picnic pavilion. At this point, what stood out most to me was the care taken to preserve and maintain the property. From the lawns to the flowers, and paint to the lighting, the grounds were immaculate. We experienced the same thing at the Cog Railway in Manitou Springs. I love places with historical significance, and I’m always encouraged to see them so well cared for.
Lunch at 1858 Restaurant
The walls of 1858 are decorated with Western artwork and memorabilia documenting the history of Seven Falls and Cheyenne Canyon. Compared to a lunch down in Colorado Springs, you’ll pay a bit of a premium to eat here next to the falls. However, like every establishment managed by the Broadmoor, you’ll get fantastic food and top-notch service. Our girls both eat gluten-free, and 1858 provided a GF bun for their burgers–and the fries were perfect.
Reservations are recommended for dinner, and you’ll want allow about an hour before your reservation for taking the shuttle and walking the road up to the restaurant. More info is available at: https://www.sevenfalls.com/dine/restaurant-1858/
After lunch, we climbed the 224 steps to the top of the falls. Along the way, we enjoyed the more up-close experience of the upper leaps that make up the seven segments of the waterfall.
The trails above the falls were well-marked, and it was easy to find our way to Midnight Falls and then over to Inspiration Point. Midnight Falls is a quaint waterfall, and was worth the short hike through the forest.
While the girls took the steps back down to the gift shop, I hiked the trail up to Inspiration Point. I actually found some of the lookouts along the way more enjoyable than the final destination. Distant lightning and some loud thunder were moving in from the west, so I high-tailed it back down to the base of the Falls.
Though it was a misty and foggy day, we were all smiles. The hike through the canyon to the falls, our lunch, and our time being together as a family was another chance to make memories and enjoy this unique site in our beautiful state of Colorado.
Tips & Resources for Hiking to Seven Falls in Colorado Springs
- Expect Crowds in Summer and on Weekends: Because Seven Falls is a popular tourist destination, it can become quite crowded on weekends and during the vacation season of Mid-May through Labor Day Weekend.
- Operating Hours Vary: The open and close times, as well as shuttle service, varies during different seasons. Inclement weather can also close Seven Falls, so be sure to call ahead for hours 1-855-923-7272.
- Trail Map for Seven Falls in Colorado Springs: Trail Map Link
- Packing List: Always pack the 10 Essentials. Download our Hiking Guide to get the list and dayhiking packing checklist.
- Colorado Road Conditions: Colorado Road Conditions
- Photo: We would like to express our gratitude to Tim Caynes and John Folwer for sharing their photographs of Seven Falls in Colorado Springs.
- After the Hike: Restaurant 1858 at Seven Falls: The lunch menu is more than what you might pay at a similar place in town, but quality of food and beautiful location make it worth it. Dinner menu is more expensive. No dogs, except service animals, allowed at the restaurant.
Weather
Map & Driving Directions
Looking for more waterfalls near Denver? Explore our more than 50 Colorado Waterfall Hikes, our favorite Waterfall Hikes in Rocky Mountain National Park, or 7 Waterfalls within One Hour of Denver.
Catamount Falls Hike Near Colorado Springs
The hike to Catamount Falls is a moderate 2.8-mile loop hike about 25 minutes outside of Colorado Springs. This waterfall hike takes hikers to three different waterfalls and over two different creeks that spill down from the heights of Pikes Peak. It makes for a great weekend adventure, coupled with a great opportunity for brunch at the Pantry in Green Mountain Falls. Explore the full Catamount Falls hike profile below for driving directions, trail route description, and more tips and details to help you enjoy this adventure near Colorado Springs.
NOTICE: Catamount Trail access is closed from 8/4/21 to 9/1/21. For Details see Trails and Open Space Coalition Website.
Trail Snapshot: Catamount Falls in Colorado Springs
| Hike Distance | 2.8 miles |
|---|---|
| Difficulty | Moderate |
| Duration | Approx 1-2 hr |
| Trail Type | Loop |
| Starting Elevation | 7720' |
| Elevation Gain | Approx. +560' |
| Seasons | April through October |
| Dogs | Allowed On Leash |
| Denver Drive Time | 1 hr 30 min |
| Driving Directions to Ute Pass Avenue-Lake Street Trailhead | Click for Google Map |
| Town Nearest Hike | Green Mountain Falls, Colorado |
| Beauty | Waterfall, creek, mountain views, wildflowers |
| Activities | Hiking, photography |
Parking & Trailhead Information for Catamount Falls
The hike to Catamount Falls starts at Thomas Trailhead in the quaint mountain village of Green Mountain Falls. However, since there is no parking available at the Thomas trailhead, the hike must be started from the Gazebo Lake parking area in town. To get to Gazebo Lake, from interstate 25, take exit 141 and go west on Cimarron Avenue/US 24 for 13.5 miles to the Chipita Park/Green Mountain Falls exit. Following Green Mountain Falls Rd/Ute Pass Avenue for approximately 0.7 miles. Take a left onto Lake Street. Here you will find the parking area that lines the north side of the small lake.
The Hike: Catamount Falls Trail in Colorado Springs
The loop route below requires two segments along the streets of Green Mountain Falls. The first 0.4 mile segment of the hike will takes hikers from Gazebo Lake to the Thomas Trailhead. Beginning at Gazebo Lake, walk the roadside of Ute Pass Avenue that follows the southern edge of Gazebo Lake. Take a right at the first intersection onto Hotel Street. The streets can be a bit confusing in Green Mountain falls, and Hotel Street will soon turn into Park Avenue. Follow Park avenue as it winds up to its intersection with Boulder Street, a dirt (and sometimes muddy) road that terminates at the Thomas Trailhead.
Once on the Thomas Trail, yellow circle blazes mark the way. The initial stretch of trail leads to the base of the first waterfall on this hike, Crystal Falls @ 0.5 mile. This set of cascades is formed by Crystal Creek as it runs down the mountainside from a Crystal Creek Reservoir, one of the lakes situated above Green Mountain Falls on the flanks of Pikes Peak. A bit further up the trail, there is an observation area for taking in the larger leaps of the falls.
The next 0.7 mile segment of the Thomas Trail leads to the second waterfall, Catamount Falls, and is the more demanding portion of the hike. The trail climbs west/northwest until it arrives at Thomas Trail Memorial. After the memorial, Catamount Falls is just a short ways further up the trail. A spur trail leads from the left/south to the site of Catamount falls.
From Catamount Falls, the next segment of trail goes north to take hikers back into Green Mountain Falls. Yellow blazes mark the way across the creek and back to the Thomas Trail. Soon the trail will encounter an intersection with the Catamount trail at the Catamount Trailhead. Staying on the Thomas Trail, it will cross a small footbridge where a third small waterfall can be viewed. The trail then terminates at Belvedere Avenue.
Here, the final 1-mile segment of this loop hike begins. Taking a right onto paved Belvedere Avenue, it will lead east, back into town. Belvedere Avenue will eventually merge with Ute Pass Avenue. Going South/Right on Ute Pass Avenue then leads back to Gazebo Park.
You may be wondering, "What is a 'catamount?'" A catamount is a mountain lion, also known as a cougar. The Catamount Reservoir and Catamount Creek are both named after this creature that lives in the wilds of Colorado.
Looking for more waterfalls near Denver? Explore our more than 50 Colorado Waterfall Hikes, our favorite Waterfall Hikes in Rocky Mountain National Park, or 7 Waterfalls within One Hour of Denver.
Tips & Resources for Hiking to Catamount Falls in Colorado Springs
- Watch for yellow markers: These will guide you along the Thomas Trail.
- Get there early: This can be a crowded hike on the weekends.
- Parking: Out of respect for the residents of Green Mountain Falls, refrain from parking along the roads near the trailhead. Instead, park at Gazebo Lake and follow the trail description above.
- A Shorter Option: For those looking for a less demanding hike to just one waterfall, follow the route above to take in Crystal Falls only. This makes for a less demanding 1 mile, out-and-back hike.
- Packing List: Always pack the 10 Essentials. Download our Hiking Guide to get the list and dayhiking packing checklist.
- Colorado Road Conditions: Colorado Road Conditions
- Photo: We would like to express our gratitude to Ethan Beute for sharing such an amazing photograph of this hike to Catamount Falls in Colorado Springs.
- After the Hike: The Pantry Restaurant: One of our favorite breakfast places in all of Colorado
Weather
Map & Driving Directions
Click for Driving Directions
Chasm Falls in Rocky Mountain National Park
Chasm Falls in Rocky Mountain National Park bursts through a chasm in Fall River where the rock funnels its waters into a narrow gorge. It's one of the more accessible waterfalls in RMNP, located about 100 yards off of Old Fall River Road. The only drawback is that parking fills fast. However, there are several parking and hike options that we detail in this trail profile. Explore the full Chasm Falls hike profile below for trail map, driving directions, and more tips and details to help you enjoy this adventure in Rocky Mountain National Park.
Note: Rocky Mountain National Park now requires timed entry permits from May 27th through October 10th. See the RMNP permits page for more information.
Trail Snapshot: Chasm Falls in Rocky Mountain National Park
| Hike Distance | 0.1 mile, 2.8, or 4.8 miles (depending on parking area) |
|---|---|
| Difficulty | Easy |
| Duration | 20 minutes to approx 2.5 hrs Round-Trip |
| Trail Type | Out and Back |
| Starting Elevation | 9065' at the pulloff |
| Elevation Gain | Negligible (but more, if hiking up Old Fall River Road) |
| Seasons | Spring through Fall, Winter Snowshoeing |
| Dogs | Prohibited in RMNP but Allowed on certain days on Leash along Old Fall River Road (see details below) |
| Hike Trail Map | Click for a Map of Chasm Falls RMNP |
| Denver Drive Time | 1 hr 40 min |
| Driving Directions to a roadside pulloff area at Chasm Falls Trailhead | Click for Google Map |
| Driving Directions to EndoValley Parking Area | Click for Google Map |
| Driving Directions to West Alluvial Fan Parking Area | Click for Google Map |
| Town Nearest Hike | Estes Park, Colorado |
| Beauty | Waterfall, mountain views, meadows, river, wildlife: elk, big horn sheep, Abert's squirrel, deer, moose, bear; wildflowers |
| Activities | Picnicking, hiking trails, snowshoeing, horseback riding, backcountry camping (with a permit), photography |
| Fee | Park Pass Required |
Parking & Trailhead Information for Chasm Falls
Parking is tricky for Chasm Falls. Depending on where you are able to park, the hike will be a 0.1 mile, 2.8 mile, or 4.8 mile round-trip hike. It's also important to know that Old Fall River Road is closed during the winter months from Nov 30th until the end of March. However, the dirt road gets a lot of traffic and needs a lot of maintenance; so, there may be Spring and Summer closures for repairs. For example, Fall River Road will not open to vehicles in 2016 until early July. We recommend that you visit the Rocky Mountain National Park Road Status page to plan your trip to Chasm Falls and your drive up Old Fall River Road. Below, you'll find the three different parking options
Parking Options for Chasm Falls, Rocky Mountain National Park
#1 - Pulloff Near Chasm Falls - 0.1 Mile Jaunt - Driving Directions
#2 - Endovalley Picnic Area Parking - 2.8 Mile Round Trip Hike - Driving Directions
#3 - West Alluvial Fan Parking Area - 4.8 Mile Round Trip Hike - Driving Directions
During the busy summer months, all of these parking areas fill fast. Dogs are typically not allowed in RMNP, but on certain days, they are allowed along Old Fall River Road as long as they are leashed. See the Old Fall River Road status page for days when dogs are allowed. The scenic drive up Old Fall River Road is half the adventure--but not for the faint of heart. It's a steep dirt road with no guardrails and lots of switchbacks. When the road is open, park visitors can drive it all the way up to the Alpine Visitor Center, and take Trail Ridge Road back down into Estes Park, or take Trail Ridge Road over to the west side of the park in Grand Lake, Colorado.
The Hike: Chasm Falls Trail in RMNP
The hike from the pulloff along Old Fall River Road is well-marked with signs. The short trail of approx. 100 yards leads down stone steps and a steep dirt trail. The bottom of the trail opens to a viewing platform. Like the parking areas, the platform can get quite crowded during the busy summer months.
If hiking up Old Fall River Road from either Endovalley or West Alluvial Fall parking areas, be sure to be aware of vehicles as they make their way up and down the road. This this can be a great winter hike or snowshoe trip during the winter. Usually this means starting from the West Alluvial Fan parking area.
Tips & Resources for Hiking to Chasm Falls in RMNP
- Prepare: Bring water and high-energy food.
- Winter Road Closure: The road is closed to cars during winter. You may opt to plan on a longer hike during this season - starting from the West Alluvial parking area.
- Get there early: Parking may be limited at most of the trailheads in RMNP during the summer months. Go early to get a good spot. By early, we mean before 7:30 AM.
- Trail Map of Fall River Area: Trail Map Link
- Packing List: Always pack the 10 Essentials. Download our Hiking Guide to get list and dayhiking packing checklist.
- Colorado Road Conditions: Colorado Road Conditions
- Photo: We would like to express our gratitude to Tim Vo for sharing such an amazing photograph of this hike to Chasm Falls in RMNP.
- After the Hike: Mountain Home Café
Weather
Map & Driving Directions
Click for Driving Directions to Pulloff Near Chasm Falls

Raccoon Loop Hike in Golden Gate Canyon State Park
Our kids loved this 2.5 mile loop hike in Golden Gate Canyon State Park. The trail sports lots of shade, panoramic views of snowcapped peaks, wildflowers, and trickling brooks. Be sure to see the details below regarding an annual raptor closure that detours one segment of this hike. Explore the full Raccoon Loop Hike profile for trail map, driving directions, and many of the details you need to enjoy this adventure in Golden Gate Canyon State Park.
Trail Snapshot: Raccoon Trail Loop at Golden Gate Canyon
| Hike Distance | 2.5 miles |
|---|---|
| Difficulty | Easy |
| Duration | Approx 1.5 hr |
| Trail Type | Loop |
| Starting Elevation | 9120′ |
| Elevation Gain | Approx +500′ |
| Seasons | Year Round |
| Dogs | Allowed On 6' Leash |
| Hike Trail Map | Click for a Map of Golden Gate Canyon State Park |
| Denver Drive Time | 1 hr |
| Driving Directions to Panorama Point Trailhead | Click for Google Map |
| Driving Directions to Reverends Ridge Campground Trailhead | Click for Google Map |
| Town Nearest Hike | Golden, Colorado |
| Beauty | Mountain range views of snowcapped peaks, wildflowers, aspens |
| Activities | Hiking, mountain biking, photography, snowshoeing in winter |
| Fee | Colorado State Parks Pass Required |
Parking & Trailhead Information for the Raccoon Loop Hike
You can begin your hike at either the Panorama Point Trailhead or at the Reverend Ridge Campground Trailhead. Our family hiked this from the Panorama Point Trailhead. Though parking is limited, there is additional parking located directly across the street in a dirt lot. Reverend Ridge Trailhead, while a larger parking area, can fill up fast because it is located at the campground. Either one, however, is a good option. Driving directions for both trailheads are located in the trail snapshot above.
The Hike: The Raccoon Loop Hike in Golden Gate Canyon
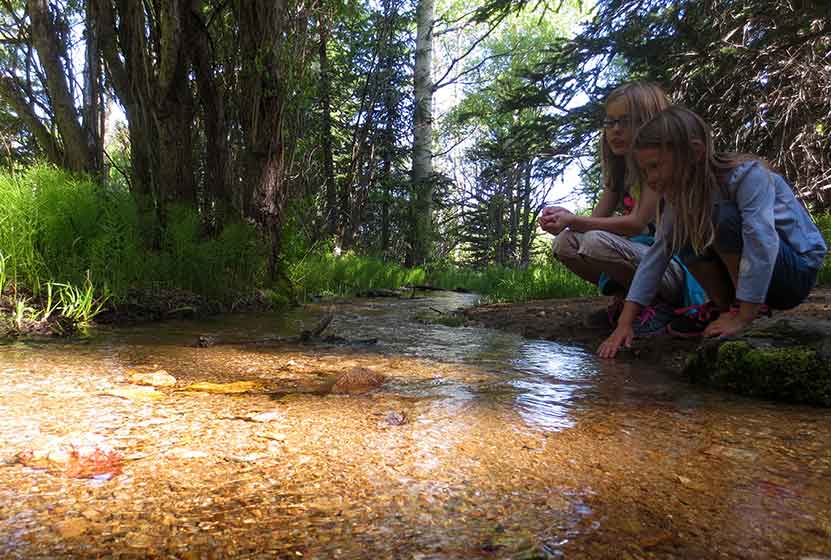
We hiked the Raccoon Loop counter-clockwise from the Panorama Point Trailhead and found it to be easy to moderate in difficulty. Our kids (at the time of this post) are 5 and 8. Both were wearing tennis shoes and did well on the trail. There was a steep segment with loose rock, where our youngest needed me to hold her hand as she navigated here way down the trail.
The trail begins with incredible views of the snowcapped Indian Peaks stretched out against the western sky. Soon, views of Thorodin Mountain and Starr peak dominate the landscape as the trail winds to the east and crosses a seasonal brook. Raccoon Trail then gently drops into aspen groves and green meadows full of wildflowers.
Entering a more mature stand of aspens, the trail begins a more steep descent. This is where hikers will want to watch their footing on the loose rock and gravel surface of the trail. After this short descent, the trail crosses another brook over a small footbridge, then begins to climb a bit further west before turning sharply to the south.
Shortly after the brook is where we encountered the closure of approximately 0.5 mile of the Raccoon trail. These closures are announced on the front page of the Golden Gate Canyon State Park website, and we knew about it before making our trip.
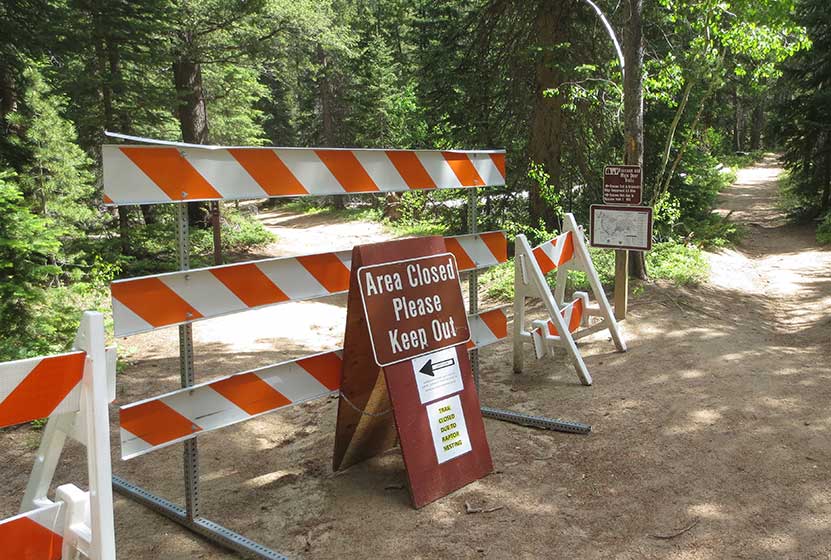
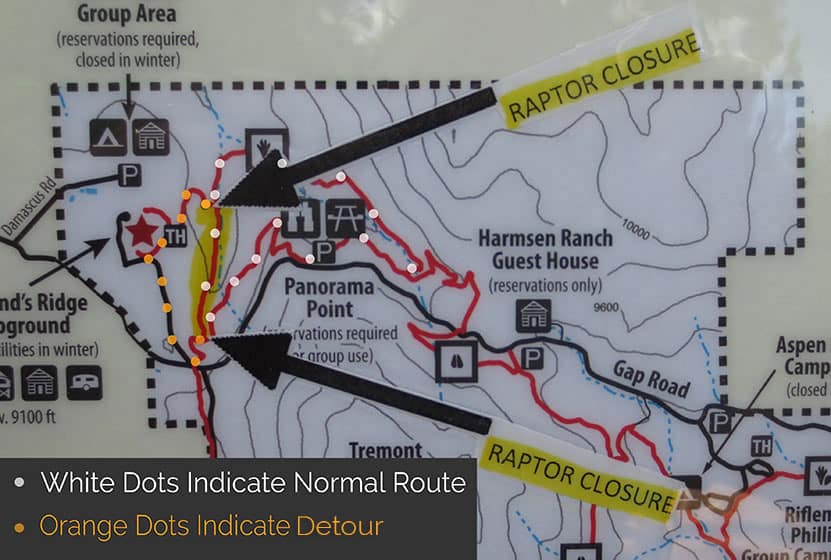
This rerouted us up to the Reverend Ridge Campground, then required that we hike down State Park Road for about 0.5 mile until we were able to pick up the Raccoon Trail again. Because the detour wasn't clearly marked, we've provided an image of the normal route vs. the detour route we took below.
It probably goes without saying, but do exercise caution when walking the road, and assume that cars will not see you. There are several sharp turns/switchbacks. We were able to pick up the trail down where the road comes to a stop sign, then hike back to Panorama Point. The detour adds approximately 1 mile to the original hike, making this into a 3.5 mile loop hike.
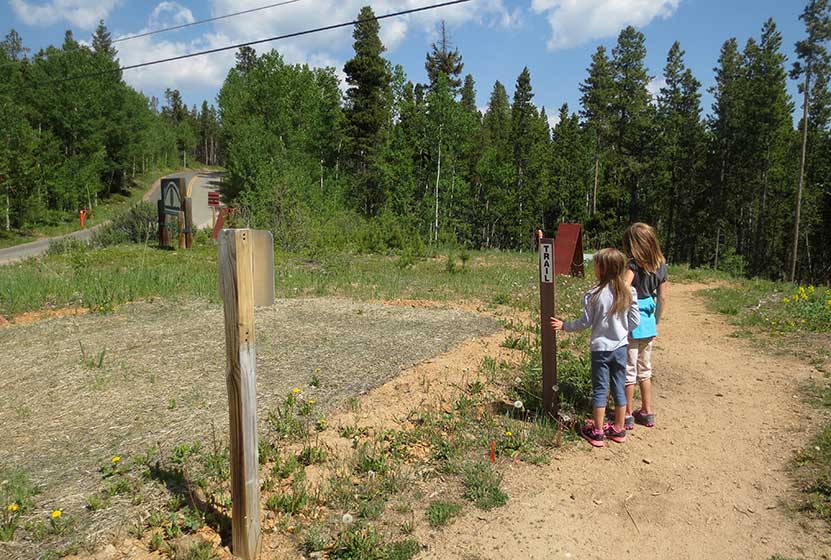
This last section had some elevation gain, but still was moderate in difficulty. This is a great hike for visiting friends and family, but those who have not acclimatized to the altitude, or who are not in the best shape, may find this last part challenging. There is a bench strategically placed on the ascent, and rocks where you can rest your legs.
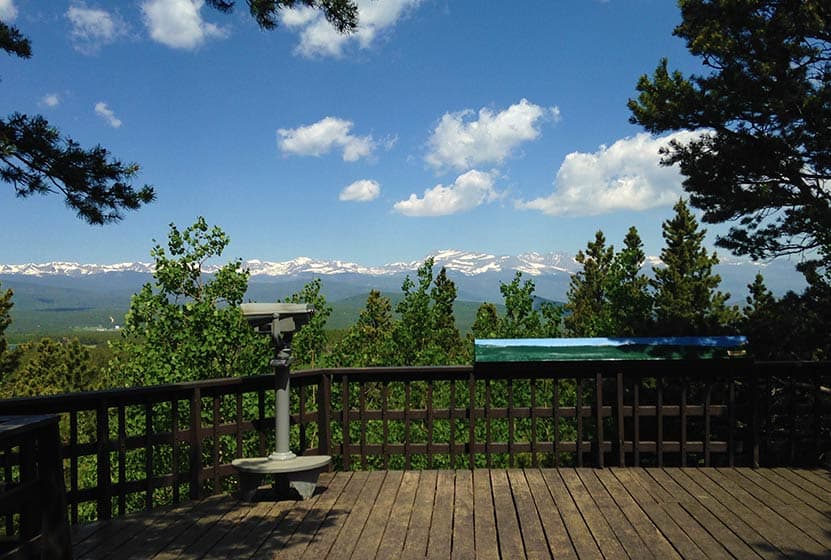
At Panorama Point, hikers will find a large deck and viewing area. It's one of the best accessible views you'll get of the Front Range near Denver.
Tips & Resources for Hiking the Raccoon Loop Hike
- Be Aware of Closures: The Raccoon Loop has seasonal closures when raptors are nesting. However, it's just one segment of the trail that is closed, and a (not-so-well-marked) detour is available.
- Look out for Mtn Bikers: We always find mountain bikers to be considerate on the trails near Denver. There is an established etiquette and they will call their pass. Still, it's good to know that this trail is popular with both mountain bikers and hikers, so keep your eyes and ears peeled and give them plenty of room to pass.
- Trail Map for Golden Gate Canyon State Park: Trail Map Link
- Packing List: Always pack the 10 Essentials. Download our Hiking Guide to get the list and dayhiking packing checklist.
- Colorado Road Conditions: Colorado Road Conditions
- After the Hike: Windy Saddle Cafe in Golden, Colorado
Weather
Map & Driving Directions
Click for Driving Directions to Panorama Point Trailhead
Arch Rocks Hike in Rocky Mountain National Park
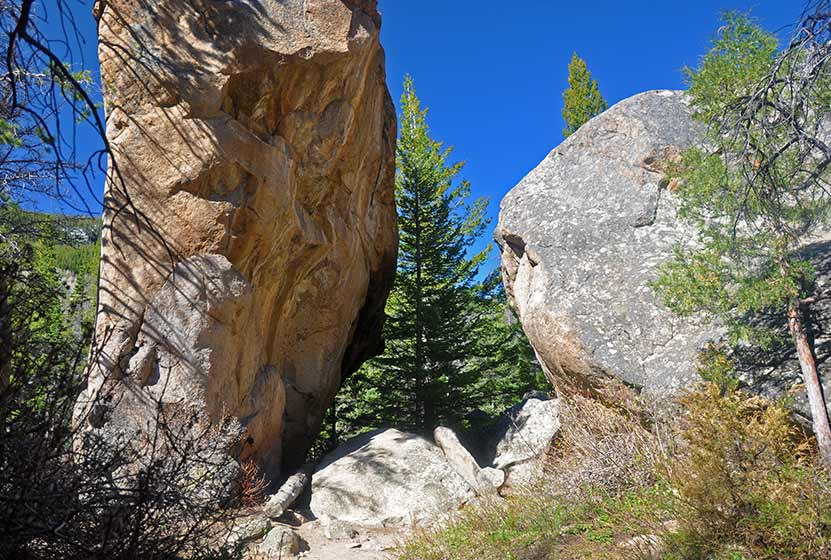
Along the way to The Pool or Fern Falls, you'll run into this towering waypoint of nature in Rocky Mountain National Park, the Arch Rocks. These are boulders as huge as cottages where the trail passes through. The trail is quite flat and hikers get to enjoy the sound of the running waters of the Big Thompson River. Explore the full Arch Rocks hike profile below for trail map, driving directions, and more of the details and tips you need to enjoy this adventure in Rocky Mountain National Park.
Note: Rocky Mountain National Park now requires timed entry permits from May 27th through October 10th. See the RMNP permits page for more information.
Trail Snapshot: Arch Rocks in Rocky Mountain National Park
| Hike Distance | 3 miles Round Trip (from Fern Lake TH) |
|---|---|
| Difficulty | Easy |
| Duration | Approx 1.5 to 2hr Round Trip |
| Trail Type | Out and Back |
| Starting Elevation | 8155′ |
| Elevation Gain | +245′ |
| Seasons | Spring through Fall |
| Dogs | Dogs Prohibited in RMNP |
| Hike Trail Map | Click for a Trail Map |
| Denver Drive Time | 1 hr 40 min |
| Driving Directions to Fern Lake Trailhead | Click for Google Map |
| Driving Directions to Fern Lake Bus Stop Parking | Click for Google Map |
| Driving Directions to Park & Ride Trailhead | Click for Google Map |
| Town Nearest Hike | Estes Park, Colorado |
| Beauty | Sub-alpine lakes, mountain views, river, wildflowers, aspen trees, ponderosa pine, wildlife: Abert's squirrel, elk, deer, moose, duck |
| Activities | Picnicking, hiking trails, snowshoeing |
| Fee | Park Pass Required |
Parking & Trailhead Information for Arch Rocks in RMNP
Parking is more limited in this area of Rocky Mountain National Park, and you'll likely have to park at the Park & Ride then take the shuttle to the Fern Lake Trailhead. You'll find driving directions above to The Fern Lake Trailhead (closest to this hike), the Fern Lake Bus Stop Parking area (very limited parking), and for the Park & Ride lot. See the RMNP Shuttle page for dates and times of service. Avoid parking along Fern Lake road as this damages the road side. If you park or are dropped off at the Fern Lake Bus Station, the hike from the station to the trailhead will add and additional .8 mile, one-way, to your hike.
The Hike: Arch Rocks in RMNP
It's a short destination hike along the Big Thomspson river to Arch Rocks. Arch Rocks was actually my very first destination on my very first hike in Rocky Mountain National Park in 2004. I camped at the backcountry site that is just a bit further up the trail, nestled back in the aspens and boulders that are so characteristic in this valley.
At approx 1.5 mile a huge rock, the size of a house, arches over the trail. In centuries past, this rock sheered off from the towering cliffs above and tumbled down to this spot. It's difficult to get a good photo of Arch Rocks and to really capture it's size. If you can get down-trail, and a bit below it, you'll have a better chance.
If you want to make your hike a bit longer, the next destination along the Fern Lake trail is The Pool--just .2 mile further--where Fern Creek and the Big Thompson River collide.
Tips & Resources for Hiking to Arch Rocks in Rocky Mountain National Park
- TIP: It is advisable to arrive early as parking is limited. One may opt to ride a shuttle that drops you off at the trailhead.
- Bring some food: The rocks near the Big Thompson River can be a great place for picnics.
- Trail Map for Rocky Mountain National Park: Trail Map Link
- Packing List: Always pack the 10 Essentials. Download our Hiking Guide to get list and dayhiking packing checklist.
- Colorado Road Conditions: Colorado Road Conditions
- Photo: We would like to express our gratitude to Charlie Stein for sharing such an amazing photograph of this hike to Arch Rocks in RMNP.
- After the Hike: Baba's Burgers & Gyros
Weather
Map & Driving Directions
Click for Driving Directions
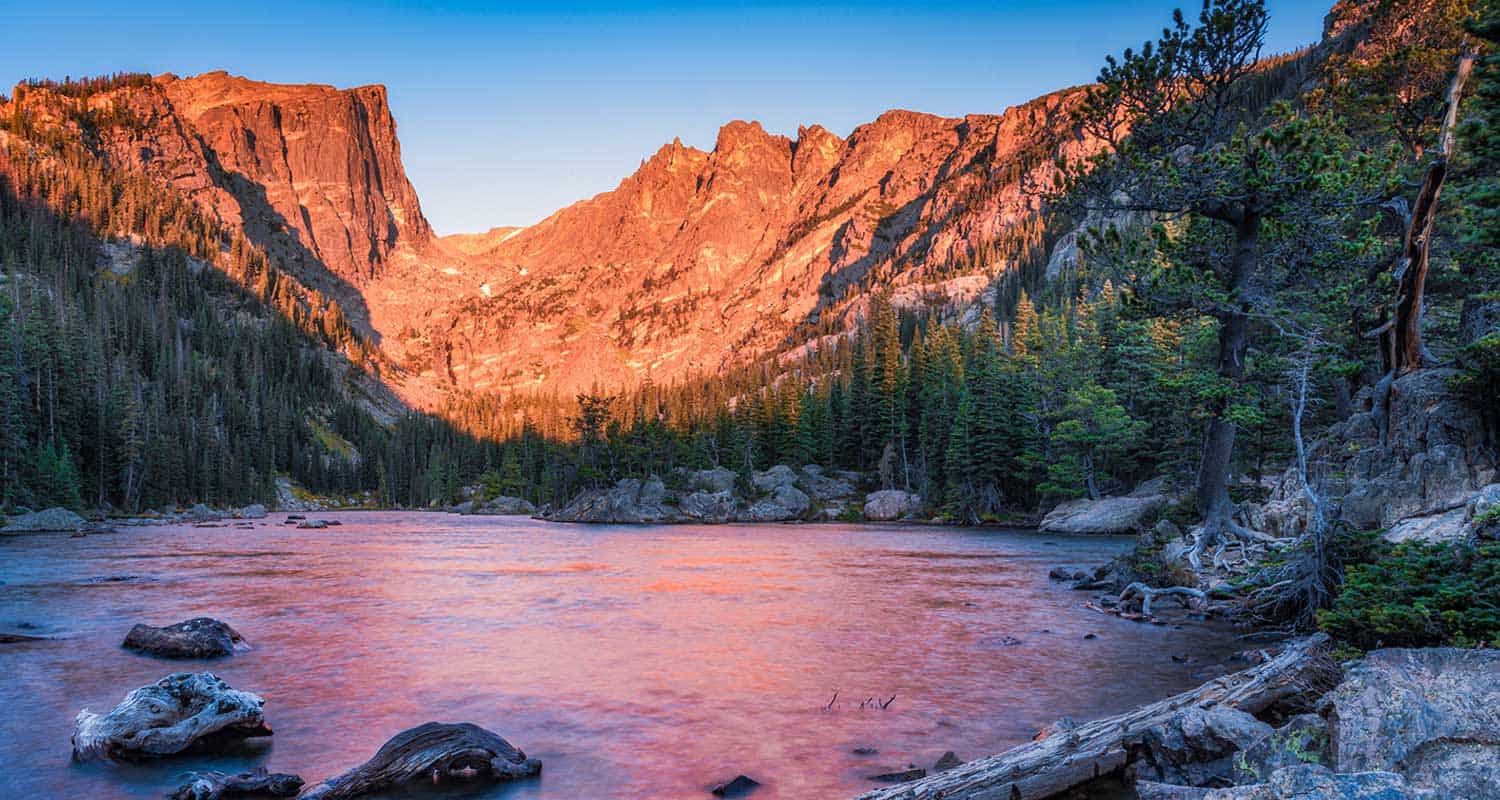
Dream Lake in Rocky Mountain National Park
The hike to Dream Lake is one of the popular destination hikes in Rocky Mountain National Park--and for good reason. In the early morning hours, Dream Lake is a vision straight out of a fairy tale. This 2.2-mile, out-and-back hike begins at the Bear Lake trailhead and passes Nymph Lake along the way. Explore the full Dream Lake hike profile below for trail map, driving directions, and all the details you need to enjoy this Colorado adventure.
Note: Rocky Mountain National Park now requires timed entry permits from May 27th through October 10th. See the RMNP permits page for more information.
Trail Snapshot: Dream Lake in Rocky Mountain National Park
| Hike Distance | 2.2 mile Round Trip |
|---|---|
| Difficulty | Easy |
| Duration | Approx 1.5hr Round Trip |
| Trail Type | Out and Back |
| Starting Elevation | 9475' at Trailhead |
| Elevation Gain | Approx. +425' |
| Seasons | Spring through Fall, Winter Snowshoeing |
| Dogs | Prohibited in RMNP |
| Hike Trail Map | Click for a Map of Dream Lake in RMNP |
| Denver Drive Time | 2 hr |
| Driving Directions to Bear Lake Trailhead | Click for Google Map |
| Town Nearest Hike | Estes Park, Colorado |
| Beauty | Sub-alpine lakes, mountain views, wildlife: Abert's squirrel, elk, bear |
| Activities | Picnicking, hiking trails, photography, snowshoeing |
| Conditions at Bear Lake Trailhead | Click Here |
| Fee | Park Pass Required |
Parking & Trailhead Information for Dream Lake:
The trail up to Dream Lake begins at the Bear Lake Trailhead (driving directions).In the event that parking lot at Bear Lake is full, you'll then need to park at the Park & Ride near the Bierstadt Trailhead and take the bus into the trailhead. This service runs 7am to 7PM and more information on the RMNP shuttle bus routes can be found at this link. The trail to Dream Lake is located on your way to Bear Lake, off to the left, just before reaching the shore viewing area of Bear Lake.
The trail to Dream Lake is paved for the first half mile. The path was surfaced to deal with the erosion caused by the heavy foot traffic, and is not considered handicap accessible. After visiting the lily pad-laden Nymph Lake, the trail becomes a dirt path and begins a gentle climb towards Dream Lake. For a short stint the trail becomes more steep and demanding. On the way up, hikers will gain views of a vast landscape featuring the Keyboard of the Winds in Glacier Gorge and Longs Peak looming over everything but the distant sky.
Just before reaching Dream Lake, the trail splits. The trail to the left takes hikers to Lake Haiyaha and the trail to the right leads to Dream Lake. Dream Lake, with the beautiful backdrop of Hallet Peak, is one of the most photographed scenes in Rocky Mountain National Park. At daybreak, light from the east illuminates the stone face and crags of Hallet, and Dream Lake returns the favor by mirroring its image in her waters.
List and Links of Destinations From Bear Lake to Emerald Lake
Tips & Resources for Hiking to Dream Lake:
- Explore More: Adventure beyond Dream Lake is Emerald Lake (+.6 mile from Dream Lake).
- Trail Map for Bear Lake Corridor: Trail Map Link
- Colorado Road Conditions: Colorado Road Conditions
- After the Hike: Poppy's Pizza
- Photo: We would like to express our gratitude to Brendan Bombaci for sharing such an amazing photograph of this hike to Dream Lake.
Weather
Map & Driving Directions
Click for Driving Directions
Eldorado Cascades at Walker Ranch
Eldorado Cascades is tucked back in Walker Ranch near Boulder, Colorado. It's an easy to moderate 1.25 mile hike from the Ethel Harrold Trailhead down to where South Boulder Creek winds through the park and crashes over the boulders blocking its path. Explore the full trail profile below for all the details: tips, trail map, and driving directions to the trailhead.
Trail Snapshot: Eldorado Cascades at Walker Ranch
| Hike Distance | 2.5 mile Round Trip |
|---|---|
| Difficulty | Moderate |
| Duration | Approx 1.5 hr Round Trip |
| Trail Type | Out and Back |
| Starting Elevation | 7000′ |
| Elevation Gain | Approx -500' to Cascades, +500 back to Trailhead |
| Seasons | Spring through Fall |
| Dogs | Allowed On Leash |
| Hike Trail Map | Click for a Map of Walker Ranch |
| Denver Drive Time | 1 hr |
| Driving Directions to Walker Ranch Ethel Harrold Trailhead | Click for Google Map |
| Town Nearest Hike | Boulder, Colorado |
| Beauty | Boulder Creek, Cascades, Wildlife: Birds, Elk |
| Activities | Hiking, picnic facilities, mountain biking, horseback riding |
Eldorado Cascades can be reached from several different trailheads that tie into the Walker Ranch Loop system. However, the shortest and probably easiest access is by starting at the Ethel Harrold Trailhead. See the directions driving directions links on this page, and be sure to make note of your last couples turns because cell phone services are spotty.
The drive up to the trailhead on Flagstaff Road is a beautiful one, but do be aware of the many hikers, climbers, and cyclists along the road. After Flagstaff road, the two roads that lead to the trailhead, Pika, then Bison, are improved dirt roads. These were recently graded when we visited (early April) and were fine to drive. However, 4-wheel drive is probably necessary during the winter months or after early Spring rains or snowfall. The trailhead parking area has a pit toilet and information board. If you are interested in birdwatching, you'll find a Birds of Walker Ranch Chechlist at the board.
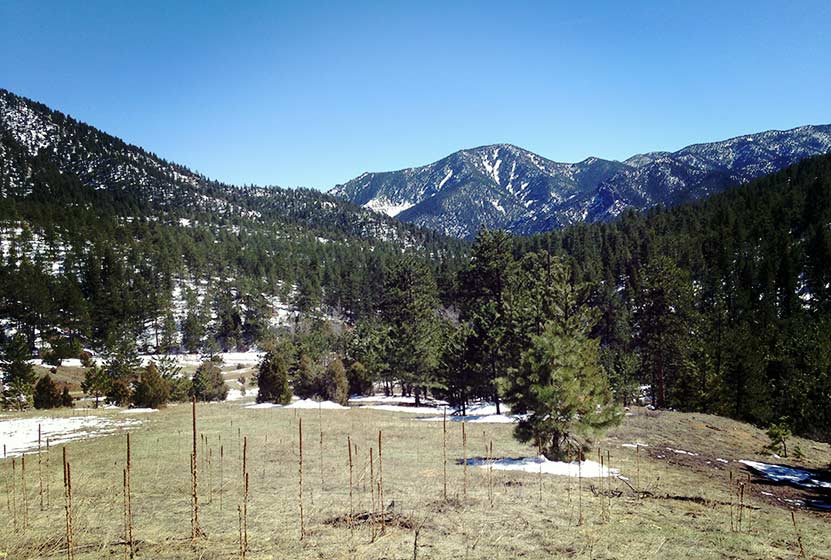
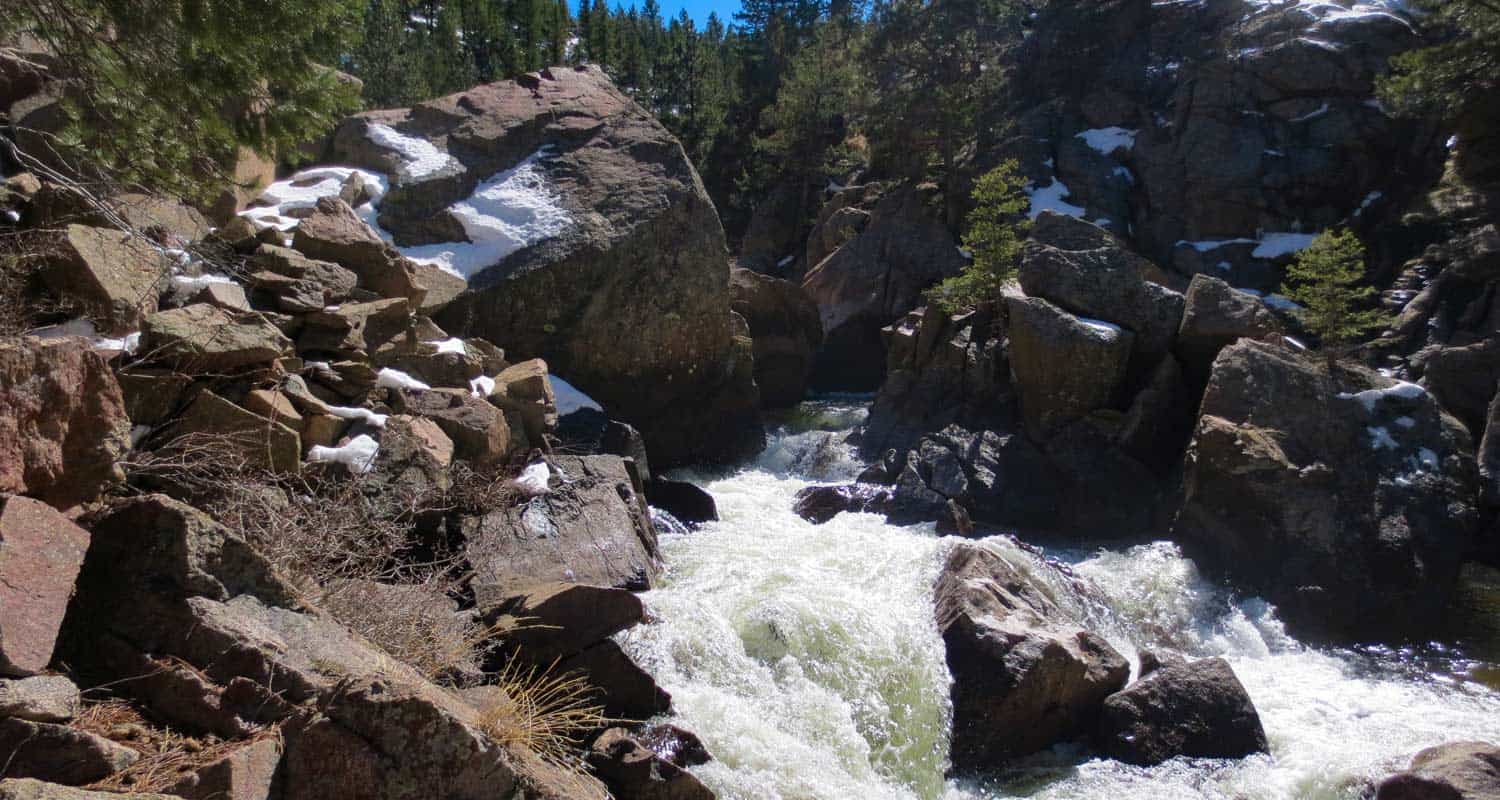
The Hike to Eldorado Cascades
The hike begins with expansive views of Walker Ranch and out towards Eldorado Canyon State Park (pictured above). The air was full of the scent of juniper trees, and we found abundant Elk sign in the meadows near the trailhead. The trail winds down to a intermittent stream that was gushing with the early Spring snowmelt. A bridge buried in snow leads across the creek, then the trail skirts the hillside for most of the hike, gradually working its way down to a junction with the Walker Ranch Loop Trail. At the junction, the trail to Boulder Creek and Eldorado Cascades is to the right and takes hikers further downhill to a bridge that crosses South Boulder Creek.
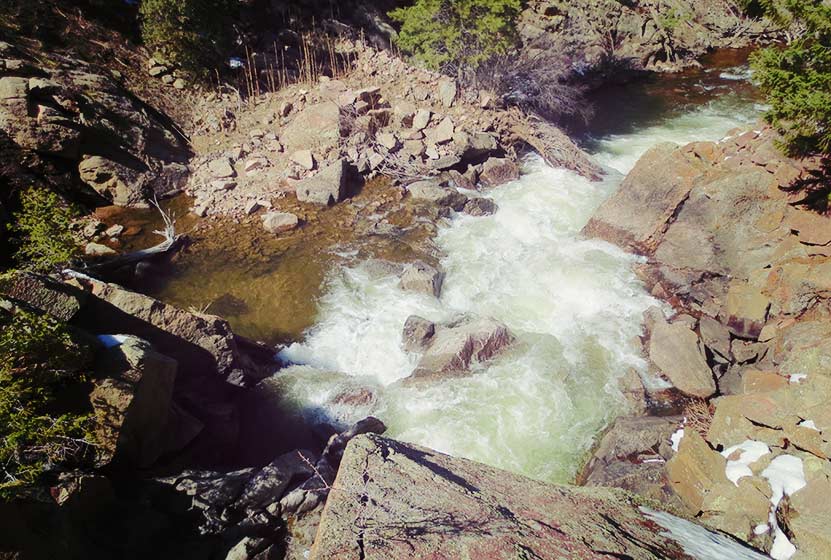
The sound of water is almost always within earshot, and the chirps of a variety of birds fill the air. Shortly before the bridge, hikers may notice a "To Eldorado Canyon" sign and trail on the left side of the Walker Ranch Trail. This leads to Eldorado Canyon State Park, about 3.5 miles away, but does not lead to the cascades. The cascades can be found almost immediately after crossing the bridge that spans South Boulder Creek. Here the trail becomes a series of uneven rock stairs that lead to the top of the cascades (pictured above is view from the top).
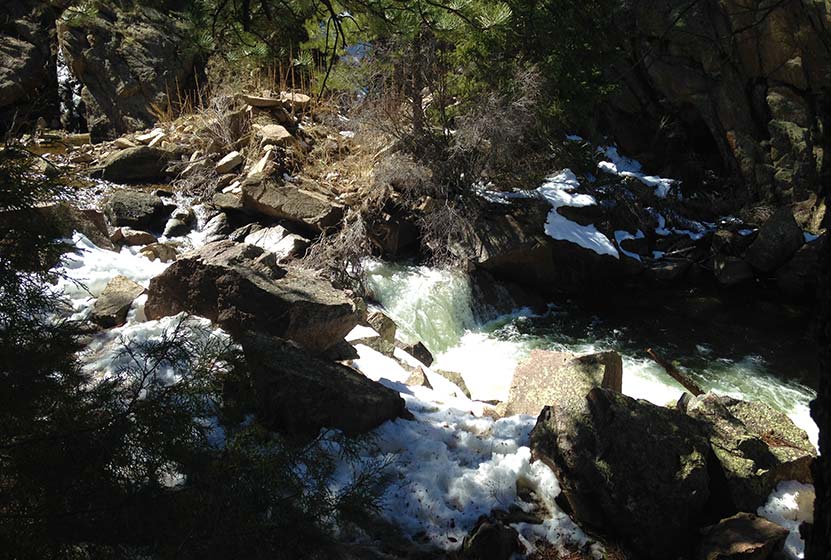
"Eldorado Falls" seems to be a local and unofficial name given to this set of cascades. The trail map simply marks them as "falls." On the back side of the cascades, South Boulder Creek seems to disappear under massive boulders that block its path. Here the water slips under the rock then shoots out on the other side in a series of small cascades. The water pools, then pours over another lower cascades (pictured above) before returning to calmer waters.
The hike back is mostly uphill, but it's only about a +500' of elevation gain. The park is open in the winter; however, the trail from the Ethel Harrold trailhead down to the Walker Ranch Loop might become difficult to discern after a blanket of snow. So, the ideal times are Spring through Fall.
Tips & Resources for Hiking to Eldorado Cascades
- Come Prepared in Spring and Winter: Because the trail is mostly in shade of ponderosa pines, the snow and ice can settle in during both winter and spring. Therefore, we recommend Trekking Poles and/or Traction Devices for this trail (I wish I had brought mine).
- Exercise Caution Around the cascades: The area around Eldorado Cascades is rocky and uneven. The cascades are also difficult to photograph because of how it's tucked back into the canyon. For this reason, exercise caution along the slippery rock and near the waters of South Boulder Creek.
- Trail Map for Walker Ranch: Trail Map Link
- Packing List: Always pack the 10 Essentials. Download our Hiking Guide to get list and dayhiking packing checklist.
- Colorado Road Conditions: Colorado Road Conditions
- After the Hike: Ozo Coffee in Boulder
Weather
Map & Driving Directions
Click for Driving Directions
Looking for waterfalls near Denver? Explore our more than 50 Colorado Waterfall Hikes, our favorite Waterfall Hikes in Rocky Mountain National Park, or 7 Waterfalls within One Hour of Denver.