Herman Gulch to Herman Lake Hike
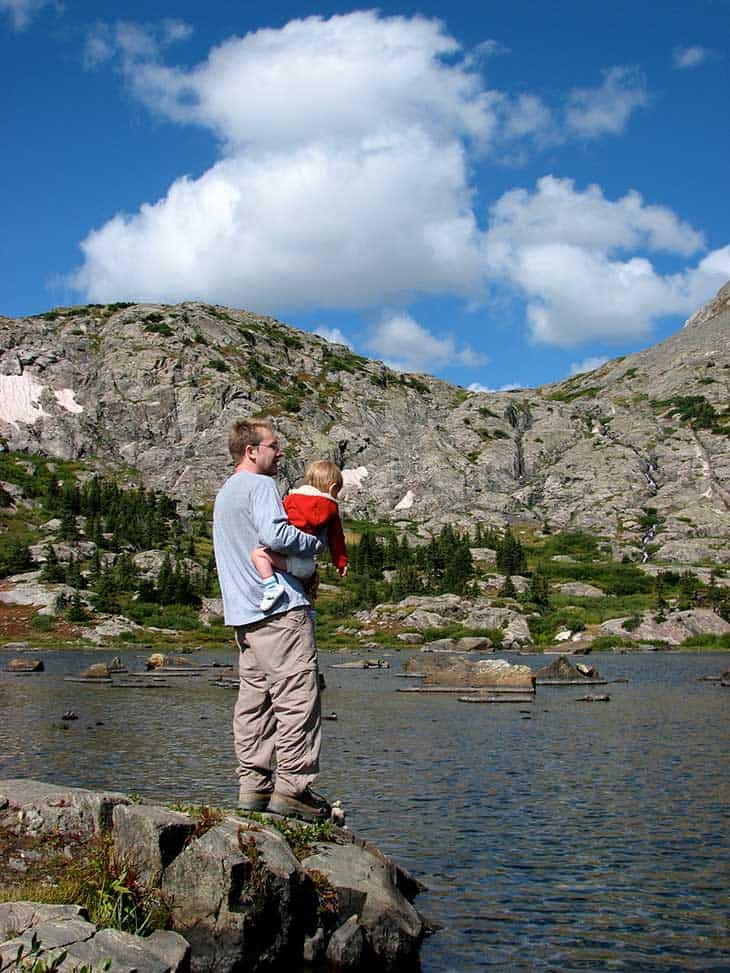
The Herman Gulch Trail is one of the best summer wildflower hikes near Denver. It's also a challenging winter snowshoe and is often used for cross-country skiing. The Herman Gulch Trail is a 2.5 mile (one-way), out-and-back adventure into snowcapped mountain country and provides access to many more trails in Arapaho National Forest. Explore the full Herman Gulch hike profile below for trail map, driving directions, and more tips and details to help you enjoy this adventure in the Rocky Mountains of Colorado.
Trail Snapshot: Herman Gulch Hike, Colorado
| Hike Distance | Approx 5 Miles Round Trip |
|---|---|
| Difficulty | Moderate (Difficult in Winter) |
| Duration | Approx 3.5 hrs |
| Trail Type | Out and Back |
| Starting Elevation | 10,400′ |
| Elevation Gain | Approx +1600+′ |
| Seasons | June to September; October to May for Winter Trail Conditions |
| Dogs | Allowed On Leash |
| Hike Trail Map: Summer | Click for a Map of Herman Gulch Trail |
| Hike Trail Map: Winter | Click for a Map of Herman Gulch Trail |
| Denver Drive Time | 1 hr |
| Driving Directions to Herman Gulch Trailhead | Click for Google Map |
| Town Nearest Hike | Silver Plume, Colorado |
| Beauty | Summer Wildflowers, lake, cascades, meadow, mountain stream, aspen trees, wildlife: mountain goats |
| Activities | Hiking, photography, snowshoeing, cross-country skiing |
Parking & Trailhead Information for Herman Gulch
The Herman Gulch Trailhead is located about 20 miles west of Idaho Springs via I-70. From Denver, it's about a 60-minute drive but can take around 1.5 hours in winter ski traffic. The trailhead is located right off Exit 218 by taking a right onto Watrous Way. There are restrooms available at the trailhead. As with all trailheads, but especially those right off the interstate, be sure that your valuables are out of site and locked up. The trail is located in the middle of the parking area, just to the left of the restroom.
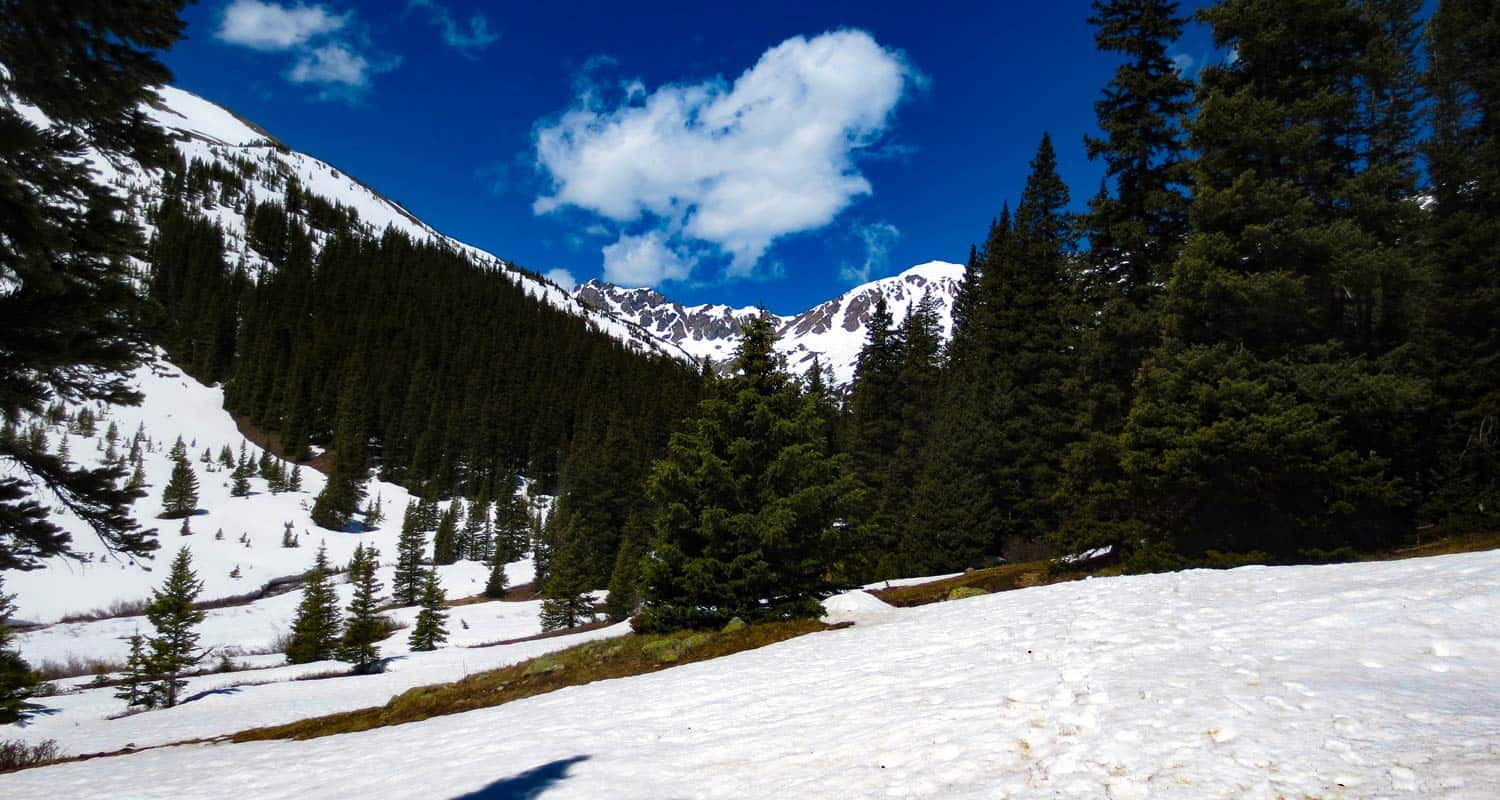
The Hike: Herman Gulch to Herman Lake
From the parking lot, the initial trail segment is steep. But be encouraged, while it's not an easy hike, the trail becomes more gradual as it gains elevation into the widening valley of Herman Gulch. At the trail intersection early in the hike, the trail to Herman Gulch will bear to the left, and a trail that leads to Waterous Gulch will lead to the right. Staying on the Herman Gulch Trail, it will weave in and out of the trees into small meadows with Herman Creek and many meltwater rivulets cascading across the landscape.
Winter may not release its grip on Herman Gulch until mid-summer. For example, all the photos in this trail profile were taken during the first week of June, so prepare for the snow to get increasingly deeper as you progress further on the trail. For this reason, we recommend trekking poles and traction devices for your boots. Also, be aware that at this elevation, thunderstorms often come up quickly on Summer afternoons, bringing dangerous lightning, especially in the open areas of the higher elevations. For this reason, and in order to avoid crowds, it's wise to begin your hike early in the day.

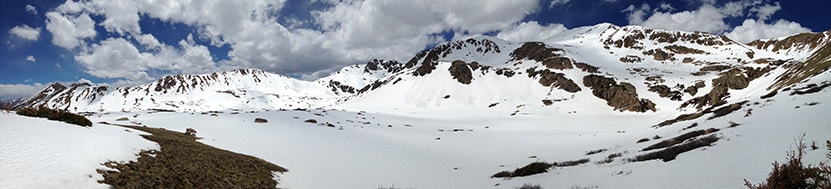
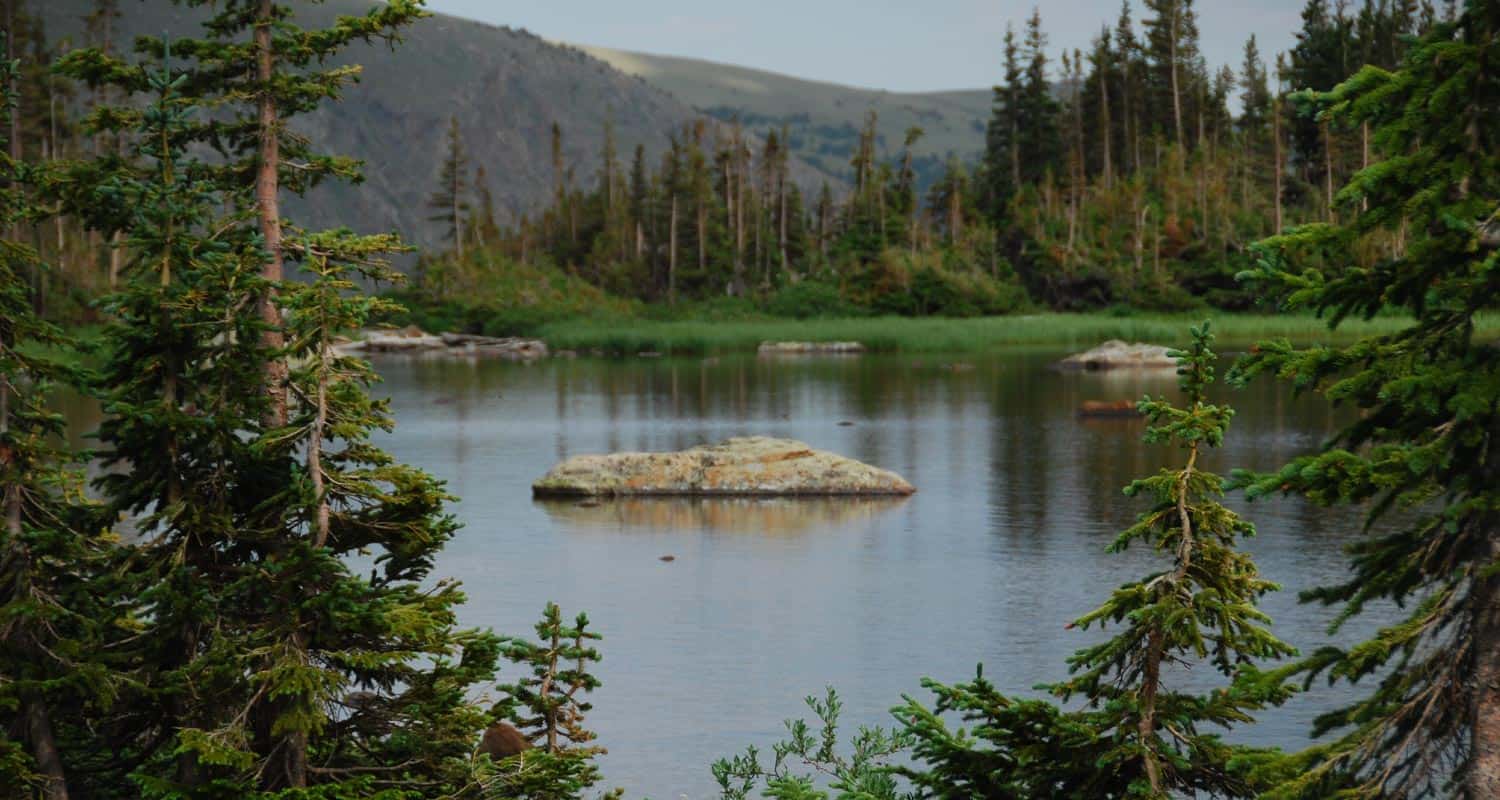
The trail eventually emerges from the trees into a broad alpine landscape where a series of rock cairns leads the way to Herman Lake. This final segment is steep and demanding. The lake is located in a wide bowl beneath the lofty reaches of Pettingell Peak. The lake may be snow-covered through much of June, depending on late-season snowfall. In the early and mid-summer, a series of small meltwater cascades make their way down along the western mountainside into the lake. Be sure to stay the trail as you will be in a fragile alpine ecosystem.
Hiking Herman Gulch in the Winter
Herman Gulch is also a popular snowshoeing and cross-country skiing destination. December to March offer the best snowpack for these activities. It's a very different experience when snow has piled up in Herman Gulch and it's even more critical that those venturing into this area have packed their 10 essentials and are dressed appropriately. There are two avalanche chutes on the right-hand side of the trail about 1 mile into the hike that hikers should keep in mind (see ORIC winter map). During this season, do not go above treeline into the higher reaches as these are very much prone to avalanches. It's also important to bear in mind that snowstorms can come up very quickly, even in Spring and Fall, reducing and even eliminating visibility. So be aware and be prepared. Snowshoeing travel speeds are about 1 mile per hour, depending on the person, which is half of hiking speeds. Adjust your travel times accordingly and for early darkness of winter.
Tips & Resources for Hiking Herman Gulch Hike
- TIP: As you ascend the valley in snow conditions, be cautious of 2 avalanche paths on the right.
- TIP: Before starting the a winter hike here, contact the Clear Creek Ranger District to inquire about snow conditions and trail updates.
- Trail Map - Summer: Herman Gulch Trail Summer
- Trail Map - Winter: Herman Gulch Trail Winter
- Packing List: Always pack the 10 Essentials. Download our Hiking Guide to get the list and dayhiking packing checklist.
- Colorado Road Conditions: Colorado Road Conditions
- After the Hike: Beaujos Pizza in Idaho Springs
Weather
Map & Driving Directions
Click for Driving Directions

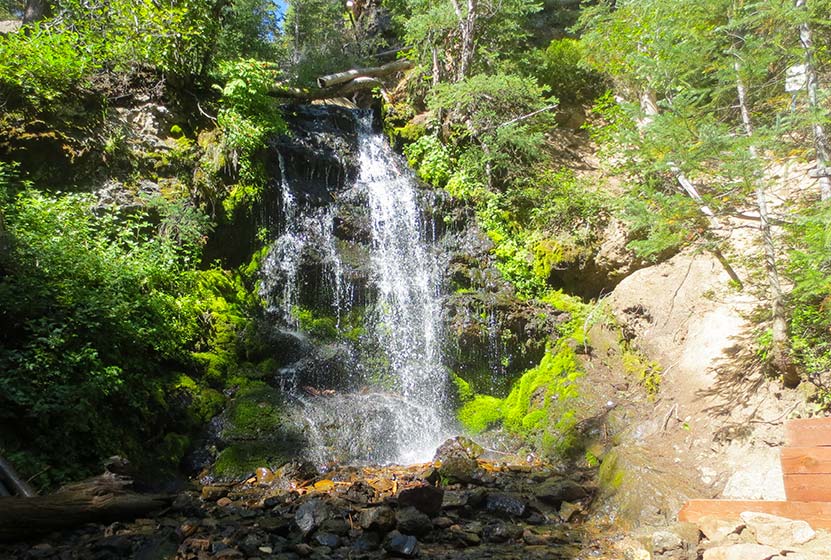
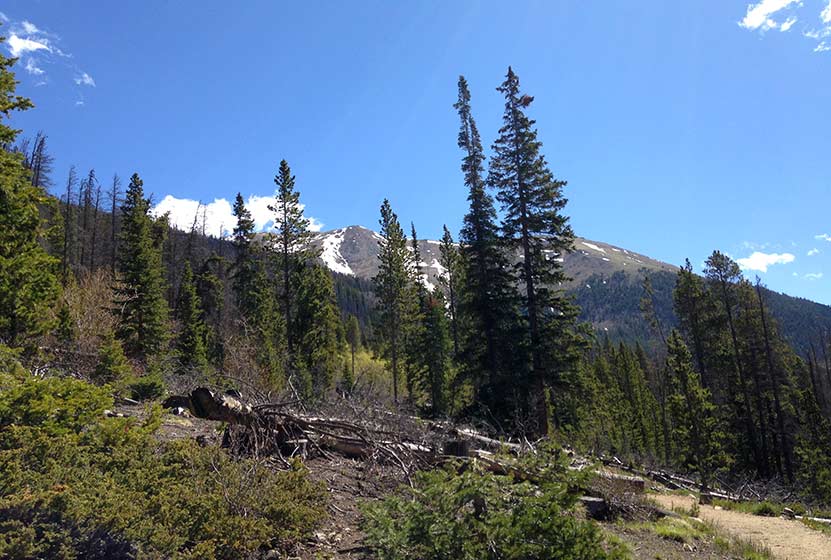
Pole Creek Falls Hike near Granby, Colorado
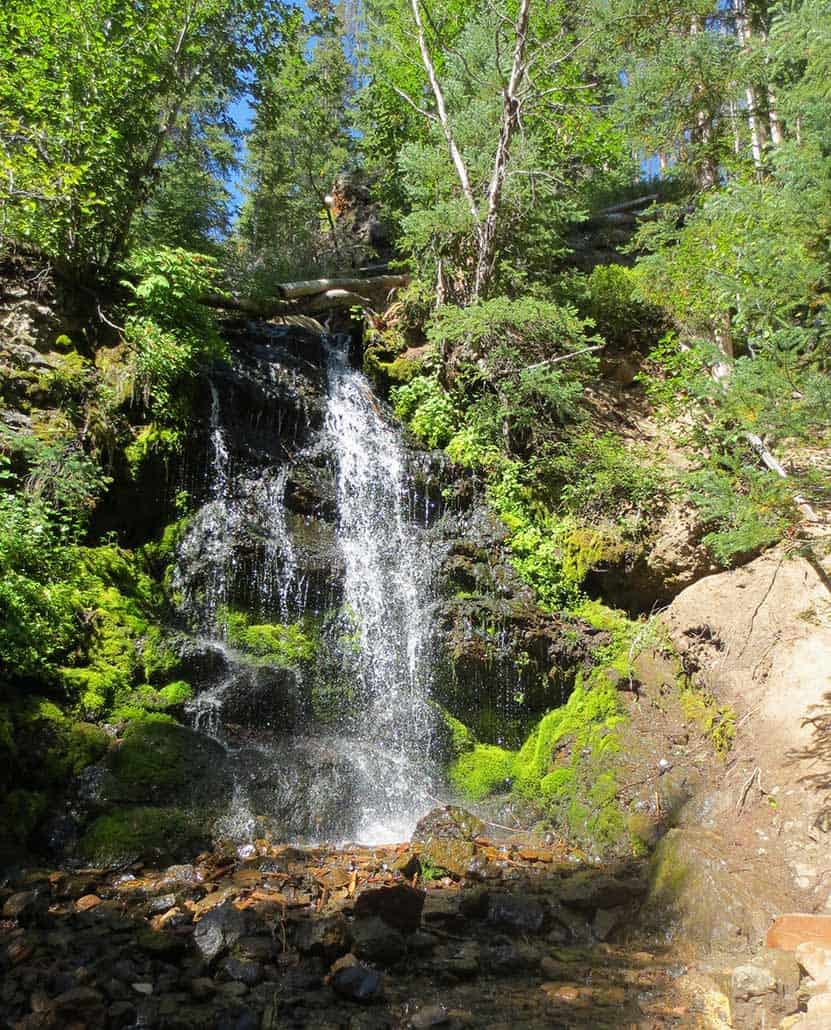
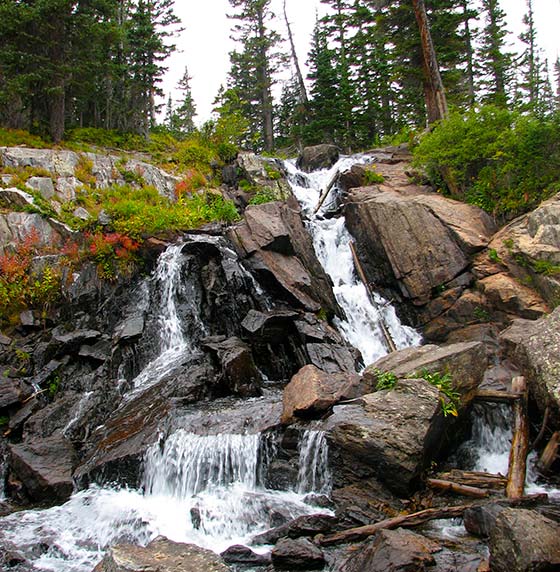
The Pole Creek Falls trail near Granby, Colorado is an easy out-and-back destination hike to a waterfall that courses down a huge dark slab of moss-covered rock. Purple mountain asters and active beaver dams can be observed along this family-friendly trail. Explore the full Pole Creek Falls hike profile below for trail map, driving directions, and more tips and details to help you enjoy this adventure near Granby.
Trail Snapshot: Pole Creek Falls Trail near Granby, Colorado
| Hike Distance | 2.2 miles Round Trip |
|---|---|
| Difficulty | Easy |
| Duration | Approx 1 Hour |
| Trail Type | Out and Back and Loop |
| Starting Elevation | 8925′ |
| Elevation Gain | Approx Total +400' on Loop |
| Seasons | Year Round |
| Dogs | Allowed On Leash |
| Hike Trail Map | Click for a Pole Creek Falls |
| Denver Drive Time | 1 Hour 50 Min |
| Driving Directions to Pole Creek Falls Trailhead | Click for Google Map |
| Town Nearest Hike | Frasier, Colorado |
| Beauty | creek, buckwheat, larkspur; wildlife: beaver, brook trout, moose, bear |
| Activities | Hiking, photography |
| Fee: | Free for YMCA of the Rockies Members and Paid Guests or Day-Pass purchase required (see details below) |
Parking, Trailhead, & Fee Information for Pole Creek Falls Hike
The trailhead for Pole Creek Falls is located on the YMCA Snow Mountain Ranch property just south of Granby, Colorado. To start out from Denver, take Interstate 70 to Highway 40. Highway 40 is a windy drive up and over Berthoud Pass, but the views make it worthwhile. You have the option of stopping at the top of Berthoud Pass to take in the alpine landscape. Then, stay on Hwy 40 through Winter Park, Fraser, and Tabernash. Turn left onto CR 53 (a sign for Snow Mountain Ranch will mark the road). As you drive into the property, look for the flagpole. This will mark your first stop, which is the Program office, the building immediately to the right of the flagpole/stone marquee entrance sign. This is where you'll need to purchase your day-pass (one for each person).
So, this is the real thing you have to consider for this hike: Is it worth the cost? The day-pass fees are $20 per adult and $10 per child 6-12. Kids 5 and under are free. The day-pass gets you access to all the hiking trails, biking trails, rec center, mini-golf, and swimming pool. However, if you're a guest at the ranch and paying for lodging, your day-use is included in the price.
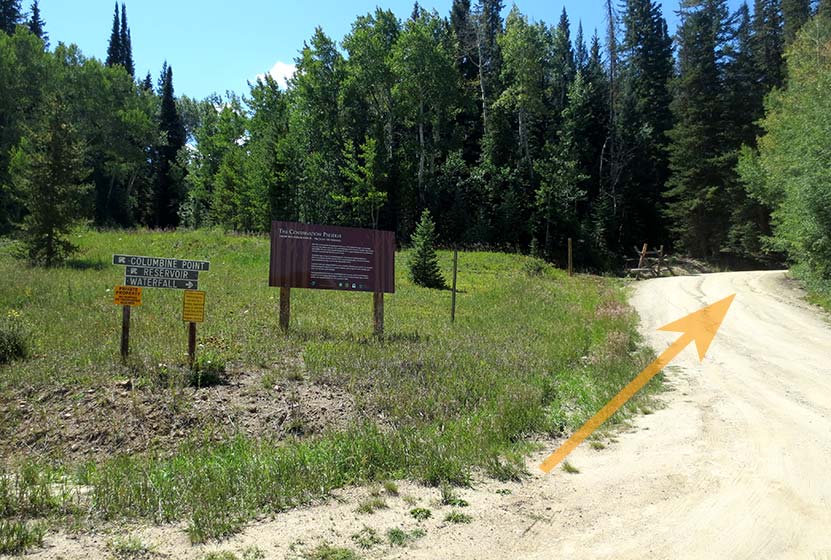
After getting your passes, drive back out and turn right onto CR 53. Stay on CR53 as it turns into a dirt road and passes the riding stables. Just after the stables it will bear left (you'll notice on the Google map that the road name at this point is CR53/Blue Ridge Rd). At the fork, there will be signage for the waterfall trailhead that points you to the right (see photo below).
The trailhead parking is just a short distance further down the road from this fork. Here you'll find a toilet, picnic tables, and trash receptacles.
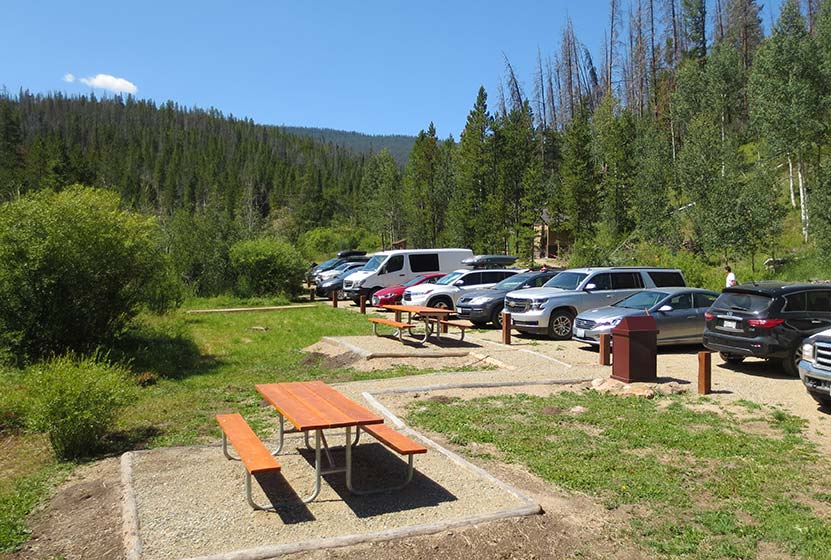
The trailhead is located at the end of the parking area on the right-hand side of the lot (pictured below).
Pole Creek Falls Trailhead
The Hike: Pole Creek Falls Trail
My oldest daughter and I hiked to Pole Creek Falls in the middle of August, and the falls were still at a nice flow. I would think that the waterfall really gushes in the late-Spring and early-Summer. The trail was gradual and enjoyable all the way up to the falls. Early on the trail, hikers will encounter a fork with a small footbridge to the left (picture below). Here you'll want to bear right to keep on the main trail.

Eventually, the trail will enter a wooded area and cross over a couple footbridges as it follows Pole Creek up to the base of the waterfall.
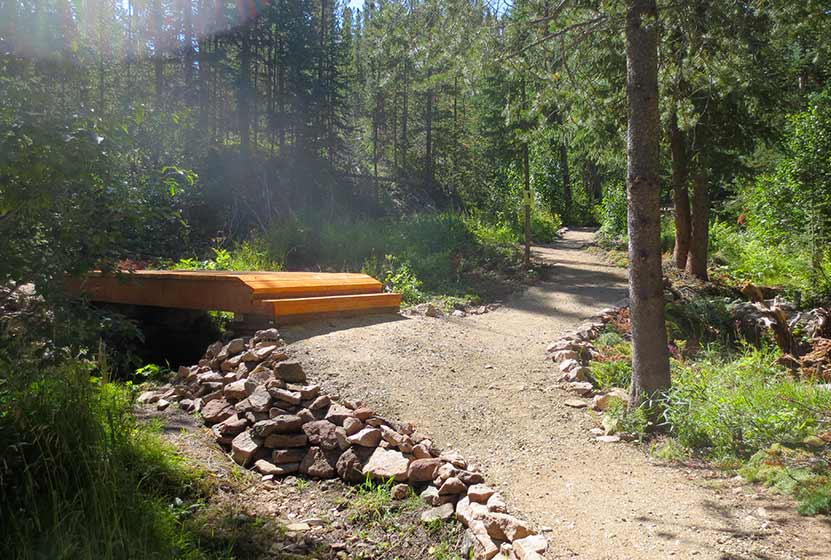
Finally, the bridge pictured above, hikers will stay on the right-hand trail segment to access the base of the falls. The trail to the left leads around to a higher viewing area, but the best views of the waterfall are at the bottom.
Tips & Resources for Hiking the Pole Creek Falls Trail
- TIP: After paying the daily access fee at the Program building in YMCA of the Rockies at Snow Mountain Ranch, obtain a map which leads to the trailhead along Blue Ridge Road, and marks the other trails on the property.
- TIP: Wear Sunscreen as much of this hike is without shade.
- Trail Map: Pole Creek Falls Trail near Granby
- Packing List: Always pack the 10 Essentials. Download our Hiking Guide to get the list and dayhiking packing checklist.
- Colorado Road Conditions: Colorado Road Conditions
- After the Hike: The Ditch in Winter Park
Weather
Map & Driving Directions
Click for Driving Directions
Beaver Loop Hike in Golden Gate Canyon
The Beaver Loop is a moderate 2.3-mile loop hike in Golden Gate Canyon State Park views of the snow-capped Rocky Mountains in the West. Add a short segment to Slough Pond to make this a 3-mile hike. Explore the trail profile for a trail map, driving directions, and tips for this hike near Golden, CO
Trail Snapshot: Beaver Loop in Golden Gate Canyon State Park
| Hike Distance | 2.3 miles |
|---|---|
| Difficulty | Moderate |
| Duration | Approx 1 hr |
| Trail Type | Loop |
| Starting Elevation | 8200′ |
| Elevation Gain | Approx +1050′ |
| Seasons | Best hiked May to October |
| Dogs | Allowed on 6' Leash |
| Hike Trail Map | Click for a Map of Golden Gate Canyon Trails |
| Denver Drive Time | 45 min |
| Driving Directions to Visitor Center | Click for Google Map |
| Town Nearest Hike | Golden, Colorado |
| Beauty | Views of Continental Divide, Treamont Mountain and Indian Peaks Wilderness Area, steep inclines, wildflowers, aspen trees< |
| Activities | Hiking, photography, snowshoeing in winter, picnic area, reservable camping shelter |
| Fee | Colorado State Parks Pass Required |
Parking & Trailhead Information for the Beaver Loop Hike
From Denver, take US-6 West to Golden. Just outside Golden, US-6 will turn left (West) into Clear Creek Canyon; it's at this intersection that you'll continue North on 93. After 1.3 miles on 93, turn left onto Golden Gate Canyon Road. Now, prepare for the rest of your drive being pretty windy. After 12.7 miles on Golden Gate Canyon Road, it will intersect with Crawford Gulch Road on a wide curve. Turn right onto Crawford Gulch road and the visitor center for Golden Gate Canyon State Park will be on your immediate right. This is the best parking area for the Beaver Loop. However, the parking here fills up fast, especially on the weekends. Another option is to park at the Ralston Roost Trailhead, located about 0.2 mile further down the road (see the State Park Map Link above). A third option is to begin your hike at Slough Pond. This will add about 3/4 of a mile to your hike, making it closer to a 3-mile trip.
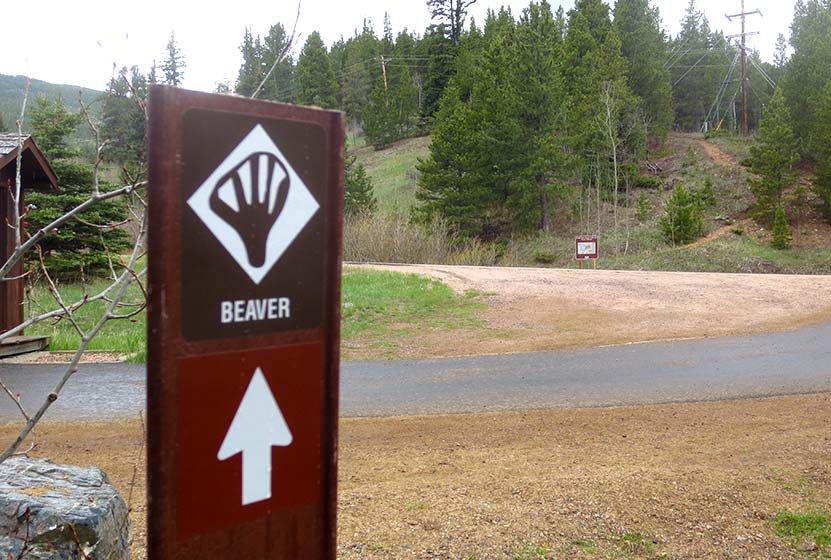
The Beaver Loop Trailhead Across Golden Gate Canyon Road from the Visitor Center
The Hike: The Beaver Loop Hike in Golden Gate Canyon
The Visitor Center at Golden Gate is worth exploring. Kids will be fascinated by the trout in the man-made creek and small pond surrounding the building. The Beaver Trail can be picked up just South of the Visitor Center by taking one of the paths around the perimeter of the building. The trail begins under the powerlines on the opposite side of Golden Gate Canyon road. Exercise caution crossing the road as vehicles may be descending the hill and not be looking out for pedestrians. Be alert for cyclists, as they frequent the road and come down the hill at high speeds.
First Trail Fork on the Beaver Loop
At the first trail fork, hikers have the option of taking the loop clockwise or counter-clockwise. I hiked this clockwise, taking the trail towards the shelter. The clockwise route offers a more gentle ascent, but steep descent on the back side of the loop. Taking it counter-clockwise will mean a steeper ascent and a more gentle descent on the way back, which is probably easier on the knees, but a more demanding climb.
You'll notice that the State Park trail map rates this trail as "most difficult." It's important to note that these ratings are relative to the other trails in the park. I 've classified the Beaver Loop as medium/moderate because, while it does have over 1000' of elevation gain, it is only a 2.3-mile hike. Add about 3/4 of a mile if you make the out-and-back trip out to Slough Pond. See our Hikes by Difficulty page for more hikes and the basic criteria we use to classify hikes. It should be noted that difficulty will differ by persons, so be sure to review the details of a hike before attempting it.
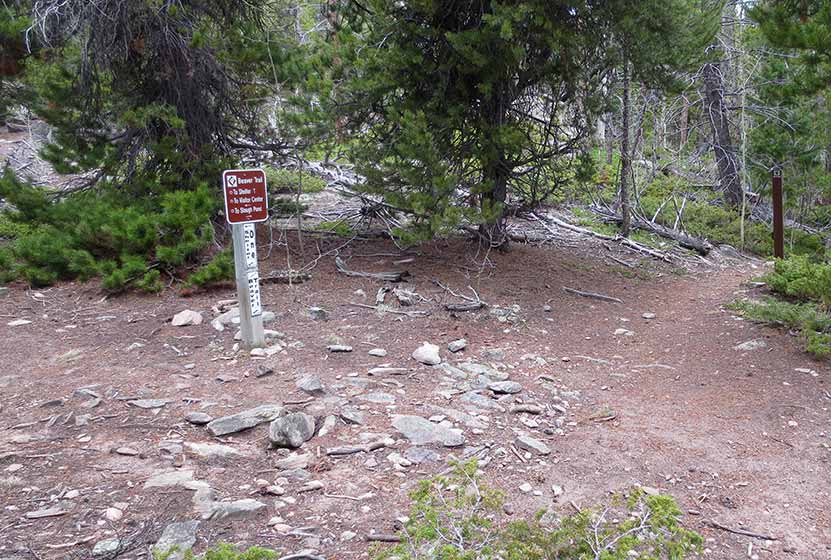
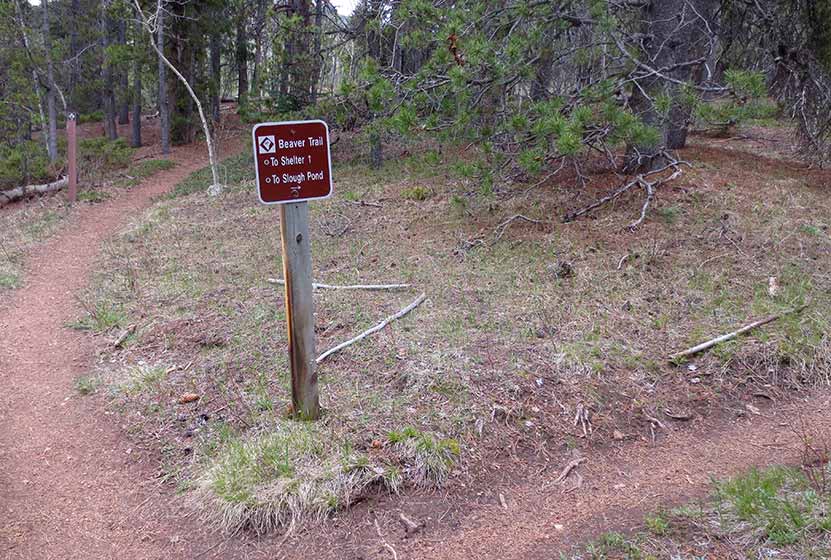
Sign Indicating Spur Trail to Shelter
At approximately 1 mile into the loop, hikers will encounter a sign (pictured above) pointing to a 0.5-mile spur trail leading to a backcountry shelter. A permit is required to camp here and can be purchased online at the Golden Gate Canyon fees page. Continuing on the loop, the trail will soon lead to an overlook of views to the West. During most of the year, snow-capped peaks appear above a verdant green valley in these western foothills.
After the overlook, the trail begins a steep descent. I had brought my trekking poles (I always bring them), and was glad that I did. I would imagine that this trail gets slicked over with ice and hardened snow during the winter, making it really difficult to navigate. The trail then leads down to an intersection with the Slough Pond trail.
Downhill Trail Segment on the Beaver Loop
At this intersection at the bottom of the hill, you have the option of making the trip over to Slough Pond. The hike over to Slough Pond is pleasant and mostly flat. At the pond, a quaint creek flows out of the pond and under a footbridge. Slough Pond is a popular fishing spot and a great place for kids to learn to bait a hook. As mentioned above, adding this out-and-back segment to the hike, makes this closer to a 3 mile hike.
Tips & Resources for Hiking the Beaver Loop Hike
- TIP: Don't forget to bring food and water along this hike for refuelling.
- TIP: Pick up a paper map at the visitor center before hiking.
- TIP: Trekking poles will be a big help on the steeper portions of the trail. Traction devices are recommended for winter weather..
- Trail Map: Golden Gate Canyon Trail Map
- Packing List: Always pack the 10 Essentials. Download our Hiking Guide to get the list and dayhiking packing checklist.
- Colorado Road Conditions: Colorado Road Conditions
- After the Hike: Windy Saddle Cafe in Golden, Colorado
Weather
Map & Driving Directions
Click for Driving Directions to Visitor Center
Windy Peak Hike in Golden Gate Canyon
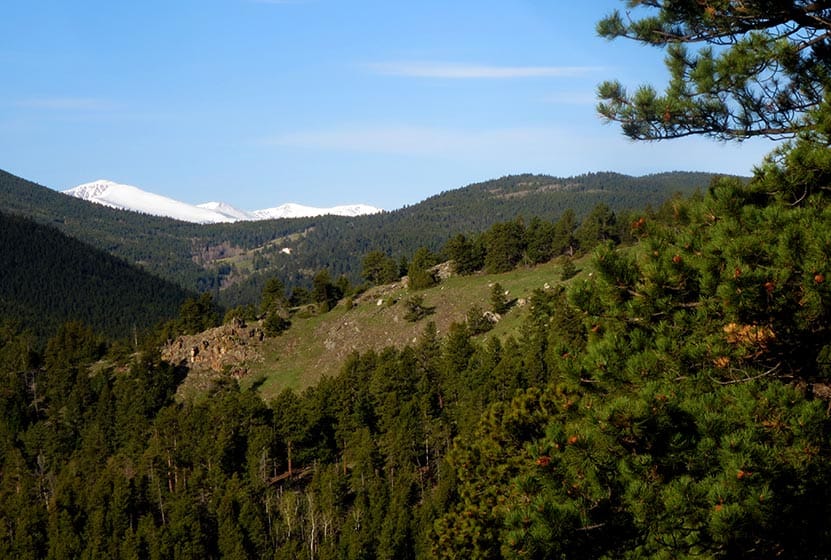
Windy Peak is a summit hike in Golden Gate Canyon State Park. A moderate to difficult 6.4-mile loop hike that follows meltwater creeks, crosses green meadows replete with wildflowers, and offers great views at the summit of the snow-capped Rocky Mountains in the West. Explore the full Windy Peak Hike profile for trail map, driving directions, and many of the details you need to enjoy this adventure in Golden Gate Canyon State Park.
Trail Snapshot: Windy Peak in Golden Gate Canyon State Park
| Hike Distance | 6.4 miles Round Trip |
|---|---|
| Difficulty | Moderate |
| Duration | Approx 2-3 hrs |
| Trail Type | Lollipop-Loop with Spur to Summit |
| Starting Elevation | 7860′ |
| Elevation Gain | Approx +1300′ |
| Seasons | Best hiked May to October |
| Dogs | Allowed on 6' Leash |
| Hike Trail Map | Click for a Map of Golden Gate Canyon Trails |
| Denver Drive Time | 50 min |
| Driving Directions to Bridge Creek Trailhead | Click for Google Map |
| Town Nearest Hike | Golden, Colorado |
| Beauty | Panoramic views of snow-capped mountains, wildflowers, meadow, spruce, aspen |
| Activities | Hiking, photography, snowshoeing in winter, picnic area |
| Fee | Colorado State Parks Pass Required |
Parking & Trailhead Information for the Windy Peak Hike
From Denver, take US-6 West to Golden. Just outside Golden, US-6 will turn left (West) into Clear Creek Canyon; it's at this intersection that you'll continue North (not turning left) on 93. After 1.3 miles on 93, turn left onto Golden Gate Canyon Road. Now, prepare for the rest of your drive being pretty windy. About 4 miles down Golden Gate Canyon Road, you have the option of taking Crawford Gulch road to the Right or to stay on Golden Gate Canyon Road. Both routes will get you there.
I believe that Google Maps from Denver is going to default to Crawford Gulch Road. Do take your time and be alert for cyclists and motorcycles, especially on the weekend, as both Golden Gate Canyon Road and Crawford Gulch Roads are popular roads for riding. Eventually, Crawford Gulch Road will turn into Drew Hill Road, which runs through the heart of Golden Gate Canyon State Park. If you decide to take the Golden Gate Canyon Road option, it will intersect with Crawford Gluch/Drew Hill at the visitor center (on your right, just after the intersection on Crawford Gulch). If you take this route, the Bridge Creek Trailhead will be 2.3 miles down the road and on your left (north). One last thing to note is that Crawford Gulch Road has yet one more name, Ralston Creek Road. So, if you see that on any signage, just know you are on the right track.
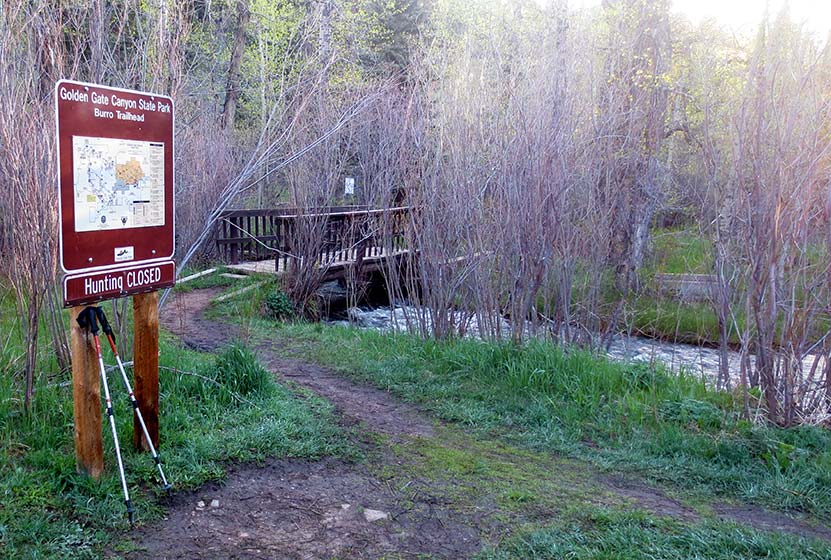
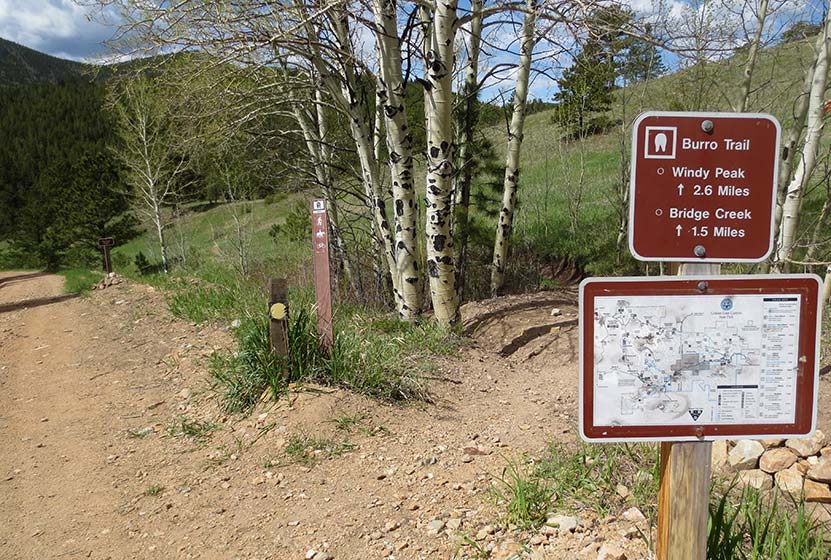
The Bridge Creek Trailhead is a bit unusual because it's composed of several parking areas along the on the north side of the road. However, all parking areas have trails that will lead hikers to the footbridge that crosses the trail and serves as the official start of the Burro trail and this hike. A sign (pictured above) reads "Burro Trailhead."
The Hike: The Windy Peak Hike in Golden Gate Canyon
This is a Lollipop-loop trail with a spur trail at the end that leads up to the summit. There are several trail junctions, which can make this the route a bit confusing. I've provided photos below of the trail junctions, but it's important to remember that weather can change the landscape and signage. The description here hikes the loop portion of the trail in a clockwise direction. We've classified this as moderate/medium in difficulty. However, its right on the edge because of the over 1000' elevation gain and more than 5 miles of trail. For some, this will be difficult. It's also on our list of dog-friendly hikes, but it's important to know that the peak is all rocky terrain that may be a bit tough on your dog's paws. As always, if you are taking your best friend, be sure to keep them on a leash out of respect for the wildlife, environment, and other hikers.
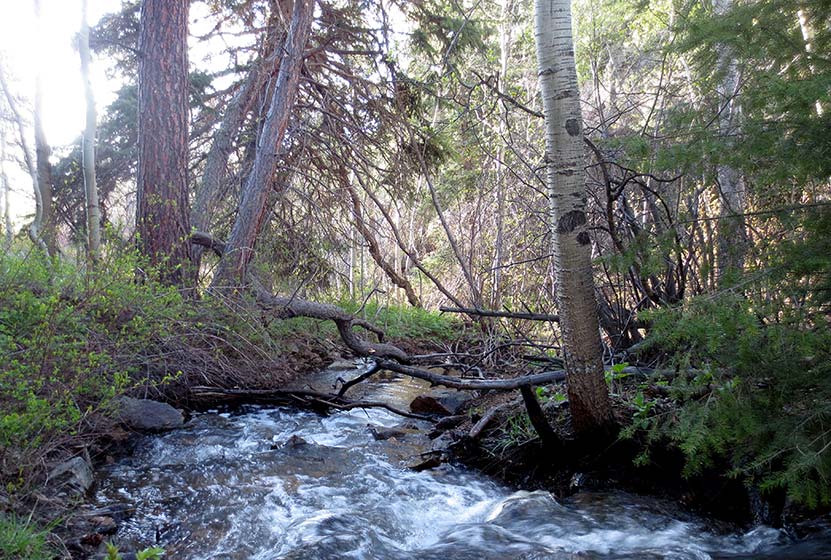
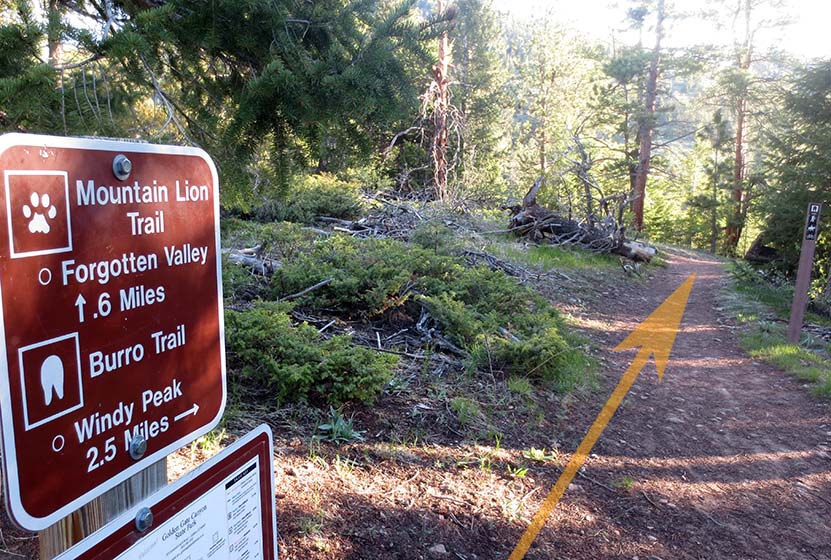
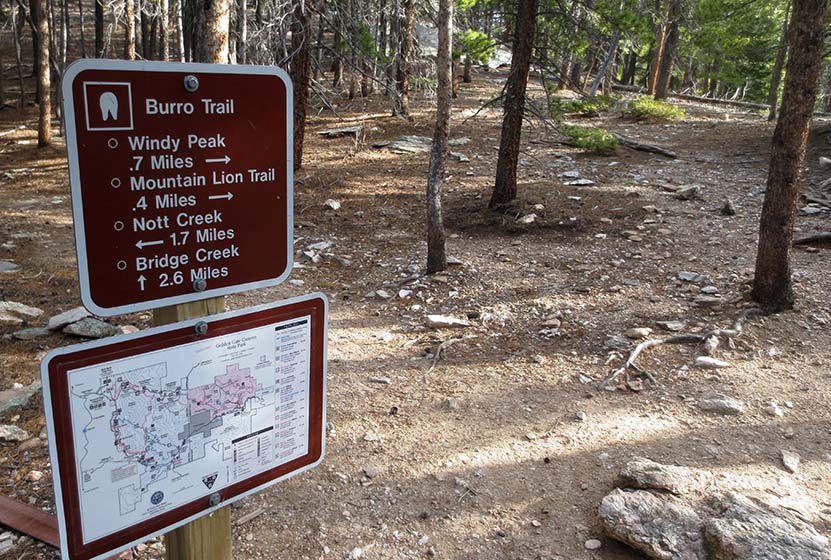
After crossing Ralston Creek, the trail makes its way up a gentle slope into the trees. At the first trail junction, stay on the Burro Trail (left). The second trail junction leads either straight on the Mountain Lion Trail to Forgotten Valley or right toward Windy Peak on the Burro Trail. The trail will make its way along a creek. Look for Calypso flowers, also called Pink Lady Slippers in this area. They grow along the creeks in Golden Gate Canyon State Park.
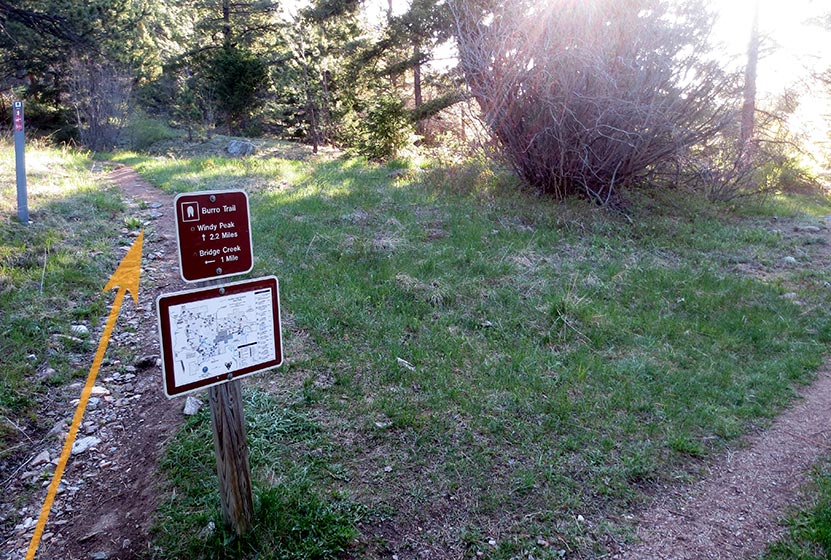
The loop begins at the third junction (pictured above), the way up to Windy Peak is clearly marked as the left-hand trail. From this point, it's 2.2 miles to the peak. Here the trail begins a steeper climb through an area with prominent chalk colored cliffs.

As you gain altitude, you'll gain views out to the Continental Divide rising above the green foothills of Golden Gate. The trail will then enter the shade of lodgepole forest.
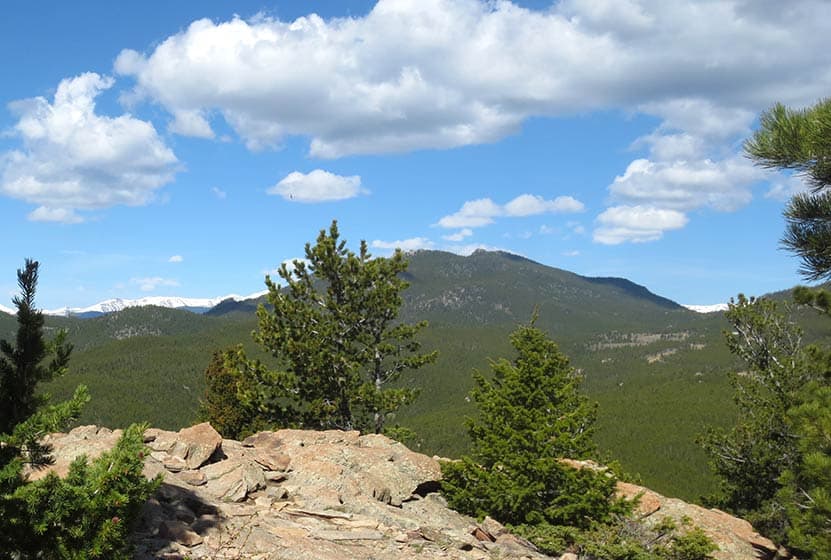
At the top of the loop, hikers will encounter the junction for the .7 mile spur trail that leads to the summit of Windy Peak (pictured below). There will be one more sign pointing the way at 0.4-mile below the summit.
The summit of Windy Peak is one of my favorite places to read and journal. Be sure to bring a picnic lunch with you, because you'll want to spend some time here resting and refueling for the hike back to the trailhead. The spur trail will lead back to the main Burro loop trail. At this point, you can return the way you hiked in to the spur trail (a slightly shorter way back), or continue on the rest of the loop toward Nott Creek. The landscape on this back end of the loop is riddled with wildflowers, so it's well worth doing the full loop hike.
The trail will weave its way down into a valley with a dirt service road. Here, hikers will want to follow the Burro trail towards the Bridge Creek Trailhead as it makes its way on and off the service roads.
The trail will work its way through a green meadow, then along Nott creek, following it West until retracing the trails that lead back to Bridge Creek Trailhead.
Tips & Resources for Hiking to Windy Peak
- TIP: Don't forget to bring food and water along this hike for refuelling.
- TIP: We advise picking up a paper map of Golden Gate Canyon State Park at the visitor center before embarking on this hike.
- Trail Map: Golden Gate Canyon Trail Map
- Packing List: Always pack the 10 Essentials. Download our Hiking Guide to get the list and dayhiking packing checklist.
- Colorado Road Conditions: Colorado Road Conditions
- After the Hike: Windy Saddle Cafe in Golden, Colorado
Weather
Map & Driving Directions
Click for Driving Directions to Bridge Creek Trailhead
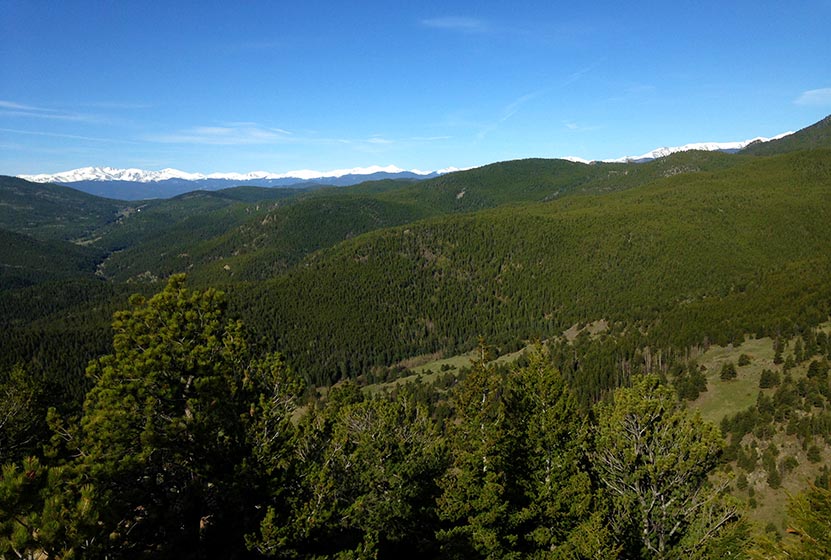
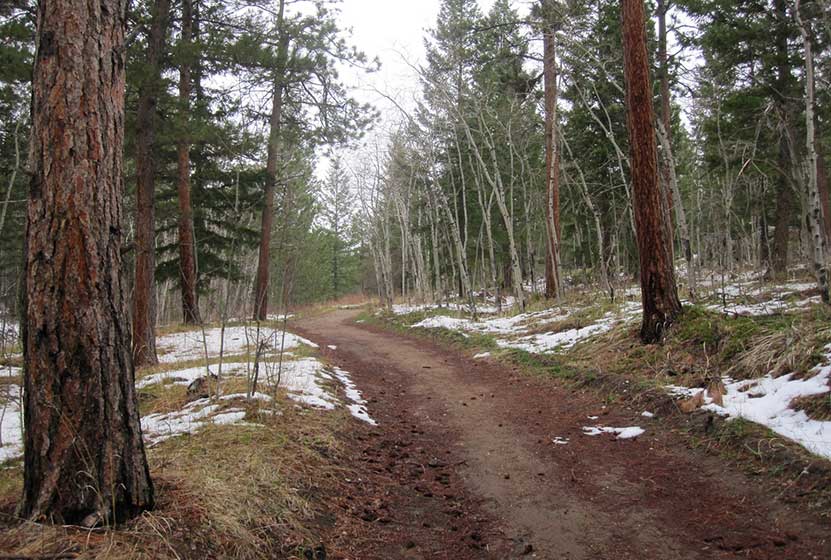
Heil Valley Ranch Ponderosa Loop Hike
Heil Valley Ranch near Boulder offers this rewarding lollipop-loop hike which features views of distant snowcapped mountains and geological features unique to this section of Colorado. Nestled in the foothills between Boulder and Lyons this singletrack trail is a great destination for both hikers and mountain bikers. However, soil erosion has required occasional trail closures, so be sure to check out the Boulder County Open Space Twitter feed for trail conditions. Explore the full Heil Valley Ranch hike profile below for trail map, driving directions, and more tips and details to help you enjoy this adventure in the Boulder County, Colorado.
Trail Snapshot: Heil Valley Ranch Ponderosa Loop
| Hike Distance | 7.6 miles Round Trip |
|---|---|
| Difficulty | Moderate |
| Duration | Approx 4 hrs |
| Trail Type | Lollipop-Loop |
| Starting Elevation | 6000′ |
| Elevation Gain | Approx +1000′ |
| Seasons | Year Round |
| Dogs | Dogs Not Allowed |
| Hike Trail Map | Click for a Map of Heil Valley Ranch |
| Denver Drive Time | 50 min |
| Driving Directions to Heil Valley Ranch Trailhead | Click for Google Map |
| Town Nearest Hike | Boulder, Colorado |
| Beauty | Views to snowcapped peaks, unique geology, wildlife: deer, coyote, squirrel |
| Activities | Hiking, mountain biking, and photography |
Parking & Trailhead Information for Heil Valley Ranch Hike
From Boulder, follow US 36 West toward Lyons, turn left onto Left Hand Canyon Drive. After 0.7 mile, turn right onto Geer Canyon Drive. After approx. 1.2 miles, you'll come around a curve and see a sign for Heil Valley Ranch. The parking area is on the right/North side of the roach.
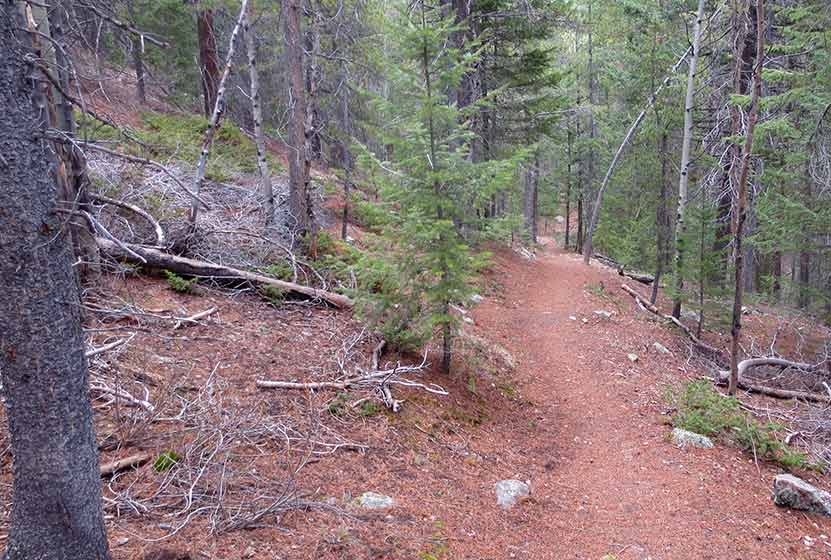
The Hike: Ponderosa Loop at Heil Valley Ranch Trail
There are two trails located at the north end of the parking area, the Wapiti and the Lichen. For this longer loop hike, we'll be taking the Wapiti up to the Ponderosa loop. This trail is found just to the left/west of the Lichen Loop trail. These should be well-marked by signs and the Lichen loop trail will immediately cross a footbridge. The Lichen loop is a great option for families with small children being just 1.3-mile loop with about 230' of elevation gain over the course of the hike.
Taking the Wapiti trail, hikers will head North through a broad valley punctuated with Ponderosa Pine. After passing an intersection with the Lichen Loop, the Wapiti will soon enter the shade of more ponderosa pines as it makes its way through more rocky and steep terrain. At 2.5 miles in, the Wapiti will meet up with the Ponderosa Loop Trail.
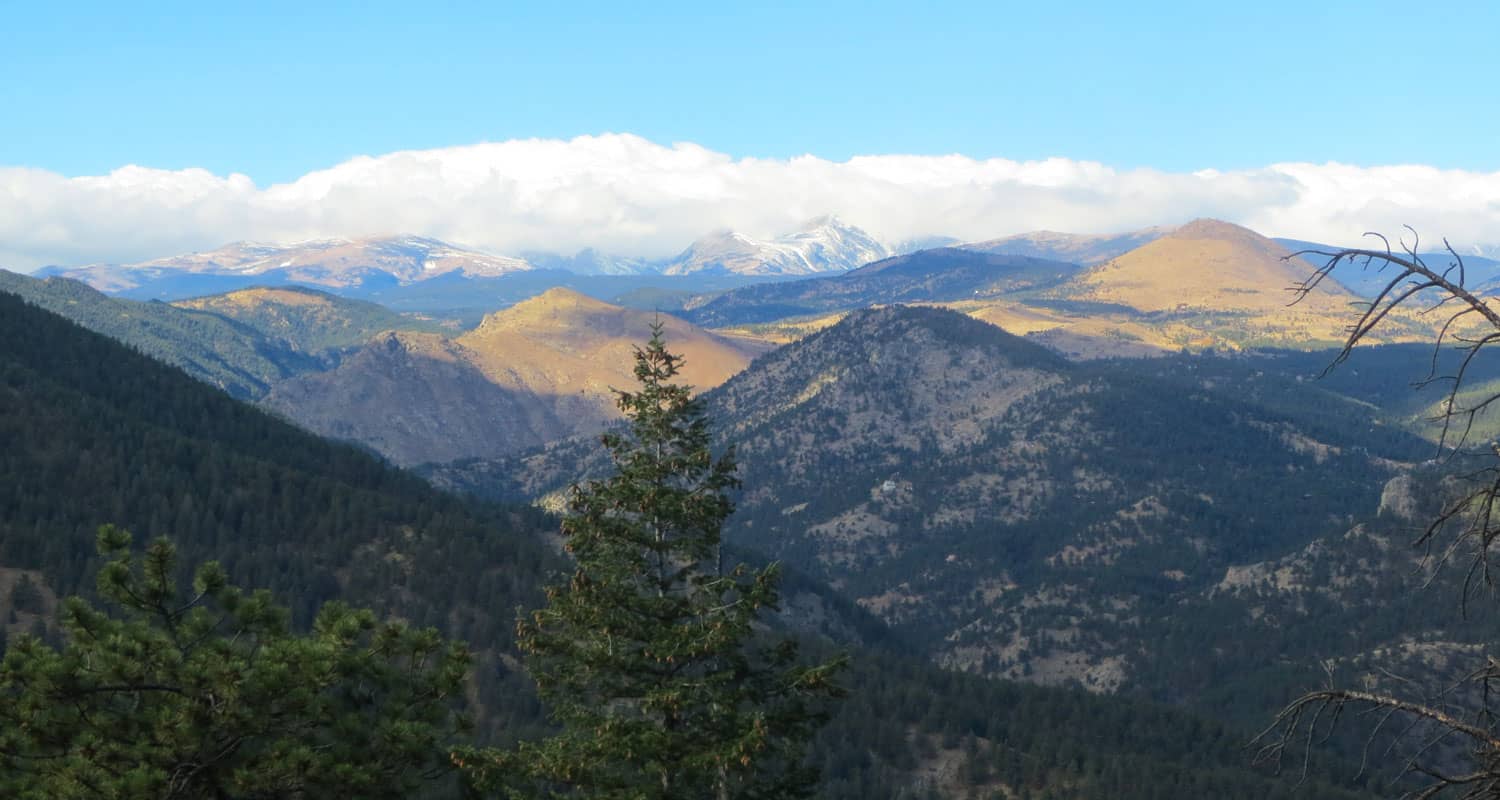
The Ponderosa loop segment offers a great set of views, beginning with views of snowcapped peaks in the west. We recommend taking the Ponderosa loop counter-clockwise, which will take you up to a high point then back down into a beautiful meadow with views all the way out to Left-Hand Reservoir. A second overlook is gained after this section, providing great views out to Indian Peaks Wilderness and Longs Peak in the North. The trail will meet back up with the Wapiti trail for a descent back to the trailhead.
Tips & Resources for Hiking the Heil Valley Ranch Trail
- TIP: Keep alert for mountain bikers as much of the trail is singletrack and a popular mountain biking area..
- Trail Map for Heil Valley Ranch Trail near Boulder: Trail Map Link
- Packing List: Always pack the 10 Essentials. Download our Hiking Guide to get the list and dayhiking packing checklist.
- Colorado Road Conditions: Colorado Road Conditions
- Photo: We would like to express our gratitude to Jonathan Reyes for sharing such great photographs of this hike at Heil Valley Ranch.
- After the Hike: The Parkway Cafe
Weather
Map & Driving Directions
Click for Driving Directions
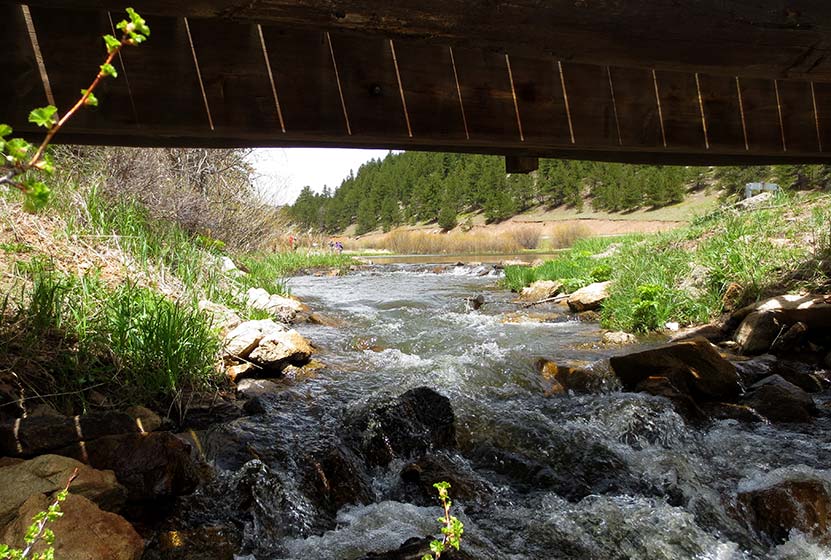
Meyers Homestead Hike in Walker Ranch
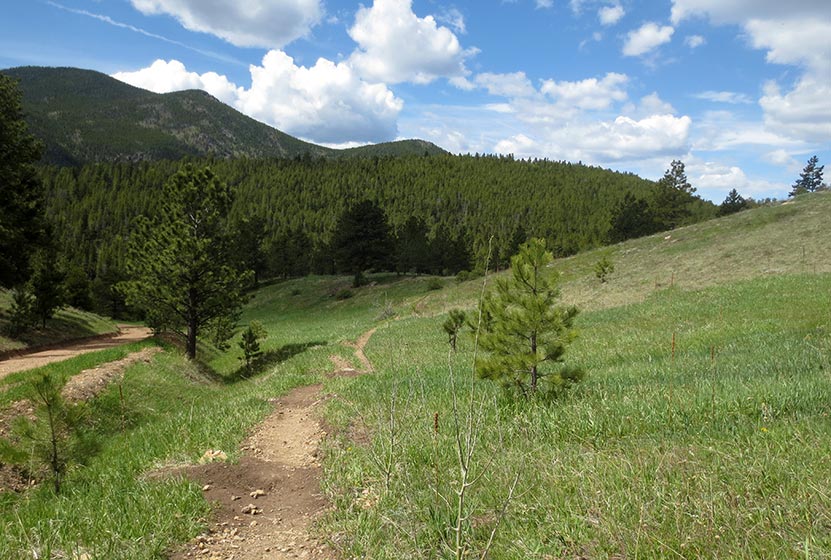
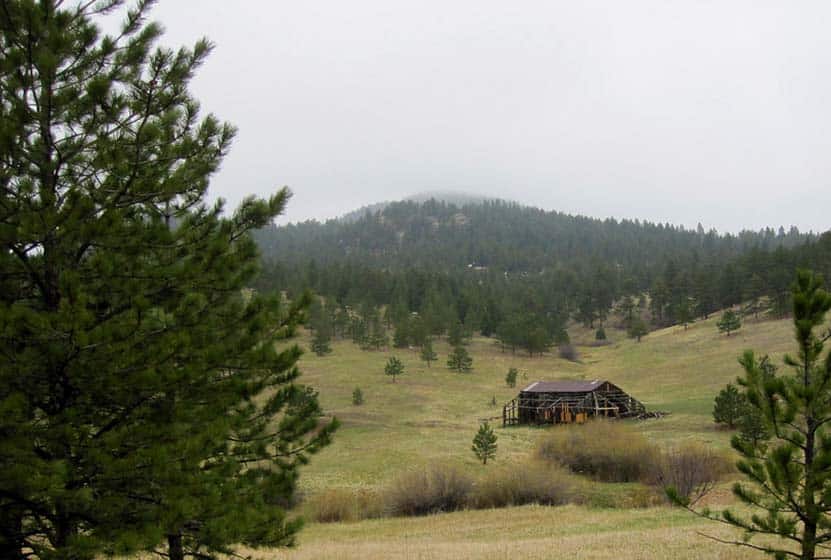
The Meyers Homestead Hike located in Walker Ranch is an almost perfect family hike near Boulder, Colorado. This 5.2-mile out-and-back hike travels through Meyers Gulch, past the remnants of a historic homestead, to an overlook offering panoramic views of Boulder Canyon and the snowcapped mountains of Indian Peaks. It's a wide trail through meadows, stands of aspen, and punctuated by ponderosa pine and wildflowers. Explore the full Meyers Homestead hike profile below for trail map, driving directions, and more tips and details to help you enjoy this trail near Boulder.
Trail Snapshot: Meyer Homestead Hike Near Boulder
| Hike Distance | 5.2 miles Round Trip |
|---|---|
| Difficulty | Easy to Moderate |
| Duration | Approx 3 hrs |
| Trail Type | Out and Back |
| Starting Elevation | 7500′ |
| Elevation Gain | Approx +750′ |
| Seasons | Year Round |
| Dogs | Allowed On Leash |
| Hike Trail Map | Click for a Map of Meyers Homestead Trail in Walker Ranch |
| Denver Drive Time | 1 hr |
| Driving Directions to Meyer Homestead Trailhead | Click for Google Map |
| Town Nearest Hike | Boulder, Colorado |
| Beauty | Meadows, historic homestead, wildflowers, peak views, aspen, ponderosa |
| Activities | Hiking, Walker Ranch homestead tours, horseback riding, mountain biking (double-track most sections), trail running, snowshoeing, photography |
Parking & Trailhead Information for Meyers Homestead Trail
The drive to Meyers Homestead Trailhead starts on the Baseline Road in Boulder. Traveling West past Chautauqua Park, the road will turn into Flagstaff Road at the base of Flagstaff Mountain and begin a windy and steep ascent. The overall trip on Flagstaff Road to the trailhead is about 6.2 miles. The Myers Homestead Trailhead is located on the right (West) side of the road. Restrooms, picnic area, and interpretive signs are available at the trailhead.
The Hike: Meyers Homestead Trail
The hike starts from the Meyers Homestead Trailhead by taking the trail on the right marked with a sign that reads "Meyers Homestead Trail - 2.6 Miles One-Way." The initial trail segment descends into a broad meadow. Around just 1/4 mile into the trail, you'll spot the remnants of a sawmill, part of the original Meyer Homestead. There is a spur trail that leads to a mill. Once past the sawmill, the trail begins a very gradual ascent and follows a small seasonal creek into the Meyer Gulch.
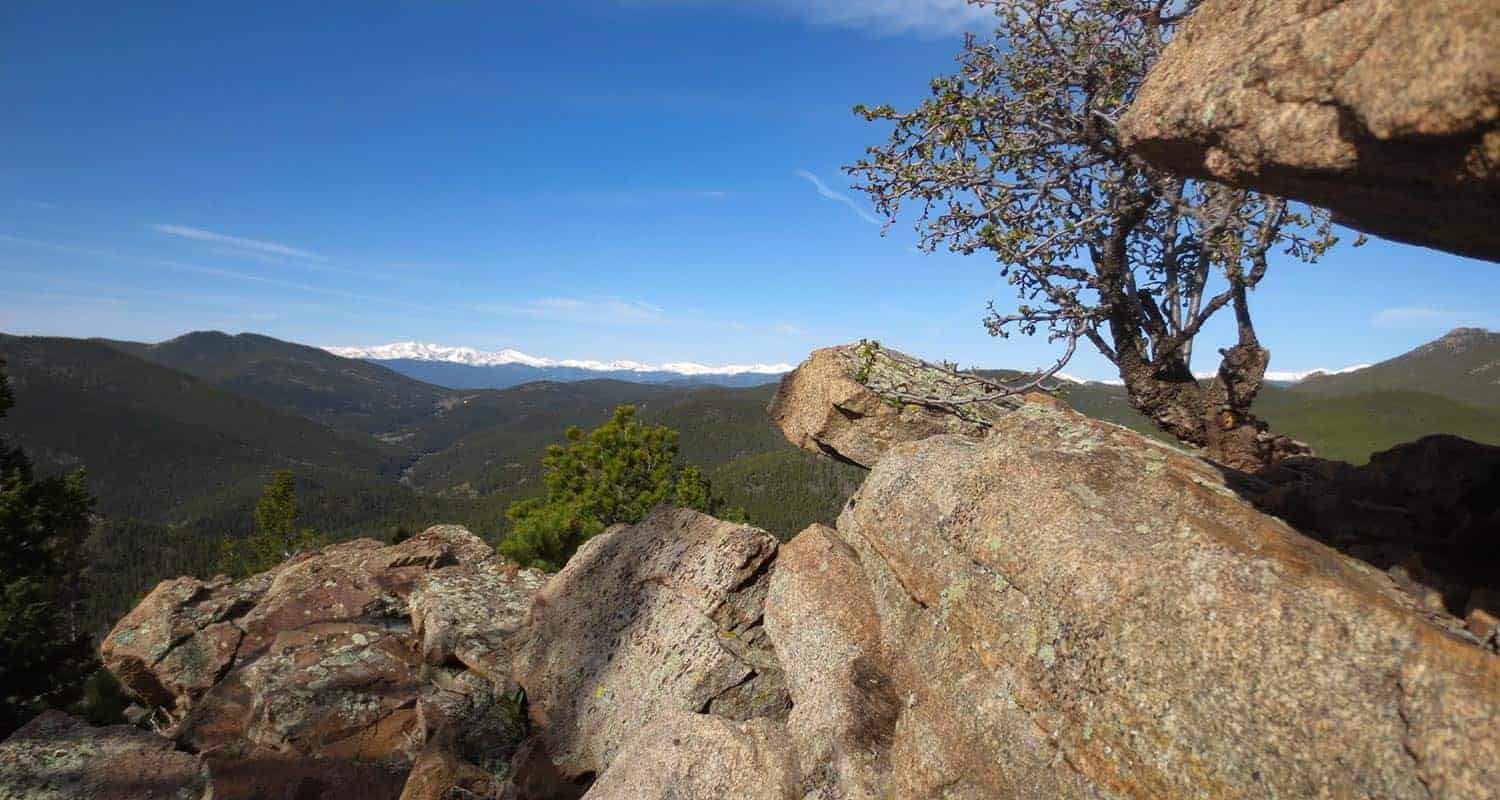
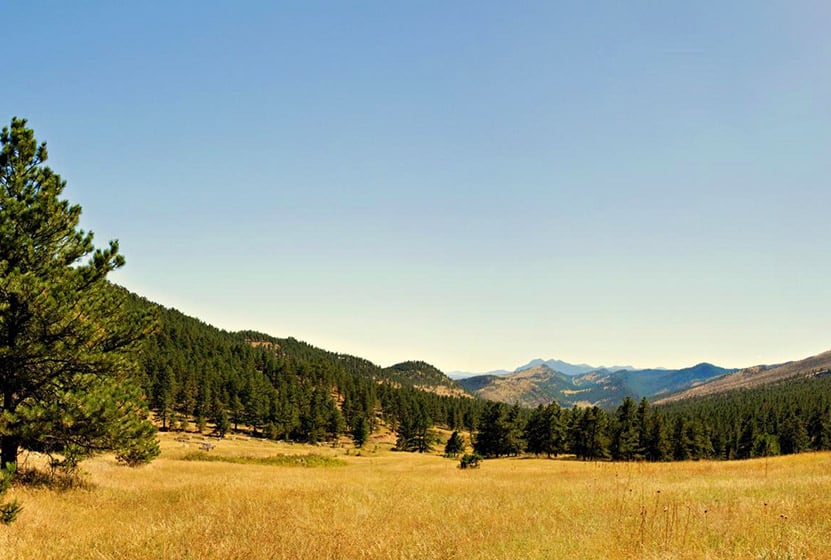
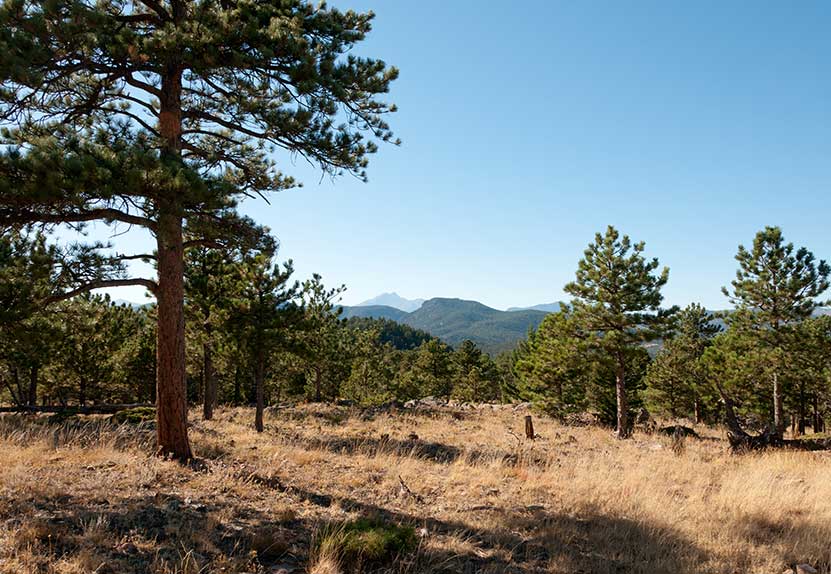
Starting at around 1/2 mile in, the trail will begin to weave in and out of groves of aspens and ponderosa pine, providing intermittent shade on a hot summer day. The trail will eventually open to another large meadow before entering the final, wooded and steeper 1/2 mile. This segment of switchbacks leads to a small unnamed peak with a bench and overlook. Here, you can take in views of Sugarloaf Mountain, Indian Peaks, Longs Peak, and Boulder Canyon.
A great related hike is the Eldorado Falls hike that is also part of the Walker Ranch Trail system.
Tips & Resources for Hiking the Meyers Homestead Trail
- TIP: Pause to read thee interpretative signs along the trail to indicate places that have historical and ecological significance.
- Trail Map for Meyers Homestead Trail: Trail Map for Meyers Homestead Trail
- Packing List: Always pack the 10 Essentials. Download our Hiking Guide to get the list and dayhiking packing checklist.
- Colorado Road Conditions: Colorado Road Conditions
- Photo: We would like to express our gratitude to Ian W. Stearns for sharing such amazing photographs of this hike to Meyers Homestead.
- After the Hike: The Parkway Cafe
Weather
Map & Driving Directions
Click for Driving Directions
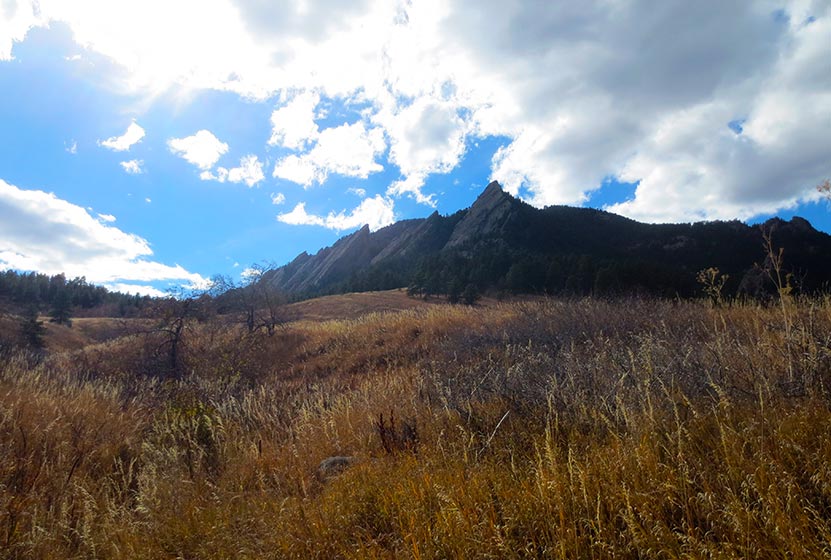
Gregory Canyon Hike to Realization Point
The trail up Gregory Canyon is a moderately challenging hike to Realization Point Trailhead where hikers can pick up two different loop trails. Both loops offer expansive views of the Rocky Mountains in the West and wildflowers along the trail. Explore the full Gregory Canyon-Realization Point hike profile below for trail map, driving directions, and more tips and details to help you enjoy this adventure in Boulder, Colorado.
Trail Snapshot: Gregory Canyon to Realization Point
| Hike Distance | 2.4 to 5.7 miles Round Trip |
|---|---|
| Difficulty | Moderate |
| Duration | Approx 2-3 hrs |
| Trail Type | Out and Back |
| Starting Elevation | 5600′ |
| Elevation Gain | Approx +900′ Gregory Canyon Segment |
| Seasons | Year Round |
| Dogs | Allowed On Leash |
| Hike Trail Map | Click for a Map of Gregory Canyon Trail to Realization Point in Boulder |
| Denver Drive Time | 40 Minutes |
| Driving Directions to Gregory Canyon Trailhead | Click for Google Map |
| Town Nearest Hike | Boulder, Colorado |
| Beauty | Canyon, wildflowers, summit views, forest, rocky hillsides, wildlife: mule deer, coyote, mountain lion, bear, red-tailed hawk, fox |
| Activities | Hiking,Photography |
Parking & Trailhead Information for Gregory Canyon
Hikers have several parking options for the Gregory Canyon Trail: 1) the Gregory Canyon Trailhead, 2) Parking at Chautauqua Park, or 3) along permitted stretches of Baseline Road. The Gregory Canyon Trailhead can be reached by following Baseline Road in Boulder west past Chautauqua park. Gregory Canyon Road is located on the left/South about 1/2 mile West of the park. Parking is allowed along most of the south side of Gregory Canyon Road and there is room for 7-8 vehicles at the trailhead. Both the roadside parking and the small parking area at the Gregory Canyon Trailhead require an access fee. Because of the fee and because this parking area fills quickly most mornings, many hikers opt to park along Baseline or at Chautauqua Park. Another option is to park at the Realization Point Trailhead (another fee parking area) and to hike down through the Canyon.
The Hike: Gregory Canyon Trail to Realization Point
In addition to its proximity to Boulder, this hike sports a number of options and a variety of landscapes. The stretch between Gregory Canyon Trailhead and Realization Point Trailhead is the main artery of all the options in this profile. Because most hikers will begin their adventure at Chautauqua Park, there are a couple 1/2 mile (one-way) approaches: the Baseline Trail or the Meadow Trail. On the upper end of the hike, at Realization Point Trailhead, there are two different loop options that offer beautiful views to the West of seasonal snowcapped peaks. These are the Rangeview/Ute Loop and the Tenderfoot Loop. You can review each of the hike options below to decide which trail combination is best for you.
Gregory Canyon Trailhead to Realization Point Trailhead - 2.4 Miles Round Trip
This segment constitutes the main artery for all the hike options below. The Gregory Canyon Trail begins in the shade along Gregory Canyon Creek and climbs gradually to 0.5 mile where it crosses another small creek. Here the trail becomes more steep, making its way up a ridge via a set of switchbacks. Then the trail descends to a junction. At the junction, the Northern (right) segment leads a short distance up to Flagstaff Road and the Realization Point Trailhead (the destination for this hike as described here), or South (left) to the Long Canyon and Ranger Trails. After hiking the short segment to Flagstaff road, Realization Point Trailhead will be located across the street to the North. Be sure to watch for both cars and cyclists before crossing. If starting at Chautauqua Park and taking the Baseline or Meadow Trails to the Gregory Canyon Trailhead, add approximately 1 mile to this hike, making it 3.4 miles Round Trip.
Gregory Canyon Trailhead to Realization Point Trailhead + Rangeview/Ute Loop - 3.2 Miles Round Trip
After traveling the 1.1 miles up through the canyon to Realization Point, hikers will find two loop options. The first is the shorter Rangeview/Ute Loop. This loop makes a 0.8-mile clockwise circuit around Flagstaff Mountain then joins back up to the trailhead. The loop offers views to the mountains in the West and great viewpoints to take in the changing aspens in the Fall. If starting at Chautauqua Park, add approximately 1 mile to this hike, making it 4.2 miles Round Trip.
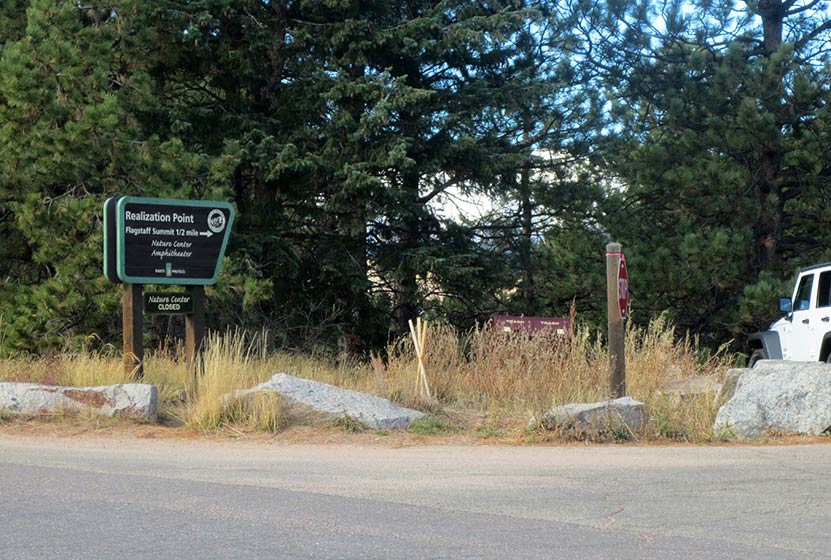
Realization Point Trailhead Across Flagstaff Road
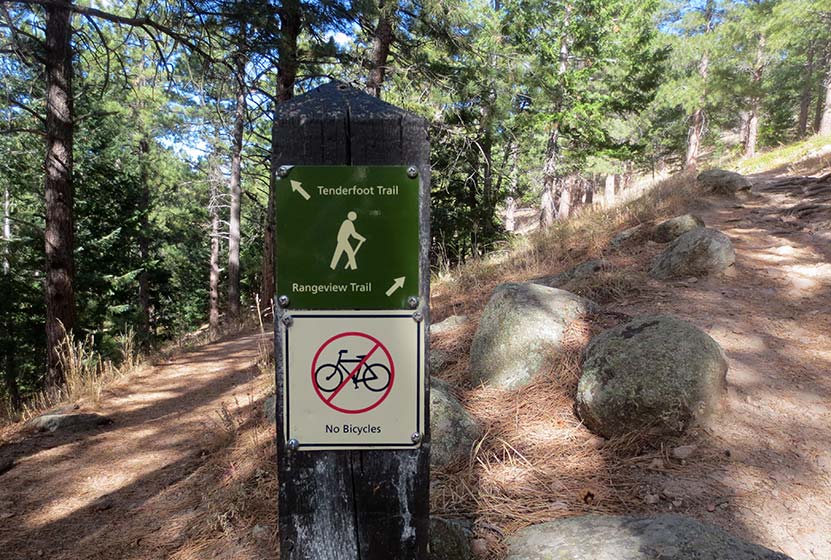
Gregory Canyon Trailhead to Realization Point Trailhead + Tenderfoot Loop - 4.7 Miles Round Trip
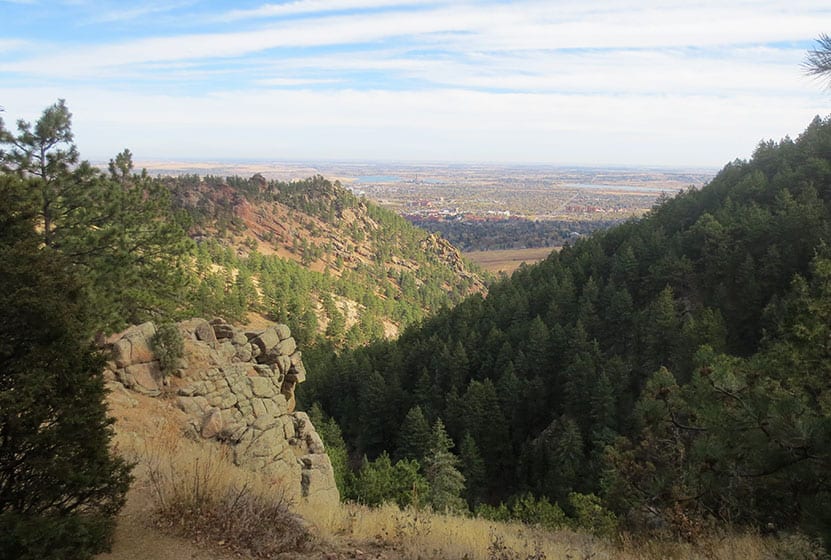
From Realization Point Trailhead, the Tenderfoot Trail bears to the left (Northwest) and makes for a more demanding loop when compared to the Rangeview/Ute Trail because of both the added distance and the additional elevation loss and gain. At its most northern point, hikers will find a short spur trail leading to a small peak that affords expansive views to the West. If starting at Chautauqua Park, add approximately 1 mile to this hike, making it 5.7 miles Round Trip. By adding the spur trail, it becomes closer to 6 miles total.
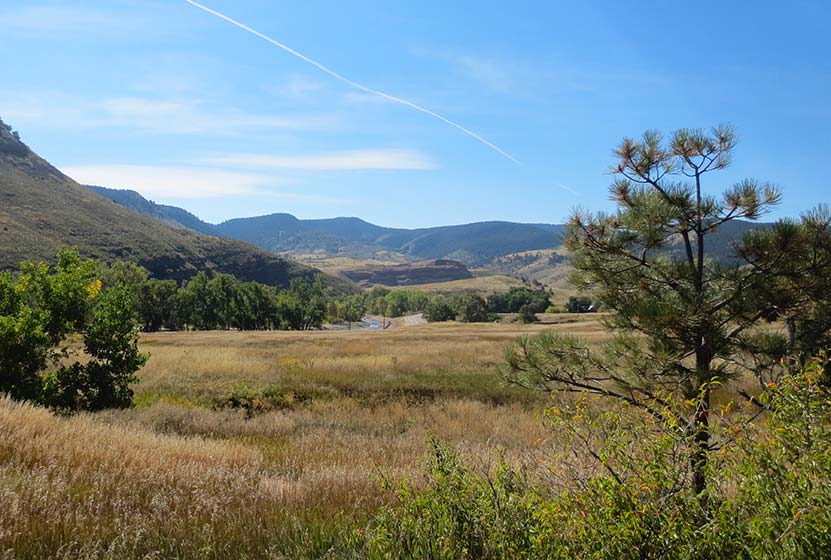
Both loop hikes afford multiple opportunities for taking in views out to the Rocky Mountains. The photo below was taken along the beginning segment of the Rangeview Trail.
Video of Gregory Canyon Hike
Tips & Resources for Hiking Gregory Canyon
- Poison Ivy: The canyon trail segment has a good deal of poison ivy trailside. Be aware and stay the traill
- Stay the Trail: Bear and Mountain Lion frequent this area of Boulder. It's wise to stay the trail and to hike with others.
- Trail Map: Trail Map for Gregory Canyon to Realization Point in Boulder
- Boulder Parks Area Dog Regulations Map
- Boulder Area Dog Regulations Map
- Packing List: Always pack the 10 Essentials. Download our Hiking Guide to get the list and dayhiking packing checklist.
- Colorado Road Conditions: Colorado Road Conditions
- After the Hike: Alpine Modern Cafe
Weather
Map & Driving Directions
Click for Driving Directions
Hall Ranch Hike Near Lyons, Colorado
Hall Ranch, just outside of Lyons Colorado, is a hiking, mountain biking, trail running destination that features red sandstone buttes, vast green meadows, and panoramic views of white snowcapped meadows. Tucked into the foothills near the St. Vrain River, the trails at Hall Ranch are a great escape from life in the city. Explore the full Hall Ranch hike profile below for trail map, driving directions, and more tips and details to help you enjoy this adventure in the Boulder County.
Trail Snapshot: Hall Ranch Hike Near Lyons
| Hike Distance | 2 to 9.2 miles Round Trip |
|---|---|
| Difficulty | Easy to Moderate |
| Duration | Approx 5.5 hrs for Loop Hike |
| Trail Type | Out and Back and Loop |
| Starting Elevation | 5500′ |
| Elevation Gain | Approx Total +2479' on Loop |
| Seasons | Year Round |
| Dogs | Dogs are Prohibited in Hall Ranch |
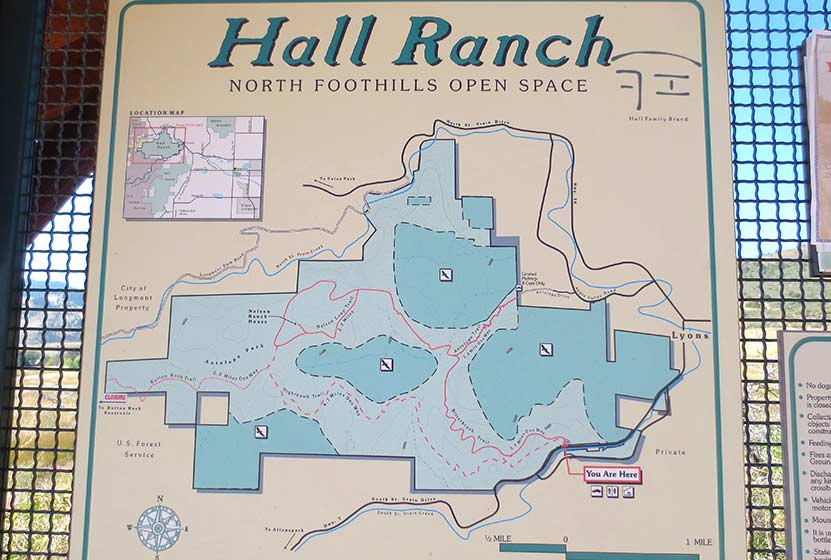
| Hike Trail Map | Click for a Map of Hall Ranch Hiking Trails |
| Denver Drive Time | 1 Hour |
| Driving Directions to Hall Ranch Trailhead | Click for Google Map |
| Town Nearest Hike | Lyons, Colorado |
| Beauty | wildflowers, vistas, grasslands, buttes, pine trees, wildlife |
| Activities | Hiking, photography, picnic tables, mountain biking, trail running |
Directions & Trailhead Information for Hall Ranch Hike
Hall Ranch is situated west of Lyons, Colorado about 16 miles north of Boulder. It's easy to access via the CO 7. There are two trailheads for Hall Ranch. The primary Hall Ranch Trailhead is located off Saint Vrain Drive/CO 7 West, about a mile outside of Lyons. The parking area is located on the North side of the road. This is the best access for most of the hikes and has both restrooms as well as a picnic shelter that can accommodate up to 24 people. The second smaller trailhead is the Antelope Trailhead, located at the end of Antelope Drive just northwest of Lyons. This second trailhead provides access to the Antelope trail, a connector trail described below.
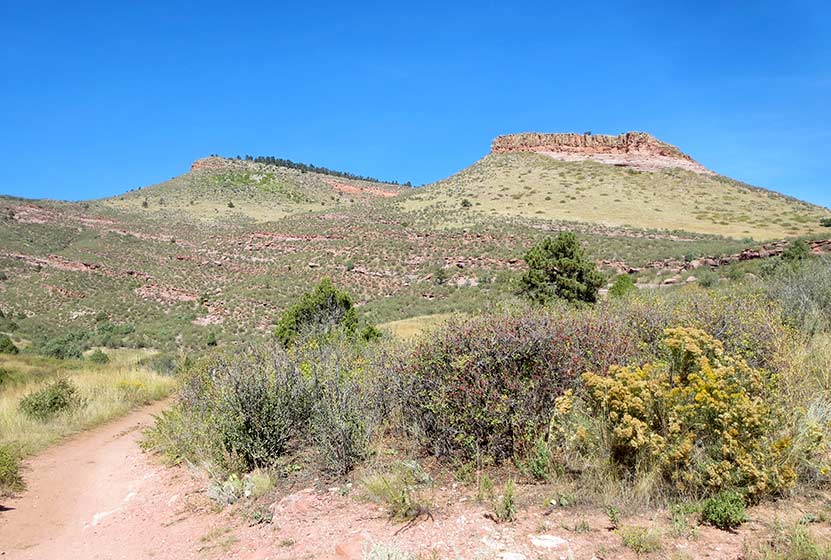
Sandstone Buttes at Hall Ranch
The Hikes: Hall Ranch Hike
There are several options for trails at Hall Ranch:
-
Nighthawk/Bitterbrush Loop - 9.2 Miles RT - +2480' - Moderat
-
Nelson Loop Trail - 2.2 Mile Loop - +299' - Moderate
-
Nighthawk Trail at Hall Ranch - 9 Miles RT - +1282' - Moderate/h3>
-
Bitterbrush Trail - 7.4 RT - +898' - Moderate
-
Antelope Trail - 1 Mile Trail Connector +458' - Moderate
-
Button Rock Trail - 2 Mile Trail Connector +220' - Easy
Probably the most popular is the Nighthawk Trail/Bitterbrush Loop. The loop starts at the west side of the main trailhead and sports a variety of landscapes: expansive meadows, tall buttes, pinion pines, and 180-degree views at its higher elevations. Starting at the main trail, hikers will soon come to an intersection with the Nighthawk trail and Bitterbrush. For this trail profile, we'll take a clockwise approach, following the Nighthawk trail westward. The Nighthawk trail makes a steady climb to where it tops out at approximately 7700' where it offers great views out to Longs Peak and a panorama of Rocky Mountain National Park. Here, hikers will notice an intersection with the Button Rock trail. This 2-mile out-and-back trail is not part of the loop. Staying on the Nighthawk Trail, it will meet up with the Nelson Loop Trail. Hikers can choose to go right or left, both trail segments will link up with the Bitterbrush after approximately 1 mile. Now about 5.5 miles into the hike, hikers will follow the Bitterbrush Trail as it descends for 3.7 miles back down to the main trailhead.
The Nelson Loop can only be accessed by first hiking either the Nighthawk or the Bitterbrush to where they connect up with the Nelson Loop. If you would like to do a lollipop loop hike, we recommend taking the Bitterbrush up to the Nelson Loop, hiking the loop, then returning via the Bitterbrush. This makes for a 9.6-mile hike. The Nelson Loop features the remnants of the old Nelson Homestead just off of the southern segment of the loop.
The Nighthawk trail can also be hiked as a 9-mile out-and-back trail. However, we recommend the full loop above because it's almost the same total distance and offers a greater variety of landscape. The Nighthawk Trail is hiker-only, so it makes for a great option if you prefer to avoid horse and mountain bike traffic. This trail is our favorite, offering vast meadows of green in the Spring and early Summer with views out to Mt Meeker and other snowcapped peaks.
The Bitterbrush Trail is a moderate 3.7 trail that begins at the main trailhead or that can be accessed midway by way of the Antelope Trailhead. Out-and-back, it makes for a 7.4-mile trip.
From the Antelope Trailhead, the 1-mile Antelope Trail takes you west to meet up with the Bitterbrush Trail. Gaining approximately 500' in a mile, it can make for a great 2-mile out-and-back trail run and provides some unique views not available on the longer trails.
The Button Rock Trail leads down to the Sleepy Lion Trail at Button Rock Preserve where hikers can pick up a whole series of trails around Ralph Price Reservoir.
Tips & Resources for Hiking Hall Ranch Hike Near Boulder
- Stay the Trail: Follow the designated trails. Keep off the old dirt roads.
- Dogs Prohibited: No pets are allowed at Hall Ranch in order to protect wildlife habitat.
- Trail Map: Hall Ranch Trail Map
- Packing List: Always pack the 10 Essentials. Download our Hiking Guide to get the list and dayhiking packing checklist.
- Colorado Road Conditions: Colorado Road Conditions
- After the Hike: The Stone Cup
Weather
Map & Driving Directions
Click for Driving Directions
Mohawk Lakes Hike Near Breckenridge
Mohawk Lakes are situated in the mountains south of Breckenridge, Colorado. Less than a 2-hour drive from Denver, this moderately demanding hike leads through pine and aspen forest, along a mountain stream, to a beautiful waterfall spilling over granite slabs. Breaking out above treeline at mile 3, hikers will arrive at Lower Mohawk Lake, and a bit further up the trail, can take in spectacular views of the neighboring mountain ranges at Upper Mohawk Lake. Explore the full Mohawk Lakes hike profile below for trail map, driving directions, and more tips and details to help you enjoy this adventure near Breckenridge.
Trail Snapshot: Mohawk Lakes Trail near Breckenridge, Colorado
| Hike Distance (Lower Mohawk Lake) | 6 miles Round Trip |
|---|---|
| Hike Distance (Upper Mohawk Lake) | 6.8 miles Round Trip |
| Difficulty | Moderate |
| Duration | Approx 4 hrs |
| Trail Type | Out and Back |
| Starting Elevation | 10380′ |
| Elevation Gain (Lower Mohawk Lake) | Approx +1380′ |
| Elevation Gain (Mohawk Lake) | Approx +1730′ |
| Seasons | Year Round |
| Dogs | Allowed On Leash |
| Hike Trail Map | Click for a Map of Mohawk Lakes near Breckenridge |
| Denver Drive Time | 1 hr 40 min |
| Driving Directions to Spruce Creek Trailhead | Click for Google Map |
| Town Nearest Hike | Breckenridge, Colorado |
| Beauty | Waterfall, lakes, cabin ruins, creek, mountain views |
| Activities | Hiking, photography, horseback riding, fishing |
Parking & Trailhead Information for Mohawk Lakes Hike
From Breckenridge, follow CO 9 South to The Spruce Creek Road. This is found on the right/west approximately 2.5 miles from the south end of town (junction of Main and South Park Ave). The trailhead for this hike to Continental Falls is located approximately 1.1 mile up Spruce Creek Road. This is the Spruce Creek Trailhead.
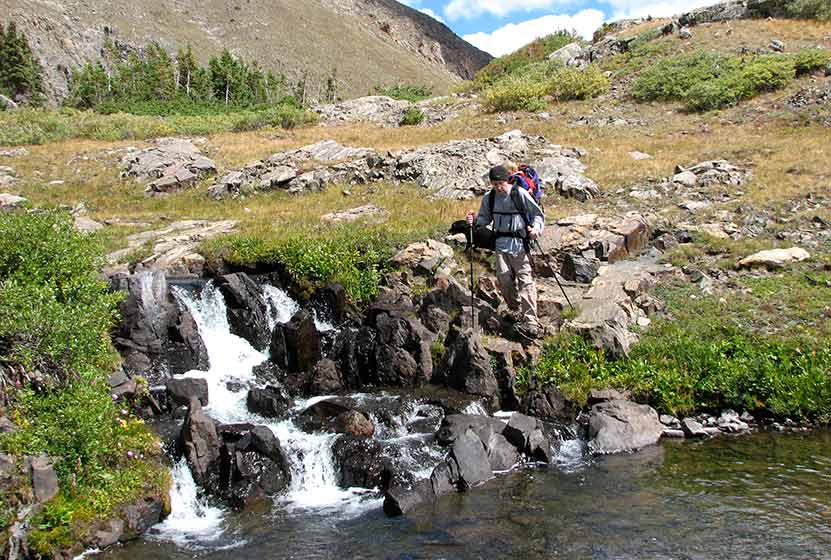
A Cascade Spilling out of Mohawk Lake
The Hike: Mohawk Lakes Trail
From the trailhead, hikers will follow the Spruce Creek trail, which is marked by blue diamond blazes painted on the trees along the trail. About 1/2 mile into the hike, the trail crosses Spruce Creek via a footbridge. Here the forest opens to provide views of Mt. Helen to the West. At approximately the 1.7 miles mark, the Spruce Creek trail intersects with the Wheeler Trail. At this junction, continue straight on Spruce Creek Trail.
At approximately 2 miles, the Spruce Creek trail joins up with a 4WD road for a short jaunt past a small dam, then reconnects with the Spruce Creek trail. At about 2.5 miles into the hike, the trail intersects with the Mayflower Lakes Trail. Proceeding left (southwest) will lead to Mohawk lakes and past a beautiful granite waterfall, Continental Falls. This segment of the trail is one of my favorites, as it leads past the ruins of a mining operation complete with cabins, mine shaft, and old mining equipment. Exercise caution around such areas as hikers have been been injured or lost their lives by entering mining shafts and adits. Take a moment to read the signage around these areas for details.
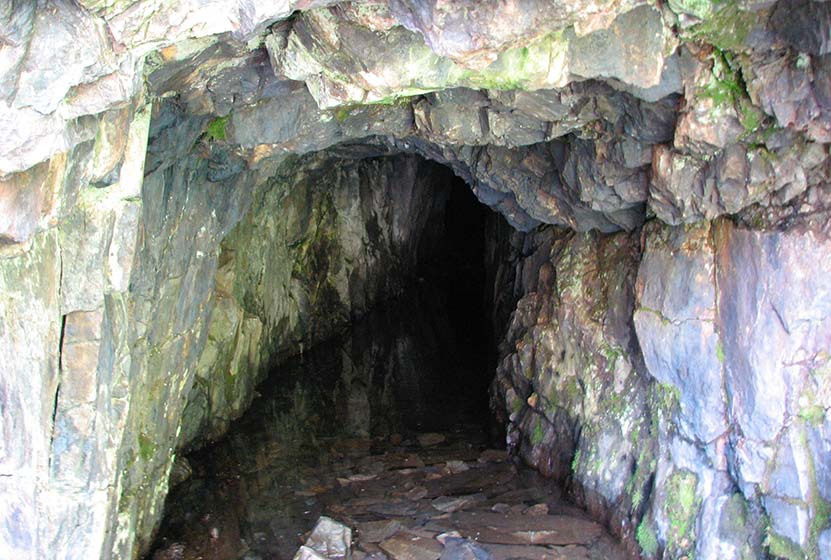
An Old Mine Shaft along the Trail
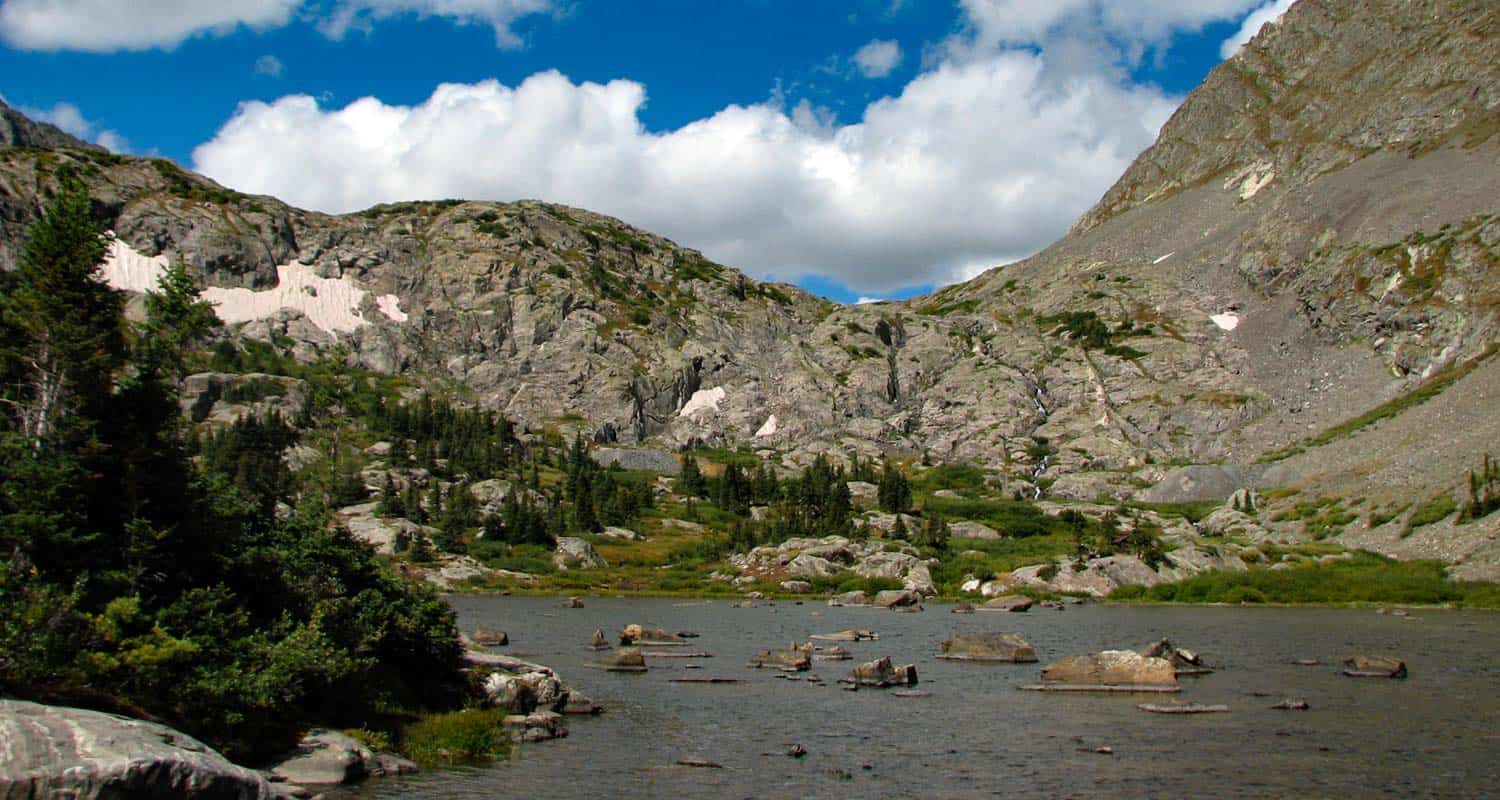
There are more cascades to taken in between Continental Falls and Lower Mohawk lake. At approximately the 3-mile mark, hikers will arrive at beautiful Lower Mohawk lake, surrounded by rugged mountainsides with the peak of Mt. Helen directly north of the center of the lake. The trail continues for about 0.3 miles and another 450' of elevation gain to Upper Mohawk Lake where you can take in the expansive views of Colorado's majestic Tenmile Range of the Rocky Mountains. Because this is an out-and-back trail, the way back to the trailhead is the reverse of the same trail hikers take to the lakes.
At the shore of Lower Mohawk Lake
Tips & Resources for Hiking the Mohawk Lakes Trail
- TIP: You will be hiking through alpine tundra, which is a fragile ecosystem. Be sure to stay on the trail and hike only on durable surfaces if you are hiking or fishing along the lakes.
- TIP: There are mine ruins off trail nearby. Be careful as mines have been known to collapse and to produce poisonous gases.
- Trail Map: Mohawk Lakes Trail near Breckenridge
- Packing List: Always pack the 10 Essentials. Download our Hiking Guide to get the list and dayhiking packing checklist.
- Colorado Road Conditions: Colorado Road Conditions
- After the Hike: The Crown
Weather
Map & Driving Directions
Click for Driving Directions
Diamond Lake Hike
The Diamond Lake Trail leads hikers to a high alpine lake nestled in the forest below Jasper Peak in Indian Peaks Wilderness. This 3.5 mile, moderately demanding trail leads to good fishing at Diamond Lake, past a waterfall and multiple cascades, and opens up to the incredible views that make Colorado's high-country famous. Explore the full Diamond Lake hike profile below for trail map, driving directions, and more tips and details to help you enjoy this adventure in the Indian Peaks Wilderness.
Trail Snapshot: Diamond Lake Trail
| Hike Distance | 7.0 miles Round Trip |
|---|---|
| Difficulty | Moderate |
| Duration | Approx 3-4 hrs |
| Trail Type | Out and Back |
| Starting Elevation | 10150′ |
| Elevation Gain | +850′, with additional elevation dip and gain |
| Seasons | Year Round |
| Dogs | Allowed On Leash |
| Hike Trail Map | Click for a Map of Diamond Lake Trail near Nederland |
| Denver Drive Time | 1 hr 30 min |
| Driving Directions to 4th of July Trailhead | Click for Google Map |
| Town Nearest Hike | Nederland, Colorado |
| Beauty | lake, waterfalls, wildflowers, streams, wildlife: moose, deer, squirrel, chipmunk |
| Activities | Hiking, snowshoeing, skiing, camping, fishing |
Directions to Diamond Lake Trail & Trailhead
Drive for approximately for 1hr from Denver to Nederland, Colorado. From Nederland, drive south on CO 119 for about half a mile. Turn right onto CR 130 towards Eldora, then proceed westward through the town of Eldora on Eldorado Avenue which will turn into Hessie Road as it leaves town. At the intersection with CR 111 (4th of July Road) turn right; this will take you to the Fourth of July Trailhead. On the way to the trailhead, you'll pass Buckingham Campground. Though this looks like a trailhead and parking area, drive past it to the actual trailhead. It is important to note that 4th of July Road is a dirt road and only useable by passenger vehicles during the Summer months, and rain and snow can cause the road conditions to be unpredictable. Washouts can make this a 4WD road.
The Hike to Diamond Lake
The hike to Diamond Lake begins at the 4th of July Trailhead by taking the Arapaho Pass Trail #904. The Arapaho Pass trail ascends quickly into Indian Peaks Wilderness area. New views open up about every quarter mile featuring distant waterfalls, trailside cascades, creeks, wildflowers, and expansive mountain views. Hikers will encounter the first trail junction at 1.2 miles in. The correct trail, the Diamond Lake Trail (easy to remember) is to the left/west. The first 1/2 mile on the Diamond Lake Trail heads west along a drainage then descends to Middle Boulder Creek. At approximately 1.7 miles into the hike, the trail follows a bridge over Middle Boulder Creek. This a great place to stop and take in Diamond Lake Falls (pictured below).
After the waterfall, the trail crosses two more creeks then begins a steep ascent through a series of switchbacks. This final trail segment is approximately 1 mile, making the entire one-way hike to Diamond Lake approximately 3.5 miles. This segment from the waterfall to the lake is often covered with snow into early Summer, so orienteering and snow-travel skills are recommended for those who decide to negotiate the snow-covered trail.
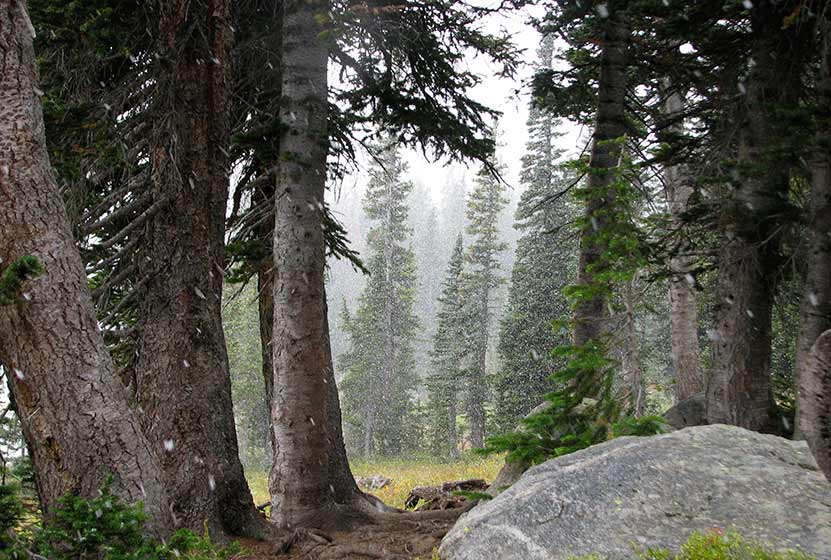 Snow and Fog on the Forest near Diamond Lake
Campfires are prohibited at Diamond Lake, but camping is allowed by permit and in the designated sites. For more details on backcountry travel and permits in the Indian Peaks Wilderness area, see the Indian Peaks Wilderness Alliance. The Diamond Lake Trail continues past Diamond Lake into the high country where it meets up with the Devils Thumb trail. Hikers in Indian Peaks should always prepare by packing the 10 Essentials, and have a plan in case they encounter rapidly changing weather conditions. In the summer, this means thunderstorms and lightning that rapidly form, and un-forecasted snowstorms from Fall to early Summer.
Tips & Resources for Hiking the Diamond Lake Trail
- TIP: Go there early (especially during the weekends) to avoid an overcrowded parking area.
- TIP: Bring bug spray for mosquitoes.
- Trail Map: Diamond Lake Trail
- Packing List: Always pack the 10 Essentials. Download our Hiking Guide to get the list and dayhiking packing checklist.
- Colorado Road Conditions: Colorado Road Conditions
- After the Hike: Happy Trails Cafe
- Photo Credit: A Place to Ponder by Let Ideas Complete
Weather
Map & Driving Directions
Click for Driving Directions