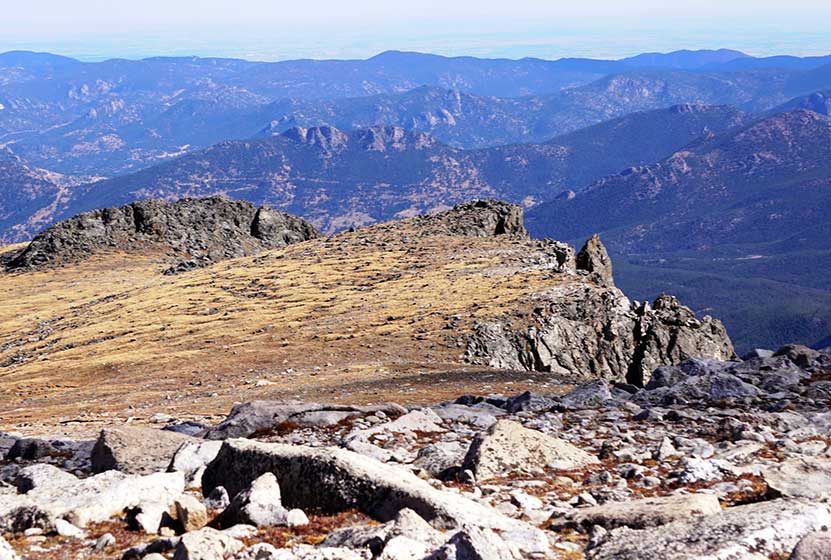
Chief Mountain Hike
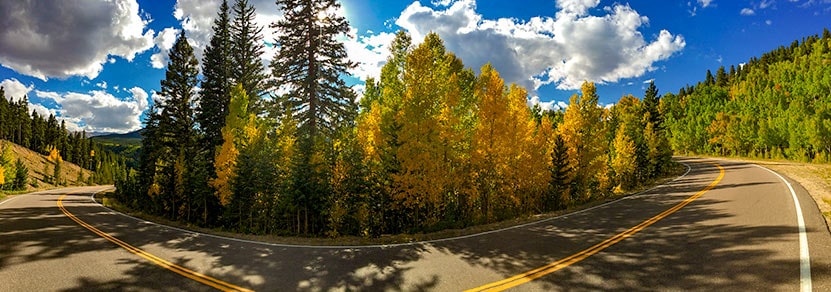
Chief Mountain is a 1.5-mile hike in the mountains just one hour outside of Denver, Colorado. The Chief Mountain trail travels through alpine forest, then breaks out into high-country tundra, eventually gaining panoramic views of surrounding mountains. Chief Mountain gives hikers an incredible vantage point to survey the changing colors of Fall spread out in 360 degrees below. Explore the full Chief Mountain hike profile below for trail map, driving directions, and more tips and details to help you enjoy this adventure near Denver.
Trail Snapshot: Chief Mountain Hike
| Hike Distance | 3 miles Round Trip |
|---|---|
| Difficulty | Moderate |
| Duration | Approx 3 hrs |
| Trail Type | Out and Back |
| Starting Elevation | 10800′ |
| Elevation Gain | Approx +1000′ |
| Seasons | Year Round (weather permitting) |
| Dogs | Allowed On Leash |
| Hike Trail Map - Winter | Click for a Map of Chief Mountain Trail |
| Hike Trail Map - Summer | Click for a Map of Chief Mountain Trail |
| Denver Drive Time | 1 hr |
| Driving Directions to Chief Mountain Trailhead | Click for Google Map |
| Town Nearest Hike | Idaho Springs, Colorado |
| Beauty | Panoramic views, Rock Formations, Summer Wildflowers, Fall Colors |
| Activities | Hiking, snowshoeing, skiing, camping, photography, |
Parking & Trailhead Information for Chief Mountain Hike
From Denver, take Interstate 70 west to exit 252. This exit will funnel you onto CO-74/Evergreen Parkway headed West/Southwest for about 2 miles, where you'll take a right onto Squaw Pass Road. Squaw Pass road is paved and climbs the mountain in a series of switchback for 10.4 miles. The trailhead is easy to miss. It's a pull-out on the right-hand/North side of the road. It's worth taking a look at the parking area using satellite view on Google maps before going. You'll notice that the trail begins just a bit East of the parking area on the South side of the road. We've dropped the pin in the driving directions above at the location of the trailhead. As with all roads at this altitude, be sure to check conditions and closures before setting out.
The Hike: Chief Mountain Trail
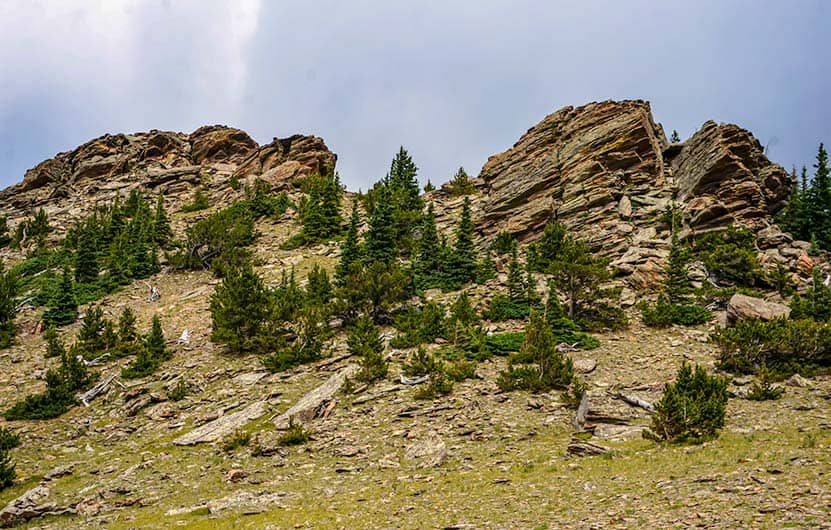
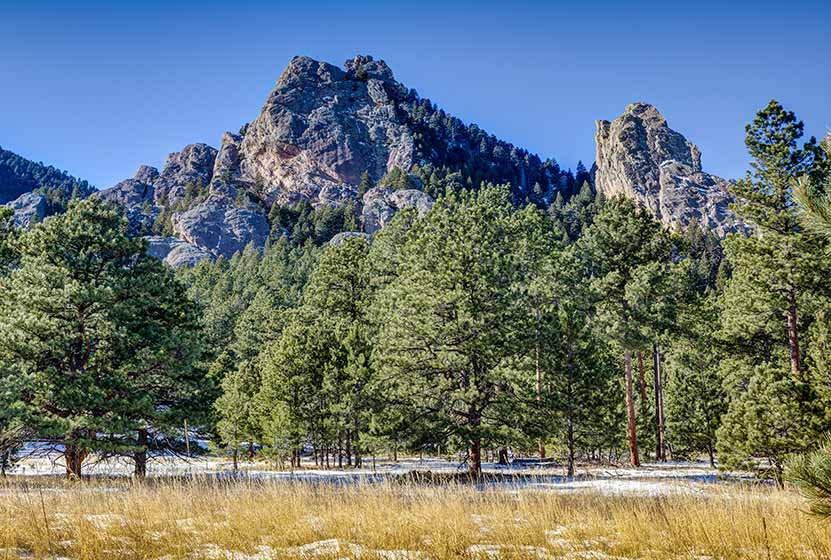
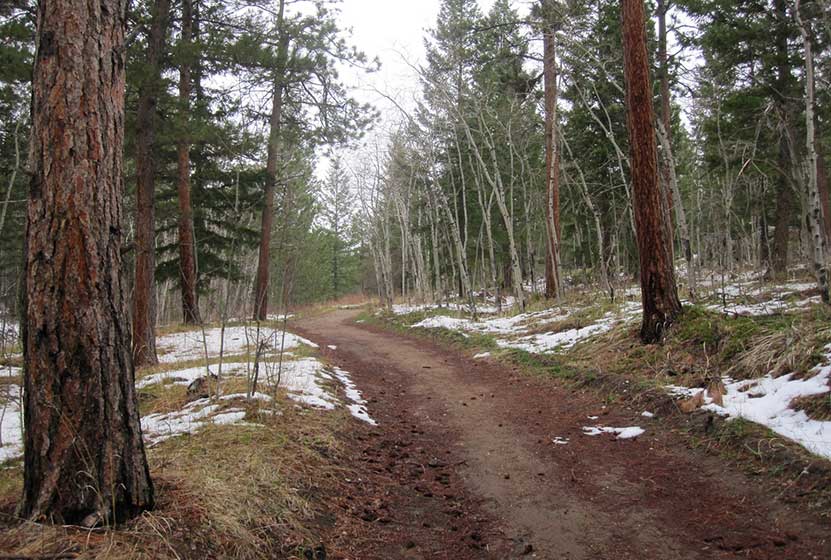
The Chief Mountain trail begins on the south side of Squaw Pass road. The trail starts out as a steep 1/4 mile segment that takes hikers through dense alpine forest to Old Squaw Pass Road. The trail is picked up again on the other side of the dirt road and marked by signage. The trail bends now along the base of Papoose Mountain and the dense forest gives way to scattered trees and eventually into high-country tundra. Colorado's tundra ecosystems are incredibly fragile. Here the alpine flowers and lichens grow close to the ground in order to survive in the harsh winds and cold. Stay on maintained trails as it can literally take centuries for this alpine environment to recover from the damage inflicted upon it by foot traffic.
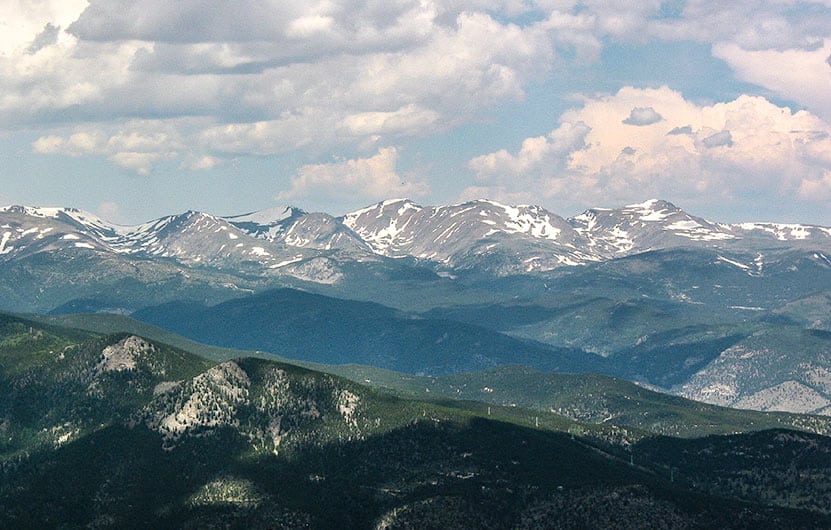
The trail should be evident, but you'll also find that it is marked by blaze marks on some of the trees. The trail becomes more demanding and steep. With each switchback new panoramas reveal distant snow-capped landscapes. Jagged rock formations grow in size as the trail gains elevation and makes its way closer to the summit.
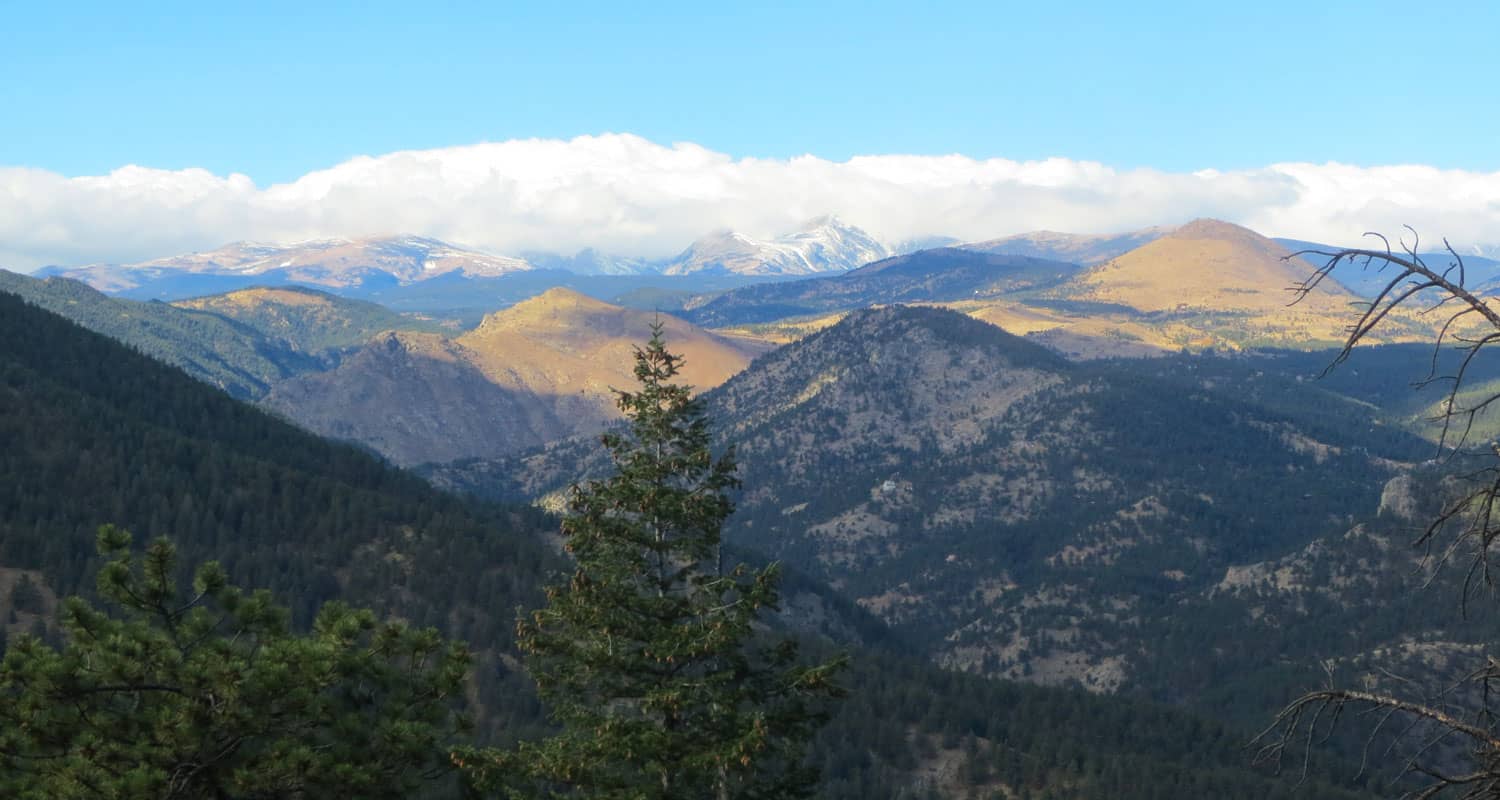
The views are incredible at the top (see photo below). Mount Evans can be seen to the West and Squaw Mountain to the East. This is a great vantage point for taking in the changing aspens along the Front Range of Colorado. For more Fall Hikes, see our 25+ Hikes for Viewing the Changing Aspens in Colorado.
Tips & Resources for Hiking the Chief Mountain Trail
- TIP: Because this hike is popular especially on summer weekends, get there early or do it during weekdays.
- Trail Map for Chief Mountain Trail - Winter: Trail Map Link
- Trail Map for Chief Mountain Trail - Summer: Trail Map Link
- Packing List: Always pack the 10 Essentials. Download our Hiking Guide to get the list and dayhiking packing checklist.
- Colorado Road Conditions: Colorado Road Conditions
- Photo: We would like to express our gratitude to Rick Pawela and CL Baker for sharing photo of this hike on Chief Mountain.
- After the Hike: Beau Jo's Pizza in Idaho Springs
Weather
Map & Driving Directions
Click for Driving Directions

Shanahan Ridge Hike Near Boulder
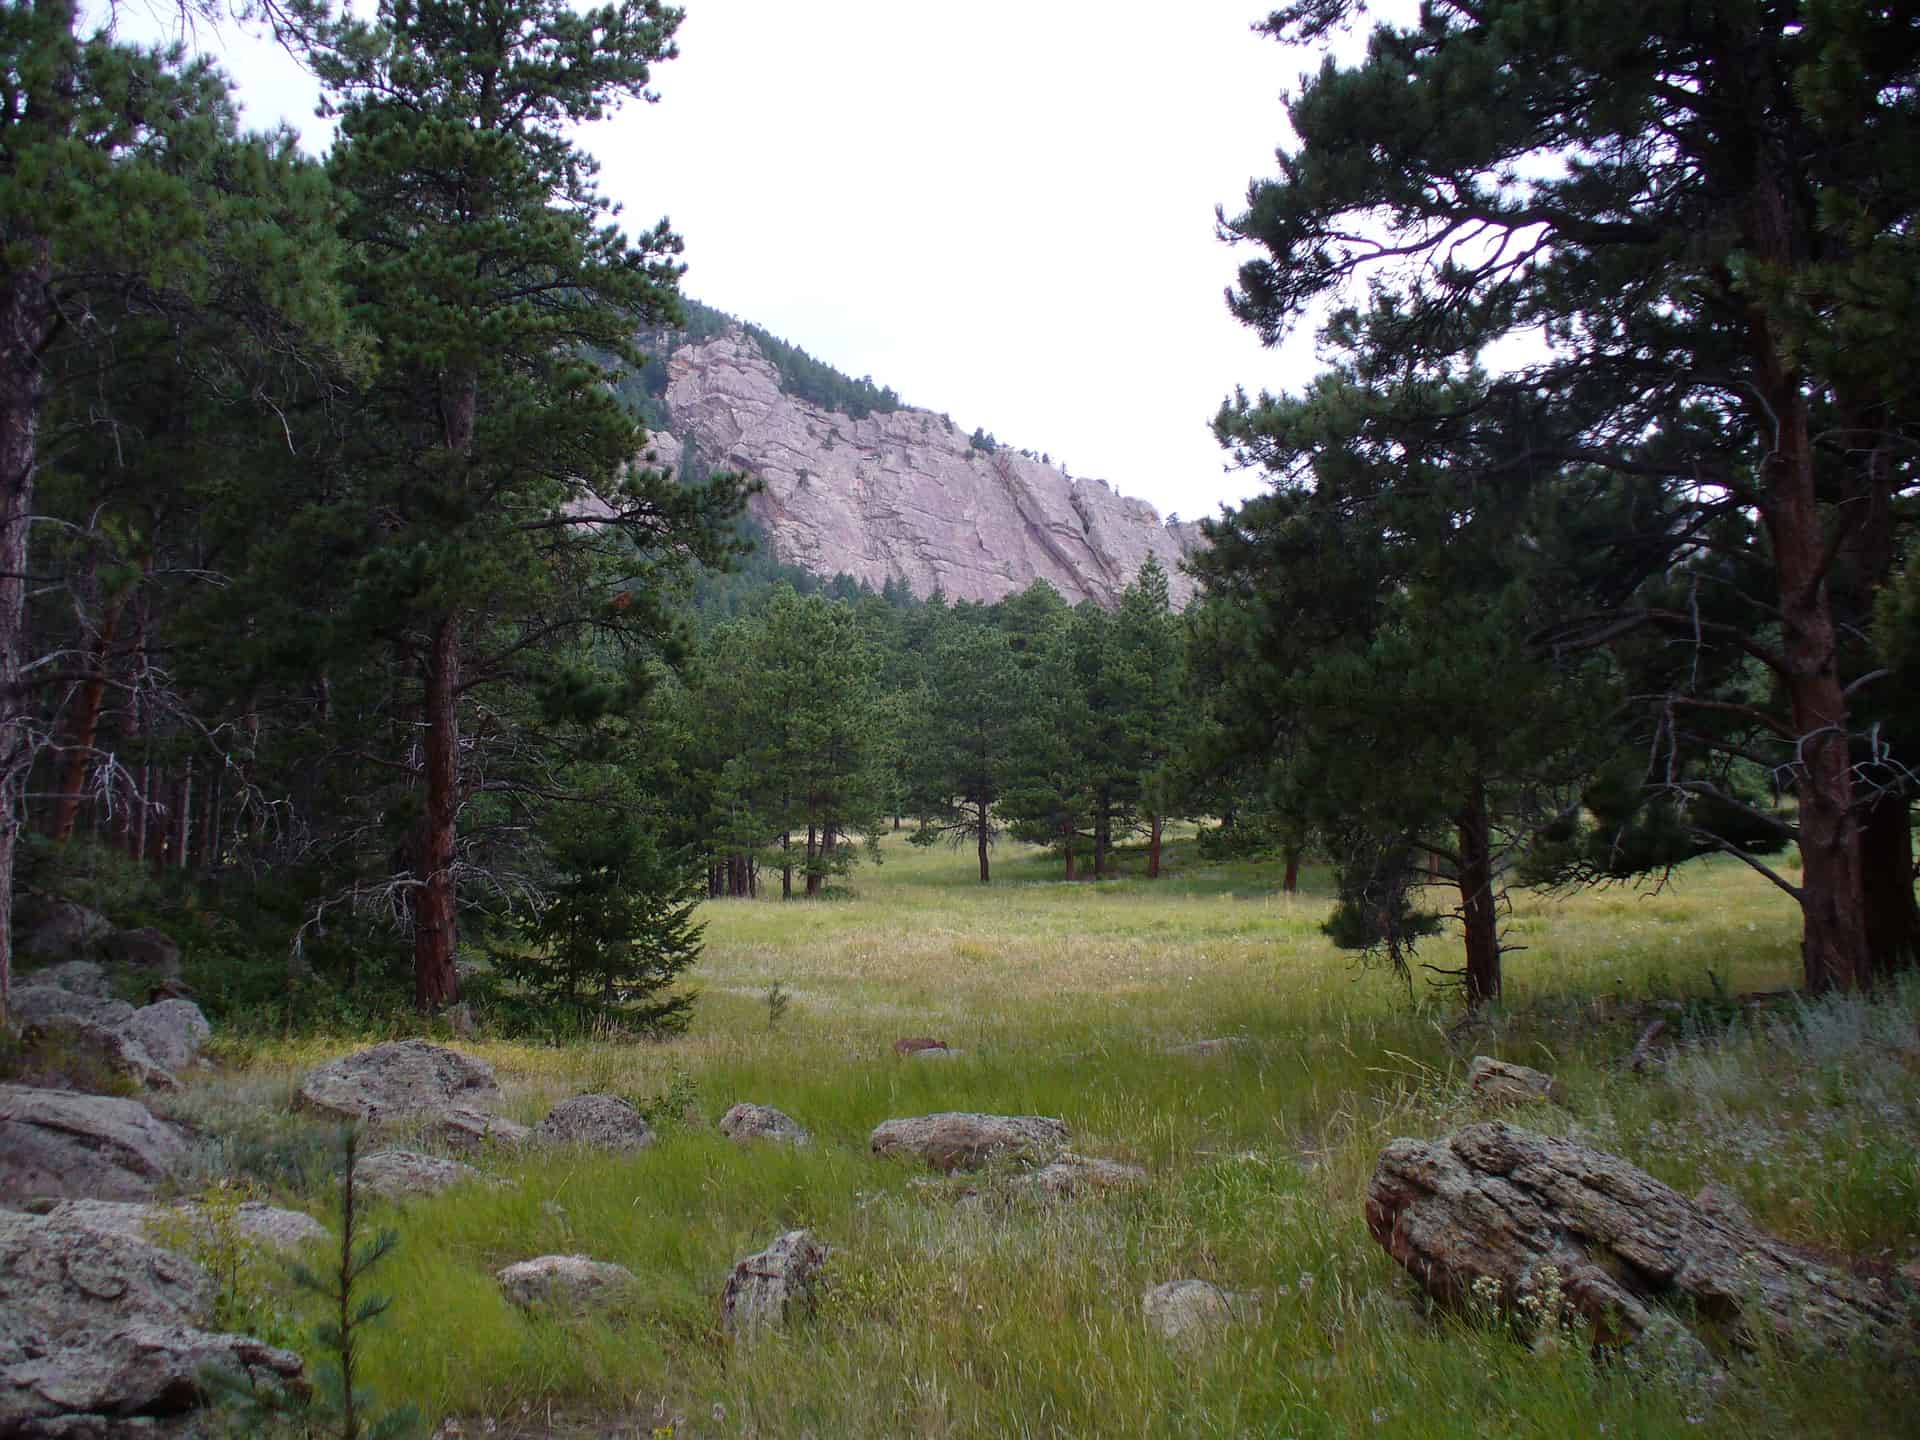
The Shanahan Ridge Loop Hike is an easy, 4-mile lollipop-loop trail with stunning views of the Shanahan Ridge of the Flatirons in Boulder, Colorado. Explore the full Shanahan Ridge Loop hike profile below for trail map, driving directions, and more tips and details to help you enjoy this hike in Boulder.
Trail Snapshot: Shanahan Ridge Loop Trail in Boulder, Colorado
| Hike Distance | 4 Miles |
|---|---|
| Difficulty | Easy |
| Duration | Approx 2 hrs |
| Trail Type | Lollipop-Loop |
| Starting Elevation | Approx. 5500′ |
| Elevation Gain | Approx +900′ |
| Seasons | Year Round |
| Dogs | Allowed On Leash |
| Hike Trail Map | Click for a Map of Shanahan Ridge Trail |
| Denver Drive Time | 40 Min |
| Driving Directions to Shanahan Ridge Trailhead | Click for Google Map |
| Town Nearest Hike | Boulder, Colorado |
| Beauty | meadows, wildflowers, peak views, pine forest |
| Activities | Hiking, Photography, Trail Running |
Parking & Trailhead Information for Shanahan Ridge Loop Trail
The Shanahan Ridge Trailhead is located just along Lehigh Street south of Boulder. From US 36, follow Table Mesa Drive West to its intersection with CO 93. Turn left onto 93 and follow it for less than a mile. Turn right onto Greenbriar Boulevard which eventually becomes Lehigh Street. The trailhead is on the left/southwest side of the road and marked by a trail post and trash receptacle. There is actually no parking lot because the trailhead is located in a residential area. Because of this please exercise extra care and respect for the residents as you park along Lehigh or adjacent streets. Be aware of city parking signage.
The Hike: Shanahan Ridge Loop Trail
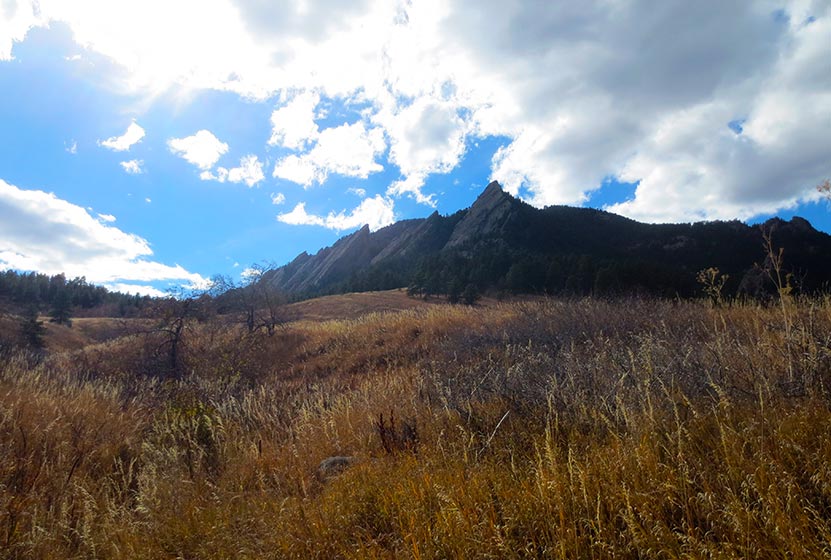
The Shanahan Ridge loop is best hiked clockwise in order to gain the best views of the Flatirons and surrounding countryside. Going left on the first junction will take you onto a connector trail that will next intersect with the South Fork Shanahan Trail. This trail begins with a gradual ascent which becomes more demanding. If you are acclimatized to the altitude and hike a fair amount, you'll find this segment easy; but beginner hikers and those of us who are not in the best of shape will find this a moderately demanding trail.
Continue on the South Fork Shanahan Trail for about 1.8 miles as it weaves through ponderosa forest and opens out to captivating vistas of the Flatirons. The trail will terminate at a junction with the Mesa Trail. Follow this trail North (right) as it winds along the base of the Shanahan Ridge of the Flatirons.
After approximately a 1/2 mile on the Mesa trail, it will intersect with the North Fork Shanahan Trail. Taking a right onto the North Fork Shanahan leads backdownhill for about 1.3 miles to the trailhead.
Tips & Resources for Hiking the Shanahan Ridge Loop
- TIP: Check ahead for trail closures.
- More Hikes in the Flatirons: Royal Arch Trail, First and Second Flatirons Hike, and Enchanted Mesa Hike.
- Trail Map: Shanahan Ridge Loop Trail
- Packing List: Always pack the 10 Essentials. Download our Hiking Guide to get the list and dayhiking packing checklist.
- Colorado Road Conditions: Colorado Road Conditions
- Photo: We would like to express our gratitude to Dave Dugdale and John Giez for sharing their photographs of this hike.
- After the Hike: The Parkway Cafe
Weather
Map & Driving Directions
Click for Driving Directions
St. Vrain Mountain Hike
The St. Vrain Mountain trail is just a 3-mile hike into Indian Peaks Wilderness to stunning views of the rocky peaks of Wild Basin. Hike up and additional 1.5 miles from the RMNP boundary to the summit of St. Vrain mountain for 360-degree panoramic views of a wildflower-laden wilderness. Explore the full St. Vrain Mountain hike profile below for trail map, driving directions, and more.
Trail Snapshot: St. Vrain Mountain Hike
| Hike Distance | 9 miles Round Trip |
|---|---|
| Difficulty | Difficult |
| Duration | Approx 5-6 hrs |
| Trail Type | Out and Back |
| Starting Elevation | 8,800′ |
| Elevation Gain | Approx +3,200′to Summit of St. Vrain Mountain |
| Seasons | June-Sept. |
| Dogs | Allowed On Leash |
| Hike Trail Map | Click for a Map of St. Vrain Mountain Trail |
| Denver Drive Time | 1 hr 30 min |
| Driving Directions to St. Vrain Mountain Trailhead | Click for Google Map |
| Town Nearest Hike | Allenspark, Colorado |
| Beauty | Cascades, Panoramic Views, Wildflowers, Summit |
| Activities | Hiking, snowshoeing, photography |
Parking & Trailhead Information for St. Vrain Mountain
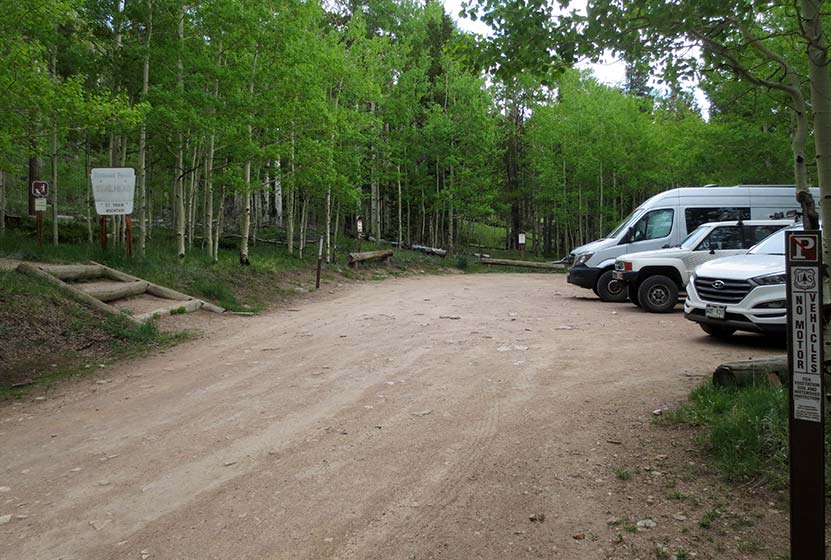
From Denver, take Interstate 25 to either 36 or 66 to Lyons. In Lyons, follow 7 to Allenspark. In Allenspark, turn left onto Ski Road - FR-107. This will be marked with a street sign and a home-crafted sign made out of an old pair of skis. Follow this dirt road as is weaves through Allenspark then a series of dispersed cabins for about 2 miles until the road terminates at the trailhead. There is parking for only about 8 vehicles at the trailhead. There is additional parking along the road, but make sure that you're not blocking cabin drives or tearing up the roadside. You may have to park a ways back down the road if crowded. I hiked this on the weekend and the lot was full around 8 AM. There are not restrooms or potable water at the trailhead.
The Hike: St. Vrain Mountain Trail
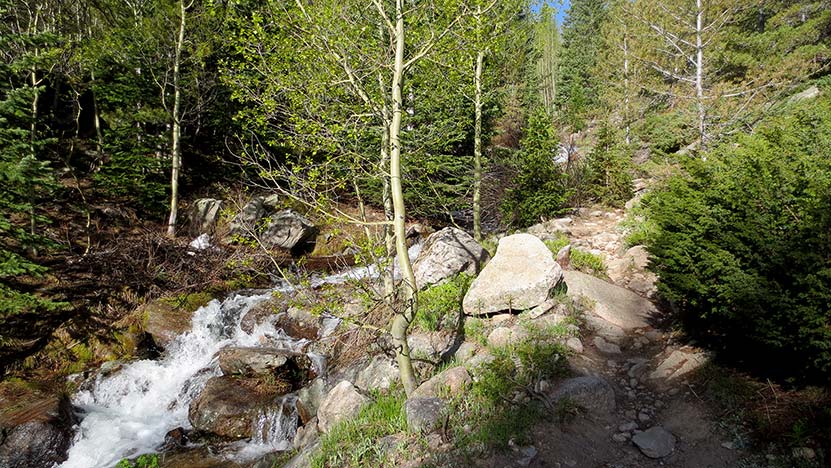
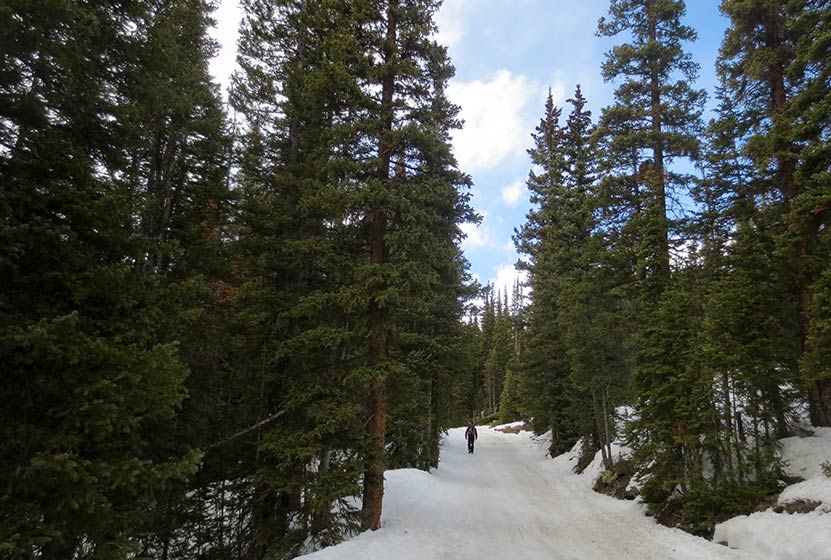
The hike begins in the shade of aspen, spruce, and lodgepole pine forest. This first segment is easy and gradual, getting steeper as the sounds of distant St. Vrain Creek grow louder and closer. Wildflowers become more prevalent and soon the trail begins to follow right alongside the course of the creek.
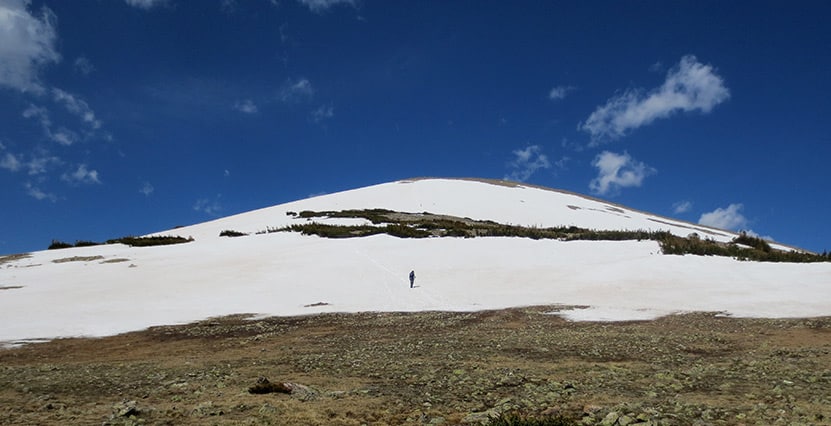
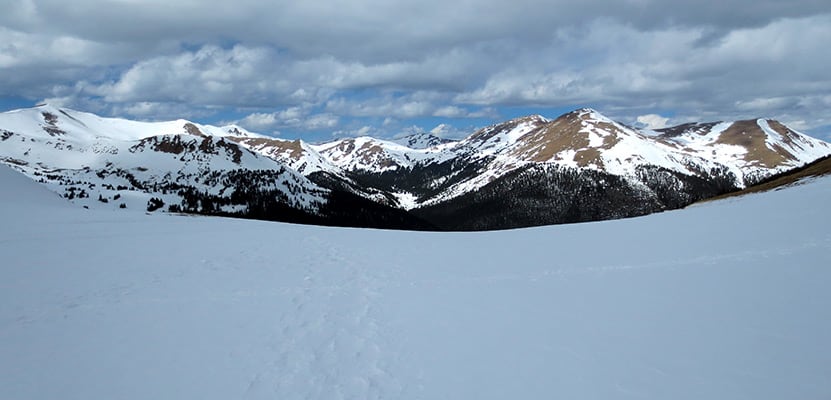
Then the switchbacks begin. I hiked this in late-May after a Winter when our snowpack was below normal. So it was snow-free until around mile 2. From about mile 2 to mile 3, intermittent snow covered about 3/4 of the trail. I didn't bring snowshoes but had it been early May, I definitely would have needed a pair. Trekking poles were essential for negotiating the trail and to keep from post-holing up to my waist. It could be done without poles, but I'd definitely recommend having them.
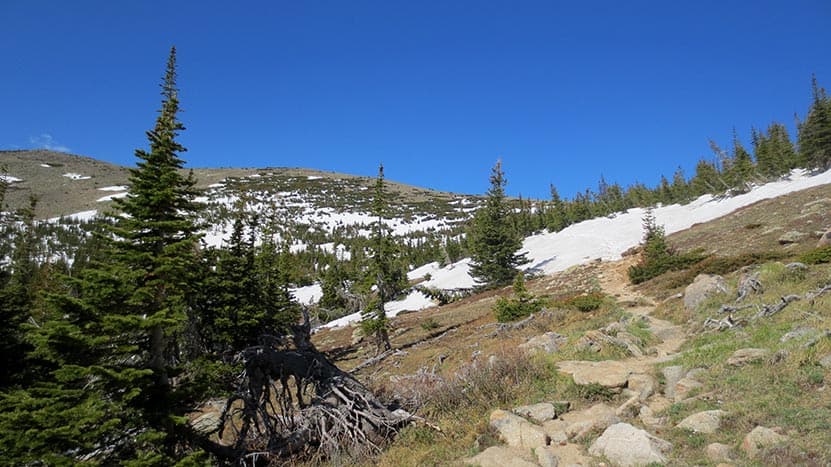
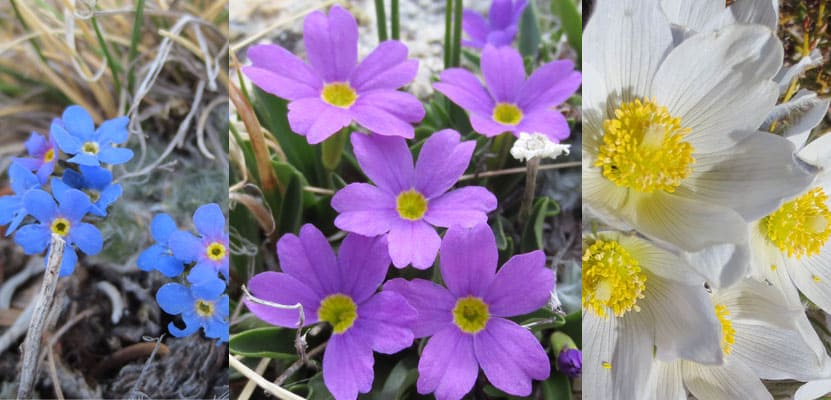
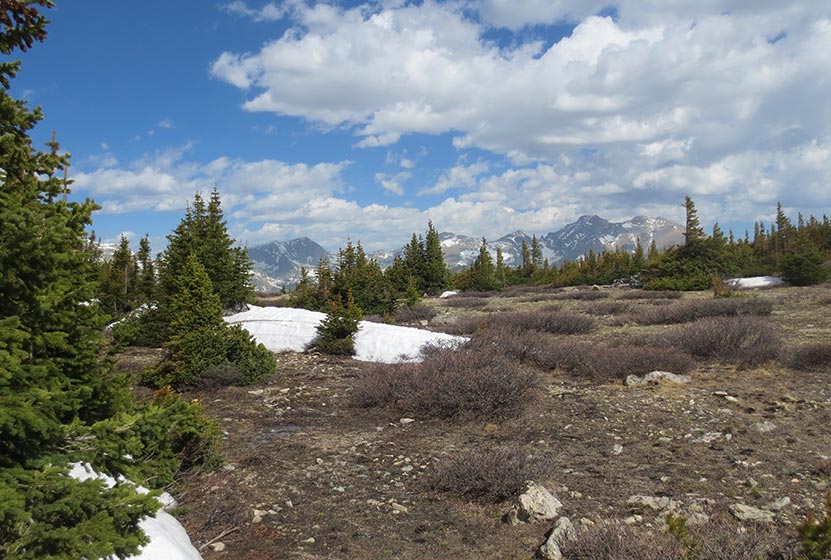
At treeline, things open up to blue skies and high-country tundra brightened by the many colors of summer wildflowers. In early-May, these were just beginning to bloom. However, come mid-June, the creek alongside the trail and these upper reaches of high-country should be replete with wildflowers.
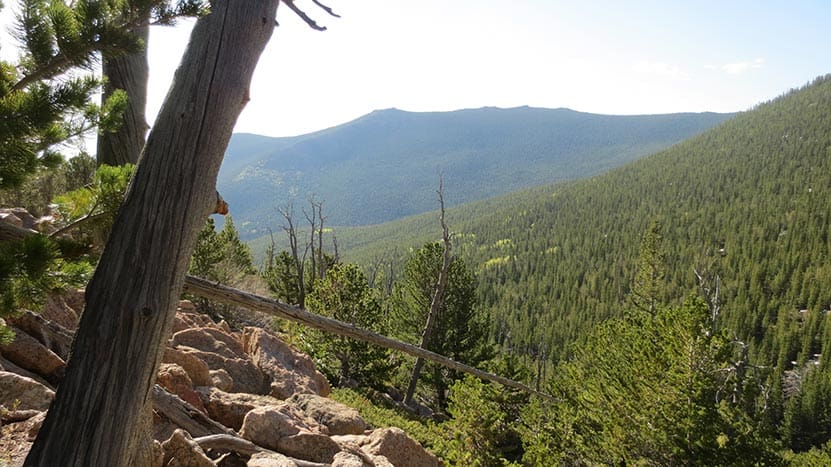
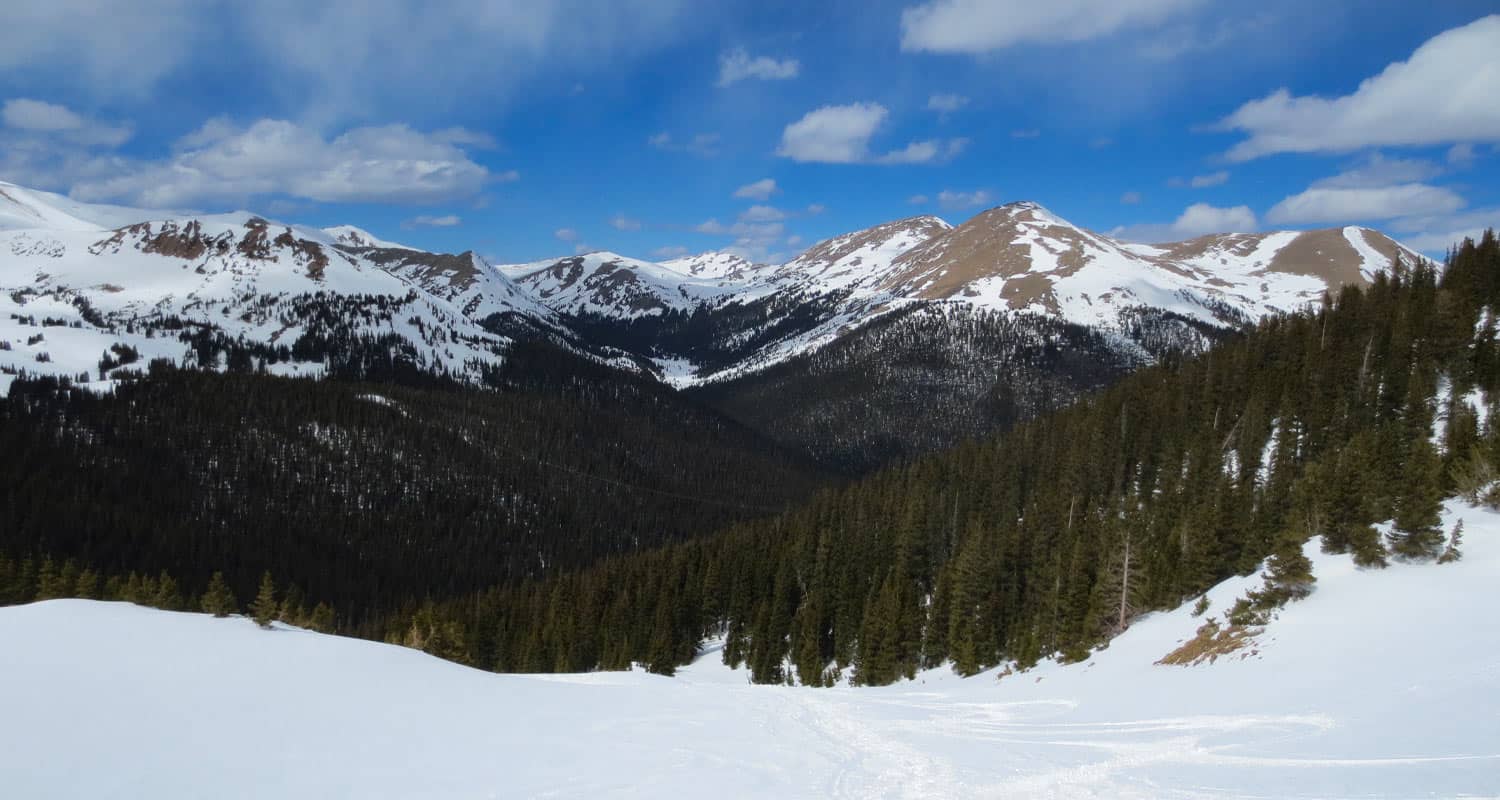
Once you crest the saddle, the views are outstanding. To the Northwest, the entire Wild Basin of Rocky Mountain National Park opens up before you. To the North, you'll find Meadow Mountain, elevation 11,632'. I met a local from Allenspark along the trail and he said the views from the summit of Meadow Mountain rival those of St. Vrain because of the perspective looking down into the Wild Basin area.
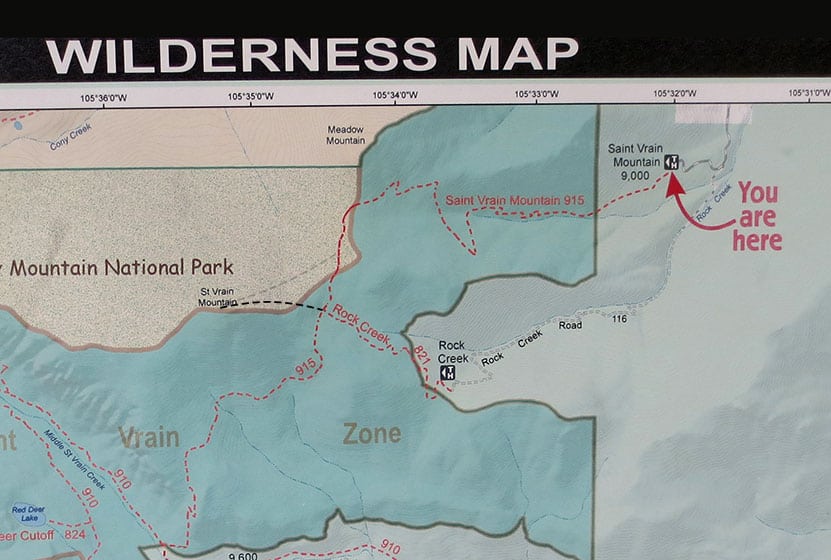
At mile 3, the trail enters Rocky Mountain National Park. From this point, I could see a faint trail in the snow leading up the rounded ridgeline of St. Vrain Mountain. It's about a 1/2 mile hike from the main trail to the summit with about 700 feet of elevation gain.
Below is a photo of the map found at the trailhead. I've added a dark-black dashed line to indicate the trail that goes from the junction with the Rock Creek Trail to the summit. The lighter-grey dashed line indicates the path hikers were taking across the snow to the slopes of St. Vrain Mountain. Be sure to hike on durable surfaces (snow, rock, trails) on the summit approach to protect the fragile tundra environment.
Tips & Resources for Hiking St. Vrain Mountain Trail
- TIP: Trekking Poles are a must on this trail. They will be especially helpful to negotiate the snow that covers the upper reaches of the trail in late-Spring through early Summer.
- TIP: Apply sunscreen as the trail is mostly exposed to the sun.
- Similar Hikes: Flattop Mountain, Windy Peak, Carpenter Peak.
- Trail Map: St. Vrain Mountain Trail
- Packing List: Always pack the 10 Essentials. Download our Hiking Guide to get the list and dayhiking packing checklist.
- Colorado Road Conditions: Colorado Road Conditions
- After the Hike: Meadow Mountain Cafe in Allenspark, CO
Weather
Map & Driving Directions
Click for Driving Directions
Butler Gulch Hike
The Butler Gulch Trail near Berthoud Falls is a moderately difficult out-and-back trail with a balance of shade on the first half and then above treeline with spectacular views of peaks and wildflowers all around. Activities here include stream crossings and steep climbs, and one can visit an old mine above the treeline. This is also a great snowshoeing hike during winter and is a well-known skiing destination. Explore the full Butler Gulch hike profile below for trail map, driving directions, and more tips and details to help you enjoy this adventure near Berthoud Falls.
Trail Snapshot: Butler Gulch Hike
| Hike Distance | Approx 5 Miles Round Trip |
|---|---|
| Difficulty | Moderate (difficult in Winter) |
| Duration | Approx 3.5 hrs |
| Trail Type | Out and Back |
| Starting Elevation | 10,400′ |
| Elevation Gain | Approx +1200+′ |
| Seasons | June to September; October to May for Winter Trail Conditions |
| Dogs | Allowed On Leash |
| Hike Trail Map | Click for a Map of Bulter Gulch Trail |
| Denver Drive Time | 1 hr |
| Driving Directions to Butler Gulch Trailhead | Click for Google Map |
| Town Nearest Hike | Empire, Colorado |
| Beauty | Summer Wildflowers, Lake, Cascades, Meadows, Stream, Aspen trees, Wildlife: Mountain Goats |
| Activities | Hiking, Photography, Snowshoeing, Cross-country Skiing |
| Nearby Hikes | Herman Gulch and Cascades Near Berthoud |
Parking & Trailhead: Butler Gulch Hike
The Trailhead for Butler Gulch is about 1 hour West of Denver via Interstate 70. Take the exit for Hwy 40/Winter Park (easy to miss) through Empire (be alert for reduced speed limit) up to where US 40 makes a sharp bend to begin climbing up the mountain toward Berthoud Pass. Just before this turn, there is a left-hand turn to take for the Henderson Mine Road. Follow Henderson Mine road for about a mile. It will pass the mining operation and the parking area is just past the mine on the left. The main parking area is the first one you will encounter and it's large. A smaller one is about .25 mile up the road (the road is 4WD after the first lot) is small and fills fast. We recommend parking in the first lot as it is maintained and this will prevent damage to the trailhead.
From the parking area, hike the 4WD road for about 1/4 mile to where the trail splits. There should be signage here at the fork indicating the Jones Pass Trail goes to the right, and the Butler Gulch Trail goes to the left. Soon, the trail begins to climb through mixed forest of spruce, fir, and aspens. After approximately one mile, a mountain stream nears the trail, forming a quaint meltwater waterfall (right side of trail). Soon, the trail emerges from the trees into a landscape of snow-capped mountains. This bowl will be replete with wildflowers in the early weeks of Summer. At this point, hikers are exposed to the elements, and during the Summer months, lightning storms can come up without warning in the afternoon. So, keep an eye on the sky. Winter travelers should be alert to avalanche conditions. Here in the bowl, the trail has come to about 2.5 miles and a hike back will make this a 5-mile round-trip adventure. Hikers can add a strenous hike up the nearby ridgeline to gain panoramic views on the Continental Divide. When I hiked this in April of 2016, tracks were evident that led past the remains of old mining equipment along the ridge. At the top, the views are absolutely beautiful. It's a great place to take in hundreds of miles of changing aspen trees in the Autumn. The trail map link for Butler Gulch in this post is not the best. Because of this we recommend The Latitude 40 Summit County Trails Map.
Tips & Resources for Hiking Butler Gulch Hike
Weather
Map & Driving Directions
Click for Driving Directions
Windy Peak Hike in Golden Gate Canyon
Windy Peak is a summit hike in Golden Gate Canyon State Park. A moderate to difficult 6.4-mile loop hike that follows meltwater creeks, crosses green meadows replete with wildflowers, and offers great views at the summit of the snow-capped Rocky Mountains in the West. Explore the full Windy Peak Hike profile for trail map, driving directions, and many of the details you need to enjoy this adventure in Golden Gate Canyon State Park.
Trail Snapshot: Windy Peak in Golden Gate Canyon State Park
| Hike Distance | 6.4 miles Round Trip |
|---|---|
| Difficulty | Moderate |
| Duration | Approx 2-3 hrs |
| Trail Type | Lollipop-Loop with Spur to Summit |
| Starting Elevation | 7860′ |
| Elevation Gain | Approx +1300′ |
| Seasons | Best hiked May to October |
| Dogs | Allowed on 6' Leash |
| Hike Trail Map | Click for a Map of Golden Gate Canyon Trails |
| Denver Drive Time | 50 min |
| Driving Directions to Bridge Creek Trailhead | Click for Google Map |
| Town Nearest Hike | Golden, Colorado |
| Beauty | Panoramic views of snow-capped mountains, wildflowers, meadow, spruce, aspen |
| Activities | Hiking, photography, snowshoeing in winter, picnic area |
| Fee | Colorado State Parks Pass Required |
Parking & Trailhead Information for the Windy Peak Hike
From Denver, take US-6 West to Golden. Just outside Golden, US-6 will turn left (West) into Clear Creek Canyon; it's at this intersection that you'll continue North (not turning left) on 93. After 1.3 miles on 93, turn left onto Golden Gate Canyon Road. Now, prepare for the rest of your drive being pretty windy. About 4 miles down Golden Gate Canyon Road, you have the option of taking Crawford Gulch road to the Right or to stay on Golden Gate Canyon Road. Both routes will get you there.
I believe that Google Maps from Denver is going to default to Crawford Gulch Road. Do take your time and be alert for cyclists and motorcycles, especially on the weekend, as both Golden Gate Canyon Road and Crawford Gulch Roads are popular roads for riding. Eventually, Crawford Gulch Road will turn into Drew Hill Road, which runs through the heart of Golden Gate Canyon State Park. If you decide to take the Golden Gate Canyon Road option, it will intersect with Crawford Gluch/Drew Hill at the visitor center (on your right, just after the intersection on Crawford Gulch). If you take this route, the Bridge Creek Trailhead will be 2.3 miles down the road and on your left (north). One last thing to note is that Crawford Gulch Road has yet one more name, Ralston Creek Road. So, if you see that on any signage, just know you are on the right track.
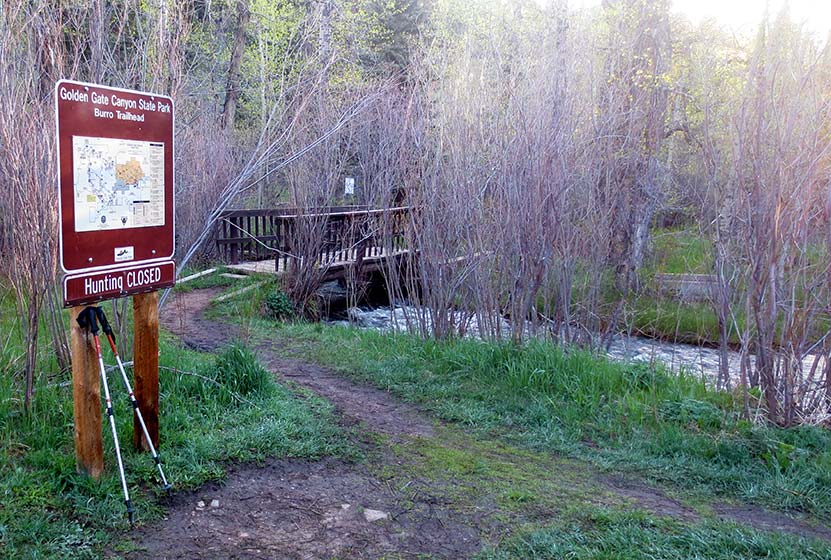
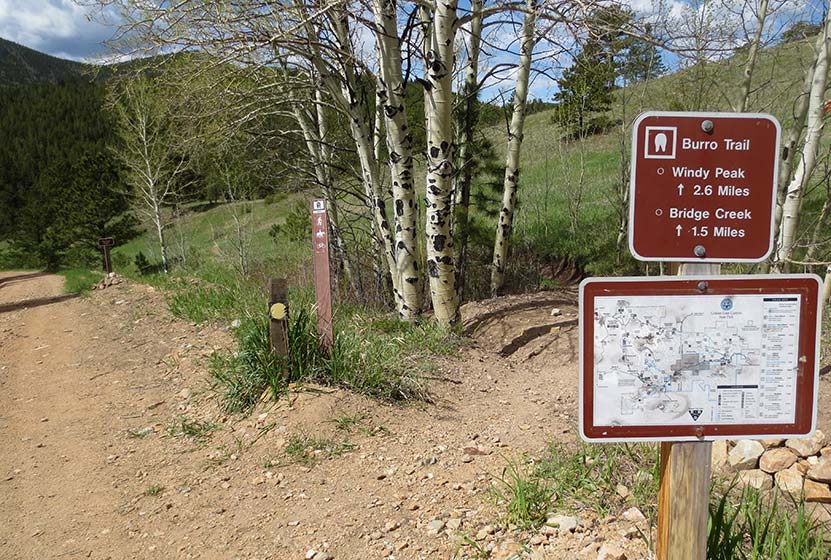
The Bridge Creek Trailhead is a bit unusual because it's composed of several parking areas along the on the north side of the road. However, all parking areas have trails that will lead hikers to the footbridge that crosses the trail and serves as the official start of the Burro trail and this hike. A sign (pictured above) reads "Burro Trailhead."
The Hike: The Windy Peak Hike in Golden Gate Canyon
This is a Lollipop-loop trail with a spur trail at the end that leads up to the summit. There are several trail junctions, which can make this the route a bit confusing. I've provided photos below of the trail junctions, but it's important to remember that weather can change the landscape and signage. The description here hikes the loop portion of the trail in a clockwise direction. We've classified this as moderate/medium in difficulty. However, its right on the edge because of the over 1000' elevation gain and more than 5 miles of trail. For some, this will be difficult. It's also on our list of dog-friendly hikes, but it's important to know that the peak is all rocky terrain that may be a bit tough on your dog's paws. As always, if you are taking your best friend, be sure to keep them on a leash out of respect for the wildlife, environment, and other hikers.
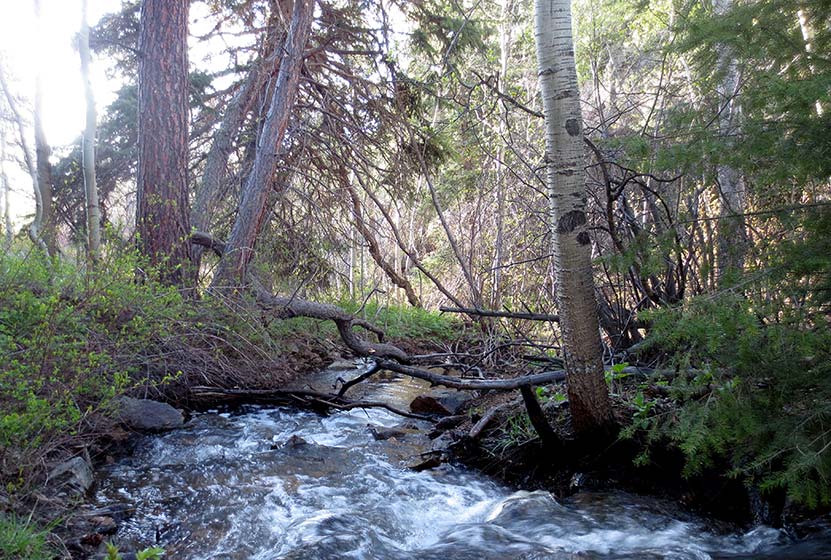
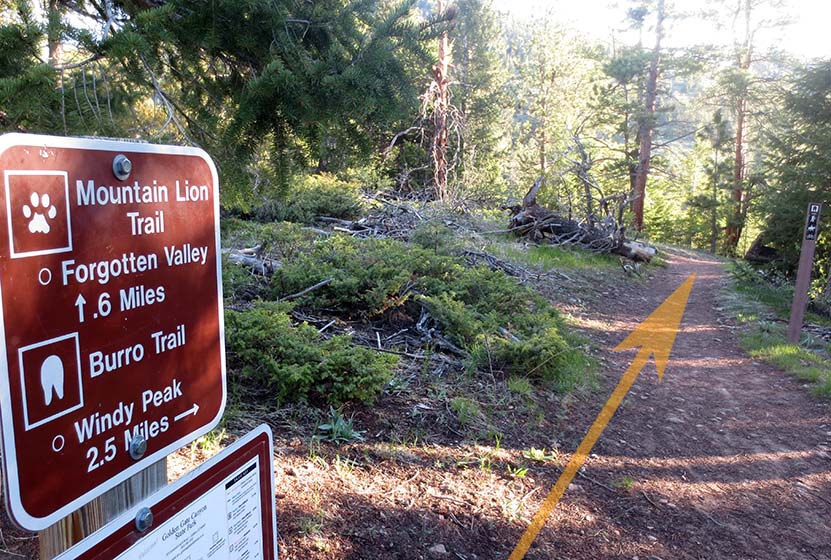
After crossing Ralston Creek, the trail makes its way up a gentle slope into the trees. At the first trail junction, stay on the Burro Trail (left). The second trail junction leads either straight on the Mountain Lion Trail to Forgotten Valley or right toward Windy Peak on the Burro Trail. The trail will make its way along a creek. Look for Calypso flowers, also called Pink Lady Slippers in this area. They grow along the creeks in Golden Gate Canyon State Park.
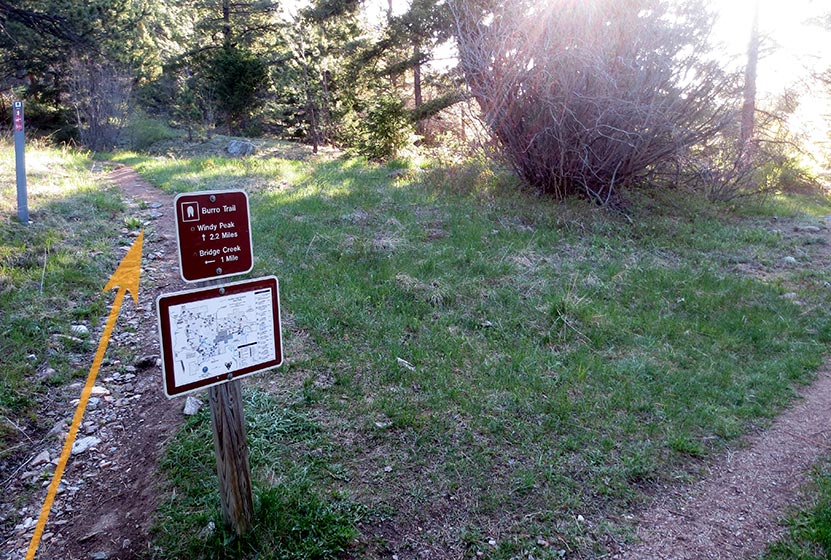
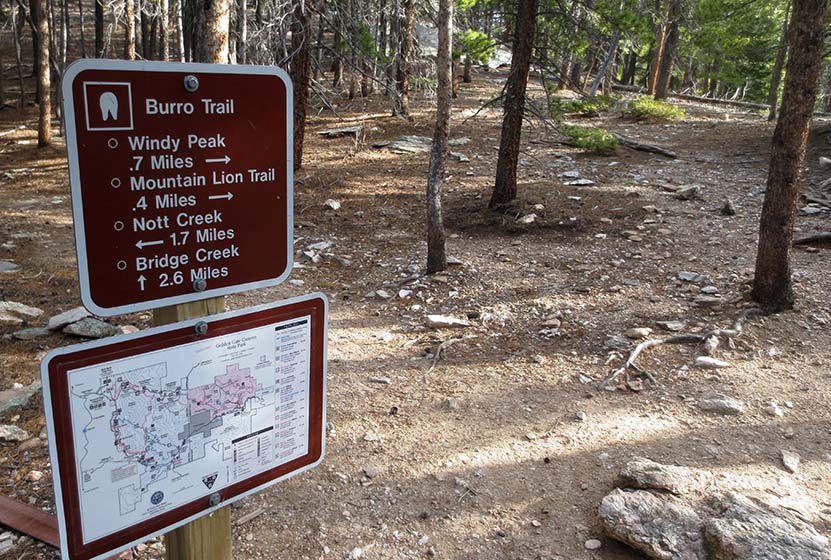
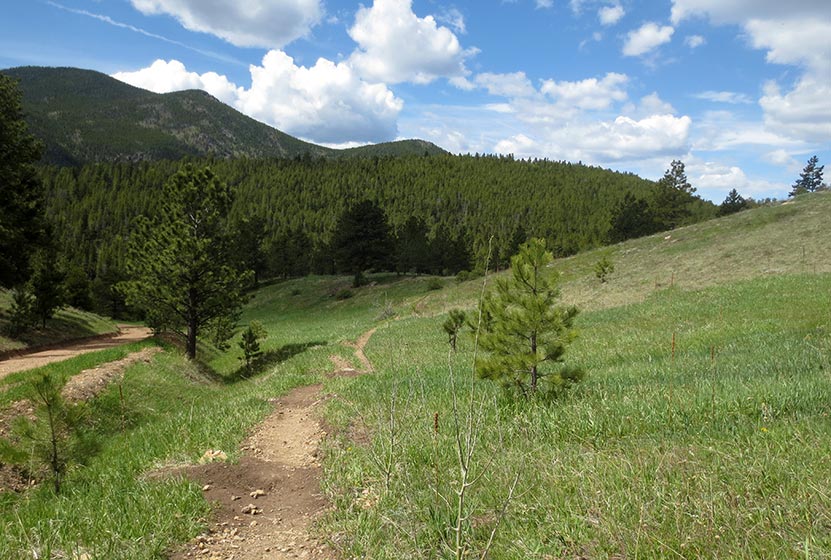
The loop begins at the third junction (pictured above), the way up to Windy Peak is clearly marked as the left-hand trail. From this point, it's 2.2 miles to the peak. Here the trail begins a steeper climb through an area with prominent chalk colored cliffs.

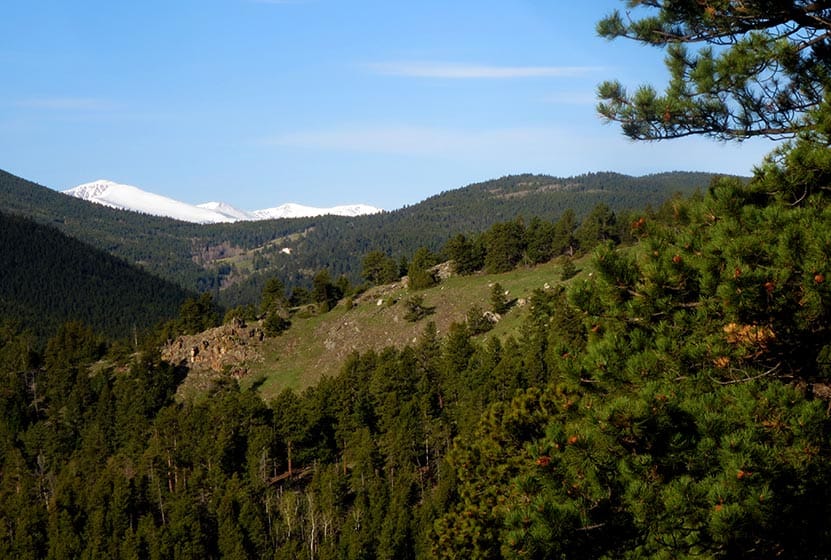
As you gain altitude, you'll gain views out to the Continental Divide rising above the green foothills of Golden Gate. The trail will then enter the shade of lodgepole forest.
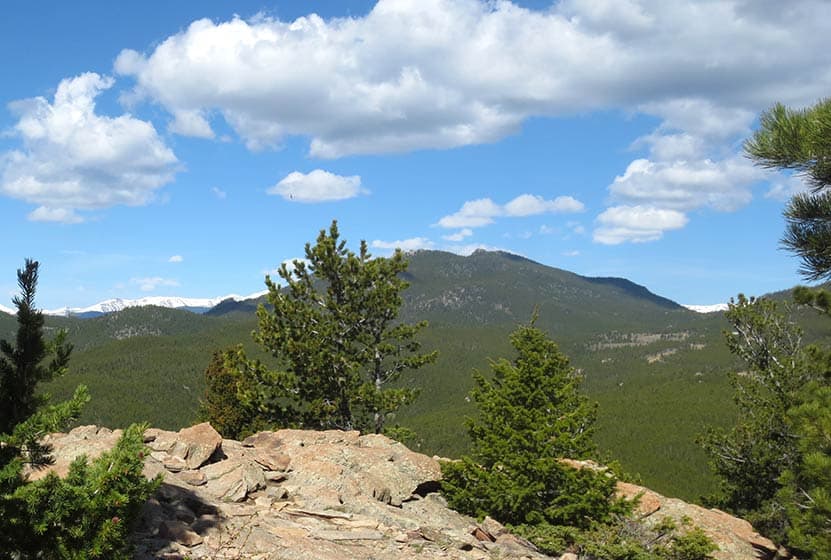
At the top of the loop, hikers will encounter the junction for the .7 mile spur trail that leads to the summit of Windy Peak (pictured below). There will be one more sign pointing the way at 0.4-mile below the summit.
The summit of Windy Peak is one of my favorite places to read and journal. Be sure to bring a picnic lunch with you, because you'll want to spend some time here resting and refueling for the hike back to the trailhead. The spur trail will lead back to the main Burro loop trail. At this point, you can return the way you hiked in to the spur trail (a slightly shorter way back), or continue on the rest of the loop toward Nott Creek. The landscape on this back end of the loop is riddled with wildflowers, so it's well worth doing the full loop hike.
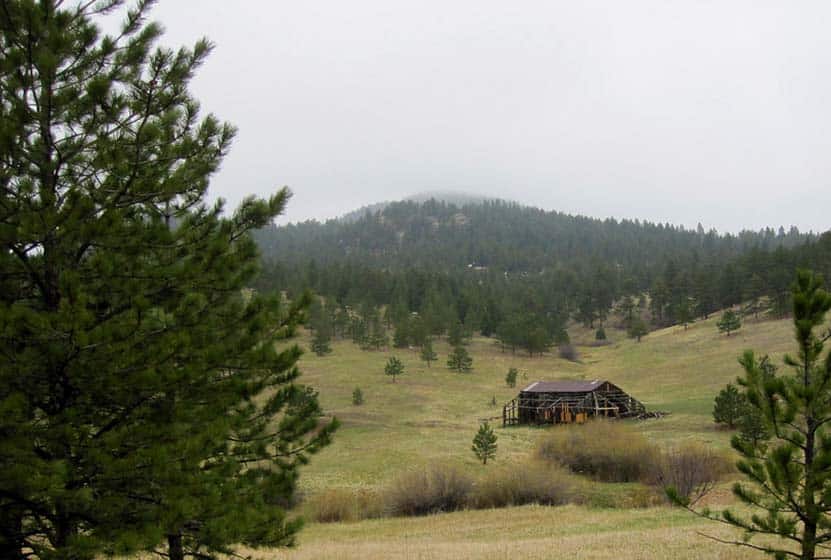
The trail will weave its way down into a valley with a dirt service road. Here, hikers will want to follow the Burro trail towards the Bridge Creek Trailhead as it makes its way on and off the service roads.
The trail will work its way through a green meadow, then along Nott creek, following it West until retracing the trails that lead back to Bridge Creek Trailhead.
Tips & Resources for Hiking to Windy Peak
- TIP: Don't forget to bring food and water along this hike for refuelling.
- TIP: We advise picking up a paper map of Golden Gate Canyon State Park at the visitor center before embarking on this hike.
- Trail Map: Golden Gate Canyon Trail Map
- Packing List: Always pack the 10 Essentials. Download our Hiking Guide to get the list and dayhiking packing checklist.
- Colorado Road Conditions: Colorado Road Conditions
- After the Hike: Windy Saddle Cafe in Golden, Colorado
Weather
Map & Driving Directions
Click for Driving Directions to Bridge Creek Trailhead
Meyers Homestead Hike in Walker Ranch
The Meyers Homestead Hike located in Walker Ranch is an almost perfect family hike near Boulder, Colorado. This 5.2-mile out-and-back hike travels through Meyers Gulch, past the remnants of a historic homestead, to an overlook offering panoramic views of Boulder Canyon and the snowcapped mountains of Indian Peaks. It's a wide trail through meadows, stands of aspen, and punctuated by ponderosa pine and wildflowers. Explore the full Meyers Homestead hike profile below for trail map, driving directions, and more tips and details to help you enjoy this trail near Boulder.
Trail Snapshot: Meyer Homestead Hike Near Boulder
| Hike Distance | 5.2 miles Round Trip |
|---|---|
| Difficulty | Easy to Moderate |
| Duration | Approx 3 hrs |
| Trail Type | Out and Back |
| Starting Elevation | 7500′ |
| Elevation Gain | Approx +750′ |
| Seasons | Year Round |
| Dogs | Allowed On Leash |
| Hike Trail Map | Click for a Map of Meyers Homestead Trail in Walker Ranch |
| Denver Drive Time | 1 hr |
| Driving Directions to Meyer Homestead Trailhead | Click for Google Map |
| Town Nearest Hike | Boulder, Colorado |
| Beauty | Meadows, historic homestead, wildflowers, peak views, aspen, ponderosa |
| Activities | Hiking, Walker Ranch homestead tours, horseback riding, mountain biking (double-track most sections), trail running, snowshoeing, photography |
Parking & Trailhead Information for Meyers Homestead Trail
The drive to Meyers Homestead Trailhead starts on the Baseline Road in Boulder. Traveling West past Chautauqua Park, the road will turn into Flagstaff Road at the base of Flagstaff Mountain and begin a windy and steep ascent. The overall trip on Flagstaff Road to the trailhead is about 6.2 miles. The Myers Homestead Trailhead is located on the right (West) side of the road. Restrooms, picnic area, and interpretive signs are available at the trailhead.
The Hike: Meyers Homestead Trail
The hike starts from the Meyers Homestead Trailhead by taking the trail on the right marked with a sign that reads "Meyers Homestead Trail - 2.6 Miles One-Way." The initial trail segment descends into a broad meadow. Around just 1/4 mile into the trail, you'll spot the remnants of a sawmill, part of the original Meyer Homestead. There is a spur trail that leads to a mill. Once past the sawmill, the trail begins a very gradual ascent and follows a small seasonal creek into the Meyer Gulch.
Starting at around 1/2 mile in, the trail will begin to weave in and out of groves of aspens and ponderosa pine, providing intermittent shade on a hot summer day. The trail will eventually open to another large meadow before entering the final, wooded and steeper 1/2 mile. This segment of switchbacks leads to a small unnamed peak with a bench and overlook. Here, you can take in views of Sugarloaf Mountain, Indian Peaks, Longs Peak, and Boulder Canyon.
A great related hike is the Eldorado Falls hike that is also part of the Walker Ranch Trail system.
Tips & Resources for Hiking the Meyers Homestead Trail
- TIP: Pause to read thee interpretative signs along the trail to indicate places that have historical and ecological significance.
- Trail Map for Meyers Homestead Trail: Trail Map for Meyers Homestead Trail
- Packing List: Always pack the 10 Essentials. Download our Hiking Guide to get the list and dayhiking packing checklist.
- Colorado Road Conditions: Colorado Road Conditions
- Photo: We would like to express our gratitude to Ian W. Stearns for sharing such amazing photographs of this hike to Meyers Homestead.
- After the Hike: The Parkway Cafe
Weather
Map & Driving Directions
Click for Driving Directions
Gregory Canyon Hike to Realization Point
The trail up Gregory Canyon is a moderately challenging hike to Realization Point Trailhead where hikers can pick up two different loop trails. Both loops offer expansive views of the Rocky Mountains in the West and wildflowers along the trail. Explore the full Gregory Canyon-Realization Point hike profile below for trail map, driving directions, and more tips and details to help you enjoy this adventure in Boulder, Colorado.
Trail Snapshot: Gregory Canyon to Realization Point
| Hike Distance | 2.4 to 5.7 miles Round Trip |
|---|---|
| Difficulty | Moderate |
| Duration | Approx 2-3 hrs |
| Trail Type | Out and Back |
| Starting Elevation | 5600′ |
| Elevation Gain | Approx +900′ Gregory Canyon Segment |
| Seasons | Year Round |
| Dogs | Allowed On Leash |
| Hike Trail Map | Click for a Map of Gregory Canyon Trail to Realization Point in Boulder |
| Denver Drive Time | 40 Minutes |
| Driving Directions to Gregory Canyon Trailhead | Click for Google Map |
| Town Nearest Hike | Boulder, Colorado |
| Beauty | Canyon, wildflowers, summit views, forest, rocky hillsides, wildlife: mule deer, coyote, mountain lion, bear, red-tailed hawk, fox |
| Activities | Hiking,Photography |
Parking & Trailhead Information for Gregory Canyon
Hikers have several parking options for the Gregory Canyon Trail: 1) the Gregory Canyon Trailhead, 2) Parking at Chautauqua Park, or 3) along permitted stretches of Baseline Road. The Gregory Canyon Trailhead can be reached by following Baseline Road in Boulder west past Chautauqua park. Gregory Canyon Road is located on the left/South about 1/2 mile West of the park. Parking is allowed along most of the south side of Gregory Canyon Road and there is room for 7-8 vehicles at the trailhead. Both the roadside parking and the small parking area at the Gregory Canyon Trailhead require an access fee. Because of the fee and because this parking area fills quickly most mornings, many hikers opt to park along Baseline or at Chautauqua Park. Another option is to park at the Realization Point Trailhead (another fee parking area) and to hike down through the Canyon.
The Hike: Gregory Canyon Trail to Realization Point
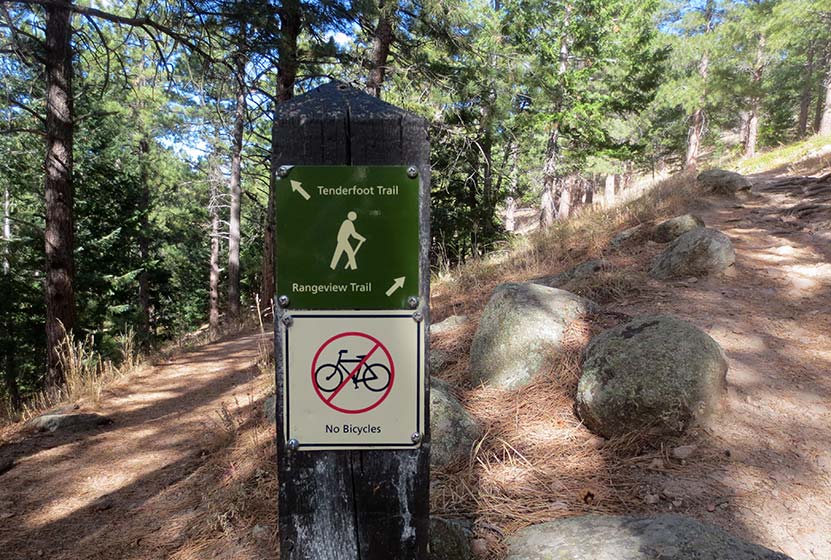
In addition to its proximity to Boulder, this hike sports a number of options and a variety of landscapes. The stretch between Gregory Canyon Trailhead and Realization Point Trailhead is the main artery of all the options in this profile. Because most hikers will begin their adventure at Chautauqua Park, there are a couple 1/2 mile (one-way) approaches: the Baseline Trail or the Meadow Trail. On the upper end of the hike, at Realization Point Trailhead, there are two different loop options that offer beautiful views to the West of seasonal snowcapped peaks. These are the Rangeview/Ute Loop and the Tenderfoot Loop. You can review each of the hike options below to decide which trail combination is best for you.
Gregory Canyon Trailhead to Realization Point Trailhead - 2.4 Miles Round Trip
This segment constitutes the main artery for all the hike options below. The Gregory Canyon Trail begins in the shade along Gregory Canyon Creek and climbs gradually to 0.5 mile where it crosses another small creek. Here the trail becomes more steep, making its way up a ridge via a set of switchbacks. Then the trail descends to a junction. At the junction, the Northern (right) segment leads a short distance up to Flagstaff Road and the Realization Point Trailhead (the destination for this hike as described here), or South (left) to the Long Canyon and Ranger Trails. After hiking the short segment to Flagstaff road, Realization Point Trailhead will be located across the street to the North. Be sure to watch for both cars and cyclists before crossing. If starting at Chautauqua Park and taking the Baseline or Meadow Trails to the Gregory Canyon Trailhead, add approximately 1 mile to this hike, making it 3.4 miles Round Trip.
Gregory Canyon Trailhead to Realization Point Trailhead + Rangeview/Ute Loop - 3.2 Miles Round Trip
After traveling the 1.1 miles up through the canyon to Realization Point, hikers will find two loop options. The first is the shorter Rangeview/Ute Loop. This loop makes a 0.8-mile clockwise circuit around Flagstaff Mountain then joins back up to the trailhead. The loop offers views to the mountains in the West and great viewpoints to take in the changing aspens in the Fall. If starting at Chautauqua Park, add approximately 1 mile to this hike, making it 4.2 miles Round Trip.
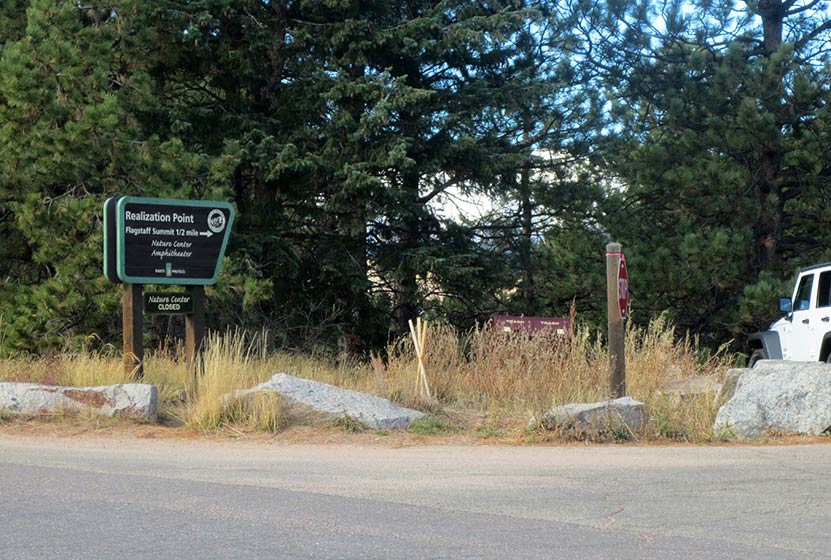
Realization Point Trailhead Across Flagstaff Road
Gregory Canyon Trailhead to Realization Point Trailhead + Tenderfoot Loop - 4.7 Miles Round Trip
From Realization Point Trailhead, the Tenderfoot Trail bears to the left (Northwest) and makes for a more demanding loop when compared to the Rangeview/Ute Trail because of both the added distance and the additional elevation loss and gain. At its most northern point, hikers will find a short spur trail leading to a small peak that affords expansive views to the West. If starting at Chautauqua Park, add approximately 1 mile to this hike, making it 5.7 miles Round Trip. By adding the spur trail, it becomes closer to 6 miles total.
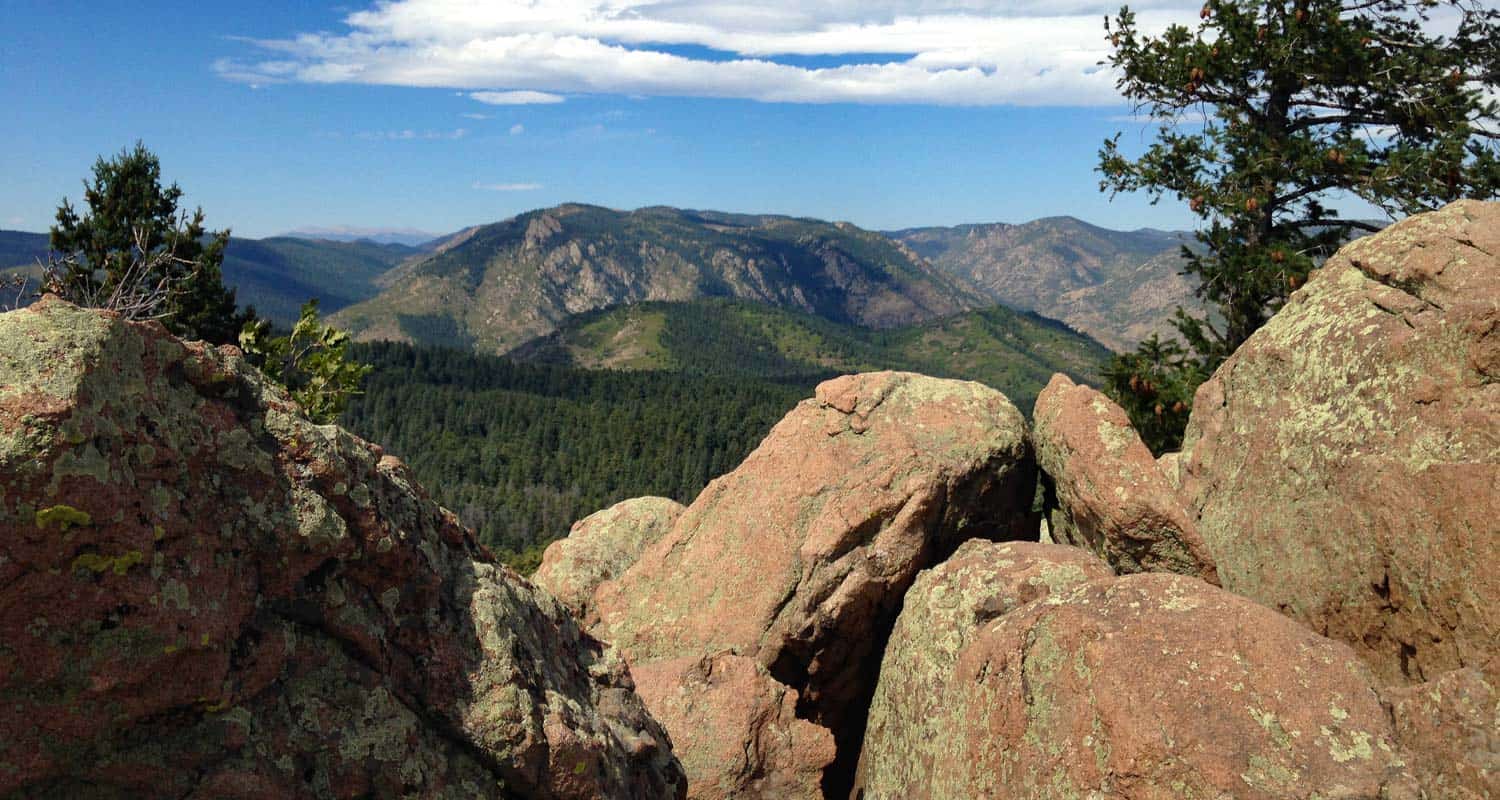
Both loop hikes afford multiple opportunities for taking in views out to the Rocky Mountains. The photo below was taken along the beginning segment of the Rangeview Trail.
Video of Gregory Canyon Hike
Tips & Resources for Hiking Gregory Canyon
- Poison Ivy: The canyon trail segment has a good deal of poison ivy trailside. Be aware and stay the traill
- Stay the Trail: Bear and Mountain Lion frequent this area of Boulder. It's wise to stay the trail and to hike with others.
- Trail Map: Trail Map for Gregory Canyon to Realization Point in Boulder
- Boulder Parks Area Dog Regulations Map
- Boulder Area Dog Regulations Map
- Packing List: Always pack the 10 Essentials. Download our Hiking Guide to get the list and dayhiking packing checklist.
- Colorado Road Conditions: Colorado Road Conditions
- After the Hike: Alpine Modern Cafe
Weather
Map & Driving Directions
Click for Driving Directions
Carpenter Peak Hike in Roxborough State Park
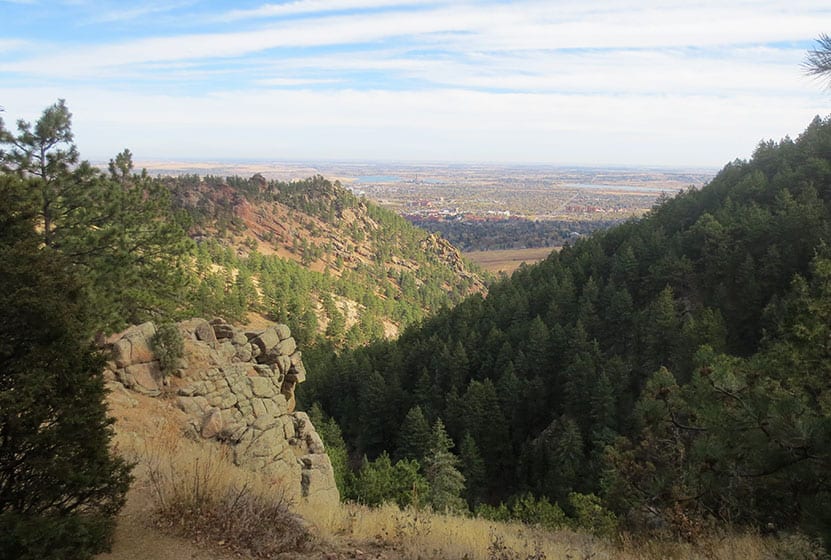
The hike up Carpenter Peak in Roxborough State Park is a strenuous 3.1 mile journey (one-way) to a foothill summit that overlooks the red rock formations of Fountain Valley. You'll also gain 360 degree panoramic views of Denver, east to the plains, and west to distant snow-capped peaks. In this Colorado trail profile, you'll find driving directions, trail map, and more tips and details to help you enjoy this adventure in Roxborough State Park.
Trail Snapshot: Carpenter Peak Hike at Roxborough State Park
| Hike Distance | 6.2 Mile Round Trip |
|---|---|
| Difficulty | Moderate |
| Duration | 3-4 hours |
| Trail Type | Out and Back |
| Starting Elevation | 6200' |
| Elevation Gain | Approx. +960' |
| Seasons | Year Round |
| Dogs | Prohibited in Roxborough State Park |
| Hike Trail Map | Click for a Map of Roxborough State Park |
| Denver Drive Time | 45 min |
| Driving Directions to Roxborough State Park | Click for Google Map |
| Town Nearest Hike | Littleton, Colorado |
| Beauty | Red rock formations, meadows, wildlife: mule deer, eagles, foxes, birds |
| Activities | Hiking, birdwatching, Visitors’ Center |
| Fee | Entrance Fee or State Parks Pass Required |
Parking and Trailhead Information
The last two miles of access road into Roxborough State Park are a maintained dirt road, but it can get washboarded and can be tough on the car. Still, it's not a long drive in. Undulating green hills can be seen in the east where deer and antelope graze. Roxborough State Park can fill up during it's busiest hours on the weekend. If that's the case, you can wait until enough vehicles exit the park then drive in. The peak times appear to be are around 10AM-2PM on the weekends. If the line looks long, you can always turn around and head over to Waterton Canyon or to South Valley Park--both are great options.
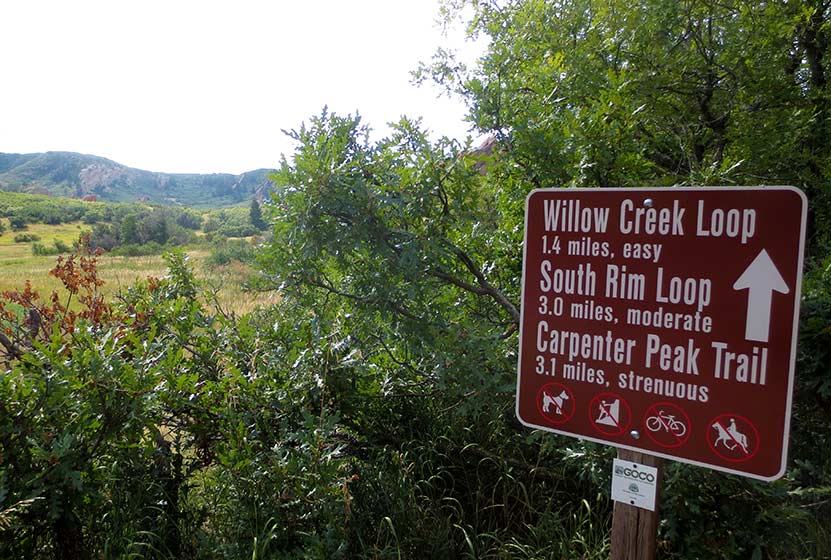
The hike up to Carpenter Peak begins just southwest of the Roxborough State Park visitor center. Clear signage marks this access to Carpenter Peak, the Willow Creek, and South Rim Trails (pictured above). Soon the trail enters a corridor of scrub oak which provides shade for this first short segment of the hike. There is a great deal of poison ivy in this corridor, so be sure to avoid going off trail. Just short of 0.5 mile into the hike, the trail will open up to a large meadow among the red rock. Continue following the signs for Carpenter Peak.
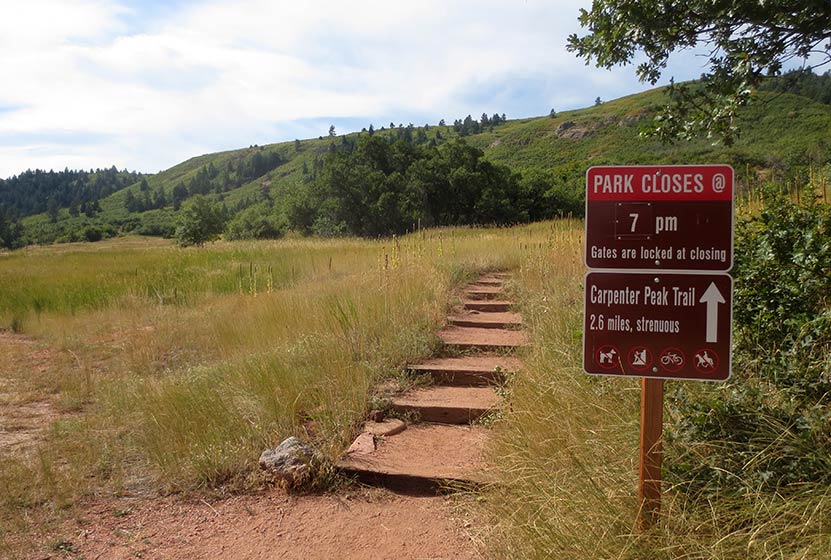
The trail will soon cross a dirt road and begin its way west. This is the most steep and demanding segment of trail. We've classified this as a moderate hike in difficulty, but for those who are from out-of-town or who are not in the best of shape, it may be considered difficult.
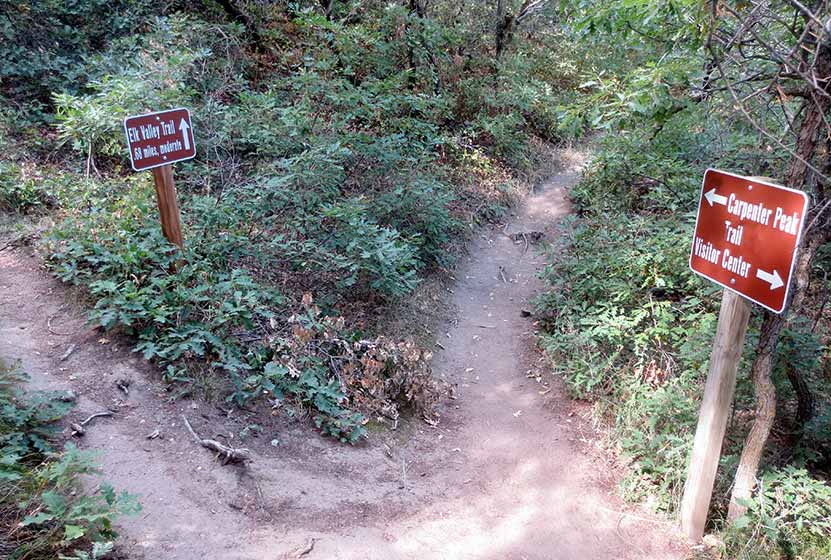
At 1.7 mile, the trail will come to a Y intersection (pictured above). The trail to the left leads to Elk Meadows, and the trail for Carpenter Peak leads to the right. The trail now winds along the hillsides with switchbacks that open up to expansive views of the red rock formations that make Roxborough Park Denver's Garden of the Gods.
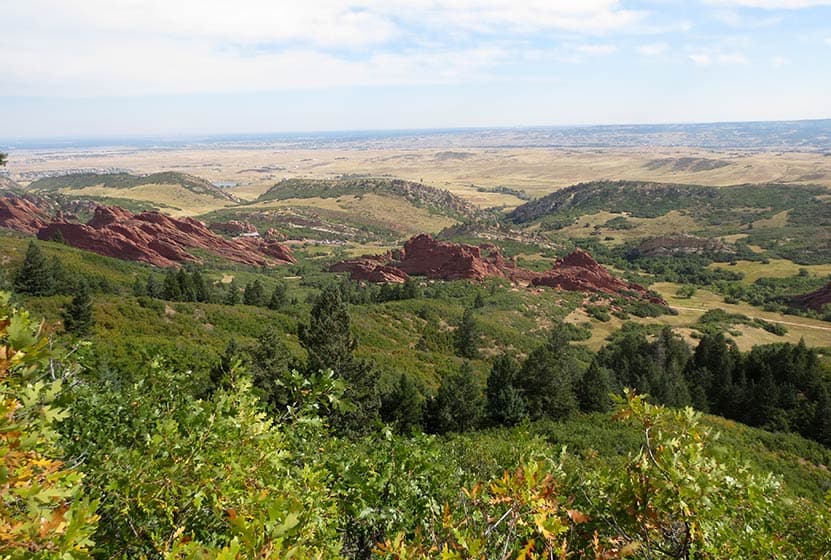
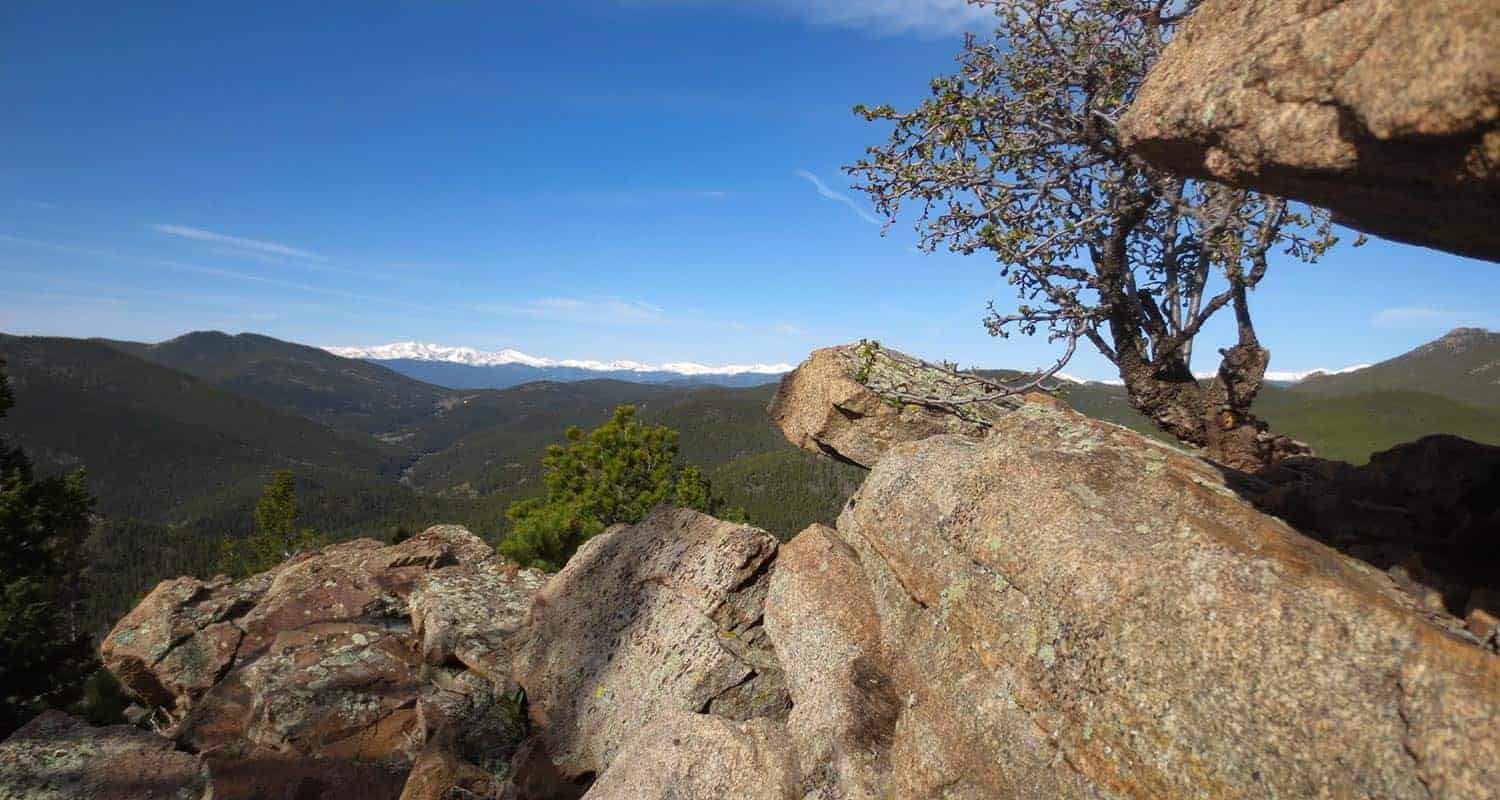
After gaining the ridge at mile 3, hikers will encounter a final intersection. Again, there is clear signage pointing the way right to Carpenter peak, now just a few hundred yards further. At the summit, you'll be able to take in a 360 degree panorama of Denver, Roxborough State Park, the plains, and distant mountains in the west. I particularly enjoy the views from here over to the mountains that surround Waterton Canyon. In the Spring and early Summer, a few western peaks will still still show their snow caps.
The return route follows the same trails back down to the visitor center.
Tips & Resources for Hiking to Carpenter Peak in Roxborough
- Posion Ivy: Because there is a significant amount of poison ivy that grows out to the edges of parts of this trail, it's wise to wash your clothing soon after your return home as poison ivy can affect people by indirect contact.
- Hiking in Winter: If you plan to hike Carpenter Peak in the winter, it is advised that you have traction devices like YakTrax because much of the trail will be in shadow, and ice will likely form on the trail.
- Trail Map for Roxborough State Park: Trail Map Link
- Packing List: Always pack the 10 Essentials. Download our Hiking Guide to get list and dayhiking packing checklist.
- Colorado Road Conditions: Colorado Road Conditions
- After the Hike: Waterton Tavern in Roxborough
Weather
Map & Driving Directions
Click for Driving Directions
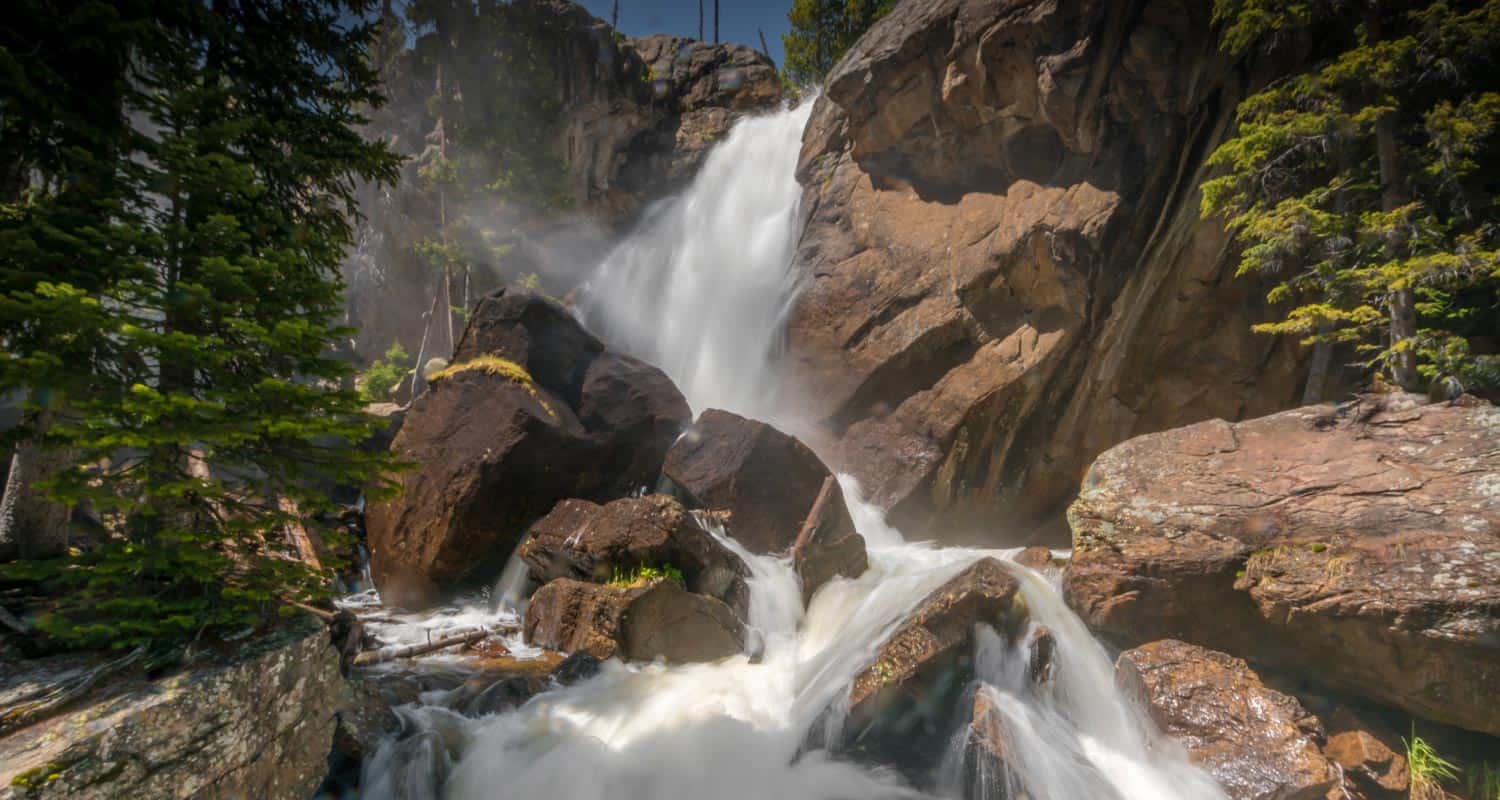
Ouzel Falls in Rocky Mountain National Park
Ouzel Falls spills over a cliffside and enormous boulders, making it arguably one of the most beautiful waterfalls in Rocky Mountain National Park. Before reaching this 40-foot falls, the trail traces the course of several creeks and leads hikers past three other cascade waterfalls. Explore the full Ouzel Falls hike profile below for trail map, driving directions, and more tips and details to help you enjoy this adventure in the Wild Basin of Rocky Mountain National Park.
Note: Rocky Mountain National Park now requires timed entry permits from May 27th through October 10th. See the RMNP permits page for more information.
Trail Snapshot: Ouzel Falls in Rocky Mountain National Park
| Hike Distance | 5.4 miles Round Trip |
|---|---|
| Difficulty | Moderate |
| Duration | 3 - 4 hr Round Trip |
| Trail Type | Out and Back |
| Starting Elevation | 8566' |
| Elevation Gain | Approx +950' |
| Seasons | Spring through Fall, Winter Snowshoeing |
| Dogs | Prohibited in RMNP |
| Hike Trail Map | Click for a Map of Ouzel Falls RMNP |
| Denver Drive Time | 1 hr 30 min |
| Driving Directions to Wild Basin Trailhead | Click for Google Map |
| Driving Directions to Winter Recreation Parking for Wild Basin Hikes | Click for Google Map |
| Town Nearest Hike | Allenspark, Colorado |
| Beauty | Waterfall, mountain views, meadows, river, wildlife: Abert's squirrel, elk, deer, moose, bear; wildflowers |
| Activities | Picnicking, hiking trails, snowshoeing, horseback riding, backcountry camping (with a permit), photography |
| Fee | Park Pass Required |
Parking & Trailhead Information for Ouzel Falls
The southeast corner of Rocky Mountain National Park boasts one of the loveliest portions in the park known as the Wild Basin. The Wild Basin Trailhead is located just 15 minutes outside of Allenspark, Colorado along Highway 115. There is a ranger station at at the Wild Basin Trailhead with toilets and drinking water available.
In the winter (October-May), Hwy 115 may not be plowed to the trailhead, and hikers will need to park their vehicles at a winter parking lot for Wild Basin hikes. Be aware that hikes from the winter parking lot add on another 3 miles of hiking (one-way). There are other small parking areas, like the Finch Lake Trailhead, that may be accessible and allow hikers to park closer to the Wild Basin Trailhead. It's important to know that Hwy 115, though titled a "highway", is a maintained dirt road, which means that it can be used by 2WD vehicles. However, after heavy rains and other severe weather, its quality may degrade until it is repaired. 4WD may be needed when snow is on the ground.
The Hike: Ouzel Falls Trail in RMNP
This 2.7 mile hike (one-way) begins at the Wild Basin Trailhead and passes three other cascade waterfalls before arriving at the Ouzel Falls. Copeland Falls are found just 0.4 miles into the hike. For details on locating both the lower and upper cascades, explore our full trail profile on Copeland Falls. After Copeland Falls, the trail continues following alongside North Saint Vrain Creek for about 1 mile to where it splits. The right-hand trail leads south to a log bridge crossing the creek. Near the bridge, hikers can take in the sights and sounds of another small cascade.
The trail continues south to Calypso Cascades, the third and final cascade waterfall before reaching Ouzel Falls. Here the trail splits again. The left-hand/east trail leads aback towards the Finch Lake trail and the Allenspark Trailhead. The right-hand/west trail leads towards Ouzel Falls and the Bluebird Lake Trail. Here, the trail crosses a set of two bridges, then climbs uphill through a set of switchbacks. The mountains to the north now come into view, both Mt. Meeker, Pagoda, and Longs Peak. This segment of trail between Calypso Cascades and Ouzel Falls is approximately 1 mile.
A second set of switchbacks brings hikers within earshot of the falls, and they will come into view at the bridge that crosses over Ouzel Creek. However, the best views of the falls can be gained via a social trail that is located before the bridge on the left side of the creek. This unmaintained trail leads to an area above the falls with incredible views of alpine meadows and craggy peaks. As with any social trails, please use the most worn paths and hike on durable surfaces. Be aware that the rock can become slick in this area and hikers should exercise caution when navigating above the falls.
Ouzel Falls is named after the Ouzel or Water-Dipper, the only songbird that lives a mostly aquatic life. Ouzels weave globe-shaped nests near waterfalls, lakes, and streams. They dive--even walk--underwater to catch insects and larvae.
Hikers can return the 2.7 miles back they way they came to Ouzel Falls, or can hike further to destinations such as Ouzel Lake (an additional 2.2 miles, one-way).
Ouzel Falls on a Wet Spring Day - Courtesy of Chris Heald
Tips & Resources for Hiking to Ouzel Falls in RMNP
- Get there early: Parking may be somewhat limited as with many hikes in RMNP. Parking at the trailhead can fill up, even in the early morning.
- You're in Bear Country: Black Bears live in the Wild Basin area and are active on the months of April through November. Be aware, and dispose of your food responsibly. Be sure that no food or strong scented items are left in your car.
- TIP: There are food storage lockers available at the Wild Basin, Finch Lake, and Sandbeach Lake Trailheads. These are required for visitors staying overnight.
- Trail Map for Wild Basin Area: Trail Map Link
- Packing List: Always pack the 10 Essentials. Download our Hiking Guide to get list and dayhiking packing checklist.
- Colorado Road Conditions: Colorado Road Conditions
- Photo: We would like to express our gratitude to Steven Bratman for sharing such an amazing photograph of this hike to Ouzel Falls in RMNP.
- After the Hike: Meadow Mountain Cafe
Weather
Map & Driving Directions
Click for Driving Directions
Flattop Mountain in Rocky Mountain National Park
Hiking the Flattop Mountain Trail and reaching its summit offers 360 degrees of stunning panoramas in Rocky Mountain National Park. The trail begins at the Bear Lake Trailhead and traces its way through a varied alpine landscape. The hike to Flattop Mountain also provides access to both Hallett Peak and Otis Peak. Explore the full Flattop Mountain hike profile below for trail map, driving directions, and more of the details and tips you need to enjoy this adventure in Rocky Mountain National Park.
Note: Rocky Mountain National Park now requires timed entry permits from May 27th through October 10th. See the RMNP permits page for more information.
Trail Snapshot: Flattop Mountain in Rocky Mountain National Park
| Hike Distance | 8.8 miles Round Trip (from Bear Lake TH) |
|---|---|
| Difficulty | Moderate (but demanding) |
| Duration | Approx 6 hr Round Trip |
| Trail Type | Out and Back |
| Starting Elevation | 9475' |
| Elevation Gain | Approx. +2880' |
| Seasons | Year Round |
| Dogs | Prohibited in RMNP |
| Hike Trail Map | Click for a Map of Flattop Mountain RMNP |
| Denver Drive Time | 2 hr |
| Driving Directions to Bear Lake Trailhead | Click for Google Map |
| Town Nearest Hike | Estes Park, Colorado |
| Beauty | Sub-alpine lake, mountain views, panoramic view, wildflowers, aspen trees, ponderosa pine, wildlife: Abert's squirrel, elk, deer, moose, bear |
| Activities | Hiking trails, snowshoeing, photography |
| Conditions at Bear Lake Trailhead | Click Here |
| Fee | Park Pass Required |
Parking & Trailhead Information for Flattop Mountain in RMNP
The hike up Flattop Mountain in RMNP begins at the Bear Lake Trailhead (driving directions) In the event that parking at Bear Lake is full, you'll then need to park at the Park & Ride near the Bierstadt Trailhead and take the bus into the trailhead. This service runs 7am to 7PM and more information on the RMNP shuttle bus routes can be found at this link.
The Hike: Flattop Mountain in RMNP
Beginning at the Bear Lake trailhead, a paved trail will run along the eastern shore of the lake. Look for signs for the trail leading towards Flattop Mountain. This .4 mile connector trail leads through stands of quaking aspens to the first trail junction. The right-hand trail leads to the Bierstadt Moraine and Lake Bierstadt. The left-hand trail leads toward Flattop Mountain and Odessa Gorge.
After hiking .5 mile on this second trail segment, the trail will fork again. The trail to the left, leads up to Flattop Mountain and the trail to the right leads down into the Odessa Gorge area. This third and final segment is the longest, 3.2 miles. Here, the Flattop Mountain trail begins a series of switchbacks through Spruce Forest. Soon, hikers will come to the Dream Lake overlook with breathtaking views of Hallett Peak and the sheer north face of Longs Peak. Further up the trail, a second overlook reveals Emerald Lake deep in the bottom of Tyndall Gorge.
Near the Emerald Lake overlook, the trees begin to change shape, into what's called Krummholz forest. It's a German term meaning "crooked" or "twisted wood". These windswept pines look like they've been sculpted by a master bonsai artist. The trail gets a bit more steep as it climbs above treeline, running through rock and tundra, with cairns (stacked-rock markers) noting the trail where it might become difficult to discern.
At the top, it will make sense how Flattop Mountain got it's name. It's less of a peak and more of a broad field of tundra and rock. But the effort to get to the top is worth the views. Hikers can see the Mummy Range to the North as well as Lumpy Ridge. To the Southeast lay peak after jagged peak, with Longs Peak's leaden north face set against the sky.
From the top of Flattop Mountain, hikers can follow a trail through the tundra to the true peak of Hallett, which is approximately .4 mile away to the south with another approximately 400' in elevation gain. Be sure to read the tips section below for making this hike up Flattop Mountain as there are a few important aspects to this more demanding hike in Rocky Mountain National Park.
Tips & Resources for Hiking to Flattop Mountain in RMNP
- Start early in the morning: Afternoon thunderstorms appear suddenly during the summer hiking season. For this reason, hikers are urged to start early enough to be down off the mountain by early afternoon. Many people have ignored this and been caught in really nasty, weather up on this trail. There have been weather-related fatalities here.
- Take it Easy: It's a demanding walk up Flattop, and should not be approached as a sprint to the summit. Be sure to pace yourself and take breaks as needed.
- Layer: It gets colder as you hike toward the top of Flattop. Be sure to have warm clothing. Hikers are also very exposed to the sunlight and risk sunburn, so be sure to wear sunscreen.
- Food & Water: It probably goes without saying, but be sure to bring plenty of snacks and water to fuel your body for this demanding hike.
- Trekking Poles & Traction Devices are Recommended in Spring and Winter: During this time of year, there can be patches and even longer segments of snow and ice on the trail. Because of this, we recommend Trekking Poles and/or Traction Devices for this trail.
- Trail Map for Bear Lake Corridor: Trail Map Link
- Packing List: Always pack the 10 Essentials. Download our Hiking Guide to get list and dayhiking packing checklist.
- Colorado Road Conditions: Colorado Road Conditions
- Photo: We would like to express our gratitude to Dick Rochester for sharing such an amazing photograph of this hike to Flattop Mountain in RMNP.
- After the Hike: Baba's Burgers & Gyros
Weather
Map & Driving Directions
Click for Driving Directions